by Roy Carter | Jul 8, 2014
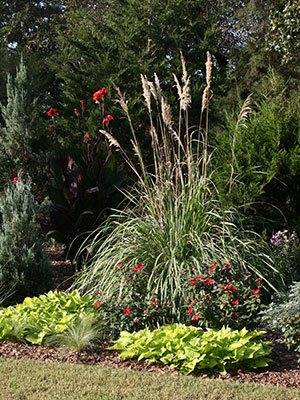
You don’t have to pamper pampas grass! This attractive perennial, which is native to Latin America – Brazil, Argentina, and Chile, is practically trouble-free. It’s well adapted to all areas of Florida. Pampas grass grows in large clumps, eight to ten feet high. In late summer, it produces showy silver –white or pinkish silken plumes, which may reach a height of 12 feet.
Pampas grass can be very eye-catching when used as a specimen plant in the landscape. Since it grows very rapidly into a massive plant, pampas grass can provide an excellent screen for sunny locations. Unfortunately, it is often used improperly as a foundation plant. In such cases, it usually is purchased from a nursery when it’s small and planted very near the home. At first, it will look fine, but, after several years, it will have reached such a large size that it will be difficult to find the house for the old pampas grass.
“This vigorous ornamental grass is widely used as a lawn specimen but its quick growth rate and large size make it unsuitable for all but large home landscapes. However, it is ideal for barrier or windbreak plantings and has a place in larger areas such as along highways or in commercial or industrial landscapes.” FPS145
There are many ornamental forms of pampas grass. The plum-like blooms differ between male and female plants. The female plumes are broad and full, due to the silky hairs covering the tiny flowers. The male plumes look narrow and short, because of the absence of hair on the flowers. Also, there is considerable variation among seedlings in growth habit, period of flowering, and size and shape of plumes. If uniformity is desired, pampas grass should be propagated by dividing clumps, rather than by seed.
The plumes of pampas grass are highly prized for indoor decorations. Plumes used for this purpose should be cut as soon as they have fully emerged. If mature plumes are brought indoors, they will fill the home with delicate fluffy flowers which can be a bigger problem than a shedding dog or cat. This shedding can be prevented by spraying mature plumes with hair spray.
When selecting planting site for pampas grass, special attention should be paid to the potential danger or injury to passersby from contact with the very sharp, saw-like edges of the leaves. Pampas grass should be planted where it will receive full sun for most of the day. In shady locations, it will grow very slowly and produce few, if any, plumes.
Pampas grass suffers from practically no pest or disease problems. It has good salt tolerance, and will grow in almost any soil. Once it’s established, about all you need to do is give it adequate fertilizer. For healthy growth and good plume production, pampas grass should be fertilized four times a year with a balanced fertilizer, such as an 8-8-8, applied at the rate of two pounds per 100 square feet.
In North Florida, pampas grass leaves are often killed by freezing temperatures. But, new leaves will sprout in the spring. Before spring growth begins, you should prune away brown leaves and other dead material that has accumulated at the base of your plants. When working around pampas grass, it’s a good ideas to wear long pants, a longs sleeve shirt, and gloves to protect you from the sharp leaf blades mentioned earlier.
The striking, feathery plumes and large, graceful clumps of foliage make pampas grass a very desirable addition to a landscape. Since it so trouble-free, perhaps you’d like to try some around your home.
by Roy Carter | Jun 23, 2014
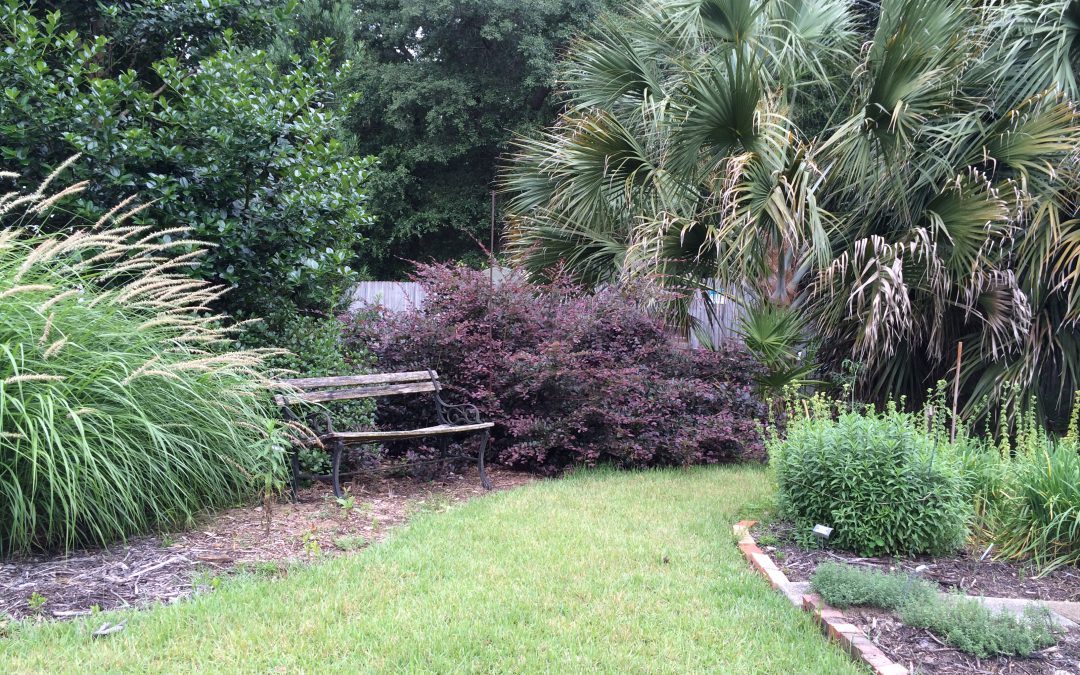
Summertime is vacation time for people, not plants! While getting ready for that long awaited trip, it’s easy to forget about your lawn, landscape, vegetable garden and house plants. A little time spent preparing your leafy friends for your absence could save you needless worry and hours of extra work when you get back.
Prepare your landscape for your absence.
Photo by Mary Derrick, UF IFAS
A vacation may be relaxing and rejuvenating for you and your family, but it can be hazardous, even deadly, for your plants. Unless you make adequate preparations before leaving, you could return to vegetable disaster.
One of the first things you might do before leaving home is ask a neighbor to check your plants periodically while you’re gone. All plants need some care. During an extended vacation container grown plants require special attention and different species have different needs. Be sure you give your friend specific instructions for the care of each type.
If you can’t find someone to personally look after your plants while you’re away, there’s plenty you can do prior to departure to make sure you don’t come home to a limp landscape and sickly house plants. Outdoor container plants should be placed in a shady area to conserve moisture. Under a tree or on the north side of a building are good locations. A thick layer of mulch will help conserve moisture for landscape plantings. Mow your lawn just before leaving, cutting the grass a little closer than usual. An unkept lawn can encourage disease, and it’s a tell-tale sign that no one’s home.
Give lawn and landscape plants a heavy watering – especially recently planted beds, which will need extra moisture. Also, thoroughly spray or dust your plants to protect them from insects and diseases while you’re away. If you have flowering annuals, cut the blossoms before departing. If you don’t, they’ll soon stop blooming. Harvest all ripe or nearly ripe fruits and vegetables. Like flowers, they will continue to produce only if they’re picked frequently. Otherwise, they’ll go to seed.
Do a thorough job of weeding. If weeds are allowed to go to seed while you’re away, you can expect to encounter much more difficult problems later in the season – even next year – when the seeds sprout. Weeding eliminates a major source of competition for your landscape plants’ food and water which may be in short supply during your absence.
Plants kept indoors require special consideration. Before leaving home, place your house plants in a room which receives indirect sunlight. Direct exposure to the sun will dry the soil too quickly. Of course, you don’t want to put your plants in a room that’s too dark, either. Too little light will almost always result in leaf drop. And, just before you depart, be sure to water your house plants thoroughly. This is especially vital, because – unlike lawn grass and landscape ornamentals – house plants cannot benefit from any rain that may fall while you’re gone.
You’ll enjoy your vacation more by making sure your plants are well prepared for your absence.

by Roy Carter | Jun 10, 2014
Blueberry. Photo credit: Eric Zamora, UF IFAS.
Blueberries are native to Eastern North America. They are one of the few crop plants that originated here. The rabbiteye blueberry occurs mostly in certain river valleys in Northern Florida and Southeastern Georgia. The high bush blueberry is native to the eastern third of the United States and Southeastern Canada. Florida is rich in other native species. The woods and swamps of Florida are populated with at least eight wild blueberry species. No area of the state lacks wild blueberries, except where soil pH is above 6.0.
The two types of blueberries grown in Florida are Southern highbush and rabbiteye. The earliest ripening southern highbush varieties ripen about 4 to 6 weeks earlier than the earliest rabbiteye varieties grown at the same location.
Some rabbiteye varieties recommended for our area are: Alice blue, Beckyblue, Climax, Bonita, Brightwell, Chaucer and Tifblue. Some recommended Southern Highbush varieties are: Blue Crisp, Gulf Coast, Jewel, Sharpblue, Santa Fe, Star and Misty.
Blueberries need a fairly acid soil; a pH range of 4 to 5 is suggested. Blueberries grown on alkaline or deep sands will grow poorly. If you need to lower the soil pH before planting, mix in some acidic peat moss.
Blueberries have a shallow, fibrous root system. That means plants should be placed in the ground about an inch deeper than they were growing in the nursery. Rabbiteye blueberries grow poorly in soils with excessive drainage. But they won’t tolerate too much moisture for long periods of time either.
Blueberries are very sensitive to fertilizers. During the first growing season, no mineral fertilizer should be added at all. In the second season, apply about two ounces of an acidic fertilizer per plant. Blueberries can use the same fertilizer as camellias and azaleas, but be careful not to overdo it. Excessive amounts of fertilizer will kill the plants.
Before planting blueberries, you should cultivate the soil by plowing or roto tilling to a depth of at least six inches. Dig a hole large enough so that the roots won’t be crowded. Lightly pack the soil around the roots and water thoroughly. Keep in mind that newly set plants need a good water supply.
Bare-root bushes should be transplanted during the winter months; container grown bushes can be transplanted anytime. The first year after planting, the blossoms should be removed to help the bush grow more quickly.
Pruning is an important part of blueberry culture. It promotes the growth of strong wood, and rids the tree of weak twiggy growth. The strong wood growth is necessary for good fruit production.
Believe it or not, the worst pests of blueberries are birds. You need to protect your bushes with some kind of netting, or employ the old fashioned scarecrow to do the job. It you don’t protect your bushes, you can count on the birds getting to the fruit before you do.
Other than birds, rabbiteye blueberries have few pest or disease problems. Powdery mildew can occur on bushes that don’t get full sun, but this problem can be easily controlled with a sulfur spray. Bud mites, thrips, fruitworms, and defoliating insects can sometimes be a problem.
Weeds will compete with young blueberry bushes for nutrients and water, so keep the beds as free of weeds as possible. Mulches are good for controlling weed growth. If necessary, there are herbicides available.
For more information please see:
Blueberry Gardener’s Guide
by Roy Carter | May 20, 2014
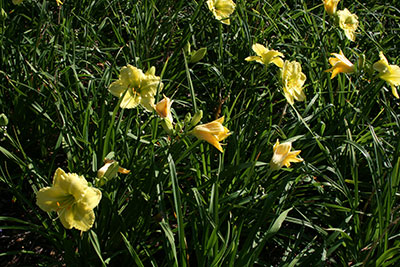
Daylillies in bloom. Image Credit UF IFAS
The daylily is a popular flowering perennial that adapts well to Florida landscape statewide. Plants are available in a wide variety of growth habits, flower shapes and colors, including yellow, orange, red, pink, and purple, near white and shades and combinations of all of these. Flowering starts in March for early-season bloomers while late-season daylilies won’t bloom until mid-May. Select early and late-season bloomers to extend the flowering season. The typical bloom period is about four to seven weeks, although some varieties bloom even longer.
Daylilies are members of the lily family, in the genus hemerocallis; “Hemero” is Greek for “day” and callis for “beauty”. The flower buds and petals are edible raw, boiled, stir-fried, steamed, or batter and fried. Dried daylily petals, call “golden needles”, are used in numerous Chinese dishes. The modern varieties of daylilies have been developed from native Chinese spices. Early settlers from Europe and Asia brought many of the original species with them to America. During the last 75 years, hybridizers in the United States and England have made great improvement in daylily varieties.
Raising daylilies is fairly simple, but first you have to make sure you’re choosing the right varieties for our area of the state. Daylilies are classified into three groups according to their growth habits – deciduous, semi-evergreen, and evergreen.
As you might expect, the deciduous daylily varieties die back in the winter. They do well in our area. But they don’t receive enough cold weather in South Florida. On the other hand, the evergreen varieties generally grow best in areas with mild winters.
Daylilies may be planted any time of year, but hey usually do best if they’re planted right after flowering. Once they’re established, these lilies need only minimum care.
Proper planting bed preparation is a critical factor in raising daylilies. They are replanted only every five to ten years, so the flower bed needs to have a soil of good quality. The lilies grow best on a well-drained soil with good aeration and good water holding capacity. Sandy soil usually provides the necessary aeration, but they don’t hold water very well. On the other hand, clay soils have good water holding properties, but they don’t provide the aeration lilies need. If your soil is sandy, you need to add two to four inches of peat moss and work it into a depth of sixth to eight inches. If your soil has a great deal of clay in it, you might want to add about an inch of perlite or similar material to increase aeration.
Prior to planting, the flower bed should be fertilized with several inches of a good compost, or 8-8-8 / 10-10-10 mixture, at the rate of two-and-a-half pounds per 100 square feet. An inch or so of water should be applied once or twice a week until the plants are well established. Twice each year, fertilize with the same two-and-a-half pounds of 8-8-8 or 10-10-10 per 100 square feet. Apply the fertilizer evenly, keeping it off the foliage.
Daylilies have a tendency to become crowded, and when this happens, flowers production is reduced. If crowding occurs, you’ll need to divide to the plants by digging them up and severing the Rhizome between the fans of leaves with a sharp knife. Cut the leaves back to within four to six inches of the crown and replant the division.
Daylilies can be planted in a variety of ways to enhance your landscape in informal groupings, in small groups in the space between shrubs or in front of a fence or wall which will serve as a background.
by Roy Carter | Apr 21, 2014
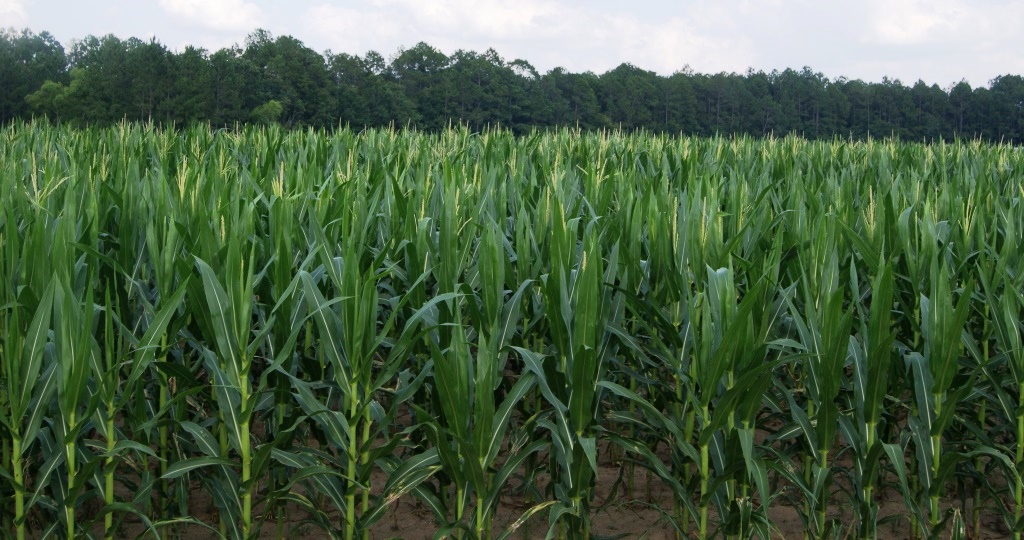
Corn Field. Image Credit Matthew Orwat
Sweet corn is a favorite among home gardeners. As long as the space is available, it’s not difficult to grow.
Corn is a new world native crop, with archaeological evidence suggesting that it was first domesticated in Mexico. This crop was the basis of the Mayan, Incan and Aztec civilizations, and by the time European explorers came to the New World in the 1500s, corn had become a staple for the native people.
Corn is monoecious (mon-ee-shuss) which means that there are both male and female flowers on each corn plant. In some monoecious plants, male and female parts are in the same flower. In corn, male and female flowers are in different locations, the male flowers form a tassel which is at the top of the plant. The female flower is located at the junction of leaves and stem. It consists of collection of hairs (silks) enclosed in the husks of what will become the ears. There silks are pollen receiving tubes. Wind-blown pollen from the mole flower (tassel) falls on the silks below. Each silk leads to a kernel, and pollen must land on all silk for the ear to fill out completely with kernel.
Corn comes in a variety of colors and sugar contents. Look for sugary enhanced varieties, with firm and sweet kernels, or the super sweet varieties, with tender and very sweet kernels. Some varieties of white and yellow corn that perform well in Florida are Silver Queen (white), “How Sweet It Is” (white), “Sweet Ice” (white), “Merit” (yellow), “Kandy Korn” (yellow), and “Peaches and Cream” (bicolor).
Sweet corn thrives best in well-drained soils but will tolerate a wide range of soil types. Optimum pH ranges from 6.0 to 6.5.
Till the soil to a depth of 6 to 8 inches using a spade, plow or rototiller. Avoid tilling the soil while it is too wet because clodding may occur.
Sweet corn is a warm-season vegetable requiring soil temperature between 60-90 degrees F°. Avoid planting seed in cool soils. Wait until after the last average dates of the last killing frost before planting. If planted too early, weak stands, stunted growth or frost-killed seedling may result. The newer, sweeter varieties are even more sensitive to cool, wet soils any may not perform well in these conditions.
Plant corn in an area that receives at least 6 to 8 hours of sunlight. It is beneficial to plant near a water source for needed irrigation.
Plant seed approximately 1 to 1 ½ inch deep in rows 3 feet apart with 8 to 12 inches between each seed in the row. A hand pushed mechanical planter can make seeding much easier for larger stands of corn.
A soil test through the local County Extension Office is always the best way to determine the lime and fertilizer needs. If lime is required, it can be tilled into the ground during soil preparation but is most effective when applied 2 to 3 months prior to planting.
If a soil test is not done, a general guideline is to apply 3-4 pounds of 10-10-10 per 100 linear row feet before planting. Side dress two or three times during the growing season with ammonium sulfate (21-0-0-17) at the rate of 2 pounds per 100 feet of row space. More frequent side dressing may be required on sandy soils or when excessive ran occurs.
Corn requires a minimum of 1 inch of water per week for normal development. The most critical period for water is during pollination and during final ear filling.
Sweet corn matures in 60 to 100 day, depending on the varieties. Sweet corn should be ready for harvest about 20 days after the appearance of the first silk stands, sweet corn is picked during the “milk stage” when the kernels are fully formed but not completely mature.
After picking, cook and eat corn that day or store it in cool temperatures, such as in a refrigerator, as soon as possible. It can then be canned, frozen or eaten fresh within few days. Keeping the corn cool is the key to better flavor as high temperatures will convert the sugar in the kernels to starch, giving it a bland taste.

