The best time to plant a tree is twenty years ago. The second best time is Arbor Day 2024. Florida recognizes the event on the third Friday in January, so the next one is January 19, 2024.
Arbor Day is an annual observance that celebrates the role of trees in our lives and promotes tree planting and care. As a formal holiday, it was first observed on April 10, 1872 in the state of Nebraska. Today, every state and many countries join in the recognition of trees impact on people and the environment.
Trees are the longest living organisms on the planet and one of the earth’s greatest natural resources. They keep our air supply clean, reduce noise pollution, improve water quality, help prevent erosion, provide food and building materials, create shade, and help make our landscapes look beautiful. A single tree produces approximately 260 pounds of oxygen per year. That means two mature trees can supply enough oxygen annually to support a family of four.
The idea for Arbor Day in the U.S. began with Julius Sterling Morton. In 1854 he moved from Detroit to the area that is now the state of Nebraska. J. Sterling Morton was a journalist and nature lover who noticed that there were virtually no trees in Nebraska. He wrote and spoke about environmental stewardship and encouraged everyone to plant trees. Morton emphasized that trees were needed to act as windbreaks, to stabilize the soil, to provide shade, as well as, fuel and building materials for the early pioneers to prosper in the developing state.
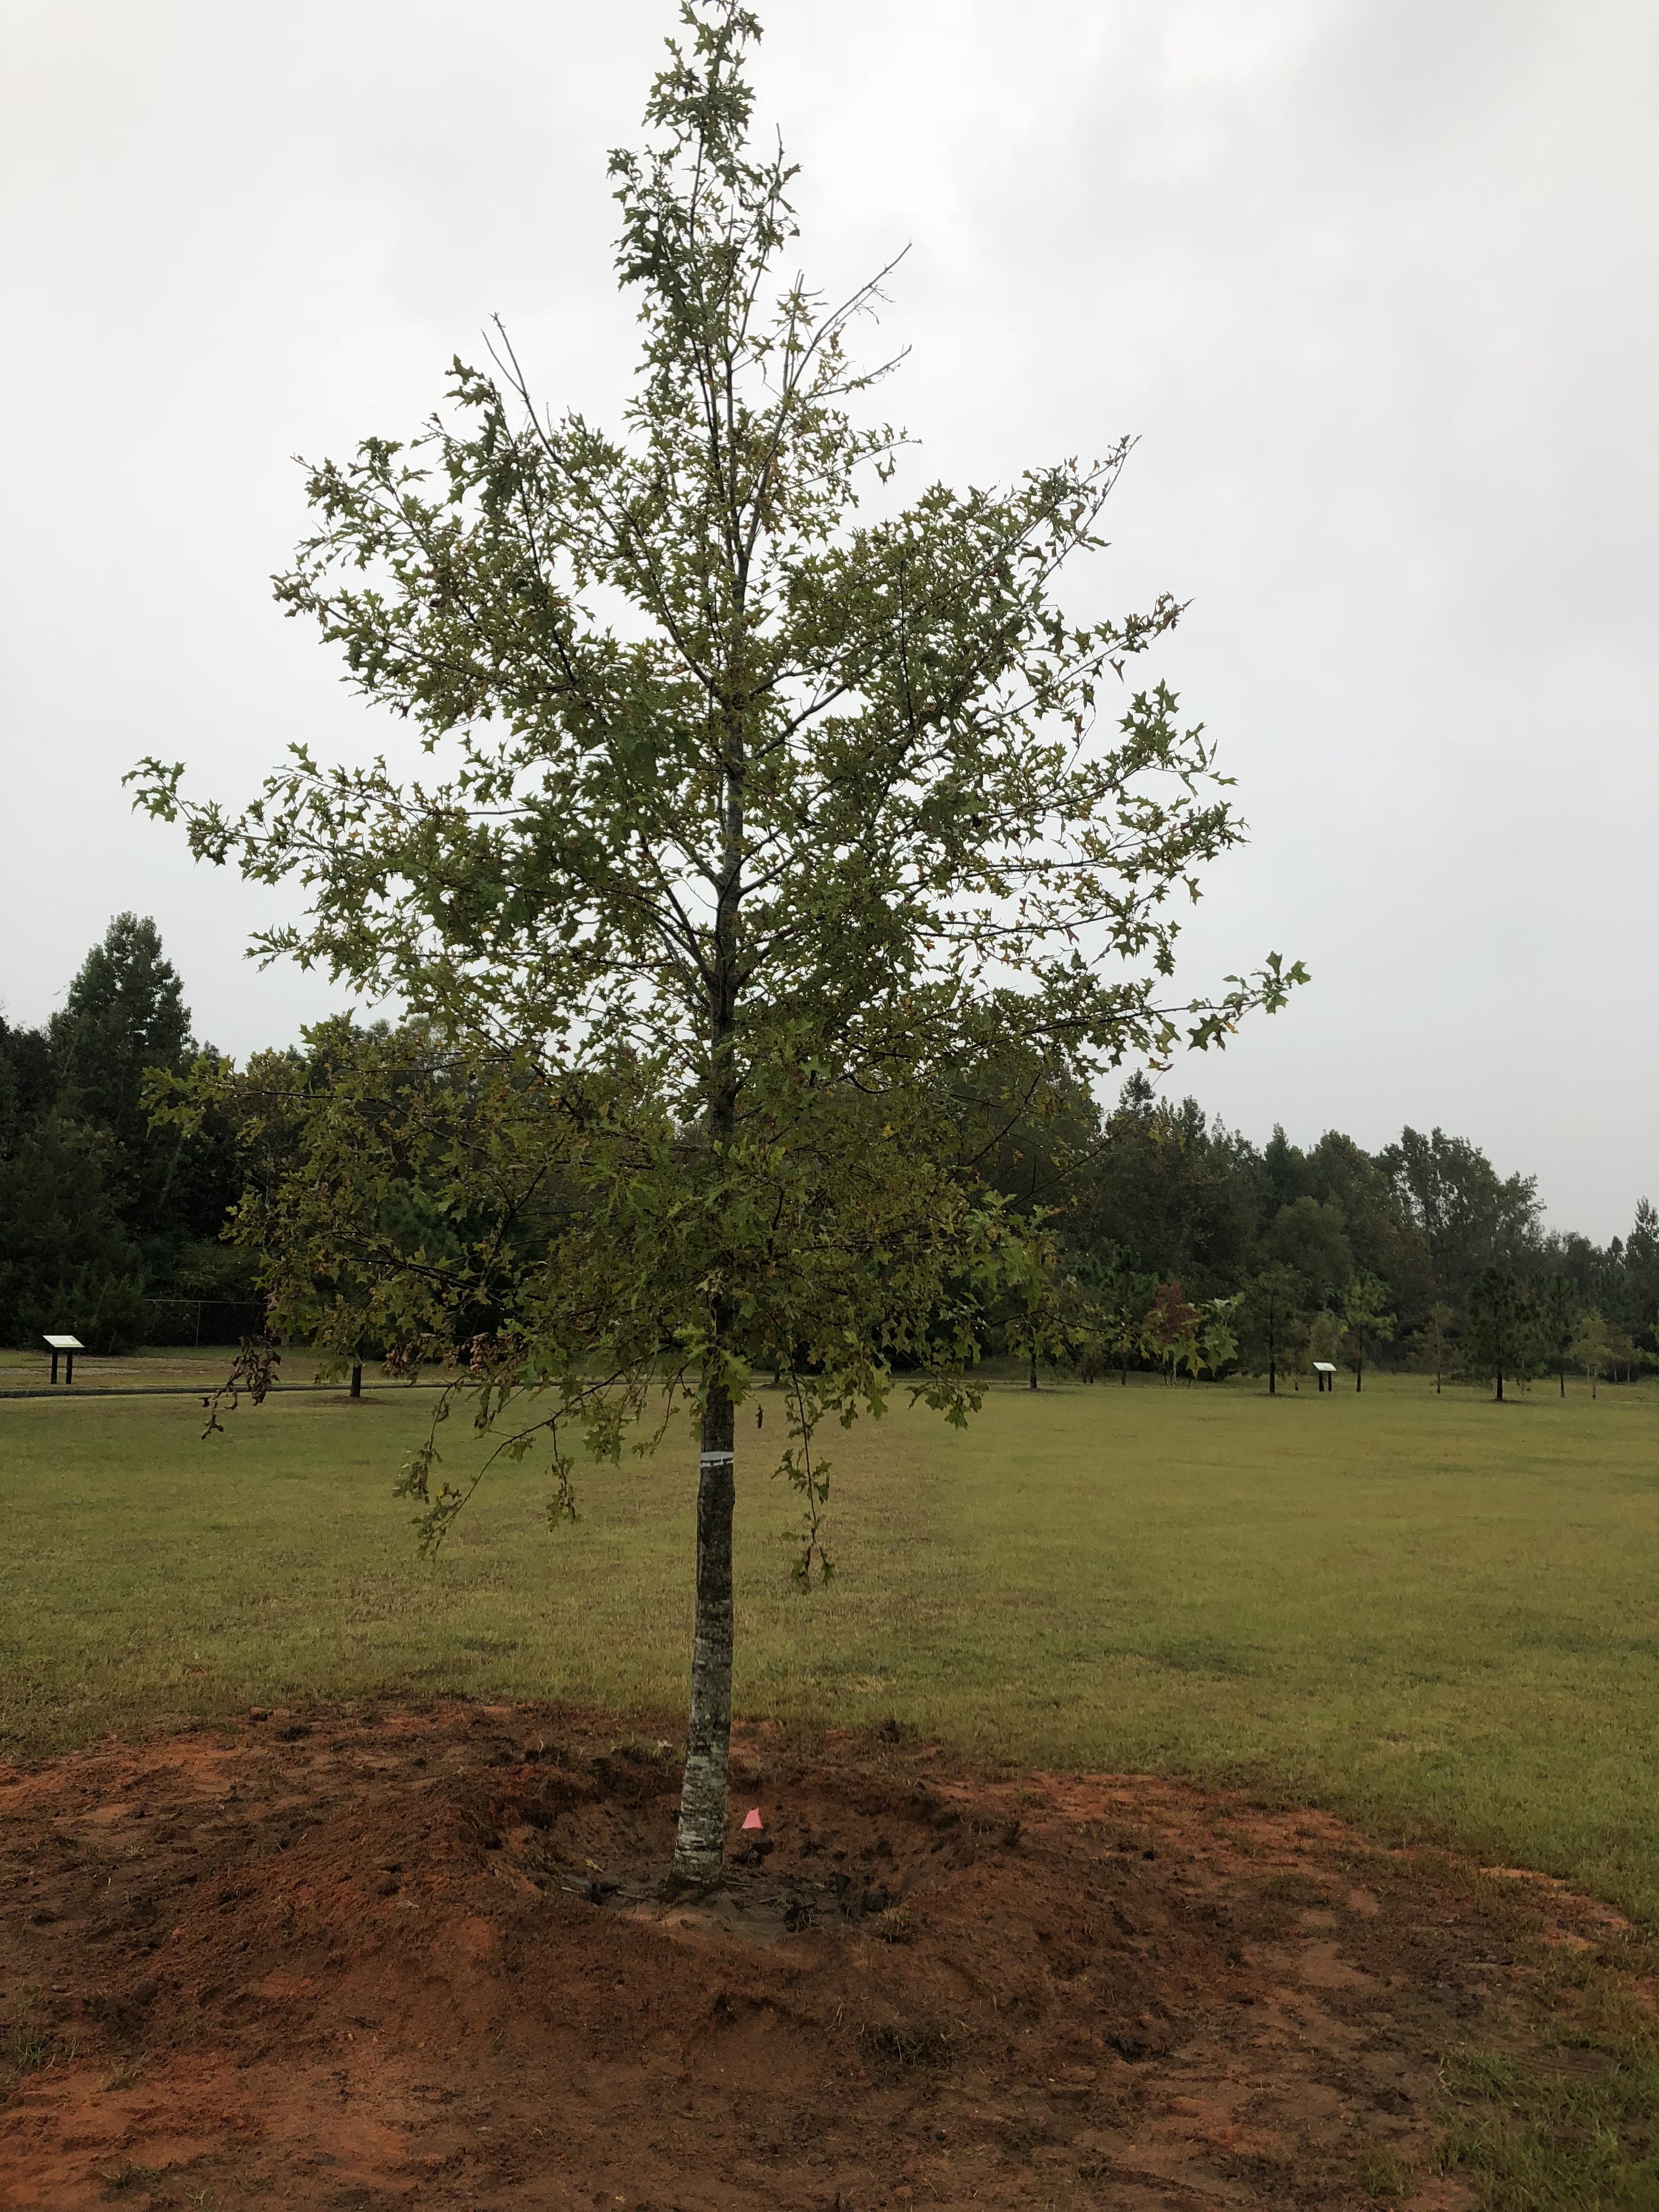
A planted tree with water retention berm. Photo Credit: Matt Lollar, University of Florida/IFAS Extension – Santa Rosa County
In 1872, The State Board of Agriculture accepted a resolution by J. Sterling Morton “to set aside one day to plant trees, both forest and fruit.” On April 10, 1872 one million trees were planted in Nebraska in honor of the first Arbor Day. Shortly after the 1872 observance, several other states passed legislation to observe Arbor Day. By 1920, 45 states and territories celebrated Arbor Day. Richard Nixon proclaimed the last Friday in April as National Arbor Day during his presidency in 1970.
Today, all 50 states in the U.S. have an official Arbor Day, usually at a time of year that has the correct climatological conditions for planting trees. For Florida, the ideal tree planting time is January, so Florida’s Arbor Day is celebrated on the third Friday of the month. Similar events are observed throughout the world. In Israel it is the Tu B Shevat (New Year for Trees). Germany has Tag des Baumes. Japan and Korea celebrate an entire week in April. Even, Iceland one of the most treeless countries in the world observes Student’s Afforestation Day.
The trees planted on Arbor Day show a concern for future generations. The simple act of planting a tree represents a belief that the tree will grow and provide wood products, wildlife habitat erosion control, shelter from wind and sun, beauty, and inspiration for ourselves and our children.
“It is well that you should celebrate your Arbor Day thoughtfully, for within your lifetime the nation’s need of trees will become serious. We of an older generation can get along with what we have, though with growing hardship; but in your full manhood and womanhood you will want what nature once so bountifully supplied and man so thoughtlessly destroyed; and because of that want you will reproach us, not for what we have used, but for what we have wasted.”
Florida’s natural areas—a great source of pride and enjoyment to its citizens—provide recreation, protect biodiversity and fresh water supplies, buffer the harmful effects of storms, and significantly contribute to the economic well-being of the state. Unfortunately, many of these natural areas can be adversely affected by invasive plant species. An estimated 25,000 plant species have been brought into Florida for use as agricultural crops or landscape plants. While only a small number of these have become invasive, Chinese tallow (Triadica sebifera) is one of them.
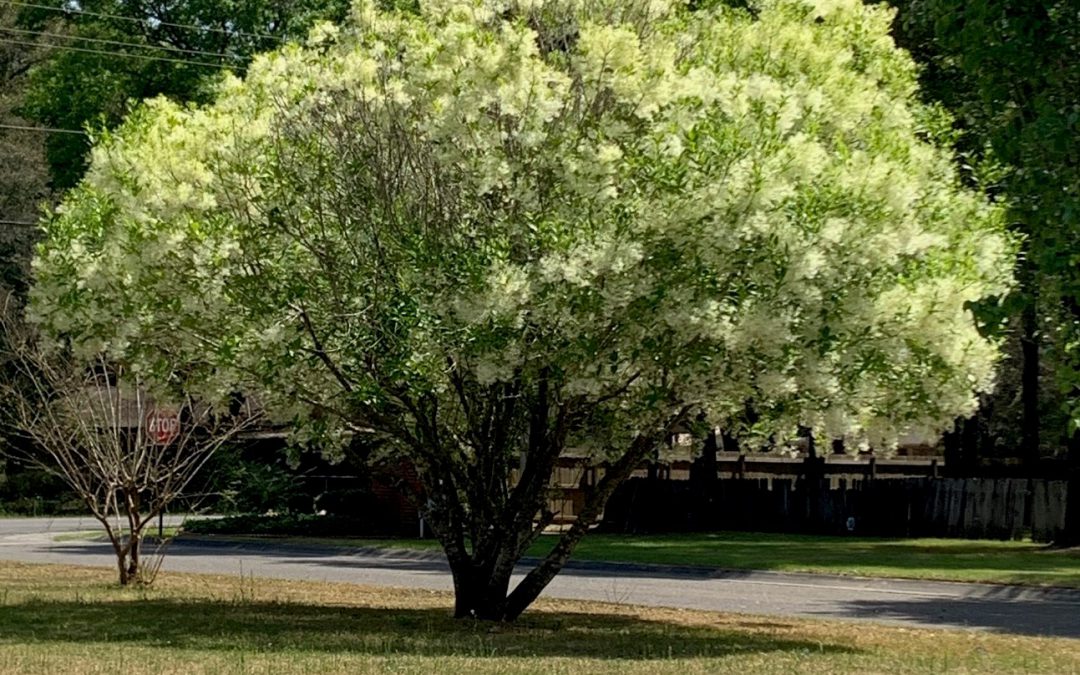
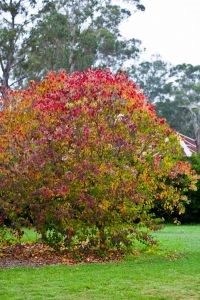
As the trees begin to turn various shades of red, many people begin to inquire about the trees. While their autumn coloration is one of the reasons they were introduced to the United States, it took years to realize what a menace the trees become. Triadica sebifera, the Chinese tallow is locally referred to as popcorn tree due to the appearance of the developing seed heads, white three-chambers seeds covered in a fatty wax. It was introduced to Charleston, South Carolina in the late 1700s for oil production and use in making candles. However, the seeds are also tasty snacks for birds and can float long distances in the water, enabling it to spread to every coastal state from North Carolina to Texas, and inland to Arkansas. In Florida it occurs as far south as Tampa, displacing other native plant species in those habitats. Therefore, Chinese tallow was listed as a noxious weed by the Florida Department of Agriculture and Consumer Services Noxious Weed List (5b-57.007 FAC) in 1998, which means that possession with the intent to sell, transport, or plant is illegal in the state of Florida.
Fall color of Chinese tallow
Individuals can help mitigate the problem of Chinese tallow trees in Florida’s natural areas by removing them from their property. Mature trees should be felled with a chain saw by the property owner or a professional tree service. The final cut should be made as close to the ground as possible and as level as possible to facilitate application of an herbicide to prevent sprouting. Stumps that are not treated with an herbicide will sprout to form multiple-trunked trees. If it is not objectionable for dead trees to be left standing, certain herbicides can be applied directly to the bark at the base of the tree (basal bark application).
Herbicides that contain the active ingredient triclopyr amine (e.g., Brush-B-Gon, Garlon 3A) can be applied to cut stumps to prevent re-sprouting. The herbicide should be applied as soon as possible after felling the tree and concentrated on the thin layer of living tissue (cambium) that is just inside the bark. Herbicides with the active ingredient triclopyr ester can be used for basal bark applications. Only certain triclopyr amine products may be applied to trees that are growing in standing water. If trees are cut at a time when seeds are attached, make sure that the material is disposed of in such a way the seeds will not be dispersed to new areas where they can germinate and produce new trees.
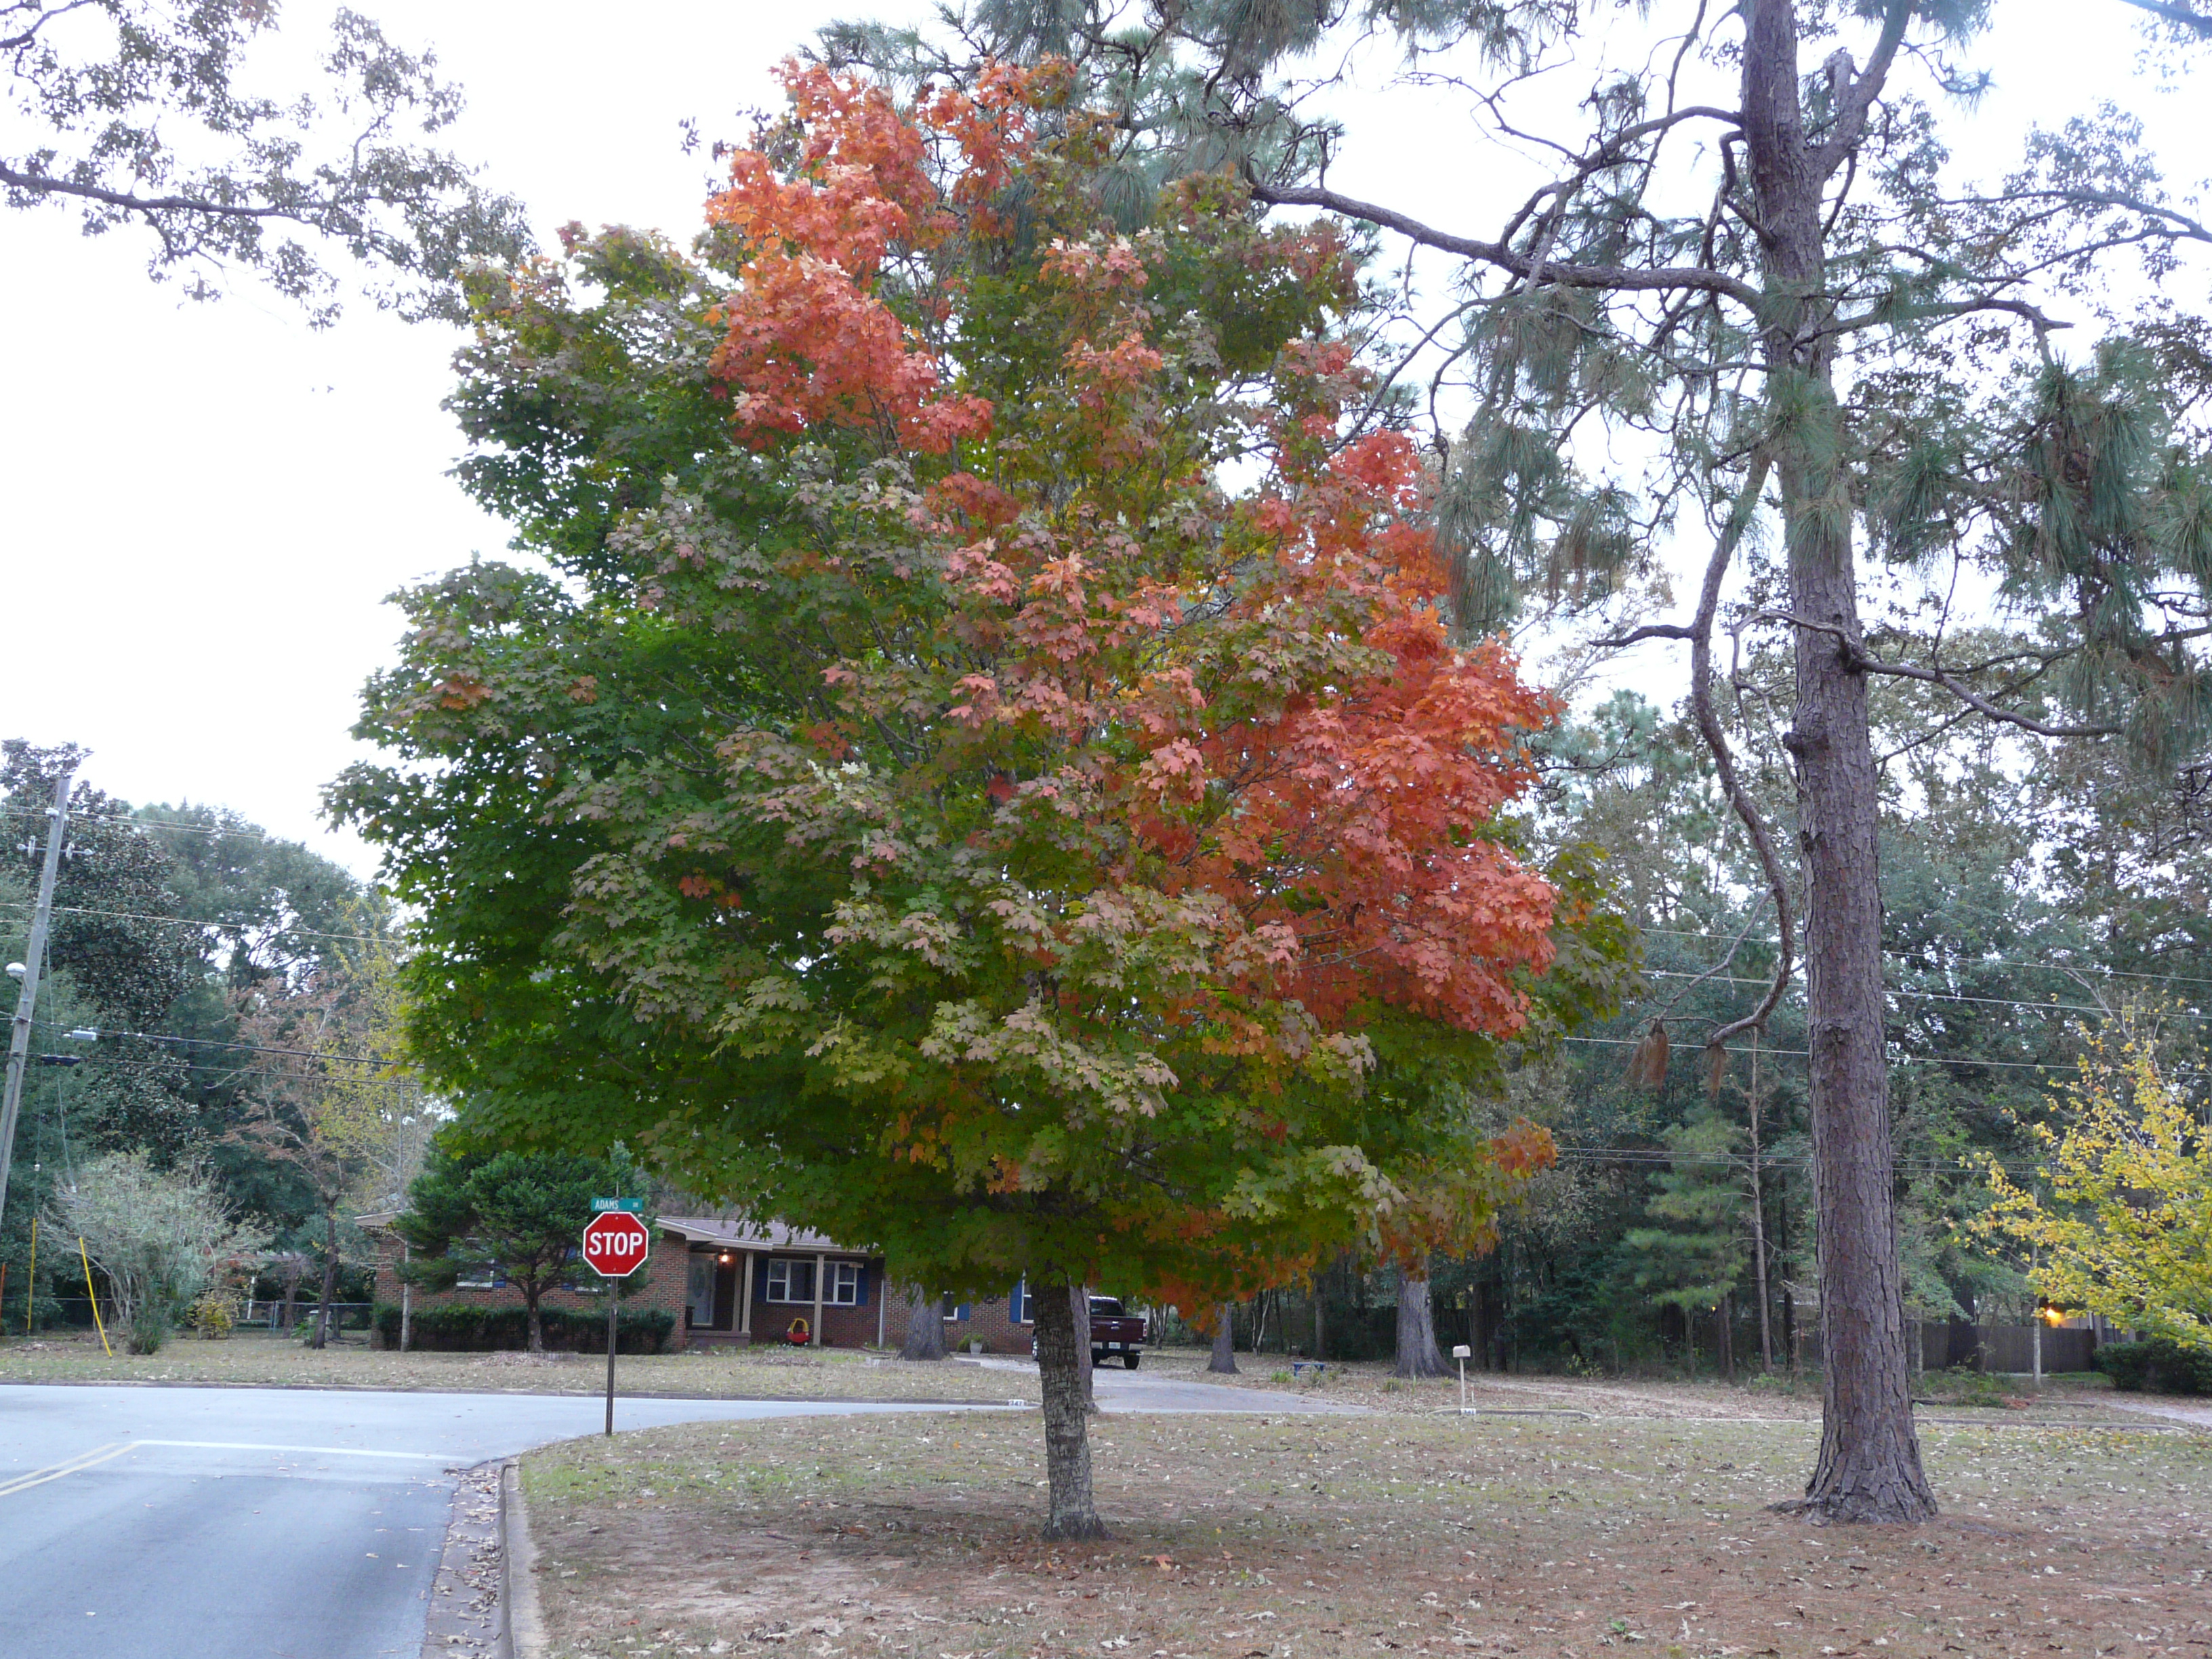
Space in a landscape left after removal of Chinese tallow can be used to plant a new native or noninvasive tree for shade, or some other landscape purpose. Although Florida is not known for the brilliant fall color enjoyed by other northern and western states, there are a number of trees that provide some fall color for our North Florida landscapes. Red maple, Acer rubrum, provides brilliant red, orange and sometimes yellow leaves. The native Florida maple, Acer floridum, displays a combination of bright yellow and orange color during fall. And there are many Trident and Japanese maples that provide striking fall color. Another excellent native tree is Blackgum, Nyssa sylvatica. This tree is a little slow in its growth rate but can eventually grow to seventy-five feet in height. It provides the earliest show of red to deep purple fall foliage. Others include Persimmon, Diospyros virginiana, Sumac, Rhus spp. and Sweetgum, Liquidambar styraciflua. In cultivated trees that pose no threat to native ecosystems, Crape myrtle, Lagerstroemia spp. offers varying degrees of orange, red and yellow in its leaves before they fall. There are many cultivars – some that grow several feet to others that reach nearly thirty feet in height. Also, Chinese pistache, Pistacia chinensis, can deliver a brilliant orange display.
There are a number of dependable oaks for fall color, too. Shumard, Southern Red, and Turkey are a few to consider. These oaks have dark green deeply lobed leaves during summer turning vivid red to orange in fall. Turkey oak holds onto its leaves all winter as they turn to brown and are pushed off by new spring growth. Our native Yellow poplar, Liriodendron tulipifera, and hickories, Carya spp., provide bright yellow fall foliage. And it’s difficult to find a more crisp yellow than fallen Ginkgo, Ginkgo biloba, leaves. These trees represent just a few choices for fall color. Including one or several of these trees in your landscape, rather than allowing the popcorn trees to grow, will enhance the season while protecting the ecosystem from invasive plant pests.
For more information on Chinese tallow tree, removal techniques and native alternative trees go to: http://edis.ifas.ufl.edu/ag148.
As you drive along the highway look out the window at the blooming roadside wildflowers. Fall is the season of yellow and purple, with splashes of red.
St. John’s Wort (Hypericum spp.), many different “daisies” (Aster spp.), tall and short Goldenrod (Solidago spp.), and “sunflowers” (Helianthus spp.) brighten up the landscape with the many shades of yellow. Spikes of Blazing Star (Liatris spp.), clumps of False Rosemary (Conradina canescens), and carpets of Moss Verbena (Verbena tenuisecta) add the purple hues. Here and there clusters of Red Basil (Calamintha coccinea) grab your attention with their fiery color.
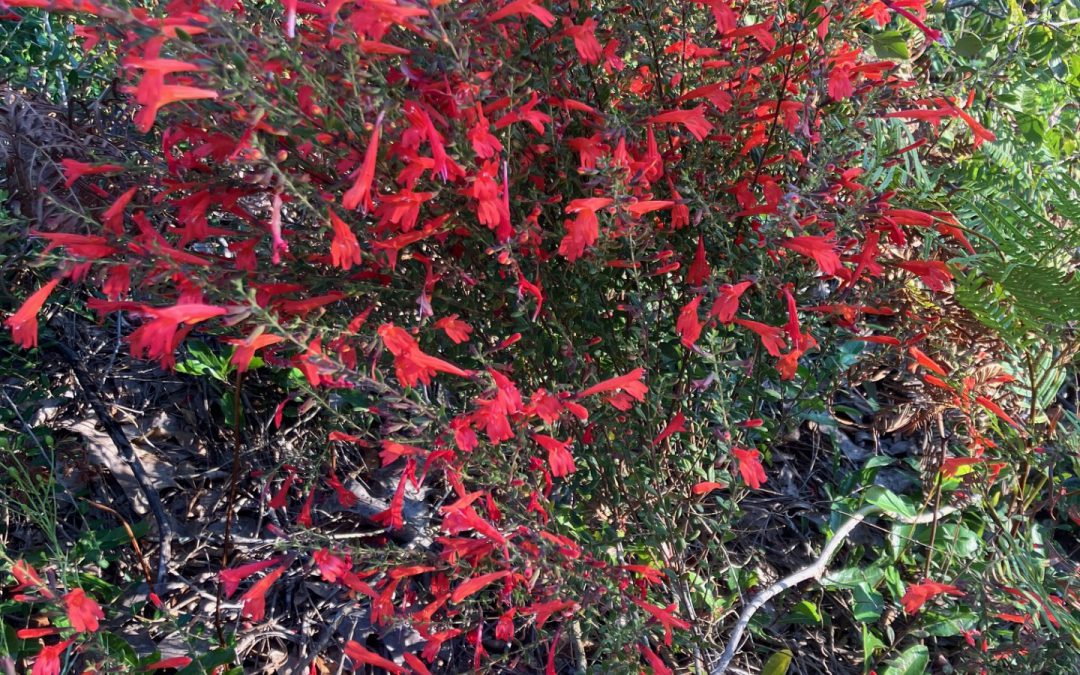
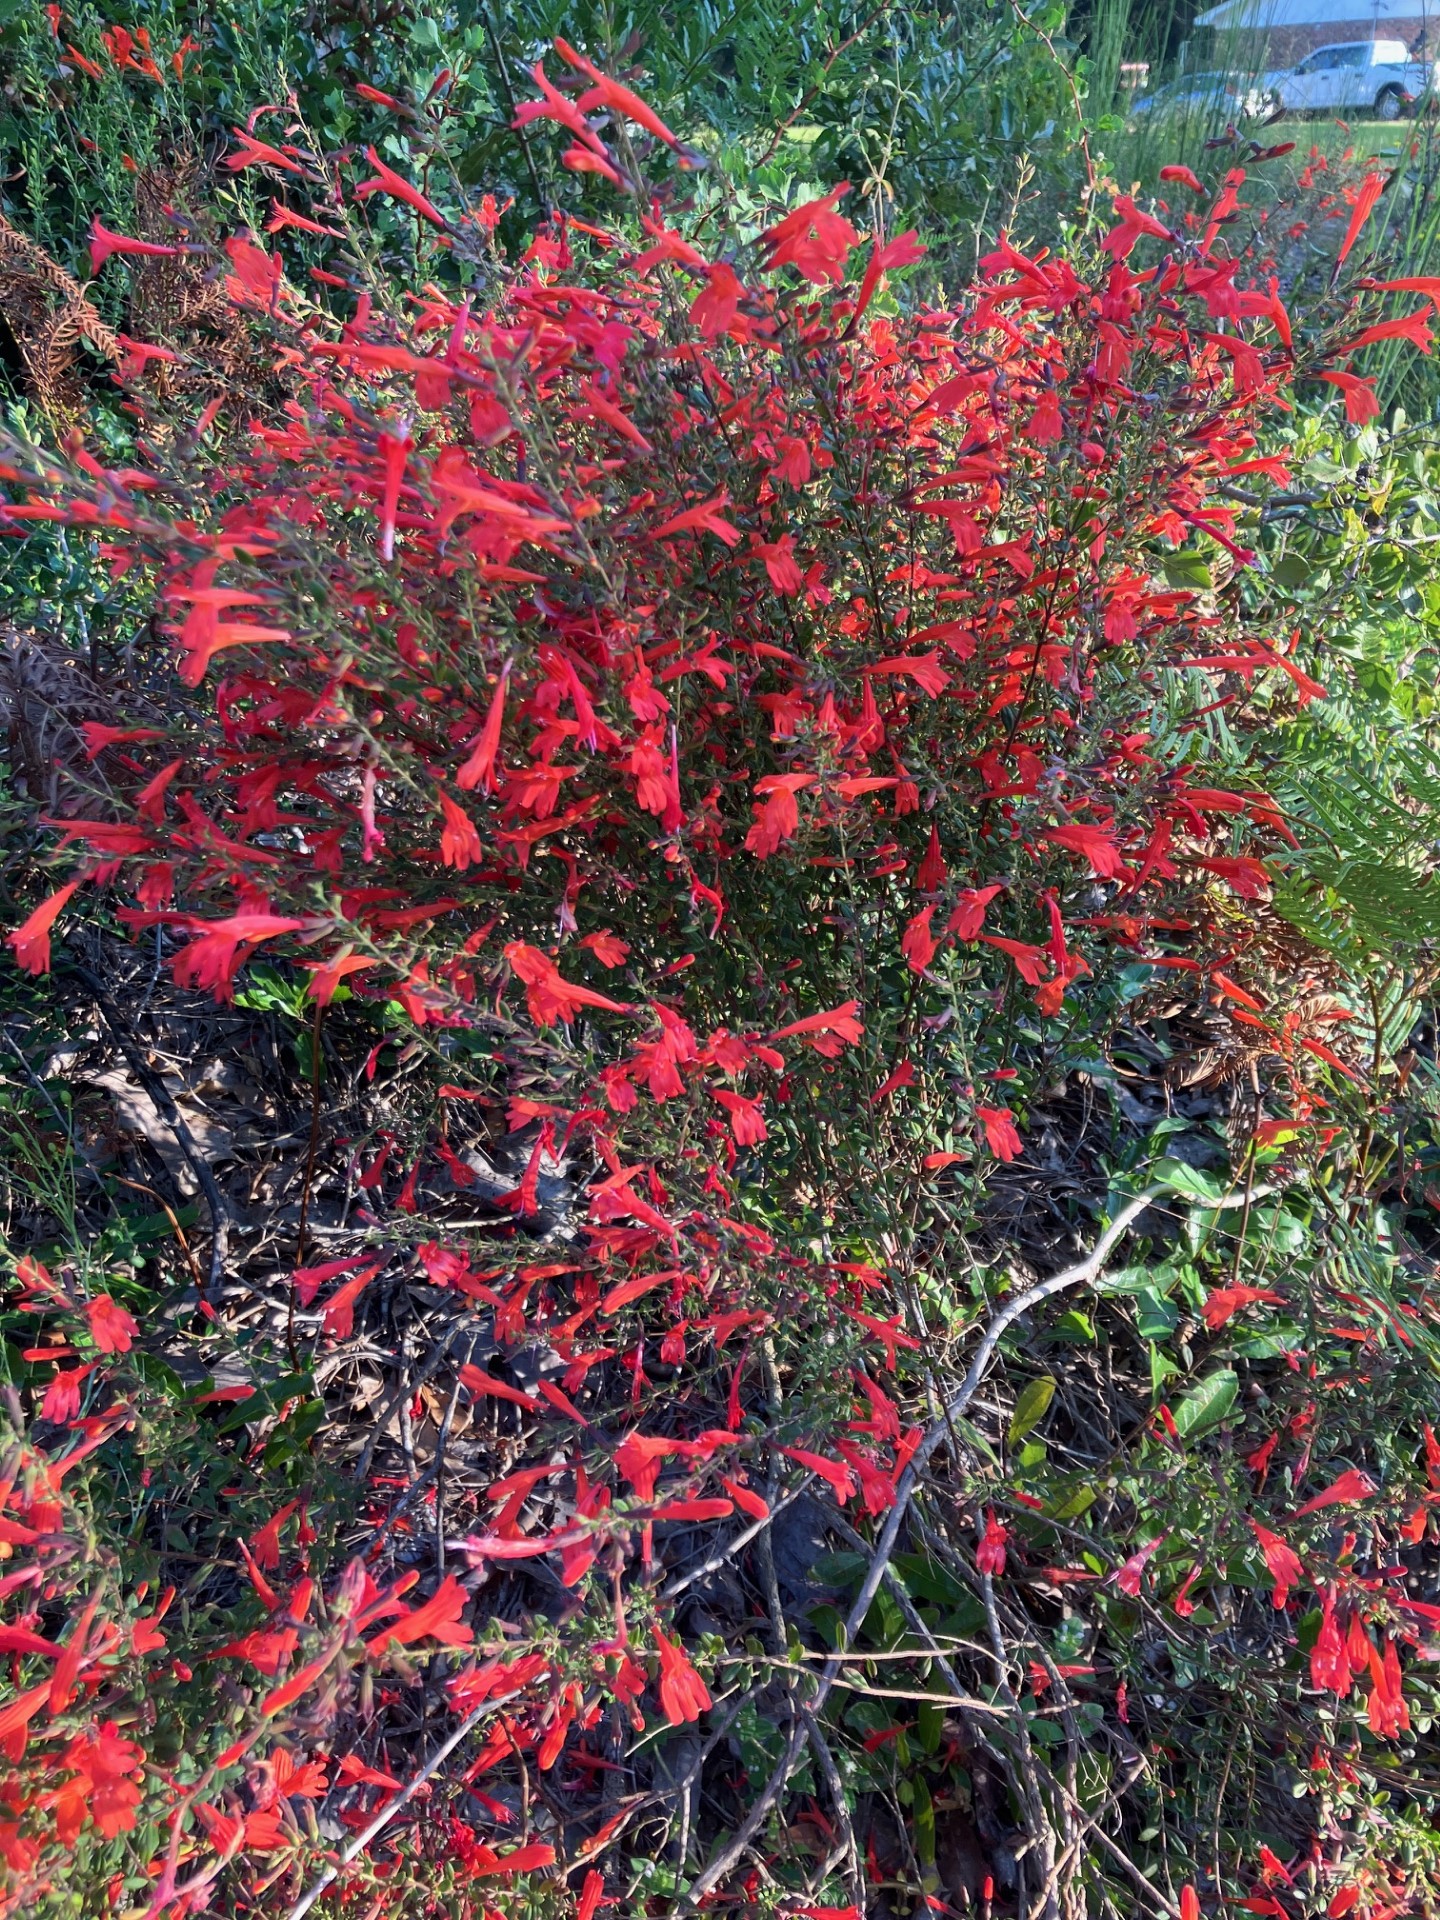
Scarlet calamint, also called Red Basil, with its brilliant red flowers, offer a dramatic contract against the backdrop of scrub, sandhill and coastal dunes where the plant naturally occurs in Florida. They bloom sporadically throughout the year, peaking in the fall with as many as 100 flowers on a single plant. It is the only Florida native Calamintha species with red flowers, and its flowers are the largest.
Red Basil (Calamintha coccinea)
When the Spanish Explorer Juan Ponce de Leon landed on the eastern shores in 1513 he immediately noticed the vast wealth of wildflowers and promptly name his new discovery the “Land of Flowers”, which is the translation for Florida. Habitats throughout the state vary greatly. Changes in elevation by only a few inches can change the soil and impact the types of plants growing there. Associated birds, butterflies, and other pollinators change as the wildflower species vary. Florida has one of the highest biodiversity in the United States.
Learning to identify the roadside wildflowers is the topic of the next Okaloosa County Master Gardener Lecture Series. Join Dave Gordon on Monday, October 23 at the Okaloosa County Extension 3098 Airport Rd. Crestview, FL 32539 from 10 -11 am CDT to learn about what is blooming along the road right of way and how they may be utilized in the landscape. For more information go to:
The plants you bring home from garden centers and nurseries may look beautiful in your landscape, but they might be invasive species that could escape your yard and quickly spread into natural areas, becoming an ecological and economic nightmare. Florida’s climate makes a cozy environment for a variety of plant species, including the non-native ones. To avoid contributing to the problem, homeowners, landscapers, and plant lovers should carefully select alternative sterile cultivars or other native plants.
The Florida Exotic Pest Plant Council (FLEPPC) created a list of invasive plants that was published every two years through 2019. Professional botanists and others perform exhaustive studies to determine invasive plants that should be placed on the lists. Invasive plants are termed Category I invasives when they are altering native plant communities by displacing native species, changing community structures or ecological functions, or hybridizing with natives.
In 2020 the Florida Invasive Species Council (FISC) took over this task. They began by standardizing invasive species terminology. FISC has adopted the following definitions as described in the publication “Invasive Species Terminology: Standardizing for Stakeholder Education” from the Journal of Extension (Iannone et al. 2020). For details on the new terminology go to: https://floridainvasivespecies.org/definitions.cfm. Words like “exotic”, “alien”, and “naturalized” have been removed from educational material due to individual interpretation concerns. The term “invasive” can only be applied to nonnative species. Many previous informational publications referred to aggressively growing native plants as invasive. This use is no longer accepted. Here are some sample definitions:
Invasive: A species that (a) is nonnative to a specified geographic area, (b) was introduced by humans (intentionally or unintentionally), and (c) does or can cause environmental or economic harm or harm to humans.
Nuisance: An individual or group of individuals of a species that causes management issues or property damage, presents a threat to public safety, or is an annoyance. Can apply to both native and nonnative species.
For a copy of the current invasive plant species listing, as well as other important list of state and federal noxious and prohibited plants go to: https://floridainvasivespecies.org/plantlist.cfm
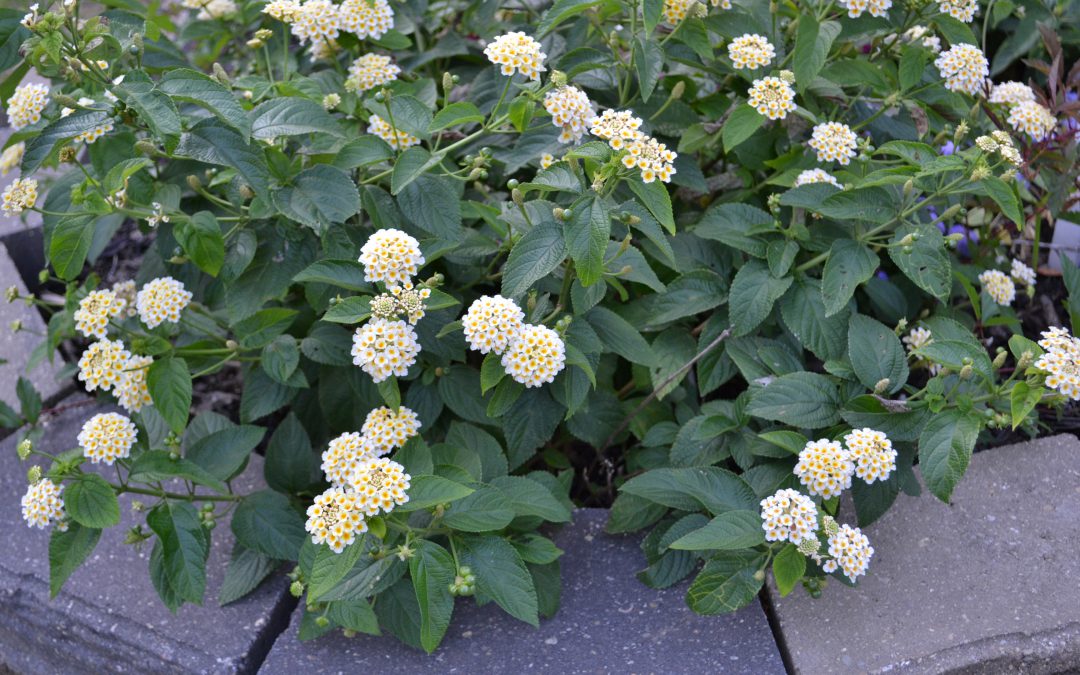
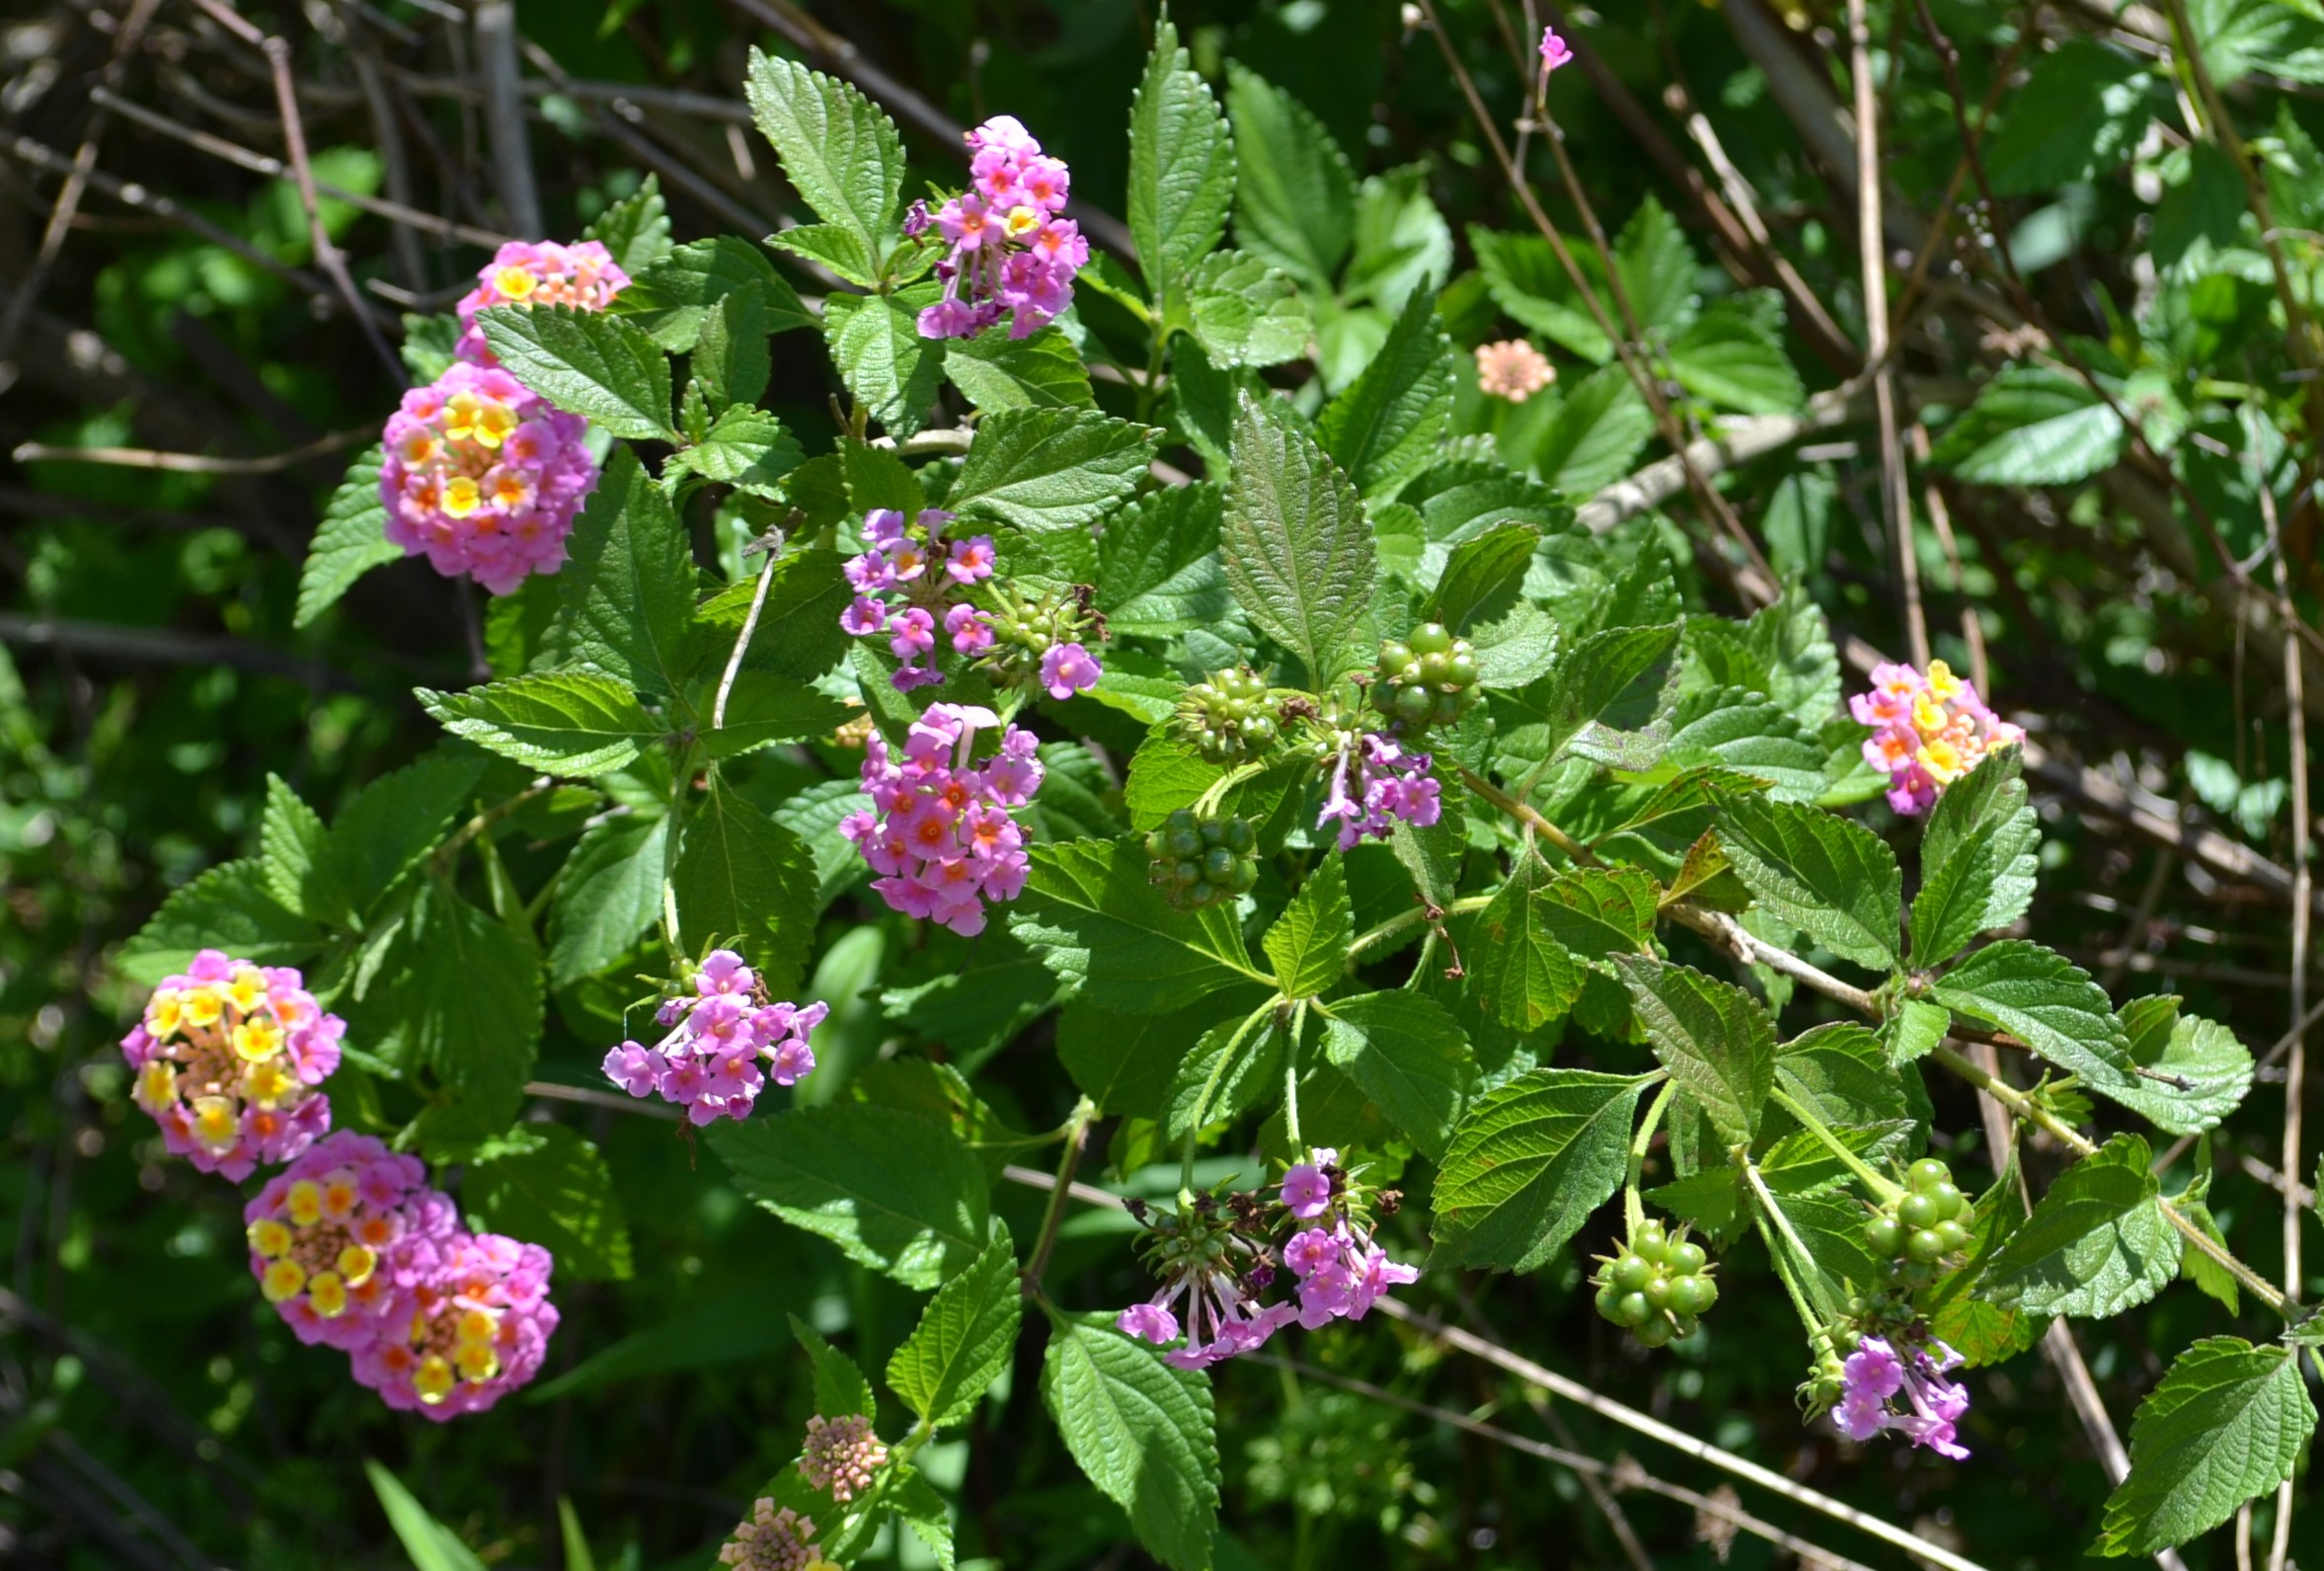
Many Lantana camara selections are invasive. Look for a sterile selections to prevent unwanted plant spread. Photo by Beth Bolles, UF IFAS Extension Escambia County.
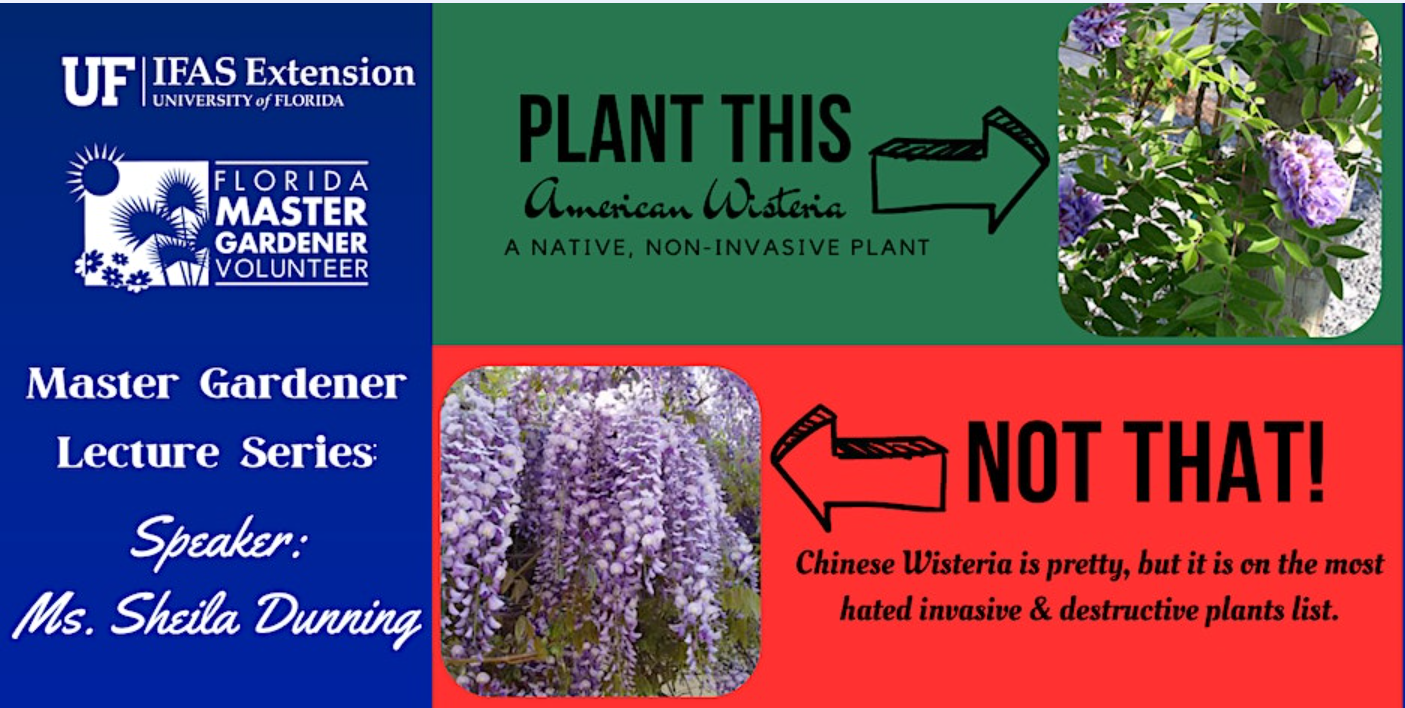
On Wednesday, September 20, 2023, the Okaloosa County Master Gardener Lecture Series topic will be “Plant This, Not That”. This program will introduce the invasive plant species that pose an ecological threat to Florida ecosystems and some alternatives that provide a similar aesthetic value. For more information and to register, click on this Eventbrite link.
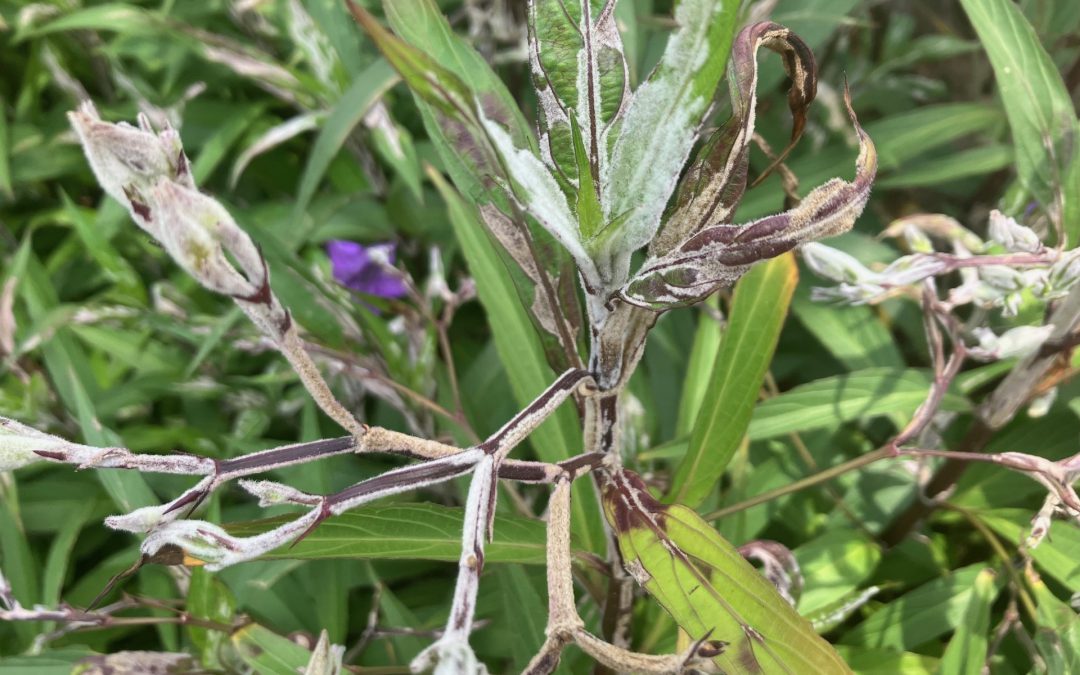
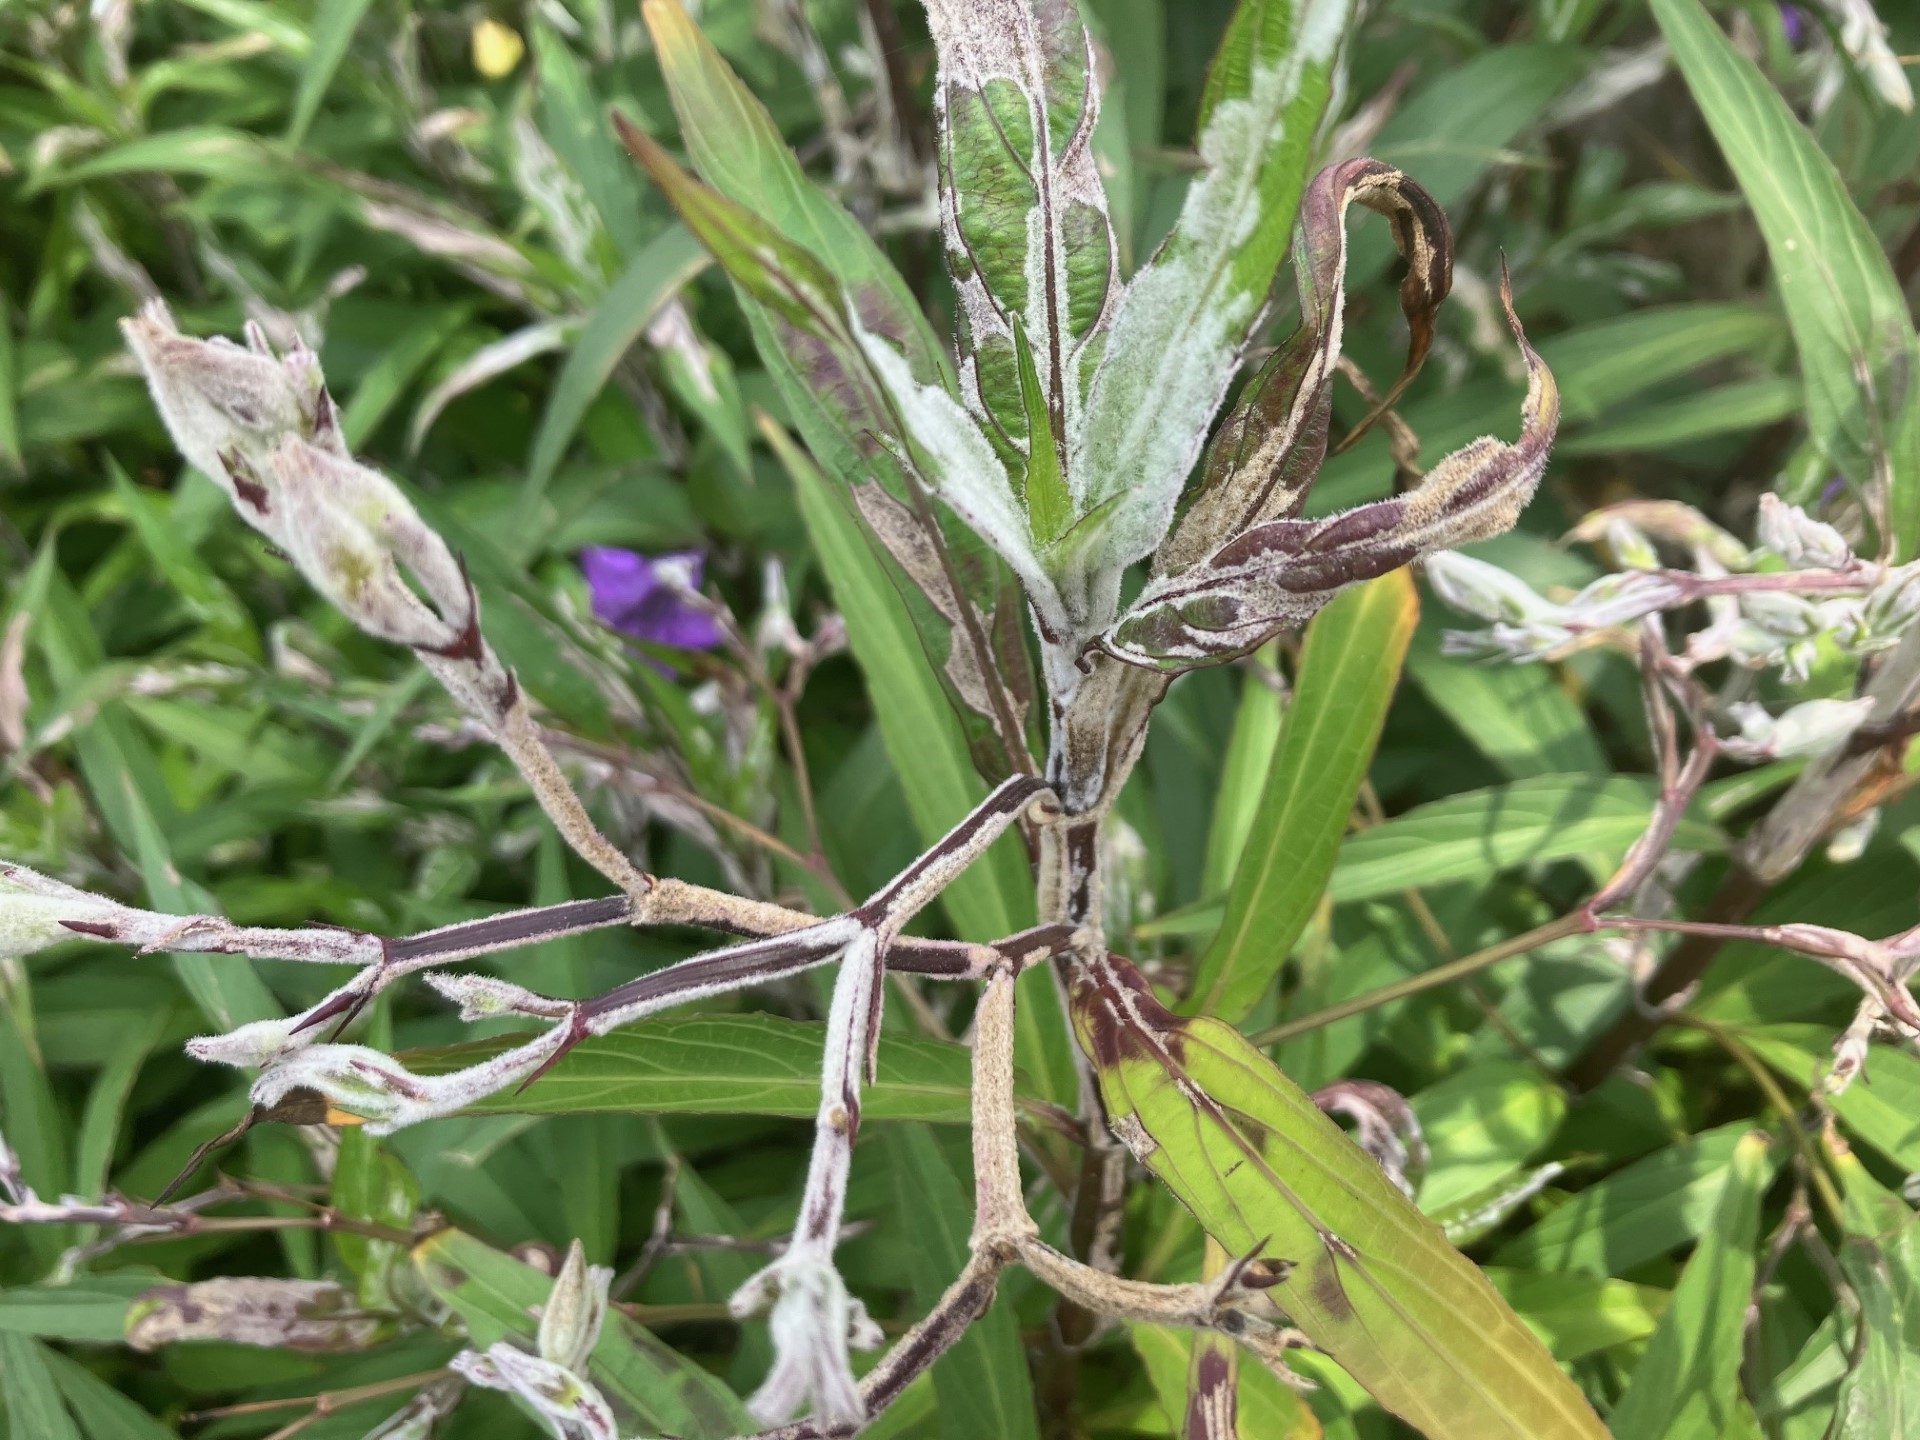
Many of the Mexican petunia plants, Ruellia simplex, growing in the landscape along the Gulf Coast are covered in white patches. The leaves appear to be growing fur, actual hairs, much denser than the dust of powdery mildew fungus. Excessive development of leaf trichomes, or surface hairs is referred to as erinea. The “fuzz” is the plant’s response to the feeding of eriophyid mites, also called gall mites. These native tiny, microscopic mites feed on the Mexican petunia leaves and stems, causing the plant to produce the white velvety masses. The distorted tissue provides shelter so the mites can continue to feed without being impacted by the weather or contact pesticide applications. Hot, dry conditions favor mite population increases. We have had plenty of that. However, the native mites are not likely to kill the invasive Mexican petunia, so they are not acting as an effective biological control for the plant.
Mexican petunia damage from the eriophyid mite.
Control of this native eriophyid mite begins with heavy foliage removal. Cutting the plants back to just a few inches above the ground removes the infested portion of the plant. The pruned parts need to be placed in a tightly sealed plastic bag before being sent to the landfill. If the location allows burning on-site, that is an even better option. Remember that these mites can feed on many other plants if allowed to escape. They have caused galls in crape myrtle, loropetalum, and hollies, as well as, vectoring diseases like rose rosette.
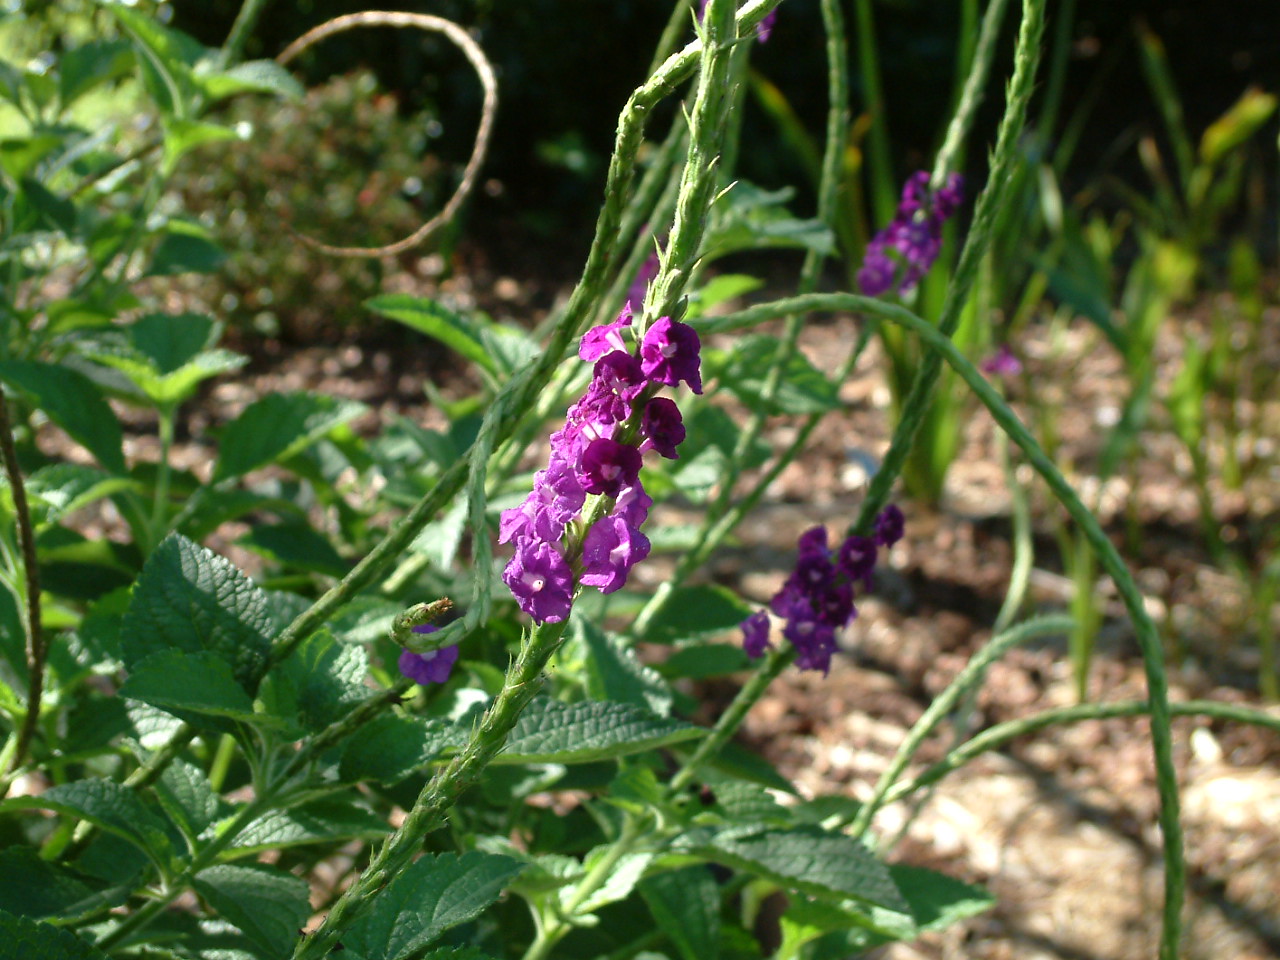
Then comes the tough decision. If the Mexican petunia is not one of the new sterile cultivars should the new growth be protected as it grows back? If you didn’t plant them or don’t remember what they were called when you purchased them, there is still a way to determine whether they are the invasive Mexican petunia or not. Invasive Mexican petunia produces seed after flowering. Were there any seed pods on the pruned parts? If so, you may consider killing off the entire planting. Several applications of a total vegetation herbicide with surfactant will remove them, leaving you a spot for a new purple flower, maybe a porterweed (Stachytarpheta), verbena or blue salvia.
Blue porterweed can be a substitute for non sterile Ruellia. Photo by Beth Bolles UF IFAS Escambia Extension
If your plants are sterile (have no seed pods), an application of horticultural oil and/or a miticide like abamectin sprayed with each flush of new growth will produce a pretty bed of purple flowers in a short period of time.