by Pat Williams | Sep 9, 2021
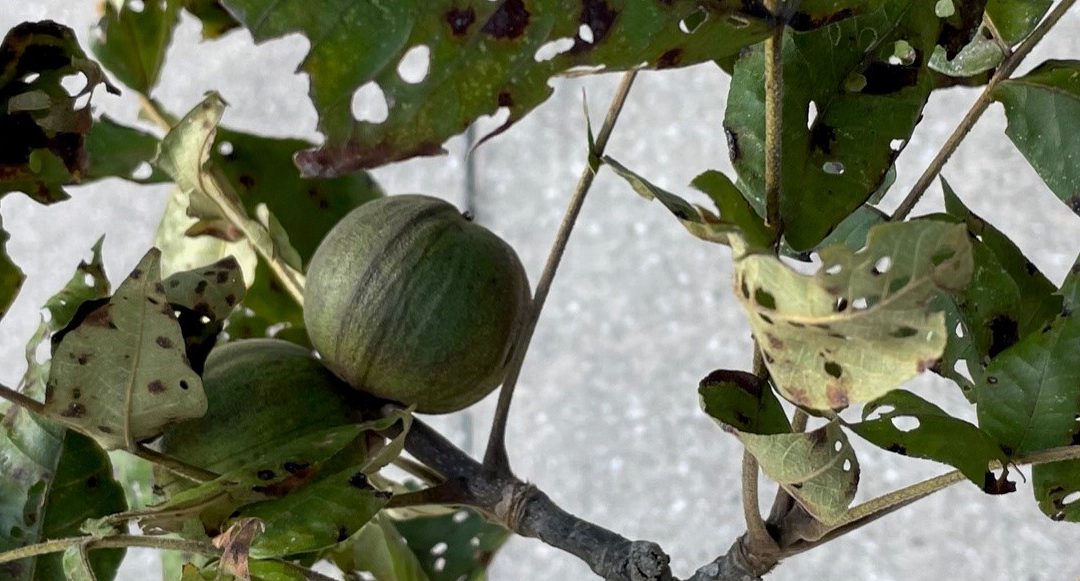
As homeowners, we do value our trees and no one wants to lose a shade tree especially on the house’s south side in Florida. On a recent site visit, a hickory tree had multiple concerns. Upon closer inspection, the tree had a bacterial infection about 30” off the ground with a smelly, black-brown ooze seeping forth. The leaf canopy was riddled with beetle holes and leaf margins were chewed by caterpillars. When leaves were viewed under the microscope, thrips (insects) and spider mites were found running around. The biggest homeowner cosmetic concern arose from hickory anthracnose (fungus) and upon closer inspection found the leaves to have hickory midge fly galls. The obvious question is should the tree come down? I’ll have you read the whole article before giving you the answer.
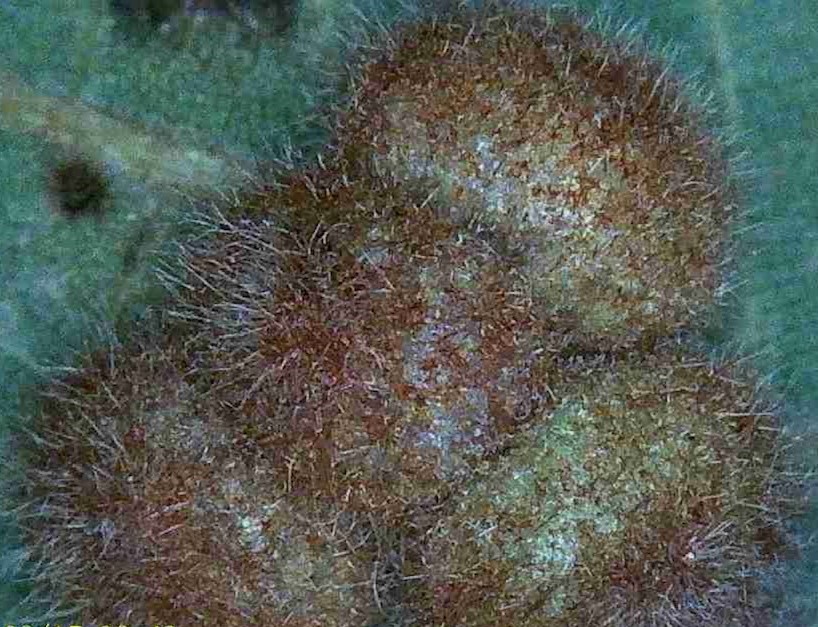
Each hickory gall is approximately 3/16″ wide.
Hickory anthracnose or leaf spot as seen in the banner photo is caused by a fungal infection during the wet summer months in Florida. The homeowner can usually recognize the disease by the large reddish brown spots on the upper leaf surface (sending a sample to the NFREC Plant Pathology Lab will confirm the diagnosis) and brownish spots with no formal shape on the bottom. Be sure to rake and remove all leaves to prevent your disease from overwintering close to the tree thus reducing infection next year.
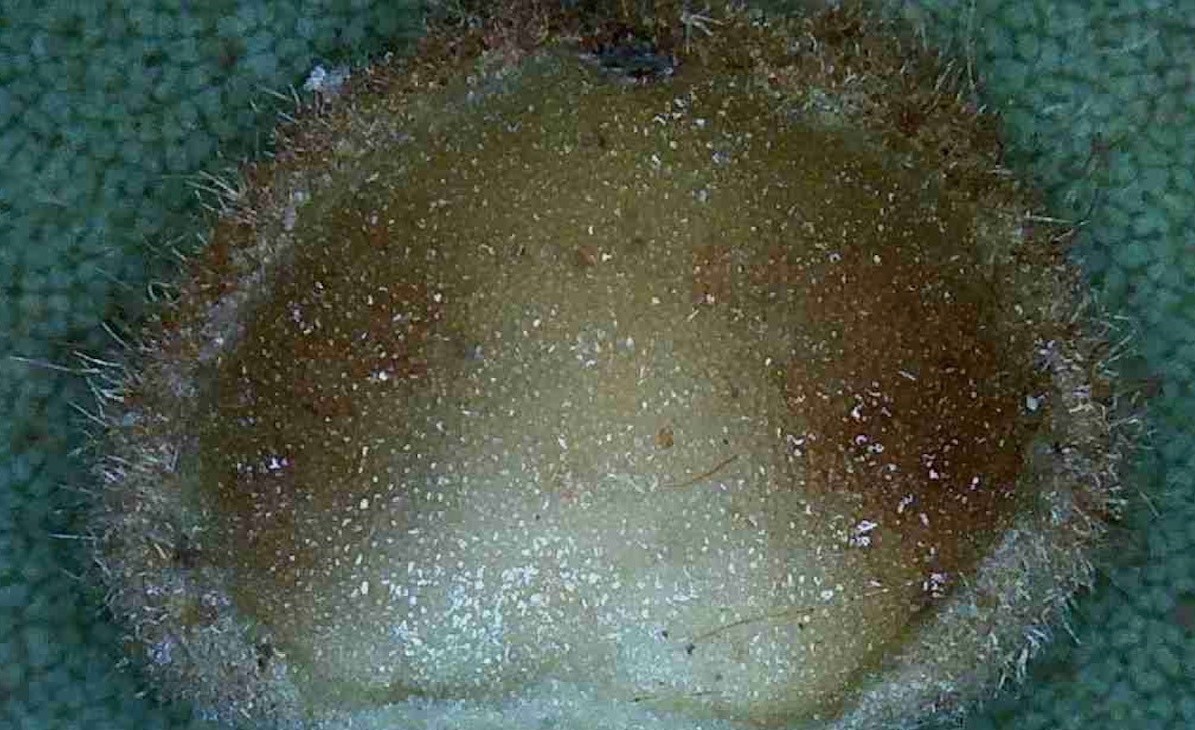
A hickory gall has been cut in half to show the leaf tissue.
The fungus can be lessened by good cultural practices and appropriate fungicidal applications. Please remember it is best left to professionals when spraying a large tree. This alone is not cause to remove your tree.
Hickory gall is caused by the hickory midge fly, an insect that lays eggs in the leaf tissue. The plant responds by building up tissue around each egg almost like the oyster when forming a pearl.
As the gall tissue grows, eggs hatch and larva start to feed on this tissue. The larva will continue to
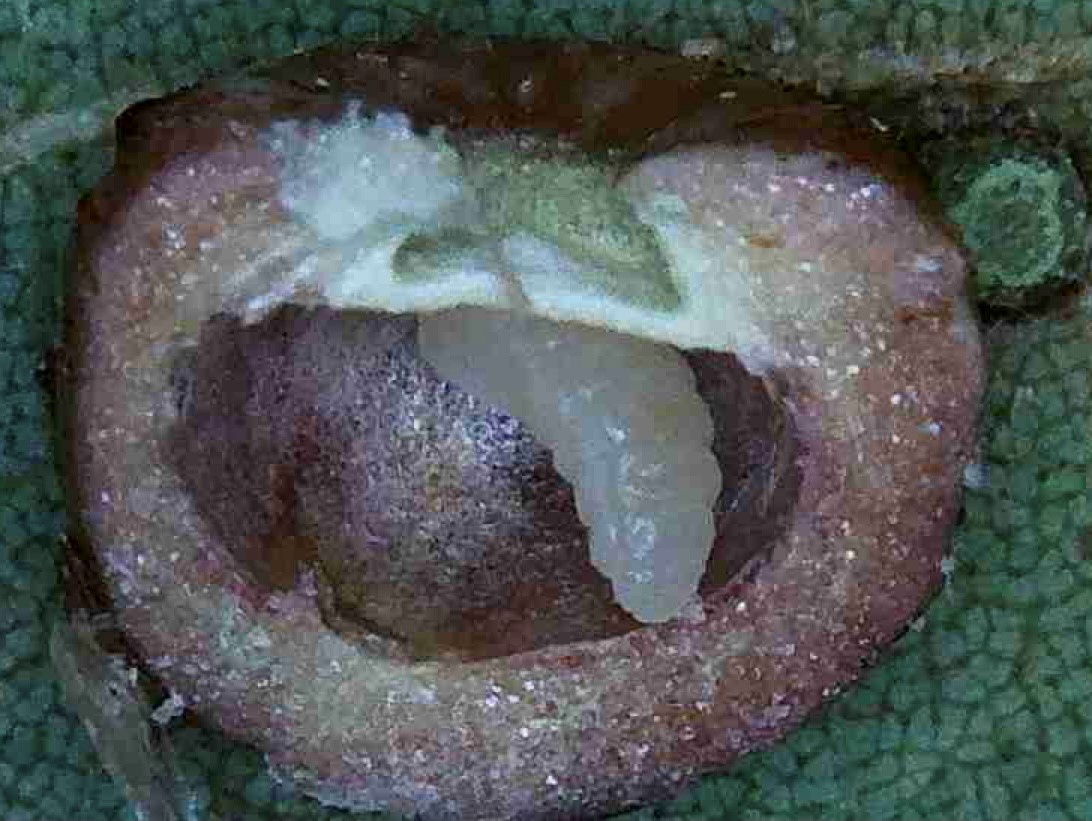
The larva has eaten all soft material inside the gall and is ready to pupate.
feed until it is ready to pupate within the gall. After forming a pupa, the midge fly will eventually emerge as an adult and females will continue to lay eggs on other leaves. The galls are more of a cosmetic damage and because your hickory leaves will fall from the tree as winter comes, the galls will normally not cause enough damage to worry about each year. Once again good cultural practices and disposal of each year’s leaves will reduce the gall numbers next year.
In a large tree with many leaves, foliar feeding by beetles and caterpillars do cause damage though the leaves will still produce enough food (photosynthesis) to keep the tree alive. Most of us never climb our trees to look at leaves to see the small insects/mites and there are more than enough leaves to maintain tree health.
The biggest concern during my site visit was their tree’s bacterial infection. A knife blade was pushed into the wound area and went in less than 1/4″. The homeowner was instructed to look at bactericide applications. In the end, this hickory tree with so many problems is still shading the home and helping cool the house. It is still giving refuge to wildlife and beneficial insects. When in doubt give our trees the benefit and keep them in place. Remember your local Extension agent is set up to make site visits and saving a tree is time well spent.
by Pat Williams | Aug 11, 2021
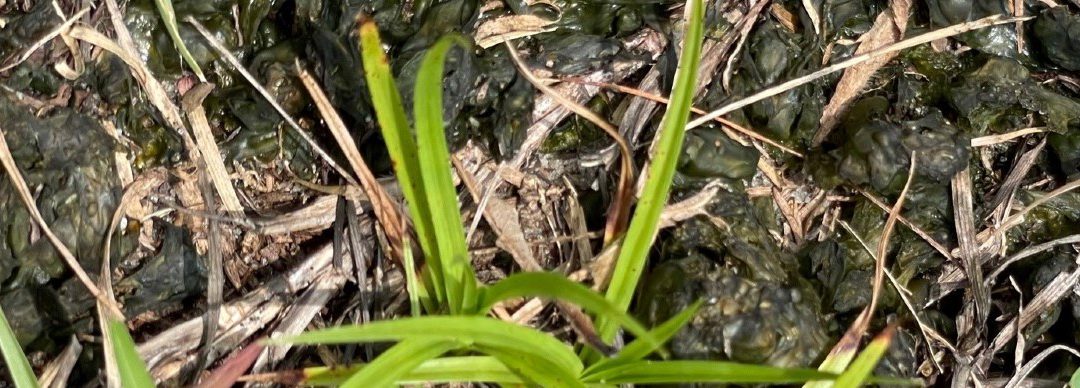
The lawn is a source of pride for most and anything out of the ordinary causes alarm. Now image finding something that looks like lumpy green jelly in your turfgrass and it doesn’t go away. You try raking it, spraying it, covering it, and it still comes back time and time again. One of the things we see in late spring/early summer turf is a reemergence of cyanobacteria (Nostoc), sometimes confused with algae because of green coloring and this remains all summer long.
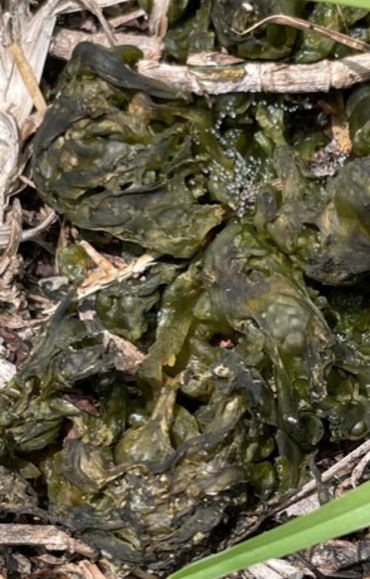
Dehydrated cyanobacteria in a centipedegrass lawn.
Unlike normal bacteria that needs a food source, cyanobacteria contains chlorophyll and produces its own food source through photosynthesis which allows it to grow on bare sandy soils, fabric mats, concrete sidewalks, plastic, and yes even your lawn. Besides the green pigment, it also produces a blue pigment and is why we call it cyanobacteria which means blue-green bacteria. In addition to photosynthesis, cyanobacteria can also fix nitrogen, and are believed to produce cyanotoxins and allelopathic compounds which can affect plant growth around them.
Cyanobacteria are considered one of earth’s oldest organism and they have tremendous survival capabilities. They can dry out completely, be flat, flaky, black-green dried particles in your lawn and once rehydrated, spring back to life. If you happen to notice it spreading throughout your yard, remember that pieces of the organism can stick to your wet shoes or lawnmower tires and be transported unintentionally.
The question then becomes how to control the cyanobacteria and reclaim your turfgrass. The first solution is to have a healthy lawn. Cyanobacteria likes poorly-drained compacted soils. This same condition is unfavorable to turf growth and why you end up with bare spots and establishment. Reduce soil compaction by using a core aerator, and then adding organic matter. This will increase drainage, gas exchange, and encourage microorganism populations which I like to call soil pets. Spike aerators only push the soil particles aside and don’t really loosen as well. Try to reduce low lying areas in the lawn where water sits after rainfall and irrigation. You might have to till and reestablish those areas of the yard.
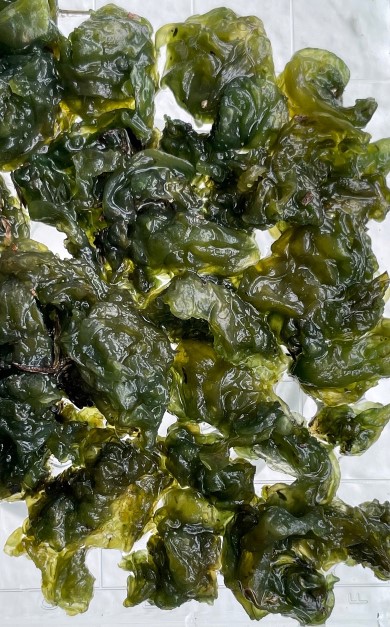
The same cyanobacteria pictured above 24 hours after being rehydrated in a petri dish of standing water.
Controlling the amount of water Mother Nature gives us and humidity levels during summer is not possible, but you can control your irrigation whether it be automatic (sprinkler system) or hand-watered. During the rainy season, you should be able to get by with only rainfall and shut off your system. If needed during extended dry weeks, it is easy enough to turn the system back on. It is thought that cyanobacteria likes phosphorus which is another reason to use little to no phosphorus in your lawn fertilizers.
As you begin to rid your lawn of cyanobacteria, remember when fully hydrated it forms a slippery surface so be careful walking on it. Cultural practices will be more effective in controlling the spread versus using chemical methods. Cultural solutions are safer for your lawn, yard and all of the wildlife that visits. If you need help with your cyanobacteria, please contact your local Extension office and we are always happy to assist.
A special thanks to Dr. Bryan Unruh, UF/IFAS for his assistance in identifying the cyanobacteria.
For additional information, please read the sources listed below.
Biology and Management of Nostoc (Cyanobacteria) in Nurseries and Greenhouses. H. Dail Laughinghouse IV, David E. Berthold, Chris Marble, and Debalina Saha
Rain, Overwatering Can Cause Slippery Algae to Pop Up in Turfgrass. C. Waltz
Nostoc. N.J. Franklin
by Pat Williams | Jul 1, 2021
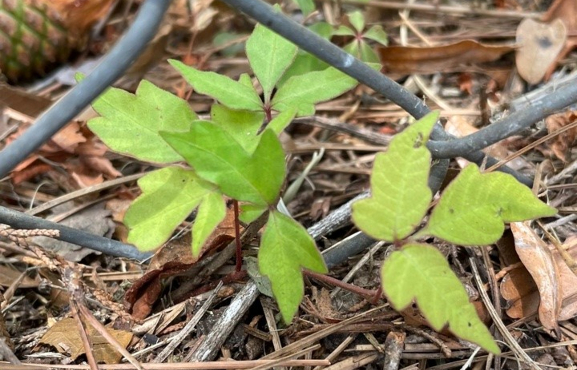
We work very hard to maintain our gardens and then we look up and vines are growing 20′ into the trees. I get asked frequently “what is growing up my trees?” My first answer is “probably the same things growing on your fences.” These include Smilax species, commonly called catbrier or greenbrier, Vitis rotundifolia, referred to as wild muscadine grape, Parthenocissus quinquefolia or Virginia Creeper, and the one to be most careful with, Toxicodendron radicans, known by many as Poison Ivy.
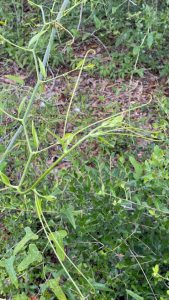
Spring growth on the Smilax vine.
Smilax is a native vine that grows quickly in spring and all summer. There are 12 species in Florida and 9 species commonly found in the Panhandle. Besides being armed with thorns on their stems and some leaves, Smilax spreads by underground stems called rhizomes. If you choose to ignore it, some species can cover your trees and the stems become woody and hard to remove. This vine also produces fruit and seeds are dispersed by birds all while the underground rhizomes are spreading under your lawns and gardens.
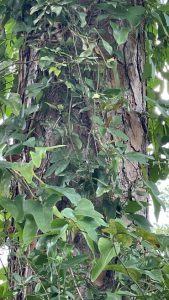
Smilax can quickly cover a tree trunk.
Removal can be difficult and mowing the vines only encourages more growth. When trying to remove by hand, wear heavy leather gloves and some eye protection because of the thorns. Cut the stems about three feet above the ground which allows you some stem to pull on to bring it out of your tree. You also then have a handle to pull and try to remove some of the rhizome from underground. Digging rhizomes is time consuming, but gives you piece of mind that they won’t come back immediately. Our family actually harvests the new shoots in spring and we use them like asparagus.
Wild muscadine grape is also native and difficult to remove. Most of the vines in nature are male and only produce by runners along the ground and then grow upwards. The female vine can produce 4-10 grapes in a cluster and then reseeds itself.
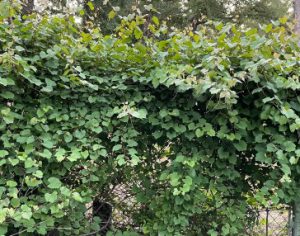
Wild muscadine grape covering a fence.
Wild grape completely covers plants and eventually the plants underneath can die. There are no thorns to contend with when removing wild grape, it is just time consuming, especially if it has taken over your fence or natural areas.
Virginia Creeper is a native vine, still considered a nursery plant in some areas of the country, and has bright red fall color.
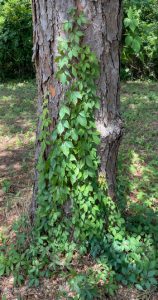
Virginia Creeper climbing a tree trunk.
It is most often confused with poison ivy because of having five leaflets per leaf whereas poison ivy only has three leaflets per leaf. It spreads by seeds, runs along the ground, and is the easiest of these four vines to remove from your property.
Poison Ivy is a native vine distinguished by its three leaflets with the individual leaflets getting up to 6″ long. This vine spreads by seeds and underground rhizomes. What makes removal of this vine difficult is the urushiol oils which causes the skin rashes and blistering.
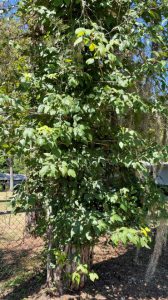
Poison ivy covering a tree trunk.
Care must be taken to cover up all skin and I recommend wearing waterproof clothes versus cotton which can absorb the oils and transfer them to your skin. Under no circumstances should these vines be put on the burn pile, the oils can become airborne and then you can inhale them.
Here are a few helpful tips when battling these native vines. First have patience and be dedicated, this removal will not happen over night. It may take a year or two to rid your property of the original vines. Be diligent though, because birds will continually land in your trees and deposit more seeds to get a fresh start. Try to remove vines when they are young and just beginning to climb your trees and fences. If you know you don’t have the time or energy to remove the vines from all your trees, at least cut the vines close to the ground to reduce flowering and new seeds. Be careful with poison ivy because falling leaves still contain oils. Once the vines start to have a new flush of growth, spray a non-selective herbicide on new growth and you should have good results. Lastly, remember one person can make a difference in trying to reduce the number of nuisance vines in our communities.
Here are some sited references to help with your removal tasks. Key to Nine Common Smilax Species of Florida. https://edis.ifas.ufl.edu/publication/fr375. Smilax is a Vine that can be Difficult to Control. http://blogs.ifas.ufl.edu/wakullaco/2017/04/21/smilax-is-a-vine-that-can-be-difficult-to-control/. The Muscadine Grape (Vitus rotundifolia Michx.) https://edis.ifas.ufl.edu/publication/hs100. Muscadine Grape Vines: Difficult to Control in Your Landscape. http://blogs.ifas.ufl.edu/wakullaco/2017/03/24/muscadine-grape-vines-difficult-to-control-in-your-landscape/. Parthenocissus quinquefolia: Virginia Creeper https://edis.ifas.ufl.edu/publication/fp454. Identification of Poison Ivy, Poison Oak, Poison Sumac, and Poisonwood. https://edis.ifas.ufl.edu/publication/EP220.
by Pat Williams | May 27, 2021
Our Gardening in the Panhandle blogs cover many horticultural topics concerning yards, however let us not forget about properties that contain a body of water (pond, lake, retention or detention basin, stream, river or Gulf of Mexico). Out of the nine Florida-Friendly Landscaping™ principles, five directly deal with water quality. Those principles are #2 Water Efficiently, #3 Fertilize Appropriately, #6 Manage Yard Pests Responsibly, #8 Prevent Stormwater Runoff, and #9 Protect the Waterfront. An easy argument can be made that the remaining four principles (#1 Right Plant, Right Place, #4 Mulch, #5 Attract Wildlife, and #7 Recycle) can also impact water quality on your properties.
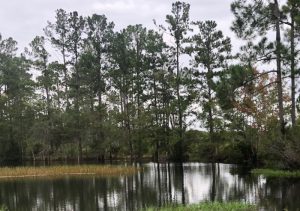
Photo Credit: University of Florida/IFAS Extension
The quickest and easiest way to start improving water quality is setting up a maintenance-free zone along your shore. At minimum, you should keep all chemicals 10′ away from the water’s edge and increase that distance as your slope becomes steeper. Chemicals include all fertilizers (#3) and any pesticides/herbicides (#6) meant for the landscape (there are times when situations arise where treatment of the water is warranted). If you must fertilize up slope, make sure to reduce irrigation (#2) to about 25% of normal the first time which keeps the fertilizer from dissolving and running down your slope’s surface (#9).
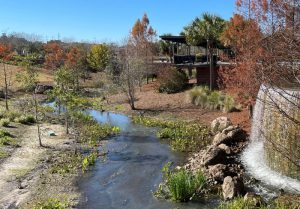
Cascades Park in Tallahassee, FL.
If possible replace turfgrass with a no mow zone containing plants adapted for shorelines to prevent applications of fertilizer and chemicals. Plants (#1) other than turfgrass will have deeper roots, stabilize the bank better and absorb more chemicals before entering the water. These taller plants in turn can become habitats (#5) for birds and other specimens which can increase your ecosystem’s biodiversity. Some properties have collection swales or low lying areas where water pools and then flows into the water. It is best to understand how water flows through the property and reduce chemicals in those areas too (#8).
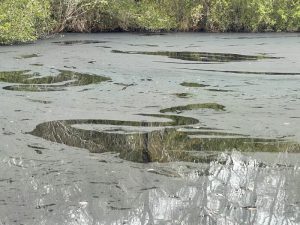
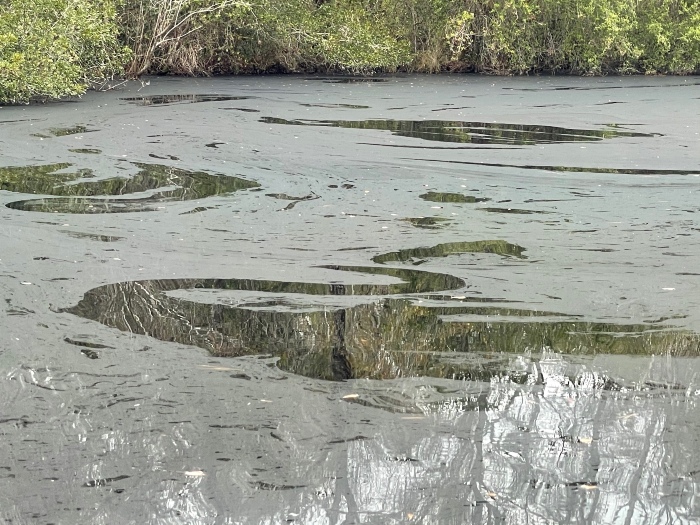
Heavy rains caused water levels to raise around this pond and decomposing leaf litter added a film over the pond.
As gardeners, we tend to compost our leaves and yard debris (#7) plus use mulch (#4) to reduce water loss from our soils. Keep mulches and compost piles away from flood zones and when possible keep leaves from washing into your water as they can create films on the surface. Never allow grass clippings to land on water surfaces as they will add nutrients when tissue decays.
As Florida continues to grow, we all must play an important role in keeping our water clean and safe for us, animals, birds, and aquatic life. If you have questions on improving your water quality, please contact your local county Extension Agent or Water Regional Specialized Agent (RSA). For additional information visit these other sites.
Protecting Florida’s Water Resources: https://gardeningsolutions.ifas.ufl.edu/care/florida-friendly-landscapes/floridas-water-resources.html
Living on Water’s Edge: http://www.sarasota.wateratlas.usf.edu/upload/documents/LivingontheWatersEdgeFreshwater.pdf
Urban Fertilizer Ordinances in the Context of Environmental Horticulture and Water Quality Extension Programs: Frequently Asked Questions: https://edis.ifas.ufl.edu/publication/AE534
by Pat Williams | Mar 11, 2021
Our trees and vines are flowering and lawns are starting to green up naturally, but one glance at the calendar and it is still early spring. The last official frost date for the Florida panhandle can be into April depending on location. We know our day time and night time temperatures are still fluctuating every other day. We also know the stores and nurseries are stocked with shelves and pallets of fertilizer. So the big question is when can I fertilizer my lawn?
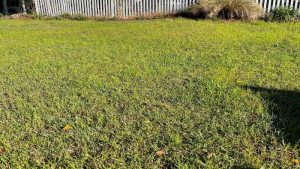
Overseeded ryegrass on a centipedegrass lawn.
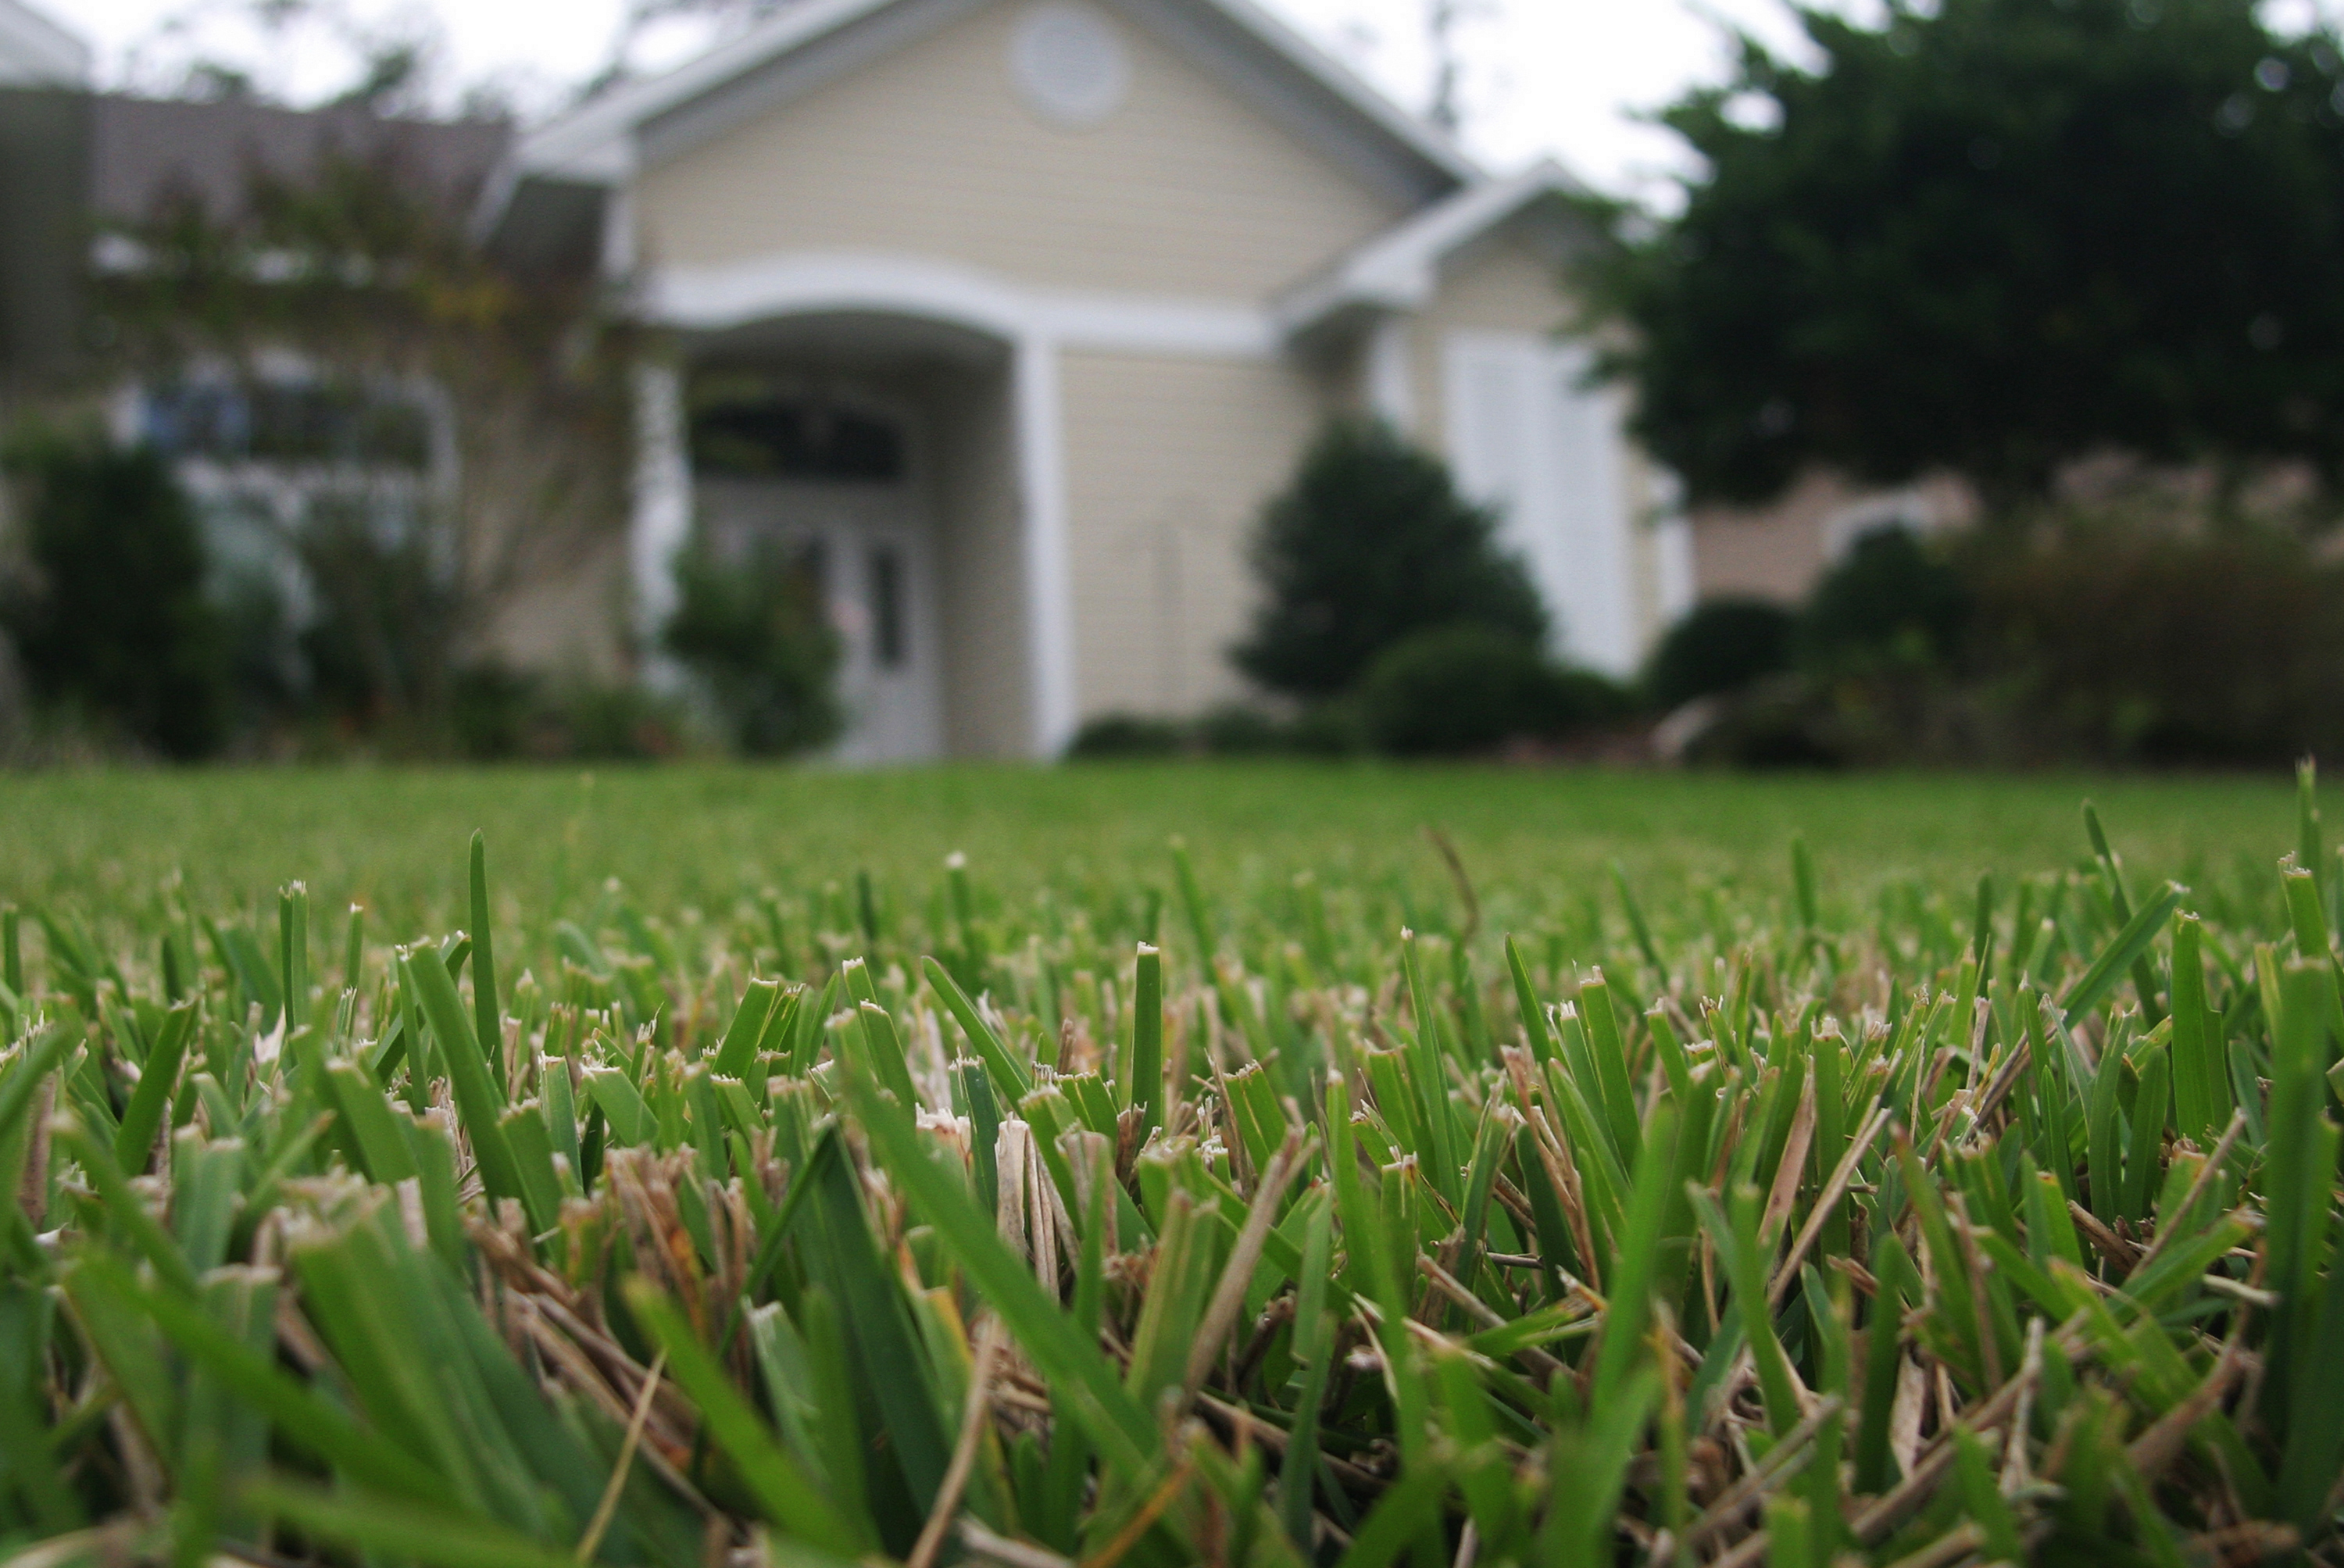
My answer after years of practice is always it depends, but my non-scientific rule of thumb to homeowners is wait until you mow three weeks in a row and make sure you’re past the last frost dates for your area. If you need to mow three weeks in a row for height, then your lawn is actively growing and most likely we are into a temperature range good for fertilizer applications. If you apply fertilizer to a lawn that is dormant, the fertilizer will not be taken up by your roots and it can leach below the root zone wasting money while not improving the lawn and possibly causing environmental concerns.
With that said, there are some factors to consider. We always recommend doing a soil test first. This can be done in advance of spring. Your test results might indicate having sufficient nutrients in the soil, so not applying would save you money and the lawn would still look good. The soil test will also indicate what nutrients are in excess or lacking, then you can apply only the nutrients needed.
I have found that fertilizer is still very much misunderstood. When I ask homeowners whether they consider fertilizer to be medicine or a stressor, most will answer medicine and we all know if a little medicine is good, then a bit more is better. However, it is more accurate to think of fertilizer as a chemical stressor. If my lawn is unhealthy, then I force my lawn to grow and it can further weaken my plants. Think of it like this, if you’re not feeling well at night before you go to bed, should you consume one of those big energy drinks? Not if you want to sleep and hopefully feel better in the morning. Apply fertilizer when the lawn is ready and capable of having a positive response when spring fully arrives.
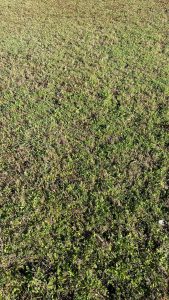
Wakulla County Extension office mixed species turf.
Here are some items you should know before you fertilize the lawn. Fertilizers used in Florida should have a license number that begins with F followed by a series of numbers. It is important to check your fertilizers before you apply. You need to know what type of turfgrass you have in your lawn. We have a lot of bahiagrass and centipedegrass lawns in the panhandle. Each will require a different regiment. You are only allowed to apply one pound of nitrogen per 1,000 square feet per application and you should never apply more than the recommended rate. I always refer to a childhood fable “The Tortoise and the Hare” when thinking about plant health. Slow and steady makes for a better lawn in the long run. This means you need to measure your lawn, understand how to calculate the nitrogen and then apply correctly with the right equipment and spreader patterns. We also recommend very little phosphorus (the middle number on the fertilizer bag 15-0-15) for Florida lawns. Our soils are usually sufficient and this is another item your soil test results will confirm.
Remember, your local Extension office is always here to help especially making sure you treat the lawn right. Think before you apply because your long-term goal is improving the lawn quality.
The Florida Fertilizer Label (https://edis.ifas.ufl.edu/ss170) and General Recommendations for Fertilization of Turfgrasses on Florida Soils (https://edis.ifas.ufl.edu/lh014). T. W. Shaddox, assistant professor; UF/IFAS Fort Lauderdale Research and Education Center, Ft. Lauderdale, FL 33314
Homeowner Best Management Practices for the Home Lawn (https://edis.ifas.ufl.edu/ep236). Laurie E. Trenholm, professor, Extension turfgrass specialist, Environmental Horticulture Department; UF/IFAS Extension, Gainesville, FL 32611.
Bahiagrass for Florida Lawns (https://edis.ifas.ufl.edu/lh006). L. E. Trenholm, professor, turfgrass specialist, Department of Environmental Horticulture; J. B. Unruh, professor, turfgrass specialist, UF/IFAS West Florida Research and Education Center; and J. L. Cisar, retired professor, turfgrass specialist, UF/IFAS Ft. Lauderdale REC; UF/IFAS Extension, Gainesville, FL 32611.
Centipedegrass for Florida Lawns (https://edis.ifas.ufl.edu/lh009). J. B. Unruh, professor, turfgrass specialist, UF/IFAS West Florida Research and Education Center; L. E. Trenholm, associate professor, turfgrass specialist, Environmental Horticulture Department; and J. L. Cisar, professor, turfgrass specialist, UF/IFAS Ft. Lauderdale REC; UF/IFAS Extension, Gainesville, FL 32611.


