by Mark Tancig | Aug 19, 2016
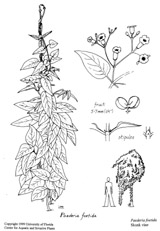
Skunkvine illustration. UF/IFAS Center for Aquatic and Invasive Plants.
North Florida gardeners have many non-native, invasive plants to deal with, but none quite as stinky as skunkvine (Paederia foetida). As the name implies, skunkvine has a noticeable smell, especially when the leaves are crushed, and it is an aggressive-growing vine, capable of smothering desirable landscape plants. Gardeners should learn to recognize and control this plant before it gets a foothold in the garden.
Skunkvine is native to eastern and southern Asia and a member of the coffee family (Rubiaceae). It was introduced to Florida prior to 1897 as a potential fiber crop, but quickly spread and is now considered a Category I invasive plant by the Florida Exotic Pest Plant Council (FLEPPC) and as a noxious weed by the Florida Department of Agriculture and Consumer Sciences (FDACS).
Skunkvine can be identified by the following characteristics:
- Aggressive twining vine
- Leaves are opposite each other
- There is a thin flap of tissue on the stem between the leaves
- Leaves have a strong skunk-like odor when crushed
- Clusters of small, tubular, lilac-colored flowers appear in late summer to fall
- Fruits are shiny brown and can persist through winter
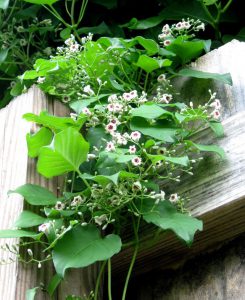
Skunkvine flowering. Photo by Ken Ferrin, UF/IFAS Center for Aquatic and Invasive Plants. Used with permission.
Once you have identified skunkvine in your garden, the next step is to work to remove it. For small patches, pulling by hand can be effective but will require monitoring to ensure it doesn’t resprout. When hand pulling, you want to be sure to get as much of the root as possible. For larger areas, chemical control using herbicide products that contain triclopyr, imazapic, or aminopyralid are most effective. Carefully reading the product label will help determine which product to purchase.
Since skunkvine can be easily spread by seed and fragments of stem, care must be taken when disposing of it. The best solution is to place plant debris into a trash bag and dispose of it with your regular household garbage.
By knowing how to identify and manage skunkvine, north Florida gardeners can keep it from stinking up their own gardens, their neighbor’s gardens, and surrounding natural areas that support our native wildlife.
References:
Langeland, K. A., Stocker, R. K., and Brazis, D. M. 2013. Natural Area Weeds: Skunkvine (Paederia foetida). Agronomy Department, Florida Cooperative Extension Service, Institute of Food and Agricultural Sciences, University of Florida. EDIS document SS-AGR-80.

by Beth Bolles | Aug 12, 2016
Homeowners and horticulture professionals spend time to develop an attractive ornamental bed only to have weeds take over months or a few years later. One common method in the attempt to prevent weeds is to apply a landscape fabric around plants in beds and place a layer of mulch on top to dress it up. The thought is that this barrier on top of the soil will prevent a large number of weeds from emerging. The fabric physically prevents the growth of weeds form the soil below and blocks sunlight from reaching weed seeds. Available fabrics are labeled as porous to allow air and water to move through them and reach ornamental plant roots.
On paper, landscape fabric sounds like a good idea and it may work for a little while. Over time, soil particles and decomposing mulch fill up the porous spaces in the fabric which prevent air and water from reaching plant roots. Even with irrigation or routine rainfall, plant roots often do not receive the needed water and air for healthy growth. Plants may respond by trying to send roots through fabric seams which breaks down the intended weed barrier. Other plants slowly decline or may die quickly due to water stress or lack of sufficient air movement into the soil.
Fabric may initially prevent some weeds but it can also prevent air and water movement. Photo by Beth Bolles, UF Extension Escambia County
Weed seeds also find their way into the mulch that is on top of the fabric from nearby lawns and landscapes. The next thing you know, you have an entire weed crop growing in the mulch on top of your landscape fabric. Perennial weeds such as torpedograss and purple nutsedge eventually grow through fabrics.
Seeds from annuals like Chamberbitter easily get into mulch from surrounding areas and grow on top of fabrics. Photo by Beth Bolles, UF Extension Escambia County
The best place to consider fabric if you want to install it in the landscape is under mulched paths or other areas without ornamental plantings where a synthetic groundcover is needed. In order to have a healthy root environment for your ornamental bed plants, it is best to keep landscape fabric out of these areas.
by Molly Jameson | Aug 12, 2016
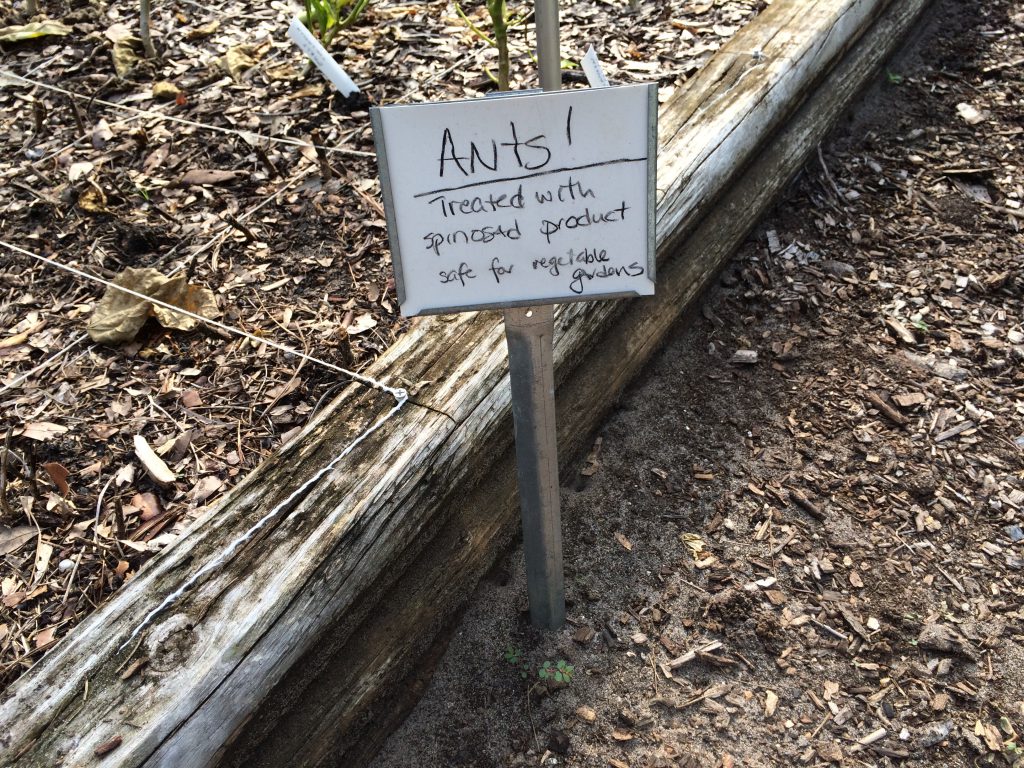
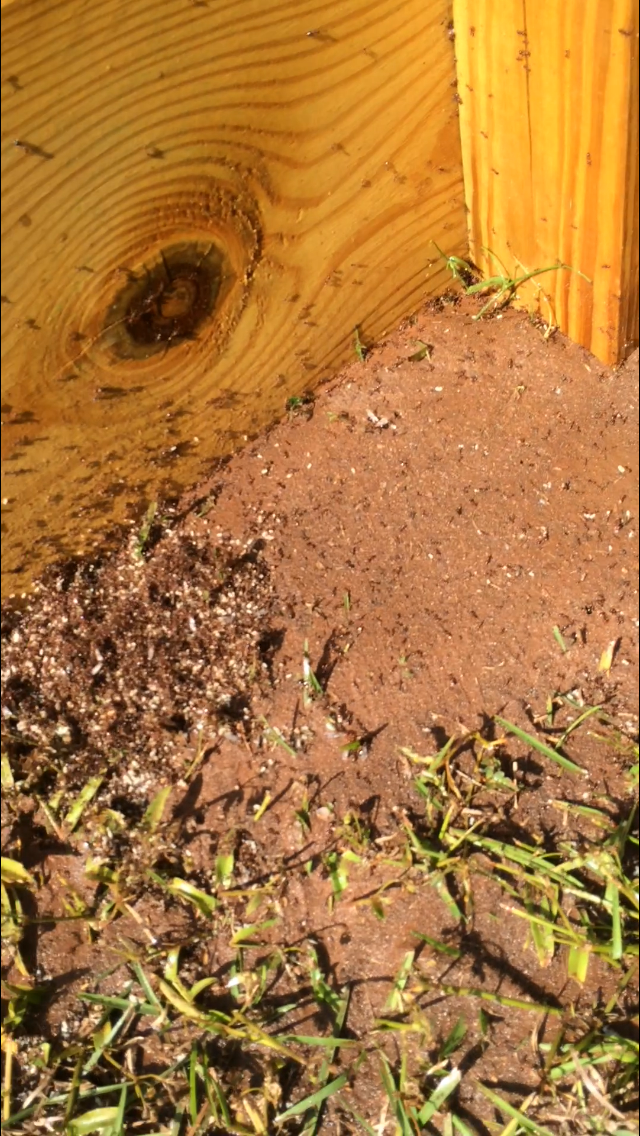
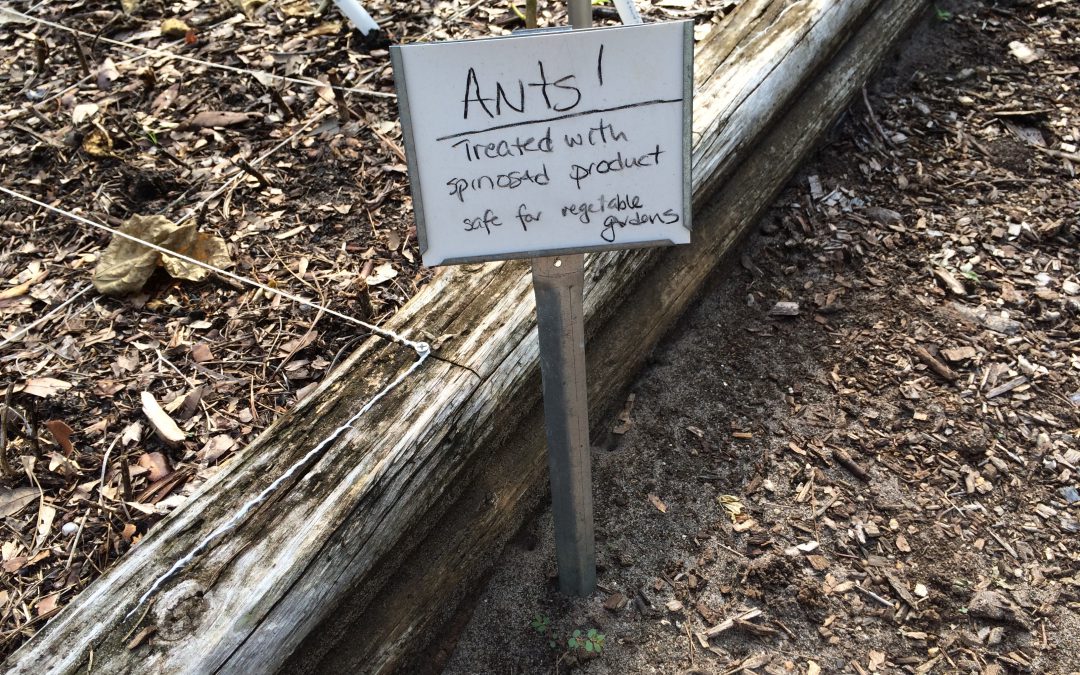
Ants can be treated with spinosad in vegetable gardens. Photo by Molly Jameson.
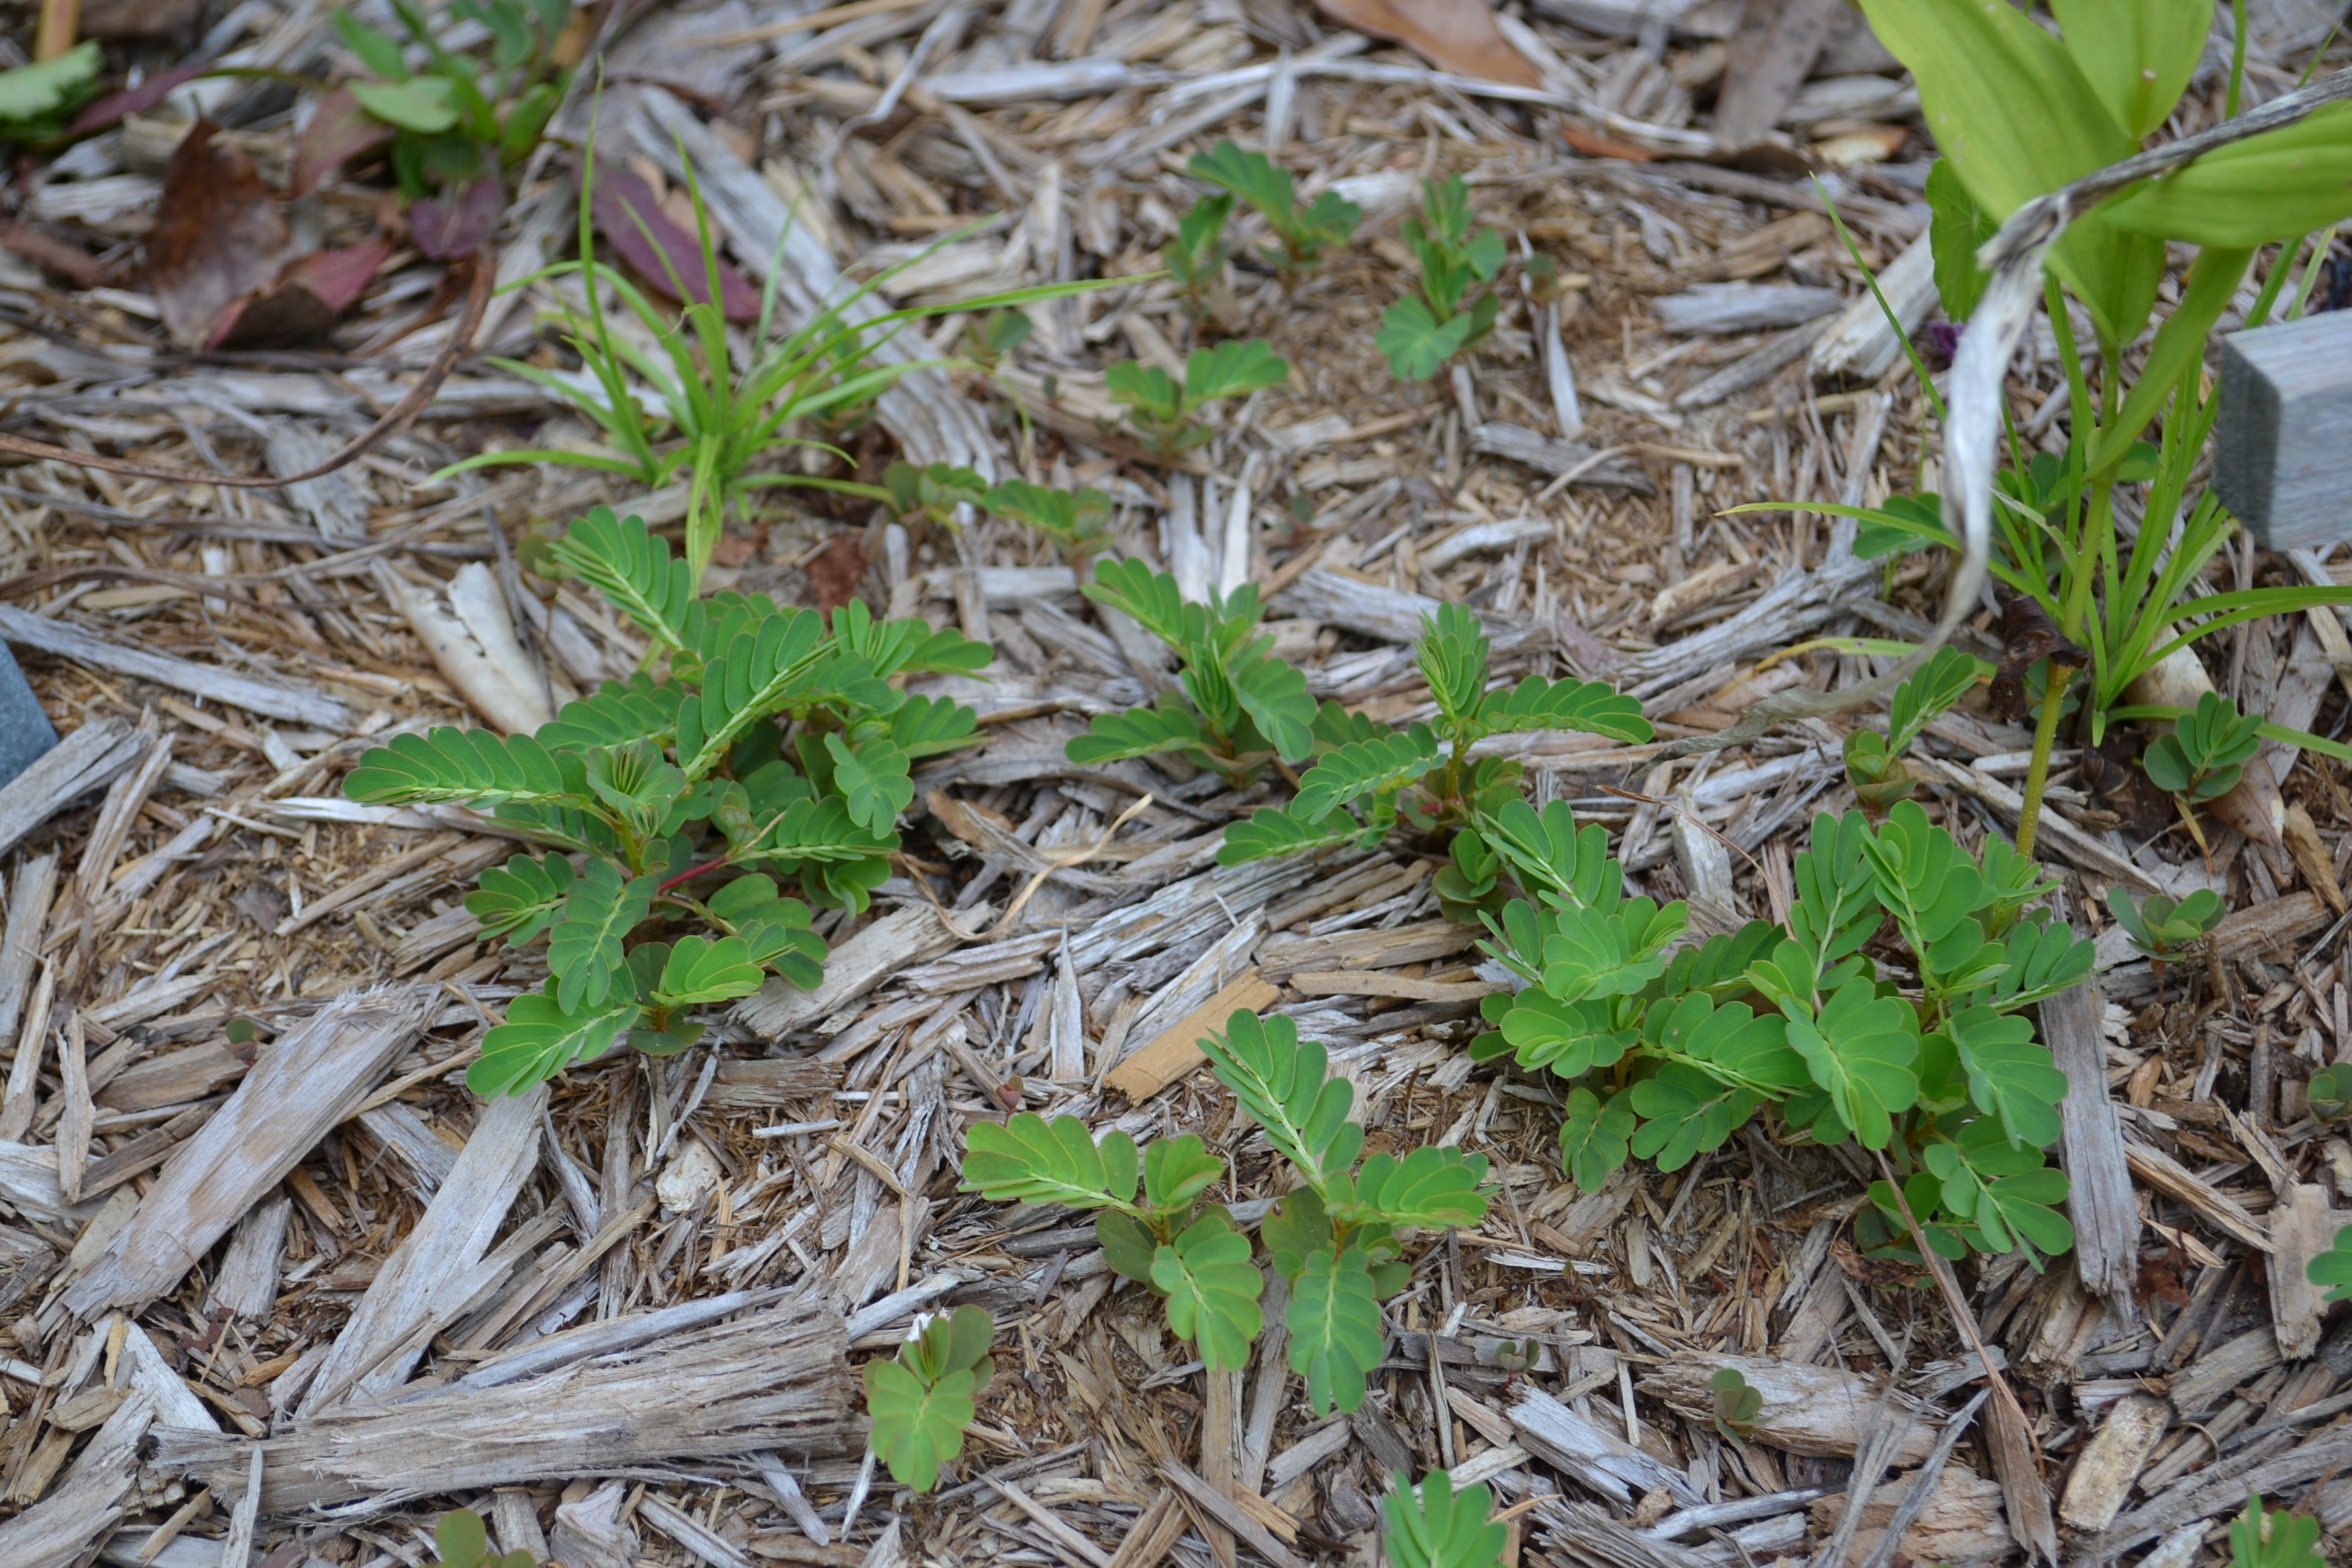
There’s nothing worse than sinking your fingers into your garden soil to dig up a potato, plant a seedling, or pull up a radish, and be met with a sharp, painful sting, and little red critters rocketing up your arms. If you are a gardener in the panhandle, my bet is that you know exactly to what I refer: fire ants!
Fire ants are certainly not native to our area. These guys are an invasive species from South America that are very resilient, and many are territorial, with the potential to drive out any native ant populations. Fire ants arrived in the 1930s, and can now be found throughout most of the southeastern United States.
So when you end up with fire ant mounds engulfing your carrot patch, what can be done? Since fire ants in your garden mean fire ants in your food, the least toxic control methods are of high importance and conventional broadcast bait treatments and mound treatments should be avoided. Even in your lawn, be careful when using strong insecticidal bait treatments, as these can harm the native ant populations that help control the spread of fire ants. This can then lead to a strong resurgence of fire ant populations that can outcompete the native ants.
Although completely controlling fire ants in an area is not possible, there are sustainable management techniques that can help. Some fire ant colonies have a single queen while others have multiple queens. Either way, in order to eliminate a fire ant colony, all queens in the colony must be killed. Fire ants are omnivorous, in that they eat plants, insects, sugars, and oils. The catch is that they are only able to ingest liquids, so solid food must be brought into the colony, where larvae regurgitate digestive enzymes onto the food, breaking it down into liquids. Therefore, any method of control by ingestion will need to be in liquid form, or the ants must be able to bring the material into the colony, without first being exterminated.

Fire ants can become a problem around and in raised vegetable gardens. Photo by Molly Jameson.
There are some commercially available products that contain boric acid or diatomaceous earth. These products may reduce populations, but eliminating whole colonies with these products can be a challenge.
The use of a nervous system toxin called spinosad is effective on fire ant populations and is considered safe to use in vegetable gardens. This toxin comes from a bacterial fermentation process, and is therefore considered organic. But be aware, even though there are organic products with ingredients derived from botanical sources such as rotenone and nicotine sulfate, they should not be used in vegetable gardens. When using chemical methods of control, always follow the directions on the label carefully.
One physical method of control is the use of hot water. Three gallons of scalding water, which is between 190 to 212ºF, has been used on colonies with a success rate of 20 to 60 percent, when applied in several treatments. You will want to slowly pour the water on the colony, being extra careful not to get burned, and avoid injuring any surrounding plants. If you are like I am, and you often leave your garden hose in the hot sun, you can spray the ant colonies with the hot water, as you wait for the water to cool off enough to water the garden. Hot water control takes persistence, but you can eventually drive the ants out.
Another method of physical control is excavation. This requires digging up the mound, putting it in a bucket, and taking it to another location. Apply talcum or baby powder to your shovel handle and bucket to help prevent the ants from escaping and crawling up to sting you.
One reason fire ants are so rampant in the United States is that they have little competition or natural enemies. Scientists have released multiple species of phorid flies, natural parasites of fire ants in South America, and a few species have become established. Scientists at UF/IFAS are currently researching additional fire ant biological control methods, such as the use of a fungi, which has shown promise.
Remember, not all ants in the garden are bad guys! Many species act as roto-tillers, aerating and redistributing nutrients in the soil. They also play a role as decomposers as they assist in turning dead insects into soil nutrients. Ants can disturb garden pests by attacking them or interrupting their feeding, mating, and egg laying processes. Additionally, ants are a food source for wildlife, such as other insects, frogs, lizards, birds, spiders, and even some mammals.
by Daniel J. Leonard | Jul 26, 2016
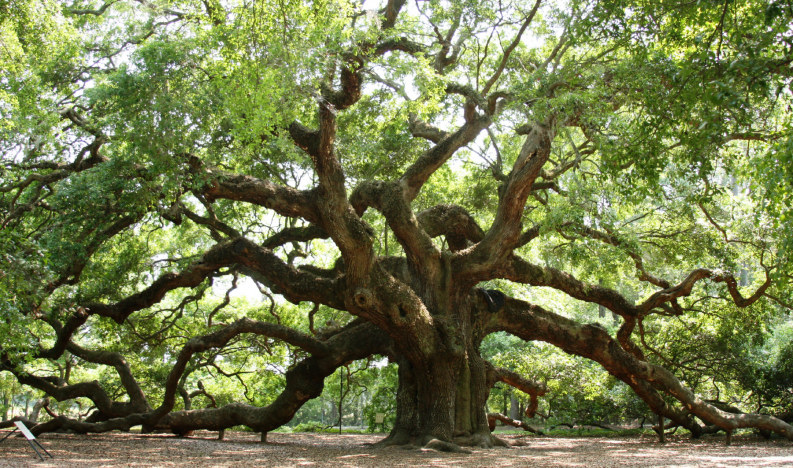
The Live Oak (Quercus virginiana) is one of the most iconic figures of the Deep South. Mentioning the words Live Oak invokes all sorts of romantic nostalgia of yesteryear and the reputation is not unearned. In fact, many Live Oaks still stand that were growing on American soil when the first English settlers set foot on Plymouth Rock. They are long-lived, picturesque trees that also happen to be nearly bulletproof in the landscape. Given these factors, it is not surprising that Live Oak is far and away the most common tree included in both residential and commercial landscapes in the Coastal South. However, even the venerable Live Oak is not without its problems; this article will discuss a few of the more common issues seen with this grand species.

The Angel Oak near Charleston, SC
Few conditions afflict live oak but when they do, improper planting or cultural practices are usually at play. Observing the following best management practices will go a long way toward ensuring the long-term health of a planted Live Oak:
- Remember to always plant trees a little higher than the surrounding soil to prevent water standing around the trunk or soil piling up around it, both of these issues frequently cause rot to occur at the base of the tree.
- If planting a containerized tree, remember to score the rootball to prevent circling roots that will eventually girdle the tree. If planting a B&B (Balled and Burlap) specimen, remember to remove the strapping material from the top of the wire basket, failure to do this can also result in the tree being girdled.
Live Oak has few insect pests but there are some that prove bothersome to homeowners. The following are two of the most common pests of Live Oaks and how to manage them:
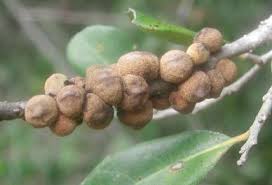
Typical galling on Live Oak
Galls are cancerous looking growths that appear on the leaves and twigs of Live Oak from time to time and are caused by gall wasps that visit the tree and lay their eggs inside the leaf or stem of the plant. The larvae hatch and emerge from the galls the following spring to continue the cycle. These galls are rarely more than aesthetically displeasing, however it is good practice to remove and destroy gall infected stems/leaves from younger trees as gall formation may cause some branch dieback or defoliation. Chemical control is rarely needed or practical (due to the very specific time the wasps are outside the tree and active) in a home landscape situation.
- Black Twig Borers can also be problematic. These little insects seldom kill a tree but their damage (reduction of growth and aesthetic harm) can be substantial. Infestations begin in the spring in Northwest Florida, with the female twig borer drilling a pen-head sized hole in a large twig or small branch and then laying her eggs in the ensuing cavity. She then transmits an ambrosia fungus that grows in the egg-cavity, providing food for the borer, other borer adults, and her offspring that take up residence and over-winter in the twig. The activity of the insects in the twig has an effect similar to girdling; the infected twig will rapidly brown and die, making removal and destruction of the infected branches a key component
In conclusion, though there are a few problems that can potentially arise with Live Oak, its premier status and continued widespread use in the landscape is warranted and encouraged. It should be remembered that, relative to most other candidates for shade trees in the landscape, Live Oak is extremely durable, long-lived, and one of most pest and disease free trees available. Happy growing!
by Beth Bolles | Jul 7, 2016
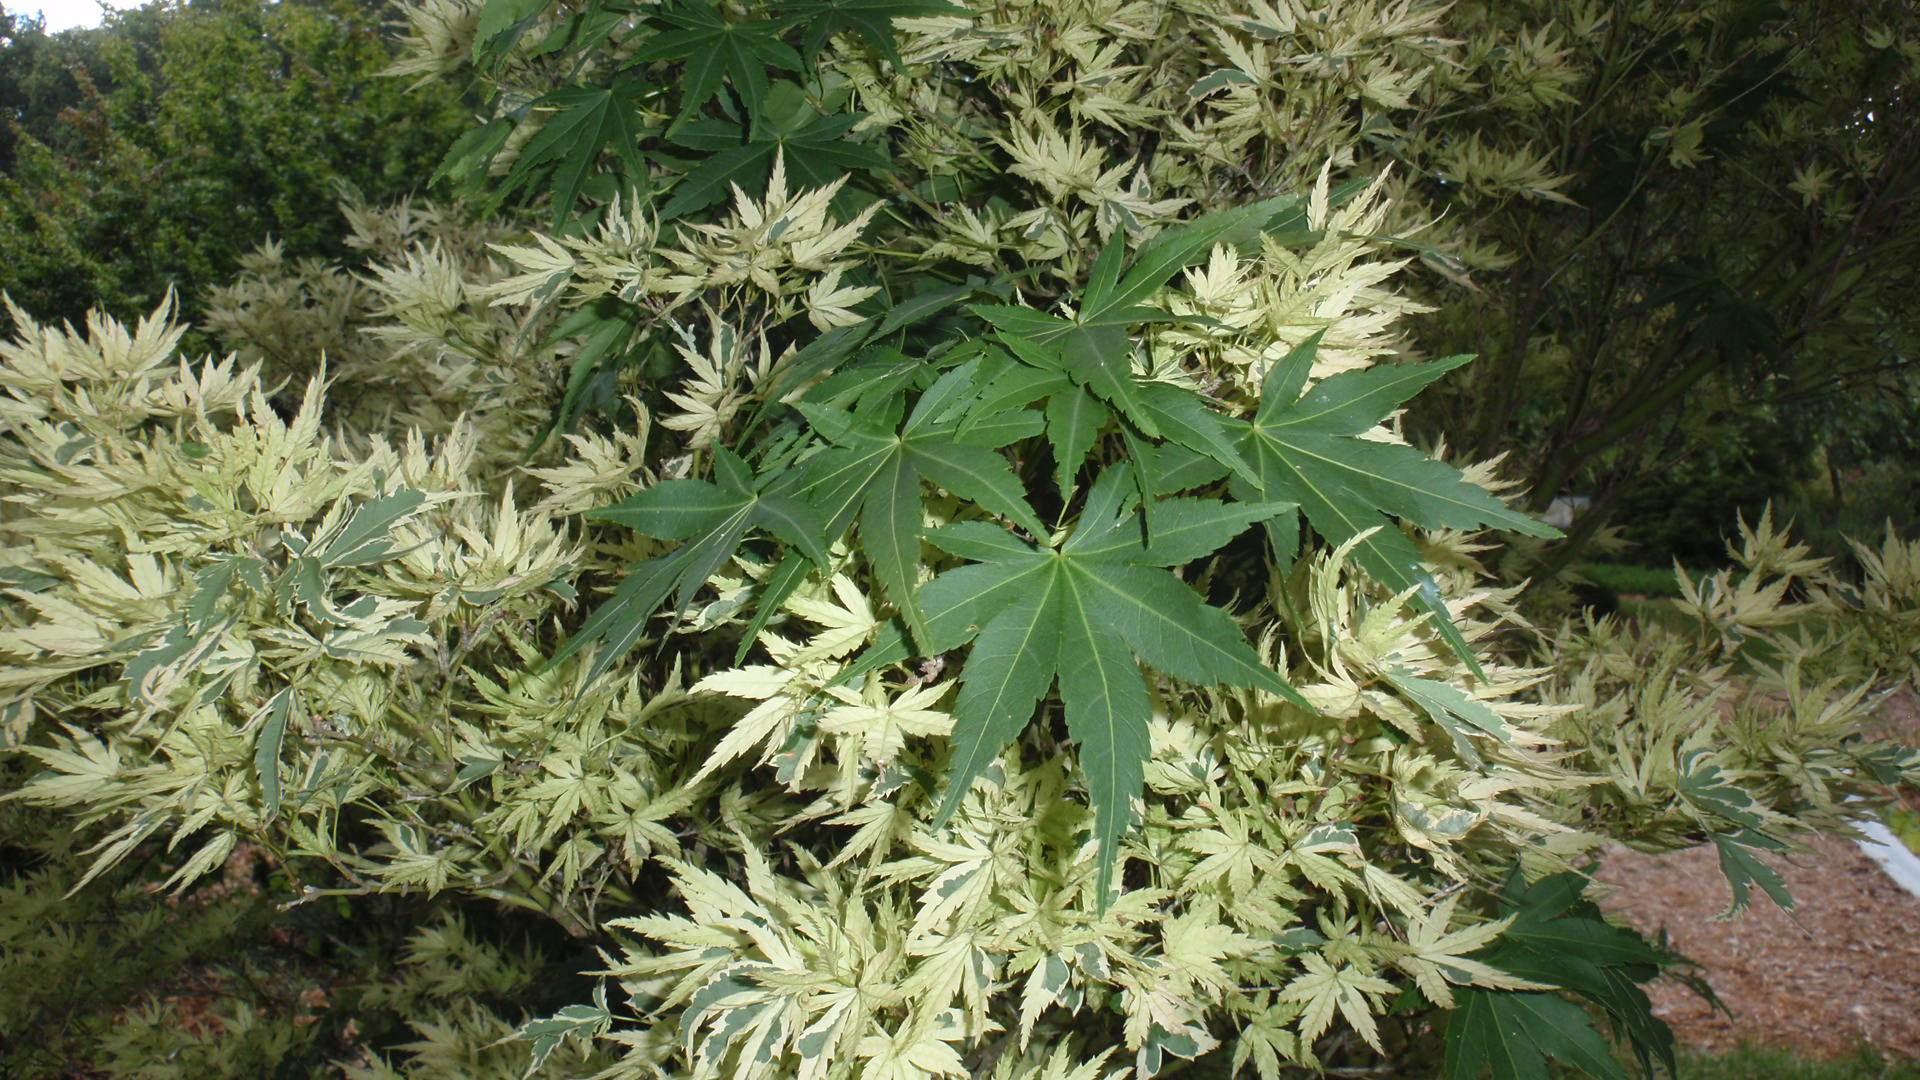
Many of the plants in our gardens have been developed and discovered that offer interesting characteristics. These may include leaves with variegations, dwarf growth habits, or even contorted stems. We enjoy these plant differences and many of these plants are big business in the nursery trade. In nature, it is likely these interesting plant mutations would not survive as they are less likely to be able to reproduce successfully. Horticulture professionals keep these plants available most often by propagation through cuttings and tissue culture.
Sometimes in the landscape, nature prevails and we see one of our favorite plant varieties revert back to its original or “wild” form. You may see a stem on a variegated plant that has larger leaves that are all green.

‘Butterfly’ Japanese maple has beautiful variegated foliage. One stem has reverted to an original form with large green leaves. Prune out this stem. Photo by Beth Bolles
These stems often grow more vigorously and can use nutrients and energy that the remainder of the plant needs. As soon as you see these different stems, prune them back to a connection with another stem that exhibits the plant characteristics you want.

by Mary Salinas | Jul 7, 2016
The Zika virus has made us all more aware of the need to avoid getting bit by mosquitoes when we travel to those destinations that have confirmed reports of Zika infected mosquitoes. The Centers for Disease Control and Prevention lists the countries and territories that have travel notices to consult prior to planning a trip or traveling.
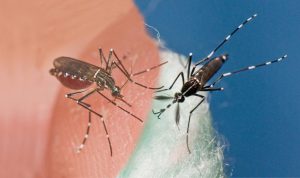
The invasive mosquitoes Aedes aegypti (left) and Aedes albopictus (right) occur in the Americas, including Florida, and have been implicated in the transmission of Zika virus.
Credit: J Newman, UF/IFAS/FMEL
The Florida Department of Health has recommendations for preventative action to take when traveling to any location that has confirmed Zika virus.
- You should use an insect repellant (following all label instructions) with any of these active ingredients:
- DEET
- Picaridin
- Oil of lemon eucalyptus
- Para-menthane diol
- IR3535
- Wear long-sleeved shirts and pants
- Wear clothing that is pre-treated with permethrin or apply a permethrin product to your clothes, but not your skin!
- Avoid getting bitten while you sleep by choosing a place with air conditioning or screens on windows and doors or sleep under a mosquito bed net.
According to the Georgia Department of Public Health you should also protect yourself against mosquito bites for at least a week after you return home from any location that has confirmed Zika. You may have an active infection without symptoms that can be spread to others through mosquito bites.
Now let’s talk about mosquito control in your own landscape.
Even though we don’t have confirmed Zika infection in Florida mosquitoes at this writing, mosquitoes in our state can transmit other diseases such as: eastern equine encephalitis, dengue fever, dog or cat heartworm, chikungunya, malaria, St. Louis encephalitis and west Nile virus.
Let’s first explore what kind of environment in your landscape and around your home is friendly to the proliferation of mosquitoes. Adult mosquitoes lay their eggs on or very near water that is still or stagnant. That is because the larvae live in the water but have to come to the surface regularly to breeze. The small delicate larvae need the water surface to be still in order to surface and breathe. Water that is continually moving or flowing inhibits mosquito populations.
Look around your home and landscape for these possible sites of still water that can be excellent mosquito breeding grounds:
- bird baths
- potted plant saucers
- pet dishes
- old tires
- ponds
- roof gutters
- tarps over boats or recreational vehicles
- rain barrels (screen mesh over the opening will prevent females from laying their eggs)
- bromeliads (they hold water in their central cup or leaf axils)
- any other structure that will hold even a small amount of water (I even had them on a heating mat in a greenhouse that had very shallow puddles of water!)
You may want to rid yourself of some of these sources of standing water or empty them every three to four days. What if you have bromeliads, a pond or some other standing water and you want to keep them and yet control mosquitoes? There is an environmentally responsible solution. Some bacteria, Bacillus thuringiensis ssp. israelensis or Bacillus sphaericus, only infects mosquitoes and other close relatives like gnats and blackflies and is harmless to all other organisms. Look for products on the market that contain this bacteria.
For more information:
Zika, a Mosquito-Transmitted Virus
Mosquito Repellents
UF/IFAS Mosquito Information Website
Florida Container Mosquitoes