by Ray Bodrey | May 4, 2018
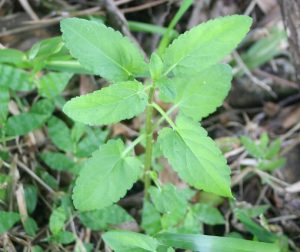
Figure 1: Florida Betony, Stachys floridana. Credit: UF/IFAS Range Cattle Research & Education Center.
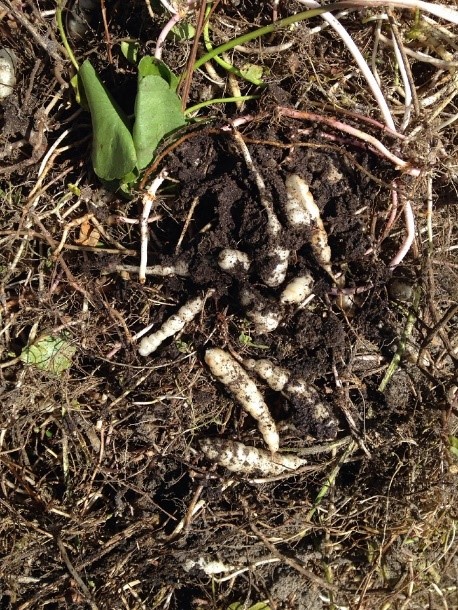
If you look closely at your yard, there is a good chance that you will find a plant that, depending on who you ask, is considered either a native wildflower or a weed and there are more than a few species that fit this description. If, upon even closer inspection, you find a plant with root tubers that resemble egg casings or even a rattlesnake’s rattle, you’ve stumbled upon Florida Betony.
Stachys floridana is a perennial broadleaf commonly referred to as rattlesnake weed due to it’s fleshy, white, segmented underground tubers. The plant has an erect stem with leaves that are opposite, shovel-shaped and coarsely serrated. The plant structure is very similar to mint. Flowers, emerging in late spring, are pinkish-purple in color. These inflorescences will also produce fruit, consisting of four nutlets. However, reproduction of the plant and it’s propensity to spread through lawns and gardens primarily occurs through dense root tuber development. Florida Betony’s growing range was originally confined to the state of Florida, but the commercial nursery trade played a major hand in dispersing the plant across the Southeast in the mid-1900’s. It can now be found as far west as Texas and as far north as North Carolina.

Figure 2: Tubers of the Florida Betony. Credit: Jill Bebee, UF/IFAS Gulf County Master Gardener.It can now be found as far west as Texas and as far north as North Carolina.
This time of year is when Florida Betony thrives. The moderate temperatures of fall and spring are the prime growing periods for Betony. In the heat of the summer, the above-ground structure of the plant will struggle and often disappear completely, only to reemerge in the fall. As a lawn weed, managing tuber development is key to controlling this plant. Applying herbicide to the leaves and stalk may seem at first to have conquered the weed. However, in most cases the tuber will simply regenerate. Glyphosate (Roundup) can be used effectively for control in ornamental plant beds where no turf is present. Be careful when spraying herbicides around trees, shrubs and other desirable plants as any foliar contact will cause phytotoxicity. If you have an infestation of Florida Betony in your turfed areas, there are a few options for control. Regular applications of three way broadleaf herbicides, such as mixtures of 2-4D, Dicamba and Mecoprop, are effective at suppressing this pesky plant. For more information and options, please contact your local county extension office or see the supporting information links below. Always refer to the product label for specific uses, precautions and application rates when using any herbicide.
Supporting information for this article can be found in the following the UF/IFAS EDIS publication, “Florida Betony Biology and Management in Turf” by J. Bryan Unruh, Ramon G. Leon, and Darcy E. P. Telenko: http://edis.ifas.ufl.edu/pdffiles/EP/EP38800.pdf
by Larry Williams | Mar 21, 2018
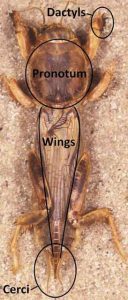
Tawny mole cricket adult.
Credit: L. Buss, UF/IFAS, IPM-206
The best time to treat for mole crickets is June through July, but don’t treat at all if mole crickets have not been positively found and identified in the affected lawn areas.
Don’t worry about the adults that are seen flying around lights in the evenings or about the mole crickets found dead in swimming pools this time of year. They are in a mating phase and are doing very little to no damage to lawns during late winter and spring.
We can take advantage of the fact that there’s only one generation per year in North Florida. The eggs will have all hatched by mid to late June. At that time, you’re dealing with young mole crickets that can’t fly and that are much more susceptible to the insecticides designed to kill them. Mole crickets spend winter as adults in the soil. In late February and March, adults emerge and begin mating. Shortly after mating, males die and females fly to suitable areas for egg laying. Mated females deposit eggs in tunnels. After depositing her eggs the female dies. Attempting to control adult mole crickets during this mating period a waste of time, money and product. Plus, adult mole crickets are difficult to control and can easily fly out of treated areas. See this excellent graphic from the Mole Cricket IPM Guide for Florida.
IPM-206: Mole Cricket IPM Guide for Florida
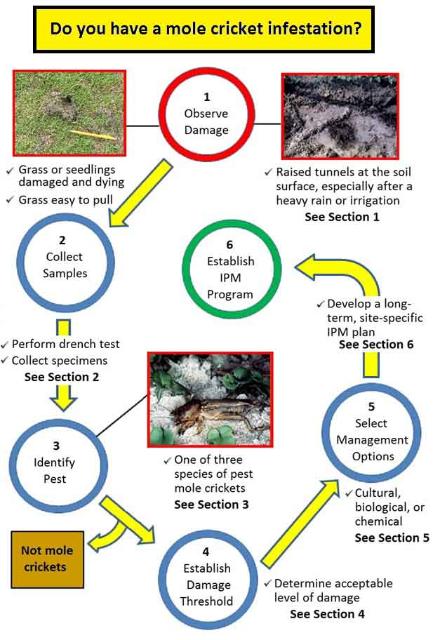
Figure 1. Pest mole cricket management: observe damage, collect samples, identify specimens, establish a damage threshold, select management options, and develop a long-term IPM program. Graphic sourced from Edis Publication IPM-206: Mole Cricket IPM Guide for Florida
You can easily determine if mole crickets are the cause for your lawn problem by flushing them out with a soap and water mixture.
Mix 1½ ounces of a lemon scented liquid dishwashing soap in two gallons of water in a sprinkling can or bucket. Pour the soapy water over an area approximately four square feet and count the number of mole crickets that emerge. It only takes several minutes for mole crickets to crawl to the surface after the soap treatment if they are present. Repeat the process around the yard where you suspect mole cricket problems. If you flush an average of two to four crickets are flushed out per site, control may be needed.
There are a number of insecticides on the market to control mole crickets. But before using any product, first identify the problem as mole cricket damage by using the soap flush technique. Then choose a lawn insecticide that lists mole crickets on its label. And finally read the label carefully for use directions, application techniques, irrigation requirements and precautions.
For more information on mole crickets, including recommended insecticides and other non-chemical control options, contact the UF/IFAS Extension Office in your County.
by Matt Lollar | Jan 25, 2018
The Jackson County Master Gardeners are hosting a hosting a Mushroom Growing Workshop on Saturday, February 10 at the Jackson County Extension Office, 2741 Penn Ave., Marianna, FL.

Shiitake mushrooms growing on a log. Photo Credit: University of Florida/IFAS
MUSHROOM GROWING WORKSHOP
SATURDAY, FEBRUARY 10
9:00 AM to 2:00 PM
• Learn to grow shiitake mushrooms on logs.
• Learn about mushroom nutrition.
• Take home an inoculated mushroom log!
• A home cooked lunch is included!
Registration Fee $20.00
Includes Lunch
Space is Limited
To register, contact the Extension Service at (850)482-9620 or s.farr@ufl.edu.
Pre-register by February 7th.
by Mark Tancig | Jan 18, 2018


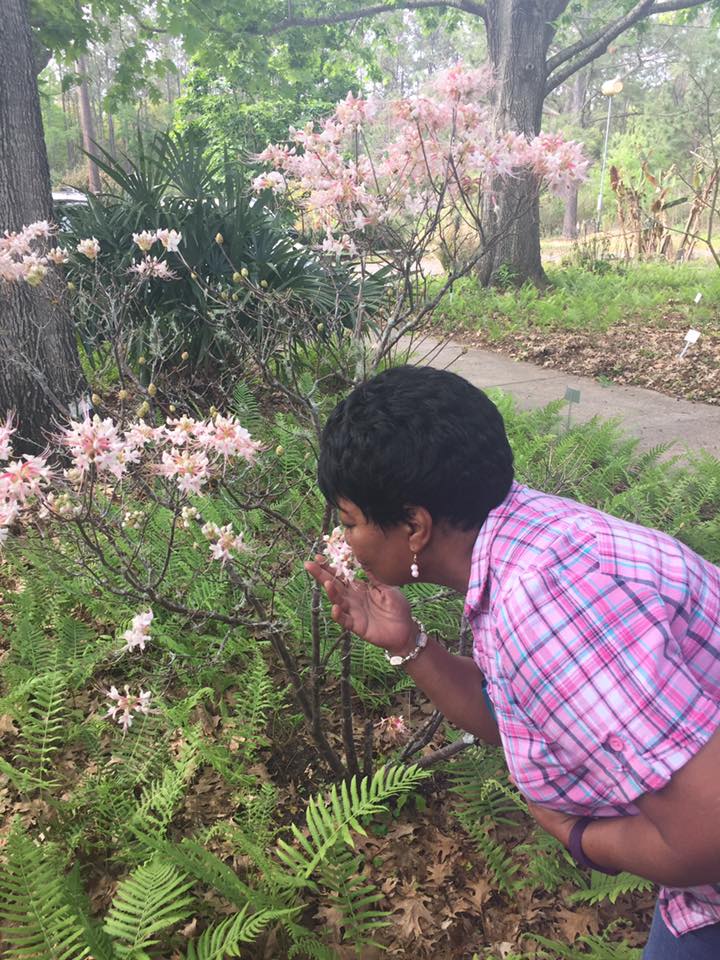
Come on by and smell the flowers! Credit: Mark Tancig/UF IFAS Extension.
At this time of year, UF IFAS Extension agents across the state are compiling all of their phone calls, emails, field visits, number of programs held and participants attended to complete their annual report of accomplishment. As an extension agent, I can vouch that our annual reports are a bit of a record keeping challenge and a little stressful since it is the sole document that determines our career. However, after completing the records review and tying it all together, seeing all we do locally and statewide is pretty amazing. If you’ve been to an extension office for a class, called for a recommendation, and/or asked a question at a community event, then you know how handy it is to get some good, trusted advice. Looking over the numbers and reviewing responses from the participants highlights the reach and impact of extension in the community.
The goal of the Extension Service, going back to the early 1900’s, is to provide scientific knowledge and expertise to the public through educational programs. Our educational programs are designed to be interesting to attend, but also to pass along information to help meet challenges and issues faced by our state and/or region. You may come to a class on growing roses and leave with new information about proper pest control. You may attend a food canning class and leave with new food safety knowledge. You found a camp for your child during the summer and they came back knowing how to compost and build robots. Our priorities, set by Dean Nick Place, address economic, environmental, health, and social concerns of Floridians. Your kid had fun and learned about the need to recycle and turn food waste into plant food, helping to meet waste reduction goals and giving them the knowledge and skills to grow their own food.
Extension agents need to show in their reports that, not only are people coming, but they’re learning and doing. That’s why attendees are often asked to fill out surveys after workshops and sometimes answer follow up emails. We also get a lot of feedback from folks that were happy with our services. So, please let us know if you gained knowledge that changed something in your life for the better. It’s also not a bad idea to call or write your elected officials and tell them thanks for supporting extension, a cooperative effort between the federal, state, and county governments.
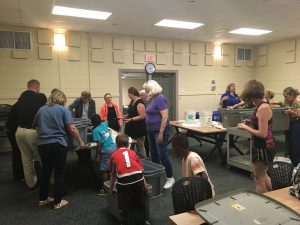
Worm composting attendees. Credit: Mark Tancig/UF IFAS Extension.
The numbers speak for themselves:
- In 2016, nearly 60 million connections were made statewide. Local extension offices connect with hundreds of thousands of citizens a year!
- Based on statewide survey data, 77% of those that called for advice said it solved their problem.
- Of those surveyed, 71% said they either saved money, developed their skills, conserved water or energy, or improved their health or well-being.
- Over 90% consider the information, up-to-date, accurate, and easy to understand.
Now that reports are done for this year, it’s time to start planning for 2018’s impacts. Agents are planning activities that will be of interest to and meet the needs of their communities. Keep a lookout for upcoming events by visiting your local county extension office’s webpage and/or Facebook page. You can also give them a call or, even better, go by and meet your local agents and staff.
by Ray Bodrey | Jan 4, 2018
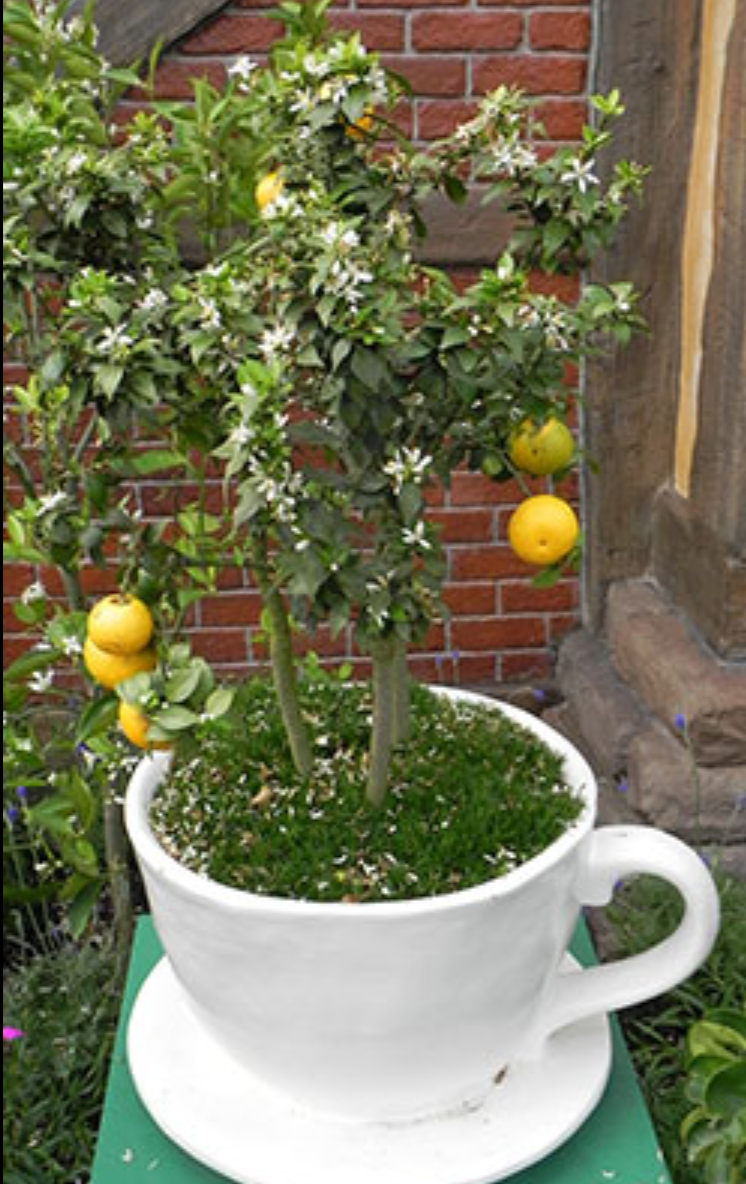
Can’t ever figure out that perfect gift to give at the holidays? During the next gift giving season, why not try something a little different. Give a patio citrus tree! It’s a unique gift to give or receive here in the Sunshine State.
One of the pleasures nearly all homeowners in Florida can enjoy is the ability to pick fruits from their own trees. It is also an attractive addition to your holiday décor. However, landscapes and hardiness zones will dictate varieties that can be grown around your home. Patio or “potted” citrus that do not grow as large as other species will allow flexibility. Calamondin, key lime, kumquat, lemon, limequat and Tahiti lime are just some of the patio citrus favorites. These types of citrus are also sometimes marketed as dwarf, miniature or snowbird citrus. Although remember, growing any fruit tree in a container can help limit the size of the tree.
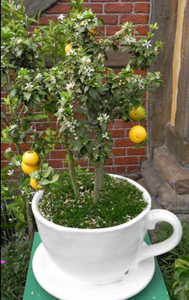
Figure 1: Patio Citrus.
Credit: UF/IFAS Communications.
There are special considerations to take into account with such fruit trees. All citrus need chilling hours each year to reset and to become viable fruit producers the following year. But, long hours of temperatures at or below freezing can cause irreversible damage. Some types of citrus have a higher tolerance to the cold, but lemons and limes tend to be less hardy than other species.
Having space in your home to move patio citrus is key. A spot with access to natural light will support growth during times when Panhandle temps drop significantly. Citrus require sun to grow and be healthy. Partial sun will slow the growth, if needed. A good rule of thumb is to treat patio citrus like a houseplant.
Most likely, from the time you purchase patio citrus, you’ll keep the tree in the pot for the first year or so. Be sure you re-pot as the tree grows. The tree will need to have adequate space in the pot for root development. A good quality potting soil is suitable for growing citrus. Also, be sure to consider weight, especially if you plan to move the pot indoors often.
In general terms, most container-grown plants do not thrive with of too little or too much watering. Rather, water only as needed. After wetting the soil, allow the top inch to become dry before watering again and make sure the container has drain holes. When fertilizing, do so in small amounts every few months. If the leaves are deeper green, then the tree is getting ample fertilizer. As time goes on, you’ll want to prune the tree to keep an appealing shape. Although pest problems are not usually an issue, a homeowner grade insecticide, neem oil or insecticidal soap are all good choices to use should problems arise.
As for fruitfulness, most citrus trees produce fruit, given time and proper care. So, please be patient. One major advantage to patio citrus, it’s easy to reach the fruit at harvest time!
For more information on patio citrus, please contact your local county extension office.
Supporting information for this article is provided by Dr. Pete Andersen of the UF/IFAS Research & Education Center in Quincy, FL, and information can also be found in the following the UF/IFAS publications: “Citrus Culture in the Home Landscape”, by Robert E. Rouse and Mongi Zekri: http://edis.ifas.ufl.edu/pdffiles/HS/HS13200.pdf & “Growing Fruit Crops in Containers”, by Larry K. Jackson and Jeffrey G. Williamson: http://edis.ifas.ufl.edu/pdffiles/MG/MG24300.pdf
UF/IFAS Extension is an Equal Opportunity Institution.
by Mark Tancig | Sep 18, 2017
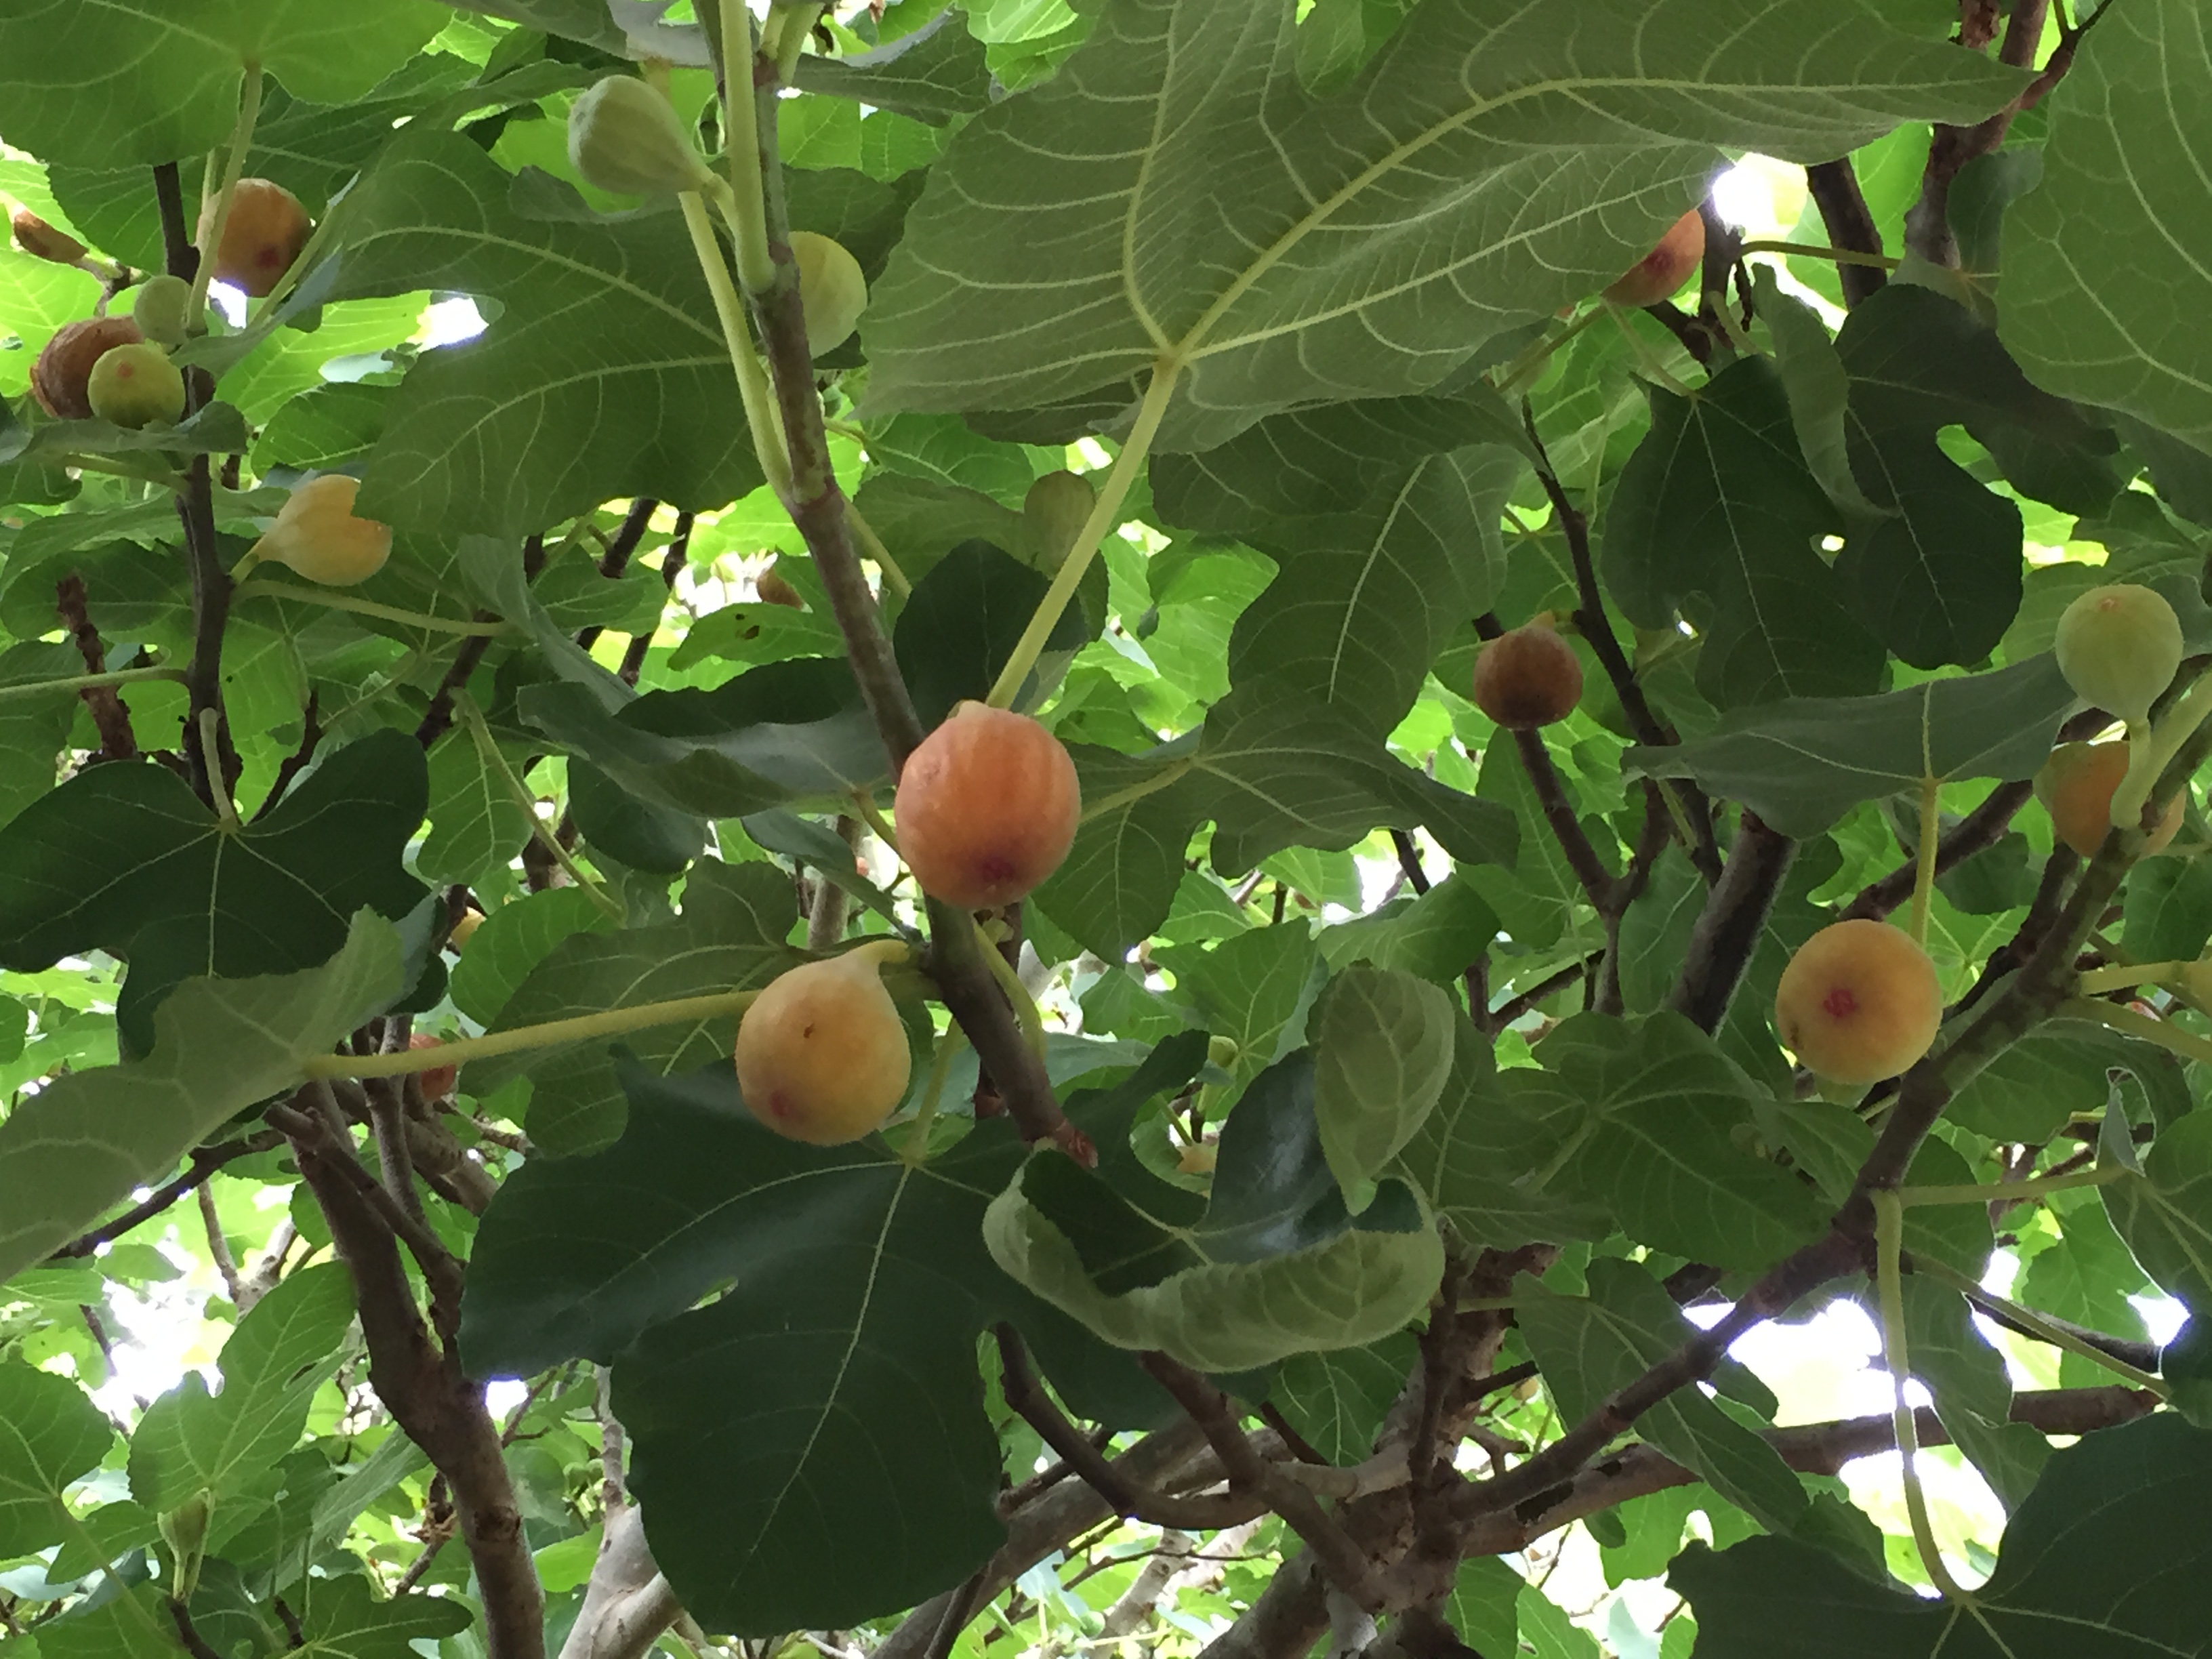
Hopefully, by this time of year, most north Florida gardeners have harvested their figs and are enjoying fig preserves or fig bars. But if you’ve noticed your fig leaves dropping a little early, it may be a sign of the fungal disease Fig Rust (Cerotelium fici).
Figs are a great fruit tree for the north Florida home garden. Not only do they provide a tasty reward (if you can keep the birds and squirrels away), but they are fairly easy to maintain and are bothered by relatively few pests and diseases. One of the few diseases that can be common, however, is fig rust, especially when conditions are favorable. In the case of fig rust, a fungus, warm humid weather is what it likes and well, we have plenty of that.

Figs are a great fruit tree for North Florida. Credit: Mary Derrick, UF/IFAS.
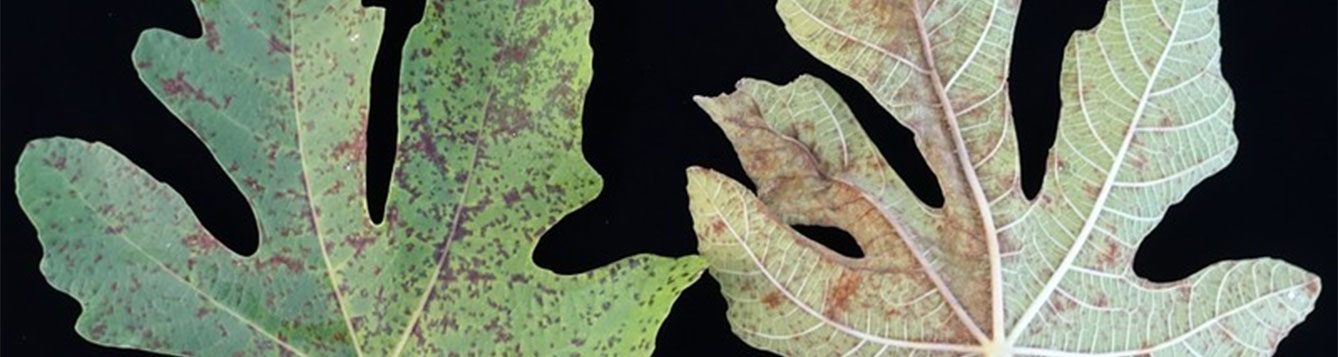
The first signs of the fig rust disease are small yellow to yellow-green spots/lesions on the upper surface of the leaf that turn a reddish-brown color as they get larger. A heavy infestation causes the leaves to turn yellow and drop early. While fig rust does not injure the fruit, repeat occurrences of premature leaf drop can adversely affect the overall health of the tree, resulting in yield loss. Another concern is that if the leaves drop too early, the tree will flush out with new growth heading into winter. This new growth can be injured by early freezes and cause a loss of fruit the following season.

Fig rust on leaves. Credit: UF/IFAS.
What can you do to prevent and/or cure fig rust? Unfortunately, once you see the yellowish-green/reddish-brown spots on the leaves, it’s too late to provide any control. As always, proper cultural practices can help. Pruning the tree to provide adequate airflow keeps the leaves as dry as possible during our humid summers. Remember to prune fig trees in Florida after fruit harvest, not in the dormant season, since fruit is borne on previous year’s growth. Another cultural control to prevent fig rust is to rake diseased leaves out from under the tree. The fungal spores in the fallen leaf litter pass the disease on to next year’s leaves. Other cultural controls include providing adequate moisture and placing a healthy dose of mulch around the tree. Figs require minimal fertilizer. Using a general complete fertilizer with micronutrients (such as a 10-10-10), young trees should receive 1 cup (1/2 pound) and mature trees 4-8 cups (2-4 pounds) per year.
There are currently no chemical controls approved for fig rust in Florida. The classic Bordeaux mix is recommended by various authors to be used as a preventative fungicide during the dormant season, before the lesions appear on the leaves. The Bordeaux mixture is a mix of copper sulfate, lime, and water in a 1:1:10 ratio and is considered an organic pesticide. This mix has been used since the late 19th century and was discovered by accident after botanists and farmers realized that grapevines sprayed with the mix to deter theft had less fungal problems. As with any pesticide, be cautious when using. Overuse of copper-based fungicides can cause copper to build up in soils, leading to potential issues to plant and human health.
While figs are generally worry free for our area, fig rust is one disease to be on the lookout for. Good gardening practices can reduce the occurrence of this disease and ensure a bountiful harvest. For questions on growing figs or about the fig rust disease, visit the UF/IFAS EDIS website – edis.ifas.ufl.edu – or contact your local Extension office.