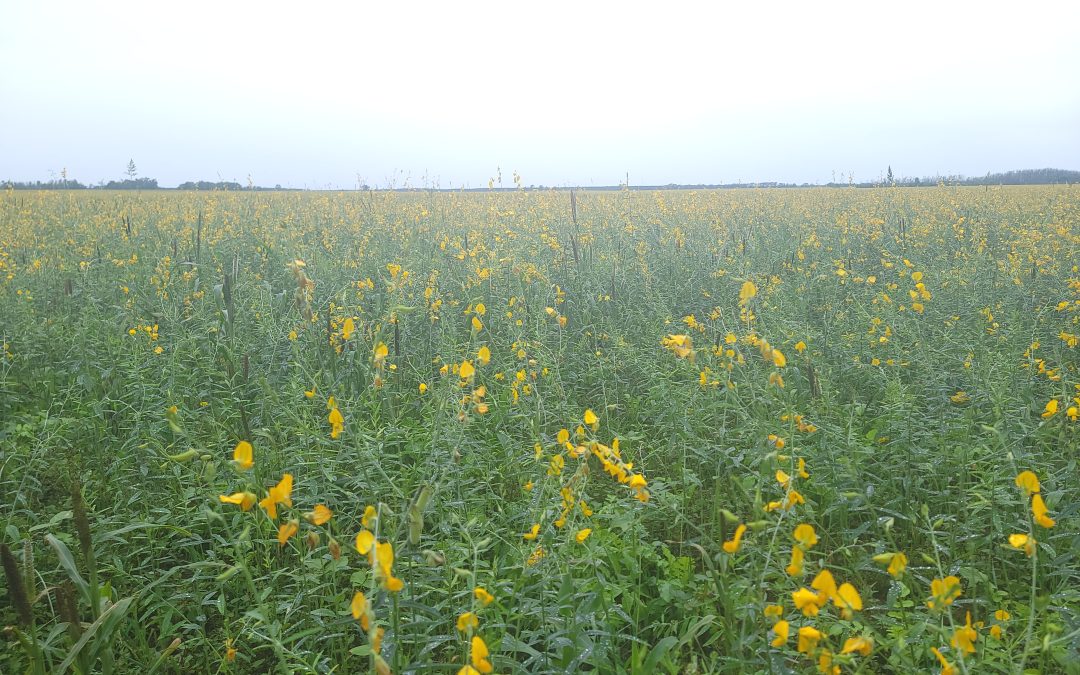
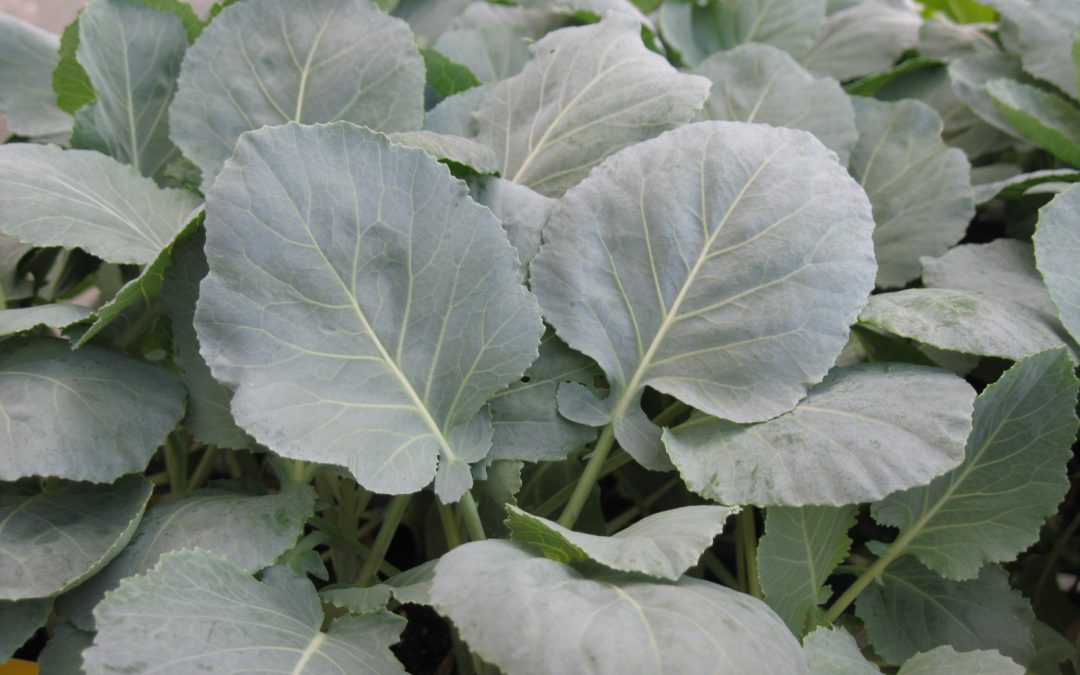
You do not often see a sea of yellow flowers on what was recently a field of row crops in North Florida. In this instance, the culprit is a cover crop called sunn hemp (Crotalaria juncea). Cover cropping, or green manure as it is sometimes known, is not a new concept. It is a great method for improving soil quality, adding organic matter, augmenting nitrogen supply, supporting pollinators when resources begin to wane, and combating nematodes. Incorporating this sustainable agriculture practice into home vegetable gardens is an excellent method to build long-term viability and production.
Many plants may be used in this capacity, but this article will focus on sunn hemp. This annual is an herbaceous, short-day flowering plant in the Lamiaceae or legume family. Its erect stems produce a great deal of biomass and, as a legume, will augment nitrogen stores within your soil profile. As if that wasn’t enough to sell you, this plant is also known to suppress nematode populations. Native to India and Pakistan, where sunn hemp is grown for fiber, this plant grows well in tropical and temperate environments. It will thrive in even sub-par conditions and requires little fertilizer input.
UF/IFAS Photo: Josh Criss
Seed Time
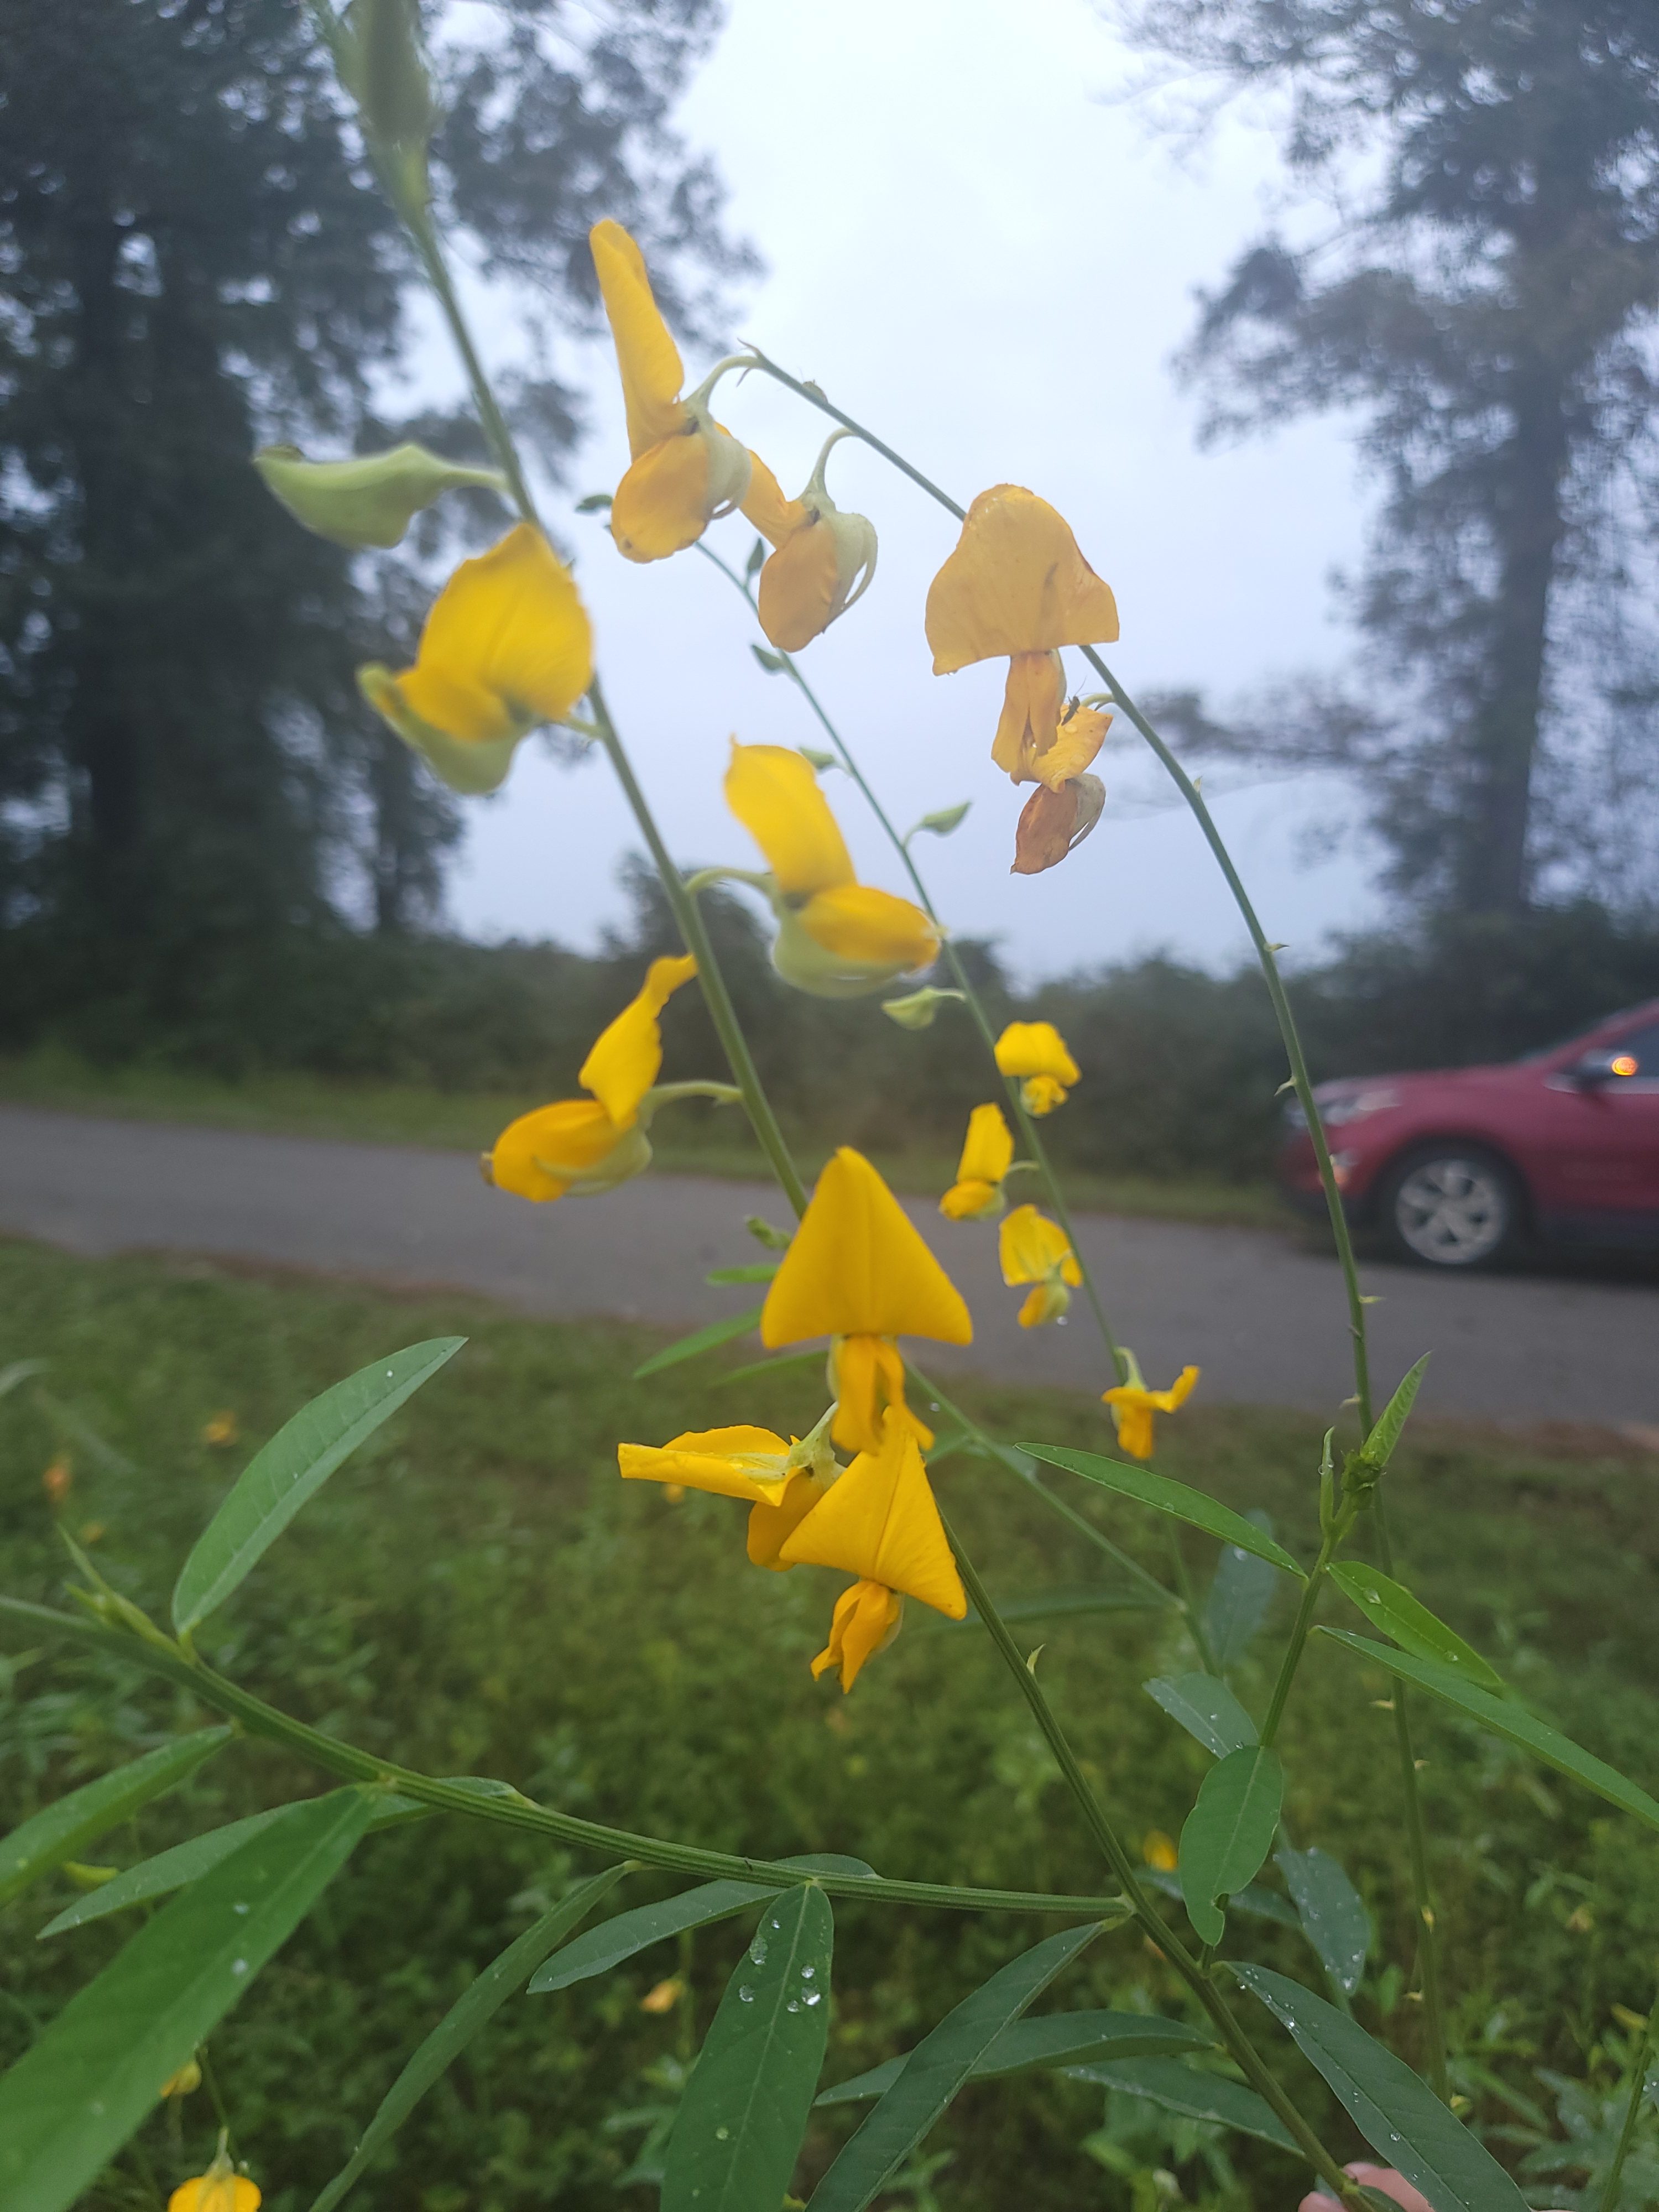
Seed this plant once your summer gardens have begun to wane. The shorter day length will keep the plant confined to about 3-4 feet while still allowing it to flower. It may also be planted earlier in the year to maximize below-ground biomass and add organic matter. In this scenario, the plant will likely grow to 7 feet tall with a closed canopy within 10 weeks.
Sunn hemp requires little fertilization as it is a legume, a plant family known to fix nitrogen from the atmosphere. This same mechanism is one of the features of this plant as a cover or green manure crop, as it can add up to 320 pounds of nitrogen per acre back to the soil when planted en masse.
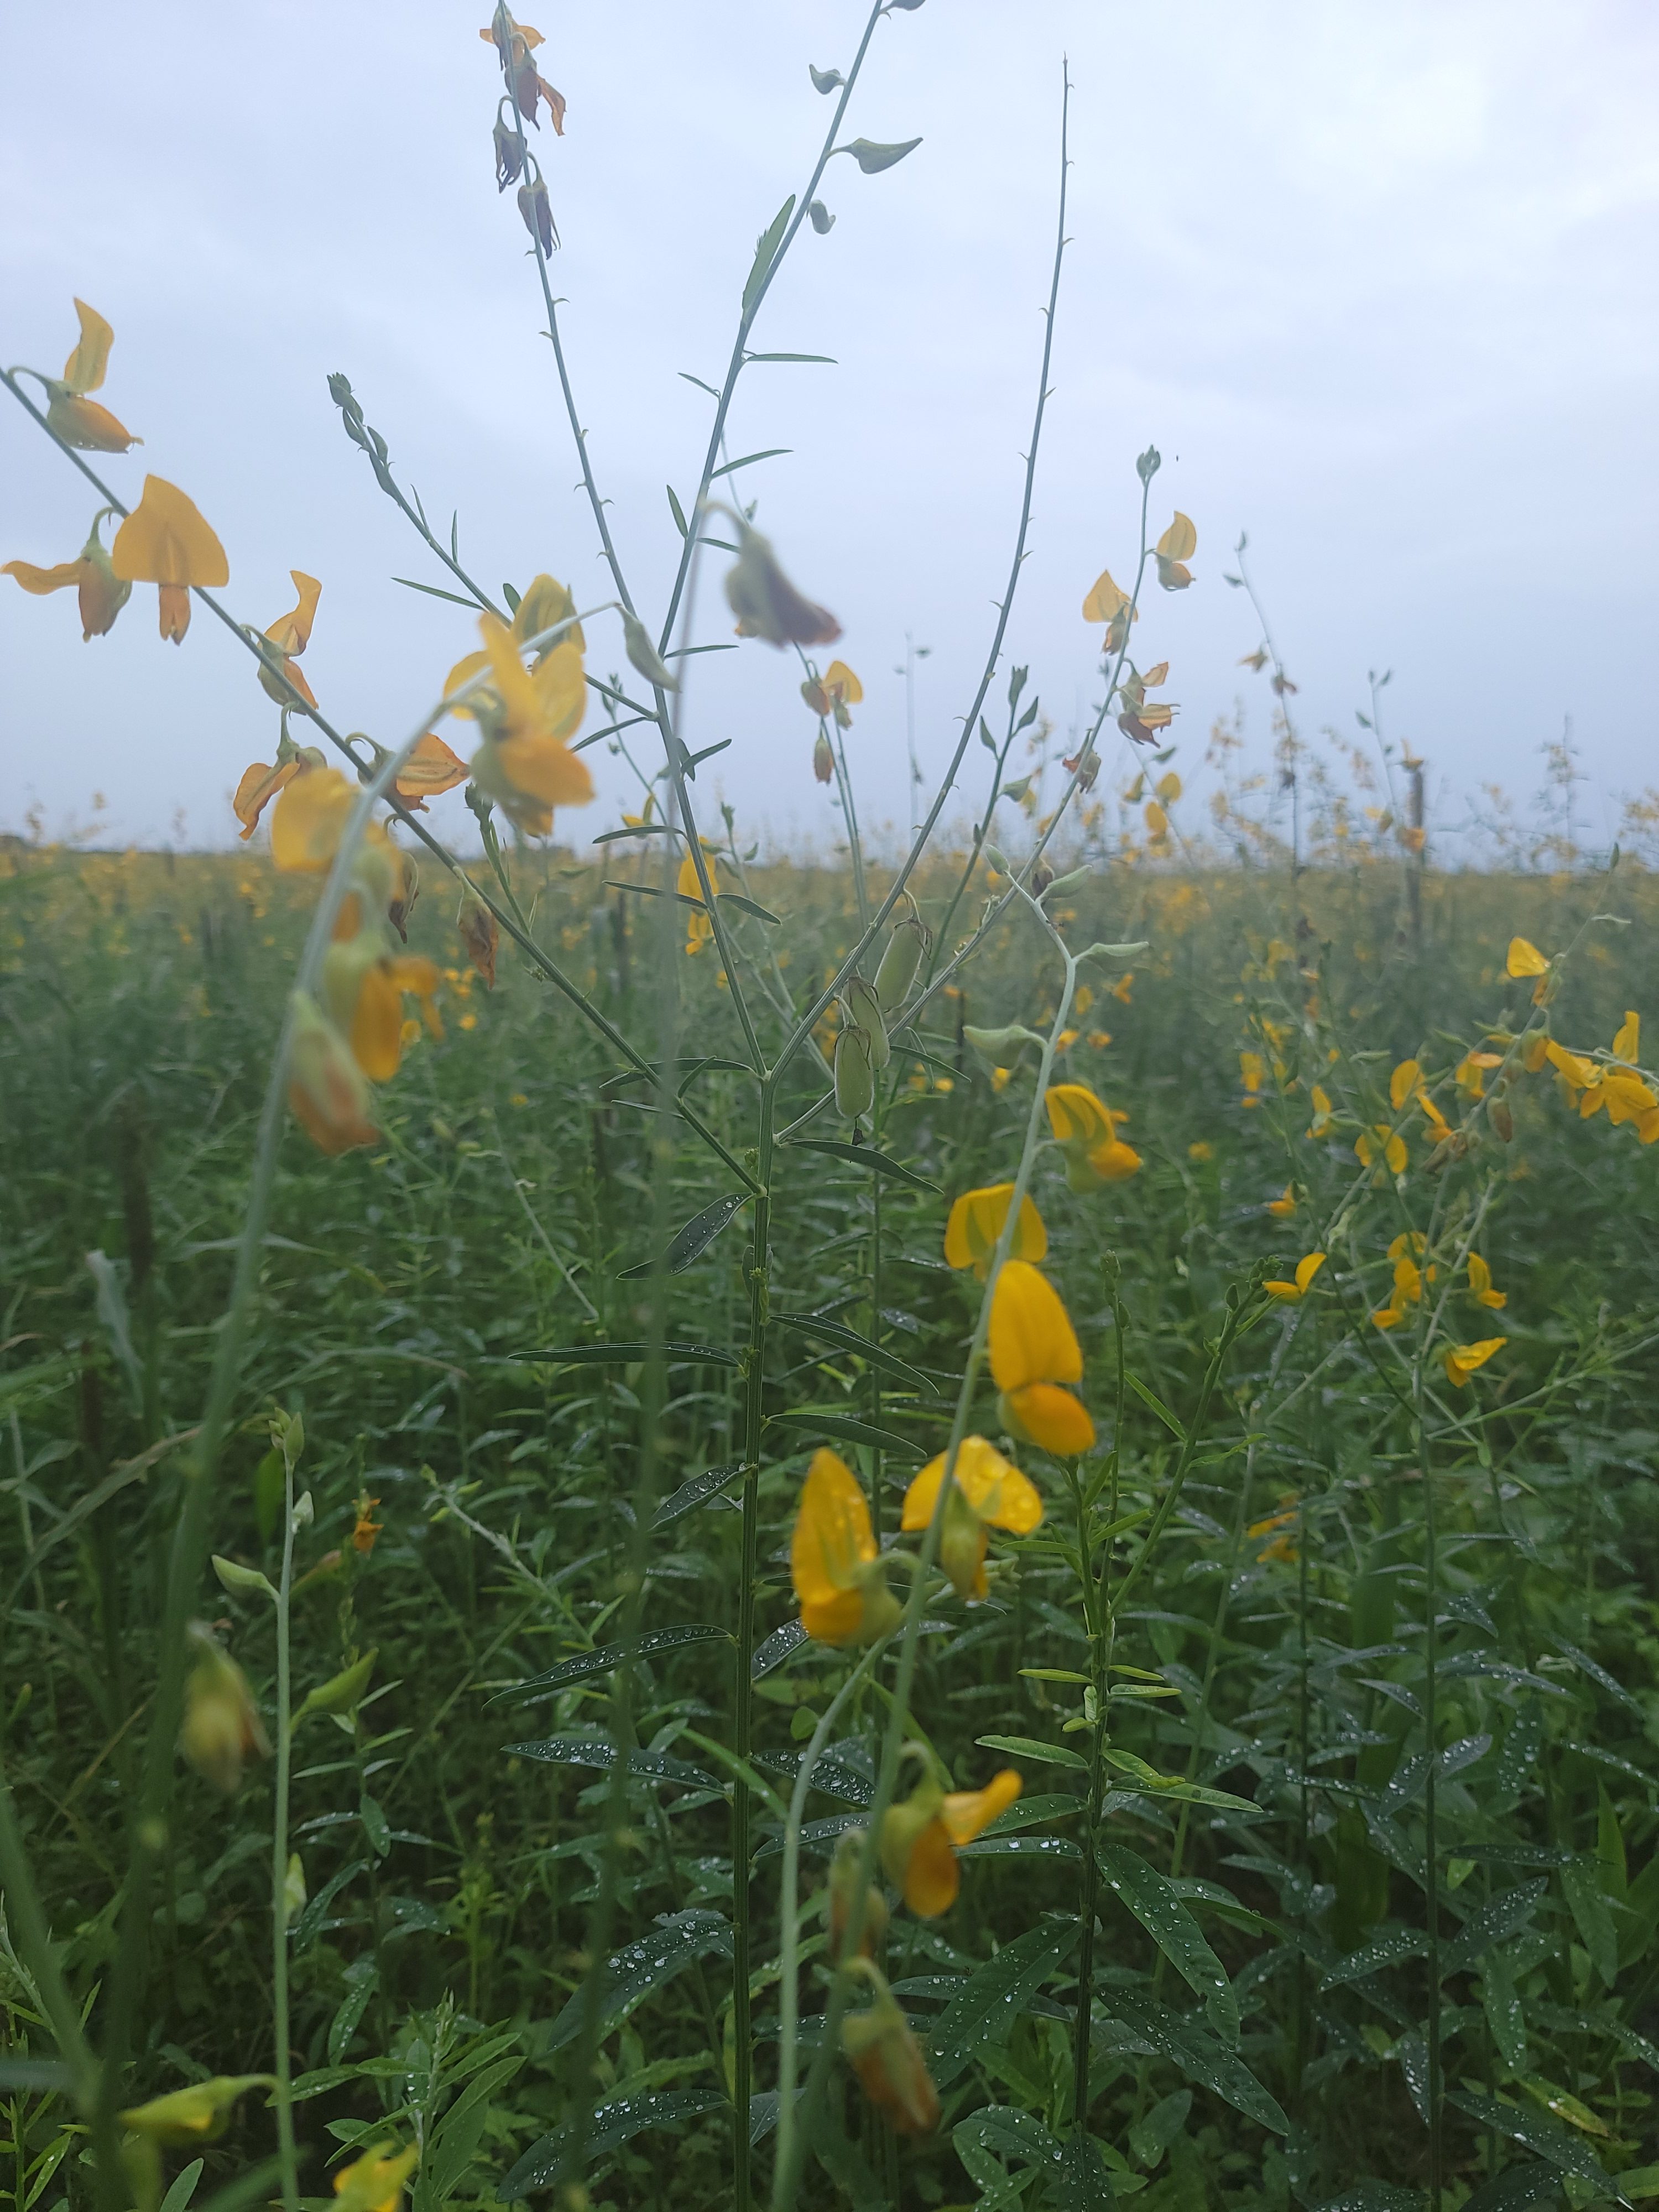
Seeding rates within a home garden are much smaller. A farmer may plant 30-50 pounds of seed, which is not practical in small-scale growing. Instead, aim to cover the garden area through broadcasting seed, as a denser planting will reduce the later branching of this plant. Ensure you have 8-12 weeks of warm, frost-free weather, and terminate them prior to reaching the full bloom stage. Doing so will provide your gardens with the same benefits seen in farm fields utilizing this sustainable practice.
UF/IFAS Photo: Josh Criss
To Sum it Up
Sunn hemp is an excellent plant for your gardens before your fall greens. The biomass it produces and the nitrogen it recovers make it very attractive to farmers and should raise eyebrows even in the home garden. The trick is learning to manage this plant within your crop rotation. For more information on soil management refer to these IFAS documents, or contact your local extension agent for additional information on this and any topic regarding your gardens and more.
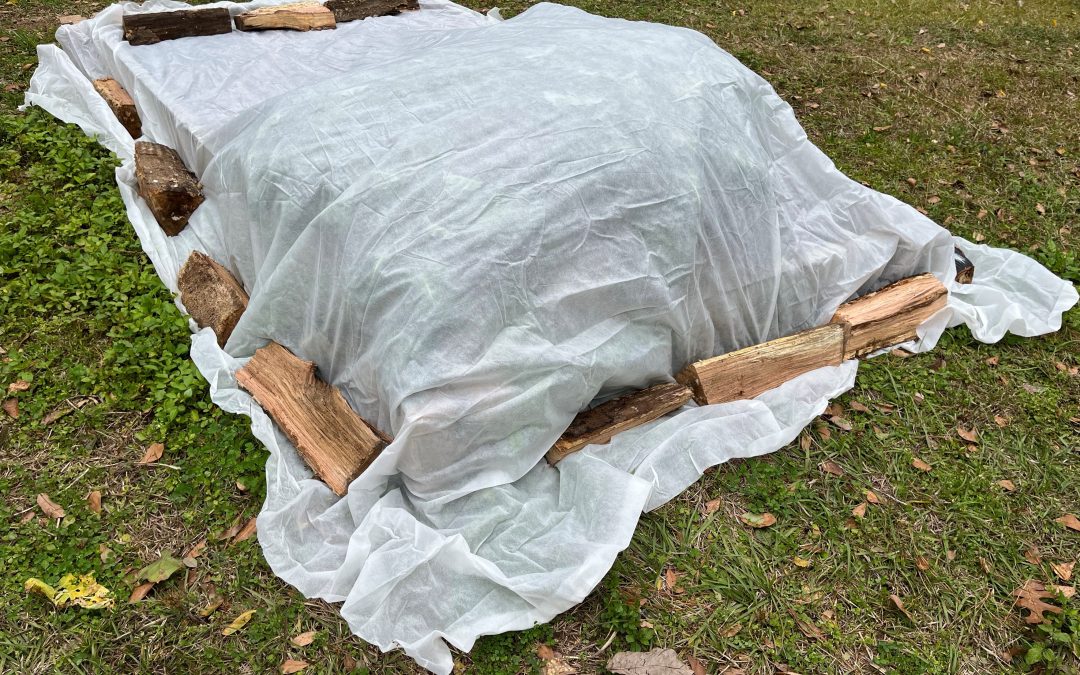
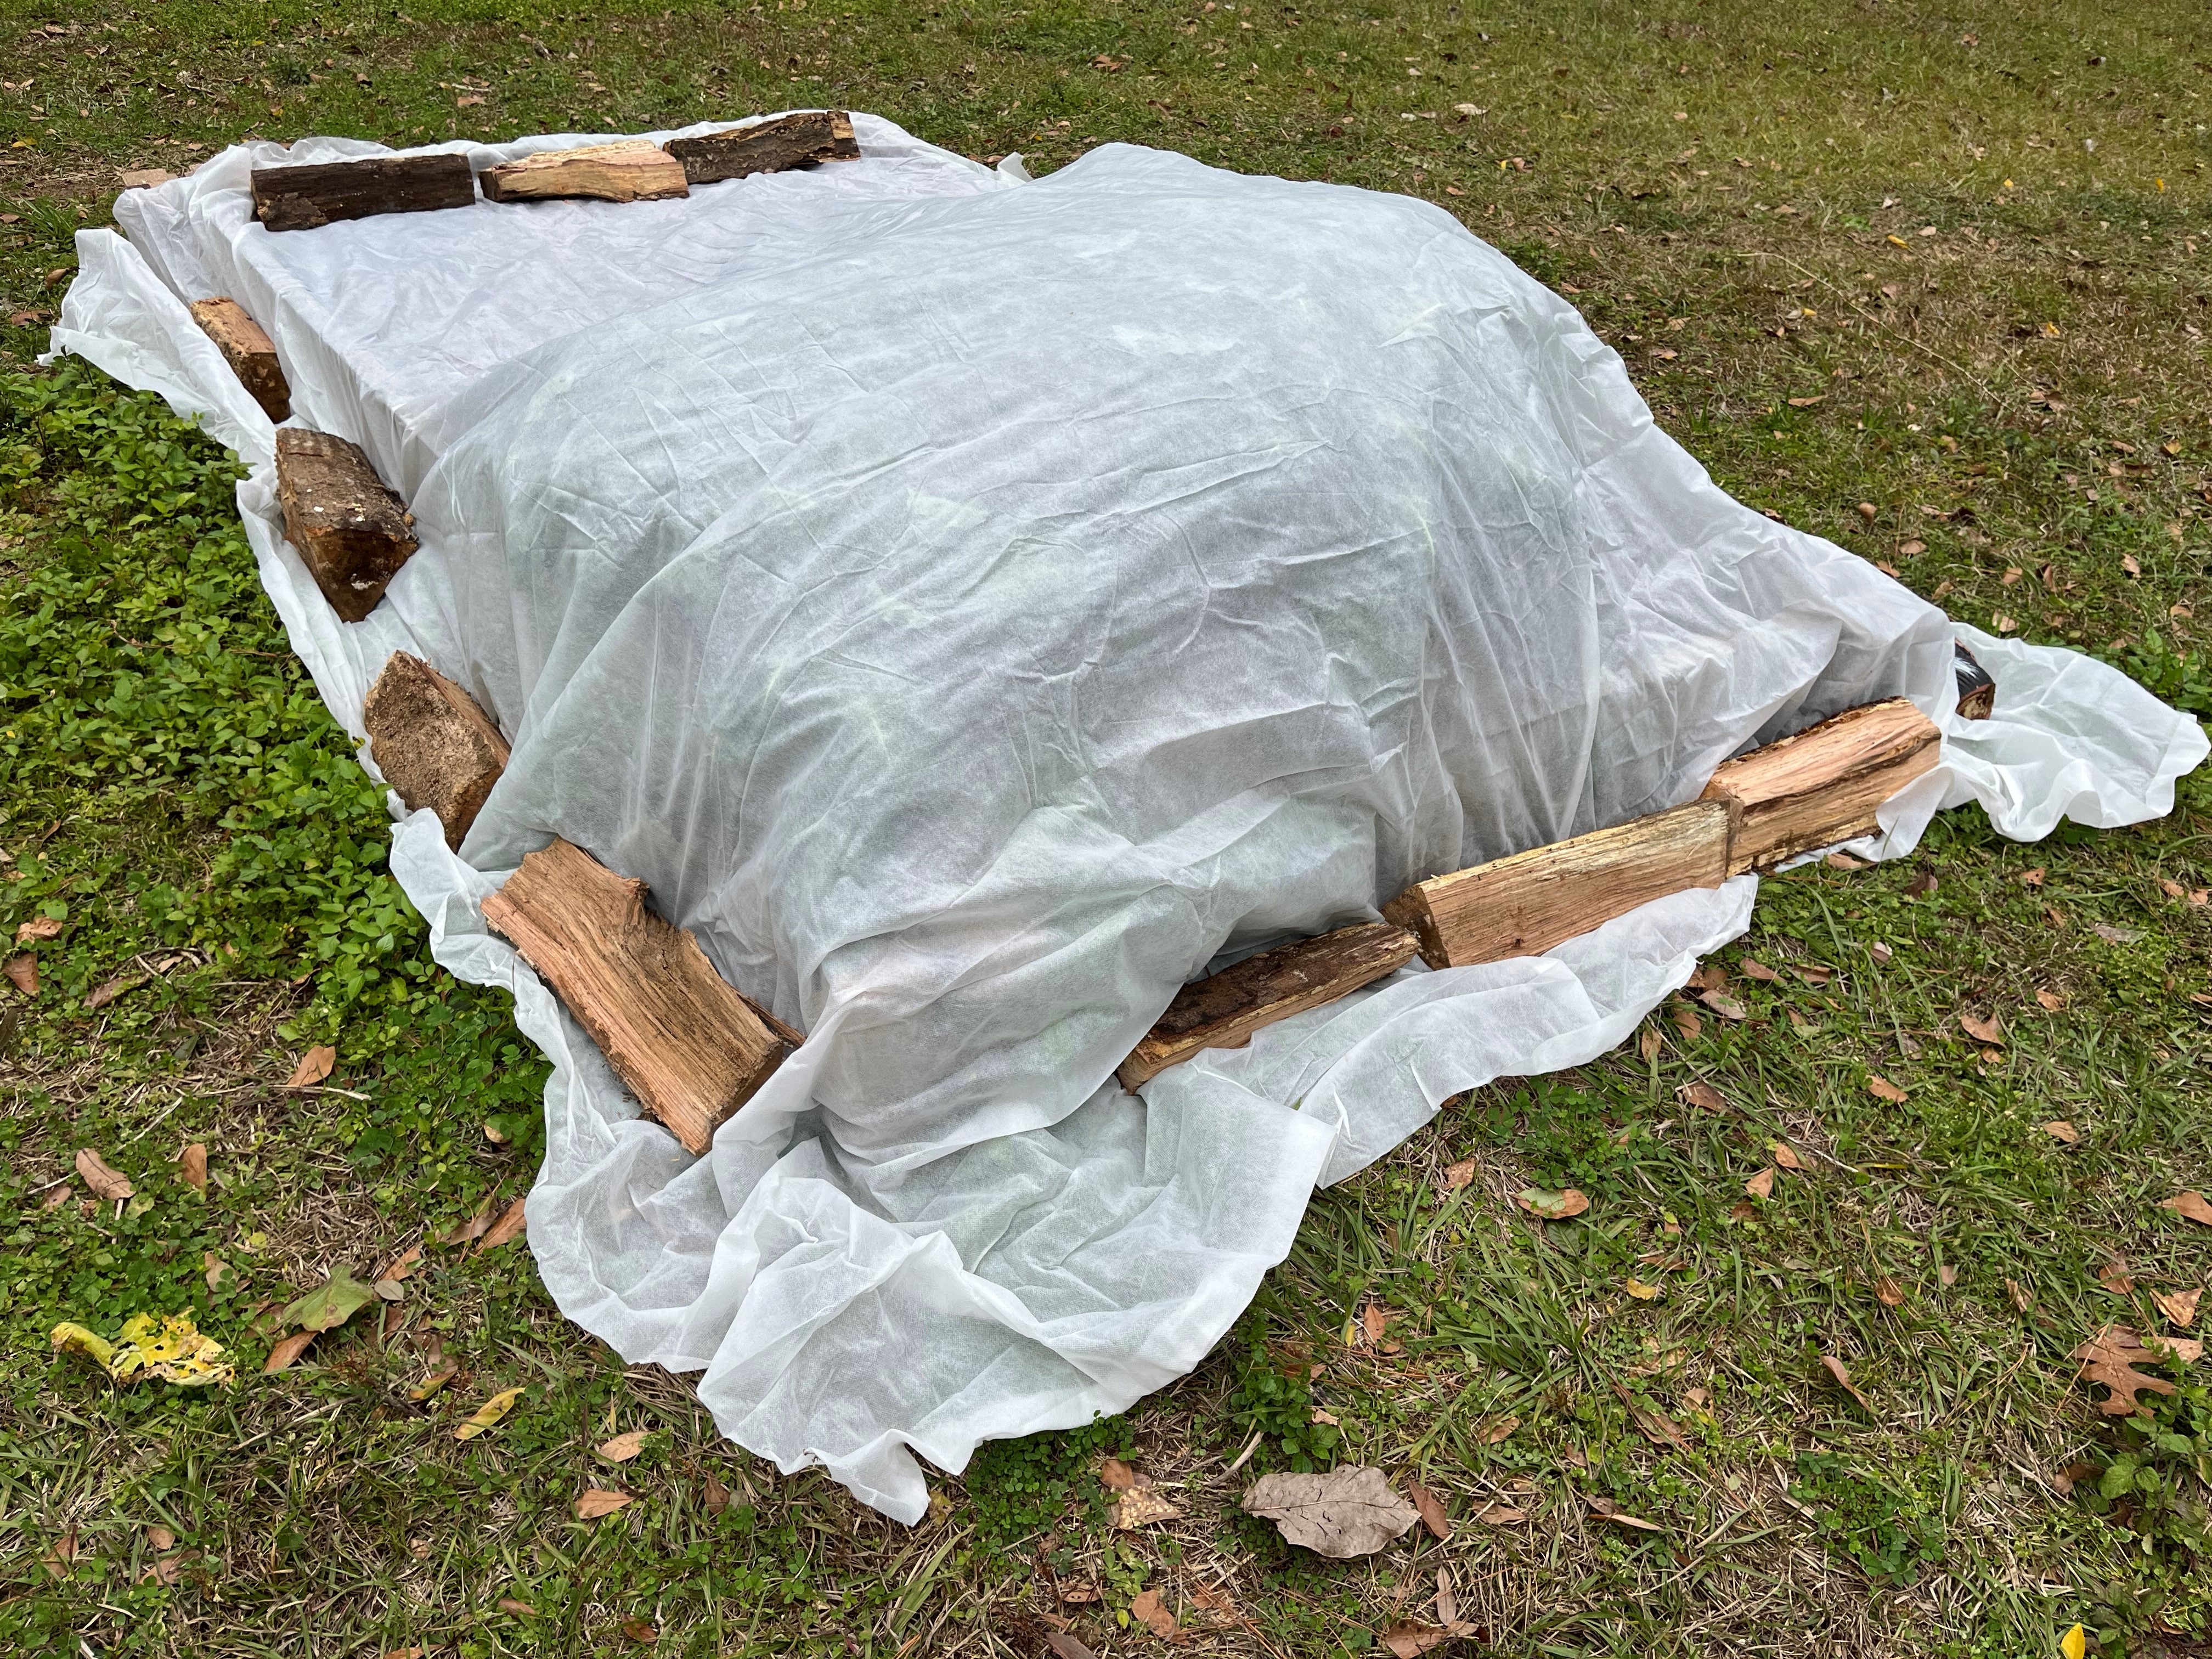
Anchor frost cloth securely to keep it tightly in place, as removing air gaps helps trap ground heat and shield plants from cold air. Photo by Molly Jameson.
Here in North Florida, mild winters are the norm, but our occasional cold snaps can be enough to wreak havoc on our gardens. As you might remember, in December of 2022 the entire Panhandle experienced temperatures dipping into the teens and low 20s for several nights in a row, with some areas reaching as low as 18°F. This kind of unexpected freeze can catch even the most experienced gardeners off guard.
While plant covers are the go-to solution for many of us, pairing them with additional techniques can offer even better protection when temperatures dip. From common cold weather protection myths to practical DIY tips that enhance your plant cover’s effectiveness, knowing your options can make all the difference during an impending cold snap.
Cold Protection Myths and Misconceptions
When a frost or freeze warning hits, there’s plenty of advice flying around. Some of it’s helpful, and some, not so much. Here are a few misconceptions to clear up:
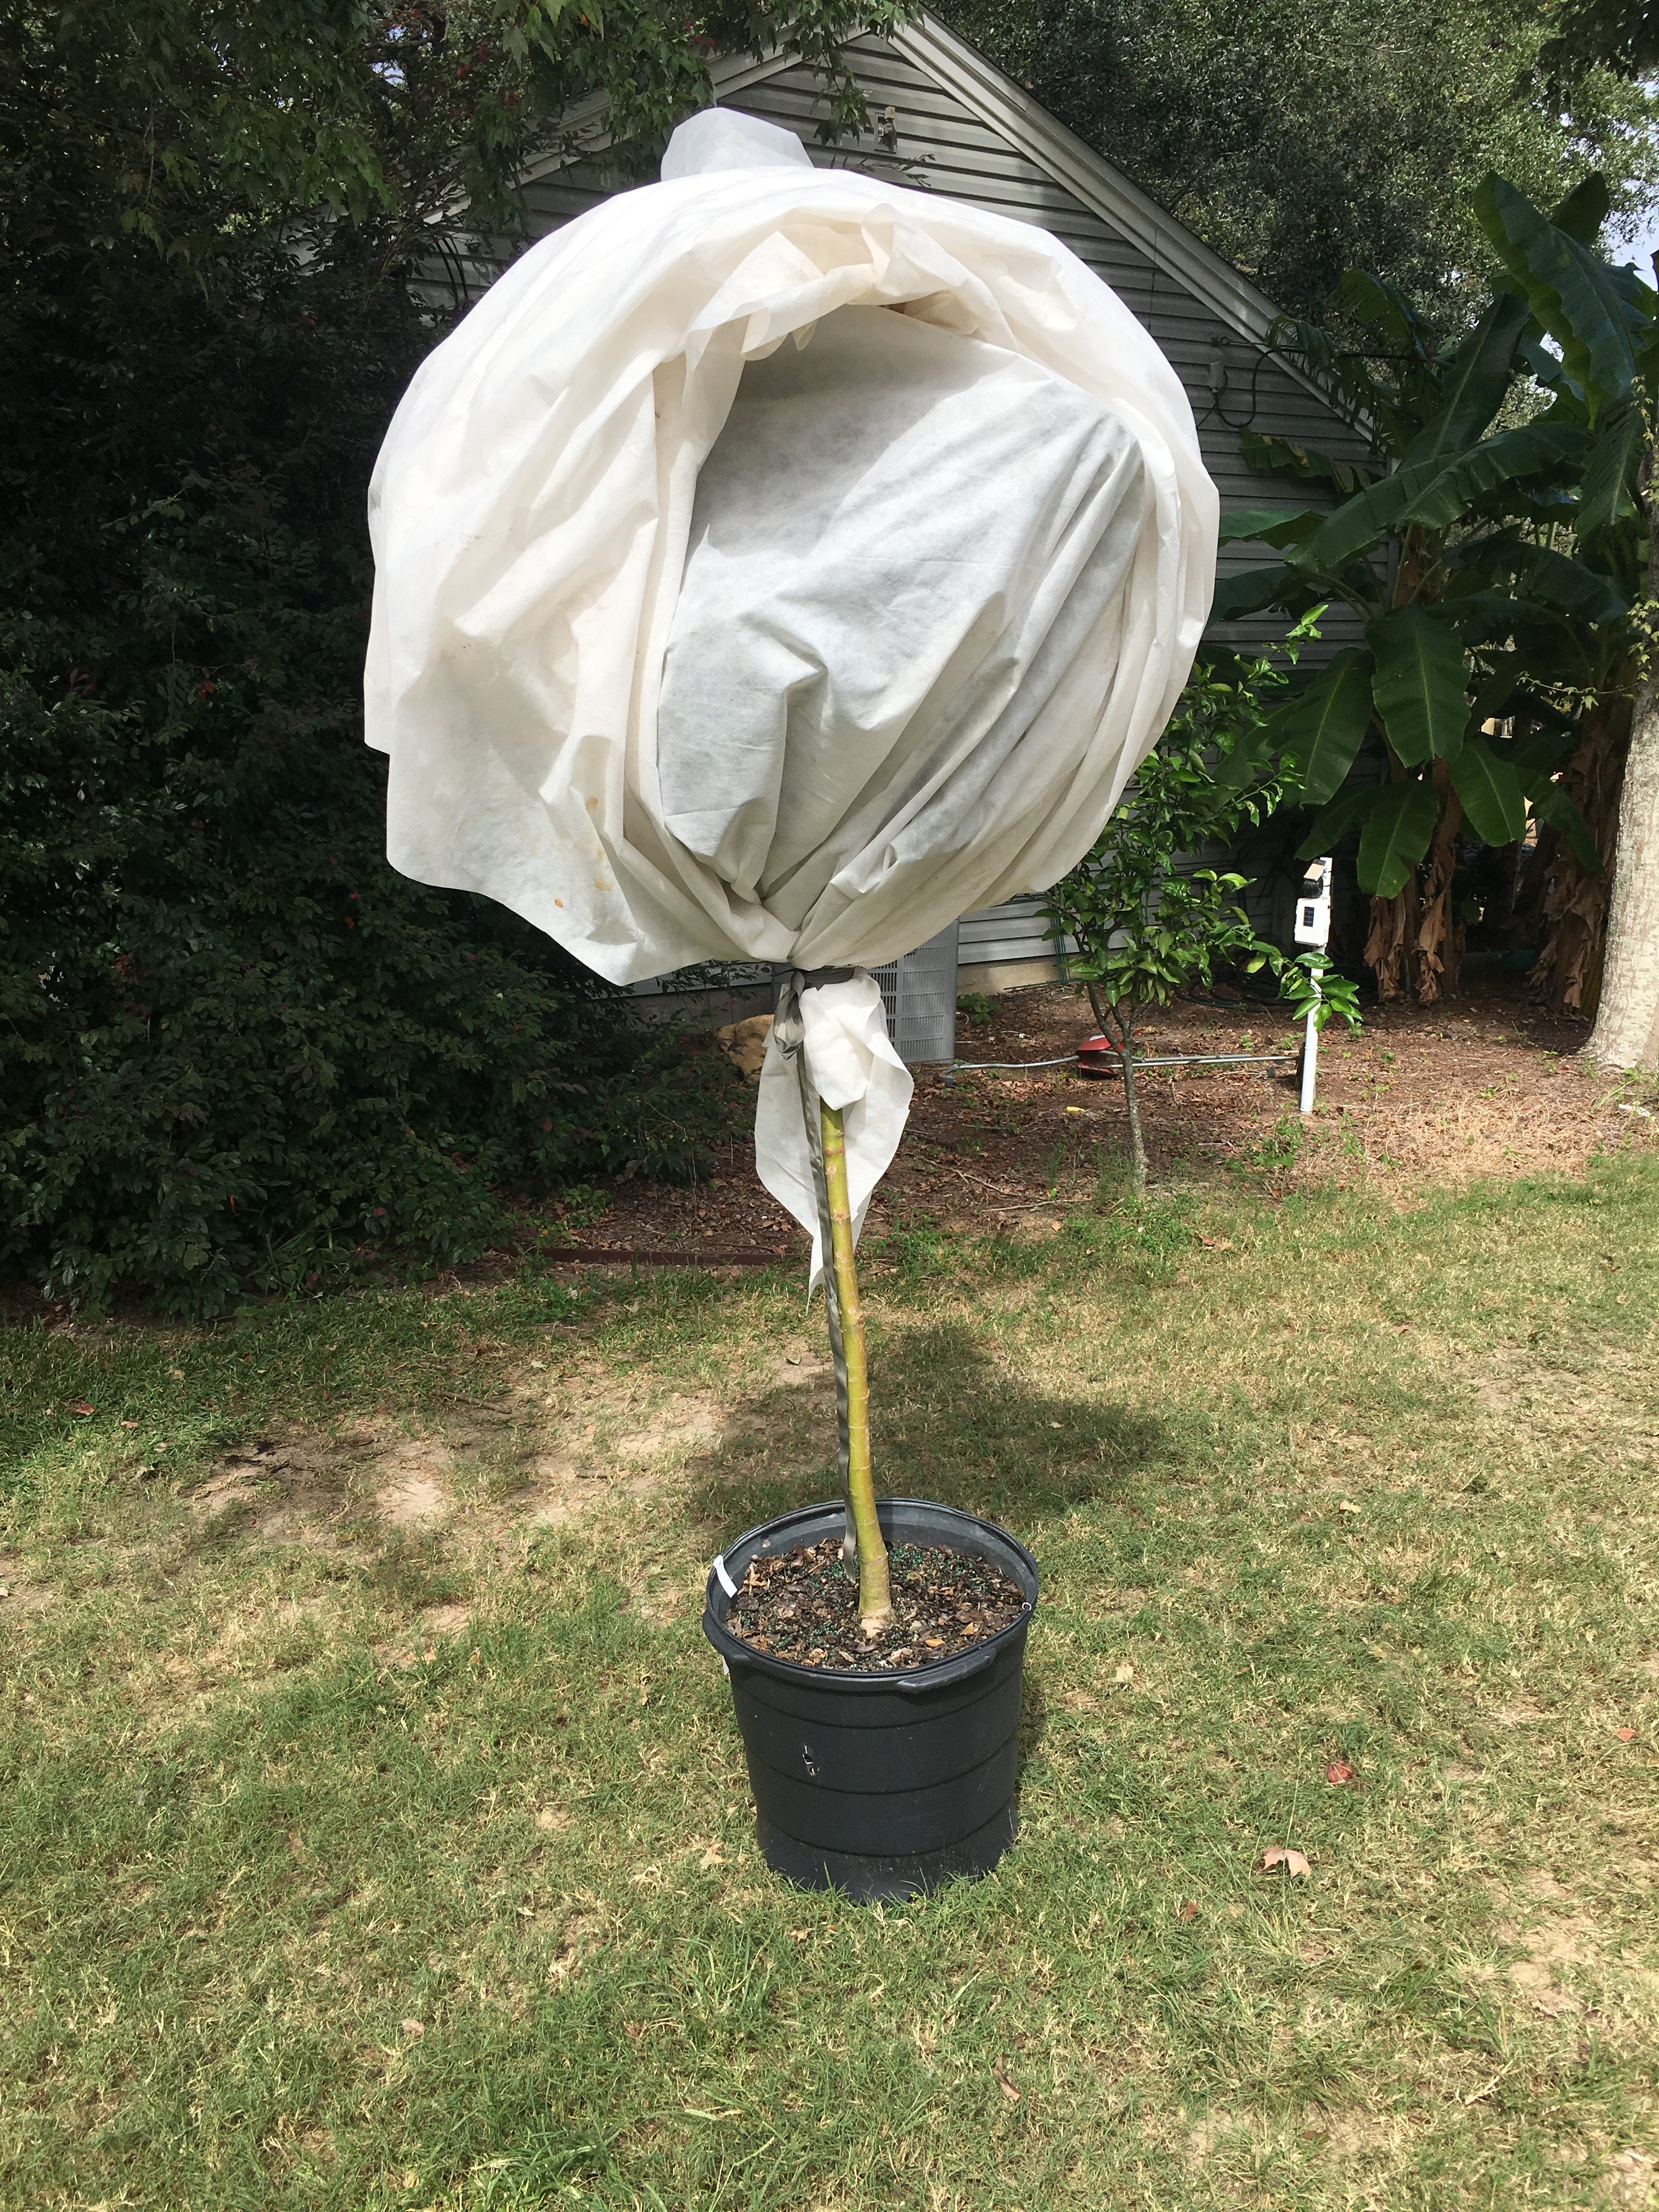
“Lollipop” trees will allow the heat from the ground to escape, giving the tree no cold protection. Photo by Jonathan Burns.
“It’s All About Covering the Leaves”
Many gardeners believe that simply covering the leaves of their plants will provide adequate protection. However, this can lead to what’s commonly referred to as “lollipop” trees, where only the foliage is covered, leaving the trunk exposed. This is problematic because cold air can still penetrate, and the heat rising from the ground isn’t captured effectively. To ensure proper protection, the plant cover should touch the ground all around the plant to trap heat radiating from the soil, providing insulation from below. For best results, choose a medium-weight frost cloth (about 1 to 1.5 oz/yd²) made from breathable polypropylene or polyester fabric. These materials offer excellent insulation, providing about 4 to 8 degrees of temperature protection, depending on factors like cloth weight, ground heat trapped, and wind conditions. Frost cloth also allows moisture and air exchange, which helps prevent overheating on sunny days.
“A Plastic Sheet Works Just as Well as Frost Cloth”
Throwing a plastic sheet over your plants might seem like an easy fix, but it often leads to more harm than good. Plastic is non-breathable, which can trap condensation and freeze on the plant’s surface. It also doesn’t insulate well, transferring cold temperatures directly to the leaves and stems. If you must use plastic in a pinch, make sure it doesn’t touch the plants directly and that it’s securely anchored to the ground to effectively trap warmth. Be sure to remove it in the morning once temperatures start to rise to avoid overheating.
“Covering Your Plants Alone is Enough”
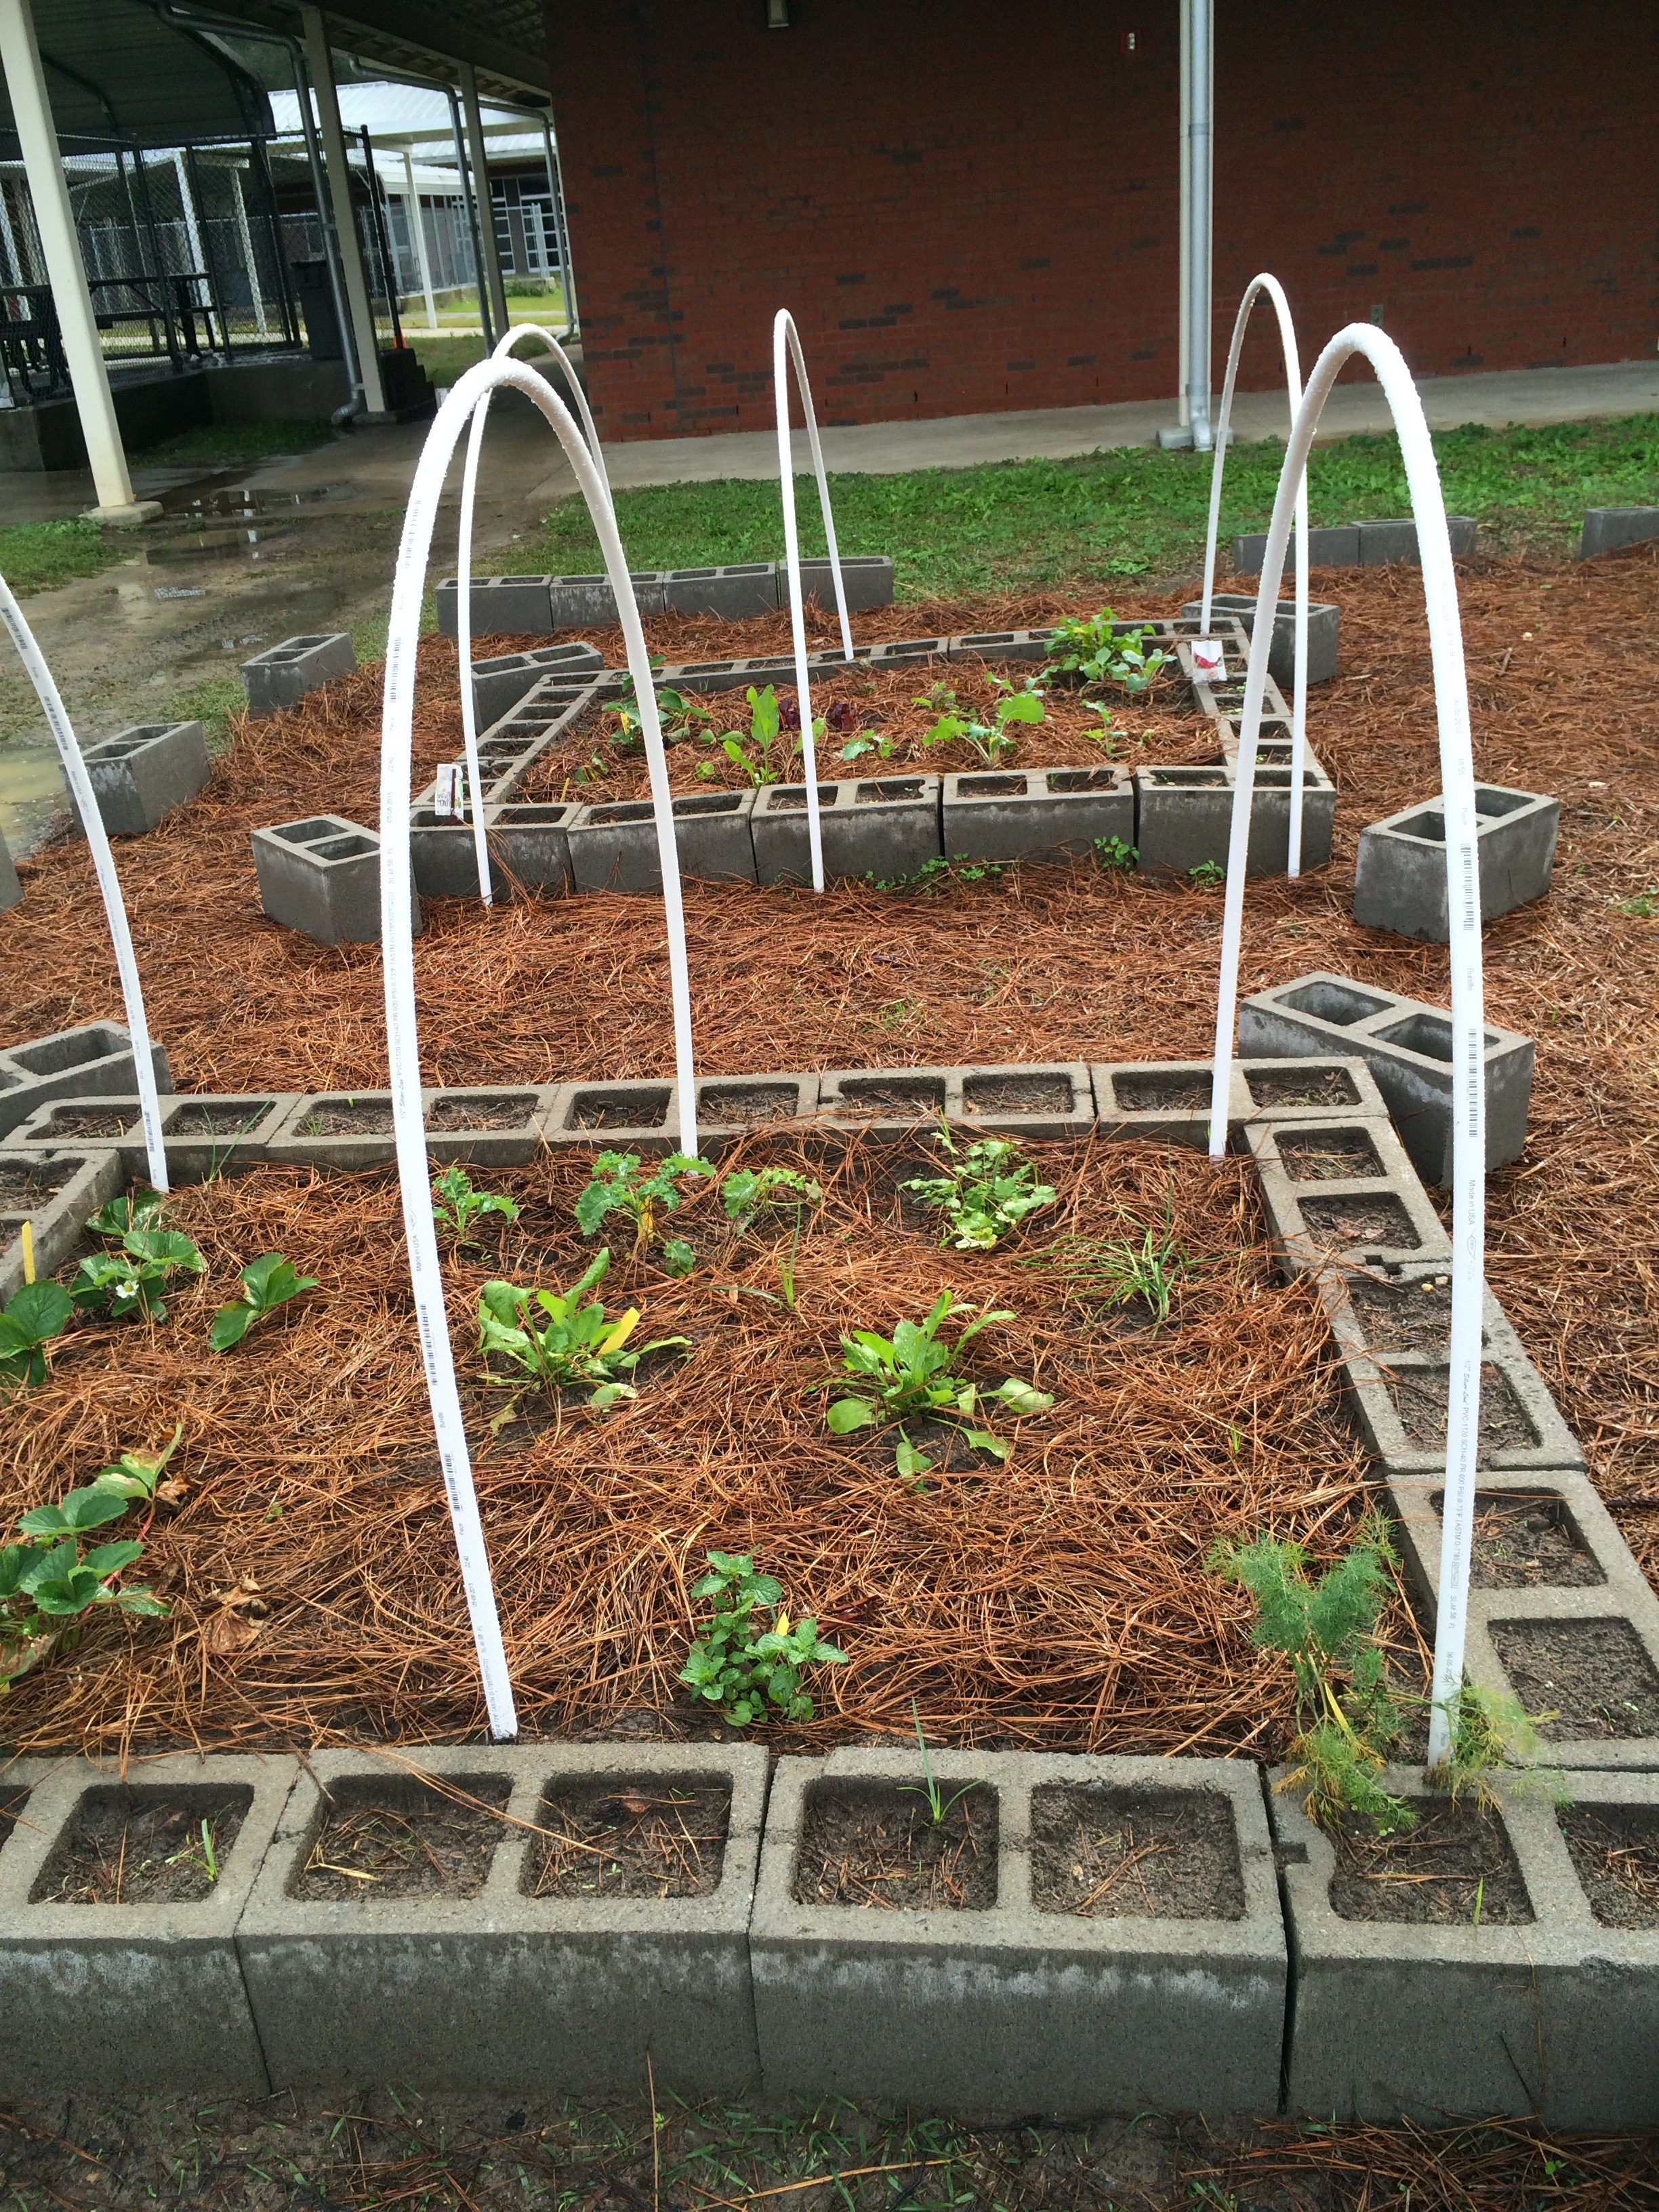
With PVC hoops ready to hold frost cloth and a thick layer of pine straw mulch, these raised beds are prepped for whatever winter throws their way. Photo by Molly Jameson.
While covering plants is crucial, sometimes additional steps can make a big difference. Mulching around the base of plants with a thick layer of pine straw or leaves helps insulate the soil and trap ground heat. It’s a small step that offers big protection to the roots and lower stems.
“Watering Plants Before a Freeze Doesn’t Help”
Watering the soil around your plants before a freeze is a good practice because moist soil retains heat better than dry soil. This can help keep the root zone warmer overnight. However, it’s important to focus on watering the soil rather than the leaves. Water on foliage can freeze and cause damage, so it’s best to keep leaves dry as the temperatures drop. A deep watering a day or two before the cold hits is ideal for giving your plants a fighting chance.
DIY Cold Protection Solutions
If expensive greenhouses and plant covers are out of your budget or you want to get creative, there are plenty of do-it-yourself solutions for protecting your plants:
Recycled Materials as Frost Protection
Old bedsheets, towels, or even buckets and cardboard boxes can be used in a pinch to cover smaller plants. Just be sure to anchor them down well, so they don’t blow away.
DIY Hoop Houses
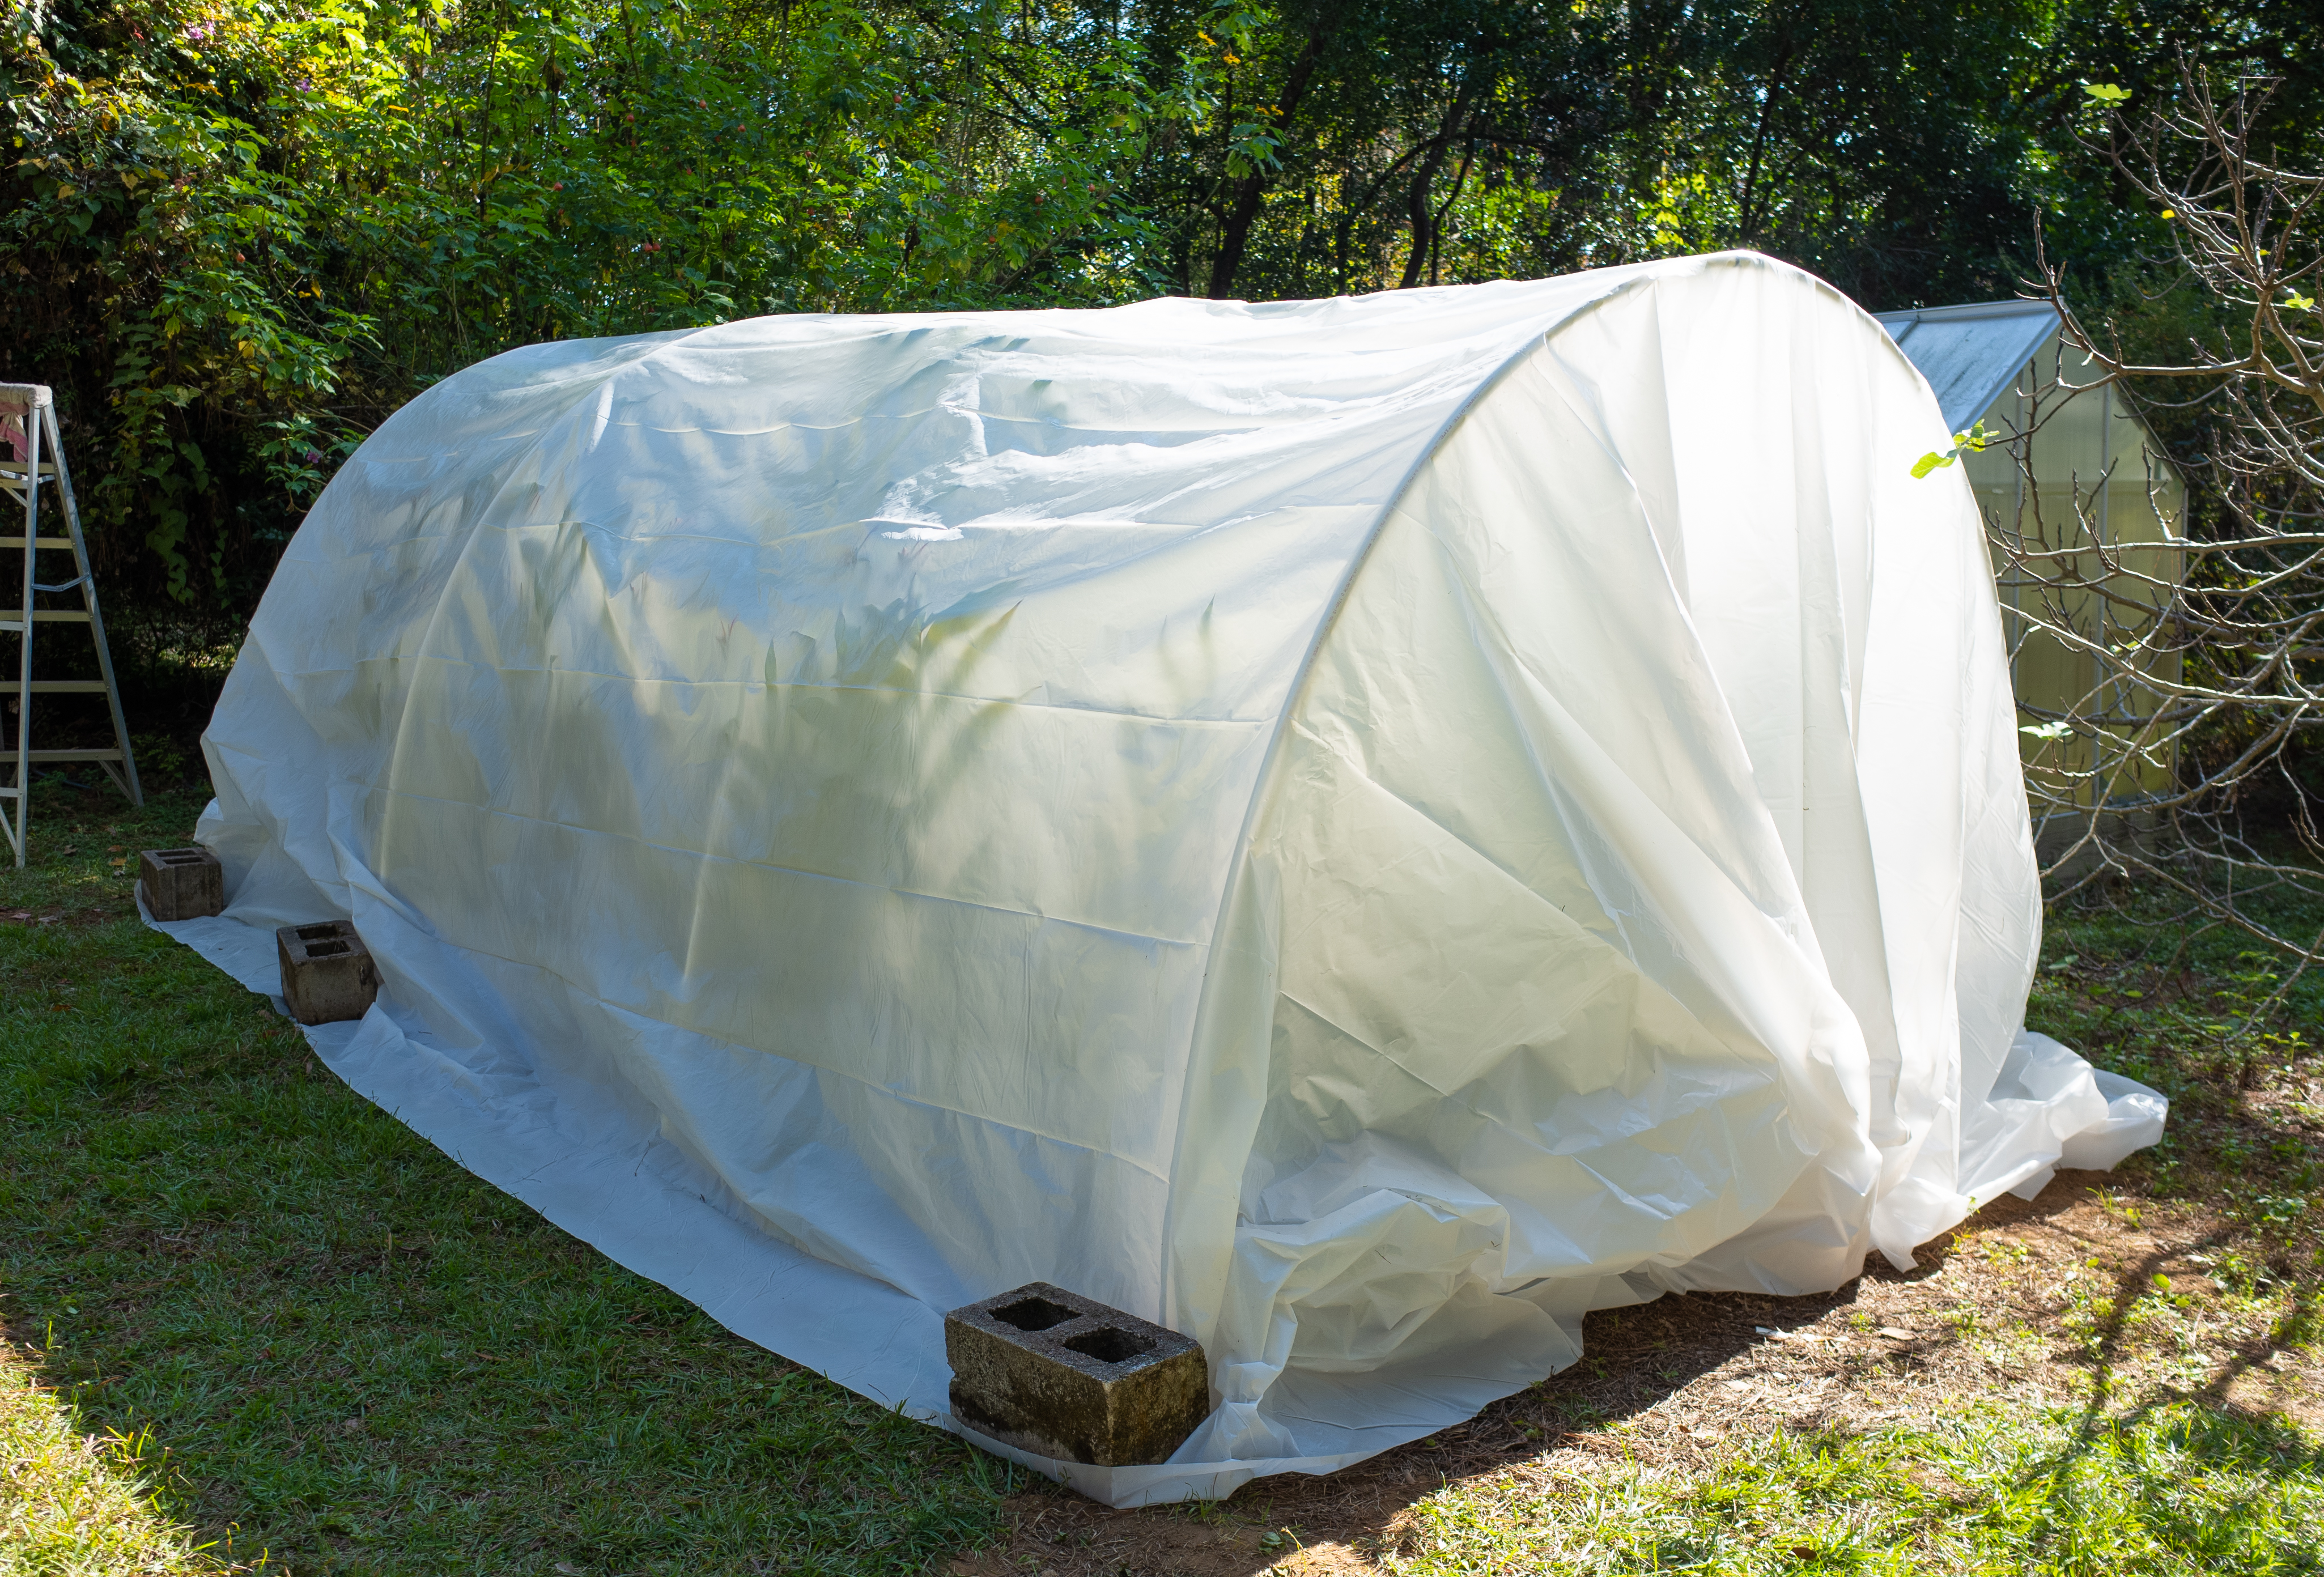
A temporary hoop house can be constructed using PVC pipes as the frame and polyethylene film as the covering to protect cold-sensitive plants during freezes. Photo by David W. Marshall.
For taller or sprawling plants, construct simple hoop houses using PVC piping with breathable frost cloth or lightweight plastic sheeting. Unlike placing plastic directly on plants, hoop houses create an air gap between the plastic and the plants, which helps trap heat from the soil while preventing direct contact damage. If using plastic, seal it tightly at night to trap warmth, and open it partially during the day to prevent overheating or excessive moisture buildup as temperatures rise. These low tunnels are perfect for garden beds or fruiting plants that need a little more room under cover.
String Lights for Added Warmth
For extra protection, consider using outdoor-rated incandescent string lights (not LEDs, which don’t produce heat). Drape the lights around or near the plant under the covering to create a gentle source of warmth, which can raise temperatures by a few degrees on especially cold nights. For fire safety, keep lights from direct contact with dry materials and use only moisture-safe, outdoor lights.
Windbreaks to Stop the Chill
In areas with open landscapes, cold winds can make frost damage even worse. Planting a hedge or using temporary barriers like hay bales or pallets can shield your garden from icy gusts and protect your more delicate plants.
One of the best ways to prepare for cold snaps is to plant cold-tolerant varieties suited to North Florida’s climate. Vegetables like collards, kale, and carrots, or perennials like rosemary and garlic chives, can withstand mild freezes with little effort. If you’re growing fruit trees, look for varieties with proven cold tolerance or dwarf varieties that are easier to cover.
With a little planning and a few simple techniques, you can protect your garden from unexpected cold spells and keep it thriving through our chilliest nights.
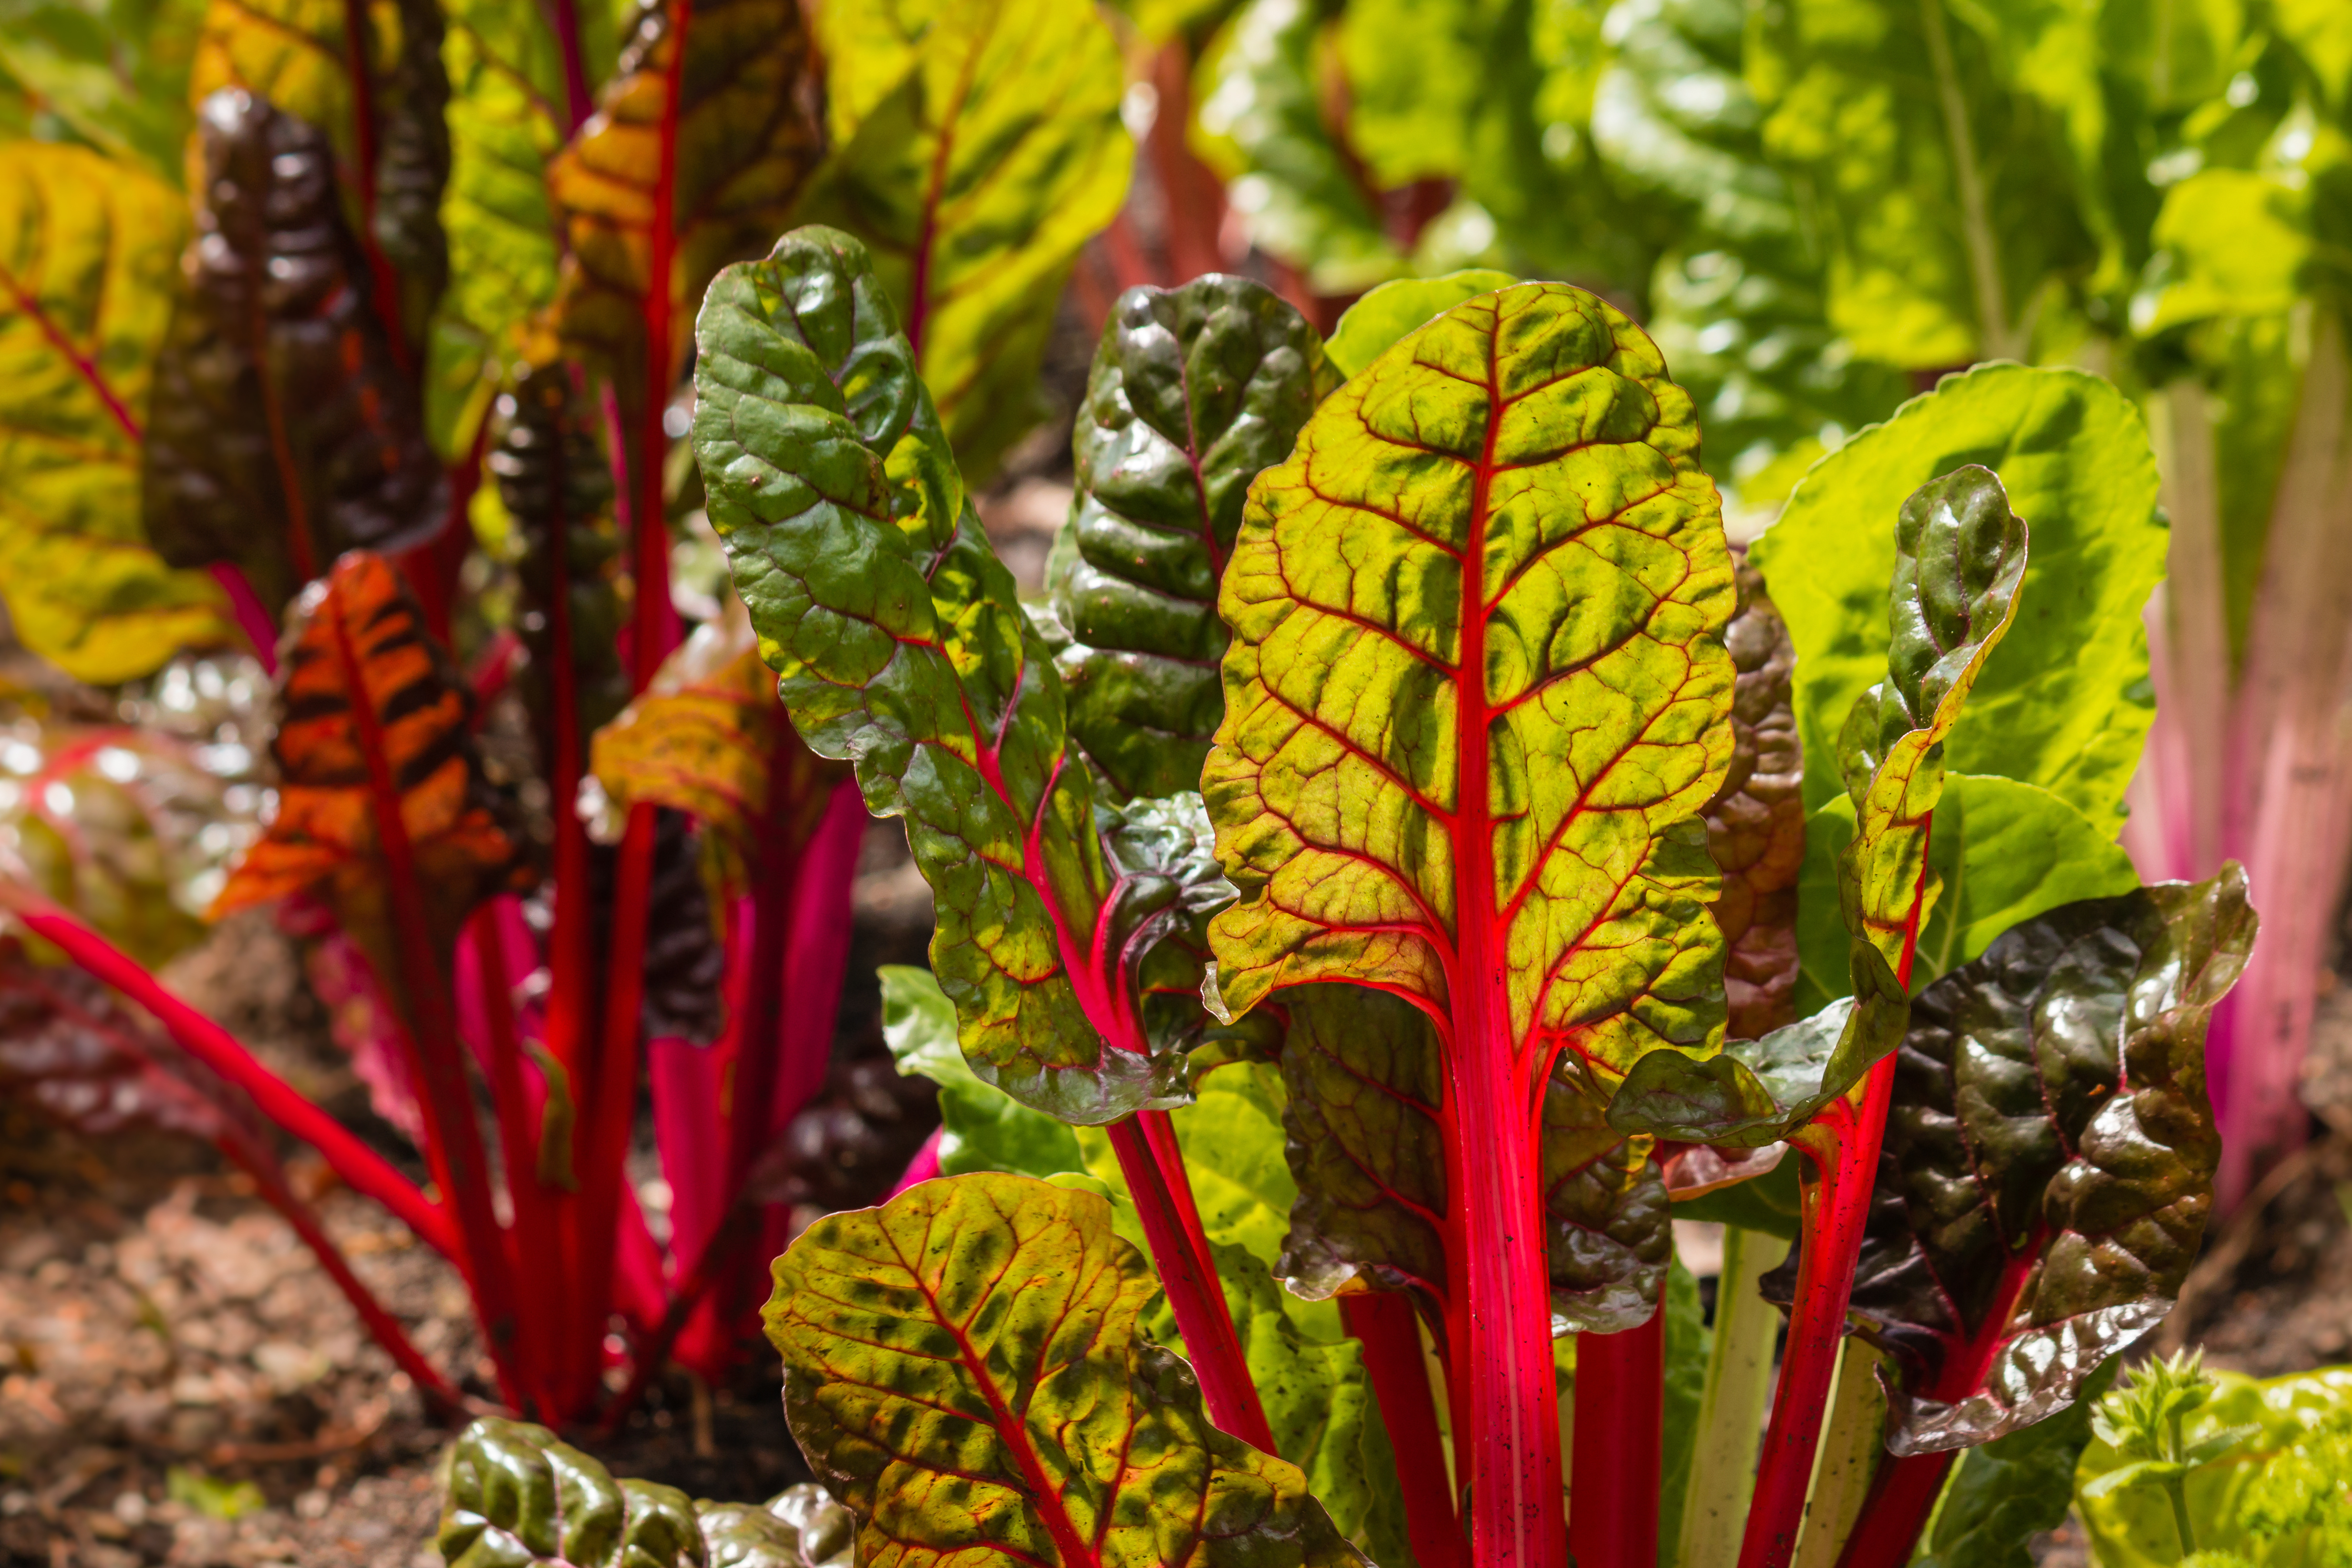
Swiss chard thrives in cooler weather, producing a continuous harvest of large, glossy, deep green leaves with colorful stems in shades of white, red, and yellow. Photo by Patrik Stedrak, Adobe Stock.
At first glance, beets and Swiss chard might seem like entirely different plants. Beets are known for their edible, bulbous root, while Swiss chard is grown for its large, leafy greens and colorful stems. However, both belong to the same species, Beta vulgaris, in the Amaranthaceae family, and their differences are the result of selective breeding over time.
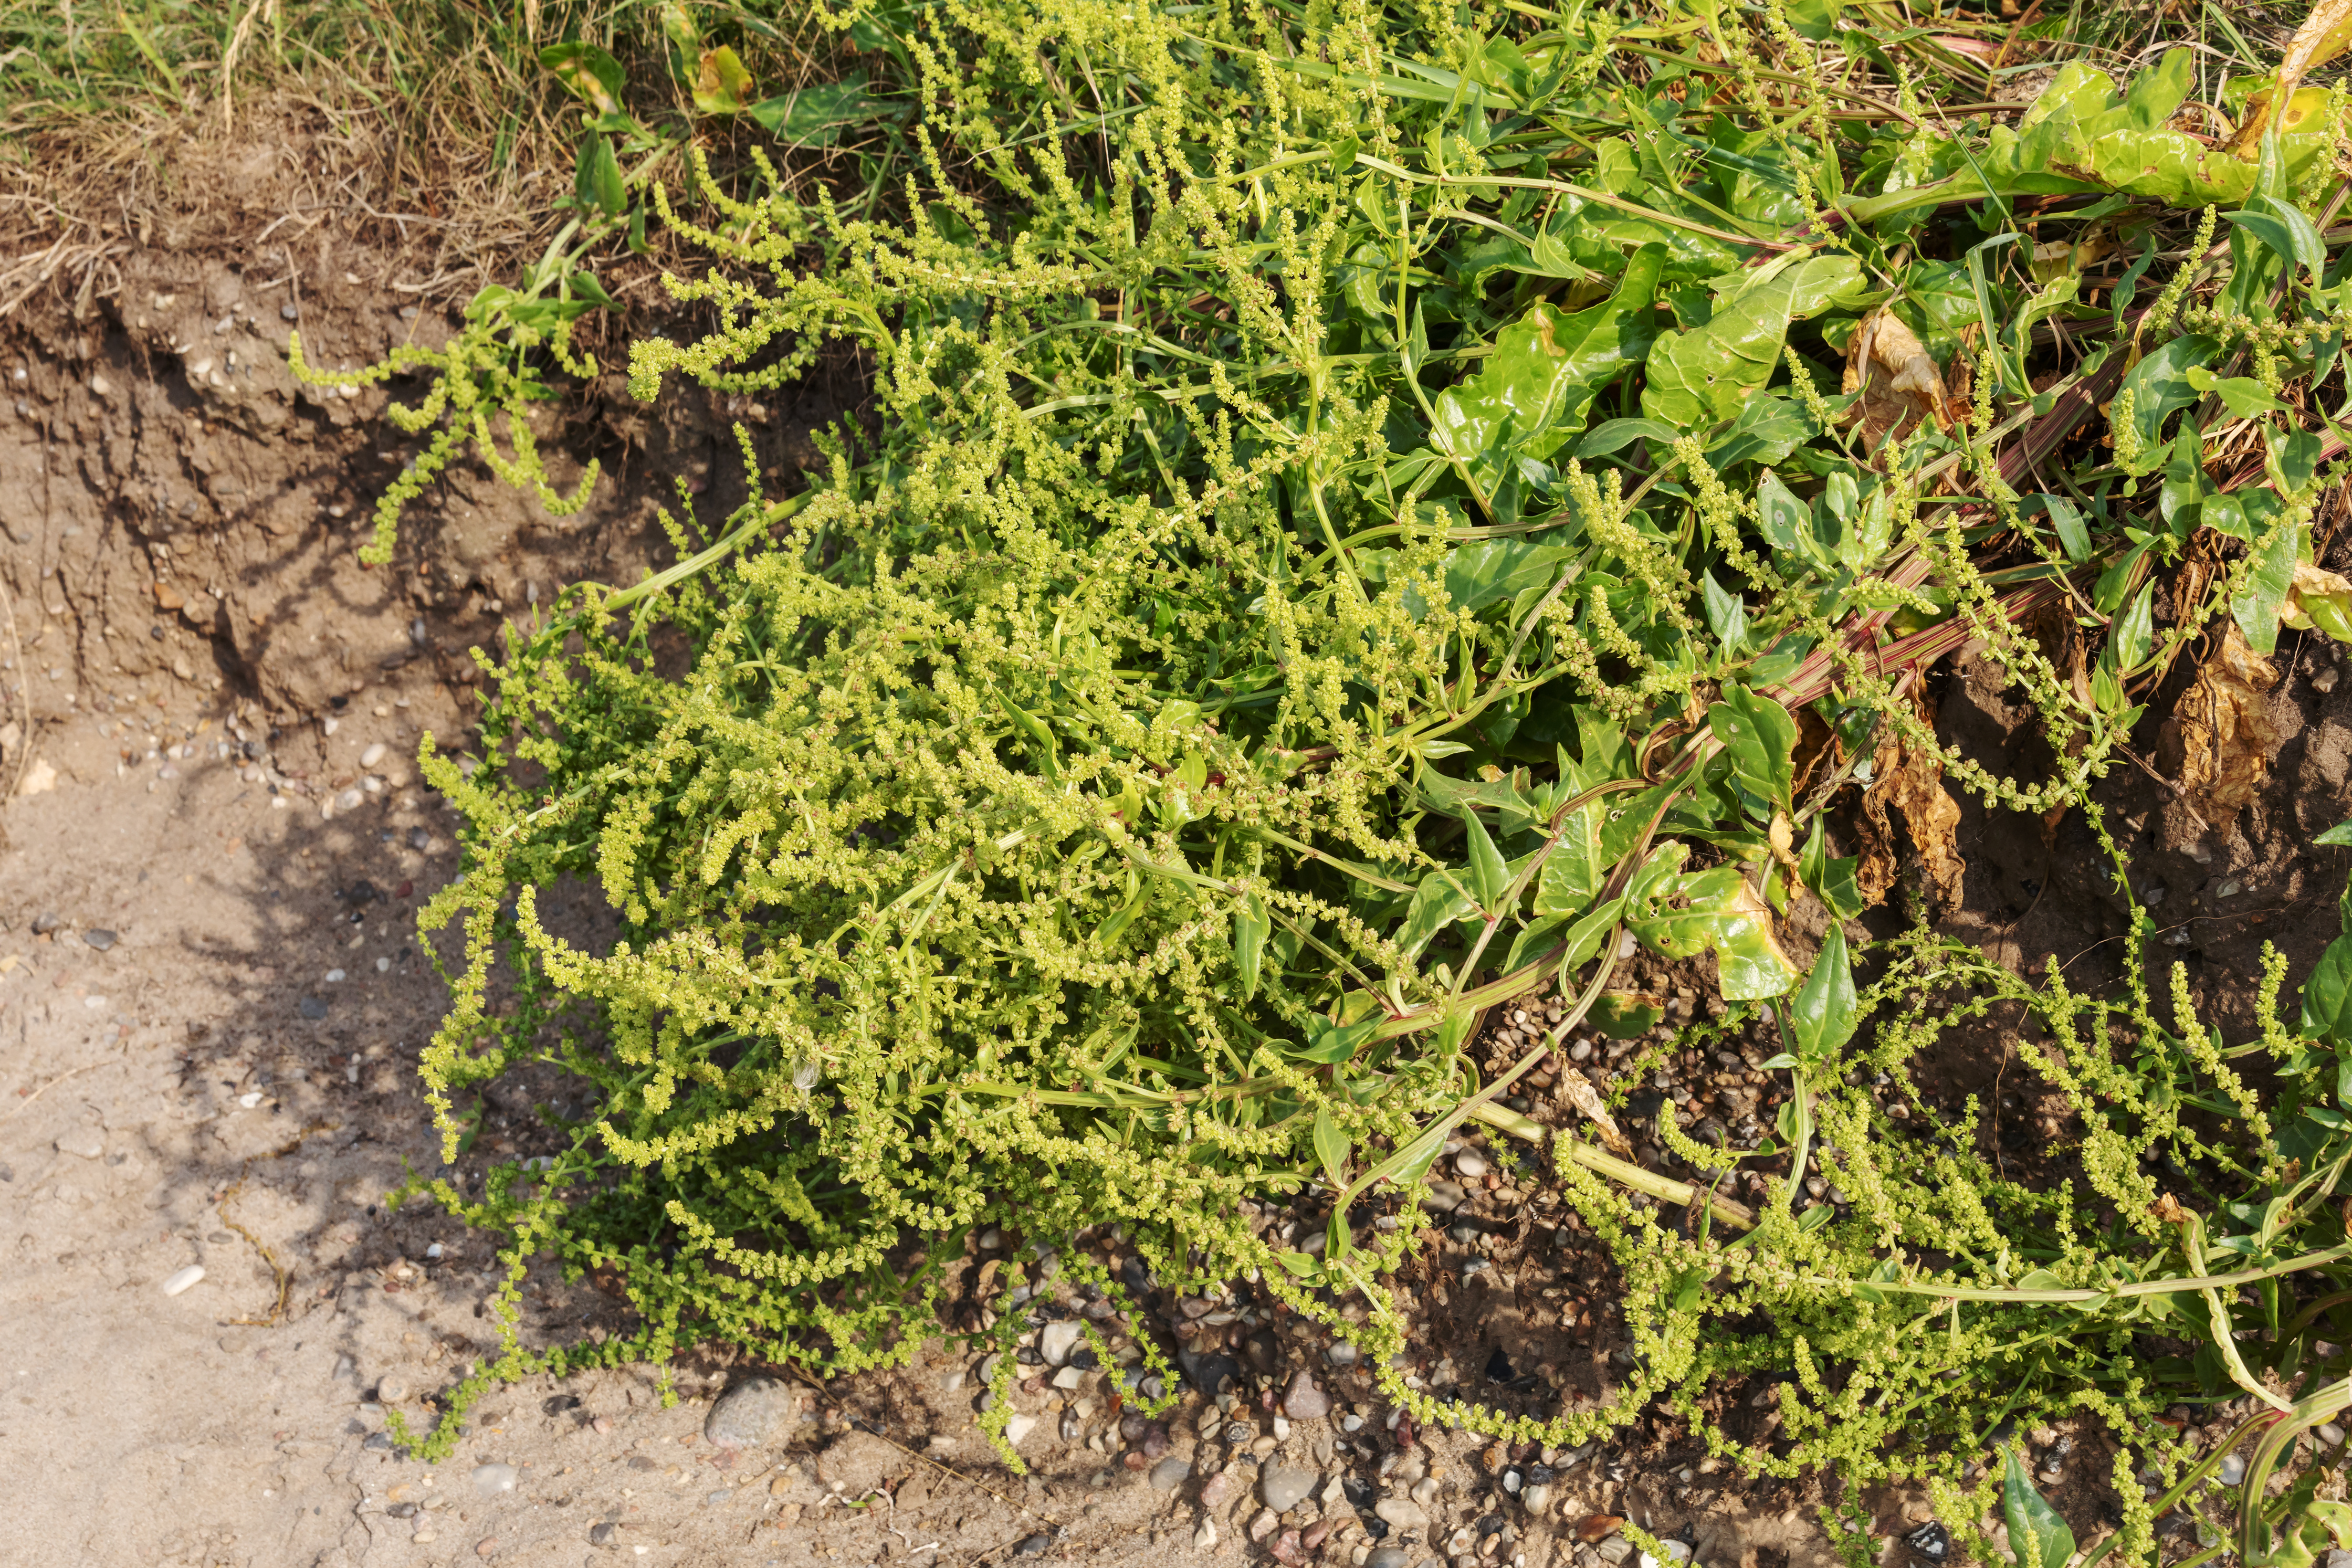
Wild sea beet (Beta vulgaris subsp. maritima), native to Mediterranean and coastal European regions, is the ancestor of cultivated beets and Swiss chard. Photo by Thorsten Schier, Adobe Stock.
Both beets and Swiss chard originate from the wild sea beet (Beta vulgaris subsp. maritima), a plant native to Mediterranean and coastal European regions. Ancient civilizations, such as the Greeks and Romans, bred beets for their enlarged roots, which eventually became the garden beets we know today. Despite its name, Swiss chard isn’t from Switzerland – it was also cultivated in the Mediterranean, bred for its nutritious leaves and stems. The “Swiss” name was added in the 19th century by seed catalog publishers to distinguish it from French spinach varieties.
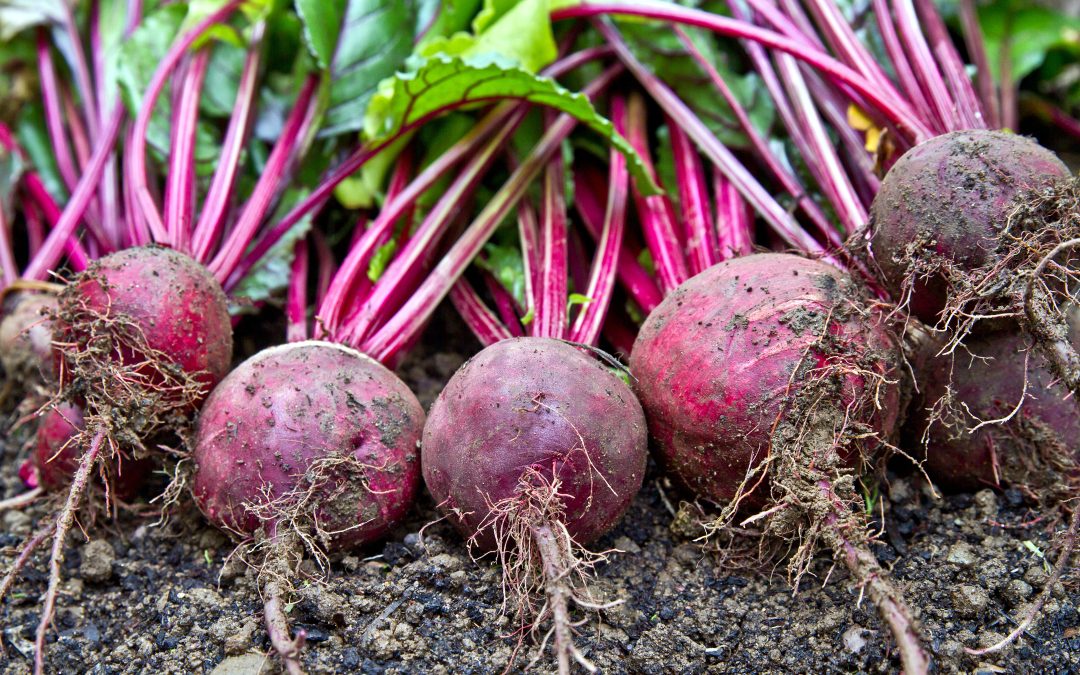
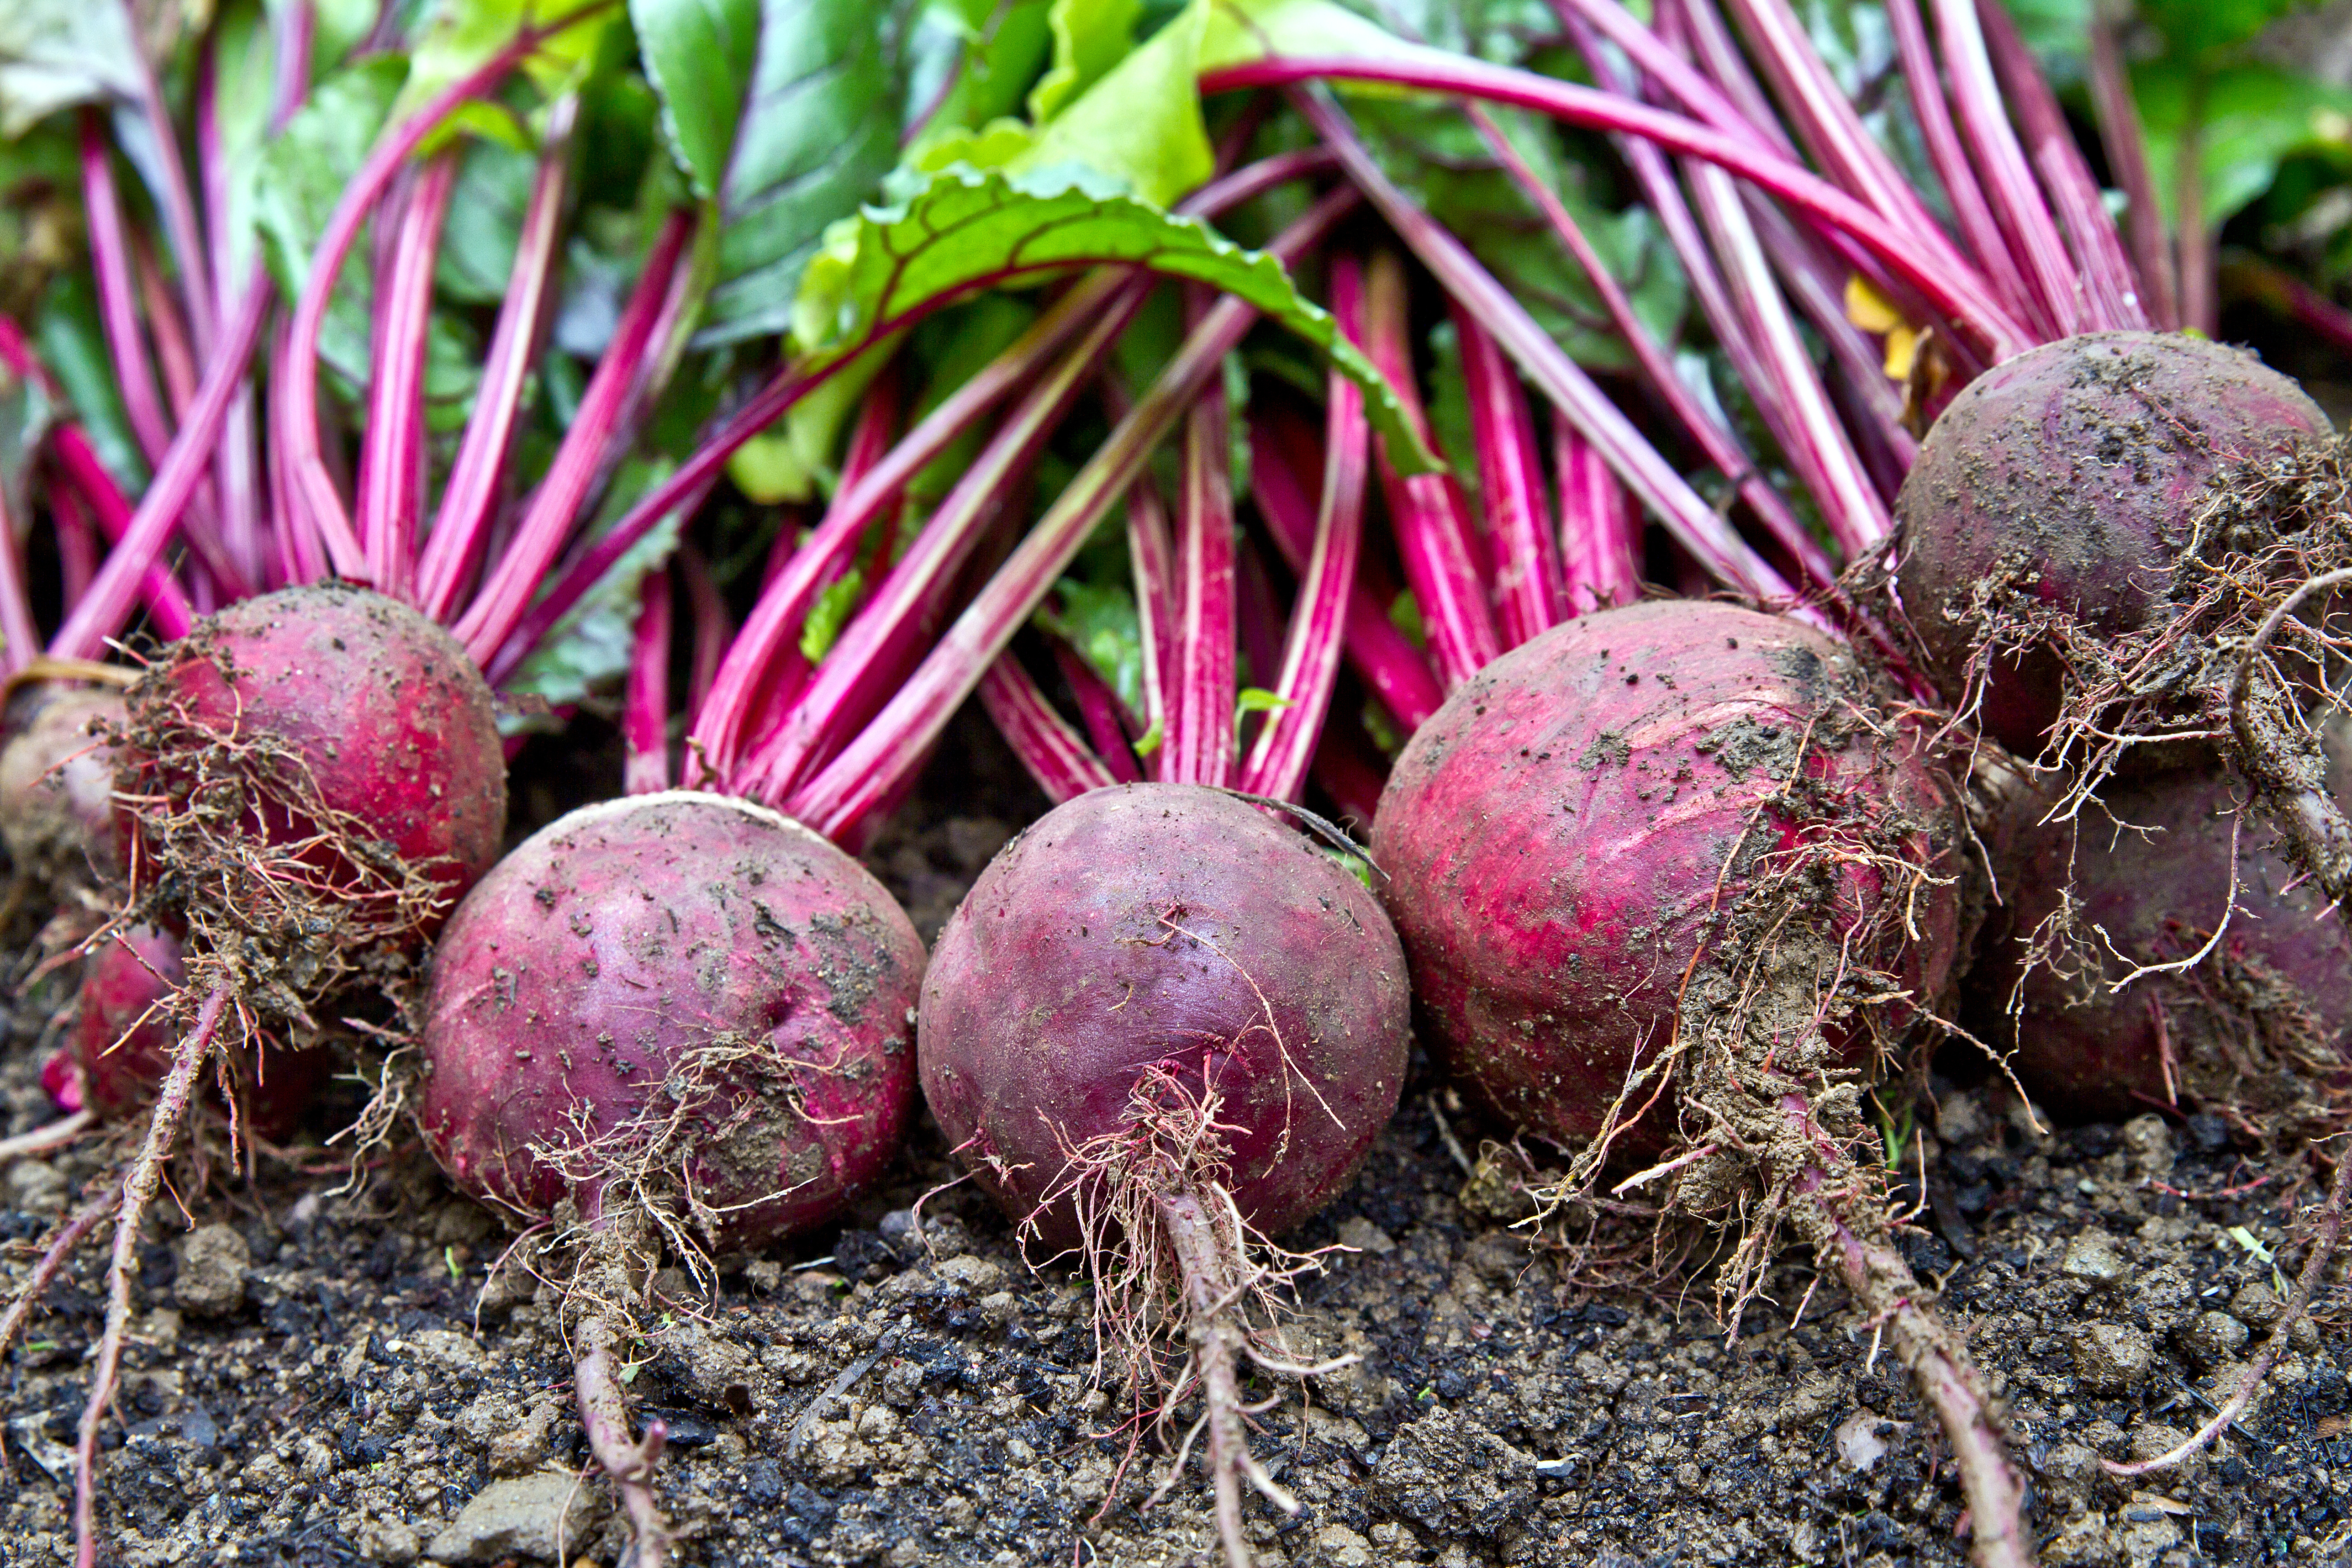
Both beets and Swiss chard are highly nutritious. Beets, which range in color from deep red to golden yellow, are rich in vitamin C, folate (B9), and essential minerals like manganese, potassium, magnesium, and iron. They contain betalains, antioxidants with strong anti-inflammatory properties, and are a great source of fiber and nitrates, supporting digestion and heart health. Beets can be cooked in a variety of ways, offering a sweet, earthy flavor that intensifies when roasted. They can also be boiled, steamed, or eaten raw in salads, pairing well with tangy ingredients like citrus and goat cheese.
Beets can be grown in the fall and winter in the Panhandle, yielding round, bulbous roots with a sweet flavor and earthy aroma. Photo by Clickmanis, Adobe Stock.
Swiss chard, with its large, flavorful leaves and vibrant stalks in red, yellow, and white, is packed with vitamins A, C, and K, as well as minerals like magnesium, potassium, iron, and calcium. It also contains antioxidants like beta-carotene, lutein, and zeaxanthin, which support eye health and combat oxidative stress. Its high levels of potassium aid in electrolyte balance and heart health, while vitamin K and calcium contribute to strong bones. Swiss chard can be sautéed, added to soups, or eaten raw in salads, with both the leaves and stems being edible.
Essentially, beets and Swiss chard are different forms of the same plant, bred for either the root or the leaves. This explains why beet greens are similar in flavor and texture to Swiss chard, though beet greens are usually smaller and more delicate. Beets provide the advantage of both edible roots and greens, while Swiss chard offers vibrant, nutritious leaves that can be harvested throughout the season. Both crops thrive in cooler weather, making them ideal for fall and winter planting in the Florida Panhandle.
UF/IFAS Extension Agents from across the Florida Panhandle had a great discussion about fall vegetable gardening in the latest episode of Gardening in the Panhandle LIVE! Fall Vegetable Gardening on September 12th. As usual, we had a great bank of questions supplied by our viewers and we want to follow up by sharing a recap of the discussion with reference links so you can dig deeper into the recommendations they provided.
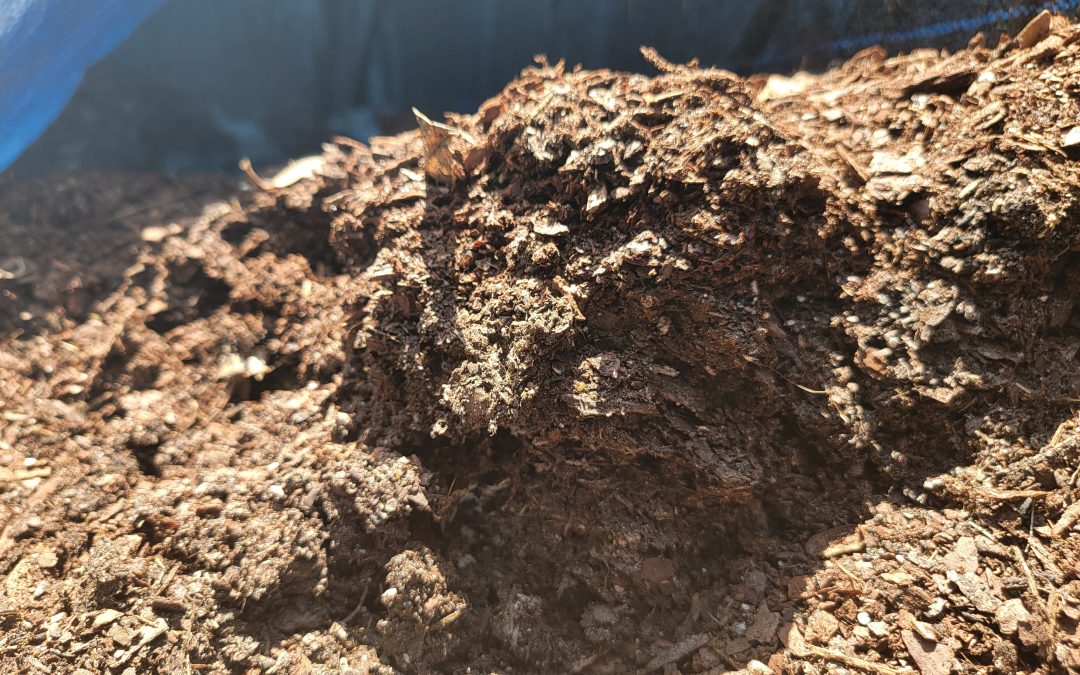
Managing your soil is easily the most critical task in gardening. Well-managed soils retain water and nutrients, making them available to your plants, thus enabling them to thrive. It may seem daunting, but with a bit of knowledge, you’ll quickly discover that soil management is much simpler than you thought. Soil management can be broken down into two major topics. The first is the physical properties outlined in a previous article, which may be found here. The second, and arguably more complicated of the two, are those chemical properties that drive plant growth.
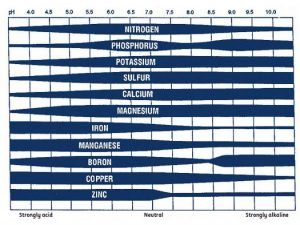
The What and Why of Soil pH
When considering chemical properties, you first need to look at soil pH. This is the measure of acidity or alkalinity within your soil profile. Innate soil pH is a product of the parent material from which your soil has formed, which tends to be slightly acidic on the Panhandle. Testing is the only accurate way to measure your soil’s pH level and buffering capacity. Your county extension office will be happy to facilitate that testing.
So, why is pH so important to plant growth? You’ll want to manage your soil’s pH for two reasons. The first is that soil acidity greatly influences the form that fertilizers and herbicides take in your landscape. Put into context, if you add fertilizers into the soil with an incorrect pH, that fertilizer may not dissolve in the water present. It will thus be unavailable to your plants. Here is another example of putting the right plant in the right place. Some, such as centipedegrass, thrive in a low-nutrition environment created by a low pH, whereas most vegetable plant species and many other landscape species only want a slightly acidic environment. Placing plants that will grow in the natural pH of your soil is a great way to ensure success in your gardens.
UF/IFAS photo
Ok, you’ve tested your soil and discovered it is not optimal for the plants you want to grow. Fear not, as you can take some actions to adjust your soil’s inherent acidity levels. Keep in mind that any changes will be very localized and are temporary. To raise soil pH, you must apply some version of calcium, colloquially called liming. Your calcium source should be based on soil testing, as different types may also add needed nutrients. Most notably, dolomitic lime will change soil pH while adding magnesium. Soil testing will also tell you to provide the buffering capacity of your soil, which will dictate the amount needed to adjust the soil properly. Soil pH may also be lowered through elemental sulfur additions, but this process is very difficult and may become detrimental to plant growth through repeated application. In this instance, it may be preferable to address via plant selection versus pH adjustment.
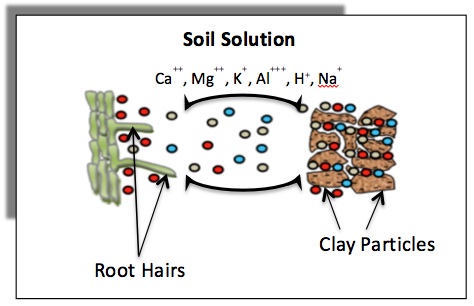
How Does Soil Hold Onto Water and Nutrition
The other main consideration for soil chemical properties is cation exchange capacity or CEC. Now, this can be a very complicated topic. Put very simply, it refers to your soil’s ability to retain both water and applied nutrients. It’s important to understand as it holds components critical to plant growth in the root zone of said plants. This happens as there are negative charges on the surfaces of clay particles in your soil that latch onto the positive ions of applied fertilizers.
Photo: University of Georgia Extension
So, what about soils low in clay, such as those in Florida? Organic matter will help in this arena. It mimics clay’s properties and will retain nutrients better than your native soil. However, this is not a pass to add endless amounts of compost, as they come with a nutritive load that must be considered in your garden management plan. Adding 1-3 inches worked into your plant root zone is more than enough when establishing new gardens.
Understanding your soil is critical when gardening anywhere. In Florida, where soils are less than optimal, understanding how water and nutrients are retained and used by your plants will help avoid much frustration. For more information on soil management refer to these IFAS documents, or contact your local extension agent for additional information on this and any topic regarding your gardens and more.
by Mark Mauldin, Agriculture & Natural Resources, Washington County
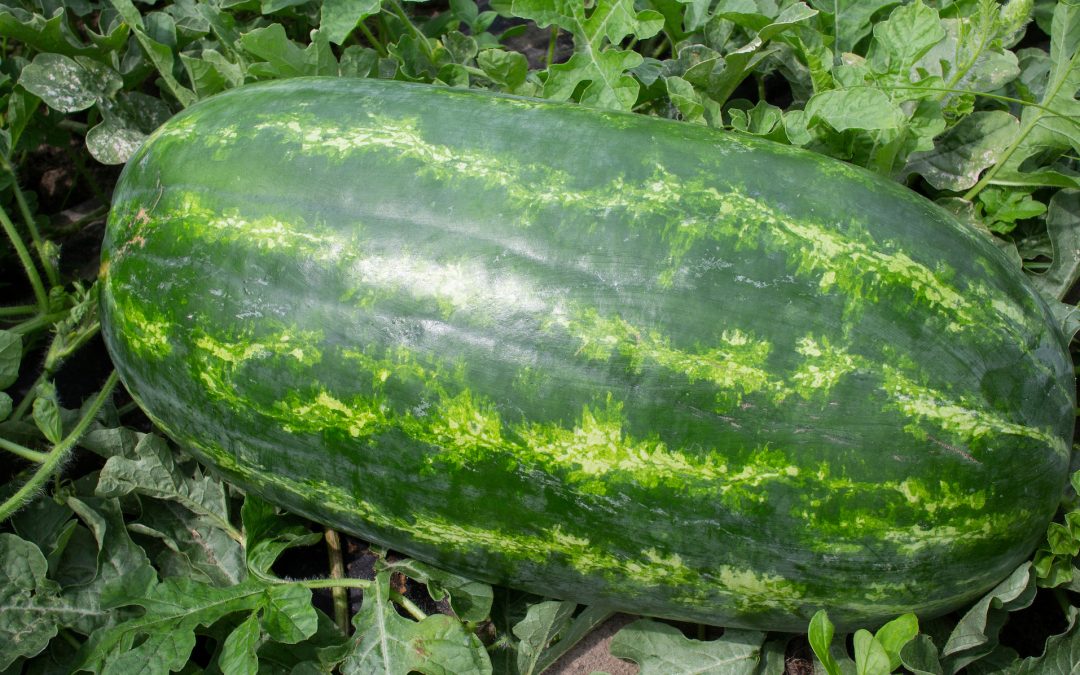
Calling all watermelon producers, commercial growers to gardeners. Planting season is just around the corner. As you plan your plantings don’t forget about the Big Melon Contest at the Panhandle Watermelon Festival. The festival and the contest have been summer-time staples in the Central Panhandle for decades. Don’t miss out on the opportunity to showcase your skills as a grower and a shot at some serious prize money.
To make the contest fun for growers of all types of watermelons, a winner and first runner-up will be recognized for each variety of melon entered in contest*, with the heaviest melon in the class winning $50 and the first runner-up $25. In addition to the variety classes, there will be a $300 grand prize paid for the overall heaviest melon in the contest and $200 for the first runner-up.
New for 2024, the Junior Jubilee Contest is a melon growing competition open only to kids 18 and under. To participate in the Junior Jubilee Contest, kids must sign-up this Spring (3/4/24 – 3/22/24). Upon signing up, kids will receive seeds and growing guide. Through the Spring the kids will grow their own melons and then bring their 2 biggest back, to enter the contest at the festival. All kids who bring a melon back for the contest will be recognized at the melon auction and prizes will be given for the 10 biggest melons, including a $200 grand prize for the biggest melon. For more information or to enter the Junior Jubilee Contest contact the Washington County UF/IFAS Extension Office. Click the link below for more details about the Junior Jubilee Contest.
There is no cost to enter a melon in the contest. However, melons entered in the contest are donated to the festival and will be sold via auction. Proceeds of the auction will go to help off-set the costs of next year’s festival. All contest melons will be on display during the festival and their variety, weight, and grower will be announced during the auction.
The 2024 Panhandle Watermelon Festival will be Friday June 21st and Saturday June 22nd in Chipley, FL. The Friday night concert festivities will be held at Jim Trawick Park and Saturday’s events (including the melon auction) will be at the Washington County Ag Center. The auction will begin at 12 noon on Saturday.
Melons being entered in the contest will need to be delivered to the Washington County Ag Center prior to the festival. Melons will be received and weighed-in at the Ag Center Wednesday 6/19 between 8am and 4pm and Thursday 6/20 between 8am and 7pm central time. If you have melons that you would like to enter in the contest but are unable to deliver during the specified times, contact Mark Mauldin prior to 6/19 to make arrangements. Pick-up may be possible, to the extent practical, provided arrangements are made in advance.
The Washington County Ag Center is located at 1424 Jackson Ave. Chipley, FL 32428.
If you have any questions regarding the contest, contact Mark Mauldin at the UF/IFAS Extension, Washington County Office (850-638-6180 or mdm83@ufl.edu).