by Ashley Stonecipher | Apr 20, 2022
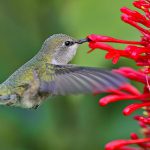
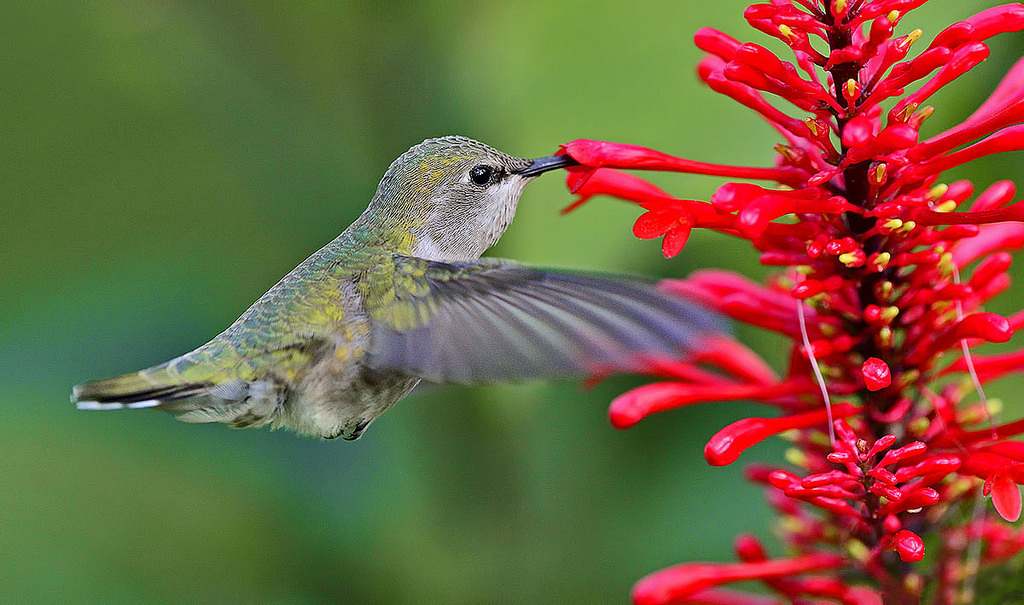
A hummingbird gathering nectar from a firespike (Odontonema strictum) flower. Photo Credit: Knolllandscapindesign.com
Do you enjoy watching a variety of birds and butterflies in your landscape? Have you ever watched squirrels get into the birdfeeder? Children may learn about wildlife by watching through a window. Food, water, cover, and space are four essential elements that will create the best habitat for wildlife. Food could be as simple as adding feeders to attract birds to your yard but having a habitat that sustains them is important. Florida wildlife and Florida native plants evolved together and are often interdependent. It is a must to understand what sustains the species you are wanting to attract to your area. Different species prefer different food/plants. Insects also provide birds a food source for their young.
Water can be bird baths, man-made ponds, and natural bodies of water such as streams, lakes, ponds on your property. When relying on a bird bath for your water supply make sure the water is fresh and clean. Shallow water (1-1.5 inches) is better than deep (over 3 inches). Birds like sloping sides and a textured surface; they prefer to walk into water rather than dive in headfirst. Place the bath 5 to 10 feet from a protective cover like shrubs or trees. This needs to be close enough for the birds to be able to reach safety if there is danger from predators. A small outpost for birds to land on near the bath can help them check for predators before heading to the bath.
Cover will provide a place to raise young and should have vertical layers for animals to use for safety, shelter, and nests. Examples of cover that could be added to the landscape are snags that give food for woodpeckers and nesting perches. Or build your own nesting boxes that are species specific for owls, bees, and bats. All bats eat insects and substantially reduce the number of nocturnal insects in a neighborhood.
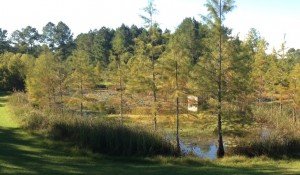
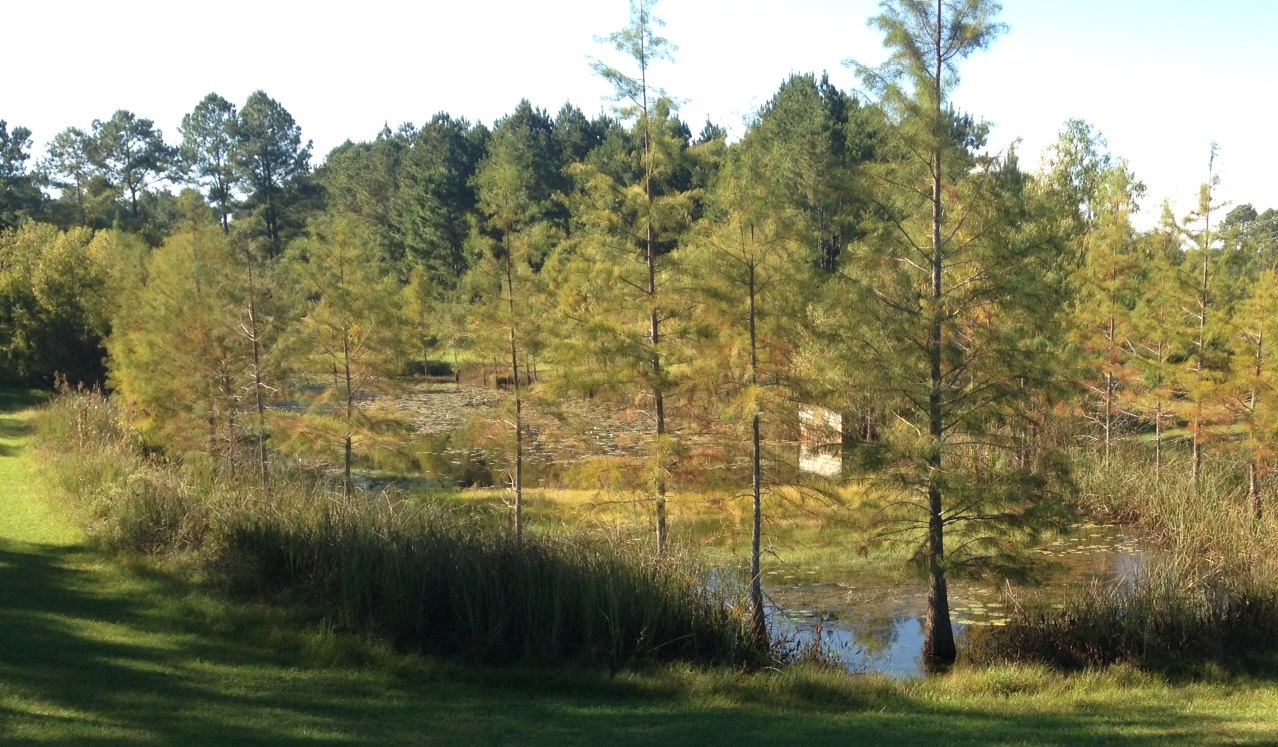
The permanently wet detention pond lined with cypress trees and sawgrass also provides habitat for fish, birds, and reptiles. Photo Credit: Carrie Stevenson, University of Florida/IFAS Extension – Escambia County
Lastly it is important to think of your space. Create large patches of good habitat that span several landscapes or consider working with your neighbors to link the backyard habitats and create a larger area. It is all about the “Right Plant, Right Place” concept and understanding the area you are working with and the possibilities. When you go into the last step of planting and attracting wildlife have a plan and know what you would like to attract. Do your research on what you will need for that wildlife and use your resources, ask your local extension agent for ideas and suggestions!
Many plants in our native landscape provide much of what attracts wildlife and provides them with at least one of the four essential elements. The article “Planting for Wildlife Habitat!” will give you some ideas of plants and trees that do well in the North Florida area and will help to attract the wildlife you desire!
by Joshua Criss | Apr 20, 2022
Getting your landscape set up in the spring is an in-depth process. Trees are pruned, soil amended, and the plantings have been accomplished. Now you have exactly the look you want. It would be easy to sit back, open a beverage of your choice, and watch it all come together. Don’t get comfortable just yet, there is a group of pests eyeing your plants. Insects come in many forms, looking to make a meal from your hard work. Do not fear though, there is a straightforward way to protect yourself from these creatures. Integrated pest management is a system of four control approaches designed to mitigate pest damage while minimizing impact on the environment.
Identification is Key
Before any of these steps may begin pests must be identified. This starts with scouting your landscape via visual inspection. Insects leave signs of their presence wherever they visit. Be sure to inspect every part of your plants including the underside of leaves. Here is where you will find insect eggs or frass (excrement) which are tell-tale signs of activity. Once discovered, you need to identify your specific pest. Insects are identified by their mouth parts when assessing plant damage. Chewing insects remove leaf material (think caterpillars and grasshoppers). Speckled leaves of brown and yellow is a symptom of piercing/sucking insects such as aphids. Other times you may only find damage after the fact where black leaves turn out to be covered in sooty mold. The sooty mold grows on the excreted honeydew of aphids, whiteflies. Once identified, it is up to you to decide if the level of damage is worth it and how you would like to approach limiting the damage.
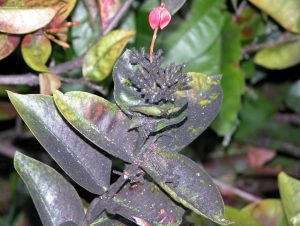
Sooty mold on Ixora Photo Credits: UF/IFAS Kim Gabel
The First Three
The first strategy is cultural control wherein you optimize the environment in which your plant grows. Improved drainage and removal of plants susceptible to insect attack are excellent examples. You should also look into the lifecycle of insect pests to remove anything that will provide habitat. The next control is mechanical. This methodology is the most work intensive but comes with the least environmental impact as insects will be removed by hand. Biological control is like mechanical control except that removal of the pest is left to natural predators. There are many, but birds and lady beetles are best known. Creating habitat for these will help keep insect populations to an acceptable level with the bonus of falling into Florida friendly landscaping philosophies.
Chemicals are Not the Bad Guy
Chemical control is the final approach. Some may be surprised to find this here, but it is effective. With the above in place, you may find there are still insect issues. Chemicals will be your next step but do not feel put off by this approach. Research the best products for your situation and follow the instructions on the label to the letter. The label is designed to reduce risk to you and the environment while providing effective pest control.
Insect pests have plagued gardeners since the first person intentionally planted anything. Controlling these pests using a multipronged approach is the optimal way to reduce damage to your plants while minimizing environmental impact. Following the methodology in this post will bring a pest free landscape that you and your family will enjoy. For more information on integrated pest management, see these Ask IFAS documents, or contact your local extension agent for additional information on this and any topic regarding your gardens and more.
by Daniel J. Leonard | Apr 14, 2022
Lost in the sea of more popular and showy spring-flowering landscape shrubs like azalea, spirea, and the like, is an underused, exceedingly tough, and currently flowering Florida native shrub that is deserving of a spot in your landscape, Walter’s Viburnum (Viburnum obovatum).
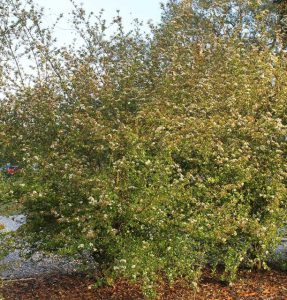
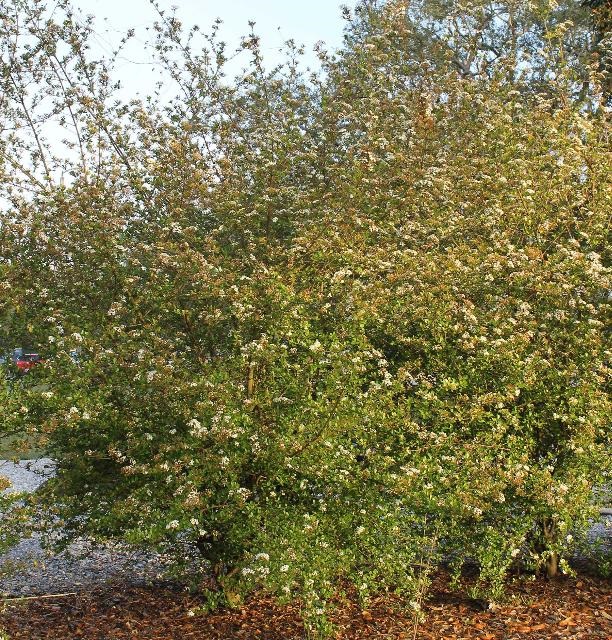
Species Walter’s Viburnum (Viburnum obovatum). Photo Credit: UF/IFAS.
Walter’s Viburnum, named for English-born botanist turned South Carolina farmer Thomas Walter, who first described the species in the late 1700’s, is a spring-flowering mostly evergreen shrub/small tree native to the Southeastern United States. In its native environment around hammocks, swamp edges, and near-river forests beneath the understory of canopy trees, Walter’s specimens often grow to around 15’ in height, live for more than 50 years, and spread slowly into loose thickets from their extensive underground root system. After covering themselves in clusters of small, showy, pollinator-attracting white flowers in spring, Walter’s produces small reddish-black fruit that are magnets for birds and other small wildlife in summer.
Though this tough, low-maintenance nature and gorgeous pure white March flower display should have seemingly enabled Walter’s to be a standout in the landscape, Walter’s Viburnum languished in popularity for many years as it didn’t fit into most landscapes in its wild form. Not too many folks in modern landscape situations are looking for a thicket forming, unkempt-looking tree! However, with increased breeding efforts aimed at selecting superior dwarf varieties and the rise in interest in using low-maintenance native plants, Walter’s has rapidly gained market share on traditional flowering shrubs in nurseries and yards in across Florida.
These newer dwarf varieties of Walter’s, including standouts like ‘Mrs. Schiller’s Delight’ and my personal favorite ‘Whorled Class’, only grow 3-4’ in height and make an excellent replacement for more commonly planted small foundation shrubs. Why plant a disease-prone Boxwood when you can have a disease-resistant native dwarf Walter’s Viburnum? Why allow your landscape to be saddled with drab Dwarf Yaupon Holly when you could get the same basic effect AND an awesome flower show by planting a dwarf Walter’s? Tired of having to constantly prune those Loropetalum or Azaleas to keep them from hiding the house? I think you know the answer by now; plant a slow-growing dwarf Walter’s!

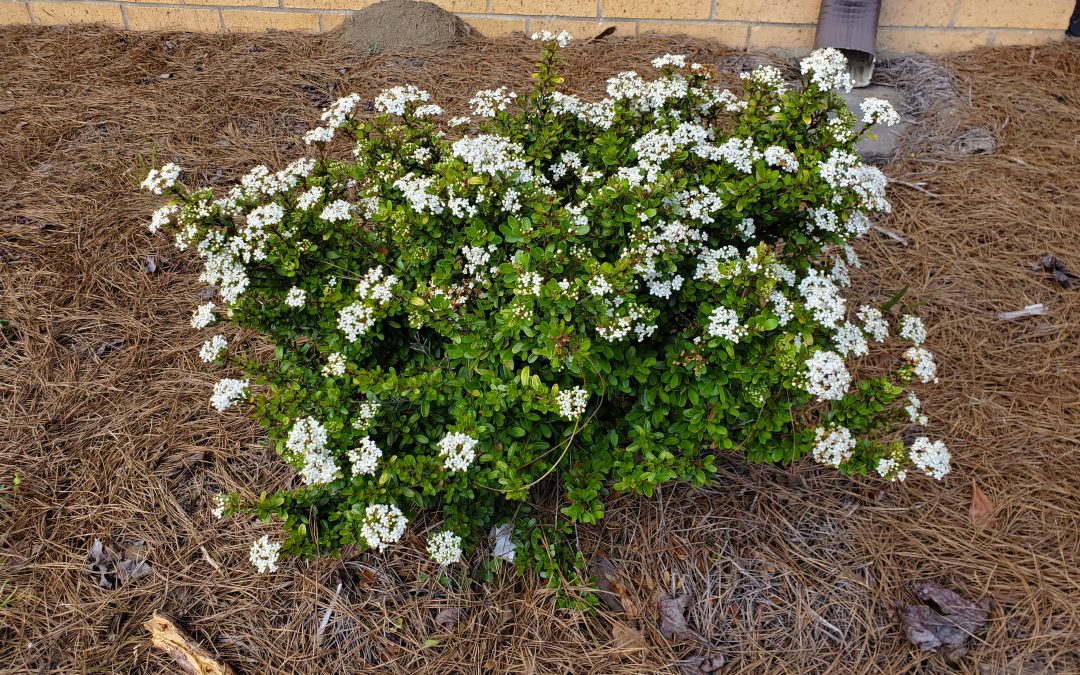
‘Whorled Class’ dwarf Walter’s Viburnum in a Calhoun County, FL landscape. Photo Credit: Daniel Leonard, University of Florida/IFAS Extension – Calhoun County.
Both the “wild-type” Walter’s Viburnum and the newer dwarf cultivars are about as low maintenance landscape shrubs as one could want. Though Walter’s normally occurs in shaded understory situations with moist, acidic soils in the wild, it is very adaptable to all manner of landscape situations. The species takes full sun extremely well but will also thrive with shade. It will tolerate very moist soil but, once established, is drought tolerant. I fertilize my Walter’s plants each spring with a general purpose, balanced garden fertilizer to boost growth, but there are many plantings of the species that get by without supplemental fertilizer. Finally, due to the dwarfing nature of the previously mentioned Walter’s cultivars, constant shearing won’t be necessary to maintain a pleasing shape, but they do respond well to pruning when a haircut is needed!
If you’ve been looking to include something a little bit different from the standard spring flowering fare in your landscape but also require your plants to be tough adaptable, try Walter’s Viburnum, especially the cultivars ‘Whorled Class’ or ‘Mrs. Schiller’s Delight’. They’ll be attractive, low-maintenance additions to nearly any Panhandle landscape for years to come! For more information about Walter’s Viburnum or any other horticultural or agricultural topic, contact your local UF/IFAS County Extension office. Happy gardening!
by Ashley Stonecipher | Apr 14, 2022
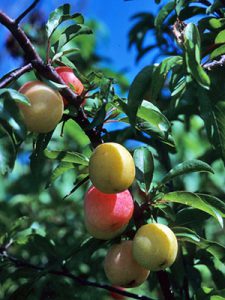
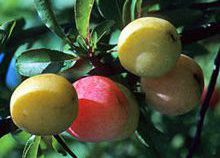
Humans and wildlife find Chickasaw plums delicious. Photo credit: University of Florida/IFAS
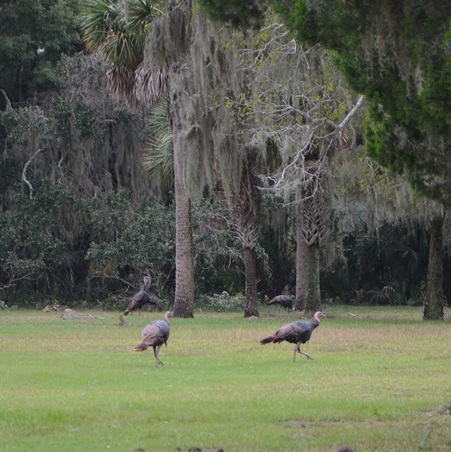
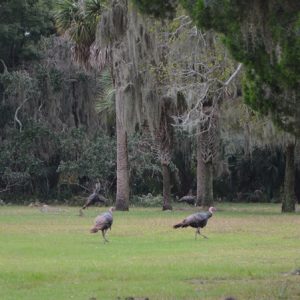
There are many trees that can be a great addition to your space that will provide one of the four essential elements food, water, cover, and space. Persimmon thrives in a wide variety of conditions from wet or sandy soil to lowlands or uplands. Deer actively seek out persimmon trees, eating every fruit that is within reach as well as leaves and twigs in the fall and winter. Other wildlife that enjoys the persimmon trees are squirrel, fox, bear, coyote, raccoon, opossum, and various birds including wild turkey. The nectar from flowers provides a significant food resource for pollinator species like bees. These trees are either male or female and at least 3 should be planted together to ensure pollination. Live Oak is a solid tree that many people in this area said survived Hurricane Michael. It provides acorns for food and deep shade. Black Cherry is a host plant for Red-Spotted purple and Eastern Tiger Swallowtail. Bitter fruit matures during the summer to fall and is used for jams, jellies, or liqueurs. Fruits are highly prized by birds and other wildlife. Wild cherry cough syrup is made from the reddish-brown, fragrant and bitter inner bark. Yaupon Holly is another tree that birds and wildlife feed on the berries throughout the winter when food is scarce. Leaves have the highest caffeine content of any other plant native to North America. Some other trees to consider are Basswood, Red Cedar, Florida Hop tree, Elderberry, Slippery Elm, Sassafras, Chickasaw Plums, and the Toothache Tree.
While yard work is important to maintain an attractive lawn, if done successfully, the resident can spend quality time in other pursuits like watching the wildlife from the front porch.
There are many plants that for the longest time I thought were only a nuisance to the everyday gardener, but I truly learned the phrase “Right Plant, Right Place” with these next few plants that I am going to mention. Smilax is a vine with thorns that is nearly impossible to get rid of and gets into our shrubs and landscape. But in the right place smilax provides shelter and food for wildlife. It has a blue-black berry in the spring and provides medicine, food, and dyes for humans. There are 2 species of smilax that are only found in the panhandle. Dog Fennel is native to fields, woodland edges, and roadsides and can be used as an insecticide and antifungal. It has feather like leaves that are very aromatic. Blackberry can grow wild and it is an all-around amazing plant for vitamins. It’s fruit can help fight cancer and decrease cardiovascular disease. Leaves and bark are useful medicinally and leaves can be used as a tea. The last plant I must mention is the Beauty Berry. It is known for its late fall bright purple fruits called drupes, not berries. This plant attracts birds for food in the fall time in North Florida. The drupes can also be used for jams and jellies. Other plants that are great for attracting wildlife are Spiderwort, Dewberry, and Spanish Needle.

by Stephen Greer | Apr 14, 2022
We all must begin somewhere in horticulture, including growing yummy vegetables of your own to enjoy and share. This activity, or is it passion, has a long colorful history while most of the time provides an exceptional food source. It can be a bit daunting the first time you try and maybe even the others to follow with determining what, when, where and how to plant for a future harvest.

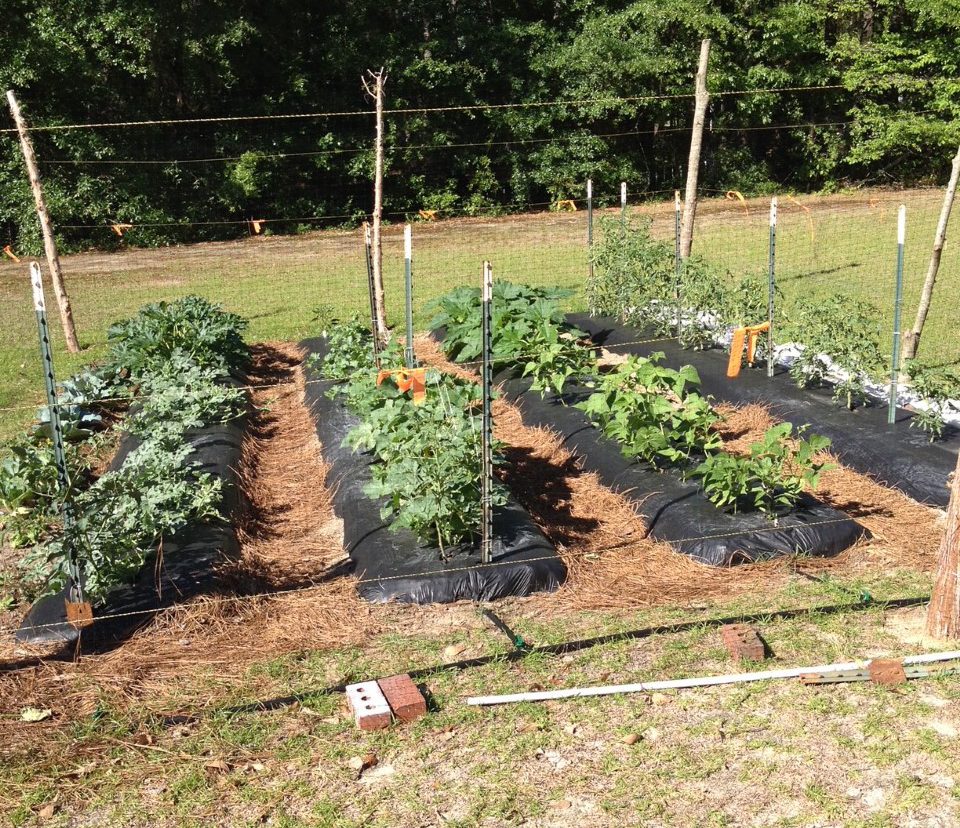
Raised Bed Vegetable Garden with Drip and Black Plastic. Photo Credit: Stephen Greer, UF/IFAS Extension – Santa Rosa
Selecting that convenient site in full sun easy with access to check on the plants progress. Things you will need to consider are the number of hours of direct sun the garden area will receive. Most garden vegetables will need at least eight hours of sunlight. Many of the leafy greens can be grown with less than eight hours with the least amount of sun at six hours. All others will need eight or more hours of sunlight. Water is a critically important part of successful vegetable garden. Too little water and the plants will not survive well and produce little and too much will reduce or end plant production. A general rule is one inch of water a week during the growing season. This can come from rain or irrigation and likely is a combination.
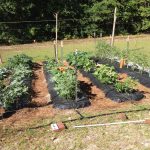
Mid-Spring Production with Managed Irrigation. Photo Credit: Stephen Greer – UF/IFAS Extension – Santa Rosa
Planning your garden before doing anything else is critically important. Take out a paper and pencil and sketch out how you want to plant your garden and what you want to grow. Start by drawing rows and labeling each row. Think about spacings between plants in the rows and between rows. Do you plan to plant everything in the ground, raised beds or on a trellis? More effective space utilization can occur by planting two- or three-foot-wide beds to plant multiple narrow rows that can be managed and harvested from both sides of the bed. Some plants to think about growing this way are leafy greens such as lettuce, kale, onion and others.
Going vertical to grow vine type plants like beans, cucumbers, early spring peas and others can be a fun part of gardening. This type of gardening allows for more space use over the same ground area. Other plants can be grown in the same bed depending on the light.
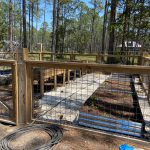
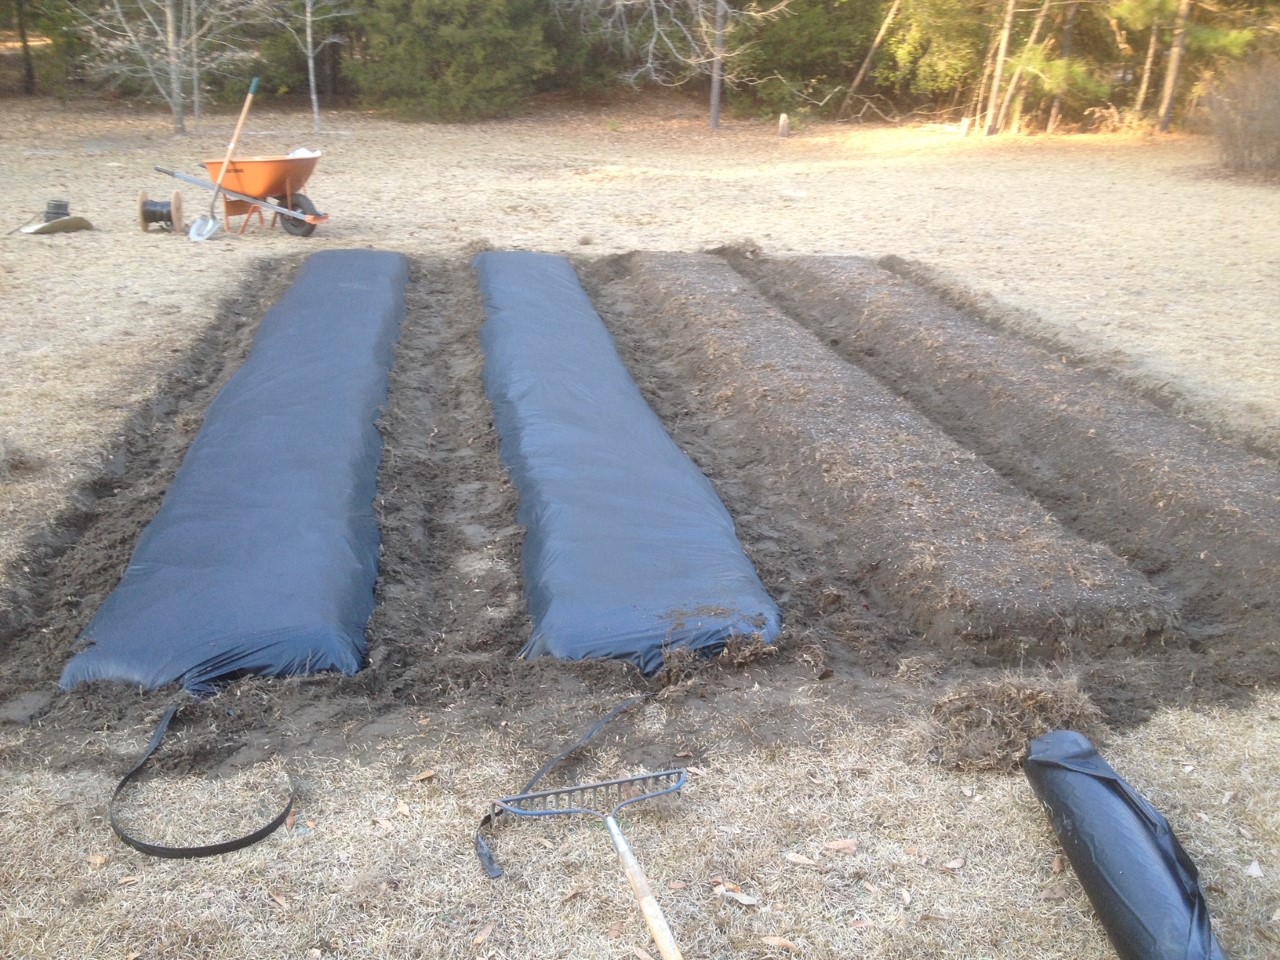
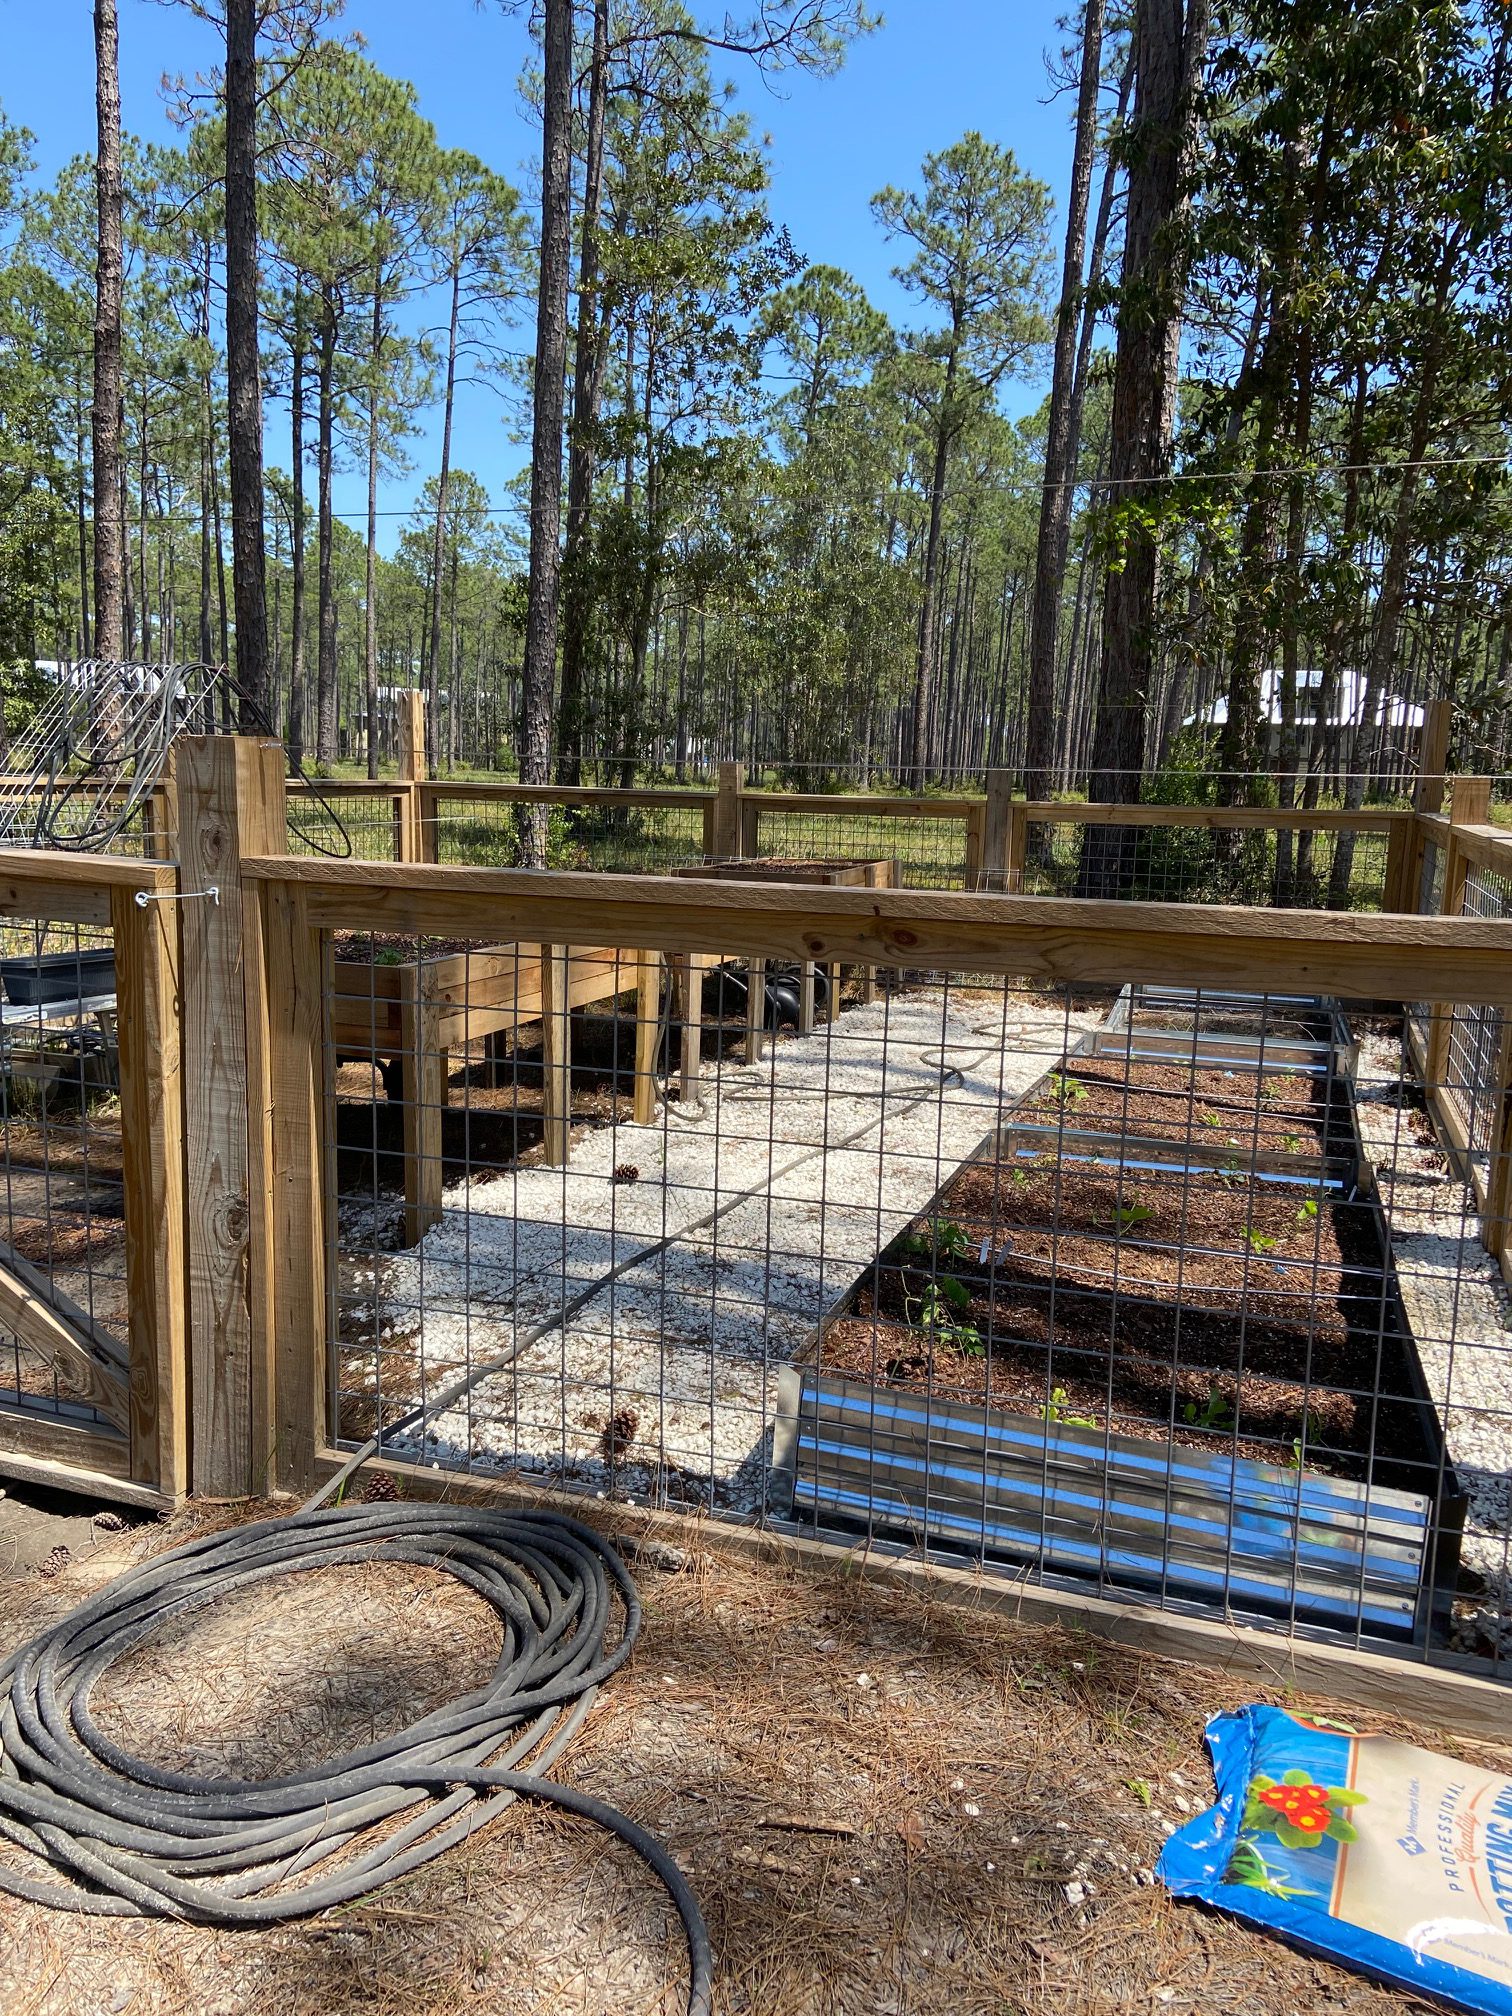
Multiple Types of Raised Beds. Photo Credit: Stephen Greer, UF/IFAS Extension – Santa Rosa
If you have interest in growing with raised beds, there are a number of materials that are used to build the beds. First do not use old railroad ties as they will leach chemicals into the soil that the vegetables can possibly take up or contaminate your soil. I have seen all kinds of creative materials used including cedar wood, plastic boards or preformed beds, even old whiskey barrels with legs built under. Do not forget all kinds of planting containers are available in the marketplace. Make sure there are drain holes in the bottom to allow the water to properly move through.
This is just the beginning of vegetable gardening. Other things to plan involve when to plant, what to plant, what is the budget, use seeds or transplants, depth of planting, watching for plant pests, harvest, storage and so on. Enjoy your gardening adventure!