by Joshua Criss | Apr 20, 2022
Getting your landscape set up in the spring is an in-depth process. Trees are pruned, soil amended, and the plantings have been accomplished. Now you have exactly the look you want. It would be easy to sit back, open a beverage of your choice, and watch it all come together. Don’t get comfortable just yet, there is a group of pests eyeing your plants. Insects come in many forms, looking to make a meal from your hard work. Do not fear though, there is a straightforward way to protect yourself from these creatures. Integrated pest management is a system of four control approaches designed to mitigate pest damage while minimizing impact on the environment.
Identification is Key
Before any of these steps may begin pests must be identified. This starts with scouting your landscape via visual inspection. Insects leave signs of their presence wherever they visit. Be sure to inspect every part of your plants including the underside of leaves. Here is where you will find insect eggs or frass (excrement) which are tell-tale signs of activity. Once discovered, you need to identify your specific pest. Insects are identified by their mouth parts when assessing plant damage. Chewing insects remove leaf material (think caterpillars and grasshoppers). Speckled leaves of brown and yellow is a symptom of piercing/sucking insects such as aphids. Other times you may only find damage after the fact where black leaves turn out to be covered in sooty mold. The sooty mold grows on the excreted honeydew of aphids, whiteflies. Once identified, it is up to you to decide if the level of damage is worth it and how you would like to approach limiting the damage.
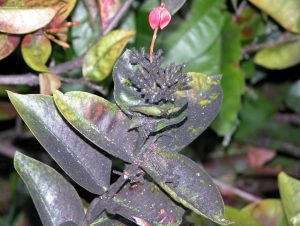
Sooty mold on Ixora Photo Credits: UF/IFAS Kim Gabel
The First Three
The first strategy is cultural control wherein you optimize the environment in which your plant grows. Improved drainage and removal of plants susceptible to insect attack are excellent examples. You should also look into the lifecycle of insect pests to remove anything that will provide habitat. The next control is mechanical. This methodology is the most work intensive but comes with the least environmental impact as insects will be removed by hand. Biological control is like mechanical control except that removal of the pest is left to natural predators. There are many, but birds and lady beetles are best known. Creating habitat for these will help keep insect populations to an acceptable level with the bonus of falling into Florida friendly landscaping philosophies.
Chemicals are Not the Bad Guy
Chemical control is the final approach. Some may be surprised to find this here, but it is effective. With the above in place, you may find there are still insect issues. Chemicals will be your next step but do not feel put off by this approach. Research the best products for your situation and follow the instructions on the label to the letter. The label is designed to reduce risk to you and the environment while providing effective pest control.
Insect pests have plagued gardeners since the first person intentionally planted anything. Controlling these pests using a multipronged approach is the optimal way to reduce damage to your plants while minimizing environmental impact. Following the methodology in this post will bring a pest free landscape that you and your family will enjoy. For more information on integrated pest management, see these Ask IFAS documents, or contact your local extension agent for additional information on this and any topic regarding your gardens and more.
by Sheila Dunning | Nov 4, 2021
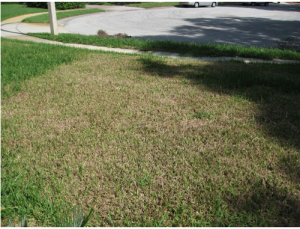
Chewing caterpillar damage on St. Augustinegrass Photo by: Steven Arthurs, UF
Tropical sod webworm larvae are destructive pests of warm season turfgrasses in the southeastern U.S. especially in the fall. Commonly referred to as a worm, they are truly caterpillars, the larvae of a moth. Larval feeding damage reduces turfgrass aesthetics, vigor, photosynthesis and density, which is very evident on finer-bladed grasses such as bermudagrass and zoysiagrass. Feeding damage is possible on all grass types however. Adults, a dull brown colored moth about ¾ inch long, rest in sheltered and shrubby areas during the day and are active at dusk. Females deposit clusters of 10-35 eggs on the upper surface of grass blades. The eggs hatch in 3-4 days and develop from a 1 mm long caterpillar to one over 11 mm long through six instars within 21 to 47 days, depending on temperature. Larval feeding occurs at night, leaving the grass looking ragged, shortened and missing.
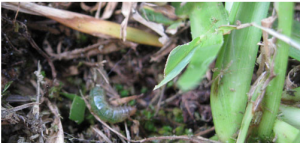
Sod webworm on soil surface
Photo by: Steven Arthurs, UF
Control should be against damaging larvae, not the flying moths. However, insecticidal soap applications to moth harboring areas can reduce re-population frequency. Soil-drenching soap flushes can be used to find the caterpillars, especially in dry and hot grass areas. Bacterial-based insecticides, such as Bt, Bacillus thuringiensis var. kurstaki or Spinosad, will control sod webworm caterpillars without impacting beneficial species as long as they are applied with each flush of grass growth.
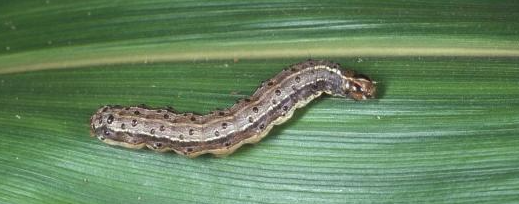
Fall armyworms are also active when the weather turns cooler. They feed any time of the day or night, but are most active early in the morning or late in the evening. The 1 ½ inch long gray and white moth lays about 1,000 eggs in multiple masses on any vegetation. Two to 10 days later, the small caterpillar hatches and begins to grow to nearly 2 inches long over a two week period. The fall armyworm is easily recognized by its dark head marked with a distinct pale-colored inverted Y and the long black stripe running along each side of its body. These aggressive feeders “march” rapidly across grassed areas consuming every above-ground plant part. While bacterial-based insecticides will reduce the numbers, control of armyworms usually requires synthetic insecticides.
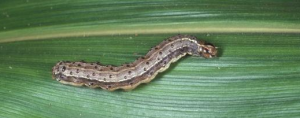
Armyworm
Photo by: Jim Castner, UF
The good news is that grass “worms” can be controlled and the blades will grow back. The damage may be devastating to see, but usually not a permanent problem.
by Evan Anderson | Oct 21, 2021
While most people are familiar with the European honey bee, the domesticated insect that pollinates our crops and provides us with honey, there are plenty of other species of bees and their relatives out there. Most of them are harmless, spending their time quietly pollinating plants, including our crops. Their presence in the landscape, however, may cause some alarm, as it can be difficult for the untrained eye to distinguish between aggressive species and those that are innocuous.
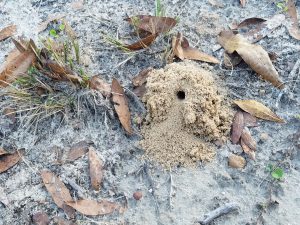
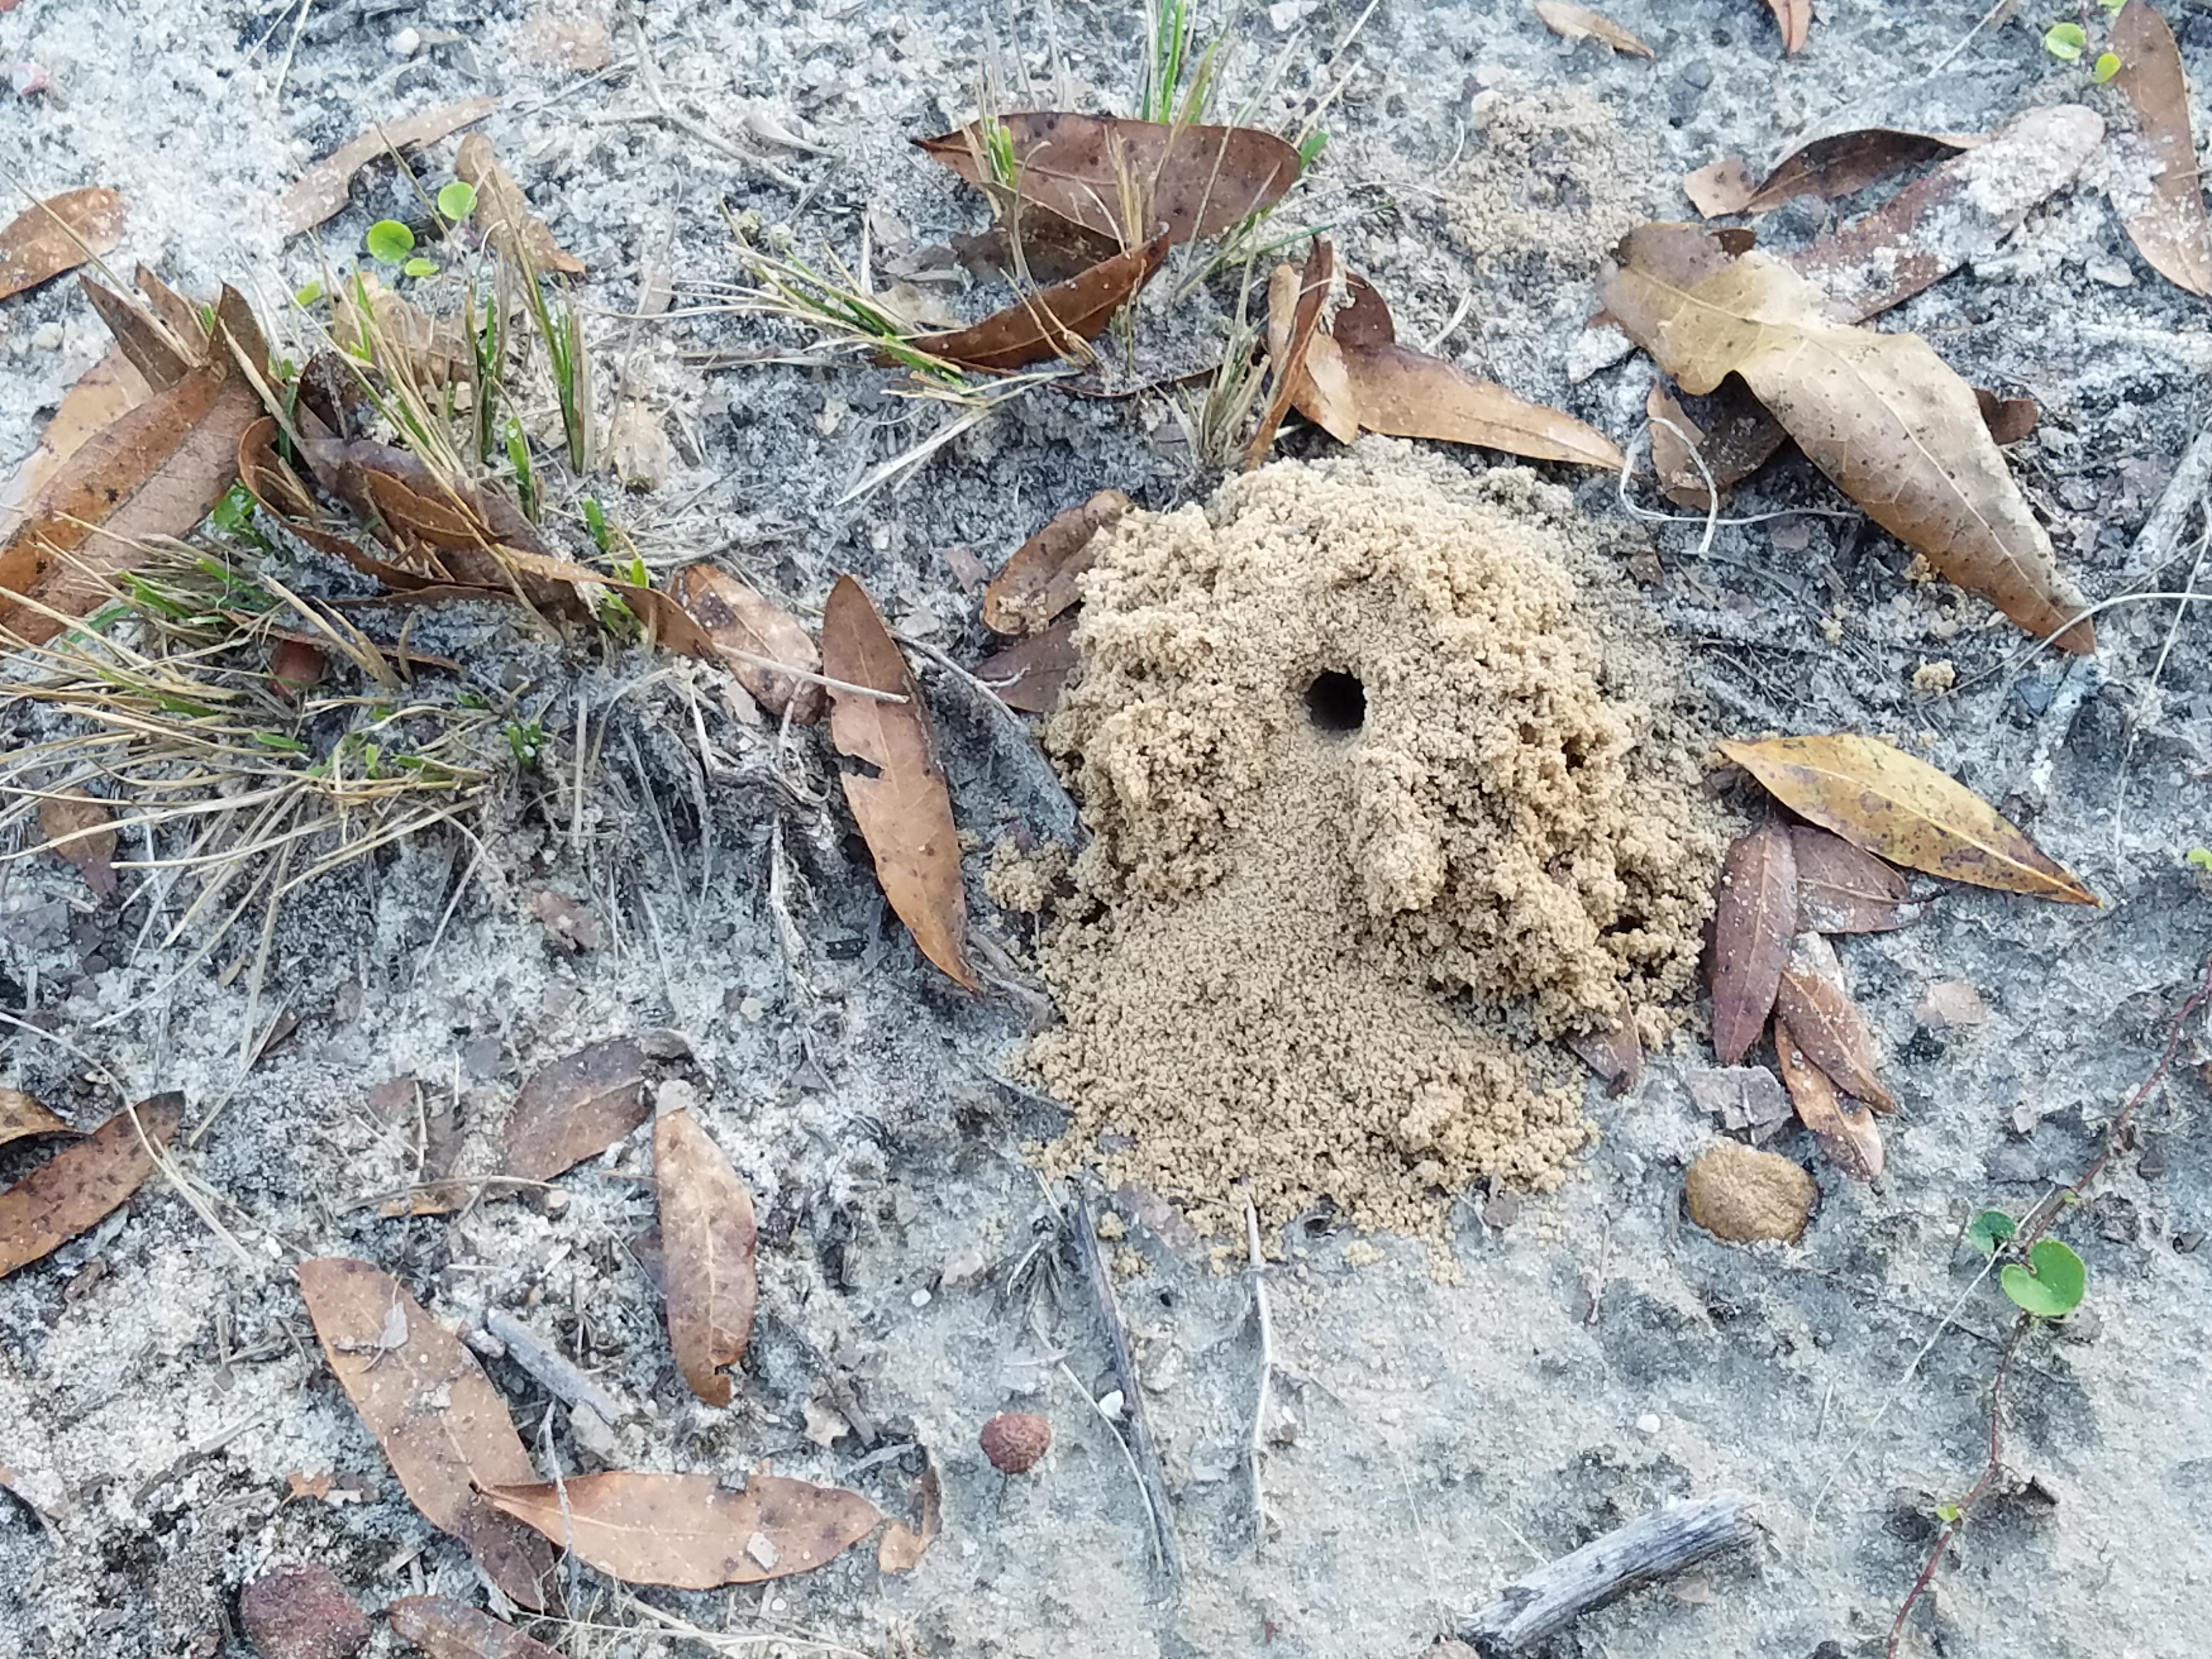
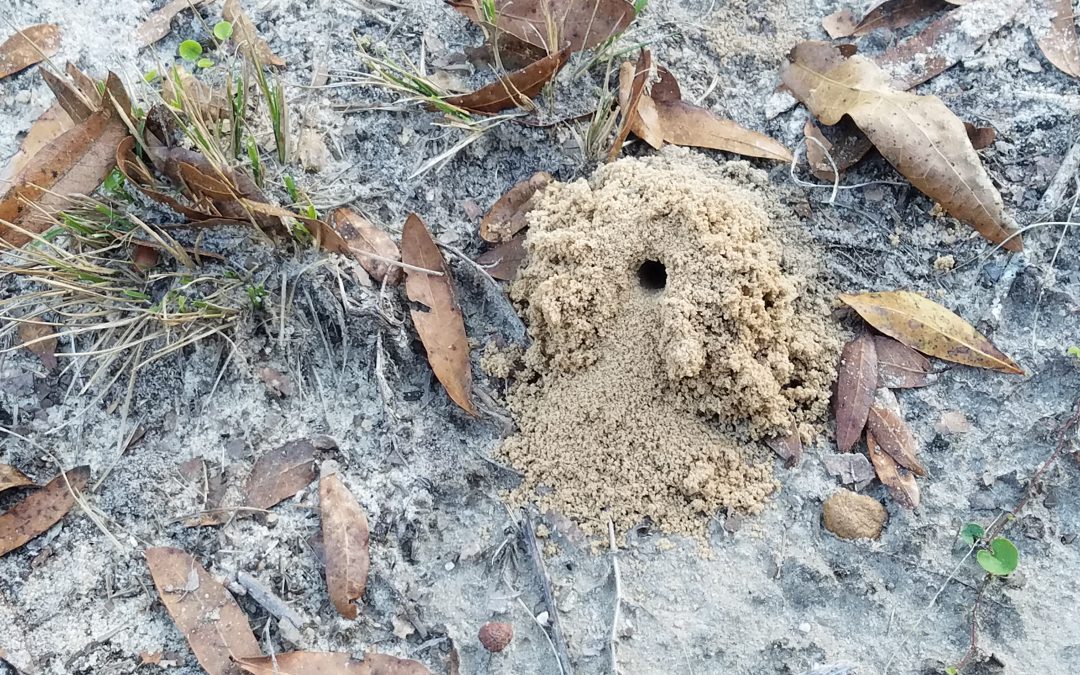
The entrance to a miner bee burrow.
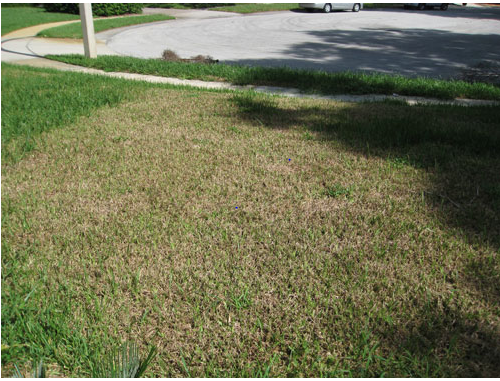
Homeowners may occasionally note small mounds of soil in sandy areas of their lawns. Sometimes sporting a small hole in the center, these are the nesting sites of solitary, ground-nesting bees or hornets. Miner bees or digger bees build underground chambers, usually in well-drained, otherwise bare areas of sandy soil. Multiple bees may choose to dig their nests in the same location, though each bee makes its own tunnel and they do not live communally. Each bee lays her eggs in the nest she has excavated. She gathers pollen to feed the young when they hatch, stocks the larder, and leaves. When the young emerge from the nest, they fly away and do not remain; they will dig their own nests when they are ready to reproduce. While there is no need to control these insects (they serve as fantastic pollinators), the mounds of soil they make may be aesthetically displeasing to some people. Keeping a healthy lawn with no bare patches can deter miner bees from nesting in an area. Irrigation sprinklers can also help to keep the ground moist; these bees prefer dry soil, so it may keep them away. Care must be taken not to over-water a lawn, however!

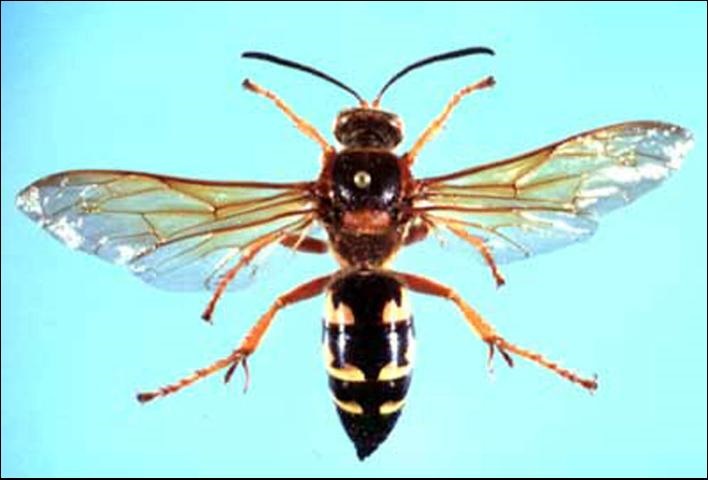
A cicada killer wasp. Photo credit: Division of Plant Industry
Another species of note is the cicada killer hornet. Also known as the giant ground hornet, these insects grow to a size of about an inch and a half in length. Instead of pollen, they capture cicadas to feed their young. Like the miner bee, though, they are not harmful. Females do possess a stinger which they use to hunt their prey. Males may try to warn people or animals away from their burrows by acting aggressive, but they have no stingers. Some may see the large size of the cicada killer and wonder if the so-called “murder hornet” has made its way from Washington state to Florida, but as of this writing it has not. Unless you are a cicada, you have nothing to fear.
One ground-dwelling hornet that does warrant some concern is the yellowjacket. These are communal hornets, living in hives that are often build underground. Yellowjackets are known for their bad attitudes, attacking anyone who disturbs the entrance to their nest. They can be beneficial, being predators of many other insects including plant pests. A colony located too close to human dwellings or areas of activity is most often a nuisance, however. Any attempts to control yellowjacket nests should be done at night when they are less active. Protective clothing is recommended even then. Large or difficult to reach nests may require the attention of a certified pest control company.
For more information on these topics, see our EDIS publications:
Miner Bees: https://edis.ifas.ufl.edu/publication/in912
Cicada Killers: https://edis.ifas.ufl.edu/publication/in573
Yellowjackets: https://edis.ifas.ufl.edu/publication/IN238
by Ashley Stonecipher | Sep 23, 2021
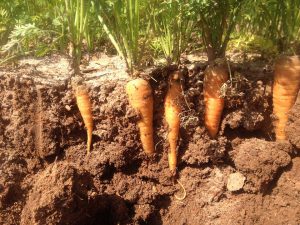
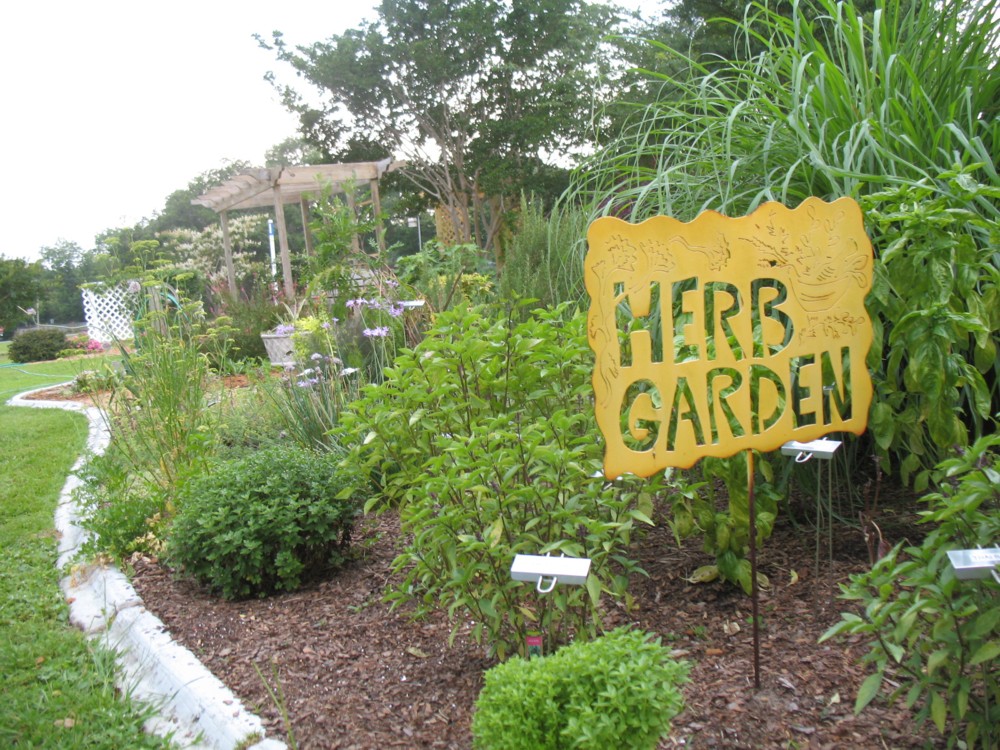
Photo by Full Earth Farm.
Yes, that’s right! We made it through the hottest part of the year and we are looking ahead to fall just around the corner! I am excited to be discussing September and what we can do to prepare for fall in the garden. As the nighttime temperatures start to cool down, we are given many more options.
For annual color plantings in September, try Ageratum, Celosia, Zinnias, and Wax Begonia to add fall color to your landscape. Bulbs will also add color, texture, and pattern to a bed. If you have some extra space, a variety of elephant ears could really accent a bed or you could always go with the classic calla, narcissus or zephyr lily. Popular vegetables to plant in North Florida in September are broccoli, carrot, cabbage, and collards. See Vegetable Gardening in Florida This is also the time of year to establish strawberry plants. Some great herbs to get started are Mexican tarragon, mint, rosemary, and basil.
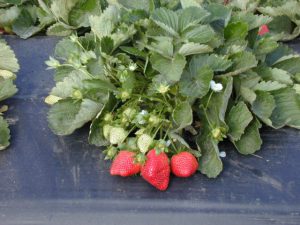
Image Credit: Matthew Orwat UF/IFAS Extension Washington County
There are many things that can be done in your lawn during September. Monitoring your lawn for its health and potential insect pests is important this time of year. Common insects to scout for are fall armyworms, chinch bugs, mole crickets, and sod webworms. The last fertilizer application should be done by the middle to end of September. Make sure you choose a fertilizer with little to no phosphorus unless a soil test shows differently. To maintain a healthy lawn, avoid weed and feed products and only apply herbicides in areas with high infestations of weeds. Weed and feed products are not recommended because the timing of when to fertilize and the timing of the weed killer is not always the same. The best management practice is to use a separate treatment for weeds and when possible spot treat weeds.
If you already have bulbs in your landscape from previous growing seasons, this is the time to divide and replant those that are big. You can also add organic matter to new planting areas. Continue working on your vegetable plants and prepare them for either transplants for a fast start, or plants seeds for more variety. Throughout your landscape, it is important that plants are getting the right amount of water as we go in and out of wet and dry weather this time of year.
October will be here before we know it in just a couple of weeks. Look out for the next article to come. We will be getting into the cooler nights and more options for planting vegetables and herbs!
by Pat Williams | Sep 9, 2021
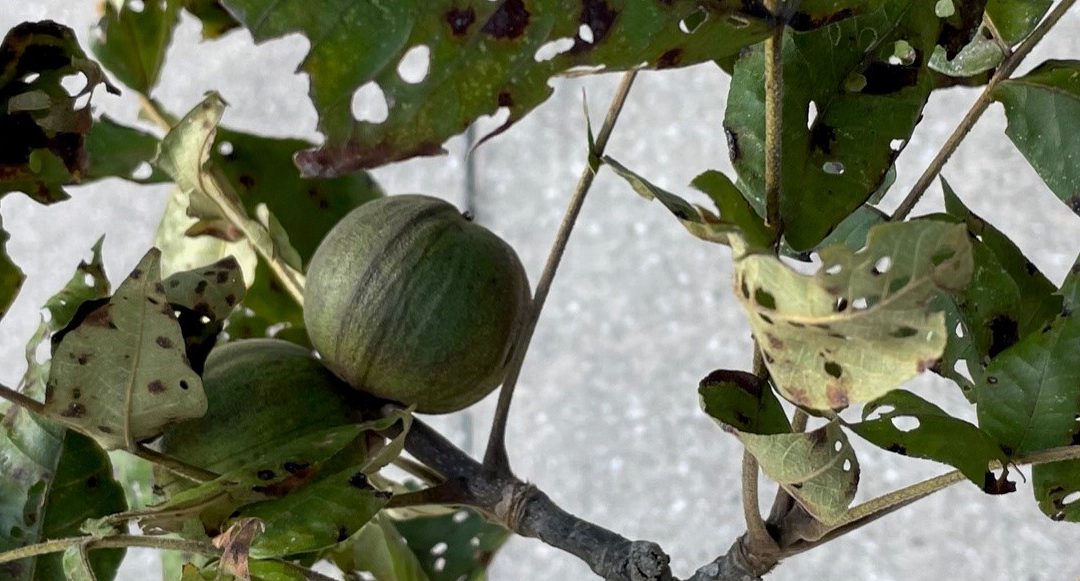
As homeowners, we do value our trees and no one wants to lose a shade tree especially on the house’s south side in Florida. On a recent site visit, a hickory tree had multiple concerns. Upon closer inspection, the tree had a bacterial infection about 30” off the ground with a smelly, black-brown ooze seeping forth. The leaf canopy was riddled with beetle holes and leaf margins were chewed by caterpillars. When leaves were viewed under the microscope, thrips (insects) and spider mites were found running around. The biggest homeowner cosmetic concern arose from hickory anthracnose (fungus) and upon closer inspection found the leaves to have hickory midge fly galls. The obvious question is should the tree come down? I’ll have you read the whole article before giving you the answer.
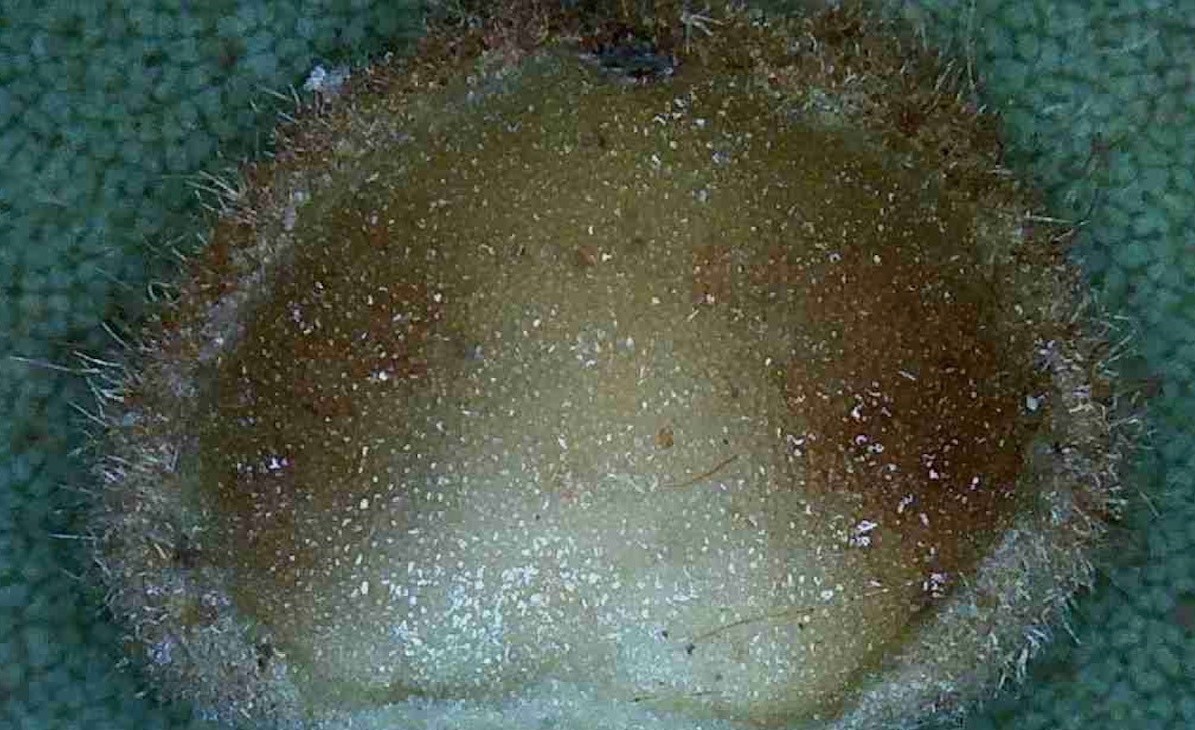
Each hickory gall is approximately 3/16″ wide.
Hickory anthracnose or leaf spot as seen in the banner photo is caused by a fungal infection during the wet summer months in Florida. The homeowner can usually recognize the disease by the large reddish brown spots on the upper leaf surface (sending a sample to the NFREC Plant Pathology Lab will confirm the diagnosis) and brownish spots with no formal shape on the bottom. Be sure to rake and remove all leaves to prevent your disease from overwintering close to the tree thus reducing infection next year.
A hickory gall has been cut in half to show the leaf tissue.
The fungus can be lessened by good cultural practices and appropriate fungicidal applications. Please remember it is best left to professionals when spraying a large tree. This alone is not cause to remove your tree.
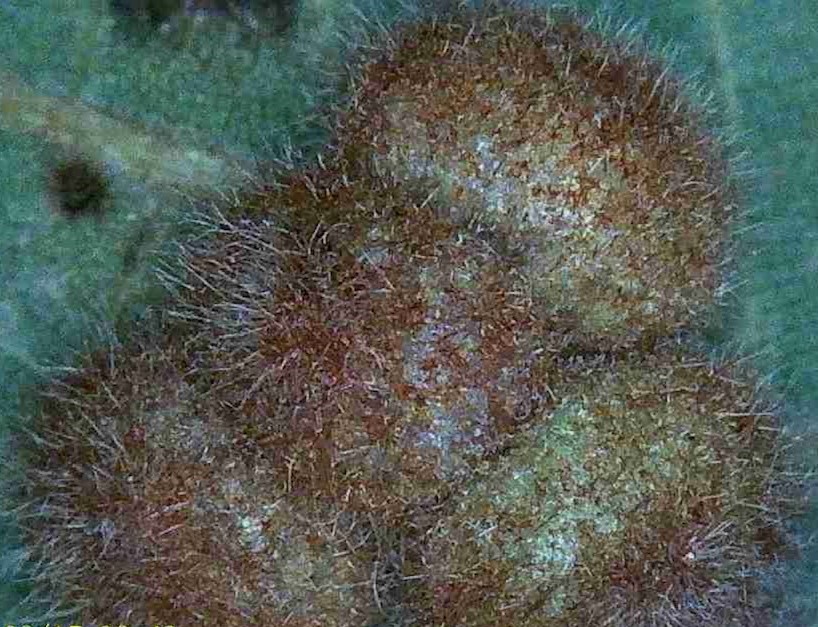
Hickory gall is caused by the hickory midge fly, an insect that lays eggs in the leaf tissue. The plant responds by building up tissue around each egg almost like the oyster when forming a pearl.
As the gall tissue grows, eggs hatch and larva start to feed on this tissue. The larva will continue to
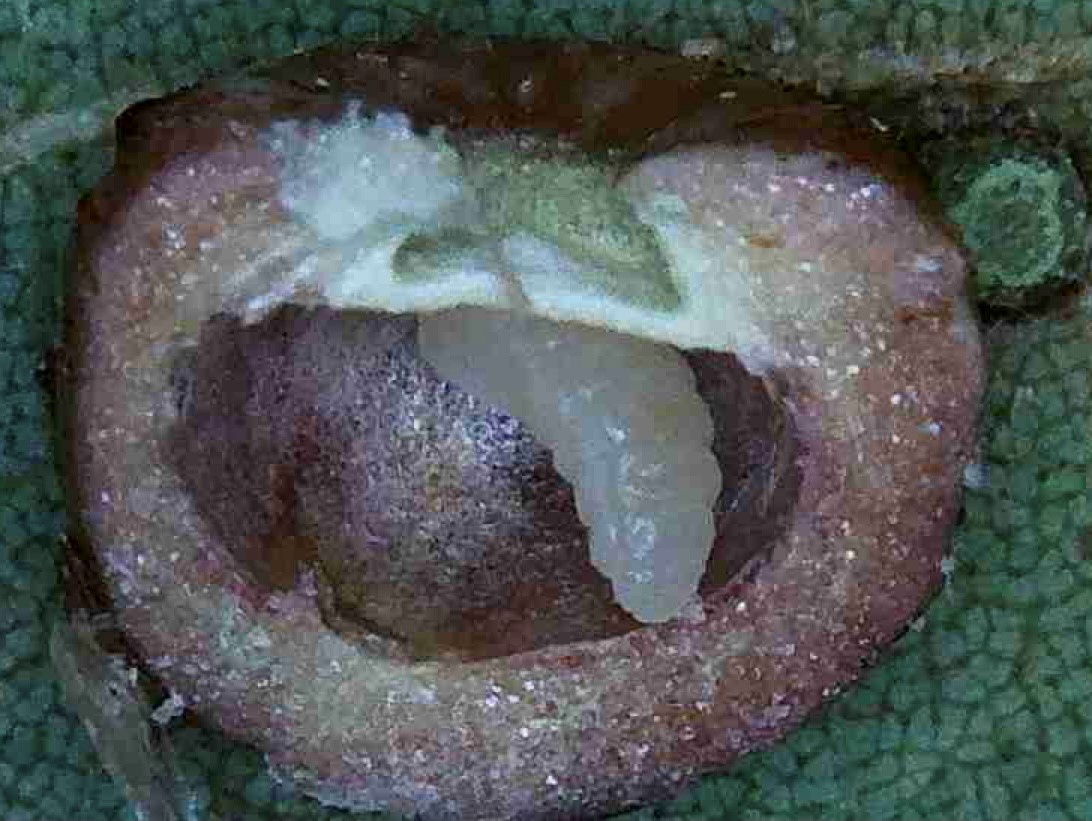
The larva has eaten all soft material inside the gall and is ready to pupate.
feed until it is ready to pupate within the gall. After forming a pupa, the midge fly will eventually emerge as an adult and females will continue to lay eggs on other leaves. The galls are more of a cosmetic damage and because your hickory leaves will fall from the tree as winter comes, the galls will normally not cause enough damage to worry about each year. Once again good cultural practices and disposal of each year’s leaves will reduce the gall numbers next year.
In a large tree with many leaves, foliar feeding by beetles and caterpillars do cause damage though the leaves will still produce enough food (photosynthesis) to keep the tree alive. Most of us never climb our trees to look at leaves to see the small insects/mites and there are more than enough leaves to maintain tree health.
The biggest concern during my site visit was their tree’s bacterial infection. A knife blade was pushed into the wound area and went in less than 1/4″. The homeowner was instructed to look at bactericide applications. In the end, this hickory tree with so many problems is still shading the home and helping cool the house. It is still giving refuge to wildlife and beneficial insects. When in doubt give our trees the benefit and keep them in place. Remember your local Extension agent is set up to make site visits and saving a tree is time well spent.