Video: Saving Tomato Seeds
Many gardeners enjoy saving their own seeds for next year’s garden. Learn the basic steps of saving seeds from your favorite tomato selections.
View the handout version too.

Many gardeners enjoy saving their own seeds for next year’s garden. Learn the basic steps of saving seeds from your favorite tomato selections.
View the handout version too.
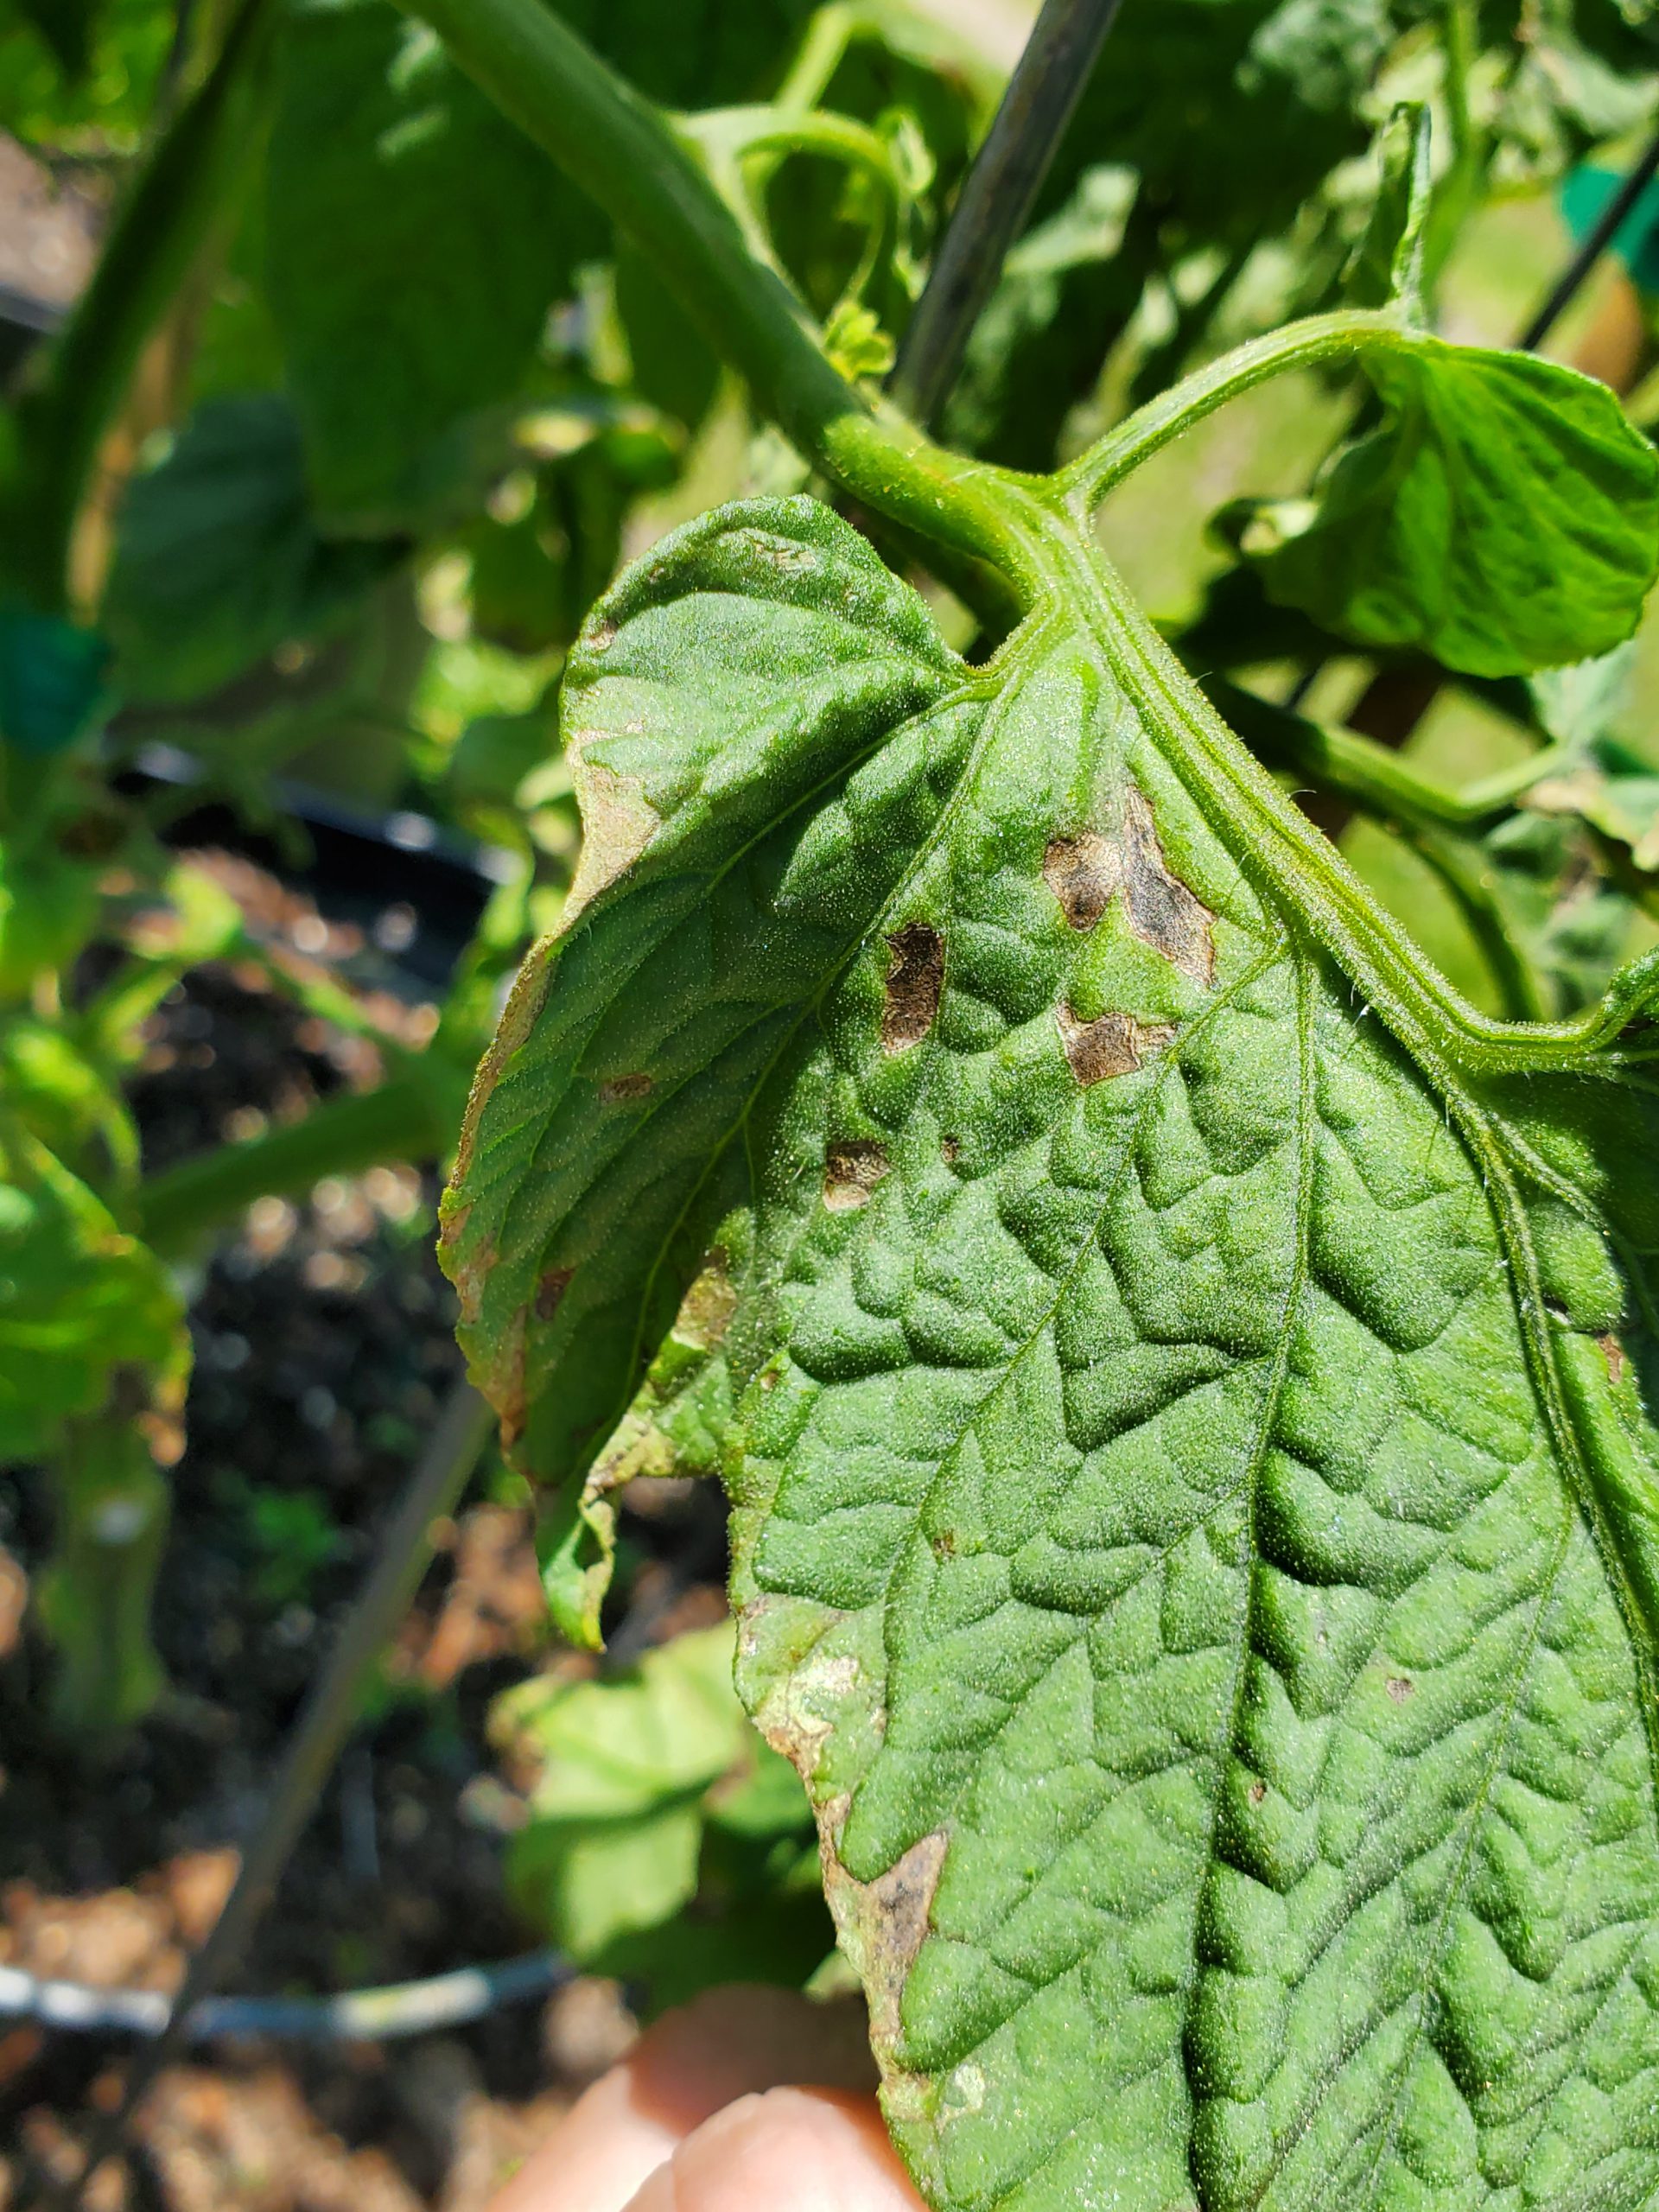
Early BLS symptoms appear on lower leaves. Photo courtesy of the author.
Tomatoes are among the most notoriously difficult vegetable species to grow in Florida. Even when you do everything right (choose disease resistant varieties, buy clean seed/healthy transplants, plant early, rotate crops, scout for insects, prune and support vines, etc), things can go wrong in a hurry. Bacterial Leaf Spot (BLS) caused by the pathogen Xanthomomas perforans, is one of those things. BLS often hitches a ride into gardens undetected on seed and transplants and presents itself as warm and humid weather arrives in late April/early May. Outbreaks typically happen in concurrence with the frequent heavy rainstorms that accompany these months and quickly wreak havoc on tomato plants.
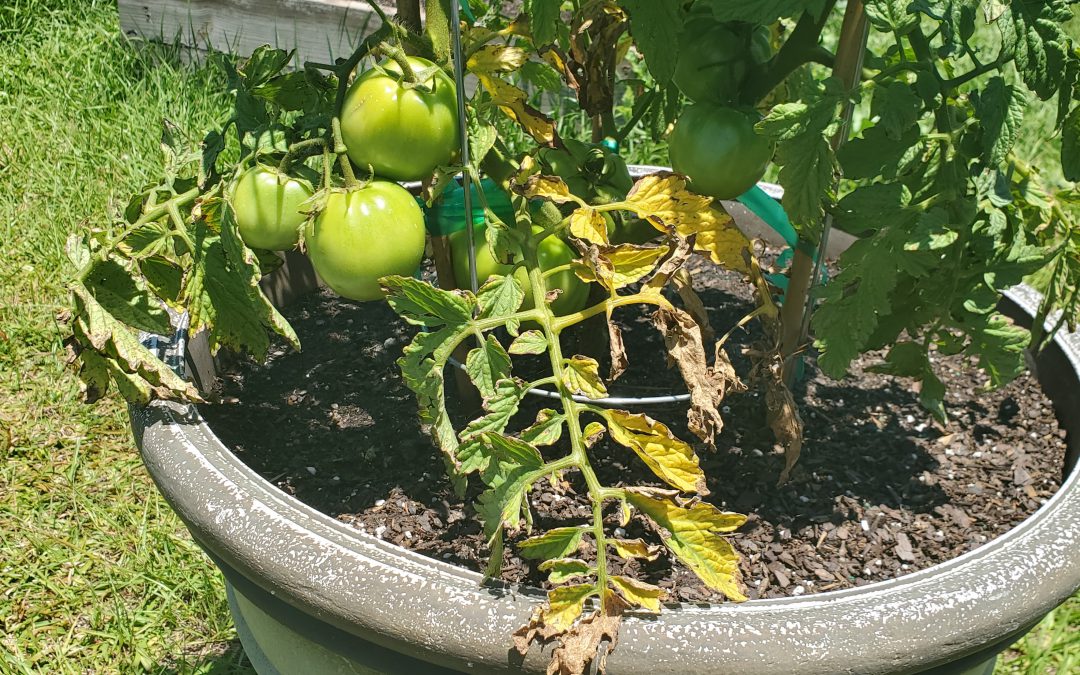
BLS occurrence, much worse in some springs than others, has exploded this year in home gardens. First noticed on the plant’s lower leaves, BLS pathogens enter through natural openings in leaves called stomata, manifest as small, “water-soaked” leaf lesions and then develop within days into dark circular spots, sometimes surrounded by a yellow halo. As conditions worsen, all these individual infections cause a general yellowing or “blighting” of entire leaves. Though the issue begins on tomato leaves, BLS can affect all parts of the plant, including stems, flowers and fruit too! It’s at this point, when blighted leaves become obvious and lesion developing on flower stalks cause both flowers and small fruit to drop, that most home gardeners notice that something is up.
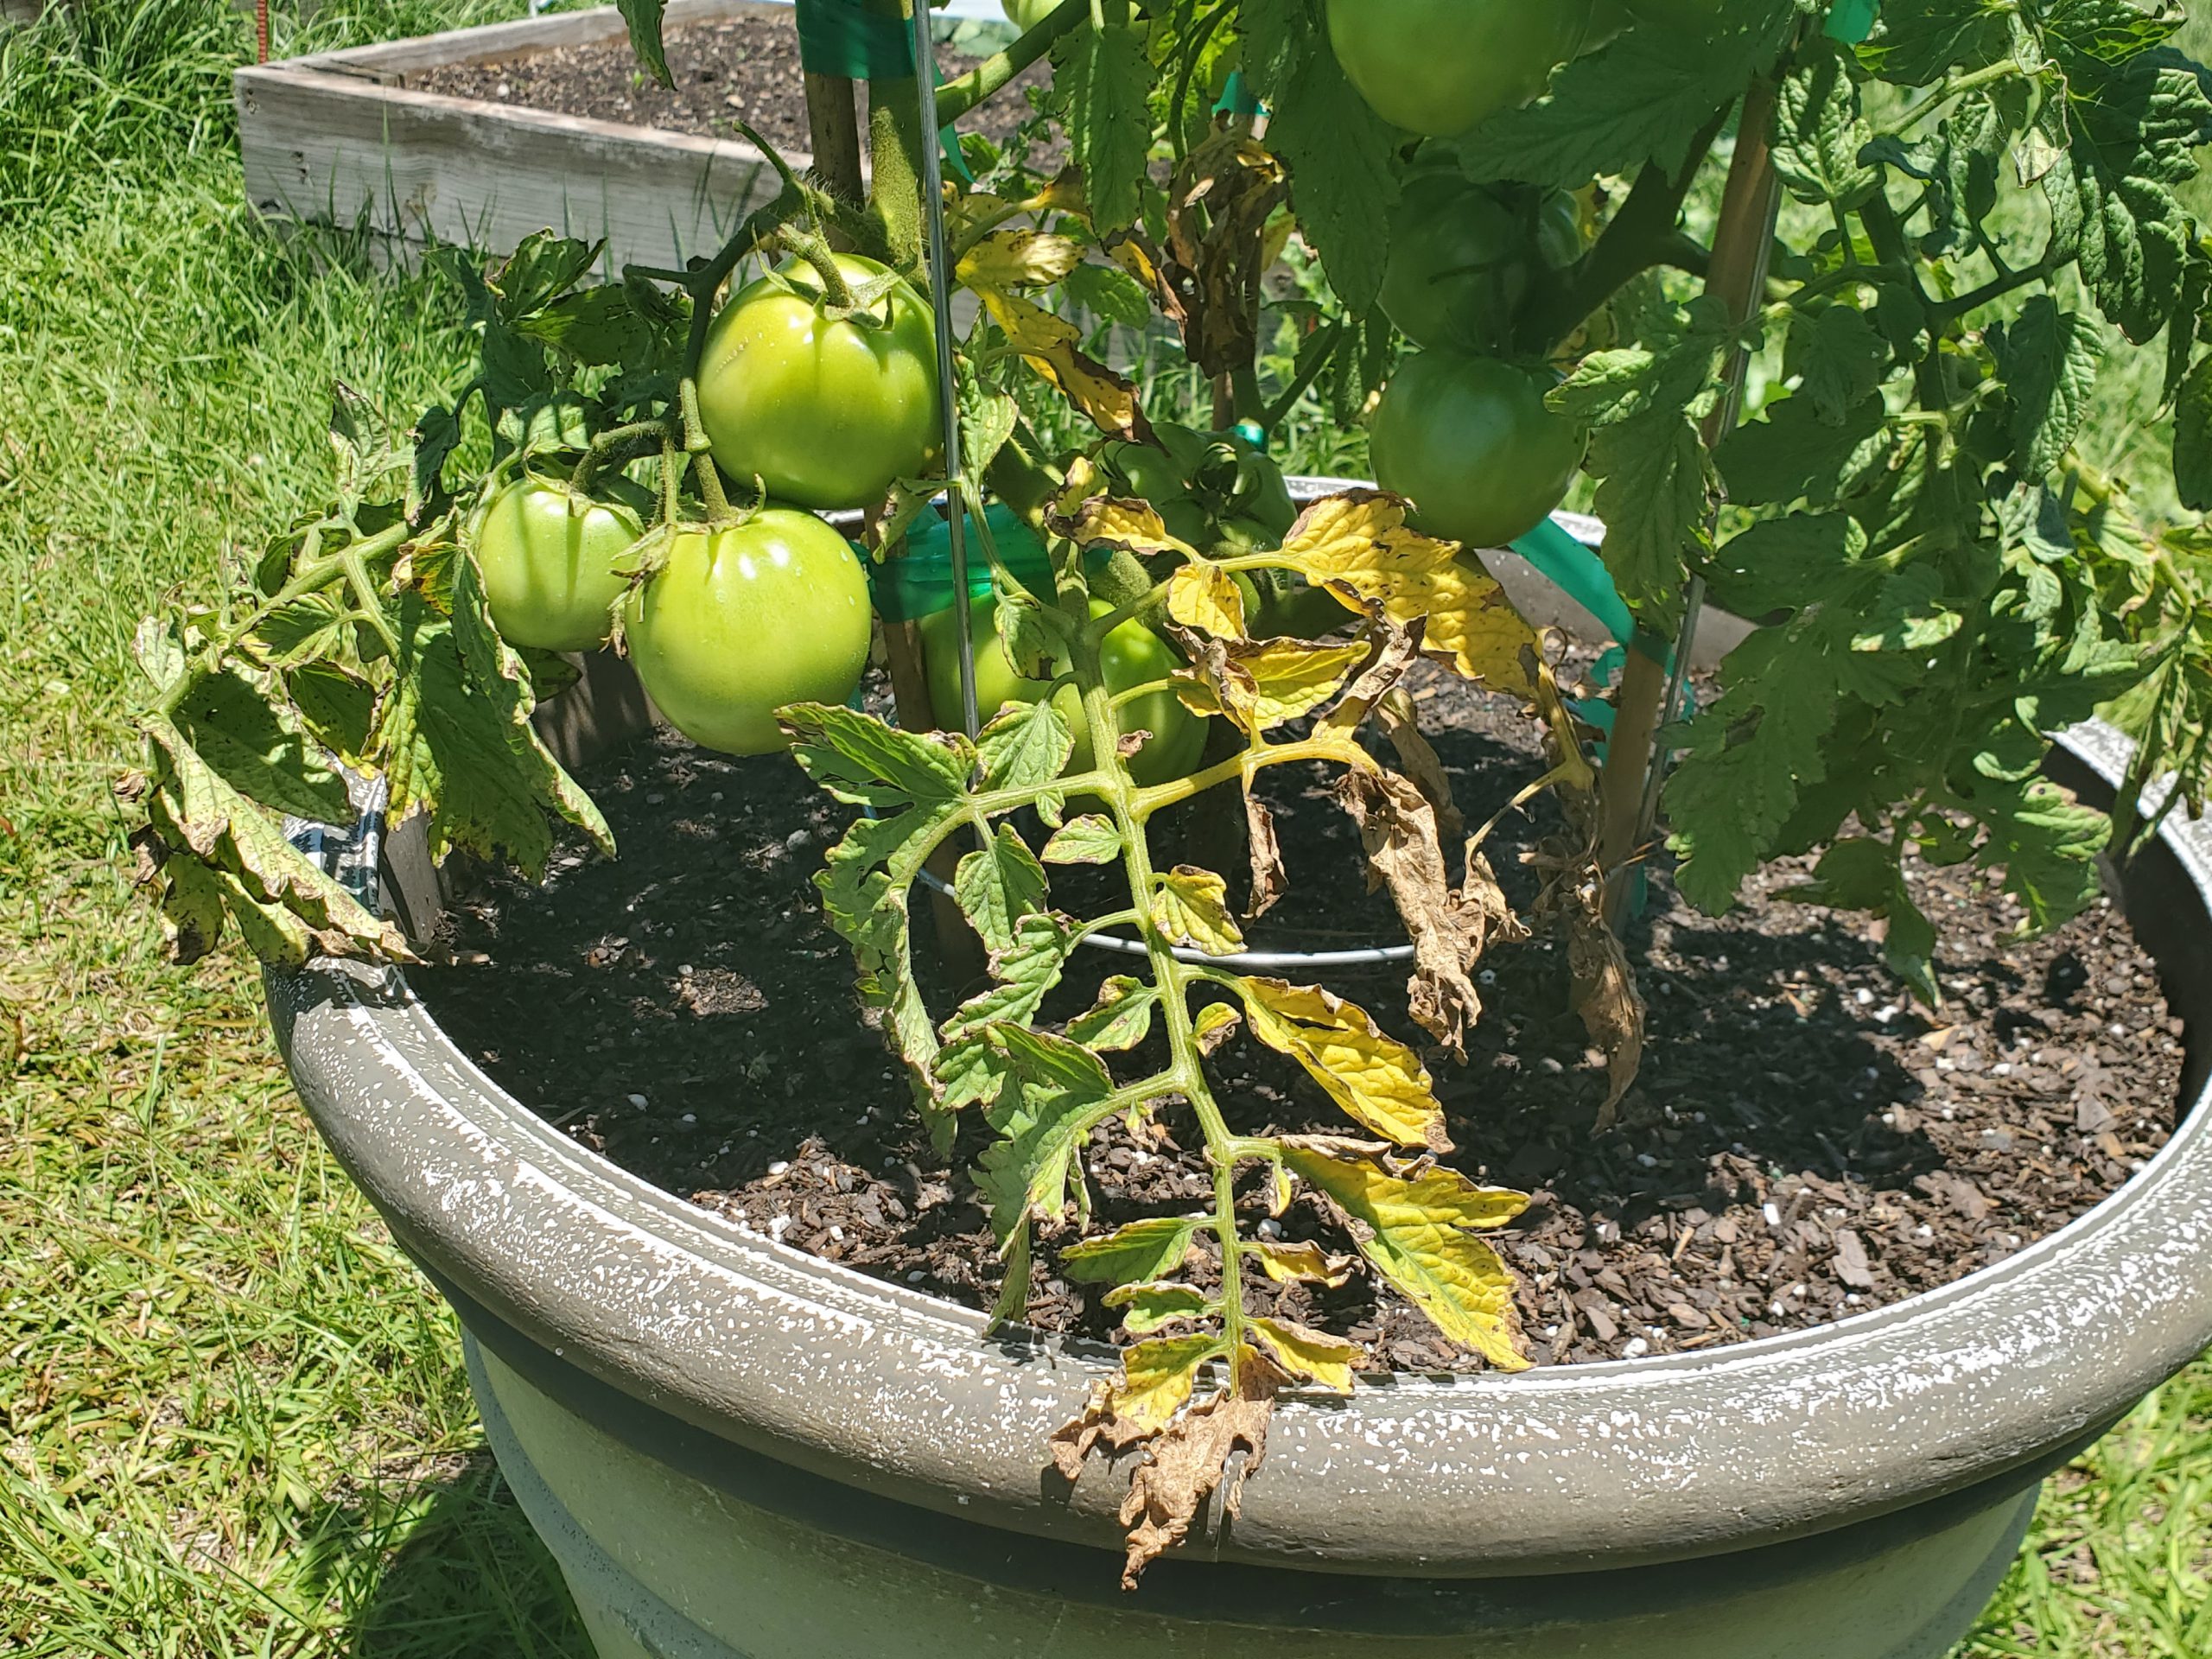
Advancing progression of BLS with “blighted” leaves. Photo courtesy of the author.
Unlike with many other pathogens, gardeners don’t have an abundance of options to control BLS. However, taking the following preventative measures can reduce the pathogen’s impact and stave off disease progression until ripe fruit can be harvested.

BLS lesions on tomato flowers. Photo courtesy of the author.
While BLS is an extremely destructive pathogen of both home and commercially grown tomatoes, growers can lessen the disease’s effects by following the preventative measures outlined above and spraying with a copper/mancozeb mix if necessary. Growing tomatoes this year hasn’t been easy, but it’s worth it to fight back and realize a harvest despite difficulties like BLS!
If bacteria have given you the blues or other garden issues are bringing you down, give your local UF/IFAS County Extension Agent a call! We’re here to help you be successful in all your horticultural endeavors. Happy gardening!
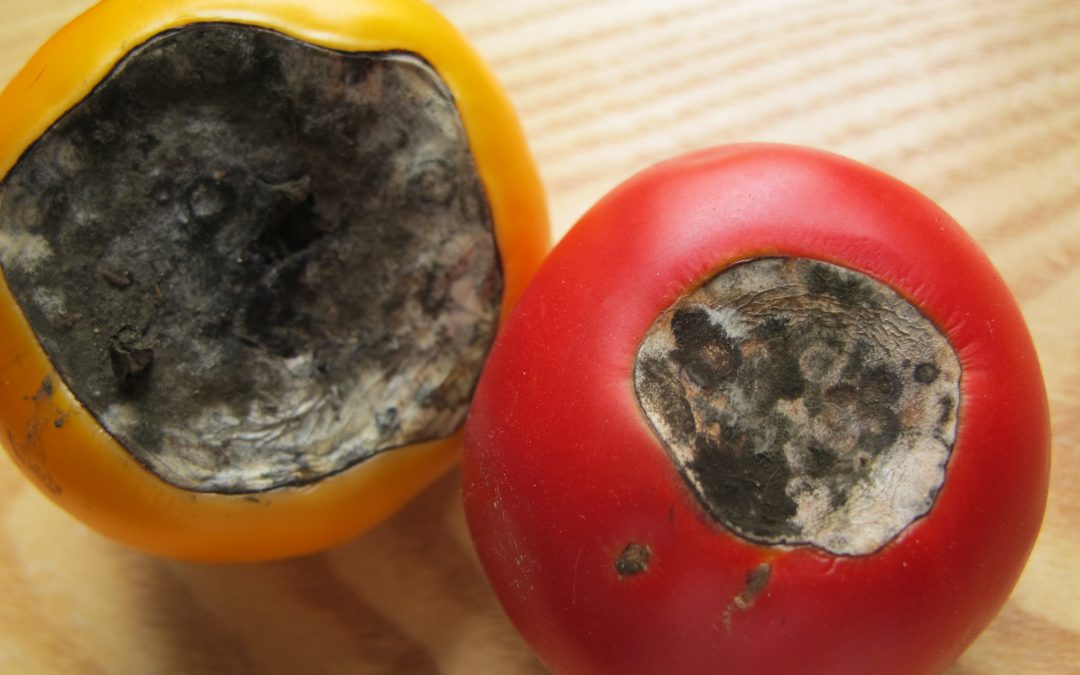
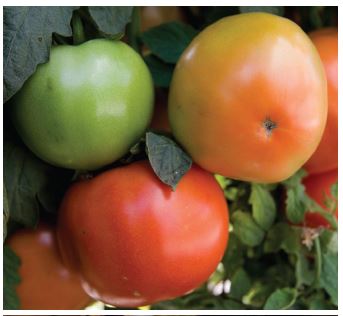
There aren’t many more frustrating things than growing seemingly healthy tomatoes, those plants setting an abundance of flower and fruit, and then, once your tomatoes get about the size of a golf ball, having the fruit rot away from the base. This very common condition, called Blossom End Rot (BER), is caused one of two ways: by either a soil calcium deficiency or disruption of soil calcium uptake by the plant. Fortunately, preventing BER from occurring and then realizing an awesome crop of tasty tomato fruit is relatively simple and home gardeners have a couple of possible preventative solution!
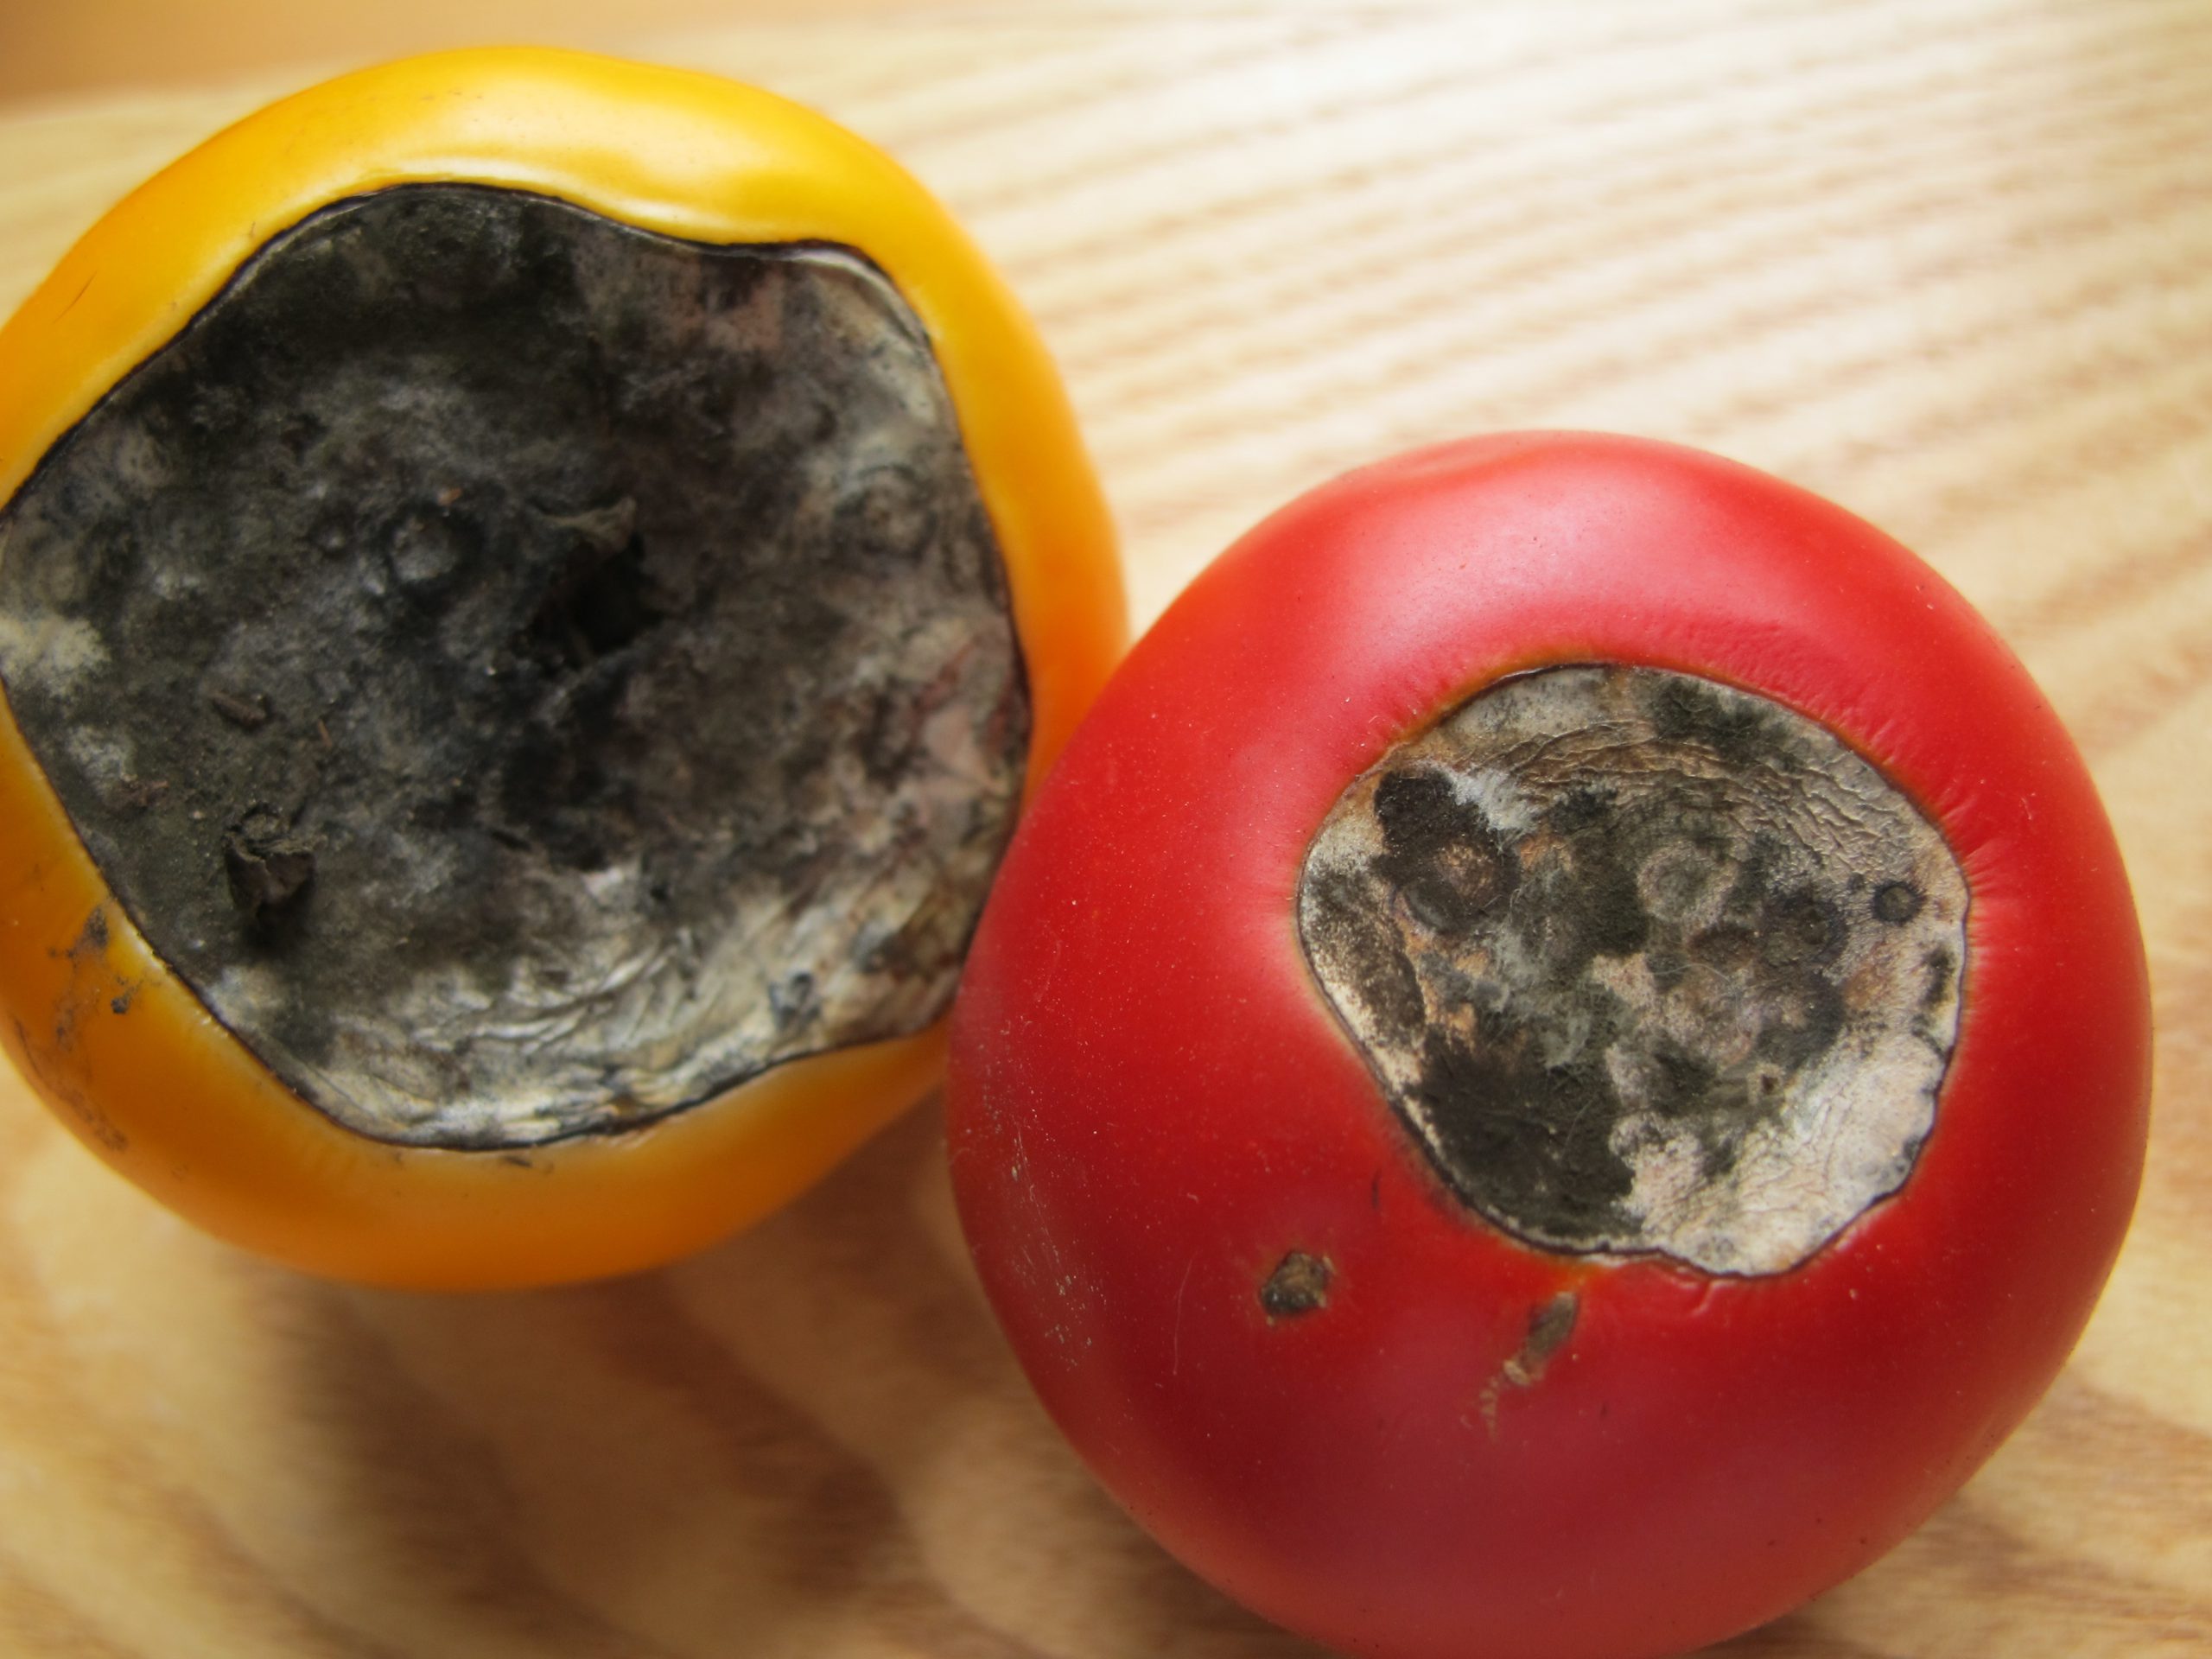
Blossom End Rot damage. Photo Courtesy Larry Williams, Okaloosa County Extension.
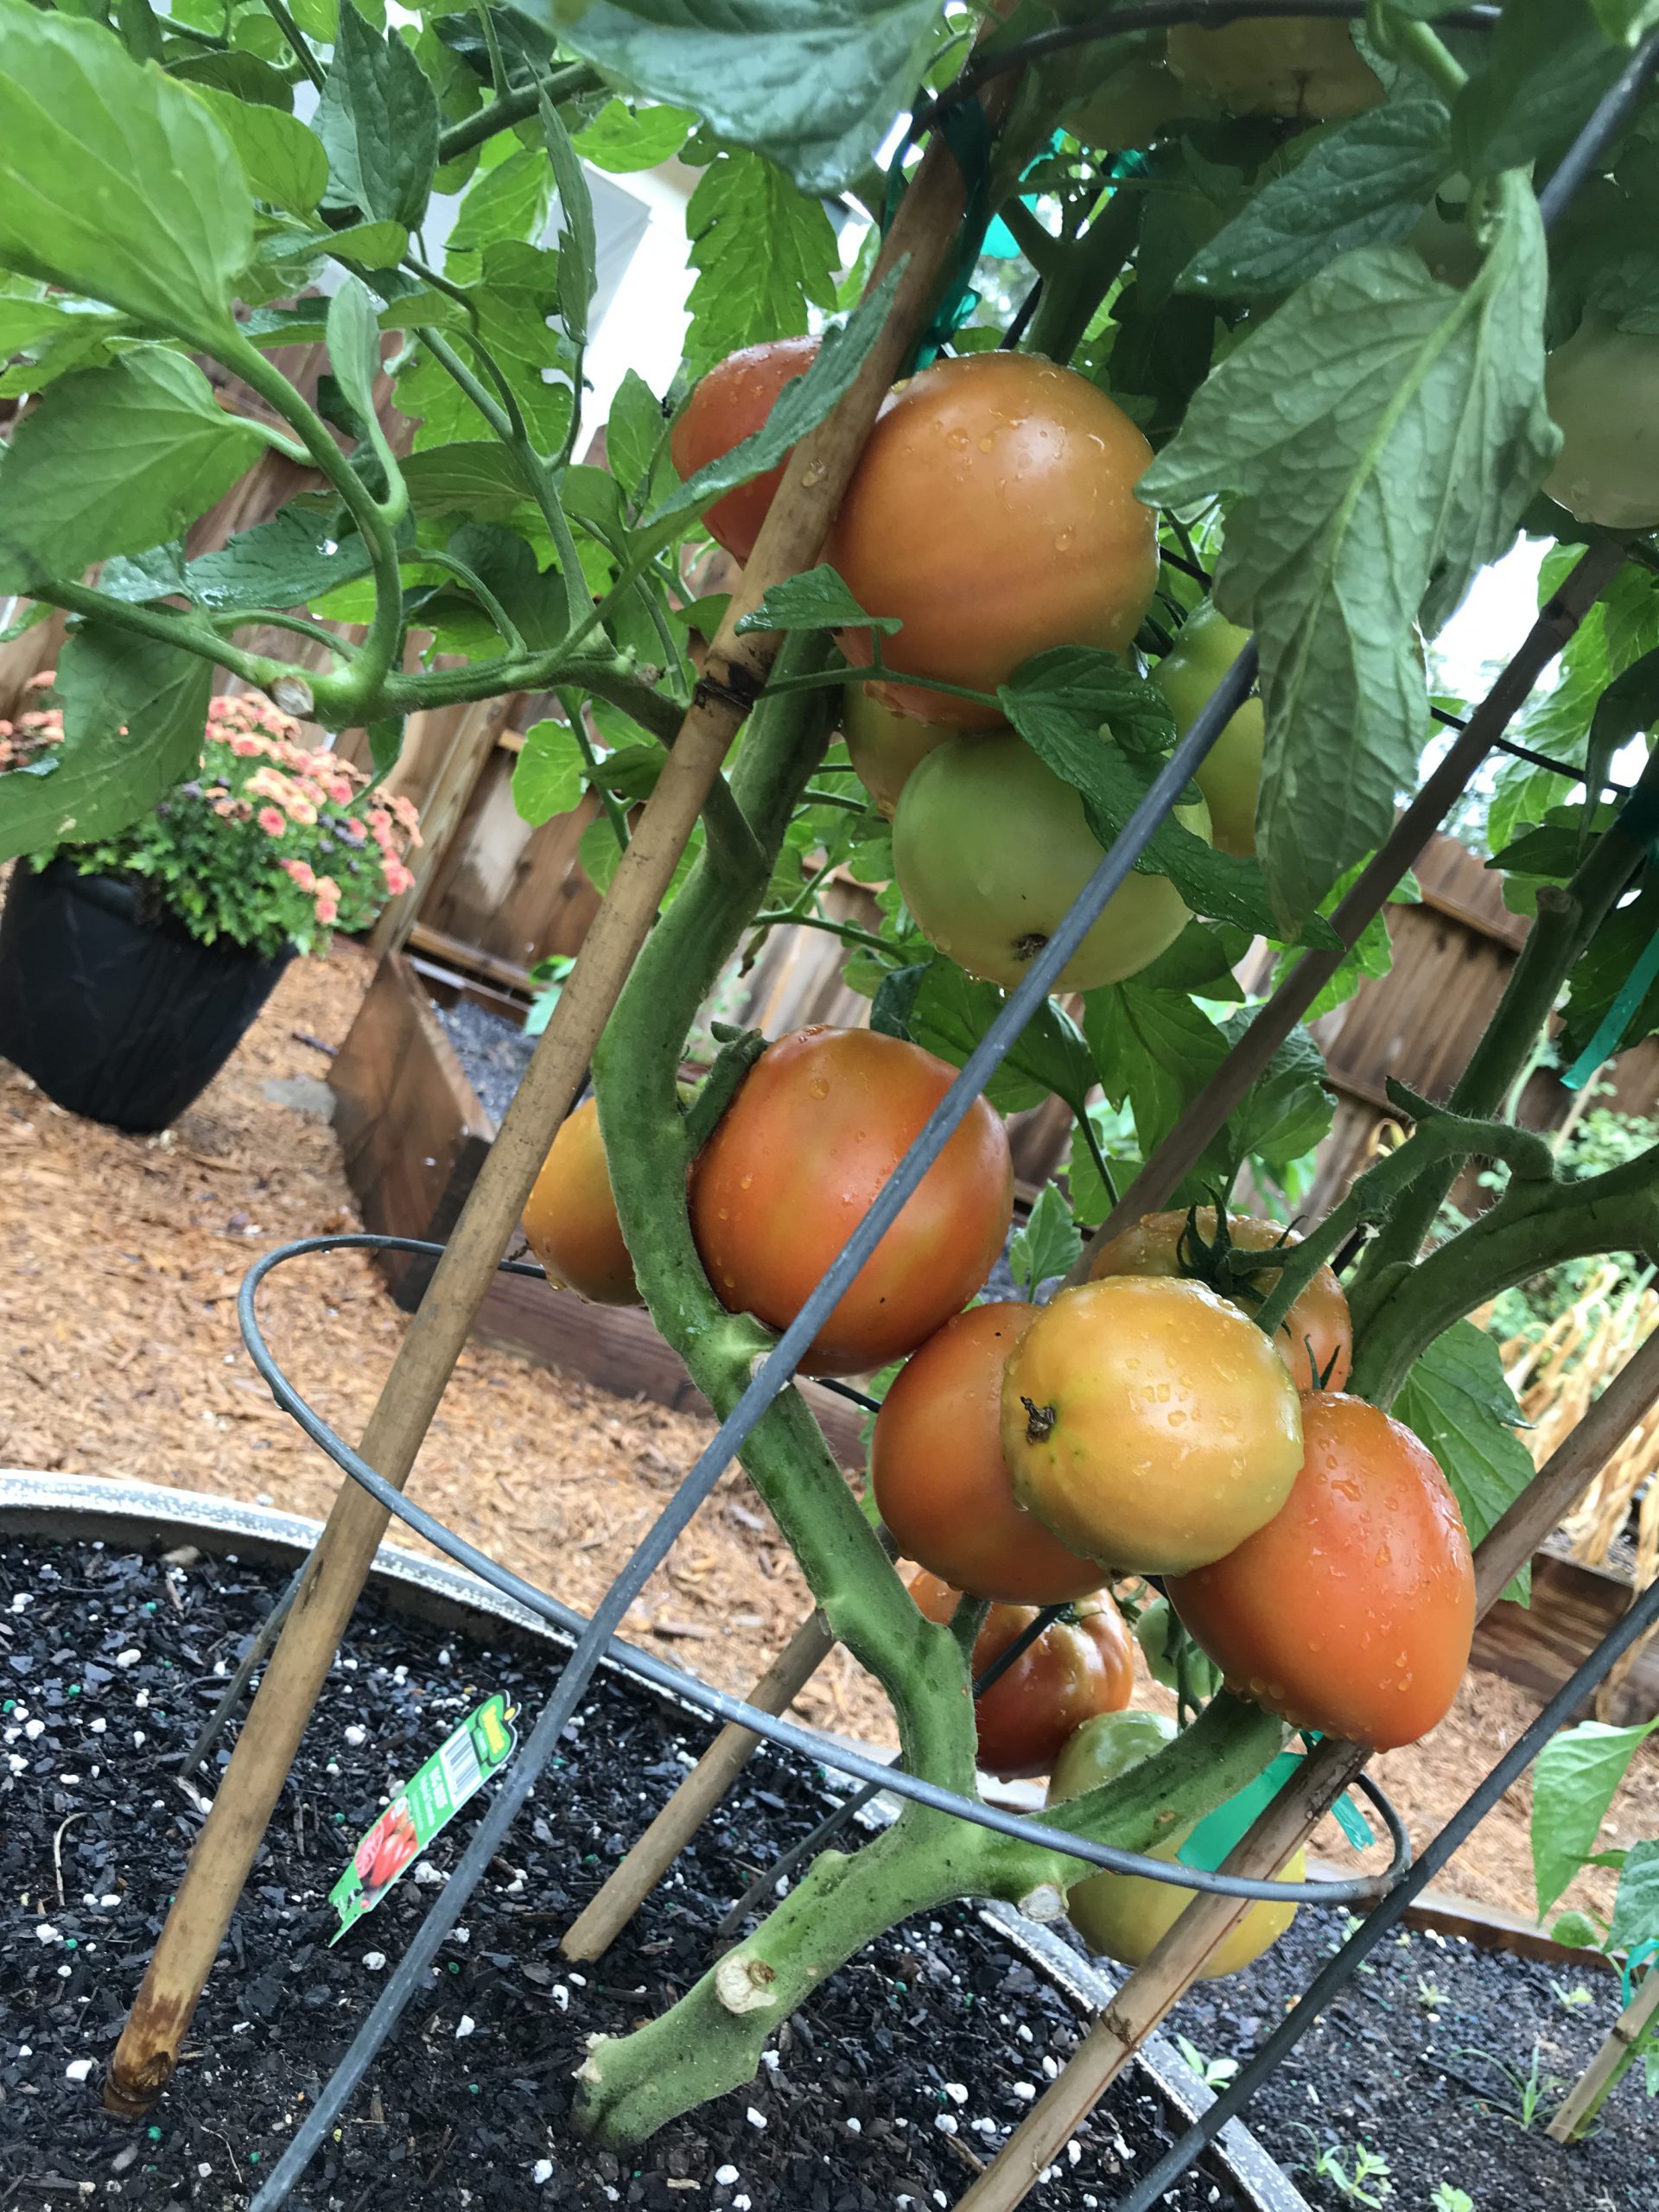
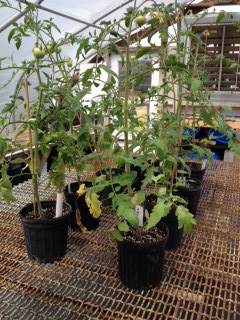
Healthy ‘Big Beef’ tomatoes grown in 2019 with a pH of 6.5, amended with Gypsum at planting, and watered regularly each day! Notice no BER. Photo courtesy the author.
caused by calcium deficiency, it can be induced by creation of distinct wet and dry periods from non-regular watering, interfering with calcium uptake and availability to the plant. So, while you may have adequate soil calcium, if you don’t water correctly, the condition will happen anyway! It’s also good to keep in mind that mature tomato plants use large quantities of water daily, so during the heat of summer, plants in containers may need to be watered multiple times daily to maintain consistently moist soil. Think about it, you don’t drink 8 glasses of water when you wake up and then never drink again throughout a hot day. A tomato is no different. Allowing your plants to wilt down before providing additional water ruins productivity and can induce BER.
Blossom End Rot, while one of the more destructive fates of tomatoes, is totally preventable by a little legwork early in the growing game from you! Soil test and change pH with lime if needed, add a shot of calcium through a tomato blend fertilizer or non-lime supplement like gypsum, and water regularly! Do these three things and you’ll be well on your way to a great crop of early summer tomatoes. If you have any questions about tomato blossom end rot or any other horticulture or agricultural topic, please don’t hesitate to reach out to us at the UF/IFAS Calhoun County Extension Office. Take advantage of this beautiful spring weather and get in the garden today! Happy gardening.
Homeowners are always looking for methods to manage one of our most difficult pests in the vegetable garden. Learn about the science of how to properly use marigolds to deter nematodes against one our our favorite summer fruits In the Garden with UF IFAS Extension Escambia County.
 Florida farmers produce more fresh tomatoes than any other state. Yet Florida home gardeners find it difficult to grow tomatoes. By changing a few basic practices, home gardeners can increase their chances of success.
My philosophy of growing tomatoes in Florida (mixed with science) is outlined below.
First, I choose mostly determinate varieties that have resistance to key diseases.
Most gardeners are used to growing indeterminate varieties. Farmers mostly grow determinate types. Determinate varieties are more compact and produce most of their crop at one time. You can usually harvest all the fruit in two to five pickings and then pull up the plants. Indeterminate varieties, sometimes referred to as “everbearing” tomatoes, set fruit along a vine stem that continues to grow all season.
Correct variety selection is a must for success with tomatoes in Florida.
One reason home gardeners have a difficult time growing tomatoes in Florida is because of incorrect variety selection. Most popular (indeterminate) tomato varieties lack resistance to Tomato Spotted Wilt Virus (TSWV) and bacterial wilt. These two diseases wreak havoc in home as well as commercial plantings. Amelia, a determinate variety that has TSWV resistance, has started showing up in some retail outlets. For a list of other varieties to look for, consult this publication, “Tomatoes in the Florida Garden”.
Secondly, I plant reasonably early – usually after April 1 (maybe earlier this year due to warm late winter). Tomato plants grow best when temperatures exceed a specific base temperature for a certain number of days (referred to as heat units or degree days). Tomatoes are heat-loving plants that need a long warm growing period to grow from seed to fruit. Optimum fruit set occurs within a narrow night temperature range. Tomatoes produce the largest yields of highest quality fruits when day temperatures are in the range of 80 to 85ºF and when night temperatures remain above 62 but below 72ºF.
Thirdly, I fertilize to produce a healthy, sturdy plant when the plant is young. With the first open flowers, I reduce fertilization (particularly the nitrogen) to about half the original rate. When the first fruits are about two inches in diameter, I reduce fertilization a little more. Once I harvest the first tomatoes, I further reduce the fertilizer to about ¼ the original rate or completely quit fertilizing. Many home growers fertilize tomatoes too much. This results in a big green plant with few tomatoes. This reduction in fertilization is mainly important with the amount of nitrogen being applied. The plant still benefits from adequate potassium.
There are two basic phases of growth in plants – vegetative and reproductive. When a tomato plant begins to produce flowers, it is becoming sexually mature (switching from a vegetative phase of growth to a reproductive phase of growth). Just remember that as plants mature and fruit, the demand for nitrogen decreases. Excessive nitrogen can reduce fruit set and development. Too much nitrogen keeps the plant in a vegetative phase of growth resulting in a big, overly vigorous, green plant with few to no fruit.
As heat, humidity, rains, diseases and insects increase during summer months, tomato production declines. Entire plants may begin to die. At this point, I’m thankful for any production I got. I do away with the plants and find something else to do other than grow tomatoes.