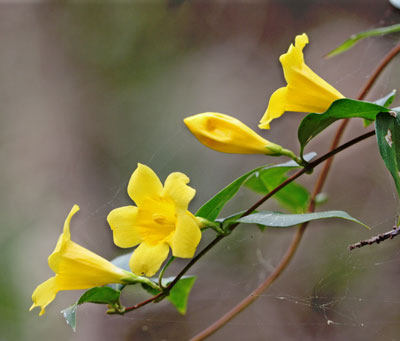
The sweetly scented, golden yellow, trumpet-shaped flowers on the cascading, fine textured foliage of Carolina jessamine (Gelsemium sempervirens) covering fences and trees in open woodlands and along roadsides from late January to early April makes it one of the most beautiful vines throughout the Southeast. Carolina jessamine’s growth rate is moderate, reaching 20 feet or more when maintained as a vine. It can also be grown as a ground cover by cutting yearly in the late spring after flowering.
Carolina Jessamine – Photo credit: Mary Keim (Flickr ID Mary Keim).
This vine is very adaptable and will grow in a variety of conditions. Carolina jessamine tolerates either full sun or partial shade. Flowering is more prolific and foliage growth is denser in full sun. It grows best in rich, well-drained soil. But, it can grow very quickly up into the canopy of young trees. You may want to limit how many vines are allowed to establish around the trees that are being raised for future shade or harvesting.
Yellow jessamine has been used by herbalists to treat eye ailments and as natural, perfumed hair oil. The essential oils of the plant are extracted for use in the perfume industry, since the pleasant odor is difficult to reproduce synthetically.
Insects or diseases rarely trouble Carolina jessamine. All parts of this plant are extremely poisonous, especially to livestock, if eaten; however, the bright yellow spring blossoms are a source of nectar for butterflies and deer often browse on the vegetation for food and fiber. The sap may cause skin irritation in sensitive individuals. People, especially children, can be poisoned by sucking the nectar from the flowers. This should be considered when choosing a location to allow the Carolina jessamine to grow.
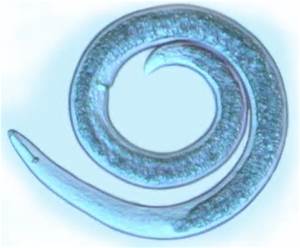
Roundworms differ from flatworms in that… well… they are round. You might recall from Part 1 of this series that flatworms were flat which helps with exchange of materials inside and out of the body. Flatworms were acoelomates – they lack an interior body cavity and thus lack internal organs. So, gas exchange (etc.) must occur through the skin. And a flat body increases the surface area in order to do this more efficiently.
A common nematode. Photo: University of Florida
But roundworms are round, which reduces this surface area and reduces the efficiency of material exchange through the skin. Though gas exchange through the skin does happen, it is not as efficient. So, there is the need for internal organs and that means there is a need for an internal body cavity to hold these organs. But with the roundworms there is only a partial cavity, not a complete one, and the term pseudocoelomate is used for them. Though the round body has adaptations to deal with gas exchange, it is a better shape for burrowing in the soil and sediment.
There are about 25,000 described species of roundworms, though some estimate there may be at least 500,000. They are placed in the Phylum Nematoda and are often called nematodes. Nematodes live within the interstitial spaces of soil, sediment, and benthic plant communities. They have been found in the polar regions, the tropics, the bottom of the sea, and in deserts – they are everywhere. They are usually in high numbers. One square meter of mud from a beach in Holland had over 4,000,000 nematodes. Scientists have estimated that an acre of farmland may have at least 1 billion of them. A decomposing apple on the ground in an orchard had about 90,000 nematodes. So, they are found everywhere and usually in great abundance. There are parasitic forms as well and they attack almost all groups of plants and animals. Food crops, livestock, and humans have made this group of nematodes a concern in our society.
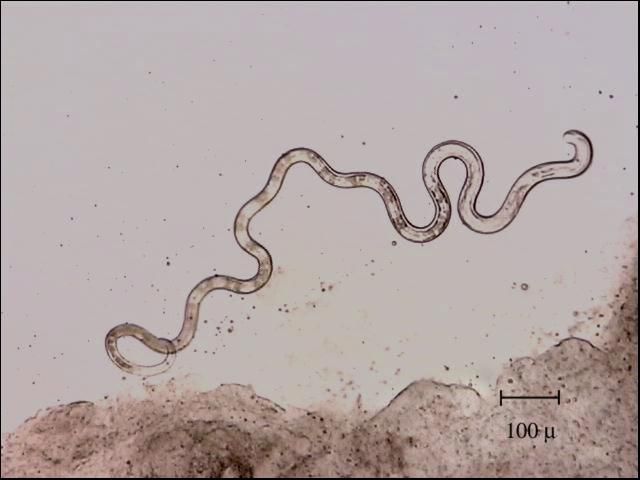
Like many pseudocoelomates, nematodes have an anterior end with a mouth, but no distinct head – rather two tapered ends. Most of the free-living nematodes are less than 3mm (0.1in), but some soil nematodes can reach lengths of 7mm (0.3in) and there are marine nematodes that can reach 5cm (2in.) – it is a group of small worms.
Roundworms usually need water in order to move, even the soil species. They typically wriggle and undulate, similar to a snake, when moving and under a microscope they wriggle quite fast. In aquatic habitats they may swim for a short distance, and a few terrestrial species can crawl through dry sand.
Marine Nematode – Dr. Roy P. E. Yanong, UF/IFAS Tropical Aquaculture Lab
Many free-living nematodes are carnivorous and feed on tiny animals and other nematodes. Some feed on microscopic algae and fungi. Some terrestrial species pierce the roots of plants and digest the material within. Many marine species will feed on detritus lying on the seafloor. The carnivorous species may possess small teeth, and many have a stylet they can use to pierce prey or the plant root to access food. The mouth leads to a long digestive tract and eventually an anus – nematodes have a complete digestive tract.
The brain is basically a nerve ring near the head that leads to numerous nerve chords that run the length of the body. Sensory cells are most associated with the sense of touch and smell.
Having separate sexes is the rule for nematodes, but not for all. Males are usually much smaller and usually have a hooked posterior end which they use to hold the female during mating. 50-100 eggs are usually produced and laid within the environment.
Farmers and horticulturists are familiar with these free-living nematodes, but it is the parasitic ones that are most known to the general public. There are many different forms of parasitism within nematodes. Dr. L.H. Hyman categorized them as follows:
Ectoparasites that feed on the external cells of plants – using their stylet to pierce the plant tissue and remove nutrients.
Endoparasites of plants. Juveniles of some nematodes enter plants and feed on tissue. This can cause tissue death and gall-like structures.
Some free-living nematodes, while juveniles, will enter the bodies of invertebrates and feed on the tissue when the invertebrate dies.
Endoparasites within invertebrates as juveniles, but the adult stage is free-living.
Some are plant parasites as juveniles and animal parasites as adults. The females live within the bodies of plant eating insects, where they give birth to their young. When the insects pierce the plant tissue, the juveniles enter the plant and begin feeding on it. When they mature into adults, they re-enter the insects and the cycle begins again.
Those that live within animals. The eggs, or newly hatched young, may be free-living for a short period, where they find new animal hosts, but the majority of the life cycle occurs within the animal. Many known to us infect dogs, cats, pigs, cattle, horses, chickens, fish, and humans.
Heartworms, pinworms, and hook worms are names you may have heard. For dog nematodes, the eggs are released into the environment by the dog’s feces. Another dog eats this feces and becomes infected.
The nematode known as Ascaris lumbricoides is the most common parasitic worm in humans. It has been estimated that almost 1 billion people are infected with it. Female Ascaris release developing eggs into the environment via human feces. Other humans become infected after swallowing food or water containing the eggs. Once inside the human, the eggs hatch and penetrate the tissue moving into the heart and eventually the lungs. From here they crawl up the trachea inducing a coughing response which is followed by a swallowing response that moves the developing juvenile worm into the esophagus and eventually back to the intestines where the cycle begins again. Infections of this worm are more common where sanitation systems are not adequate and/or human feces are used as a fertilizer.
Hookworms are another human parasite that feed on blood and can cause serious infections in humans due to blood and tissue loss. Fertilized eggs of this worm are laid in the environment and re-enter new human host as developing juveniles by penetrating their skin. Once in the new host the developing worms are carried to the lungs via the circulatory system and work their way into the pharynx, are swallowed, and eventually end up in the intestine. Not all hookworm juveniles penetrate through the skin but rather enter the body when the person unknowingly consumes human feces. This can happen from not washing your hands or food (if human waste is used as fertilizer). Pinworms and whipworms are other nematodes that have similar life cycles. In Asia there are some nematodes that are passed to humans by biting insects.
The roundworm known as the nematode is a common issue for farmers, horticulturists, and as a parasite in some parts of the world. Their lifestyles, while being a potential problem for us, have been very successful for them. In the next edition in this series, we will learn more about the most advanced worms on our planet – the segmented worms. We will begin with the polychaetes.
References
Barnes, R.D. (1980). Invertebrate Zoology. Saunders Publishing. Philadelphia PA. pp. 1089.
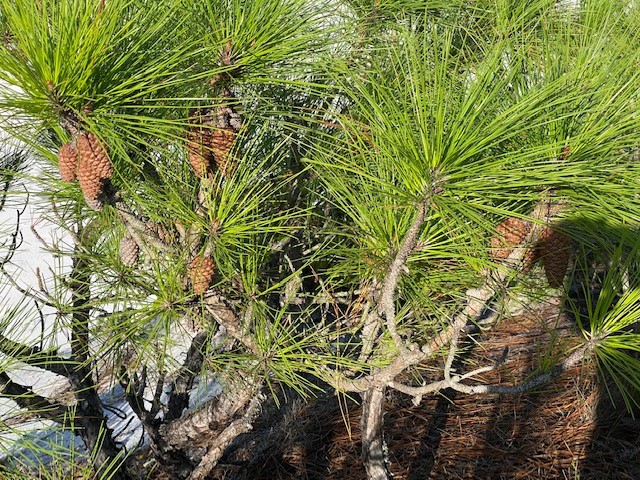
Pine tree saplings. Planting, growth. UF/IFAS Photo by Dawn McKinstry
It is Florida Arbor Day and all across the state people will be picking up trees and planting them for the future. It is also the time of year where large reforestation efforts are underway to get the next generation established. Planting trees is one of the most hopeful activities you can do. It takes a long time for a tiny forest seedling to become a titan of the forest. Similarly, a larger nursery grown tree planted in an urban setting takes a long time to get to the large shade tree that is envisioned. Whether in an urban or forest setting getting tree planting right is the difference between success and failure. Today we celebrate Florida Arbor Day, in large part because this is the best time of year to plant trees in our climate. Planting trees in the cold of winter means they can focus on growing and establishing a root system before the leaf and shoot growth they put on in spring. This is why states move their Arbor Day observance and the most southern and warm states like Florida, Louisiana, and Texas have the earliest celebrations.
So, what goes into planting a tree properly? Well, it is a lot more than green side up that is for sure. It takes lots of planning, care, and attention to detail. The specifics are very different when planting thousands of forest seedlings across a tract vs just a few large trees in a park. The basic principles are the same though and we will start with forest trees. For reforestation in forests the journey starts in specialized forest nurseries that produce the millions of trees needed to serve the forest industry of the area. Let’s take a deeper dive into getting tree planting right in this important time of year.
Tree Planting Tips in Forested Settings
Getting tree planting right in forest settings really starts with the tree species and seedlings used. If this is selected wrong, the seedling quality is low, and the seedlings are not handled correctly in shipment and the field; complete planting failures can occur. A failure is very costly as you not only have the cost for this year but the replanting cost the next, plus you lost a year of forest growth. Thankfully, it is very rare now since we know good planting protocols and follow them regularly. Forest seedling nurseries are extremely high tech operations and now provide the best seedlings in the world here in the U.S. The U.S. reforestation system is the envy of the world and the Southeast is the jewel in that crown routinely planting the highest amount of trees of any timber region globally. Entire research divisions at major universities plus state forest agency reforestation sections and the U.S. Forest Service Reforestation Division all work in concert to ensure our forests’ future. That is not to mention the massive private nurseries run by top flight companies that are experts in reforestation and forest management. Landowners and others planting trees now have the best access and reforestation material ever available in private hands, and companies provide the highest quality seedlings available in terms of seedling quality and improved tree genetics. By spending a bit more in reforestation a huge return can be generated when a stand is mature. Landowners can take advantage of this outstanding leap in reforestation technology, but old-fashioned due diligence and good planting technique is key to realize the outcome. First and foremost, the right tree species has to be matched with the right site and range of conditions where it will thrive. Off-site plantings that are not compatible with that species (such as loblolly pine on sandhills) may succeed from a survival standpoint only to fail long term (i.e. stunting and lack of volume development). Care of the seedlings during the planting operation is key to success and establishment though. Seedlings must be stored and cared for properly until planting is completed. Poor techniques will cause issues with root structure and growth and poor care and excessive storage times before planting will cause stress that can result in seedling death or loss of vigor that leads to loss of growth. Plant seedlings right though and you will have an excellent stand. Here are some tips to get tree planting right:
Work closely with a good consulting forester, forest nursery, and or reforestation service provider. Coordinate seedling delivery, storage, and planting well in advance of the operation.
Assess the weather conditions leading up to planting and do not be afraid to cancel if conditions are questionable.
Store seedlings in refrigerated trucks or a refrigerated storage facility (optimal) or tarped in an area that is out of the wind and elements.
Bareroot seedlings are the most sensitive and need to be planted as soon as possible and by skilled crews. Bareroot are prone to J-rooting and other issues if not planted with the correct equipment for the soil conditions and by highly trained and skilled crews. If machine planting ensure test runs are done to make sure the planting trench and packing system are working well and planting seedlings correctly.
Ensure the seedling type and planting conditions are communicated to the crew well ahead of arrival for logistical purposes. A Consulting Forester is invaluable here and results are usually better when a landowner uses a consultant that can coordinate. Issues like planting crews showing up with 4 inch container dibbles (the industry standard) when the landowner has ordered 6 inch containerized seedlings can be a disaster.
Conduct quality control and spacing checks throughout the planting operation to make sure seedlings are in good condition and being planted according to best practices and the planned reforestation operation. Communicate with the crew on changes needed. Crews want to do a good job and usually enjoy working together with the forester or landowner to get the best job done.
Urban Forests
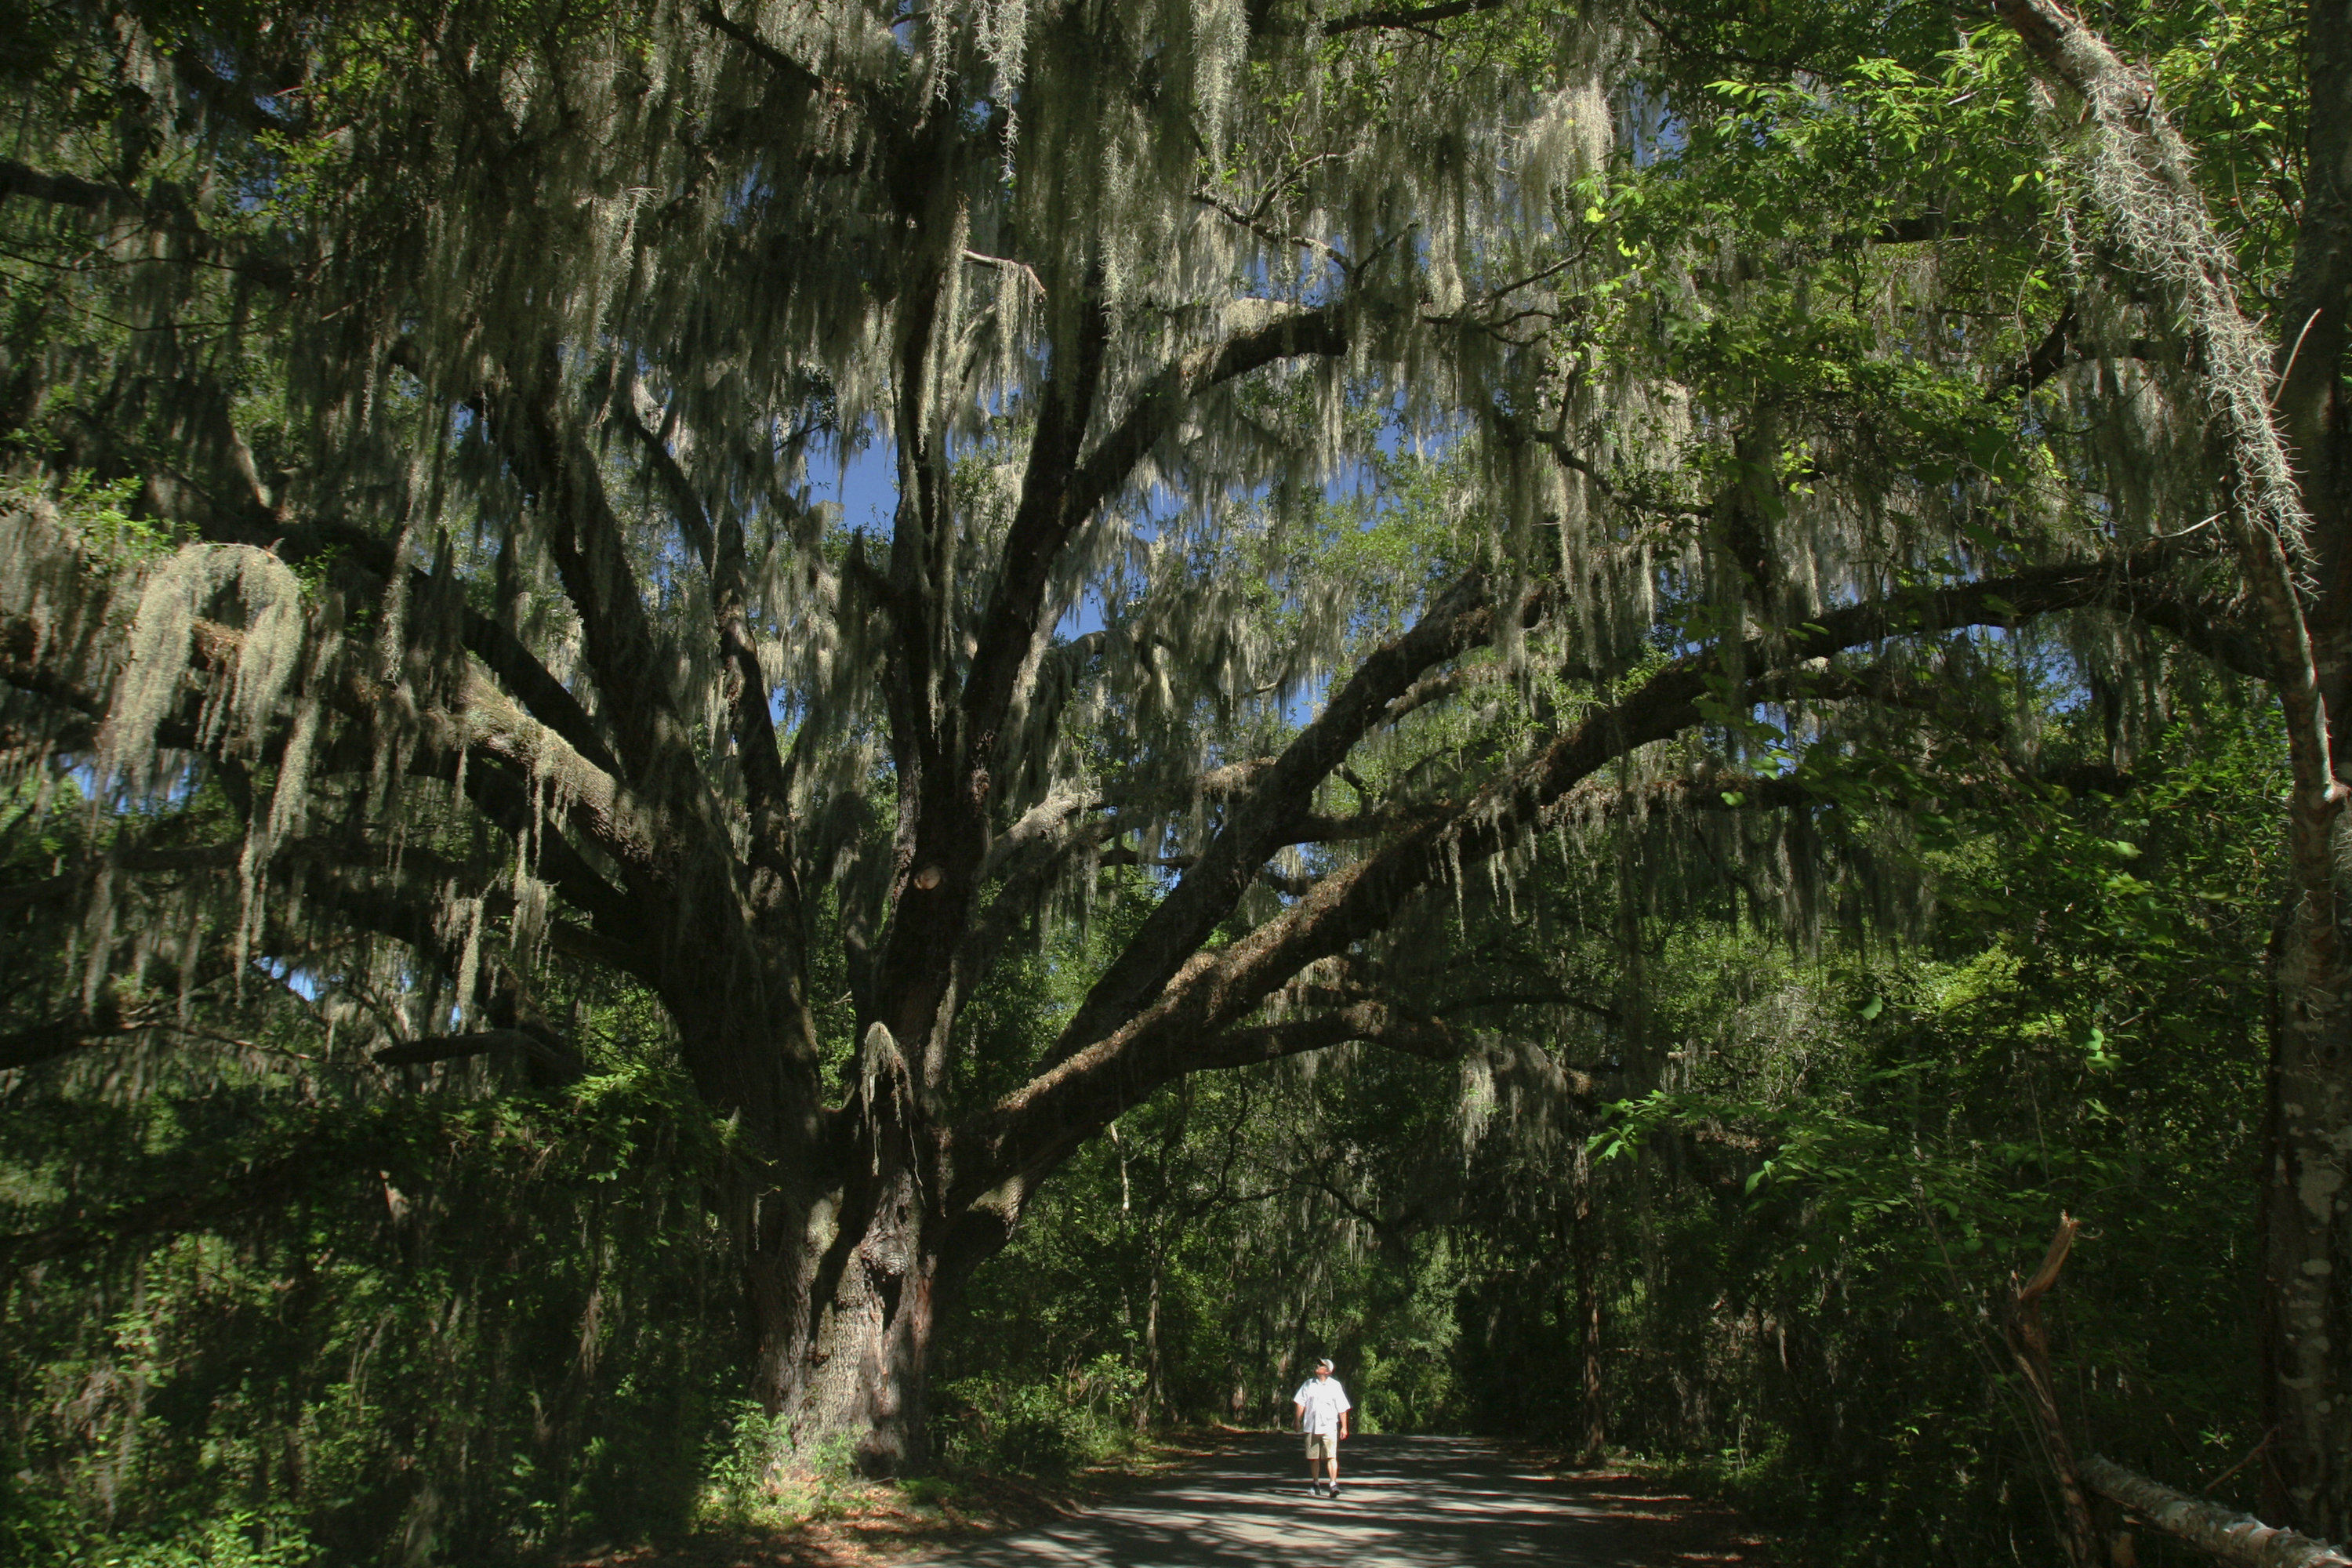
Man walking a trail in Oak Hammock. UF/IFAS Photo: Thomas Wright.
We have passed the forest tree category and we move to the urban forest and what is really the art of individual tree management. Urban forests are very different from natural forests, but they are still forests and the management principles of forestry still apply. The primary difference is planting operations in natural settings involve thousands of trees and usually count on a certain amount of loss. Urban reforestation and tree planting can rely on just a few to several hundred trees depending on the scope. The main difference is urban operations use single large container trees that have been grown for several years in the nursery and will be planted in very specific locations. There is a significant focus on each tree and the investment per tree is huge by comparison. Given this it is highly desirable that each tree live and the expense and investment in each individual tree necessitates this. Urban forests also have ready access to things like irrigation, tailored fertilizer, and many other tree care options to improve establishment. Most Arbor Day activities focus on these urban planting operations and things like tree dedications. To get it right let’s look at what we need to do to get urban trees planted right in our urban forests.
Tree Planting Tips for Urban Areas
Urban trees have a rough life compared to their relatives in the natural forest. Natural forests do not have the myriad of issues that the urban forest does, but that does not mean trees can’t thrive in our urban ecosystem. Here in the Florida Panhandle, we have some of the largest and most densely covered urban forests in our city centers and metropolitan areas. In fact, our urban forest tree cover is some of the highest in the country. This is likely due in large part to our lush semi-tropical forest ecosystem that naturally thrive here. With good management our Urban Forest just sort of forms and towers over our urban landscape. Another factor supporting this is the local community commitment to tree planting and tree care. The vast majority of our incorporated communities are Tree City USA certified and many private HOA communities have HOA rules that require tree cover maintenance. These are good things for our tree cover and our communities are much more livable, enjoyable, and healthy due to our amazing urban forest. To maintain our urban forest though we need to plan tree planting and management, if for now other reason than to replace trees that die or are lost over time. As our area grows and develops new trees need to be planted in urban areas to replace ones lost as the natural forest was converted. Doing this right means more success, healthier trees, and better use of public funds through better survival. Here is what you need to know to plant a tree right in your urban setting.
Right Tree Right Place! Planning is key and far too many times it is overlooked. Urban forests have limited root and crown growing room. Planting a towering Southern Red Oak in an area with only space for 40% of this tree at maturity will not be a success. Yes, that tree is small and dainty now, but in our climate it will grow into a towering tree in no time. Similarly, trees that drop fruit (like Sweetgum) or create a bit of a mess (like Sycamore) may not fit well in an area. Perform a through assessment of the planting spot and determine what size and characteristics are needed. Then compare it with our outstanding variety of native trees and select the right one.
Thoroughly assess the planting site and determine any mitigations that are needed. Locate and determine all utilities, rights of way, and other issues. Remember that utilities have the right to trim any tree that comes into their right of way and that includes roots and branches. If the tree will interfere consider relocation or selecting a smaller tree. Sometimes a tree will tolerate the maintenance activities associated with a utility or right of way but sometimes it will not.
Determine the soil characteristics on site and perform a soil test. This is probably the most overlooked issue, and many people plant trees without any thought to the soil. Since trees are big and tough their site needs often get ignored. It is easy to forget trees have preferences in water depth, PH, density, and nutrient needs. Compaction is particularly a problem in urban settings and a soil test can detect it. If compaction is a problem, develop a plan to mitigate it prior to planting.
Determine if amendments are needed and/or beneficial and apply accordingly. For urban trees preparing a planting hole and root establishment zone is critical to success. Fortunately we have some of the best options and methods of doing this now that we ever have before. Biochar, soil mycorrhizae (beneficial fungi) inoculants, long term release tailored fertilizers, and multiple other options mean a planting hole can be so much more than a hole. Explore the options and select what time and budgets allow, the tree will certainly do much better with good amendments to establish a strong root system early.
Plant the tree properly and using good techniques. You can take a whole class on this and still have some more to gain on technique. It is a much more complex operation than it initially appears. It is more than just getting the tree in the ground straight and level. It starts from the minute the tree arrives from the grower to the maintenance over the establishment years. Common mistakes are too small/too large a hole, incorrect depth, improper backfill and setting, failure to mulch or improper mulching technique.
Arbor Day is a good reminder that trees are a valuable and important part of the world we inhabit. That is true in a pristine forest or under the favorite shade tree at your local golf course. Except for some of the shortest-lived trees most will certainly outlive us. The longest will outlive tens of generations of we humans. Let’s hope that the trees we plant this Arbor Day are successful in establishment and benefit many generations to come.
According to Druid lore, hanging the plant in homes would bring good luck and protection. Holly was considered sacred because it remained green and strong with brightly colored red berries no matter how harsh the winter. Most other plants would wilt and die.
Later, Christians adopted the holly tradition from Druid practices and developed symbolism to reflect Christian beliefs. Today, the red berries are said to represent the blood that Jesus shed on the cross when he was crucified. Additionally, the pointed leaves of the holly symbolize the crown of thorns Jesus wore on his head.
Several hollies are native to Florida. Many more are cultivated varieties commonly used as landscape plants. Hollies (Ilex spp.) are generally low maintenance plants that come in a diversity of sizes, forms and textures, ranging from large trees to dwarf shrubs.
The berries provide a valuable winter food source for migratory birds. However, the berries only form on female plants. Hollies are dioecious plants, meaning male and female flowers are located on separate plants. Both male and female hollies produce small white blooms in the spring. Bees are the primary pollinators, carrying pollen from the male hollies 1.5 to 2 miles, so it is not necessary to have a male plant in the same landscape.
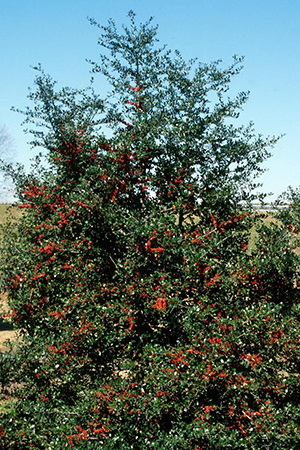
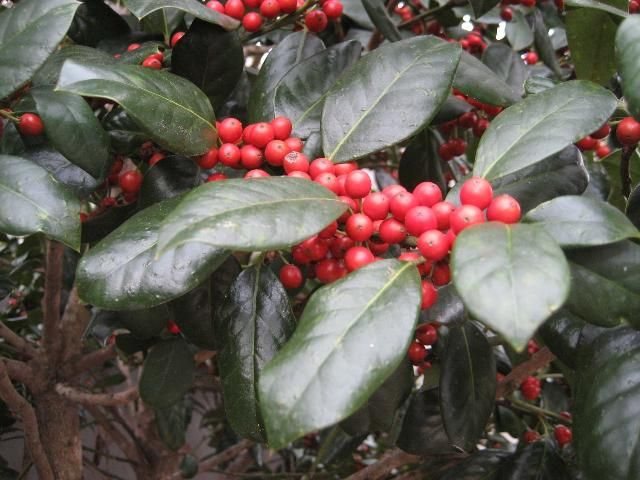
A holly tree with berries – Sheila Dunning
Several male hollies are grown for their compact formal shape and interesting new foliage color. Dwarf Yaupon Hollies (Ilex vomitoria ‘Shillings’ and ‘Bordeaux’) form symmetrical spheres without extensive pruning. ‘Bordeaux’ Yaupon has maroon-colored new growth. Neither cultivar has berries.
Hollies prefer to grow in partial shade but will do well in full sun if provided adequate irrigation. Most species prefer well-drained, slightly acidic soils. However, Dahoon holly (Ilex cassine) and Gallberry (Ilex glabra) naturally occurs in wetland areas and can be planted on wetter sites.
Evergreen trees retain leaves throughout the year and provide wind protection. The choice of one type of holly or another will largely depend on prevailing environmental conditions and windbreak purposes. If, for example, winds associated with storms or natural climatic variability occur in winter, then a larger leaved plant might be required. Several cultivars have been created by cross pollination with native species or propagation from sports of natives. Check out ‘East Palatka’, ‘Savannah’, ‘Nellie Stevens’, ‘Robin’, and ‘Screen Play’.
‘Roundleaf’ Yaupon Holly – Sheila Dunning
The natives are likely to be better adapted to local climate, soil, pest and disease conditions and over a broader range of conditions. Nevertheless, cultivars may be desirable for many attributes such as height, growth rate and texture but should not reproduce and spread beyond the area planted. When introducing a new plant to the landscape it is always important to consider any negative impacts.
There is increasing awareness of invasiveness, i.e., the potential for an introduced species to establish itself or become “established” in an ecological community and even become a dominant plant that replaces native species. Tree and shrub species can become invasive if they aggressively proliferate beyond the windbreak. At first glance, Brazilian pepper (Schinus terebinthifolius), a fast-growing, non-native shrub that has a dense crown, might be considered an appropriate red berry producing species. However, it readily spreads by seed disbursed by birds and has invaded many natural ecosystems. Therefore, the Florida Department of Environmental Protection has declared it illegal to plant this tree in Florida without a special permit. Consult the Florida Invasive Species Council (FISP) https://www.floridainvasives.org/ for a list of prohibited species in Florida.
For a more comprehensive (though not total) list of holly varieties and their individual growth habits refer to ENH42 Hollies at a Glance: http://edis.ifas.ufl.edu/mg021
It’s no secret that fall, October specifically, is the best month for wildflower watching in the Panhandle. From the abundant vibrant yellow-gold display of various Sunflowers, Asters, and Goldenrods to the cosmopolitan bright pinks and purples of Mistflower, Blazing Star, and False Foxglove, local native landscapes light up each year around this time. However, if you’re lucky and know where to look, you can also spot two species, Azure Blue Sage (Salvia azurea) and Forked Bluecurls (Trichostema dichotomum) that sport that rarest of wildflower hues – vivid blue.
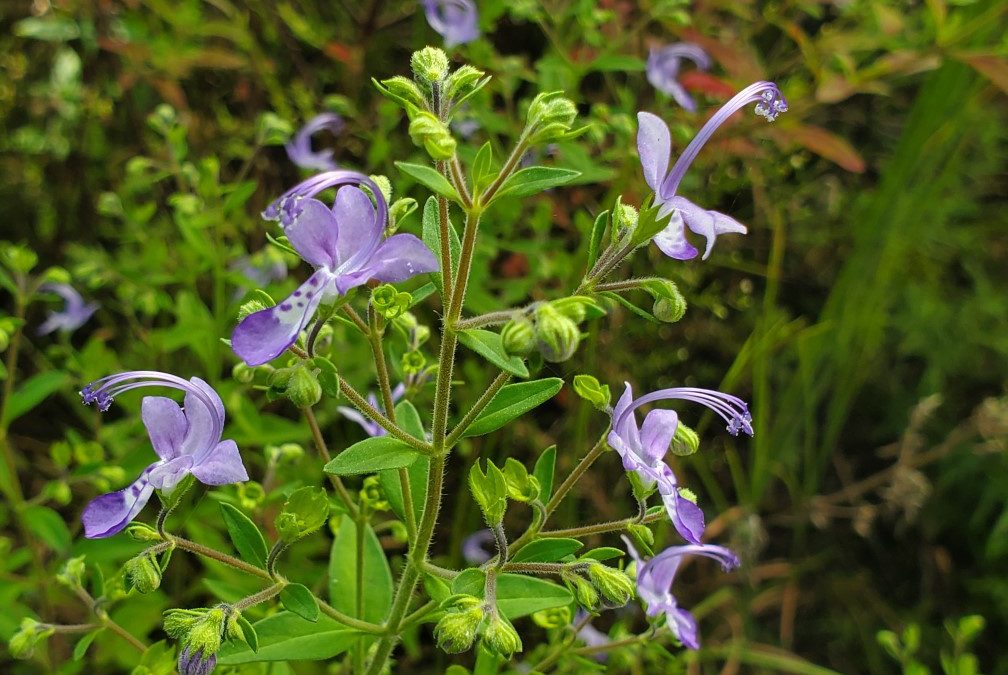
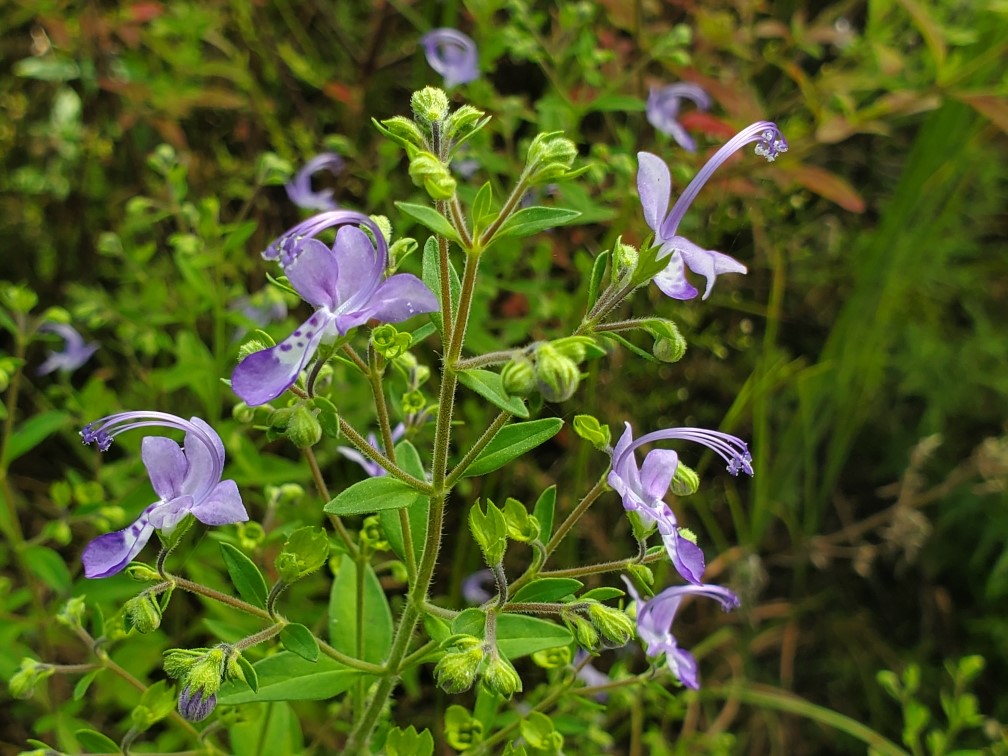
Forked Bluecurls begins its flower show in late summer, picking up steam in fall, and reaching its peak now as nights get cool and the days grow short. The species’ flowers are easily among the most unique around. Each flower has two distinct “lips” – the lower lip is white and dotted with blue specks, while the top is distinctly pure blue – with characteristically curled blue stamens rising to preside over the rest of the flower below. Though individual flowers are very small and only bloom in the morning, disappearing by afternoon, they appear by the hundreds and are very striking taken together. Various pollinators, especially bees, also find Forked Bluecurls flowers very attractive and frequent them on cool fall mornings. Though the flowers are obviously the highlight, the rest of the plant is attractive as well, growing to 3’ in height and possessing small, light-green fuzzy leaves. Forked Bluecurls, while not exceedingly common, can be found in sunny, sandy natural areas throughout the Panhandle, including well-drained flatwoods, sandhills, and open, disturbed areas.
Forked Bluecurls blooming in an open natural area in Calhoun County. Photo courtesy of Daniel Leonard.
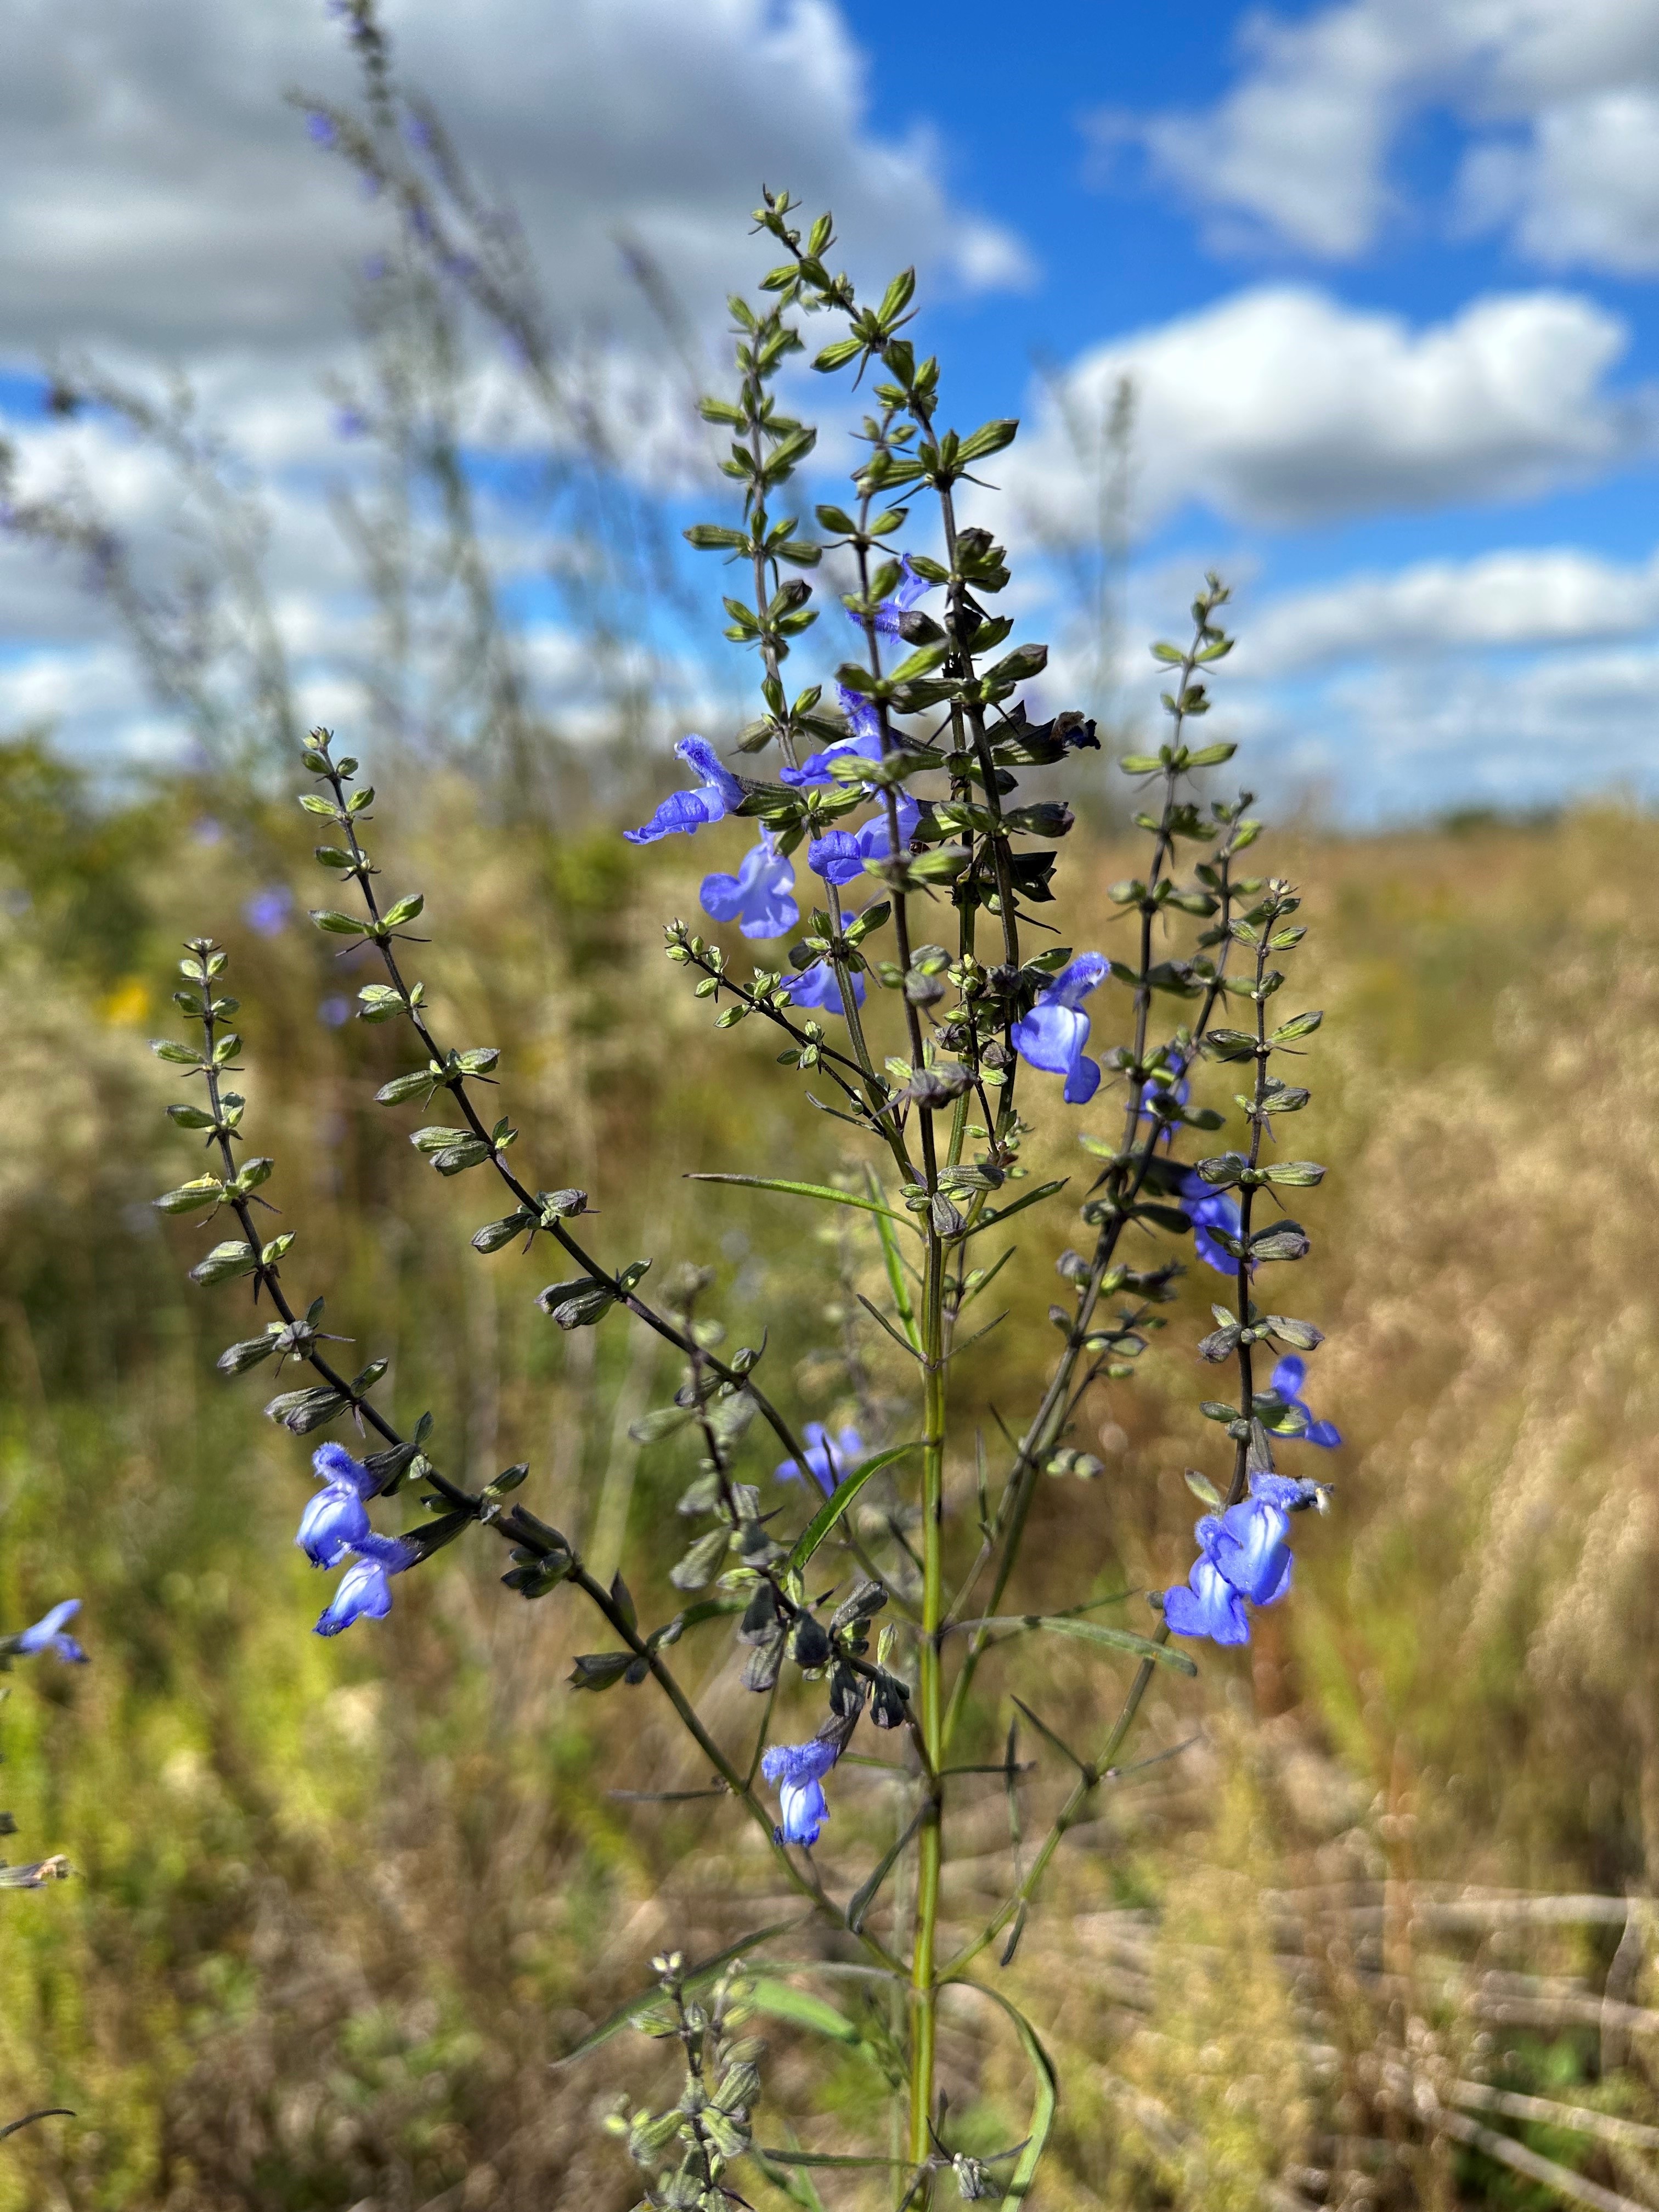
The second blue bloomer, Azure Blue Sage, is possibly even more striking in flower than Forked Bluecurls. Aptly named and blooming around the same time as Forked Blue Curls, Azure Blue Sage is a much larger plant (often 4-6’ in height) and holds its abundant sky-blue flowers high above the surrounding landscape. Because of their height and their propensity to occur in bunches, Azure Blue Sage’s brilliant tubular flowers are immediately noticeable to passersby and the myriad bee and butterfly pollinators that visit. Beyond its flowers, Azure Blue Sage is a very unusual looking perennial plant, tall and spindly with dark green, narrow leaves held tightly to square stems, a giveaway of its lineage in the Mint family. The species can be found in similar areas to Forked Bluecurls – natural areas in the Panhandle that possess abundant sunshine and very sandy, well-drained soil.
Azure blue sage blooming in a recently replanted pine forest in Calhoun County. Photo courtesy of Daniel Leonard.
Both species would make excellent additions to mixed perennial landscapes where the soil and sun conditions were right, as they are exceedingly low-maintenance and have the propensity to reseed themselves from year to year. Unfortunately, they are rarer in the nursery trade than they are in the wild and can only be found occasionally at nurseries specializing in Florida native plants. (Visit PlantRealFlorida.org to find native nurseries in your area!) However, even if you are unable to source a plant for your home, both these somewhat rare, blue-blooming fall beauties, Forked Bluecurls and Azure Blue Sage, are worth searching out in the many State Parks and public natural areas across the Panhandle! For more information about Forked Bluecurls and Azure Blue sage or any other natural resource, horticultural, or agricultural topic, contact your local UF/IFAS County Extension Office. Happy fall wildflower watching!
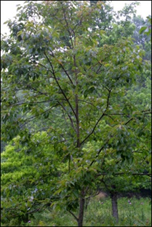
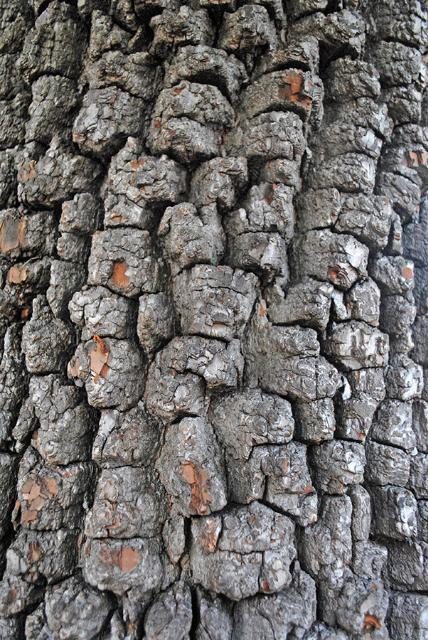
Diospyros virginiana, the Common Persimmon, is a large deciduous tree in the Ebenaceae family. The common persimmon is a southern native small to medium fruit tree that is becoming more popular for homegrown fruit. The bark is grey or black and forms chunks or blocks that give it a checkerboard look. Fall color can be a spectacular red in USDA hardiness zones 4 through 8a. It is well adapted to cities but requires fallen fruit maintenance and wildlife control. Its mature height can be 40 to 60 feet, with branches spreading from 20 to 35 feet and a trunk two feet thick, but it is commonly much shorter in landscapes. The trunk can have a singular or multiple trunks, it tends to form colonies. The leaves are alternate, simple, and a rich green color. The leaf margins can be entire or somewhat serrated. The funnel-shaped flower has four petals and ranges in color from white to cream to gray.
UF/IFAS, Full Tree
Tree Bark Photo: UF
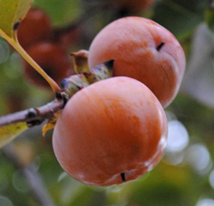
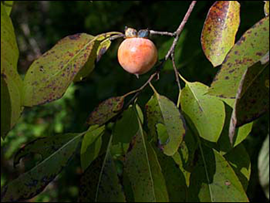
The common persimmon is smaller than a ping-pong ball. The persimmon is a round fruit with an orange to reddish-purple color, with a size of 1 ¼ inches across. The flavor is more fermented and sugary-sweet. In Florida, the season is from late August to early November. Fruit do not ripen at the same time. When ripe, the fruit turns from green to burnt orange. They also fall from the tree. The fruit is soft, sticky, and very delicious, but it needs to be separated from its skin and seeds before being used in recipes. They can be eaten out of hand when fully ripe, pureed, dried, and used in preserves, chutneys, quick breads, puddings, pies, and sweet and savory dishes. The fruit is very favored by wildlife. Persimmon fruit is an essential food source for songbirds, turkeys, and small and large mammals.
UF/IFAS Persimmon FruitUF/IFAS Persimmon Fruit
Common Persimmon Fruit. Photo: UF
Common persimmon prefers moist, well-drained, bottomland or sandy soils but is known to be very drought- and urban-tolerant. It is a fantastic tree in its adaptability to site conditions, including alkaline soil. It is commonly seen as a volunteer tree in old fields but grows slowly on dry sites. Its fruit is an edible berry that usually ripens after frost. Some cultivars do not require the frost treatment to ripen. Persimmon fruit is hard and astringent when unripe. Most American cultivars require both male and female trees for proper fruiting.
Besides fallen fruit maintenance, persimmon maintenance is easy and is suggested that it persimmon should be planted more often. Due to a coarsely branched root system, transplantation is difficult. The trees should be balled and burlapped when young or grown from containers. The wood from the tree is used for golf club heads because it is tough and almost black.
Common persimmon is troubled by a leaf-spot disease in the south. This disease causes black spots on the leaves and premature defoliation in August in the north and September in the south. The tree will not die from the disease. It is also susceptible to a vascular wilt, which can devastate established trees. There are no severe pests fort his native fruit tree, except occasional caterpillars.
For more information, please contact your local county extension Office.