by Mark Mauldin | Oct 21, 2025
Fall is here – peanuts are being picked and football season is in full swing. With fall being synonymous with the end of the growing season, it is a surprisingly good time of year to start many vegetation management operations. Fall is a particularly good time of year for a land manager to chemically control unwanted perennial vegetation.
–
General Comments & Caveats
I know plants can’t read calendars and to my knowledge they don’t watch football, so how would they even “know” it’s fall? Why does the season matter? In very general terms, perennial plants (those that live for many years) respond to shortening day length; the decreasing amount of sunlight stimulates the plants to begin storing more energy for the winter ahead. This process increases the downward flow (from leaves, towards roots and rhizomes, etc.) inside the plant. This phenomenon pairs very well with how systemic herbicides need to move within the plant to be effective. Put another way, again in very simplified terms, fall applications of systemic herbicides to perennial plants build on the plants’ natural processes associated with transitioning to winter dormancy and provide the herbicide with excellent access and opportunity to affect the plant.
While fall can be an excellent time to control perennial vegetation, taking advantage of this opportunity does require some additional attention to detail, as compared to mid-summer herbicide applications. For herbicides to work properly the chemical must be able to enter the plant and the plant must then be able to move herbicide though its xylem and phloem cells.
- In the fall it is not uncommon for it to become very dry. Drought stress can impede both necessary processes described above. Fall herbicide applications only work when adequate moisture is available.
–
- Foliar herbicides, like glyphosate, must enter a plant through a functional green leaf. At some point in the fall, the leaves of deciduous plants lose their functionality and thus their ability to convey herbicide to the rest of the plant. Chinese Tallow (popcorn tree) comes to mind here – if the leaves have changed color, they have been cut off from the rest of the plant making them useless for receiving herbicide.
–
- Cold temperatures (particularly below freezing) can cause plants to go dormant. Dormant plants do not circulate herbicide effectively. Plants vary greatly as to what temperature induces dormancy and how quickly they regain functionality after temperatures increase. When controlling perennial grasses, it is generally recommended to make fall applications before first frost and the browning of leaves that closely follows. For plants that retain green leaves after frost (privet, for example), make sure temperatures are well above freezing at the time of herbicide application.
NOW is the time to treat cogongrass – fall, with good soil moisture. Don’t miss this ideal window for herbicide application.
Photo Credit: Mark Mauldin
–
Specific Vegetation Management Practices to Consider this Fall
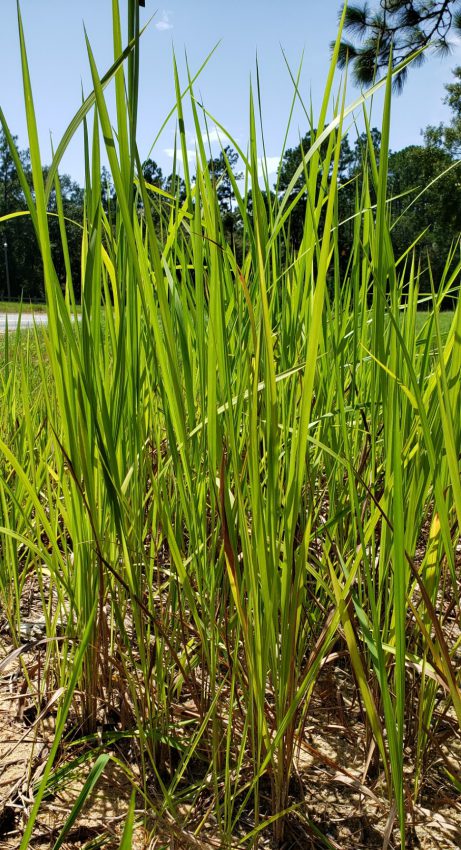
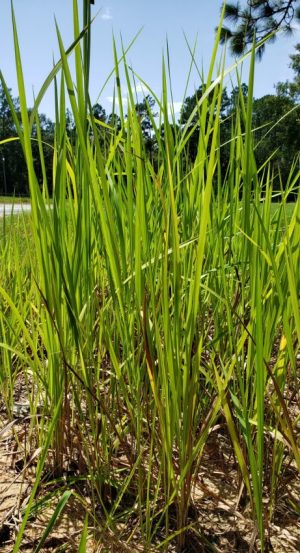
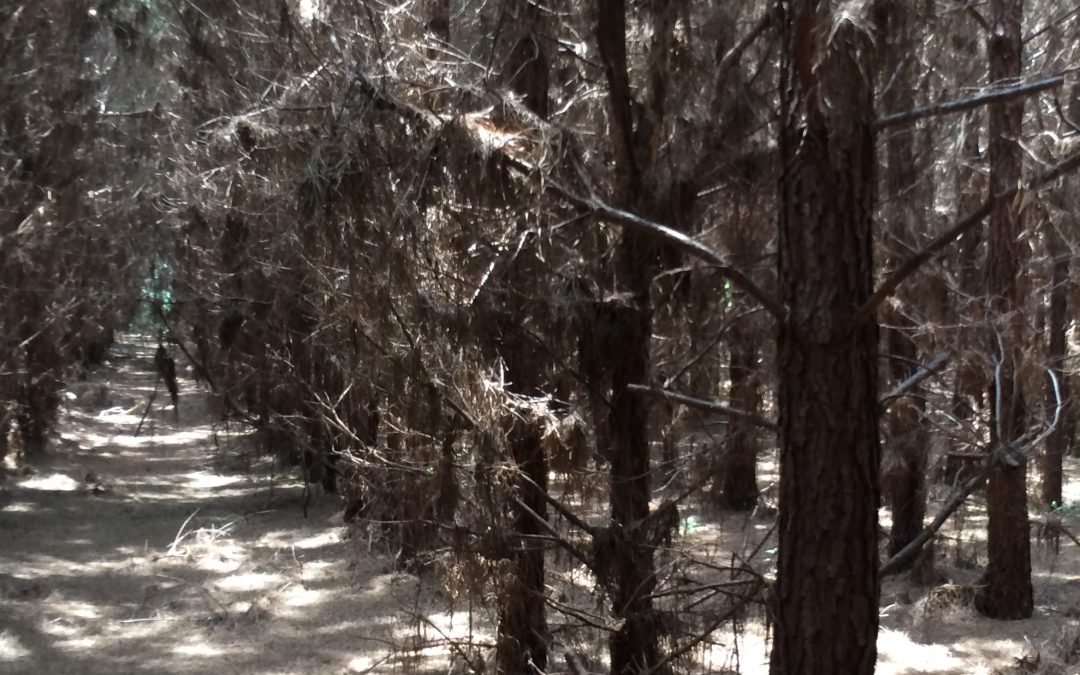
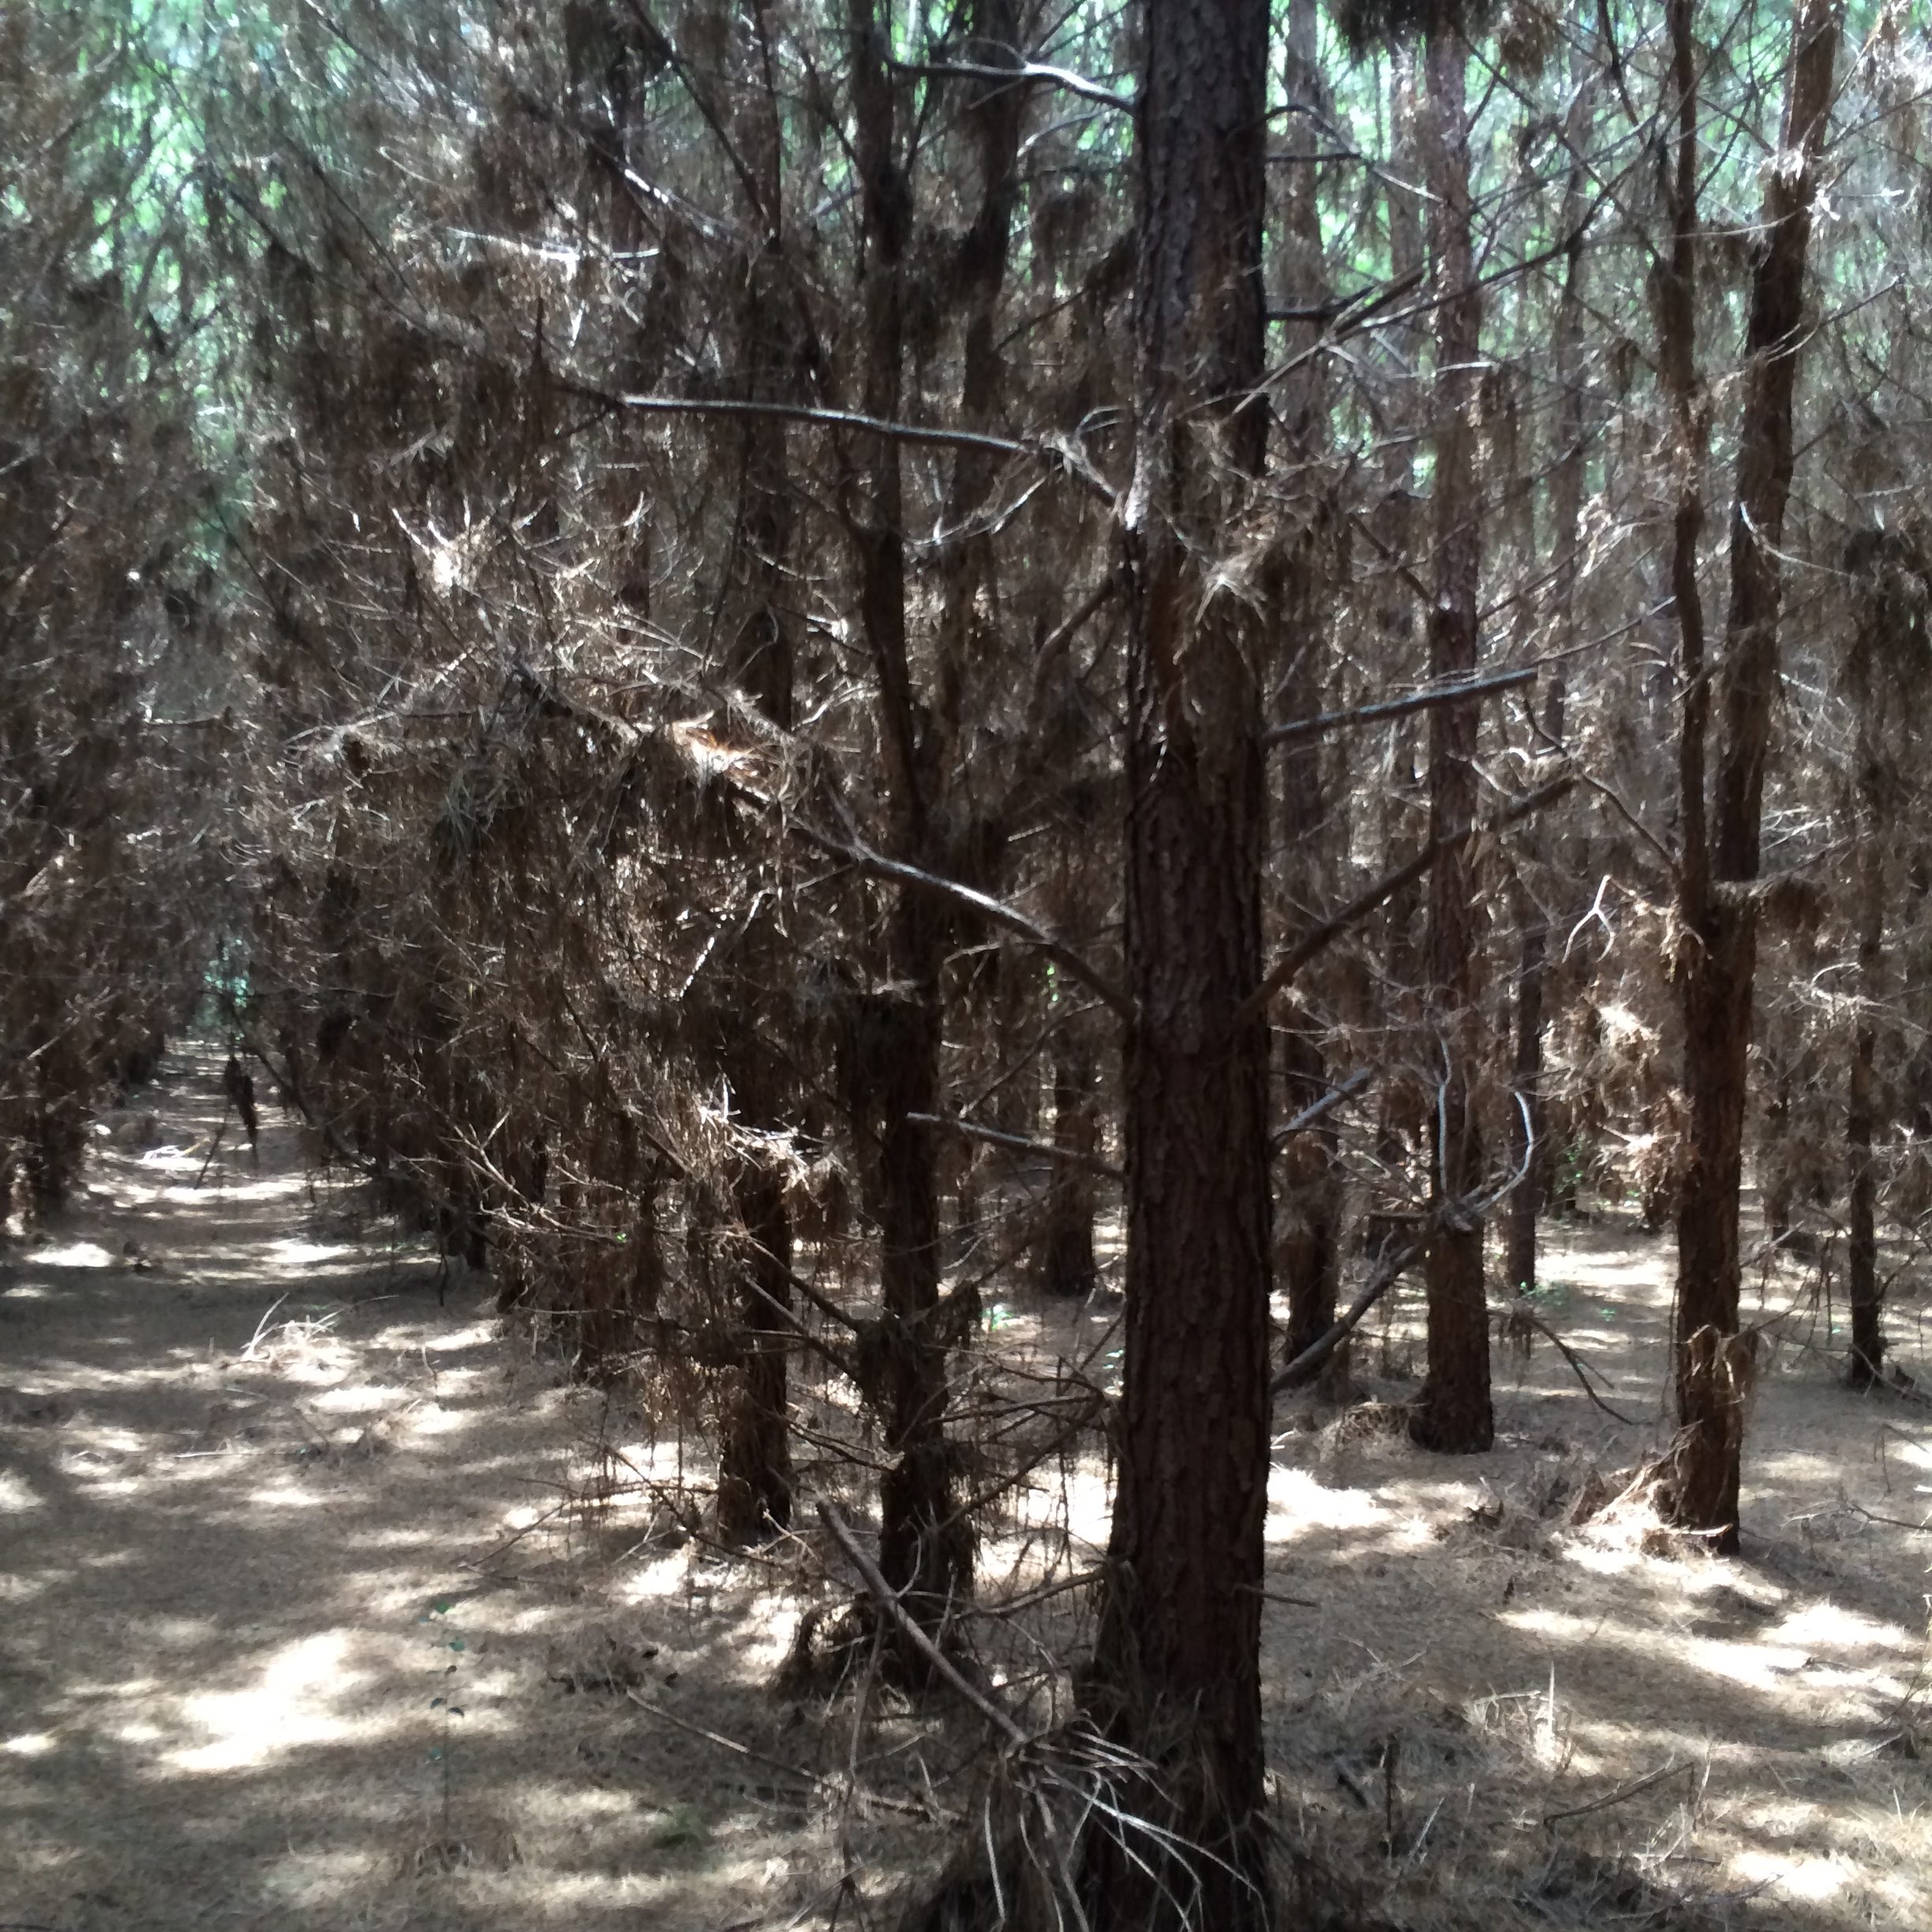
- Kill Cogongrass. Almost every year, about this time I write an article reminding folks that now is the best time of year to kill cogongrass. I won’t rewrite the article this year, I’ll just include links to previous iterations – see below. Cogongrass is bad, if it’s on your property kill it now. In my opinion, it is the most troublesome weed we have here in Northwest Florida. It is very difficult to control; so, you need to do everything you can to improve your chances of success. Spraying in the fall (not mid-summer) really helps.
–
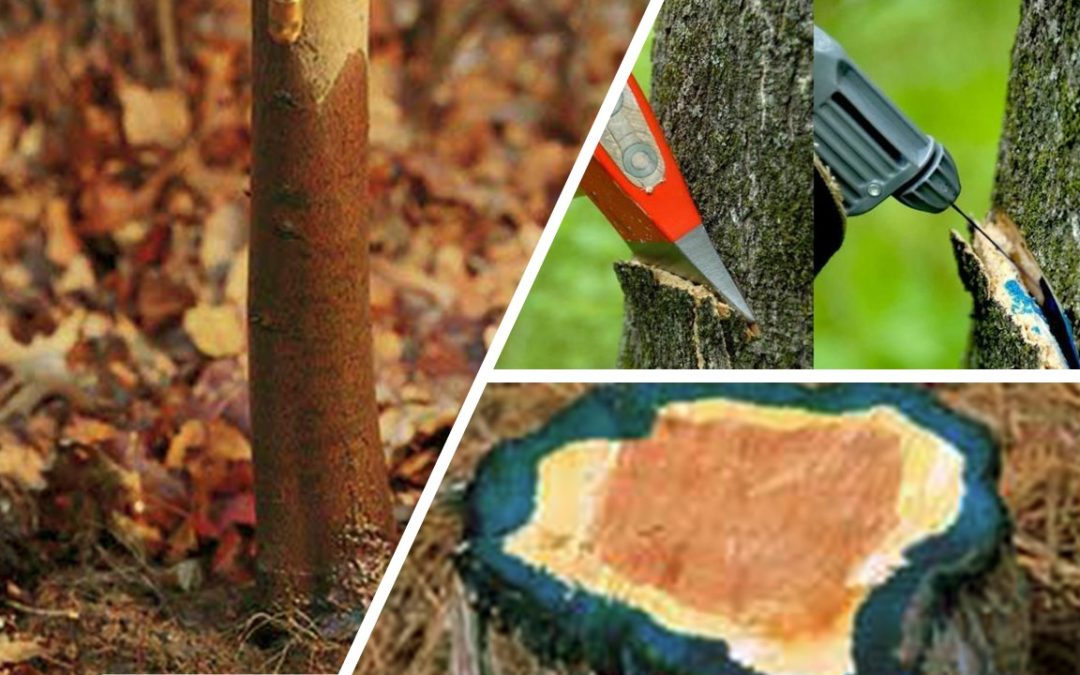
- Control Trees and Brush. Fall and winter are excellent times of year to employ several different methods which allow you to apply herbicide directly to induvial woody plants with relatively little risk to surrounding desirable vegetation. While very effective, all these individual plant techniques are quite labor intensive, making the cooler temperatures associated with the fall perhaps more important to the applicator than the plant physiology and herbicide efficacy discussed earlier. Use these links to access videos that discuss each technique in detail.
–
Foliar applications (to the leaves) of herbicide to small trees and woody brush can be very effective in the fall, for the reasons mentioned earlier and provided all of the caveats mentioned earlier are accounted for. That said, foliar applications have their limitations and generally shouldn’t be used on trees over 8ft tall. Foliar applications also generally carry more risk of damage to surrounding desirable vegetation. All that said, there are times when there is no surrounding desirable vegetation – think about doing site prep for a silviculture planting or clearing an opening for a wildlife food plot planting. In these kinds of situations fall timed, broadcast, foliar applications of systemic herbicides can be highly effective.
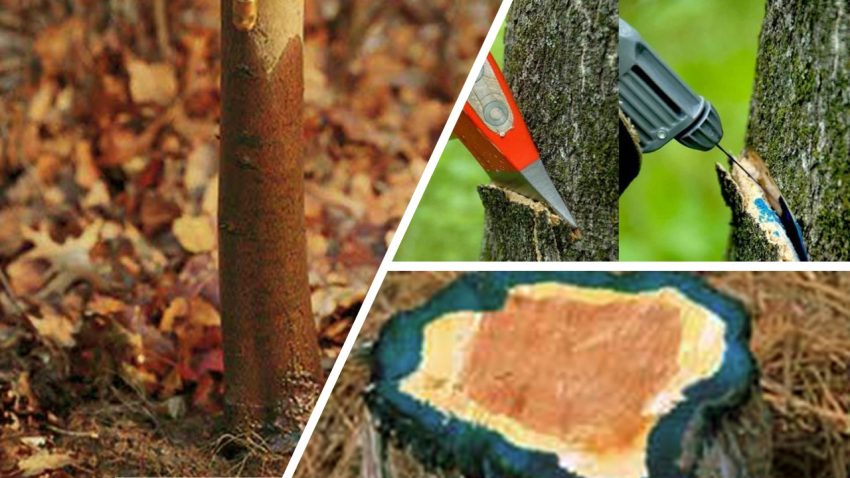
During the fall and winter trees and woody brush can be controlled via a variety of highly selective techniques, including basal bark, hack-and-squirt, and cut stump treatments. Image Credit: IFAS CAIP
–
- Mow??? I very infrequently recommend mowing for weed control but if weeds have not already made seed (many already have), fall mowing can clean up open spaces while helping to lessen the seed bank available for next year’s crop of weeds. Granted, mowing is great for quick aesthetic benefit, but it must be timed correctly to provide any long term, meaningful vegetation management. Most perennial plants can and will recover after being mowed, so mowing them after they have made seed provides little lasting benefit. Along the same lines, annual plants naturally die after making seed making timing very important to providing any meaningful weed management.
–
Fall is always a busy time year, but between tailgate parties and trips to the pumpkin patch be sure to take advantage of the opportunities the season provides for the highly effective management of some otherwise very hard to control vegetation. If you have any questions or would like to discuss any of these concepts in more detail, please don’t hesitate to reach out to me directly at mdm83@ufl.edu or 850-638-6180.

by Mark Mauldin | Aug 4, 2025
Deer grazing test plots at the NFREC in Quincy. Quality food plots take effort and planning.
The during the blistering heat of the last week of a Florida July is generally not a time when people think a lot about planting crops, but maybe it should be. Late summer can be a surprisingly active time in the world of wildlife food plots.
For those land managers who already have well established food plots, this time frame represents the end of the window for planting summer annual forages. Of the summer annuals that are particularly appealing to deer, cowpeas standout as the best option for late summer plantings. There are also several grass crops that can be planted late summer in food plots focusing on birds. While earlier plantings allow crops time to grow before pest and disease pressure peak in late summer, they also mean the crops will have matured and stopped growing before hunting season begins. Late planted forages may face some challenges and likely will not be the most beautiful crops you have ever grown but they will still be growing when archery season begins. Cowpeas take approximately 100 days to mature; this means that most years August 1st plantings will have time to mature before being killed by frost. Even if we get an early (mid-October) frost the cowpeas will have provided high quality forage right up to the beginning of archery season (October 25 in the Panhandle).
For those who are looking to establish new food plots or those whose past management may have been somewhat lacking, late summer is really when the process of preparing cool-season food plots needs to begin.
Finding the Right Spot Can Take A While
For the creation of a new food plot identifying the location is the first step. Edges, transitions between habitat types, are often a good place to start looking. Utilizing locations where deer (or whatever wildlife you are focusing on) already frequent is preferential to the “if I build it, they will” come mindset. Additional factors that cannot be overlooked are the drainage and workability of any potential site. Suitable planting options for both poorly (stands water, even occasionally) and excessively drained (deep sands) sites will be severely limited. Sites with drainage issues often have less natural vegetation making them appealing for use as a food plot since less clearing is needed. However, these sites generally do not work out well. Don’t forget, successful food plot establishment and maintenance necessitates easy access with farm equipment and ground level enough to safely operate said equipment.
A final consideration when identifying possible food plot locations is the amount of space available to work with. When it comes to food plots, size really does matter. Food plots need to be no less than ½ acre in size, preferably between 1 and 5 acres. The kinds of plants in food plots are, by design, ones that wildlife find highly desirable (because they are highly nutritious). Considering this, it is easy to understand why plantings smaller than ½ acre struggle to establish – the plants simply do not get a chance grow past the seedling stage before being eaten. Given all these considerations, finding the right spot really can take a while – get started soon because selecting the spot is just the first step.
Start Early with Pre-Plant Land Prep
After a location is identified, it is crucial to manage unwanted vegetation prior to preparing the soil and planting the food plot. If it is not eliminated, existing vegetation will compete tremendously with food plot plantings. Even if mechanical disturbance (disking, tilling, root raking, etc.) appears to remove the existing vegetation, much of it will regrow. This regrowth from established root systems will be more than a match for new seedlings. Apply herbicide before you begin soil preparation. Equally as important, give the herbicide sufficient time to do its work before mechanically disturbing the site (weeks, not days). Specific herbicide recommendations will vary depending on what vegetation you are trying to manage, but most food plot site prep applications will involve fairly high rates of glyphosate. Please don’t hesitate to call me (850-638-6180) – we can discuss your site and dial in an herbicide recommendation. You do not want to skip this step; get in front of weed pressure before you plant.
If you want a food plot to be productive and successful, you must also effectively address soil fertility issues prior to planting. First and foremost, soil pH must be corrected. Any needed applications of lime/dolomite need to take place first, well before any other fertilizer is applied (ag lime can take months to go into soil solution and alter soil pH). If fertilizers are applied before the soil pH is corrected the nutrients may still be unavailable to the plants. Once a food plot site is determined, collect a representative sample of the rooting zone soil and submit it to a lab for analysis. This is the best way to get the information needed to make informed choices regarding lime and fertilizer applications. Talk with the folks at your local Extension Office for more info on how to collect and submit soil samples. Take and submit soil samples now. Apply any need lime soon, during land preparation. Apply recommended fertilizer (N, P, K, and micros) at planting or soon after emergence. Fertilizer applied when there are no plant roots present to adsorb it is wasted.
Recap – Assuming the goal is to plant a cool-season food plot prior to the beginning of hunting season you need to pick and clear a spot, kill weeds, and soil sample very soon. After weeds have had time to die (30 days +/-), apply any needed lime/dolomite and till/disc under dead weeds and lime.
Ideally, you’d get all this done several weeks before the fall planting window (10/1-11/15) gets here. In that event, let the plot rest; let the tilled soil settle and rain-pack and let the next flush of weeds germinate. Many of our fall planted food plot crops, clovers in particular, do better when planted into a very firm seed bed making the resting period very beneficial. Additionally, another herbicide application, to take out the most recent flush of weeds, can be made at planting time ensuring your plot gets started clean and free from competition.
I know it’s hot, but as a land manager there is always something to do. Fall will be here before you know it, and now is the time to start getting ready.
by Ian Stone | Jul 25, 2025
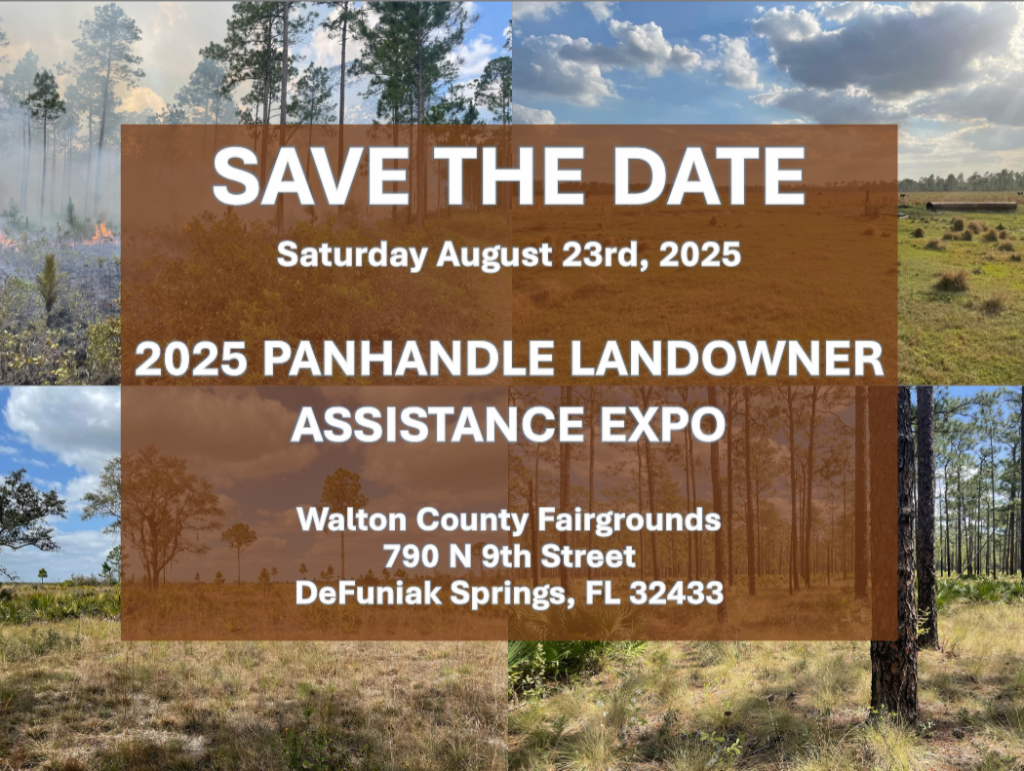
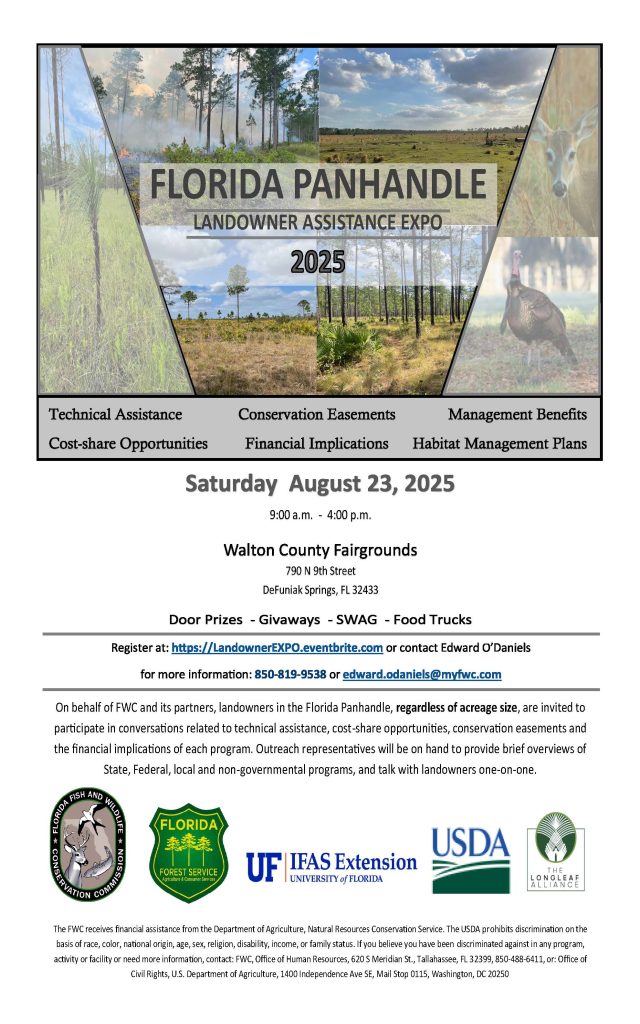
This August multiple partnering agencies, land management professionals, and landowners will come together for the first ever Panhandle Landowner Assistance Expo. This will be an all-day event at the Walton County Fairgrounds in Defuniak Springs, FL. The event itself will be 9 a.m. to 4 p.m. Saturday August 23rd. This will be the first of what all involved are very hopeful will be an annual event going forward. The goal is to build connections and provide information to help landowners meet their goals and build their land management network. The entire fairgrounds facility will feature a variety of informational and professional service provider booths, equipment show on the grounds, a series of presentations on land management topics, and presentations and tables on cost share programs from various agencies and non-profit organizations.
If you are a landowner or involved in land management and use in any way this event should be on your calendar and something to attend. Whether you own land for timber investment, agricultural or other rural use, homestead and lifestyle, or are involved in outdoor recreation through hunting clubs or similar activities; you will find great information and connections at the Expo! Currently the event team is conducting the panning and scheduling. Opportunities for sponsorships and other involvement exist beyond just attending. Through the generous involvement of the Walton County Fair Association and other organizations this event is being offered at no cost to attendees. Food Trucks will be on site as well to provide those attending with food and beverages as well (cost to attendees is based on vendor pricing).
The included Save the Date! Announcement and Event Flyer contain more details and the Eventbrite Registration. Registration is open and event capacity is limited so register early to ensure that you can attend. More details will be available as the presentation schedule and other details are available. If you are interested in being a sponsor or attending as a vendor please reach out to the event planners. The event chair is Ed O’Daniels, Private Lands Assistance Biologist with Florida Fish and Wildlife Commission, and he can be reached at Edward.ODaniels@MyFWC.com . Mark your calendars, you want won’t to miss this event!
 REGISTRATION
– Ian Stone, Panhandle Extension Forester
by Andrea Albertin | Jun 6, 2025

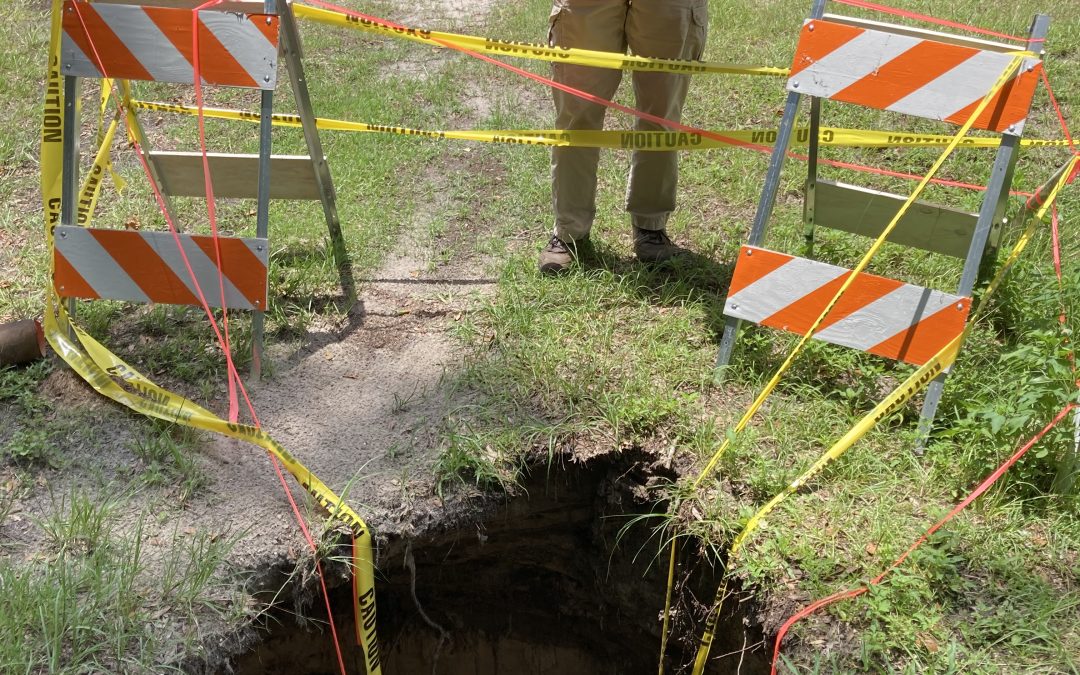
This sinkhole opened up after Hurricane Debby made landfall in Florida’s Big Bend region on August 5, 2024. Image source: Suwannee River Water Management District.
Sinkholes are a natural part of Florida’s landscape, especially in areas where limestone lies close to the surface. If a sinkhole appears on your property, knowing how to respond is key. This article outlines important first steps, available resources, and expert contacts to help you assess the situation and determine what to do.
How do sinkholes form?
Sinkholes form when surface sediments collapse into empty spaces, or cavities, within the limestone bedrock beneath the ground. These cavities develop over time as slightly acidic groundwater slowly dissolves the limestone. When a cavity becomes too large to support the weight of the ground above it, a sudden collapse can occur, creating a noticeable hole at the surface. In some cases, sinkholes can form gradually as sediments slowly settle into cavities over long periods of time, resulting in shallow, bowl-shaped depressions without a sudden collapse.
Limestone underlies our entire state but there are regions where the risk of sinkholes is higher, such as where the limestone is closer to the surface. Although cavities and voids are a feature of carbonate rocks like limestone, few collapse and directly impact roads or buildings.
Where can you find help if you have a sinkhole on your property?
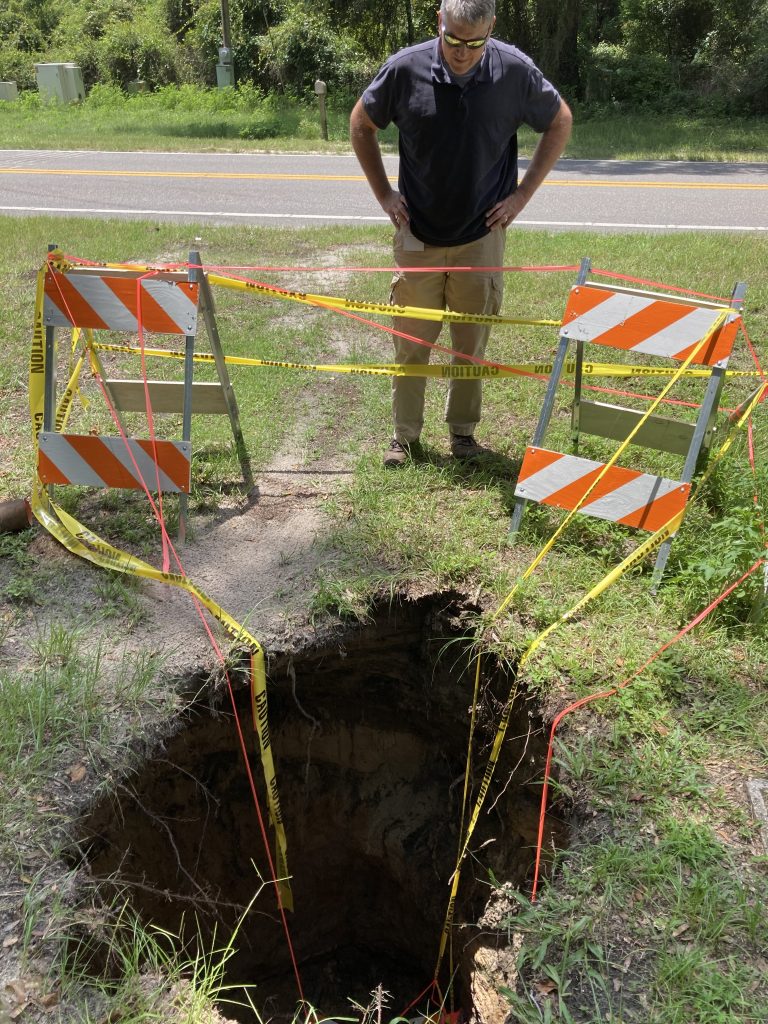
Sinkhole in Union County, FL. Image source: Suwannee River Water Management District
The Florida Geological Survey (FGS), has a Sinkhole Helpline (850 245-2118) as well as a sinkhole website and extensive Sinkhole FAQ to answer residents’ questions. You can speak with someone on the helpline for guidance about what to do (you may not need to do anything) and they can help clarify information found in the FAQ. The FGS also has a leaflet available, A Homeowner’s Guide to Sinkholes in Florida.
You can also contact your Water Management District for guidance. In our region, that would either be the Northwest Florida Water Management District (850 539-5999) if you live in Escambia County to western Jefferson County, or the Suwannee River Water Management District (386 362-1001) if you live in North Central FL, including eastern Jefferson County (Suwannee River WM District Boundary Map).
Here are a few important tips to keep in mind, summarized from the Florida Geological Survey Sinkhole FAQ. Much more detailed information is found on the website. Call the sinkhole helpline or your Water Management District for further clarification on steps to take.
- Call your local law enforcement agency if there is any risk of physical harm.
- For sinkholes under or near structures: Stay out of your house if you suspect the hole is causing or could cause any impact to the structure. In some counties, local government agencies, the sheriff’s office or emergency management office may offer help when a home is endangered.
- Contact your property insurance to see if they cover assessment and repair of damage caused to structures. It’s recommended to mark the hole’s approximate boundaries and document its size by taking photographs and monitoring changes. Do this from a safe distance. Keep children and pets away.
- For sinkholes in your yard, small holes can often be filled with clean sand or soil.
- On large properties, sinkholes that are not actively developing and are not affecting a structure can usually be left alone. If there’s a risk of people or animals falling in, fence or cordon off the sinkhole or you can usually fill the hole with clayey sand (which is preferred) although clean fill material can also be used. Don’t throw anything into a sinkhole or use any fill material that can decompose or leach toxins into groundwater. Call the Sinkhole Helpline for further clarification (850 245-2118).
- Although no permit is usually needed to fill a new sinkhole, sinkholes in wetland areas or those that may change water flow or add to groundwater pollution if filled may need an environmental resources permit (ERP) before filling. Contact your Water Management District or FL Department of Environmental Protection (FDEP) District Office for guidance.
- Keep in mind that other factors besides sinkholes can cause settling on the land surface. These include decomposing stumps, compressed or decomposing garbage and other debris, collapsed or broken sewer pipes and septic systems, soil that wasn’t compacted properly after excavation was completed, among others.
Additional information:
For insurance questions: Dept. of Financial Services – Division of Consumer Services
For information about your rights as a tenant or landlord review the Dept of Agriculture & Consumer Services’ Landlord and Tenet Law
by Ray Bodrey | Nov 21, 2024
Recently Jennifer Bearden, our Agriculture & Natural Resource Agent in Okaloosa County wrote a great article on “Common Wildlife Food Plot Mistakes”. The following information is a mere supplement in establishing food plots. Planting wildlife forages has become a great interest in the Panhandle. North Florida does have its challenges with sandy soils and seasonal patterns of lengthy drought and heavy rainfall. With that said, varieties developed and adapted for our growing conditions are recommended. Forage blends are greatly suggested to increase longevity and sustainability of crops that will provide nutrition for many different species.
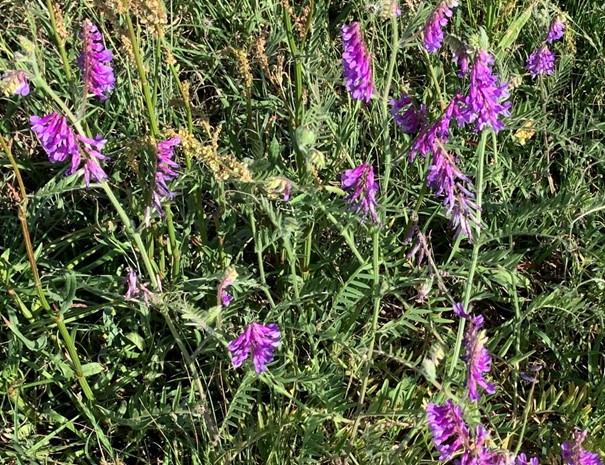
Hairy Vetch – Ray Bodrey
In order to be successful and have productive wildlife plots. It is recommended that you have your plot’s soil tested and apply fertilizer and lime according to soil test recommendations. Being six weeks from optimal planting, there’s no time like the present.
Below are some suggested cool season wildlife forage crops from UF/IFAS Extension. Please see the UF/IFAS EDIS publication, “A Walk on the Wild Side: 2024 Cool-Season Forage Recommendations for Wildlife Food Plots in North Florida” for specific varieties, blends and planting information. https://edis.ifas.ufl.edu/pdffiles/AG/AG13900.pdf
Winter legumes are more productive and dependable in the heavier clay soils of northwest Florida or in sandy soils that are underlain by a clay layer than in deep upland sands or sandy flatwoods. Over seeded white clover and ryegrass can grow successfully on certain flatwoods areas in northeast Florida. Alfalfa, clovers, vetch and winter pea are options of winter legumes.
Cool-season grasses generally include ryegrass and the small grains: wheat, oats, rye, and triticale (a human-made cross of wheat and rye). These grasses provide excellent winter forage and a spring seed crop which wildlife readily utilize
Brassica and forage chicory are annual crops that are highly productive and digestible and can provide forage as quickly as 40 days after seeding, depending on the species. Forage brassica crops such as turnip, swede, rape, kale and radish can be both fall- and spring-seeded. Little is known about the adaptability of forage brassicas to Florida or their acceptability as a food source for wildlife.
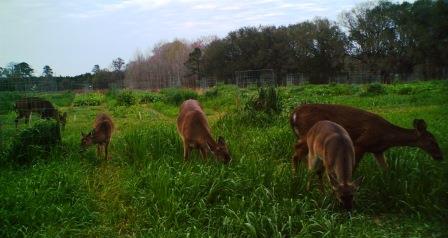
Deer taking advantage of a well maintained food plot. Photo: Mark Mauldin
For more information, contact your local county extension office.
UF/IFAS Extension is an Equal Opportunity Institution.
by Ian Stone | May 10, 2024
Thinning is an important part of any forest management plan and getting it right can be the difference between successful outcomes and persistent problems. Probably one of the most common questions foresters get is “Should I Thin My Trees?”. It is an important question to ask and definitely needs a forester’s input to get right. Thinning is part of managing the density of a forest stand and preventing issues with overstocking. If a stand is overstocked it causes multiple issues with the health and growth of a forest stand. Forest stands can even stunt when left in overstocked conditions and fail to produce the timber yield that would be expected. Not thinning at proper intervals when it is needed also results in lost growth even if the thinning is performed later. The key issue is competition and managing density prevents excessive competition among trees. To understand how thinning works you must understand some of how trees grow.
An overstocked pine stand in need of thinning Santa Rosa County, FL . Photo Credit: Ian Stone
Trees compete on a site for resources such as sunlight, water, and nutrients. As a young stand of timber develops the trees initially have plenty of resources while they are young and small, but they begin to compete when they grow older. Initially the competition can be a good thing encouraging taller and straighter growth habits and self-pruning of lower branches. As the stand develops though the competition becomes a negative factor when the trees begin to experience stress from lack of resources, primarily sunlight but also nutrients and water. At this point the stand is considered overstocked and thinning will improve the health and growth of the trees. Effectively thinning removes trees that are not needed and will eventually be out-competed and die. This allows a landowner to make some timber revenue while improving growth and health down the road. The trees that remain after thinning no longer are overstocked and competing and respond with improved growth and health. This important forest management technique is one of the primary management decisions in timberland ownership.
Overstocked stands create multiple issues that cause negative outcomes. One of the primary issues is that trees in overstocked conditions are weaker and more susceptible to insect and disease outbreaks. It is very common for bark beetle outbreaks and other issues to take hold in overstocked stands and produce considerable losses. Thinning is an effective measure at preventing this. Overstocked conditions result in poor growth and can lead to a situation where trees have a low portion of living foliage. Once this occurs a stand can become locked in a slow growing condition that can’t be reversed. This causes a loss of both volume and quality by reducing the development of high value saw-timber and poles. Overstocked and dense stands are also less desirable for wildlife and plant diversity. Thinning opens up the forest and allows more light and space which improves habitat and increases diversity on the forest floor and lower levels. All around thinning at the right time based on the forest conditions and stocking produces better outcomes. During thinning trees with form, disease, or other issues can be removed to improve the overall stand. Determining when and how to thin is a function of having a good forest inventory and monitoring tree size and stocking. There is usually a period of time that is referred to as a “thinning window” when the stand is beginning to become overstocked but will still produce a thinning response. This varies based on forest conditions and is more of a function of the size and density of the trees than an exact age or predetermined point in time. The best practice is to determine when a forest is entering the thinning window and take advantage of the thinning benefits. Delaying thinning will result in less optimal outcomes and results may be permanent. Similarly thinning too early or thinning incorrectly (too few or too many trees removed) can produce less desirable results. The key is to thin correctly and thin when forest conditions indicate it is needed.
Overall thinning is one of the best forest improvement practices available, and to get the most benefit it has to be done correctly. Far too often forest areas that need thinning are overlooked and go far too long without getting the thinning they need. You do not want to look into getting your timber thinned only to find out you should have done it 5-8 years ago or more. Worse still you develop a southern pine beetle out break and loose timber or start to have timber die from competition. The best way to make sure you stay informed on when and to what extent to thin is to have a forest management plan and update it regularly. Working with a consulting forester to inventory your timber stand and plan out forest management is one of the best things you can do. A good consultant forester can assist you in determining when and how to thin properly. They can also assist in marketing timber harvested in a thinning along with other services like timber marking. You can get assistance through the County Forester office with Florida Forest Service as well. You can work with the County Forester to enroll in the Forest Stewardship Program and get a management plan written at no cost to you. A forest management plan will cover thinning and other important practices to help you meet your goals. Determining when and how to thin is something that requires advice from a good professional forester. By working with a professional forester, you will avoid common pitfalls like making opportunistic thinning decisions, over-thinning, under thinning, leaving poor quality trees, and more. If you think your stand may need thinning contact the extension office, the county forester, or a professional forester of your choice. Making those contacts are a great first step in getting the most out of a good thinning.