by Taylor Vandiver | Apr 29, 2014
Now that spring has finally sprung and summer is well on its way, you may find yourself taking a stroll through your landscape and assessing damage done by late cold spells. However, it may not be a frost problem that has your plants looking worse for the wear. They could be experiencing nutritional imbalances which affect overall plant health. Most cases involving nutrition issues in plants can be linked back to the soil. Therefore, if you suspect a problem I suggest testing your soil to ascertain pH and nutrient levels. You can obtain a soil test kit at your local UF IFAS Extension office. Another way to diagnose your plant damage is to visually catalog its symptoms. Symptoms of mobile nutrients, such as nitrogen and phosphorus, tend to reveal themselves on older leaves first. Whereas, immobile nutrient symptoms (i.e. boron and calcium) will show up on newer leaves. These flow charts can help to narrow down which essential element may be lacking in your plant’s diet.
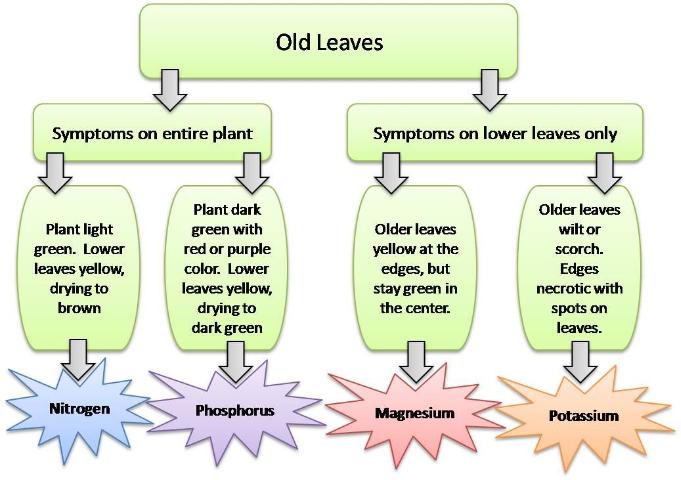
Mobile Nutrient Symptoms.
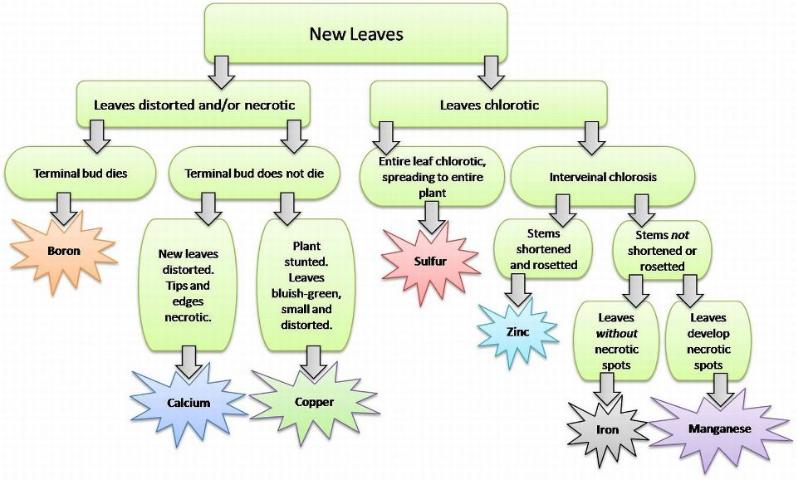
Immobile Nutrient Symptoms.
by Eddie Powell | Apr 29, 2014
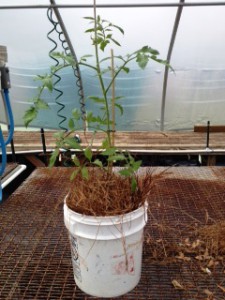
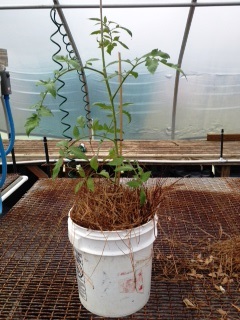
Five Gallon Container Plants
Credit: Eddie Powell
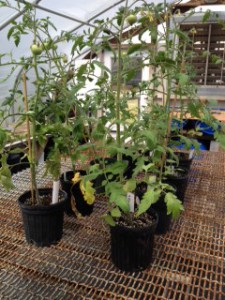
One Gallon Container Plants
Credit: Eddie
GARDENING IN A BUCKET: Grow wholesome, healthy vegetables in a container with this plan.
Materials
-
5 Gallon plastic buckets
-
40 pound sacks of Potting soil
-
40 pound sacks of compost
-
garden trowels or shovels
-
wheel barrow or other large mixing container
-
controlled release fertilizer
-
packs of vegetable seeds
Recommended: All Herbs, Tomato, Cucumber, Squash, and Zucchini
Procedures:
-
In a large container or on a plastic mat on the ground, mix potting soil and compost in a 2:1 ratio. Two scoops of soil and one of compost, add ½ cup time release fertilizer, every 6 weeks
-
Drill 6 to 8- ½ inch holes in the bottom of the 5-gallon buckets. Make sure that the buckets did not contain toxic materials!
-
Fill the bucket to within 3 inches of the top of the container
-
Place container in sunny spot that will allow drainage
-
Plant chosen vegetable with two seeds in center of the container
-
Water well and keep moist but not wet
Plant requirements:
-
Minerals. Basic needs in plants are Nitrogen (N), Phosphorus (P), Potassium (K). These are listed on all fertilizers as a ratio, example – 8-8-8 contains 8 % Nitrogen, 8% Phosphorus, and 8% Potassium 76% being filler.
-
Sunshine or artificial sources of light (grow lights).
-
Water. Soil must be kept moist but not wet. Wet soils will create root-rot and encourage fungus. Measure moisture by pinching the soil to determine if the soil is moist. Adding water as needed; plants in full sun will need much more water than plants in partial shade. Wilted plants need more water!
-
Carbon Dioxide (CO2). Plants absorb CO2 and give off Oxygen making them VERY important to human and all animal life.
-
Proper Temperatures. Too cold, plants die, too hot plants die. Make sure that if your plants are outside and the temperature goes below freezing, the plants are protected.
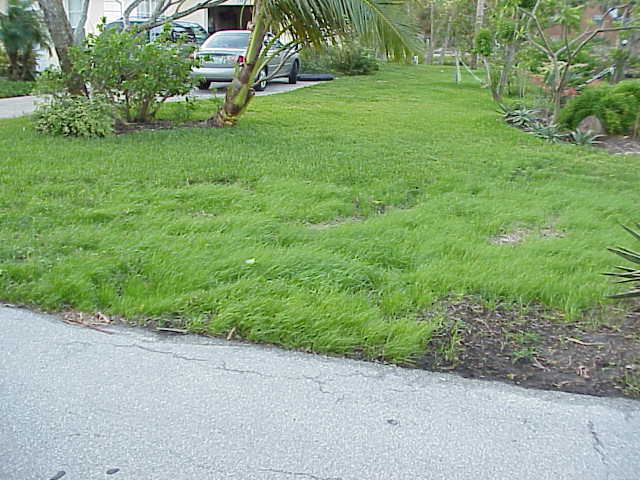
by Larry Williams | Apr 29, 2014
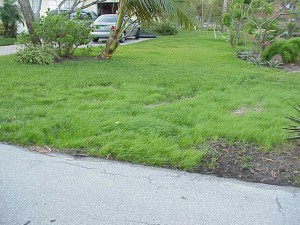
Kentucky bluegrass, Fescuegrass & ryegrass (annual ryegrass pictured) can be seeded to provide a temporary winter lawn but will not provide a permanent lawn in Florida due to our hot, wet summers. Photo Credit: Dan Culbert, UF/IFAS
If it sounds too good to be true, it probably is. This phrase offers sound advice for the person looking for the “perfect” lawn grass.
It’s common to see advertisements for the perfect lawn grass. You should be skeptical when reading advertisements that proclaim an amazing grass that produces a lush, green lawn with very little care. Question advertisements for grass seed mixtures that grow from Alaska to Florida. Beware of advertisements that do not include a specific name for the lawn grass being sold. Don’t believe advertisements that claim their grass even grows in impossible spots.
A number of years ago, I called a company that was advertising a grass seed mixture in hopes of finding out specifically what grass seeds were in this “too-good-to-be-true” mixture. I was told the seed mixture included Kentucky bluegrass, creeping red fescue and annual ryegrass. This information was not included in the advertisement. And it claimed that it would produce an attractive lawn for Florida.
In Florida, ryegrass, fescuegrass and Kentucky bluegrass will produce a green lawn during winter and early spring. However, as temperatures warm in late spring and summer, these grasses will die. All three are cool-season grasses that will not tolerate our hot, humid summer weather. They will not produce a permanent lawn in our area.
Basically there are seven types of grasses from which to choose when considering planting a lawn in Florida. Centipede and St. Augustine are the most commonly planted in our area. Bahia, bermuda, carpet, seashore paspalum and zoysia are used less often. All of these grasses have advantages and disadvantages, which should be looked at and understood before choosing a grass for your lawn.
With time, most people in our area will become frustrated with their lawn. As a result, North Florida is a great area to market a too-good-to-be-true lawn grass. It’s difficult to grow a lawn here. All of our lawn grasses are native to other parts of the world – they did not exist in our native ecosystem. Expectations for a Florida lawn are too high. Because of these factors, many people are looking for that too-good-to-be-true grass.
Be cautious before spending time and money on one of those “perfect” lawn grasses.
Contact the University of Florida Extension Office in your County or visit the following website for reliable information on lawn grass selection and maintenance for Florida. hort.ufl.edu/yourfloridalawn
by Roy Carter | Apr 21, 2014
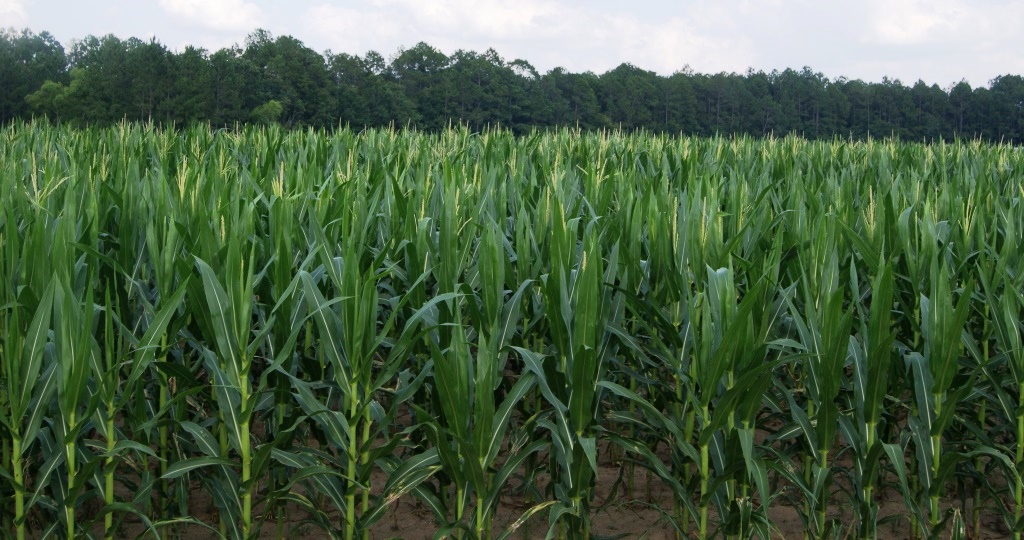
Corn Field. Image Credit Matthew Orwat
Sweet corn is a favorite among home gardeners. As long as the space is available, it’s not difficult to grow.
Corn is a new world native crop, with archaeological evidence suggesting that it was first domesticated in Mexico. This crop was the basis of the Mayan, Incan and Aztec civilizations, and by the time European explorers came to the New World in the 1500s, corn had become a staple for the native people.
Corn is monoecious (mon-ee-shuss) which means that there are both male and female flowers on each corn plant. In some monoecious plants, male and female parts are in the same flower. In corn, male and female flowers are in different locations, the male flowers form a tassel which is at the top of the plant. The female flower is located at the junction of leaves and stem. It consists of collection of hairs (silks) enclosed in the husks of what will become the ears. There silks are pollen receiving tubes. Wind-blown pollen from the mole flower (tassel) falls on the silks below. Each silk leads to a kernel, and pollen must land on all silk for the ear to fill out completely with kernel.
Corn comes in a variety of colors and sugar contents. Look for sugary enhanced varieties, with firm and sweet kernels, or the super sweet varieties, with tender and very sweet kernels. Some varieties of white and yellow corn that perform well in Florida are Silver Queen (white), “How Sweet It Is” (white), “Sweet Ice” (white), “Merit” (yellow), “Kandy Korn” (yellow), and “Peaches and Cream” (bicolor).
Sweet corn thrives best in well-drained soils but will tolerate a wide range of soil types. Optimum pH ranges from 6.0 to 6.5.
Till the soil to a depth of 6 to 8 inches using a spade, plow or rototiller. Avoid tilling the soil while it is too wet because clodding may occur.
Sweet corn is a warm-season vegetable requiring soil temperature between 60-90 degrees F°. Avoid planting seed in cool soils. Wait until after the last average dates of the last killing frost before planting. If planted too early, weak stands, stunted growth or frost-killed seedling may result. The newer, sweeter varieties are even more sensitive to cool, wet soils any may not perform well in these conditions.
Plant corn in an area that receives at least 6 to 8 hours of sunlight. It is beneficial to plant near a water source for needed irrigation.
Plant seed approximately 1 to 1 ½ inch deep in rows 3 feet apart with 8 to 12 inches between each seed in the row. A hand pushed mechanical planter can make seeding much easier for larger stands of corn.
A soil test through the local County Extension Office is always the best way to determine the lime and fertilizer needs. If lime is required, it can be tilled into the ground during soil preparation but is most effective when applied 2 to 3 months prior to planting.
If a soil test is not done, a general guideline is to apply 3-4 pounds of 10-10-10 per 100 linear row feet before planting. Side dress two or three times during the growing season with ammonium sulfate (21-0-0-17) at the rate of 2 pounds per 100 feet of row space. More frequent side dressing may be required on sandy soils or when excessive ran occurs.
Corn requires a minimum of 1 inch of water per week for normal development. The most critical period for water is during pollination and during final ear filling.
Sweet corn matures in 60 to 100 day, depending on the varieties. Sweet corn should be ready for harvest about 20 days after the appearance of the first silk stands, sweet corn is picked during the “milk stage” when the kernels are fully formed but not completely mature.
After picking, cook and eat corn that day or store it in cool temperatures, such as in a refrigerator, as soon as possible. It can then be canned, frozen or eaten fresh within few days. Keeping the corn cool is the key to better flavor as high temperatures will convert the sugar in the kernels to starch, giving it a bland taste.
by Julie McConnell | Apr 21, 2014
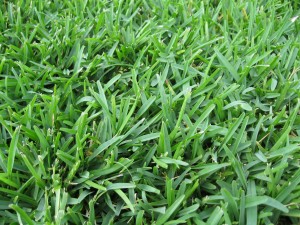
Captiva St. Augustinegrass Credit: Julie McConnell, UF/IFAS
Mowing is an important and often overlooked landscape best management practices that can increase lawn health.
Most of us mowed lawns to earn some spending money as kids. As long as it was shorter when we finished than when we started our customers were happy. Although mowing seems like a simple chore that anyone can do, it turns out that improper mowing can cause a lot of damage to lawns and can increase pest and disease issues.
Make sure your lawn mower in good working order. Ensure the blades are sharp and the engine is not leaking any oil or gas products that may damage your lawn. Dull or damaged blades will give a ragged cut to grass blades that make it easier for disease and insects to attack your lawn. Leaking fuel products can damage or kill turf. Keep your mower clean by blowing or rinsing it after use, this simple step will also reduce the spread of weeds, insects, and disease.
Know the recommended mowing height for your type of turf (see table below) and follow it! Cutting turf below the recommended height places stress on the grass and encourages shallow roots. Deep roots help turf handle stresses such as drought, shade, insects, disease, or traffic. If any of these circumstances are occurring, the mowing height should be increased and fertilization should be decreased.
Mowing Height Table
| Turfgrass Type |
Recommended Mowing Height |
| Bahiagrass |
3.0-4.0 inches |
| Bermudagrass |
0.75-1.5 inches |
| Centipedegrass |
1.5-2.5 inches |
| St. Augustinegrass |
3.5-4.0 inches, Dwarf Cultivars 2.0-2.5 inches |
| Zoysiagrass |
1.5-2.5 inches, cultivar dependent |
When mowing, never remove more than 1/3 of the leaf blade per cutting. If the grass is overgrown, plan to mow in stages to avoid scalping or removing too much of the leaf blade. Just like shrubs, turf needs leaf surface area for photosynthesis. Allow clippings to fall onto lawns rather than catching them or discharging onto hard surfaces. The grass will decompose rapidly and provide nutrients to the lawn. Clippings that are blown onto sidewalks, streets, or other hard surfaces may be washed into storm drains and get into water systems. Just as decomposed clippings provide helpful nitrogen and phosphorus to our lawns, these same nutrients are harmful to our water bodies. Keeping them in lawns is a great way to recycle and to keep our water clean.
To learn more about caring for your turf click on the link below.
Bahiagrass for Florida Lawns
Bermudagrass for Florida Lawns
Centipedegrass for Florida Lawns
St. Augustinegrass for Florida Lawns
Zoysiagrass for Florida Lawns