by Les Harrison | Jul 15, 2015
Native yuccas fit easily into the landscape without breaking the bank or the back of the gardener.
Being sharp is usually considered a complement. It implies the recipient of this assessment has the intellectual ability and the mental acuity to handle with ease the rigors of contemporary life.
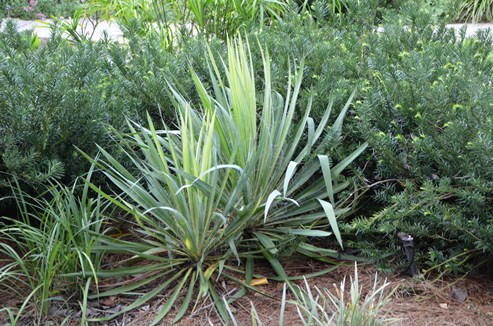
In north Florida’s native plant world the yucca genus was sharp long before people employed it in landscapes. It also has the sharp pointy spines to enforce its tactics.
Local yuccas are perennial shrubs which can grow into small trees with a unique shape. There are approximately 50 species in this genus worldwide on every continent except Antarctica.
Their most obvious and notable feature which makes them easy to identify is their leaves. These are elongated in thick clusters around the stems.
The sword-like shape is tipped with a hardened point which can quickly get the attention of anyone passing too close. The bristly structure of these evergreen plants gives them an intimidating appearance which most animals and people avoid.
The annual blooms appear at the top of these plants and protrude above the greenery. Honeybees and other pollinators will visit the profusely fragrant bell-shaped flowers to collect nectar and pollen.
In their native range, these plants are seen in sites where there is high exposure to the sun. They will not grow in heavy shade, and languish with little change if there is less than six to eight hours of daily sun.
Sandy well drained soils are the most likely locations where yuccas will prosper and grow. Their nutrient requirement are low, so they rarely display symptoms of a nutrient deficiency.
Likewise, their need for water is paltry. Once established they will easily withstand droughts and extended dry periods.
The common species native to north Florida in this genus are Adam’s needles (Yucca filamentosa) and Spanish bayonets (Yucca aloifolia). These plants are similar in appearance, but each has distinctive traits.
Adam’s needles are the smaller and shorter of the two species. The multiple stems may reach three feet in height, but extend to over six feet when the cream color blooms appear in early summer.
The green leaves are pliable with white threads of fiber trailing from each. There is a variegated cultivar which is popular for landscaping projects.
Spanish bayonets produce multiple trunks per plant and may grow to over 15 feet. They produce rigid dark green leaves projecting from the thick trunks and will impale any trespasser.
White blossoms appear in the center of the plant above the foliage from spring to late summer depending on several weather related factors. These yuccas have a high salt tolerance making wild plantings common to coastal areas.
Disease and insect problems are few for these hardy plants. Too much water resulting in excessively wet roots and extreme cold are the biggest problems.
For the sharp homeowner these native plants make a pointedly good addition to the landscape.
To learn more about native yuccas in north Florida, contact the nearest UF/IFAS Extension office.
by Matthew Orwat | Jul 15, 2015
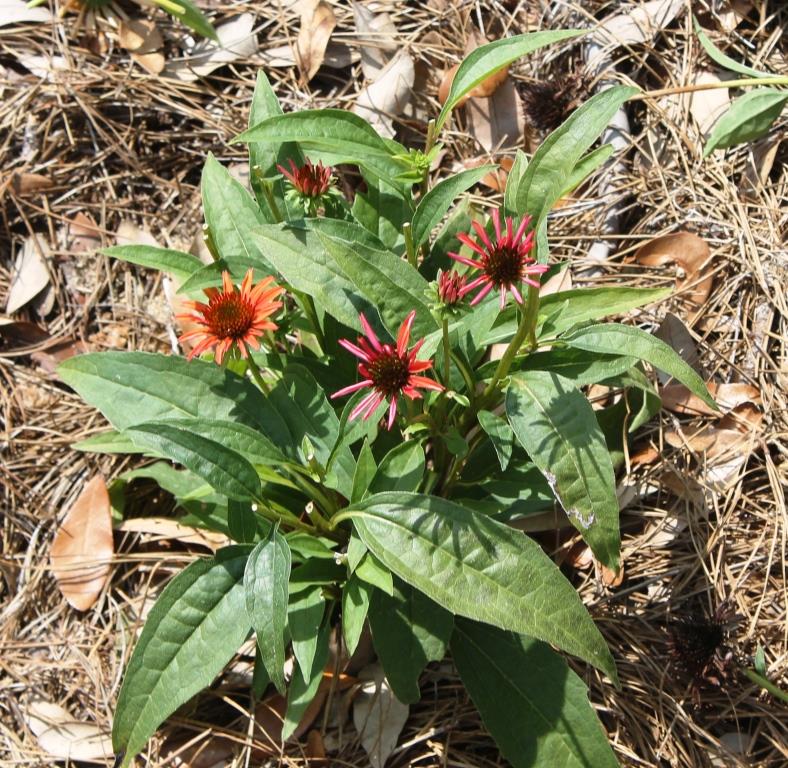
Coneflower, after deadheading, with new growth and flowers. Photo Credit Matthew Orwat, UF/IFAS Extension
During these “dog days”, full of hot temperatures punctuated with intermittent rain, gardeners can lose the motivation to get out there and get things done. One task, deadheading, can make a huge difference in the appearance of one’s landscape without a whole lot of effort.
The act of deadheading is the removal of individual blooms or flowering stalks that are past their prime. When deadheading, always trim the stem to an area above a node. The node can be determined by the presence of a leaf and its attachment to a stem. This area is known as the leaf axle.
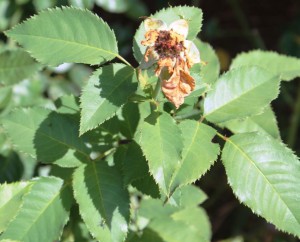
Roses before and after deadheading Photo Credit Matthew Orwat, UF/IFAS Extension
Roses before and after deadheading Photo Credit Matthew Orwat, UF/IFAS Extension
The main benefit of deadheading flowering shrubs and perennials, particularly in the spring and summer, is that removal of spent flowers promotes new growth and more flowers. It also eliminates unsightly seed stalks and decaying petals from the landscape. If trying to save seed or promote re-seeding, do not deadhead in the fall or near the terminal side of a given season for any plant.
Once proper deadheading is performed, new growth will emerge from the trimmed area. Oftentimes, this new growth is another single flower or flower cluster.
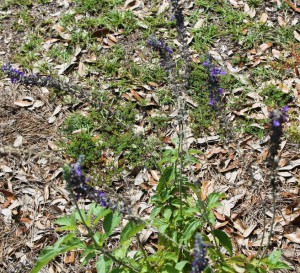
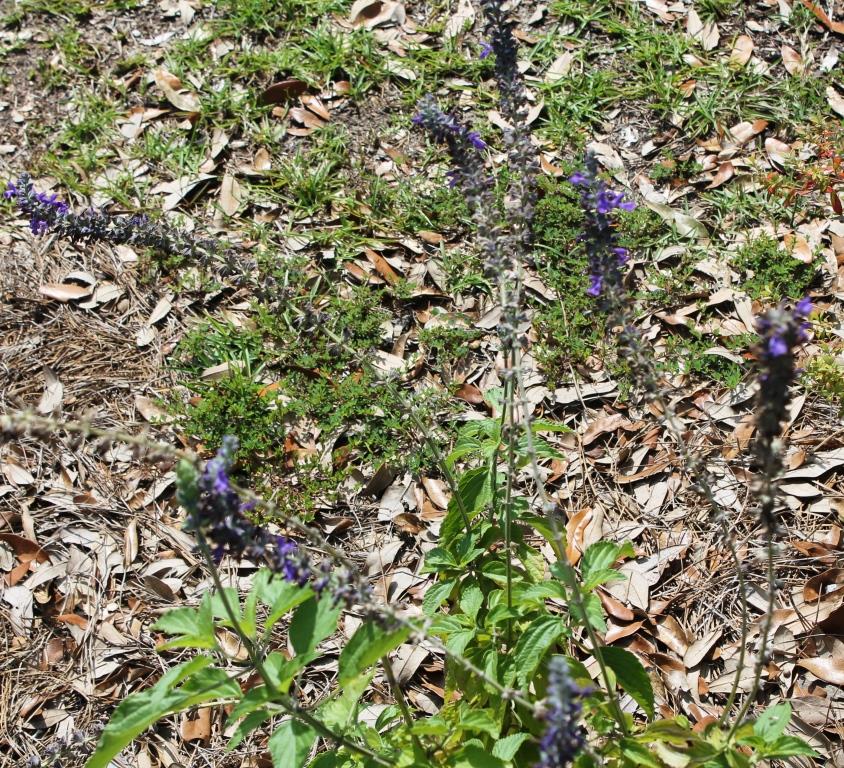
Salvia, before and after deadheading Photo Credit Matthew Orwat, UF/IFAS Extension

While this process is generally used for repeat flowering shrubs, such as roses, it can also be used effectively on crapemyrtle, salvia, cone flower, coreopsis, and many others.
Promote an extended bloom season in the garden and deadhead!
by Roy Carter | Jul 14, 2015
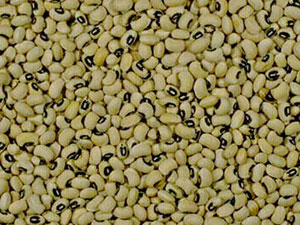
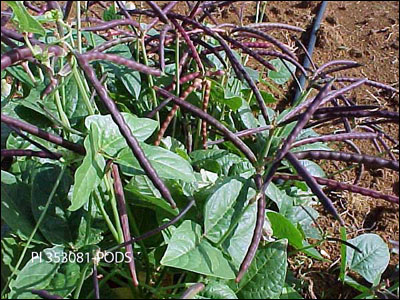
Southern Peas, Image Credit UF / IFAS gardening solutions
Cowpeas are one of the most important food legumes in the semiarid tropics covering Asia, Africa, Southern Europe, and Central and South America.
A drought-tolerant and warm-weather crop, cowpeas are well adapted to the drier regions of the tropics, where other food legumes do not perform well. It also has the useful ability to fix atmospheric nitrogen through it its root nodules, and it grows well in poor soils with more the 85 percent sand and with less than 0.2% organic matter and low levels phosphorus.
A farmer might call them cowpeas. A grocer might call them black-eyed peas. A restaurant waitress might call them field peas. But they are all talking about the same vegetable the southern pea. If you think you’re confused now, wait until you see some of the other names for this vegetable. My information was provided by Emeritus Extension Vegetable Specialist, Jim Stephens, of the University of Florida/Institute of Food and Agricultural Sciences and Okaloosa county director Larry Williams.
A good part of the confusion over southern pea variety names is due to the fact that gardeners can easily save their own southern pea seeds. Over the years, true varietal identity gets lost. So, gardeners think up new local names for the Southern pea varieties that grow. As the seeds are spread around, what started out as a single variety may become known by several names. Added to this fact that there are so many recognizable southern pea varieties and it’s easy to see how confusion can result.
Some years ago, more than fifty southern pea varieties and strains were identified through scientific testing. Since then, plant breeders have added many more varieties to that old list.
Southern Pea Plant, image Credit UF / IFAS gardening solutions
Today, eleven southern pea classifications are recognized. By looking for the characteristics associated with each grouping, gardeners usually can come fairly close to identifying unknown seed stock. With the exception of the purple hull group, southern pea classification is based mostly on the color of the seed and seed eyes and the spacing of the seed in the pods.
Varieties are called Crowder’s if the seeds are spaced so closely that the seed color varies. The color can be general over the entire seed coat or it may be concentrated around the seed eye. Colorless varieties are called creams. The purple hull group includes varieties with some purple coloring on their pods, even though they may fit into other groups due to seed characteristics.
As I said, there are III Classification Groups – The Black-Eyes, The Black-Eye Crowder’s, The Colored-Eyes, The Colored-Eye Crowder’s, The Purple Hull group, The Black Crowder’s, The Brown Crowder’s, The Speckled Crowder’s, The Creams, The Cream Crowder’s, and The Field Forage Group. To make matters even more confusing Southern peas also can be classified according to plant growth habit. Pea plants may be bush, top pick, vining, or semi-vining types.
Southern peas recommended for North Florida includes Black-eye No. 5, Cream 8, Cream 12, Knuckle Hull, Magnolia, Pink Eye, Purple Hull, Texas Cream 40, White Acres, Top Pick Eye Purple Hull, Top Pick Cream 40, Sadandy and Zipper Cream.
Southern peas can be planted in our area in the spring, summer, or fall. For more information on how to grow Southern Peas, contact your local county extension office and see Publication SP 103, Florida Vegetable Gardening Guide.

by Blake Thaxton | Jul 14, 2015
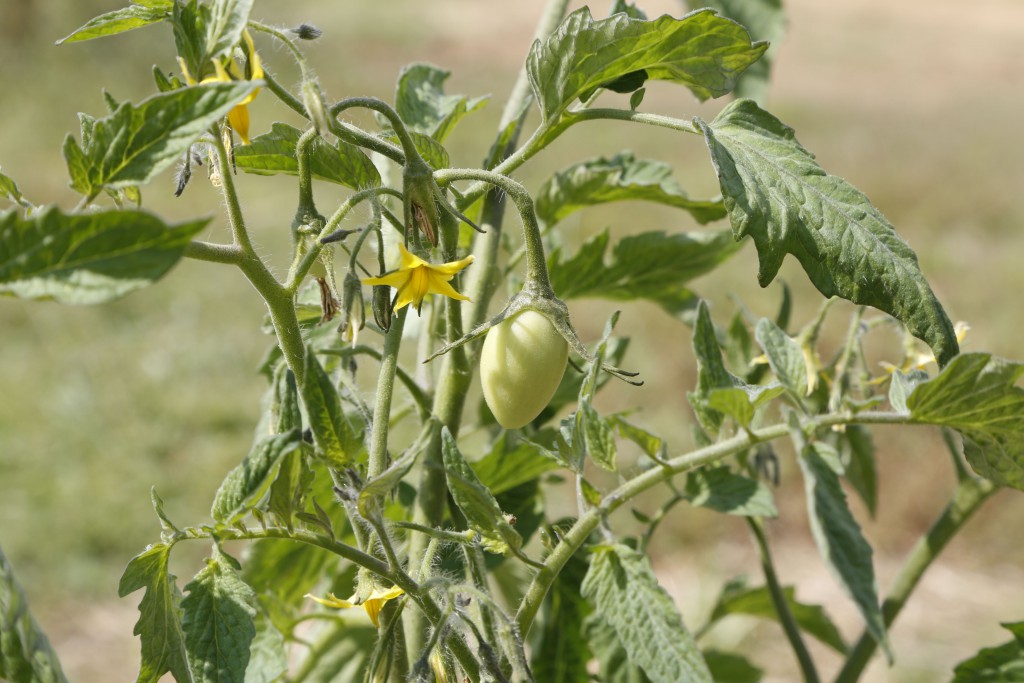
Photo Credit: Abbie Seales Rolph
One of the many great thing about living in Florida is the long growing season that the climate affords to gardeners. For up to 8 months a year warm season vegetables can be grown. The colder months are mild enough to grow other crops as well. Although most gardeners tomatoes are suffering from the extreme heat of the middle of Summer, fall preparations can begin for tomatoes.
Keeping in mind the first frost is likely to arrive at the beginning of November seeds need to be planted very soon. In general most varieties wont be ready for 70 days after transplant into the garden. To be sure to get a good harvest, fall tomatoes should be planted close to August 1st. This planting date gives a target first harvest of mid October.

There are variety to choose from. photo credit: Blake Thaxton
The heat of August and the beginning of September can induce stress on the plant and inhibit fruiting. Because of this it is a good idea to choose “hot-set” varieties. These varieties are more tolerant to high temperatures. Typically tomatoes set fruit at temperatures of 65° to 85° Fahrenheit. “Hot-set” hybrid varieties have been selected for the ability to produce at temperatures slightly above that range. A few to look for in seeding catalogs and on seed company websites are Phoenix and Solar Fire.
To learn more, read Tomatoes in the Florida Garden or call you local extension office.
by Larry Williams | Jul 7, 2015
There are a number of plants in my landscape that bring back fond memories – plants that I propagated.

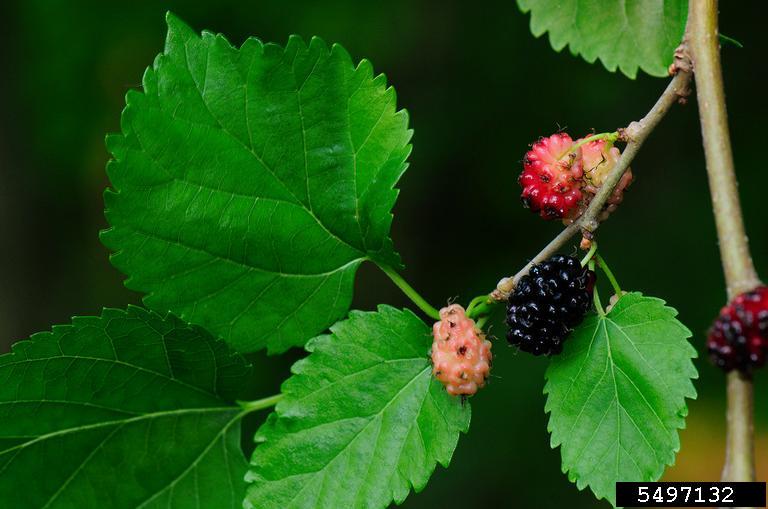
Red Mulberry. Photo credit: Vern Williams, Indiana University, bugwood.org.
There’s a mulberry tree in my backyard that I rooted years ago. I took the cuttings from an old mulberry tree in my hometown. As a boy, I climbed the tree, got in trouble once for coming home with mulberry stains on my clothes. I liked the berries and still do. I have good childhood memories about the tree.
About twenty years ago I visited the property adjacent to my childhood home. The tree was still there. It was during mulberry season. I enjoyed a few mulberries. I took about eight or ten cuttings from the tree. About a year after my visit, the property sold. The new owner bulldozed the tree.
But because of the cuttings that I rooted, the tree still lives and not just in my memory. The trees produced by those cuttings are genetically the same as the parent tree. Essentially, they are clones. The one in my backyard produces mulberries each year.
You too can propagate memories. Not all plants can be propagated from cuttings but many can be. Sometimes trial and error is necessary to learn proper timing in taking cuttings. But most reliable references will provide the time of year to take cuttings based on the plant species.
Stem cuttings should be removed from the parent plant with a clean, sharp knife or pruner. Ideally your cutting should be 4-6 inches in length and not much thicker than a pencil in diameter.
Take the bottom two-thirds of leaves off on each cutting. The cuttings should be stuck upright in a propagation medium. I usually use a good quality potting mix and mix in a little course sand or perlite for better drainage. The cuttings should be inserted deep enough to hold them upright, usually ½ to 1 inch.
To help promote rooting of moderate to difficult to root plants, wound the cuttings by scraping the lower ½ to 1 inch of the stem with a clean, sharp knife. The scrape should remove the bark or “skin.” Then dip the cutting in a rooting hormone covering the scrape with the rooting powder prior to inserting the cutting into the rooting medium.
I usually use a four inch pot, gallon size pot or bedding plant flat with drainage holes as a rooting container. I may stick as many as ten stem cuttings in a gallon size pot. I place the container of cuttings in a shady location outdoors and keep it moist. The cuttings should produce roots in two to sixteen weeks, depending upon plant species and the environment.
After the cuttings have rooted, carefully remove them and individually plant each rooted cutting in its own four inch to one gallon size pot. Keep the potting medium moist but not soggy. After the roots adequately fill the pot, the plant should be strong enough to be planted in the ground.
As your rooted cuttings grow, hopefully they will provide fond memories.