by Gary Knox | Apr 20, 2016
The huge flowers and leaves of Ashe magnolia make it one of my favorite native flowering trees. Individual flowers may be 6 – 12 inches in diameter and are white with purple blotches at the bases of the 3 inner petal-like tepals. When in flower, as they are now in April, the huge white blooms are impossible to miss because of their size and color.
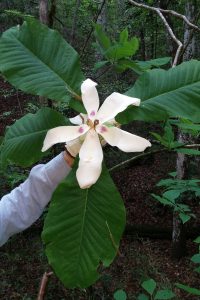
Ashe magnolia. Photo credit: Gary Knox, UF/IFAS.
The leaves are similarly huge, growing 1 – 2 feet long and up to 1 foot across. These large, banana-like leaves offer interest and coarse texture to any landscape.
Ashe magnolia grows as a small tree with a loose, open branching habit up to a height of about 25 feet. The large, light green leaves have whitish undersides and emerge in mid spring prior to flowering. Leaves turn yellowish and fall in autumn, usually without any dramatic color change. Pollinated flowers are followed by reddish, cylindrical, 3-inch fruits producing bright red fleshy seeds in early August.
Native to the Panhandle. This small tree is relatively unknown because of its rarity. Ashe magnolia, Magnolia macrophylla var. ashei, is native in only a few counties in the Florida panhandle and is endangered because of this limited distribution. It is primarily found on the slopes of ravines, growing in the understory of mixed hardwood forest. While it is now illegal to remove this plant or its seeds from the wild, nurseries can grow this plant using seeds from long-cultivated landscape trees.
Garden cultivation. Ashe magnolia makes a lovely small flowering tree if planted in the right location. It grows best in rich, well-drained soil under partial shade, although full sun is tolerated if plants are irrigated during drought. Sheltered sites are best since strong winds can shred the papery leaves and break the brittle branches. You won’t have to wait long for this plant to flower; a unique aspect of Ashe magnolia is that it flowers when young, reportedly when as small as 1 foot tall! Another unusual characteristic is that this Florida native plant is hardy north into USDA plant hardiness zone 6.
Given this species’ beauty, rarity and nativity to the Panhandle, I think it is almost an obligation for panhandle Floridians to cultivate and showcase this plant in our gardens while preserving it in our forests! Seek out specialty nurseries to obtain one of these rare beauties for your garden.
For more information:
Atlas of Florida Plants: Ashe Magnolia
Ashe Magnolia at the United States Botanic Garden
USDA Ashe Magnolia Plant Profile

by Matt Lollar | Apr 14, 2016
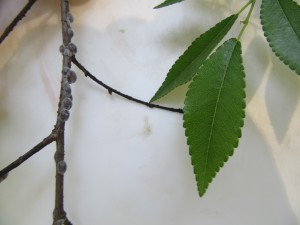
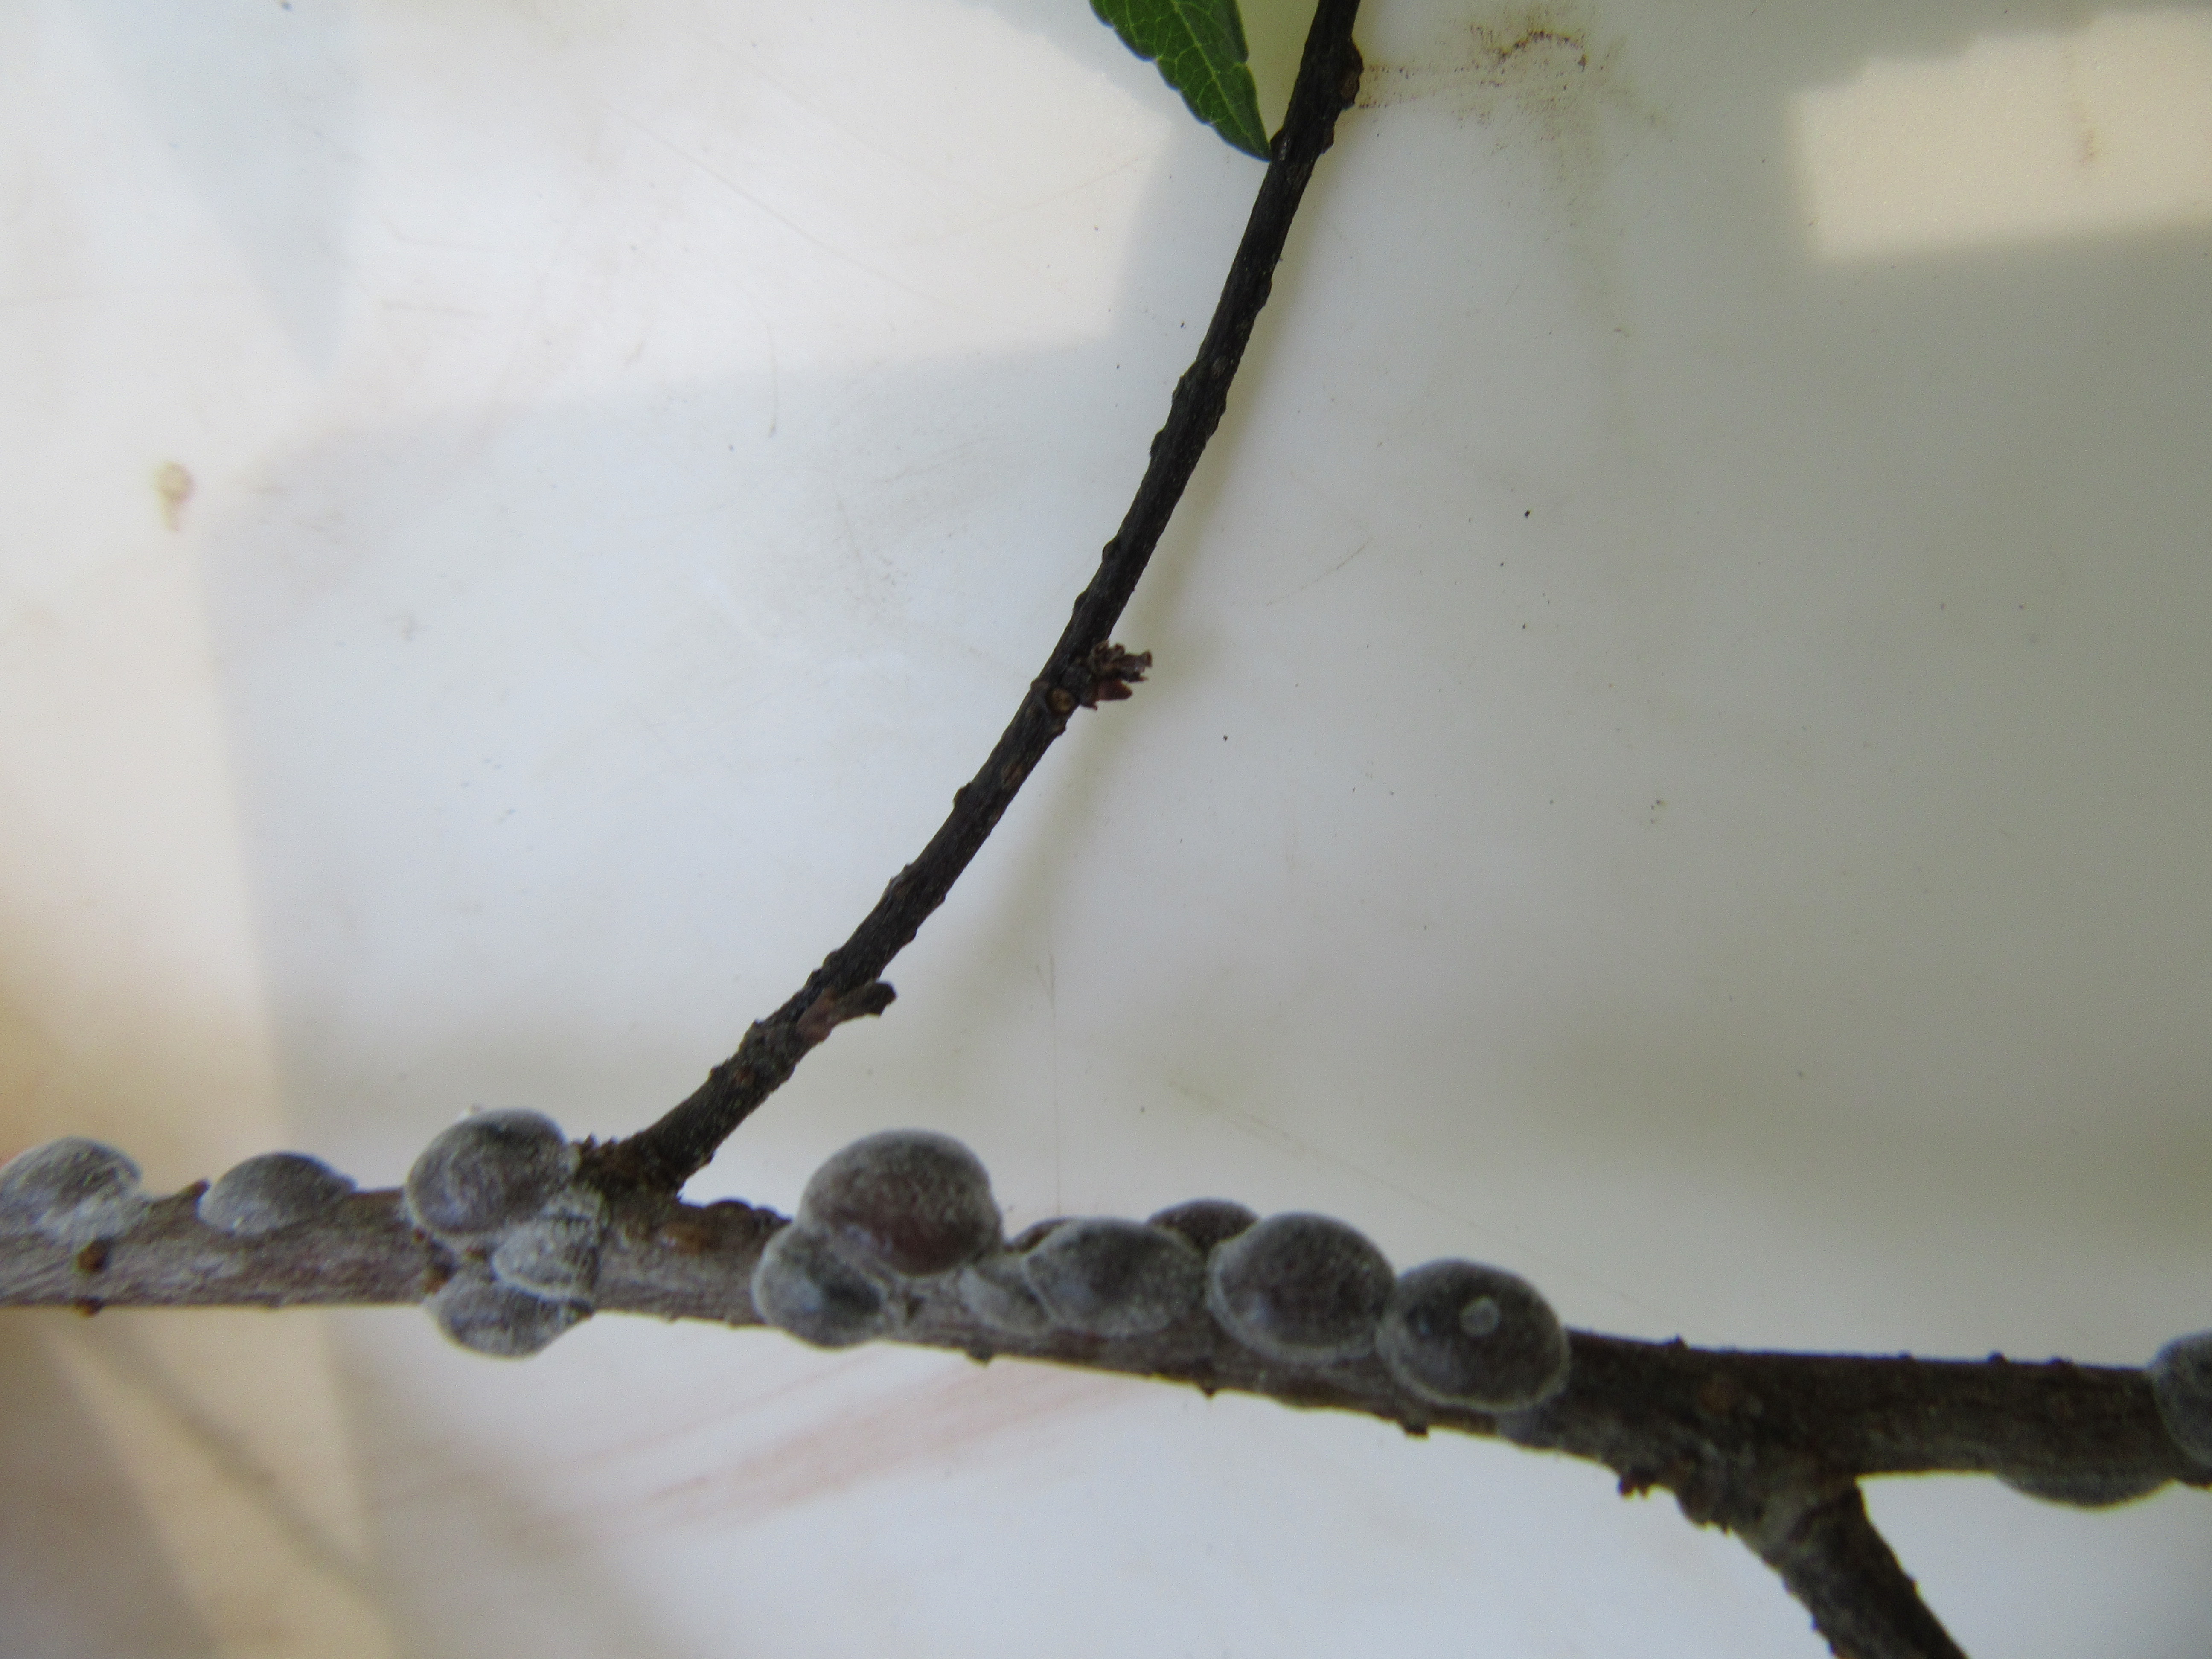
Scales on a Chinese Elm.
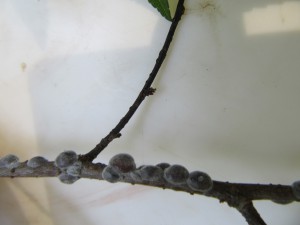
Scales on a Chinese Elm.
Last week as I was basking in the shade of the Chinese Elms (Ulmus parvifolia) in my yard, I noticed some strange lumps on the twigs. Upon further investigation, I realized the “lumps” were scales. Scale insects are serious pests of a number of ornamental plants. Here in Florida there are 13 different families of scales with the most common being armored scales, soft scales, and mealybugs. Scales have piercing-sucking mouthparts which they use to siphon fluids from the leaves, stems, and sometimes roots of many ornamental plants. Heavy infestations cause extensive leaf yellowing, premature leaf drop, branch dieback, and eventually plant death.
Scale Biology
The life cycle of a scale begins with eggs being laid beneath wax coverings or beneath the adult female. Eggs typically hatch in 1 to 3 weeks. The newly hatched nymphs, called crawlers, move around a plant until they find a spot to feed. Once a feeding site is located, their piercing sucking mouthparts are inserted into the plant and the crawlers begin to feed and grow. The males of many scale species develop wings as adults and fly to other plants to reproduce.

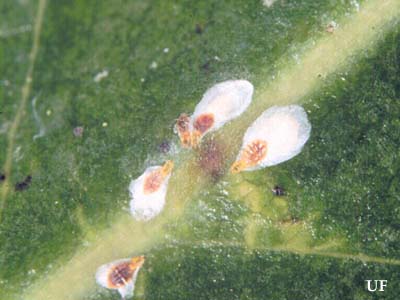
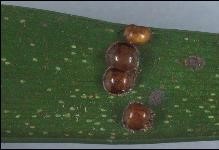
The magnolia white scale. Credits: University of Florida
Armored Scales
Armored scales get their armor by secreting a waxy covering over their bodies that is not attached. The scale lives under this covering and uses it as a protection to feed under. Armored scales can be almost any color or shape and range anywhere from 1/16 to 1/8 inch in diameter. For females, these shapes range from circular to oval to long and slender. The males typically have coverings that are more elongate and smaller than the females. As adults, the males are tiny, winged, gnat-like insects and are rarely seen.
Hemispherical scale on coontie. Credits: Lyle Buss, University of Florida
Soft Scales
Similar to armored scales, soft scales secrete a waxy covering, but it is attached to their bodies. Soft scales can be a number of colors, shapes, and sizes and range anywhere from 1/8 to 1/2 inch in diameter. Their shapes vary from spherical to nearly flat.
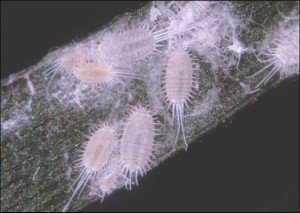
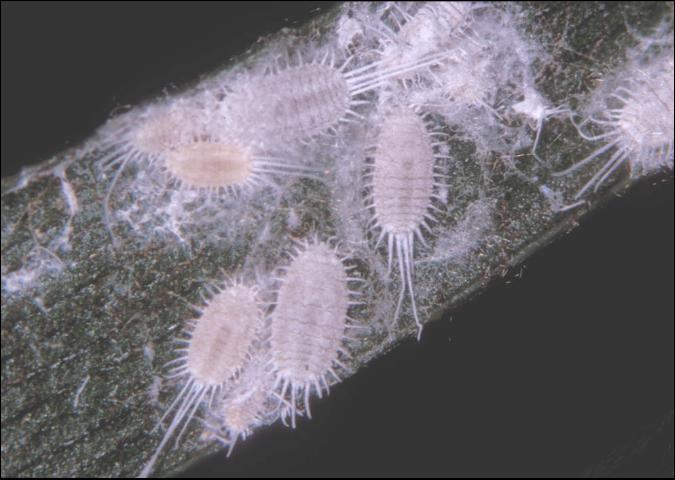
Mealybugs. Credits: James Castner, University of Florida
Mealybugs
Mealybugs are soft-bodied insects that possess a covering of flocculent, white, waxy filaments. They are about 1/8 inch in length and usually pinkish or yellowish in color. Mealybugs have piercing-sucking mouthparts which they use to siphon fluids from the leaves, stems, and sometimes roots of many ornamental plants. Mealybug damage produces discolored, wilted, and deformed leaves.
Scale and Mealybug Management
- Cultural Control – Plant inspection prior to purchase or installation is the first line of defense against a scale or mealybug population. Make sure to inspect the undersides of leaves and plant stems. Infested sections of plants can be pruned and plant material should be cleaned from the planting area and discarded. Also, you can increase air flow and decrease humidity by proper installation and pruning. Over-fertilizing can also increase pest populations.
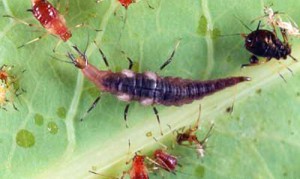
Larva of a brown lacewing. Credits: Lyle Buss, University of Florida.
- Biological Control – Predators, such as ladybugs and green lacewings, are usually present in large enough numbers to suppress scales and mealybugs to a desirable threshold. However, broad-spectrum insecticides and bad weather can reduce predator numbers. Look for signs of predation by inspecting dead scales for jagged holes in their waxy coatings. If predation signs are present, use more selective chemical controls and oils as opposed to broad-spectrum products.
- Chemical Control – Timing is everything when it comes to managing scale and mealybug insects. Crawler activity is more pronounced with the flush of new plant growth in the spring. Before application, prune infested plant parts off first to promote greater penetration of insecticides into the foliage. Contact products (acephate, bifenthrin, carbaryl, etc.) must be applied to inhibit the crawler stages of these insects and systemic products (acetamiprid, imidacloprid, thiamethoxam, etc.) can be used on the sessile growth stage. Plants should be sprayed thoroughly to the point of drip or “run off” from leaves, twigs, and stems. Repeated applications may still be necessary even if the timing is right, as crawler populations are often large and crawlers like to hide under old waxy scales. Systemic drenches are also a viable option. With good spray coverage, horticultural oils can kill scales at all stages of growth. Refer to the product label for phytotoxicity and temperature guidelines. Even after successful treatment, the outer coatings of the scales may remain on the plant material for weeks, which can be unsightly. The best way to determine if scales are dead is to squeeze them. They will be dry when squeezed if they are dead and they will ooze liquids if they are living (they were at least alive to the point of being squashed).
For insect identification and additional information on scale control, please see:
A Guide to Scale Insect Identification
UF/IFAS Featured Creatures
Your County Extension Office
by Judy Biss | Apr 14, 2016
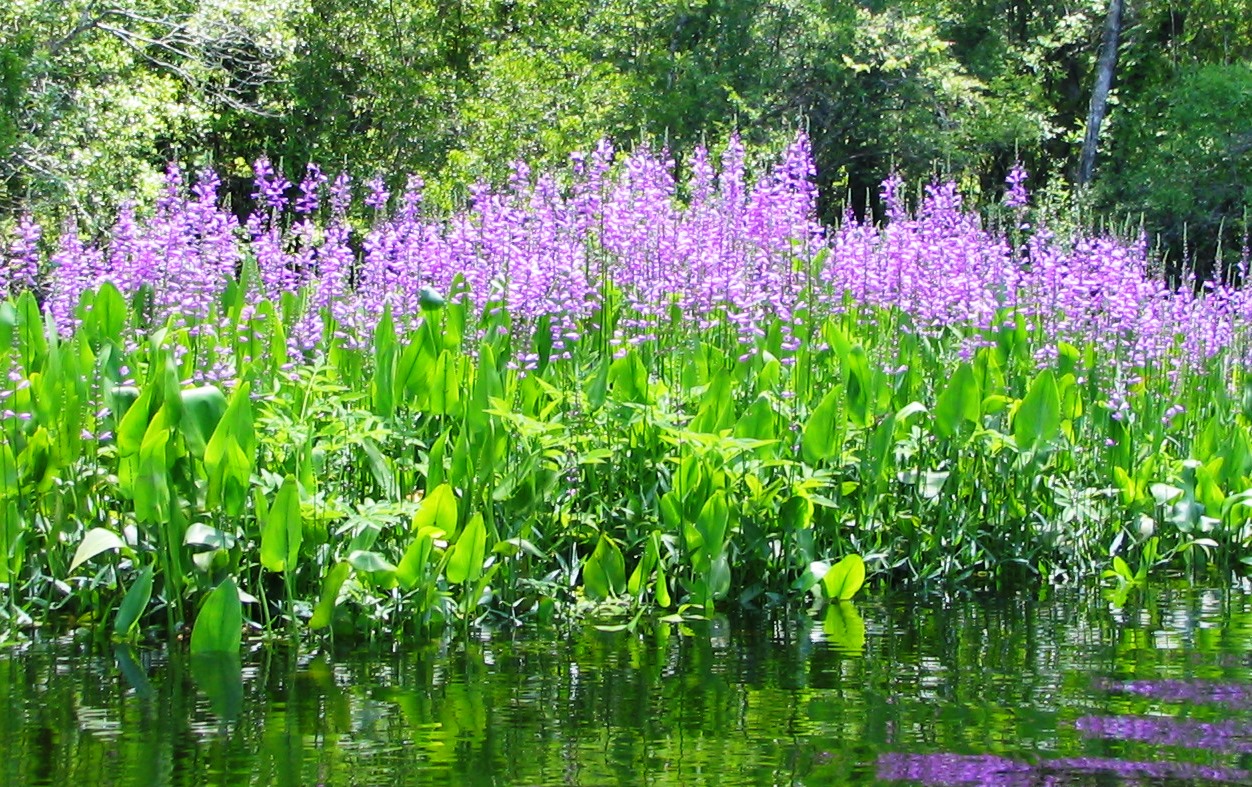
A stand of purple flowers called “False Dragon-Heads (Physostegia spp.) growing along the St. Marks River. They are behind a stand of pickerelweed (Pontederia cordata) that has not yet bloomed. Photo by Judy Biss
This is the time of year when gardens burst forth with lush green growth and colorful flowers. With a little planning and management, your backyard pond can also put on the same show each year and fight unwanted pond weeds at the same time!
Fish and farm ponds are abundant in the Florida panhandle. Most are two acres or less and are used for producing catfish, bass, and bream; for recreation and wildlife viewing; for fishing and swimming; and for irrigation and livestock watering. Ponds play an important role in various aspects of agricultural production and rural life, and for that reason, maintaining their ecological health is critical to their many uses.
Managing aquatic plants is one important component of pond ownership. If you are a pond owner, you have probably seen and read many articles related to controlling and removing aquatic weeds. Just as in terrestrial gardens, there are a number of non-native (and sometimes native) plants that can become quite weedy and problematic in and around your pond. Hydrilla, water hyacinth, torpedograss, Chinese tallow, alligator weed, and the tiny water spangles (common Salvinia) are just a few examples that plague our waterways and shorelines. But, controlling and removing weeds is only part of the bigger picture of pond management. Planting native wetland plants is another ecologically important and aesthetically enriching management tool as well.
By establishing beds of healthy native plants, you are also fighting against weedy non-native invasive plants through competition for space. Some other benefits of native aquatic plants are they act as a barrier, filtering fertilizers such as nitrogen and phosphorus from runoff, and they help control erosion. Also, because native plants are adapted to our local environments, they are generally easy to grow, and most require little or no extra water or fertilizer.
Below are a few guidelines to follow if you are considering the use of native aquatic plants in your pond.
Know Your Plants:
Depending on the type, aquatic plants generally grow in three forms. Emerged, like maidencane or bulrush, submerged like coontail and southern naiad, and floating, like the tiny free floating duckweed, and spatterdock and fragrant water lily which are rooted with floating leaves and flowers at the water’s surface. There are many good UF/IFAS publications and online resources for aquatic plant identification. Some are listed at the end of this article.
Plan Ahead:
Some questions to ask are, what is the primary use of your pond? Is it wildlife viewing, swimming, fishing, irrigation, etc.? The answers to these questions will help you determine how much of your pond and shoreline will be planted, and what types of plants to use. For example, if you use your pond for fishing and irrigation, you should leave some areas of the shore unplanted and mowed to allow for access, and you should not plant submerged plants that may clog irrigation intakes. On the other hand, if your pond is primarily for attracting wildlife, you can plant most of the shoreline including some types of submerged aquatic plants.
Right Plant Right Place:
You may have heard this Florida Friendly Landscaping term before, as it holds true for any garden including aquatic gardens. Choose plants that grow best in the water depth and planting “shelves” you have in and around your pond. By “shelf” we are referring to the slope of your shoreline. Is it a gradual, gentle slope into deeper water, or is it steep and abrupt? Also, become familiar with seasonal changes in your pond’s water depth, as it may affect the plants you select.
Prepare For Maintenance:
Just like a vegetable garden, your newly planted aquatic plants (especially those that are emerged) will need attention in the first year or so of establishment. Remove dead plants and weed out unwanted plants.
Where to Purchase the Plants:
For a list of Florida native plant suppliers, visit the Association of Florida Native Nurseries (AFNN) Please Note: collecting wild plants in Florida is subject to various regulations and may require permits! Visit this website for details on wild collection – Florida Plant Collecting and Transport, Regulations and Permitting, University of Florida Herbarium
Here are some helpful resources used for this article with more detail on establishing aquatic plants around your pond:
by Mark Tancig | Apr 14, 2016
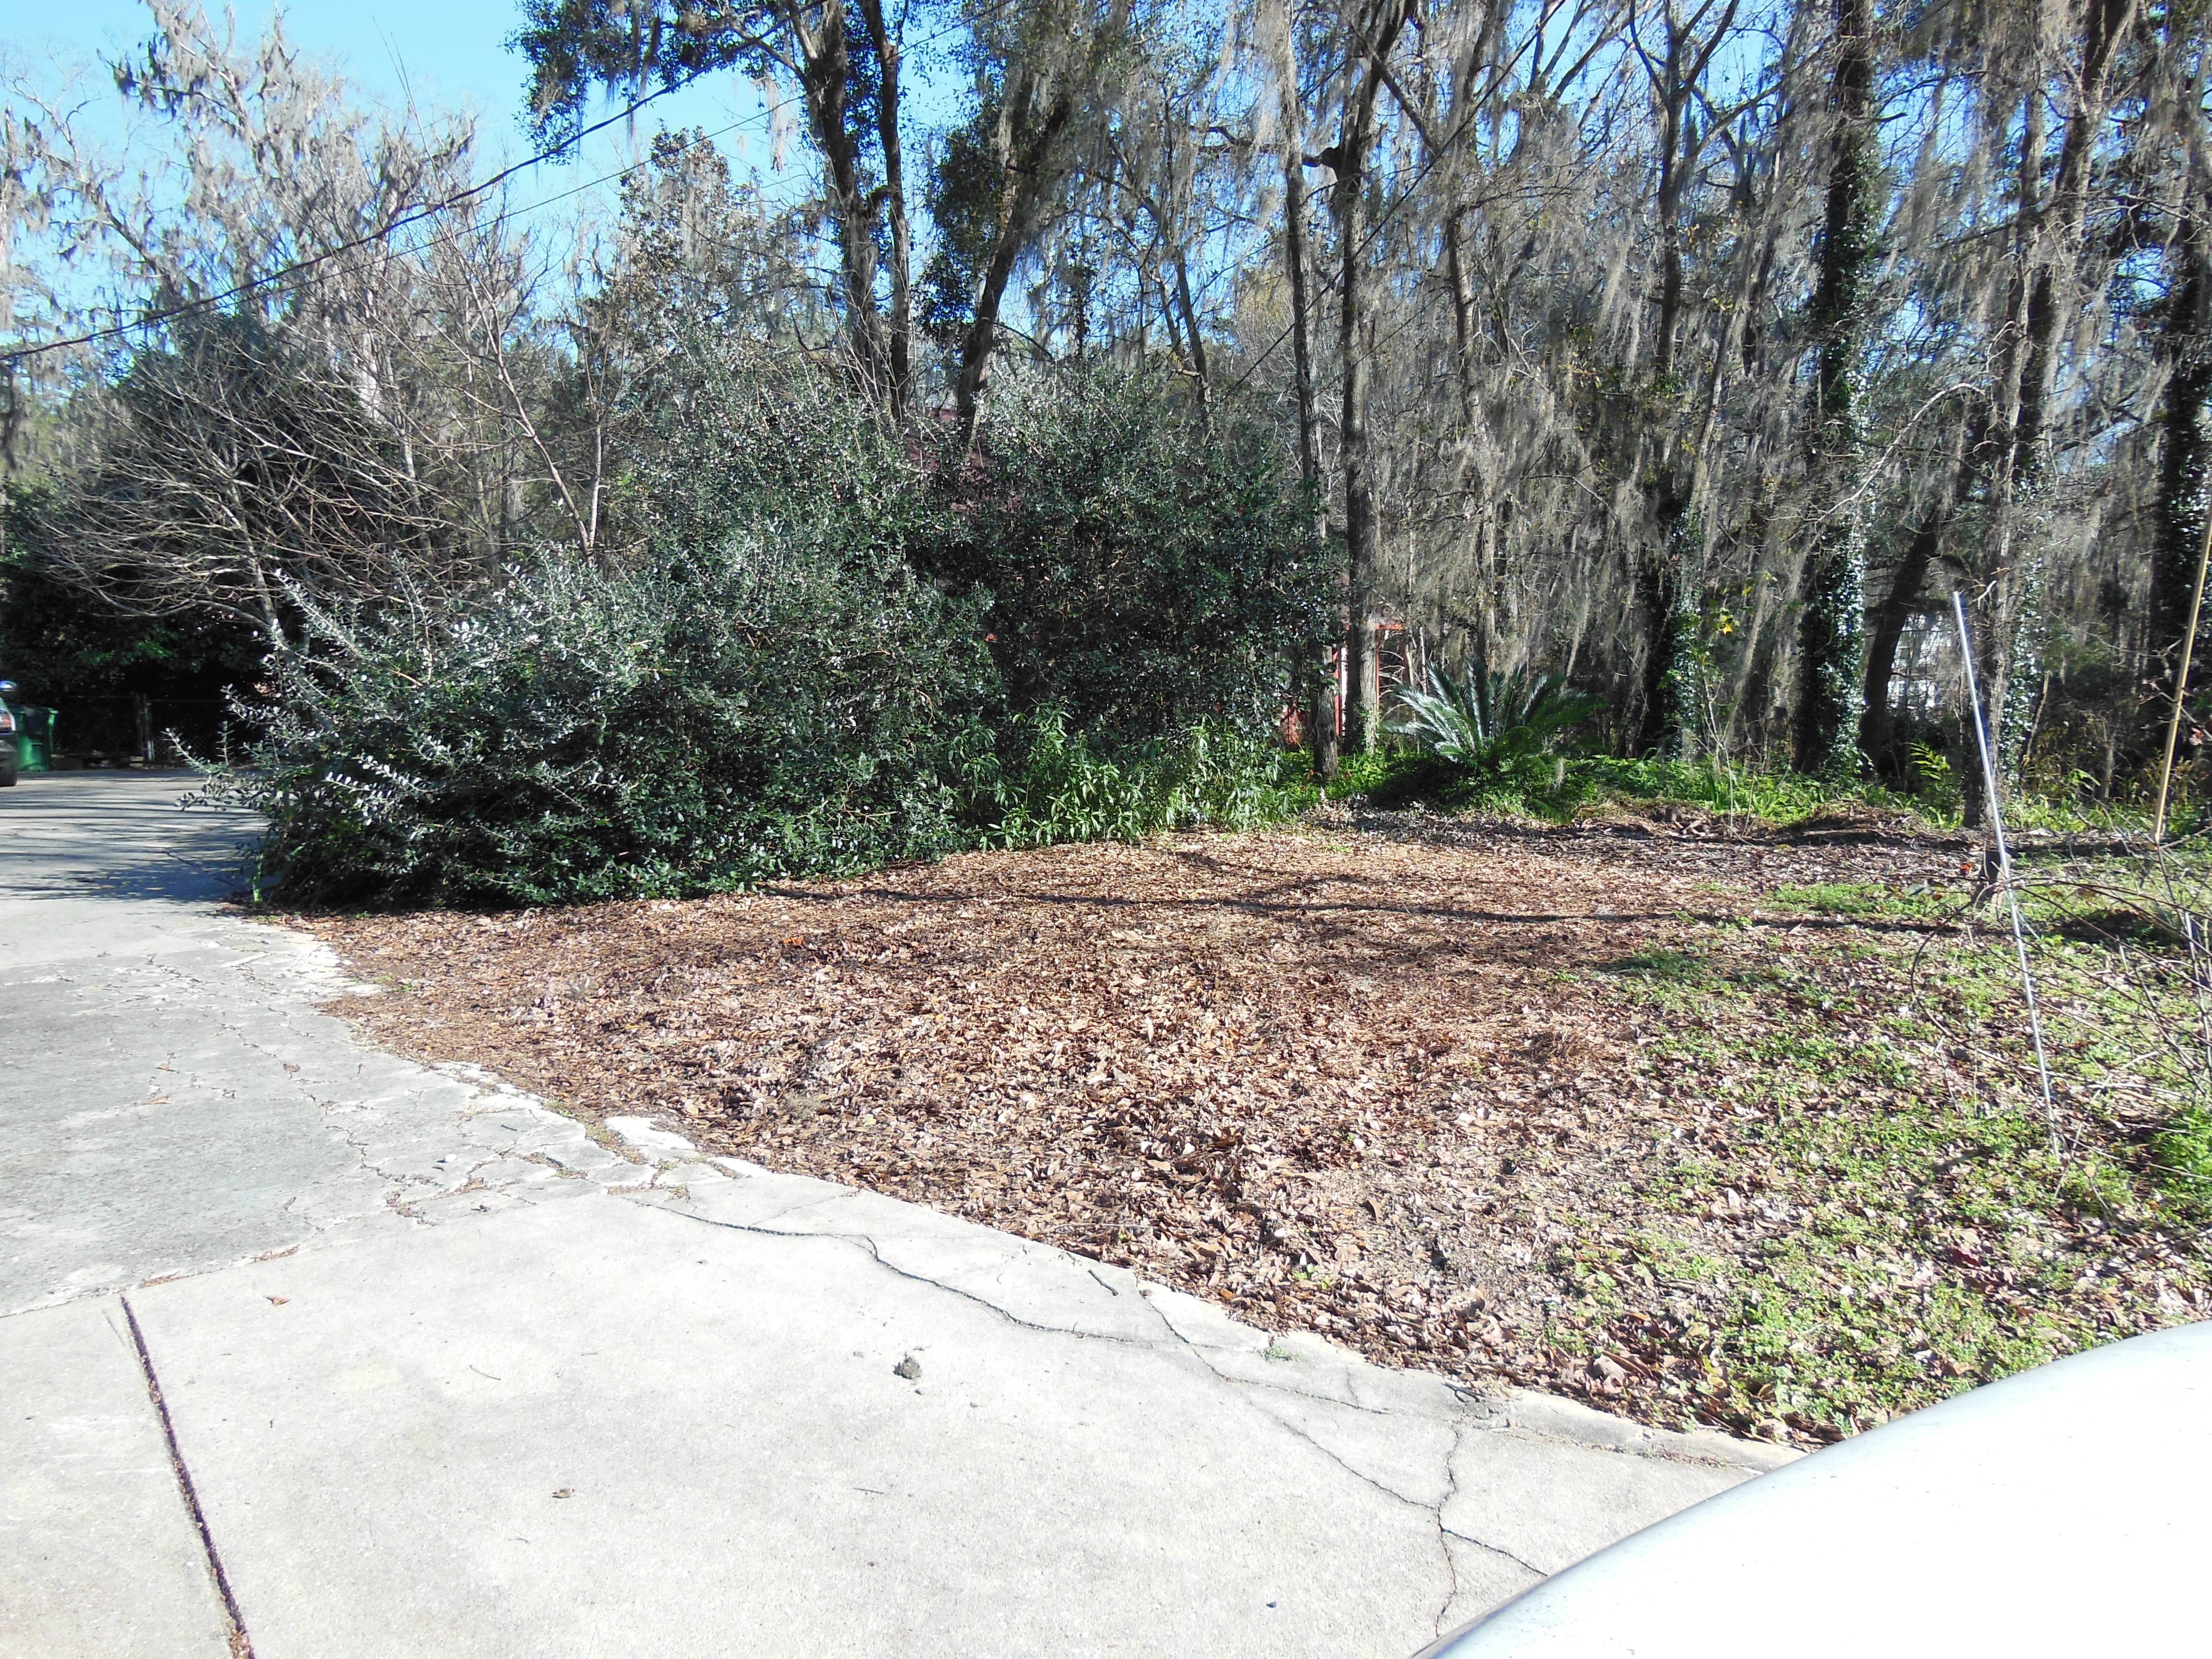
Do you have a bare spot that you would like to see go away? How about a problem getting something to grow in a particular area? I’m not talking about that receding hairline or bald spot, I’m talking about your lawns and gardens. Many residents have these problems, whether it is too much shade under our beautiful oaks, that stubborn orange clay, or that hot, dry sand. Often times, the best remedy for these situations is to use mulch. Mulch is a versatile tool in the home landscape that provides many benefits while adding aesthetic beauty.
Some of the benefits of using mulch in your landscape include retaining soil moisture, reducing the amount of weeds, insulating the soil (keeps it warm during cold months and cool during the warm season), improving soil health through decomposition, and protecting plants from mower and/or trimmer damage. In addition, mulch can help protect the quality of local lakes and streams by reducing soil erosion and stormwater runoff. Therefore, not only can it improve your yard, but it can also help minimize impacts to our precious natural resources.
When purchasing mulch, there are many options available. Local lawn and garden shops offer many different types of mulch based on their origin (type of wood the mulch comes from), texture (shredded vs. nuggets), color, and, of course, cost. When considering these options, here is some information to help you choose:
- Origin. Cypress mulch comes from the harvesting of natural cypress wetlands and it not recommended by the University of Florida Florida-friendly Landscaping Program. Pine bark mulch is produced from the paper/pulp industry as a marketable byproduct. Pine needle mulch is harvested from pine tree farms as the trees mature to harvestable size.
- Plant Needs. Pine mulch (either bark or needles) can lower the pH of your soils as it breaks down over time. This is great for acid-loving plants such as azaleas, gardenias, and blueberries, but may affect species that require a high pH.
- Texture. The coarser the texture, the longer the mulch will last. Finely shredded mulches breakdown quicker than coarse mulches, such as bark nuggets. As the mulch breaks down, it adds organic content to your soil, thus improving soil health.
If you want to save money, you can often contact local tree trimming companies for their hard day’s work. As they trim or remove trees, the smaller material is shredded into mulch and they are often willing to drop it off in your yard instead of paying for its disposal. It is best to allow this freshly shredded mulch to cure for some time before placing it in your garden beds since freshly shredded mulch can temporarily reduce the availability of nitrogen in the soil.
When using free mulch options, be aware that weed seeds may be present.
Be sure to apply the mulch in a two to three inch layer in your landscape beds or around trees and shrubs. It’s not a bad idea to aerate any old mulch already present to prevent matting or compaction. This can be done with a rake or pitchfork.
So cover up that soil to improve the look and fertility of your landscapes and to reduce erosion and stormwater runoff. If you have any questions about mulch, more information is available at the Florida-Friendly Landscaping website: http://fyn.ifas.ufl.edu.
by Larry Williams | Apr 7, 2016
Watering to establish lawn
When watering to establish a lawn or when renovating (redoing, patching, reestablishing, starting over, etc.) a lawn, we normally call for 2-3 “mists” throughout the day for the first 7-10 days until roots get established. These are just 10 minute bursts. Then back off to once a day for about ½ hour for 7-10 days. Then go to 2-3 times a week for about 7 days. By then your lawn should be established.
Of course, if we are experiencing adequate rainfall, you may not need to irrigate. Rain counts. But in the absence of sufficient rain, you’ll need to provide enough water at the correct time to allow your new sod to root – hence, the above directions.
A well designed and correctly installed irrigation system with a controller, operated correctly, really helps to achieve uniform establishment. It can be very difficult or impossible and inconvenient and time consuming to uniformly provide sufficient water to establish a lawn with hose-end sprinklers, especially if the lawn is sizeable and during dry weather. Most people are not going to do the necessary job of pulling hoses around on a regular basis to result in a well established lawn.
There is no substitute or remedy for incorrect irrigation when establishing a brand new lawn or when renovating an entire lawn or areas within a lawn.
It would be wise to not invest the necessary time and money if the new lawn cannot be irrigated correctly. Taking the gamble that adequate (not too much, not too little) rainfall will occur exactly when needed to result in a beautiful, healthy, thick, lush lawn is exactly that – a gamble.
An irrigation system is nothing more than a tool to supplement rainfall. As much as possible, learn to operate the irrigation controller using the “Manual” setting. It is also wise and is state law to have a rain shutoff device installed and operating correctly. The rain shutoff device overrides the controller when it is raining or when sufficient rainfall has occurred. Rain shutoff devices are relatively inexpensive and easily installed. Also, a good rain gauge can be an inexpensive tool to help you monitor how much rain you’ve received. Rain counts.
Too much water will result in rot, diseased roots and diseased seedlings and failure. Too little water will result in the sod, seedlings, sprigs or plugs drying excessively and failure to establish. The end result at best is a poorly established sparse lawn with weeds. Or complete failure.
For additional information on establishing and maintaining a Florida lawn, contact your County UF/IFAS Extension Office or visit http://hort.ufl.edu/yourfloridalawn.