by Molly Jameson | Jun 26, 2025
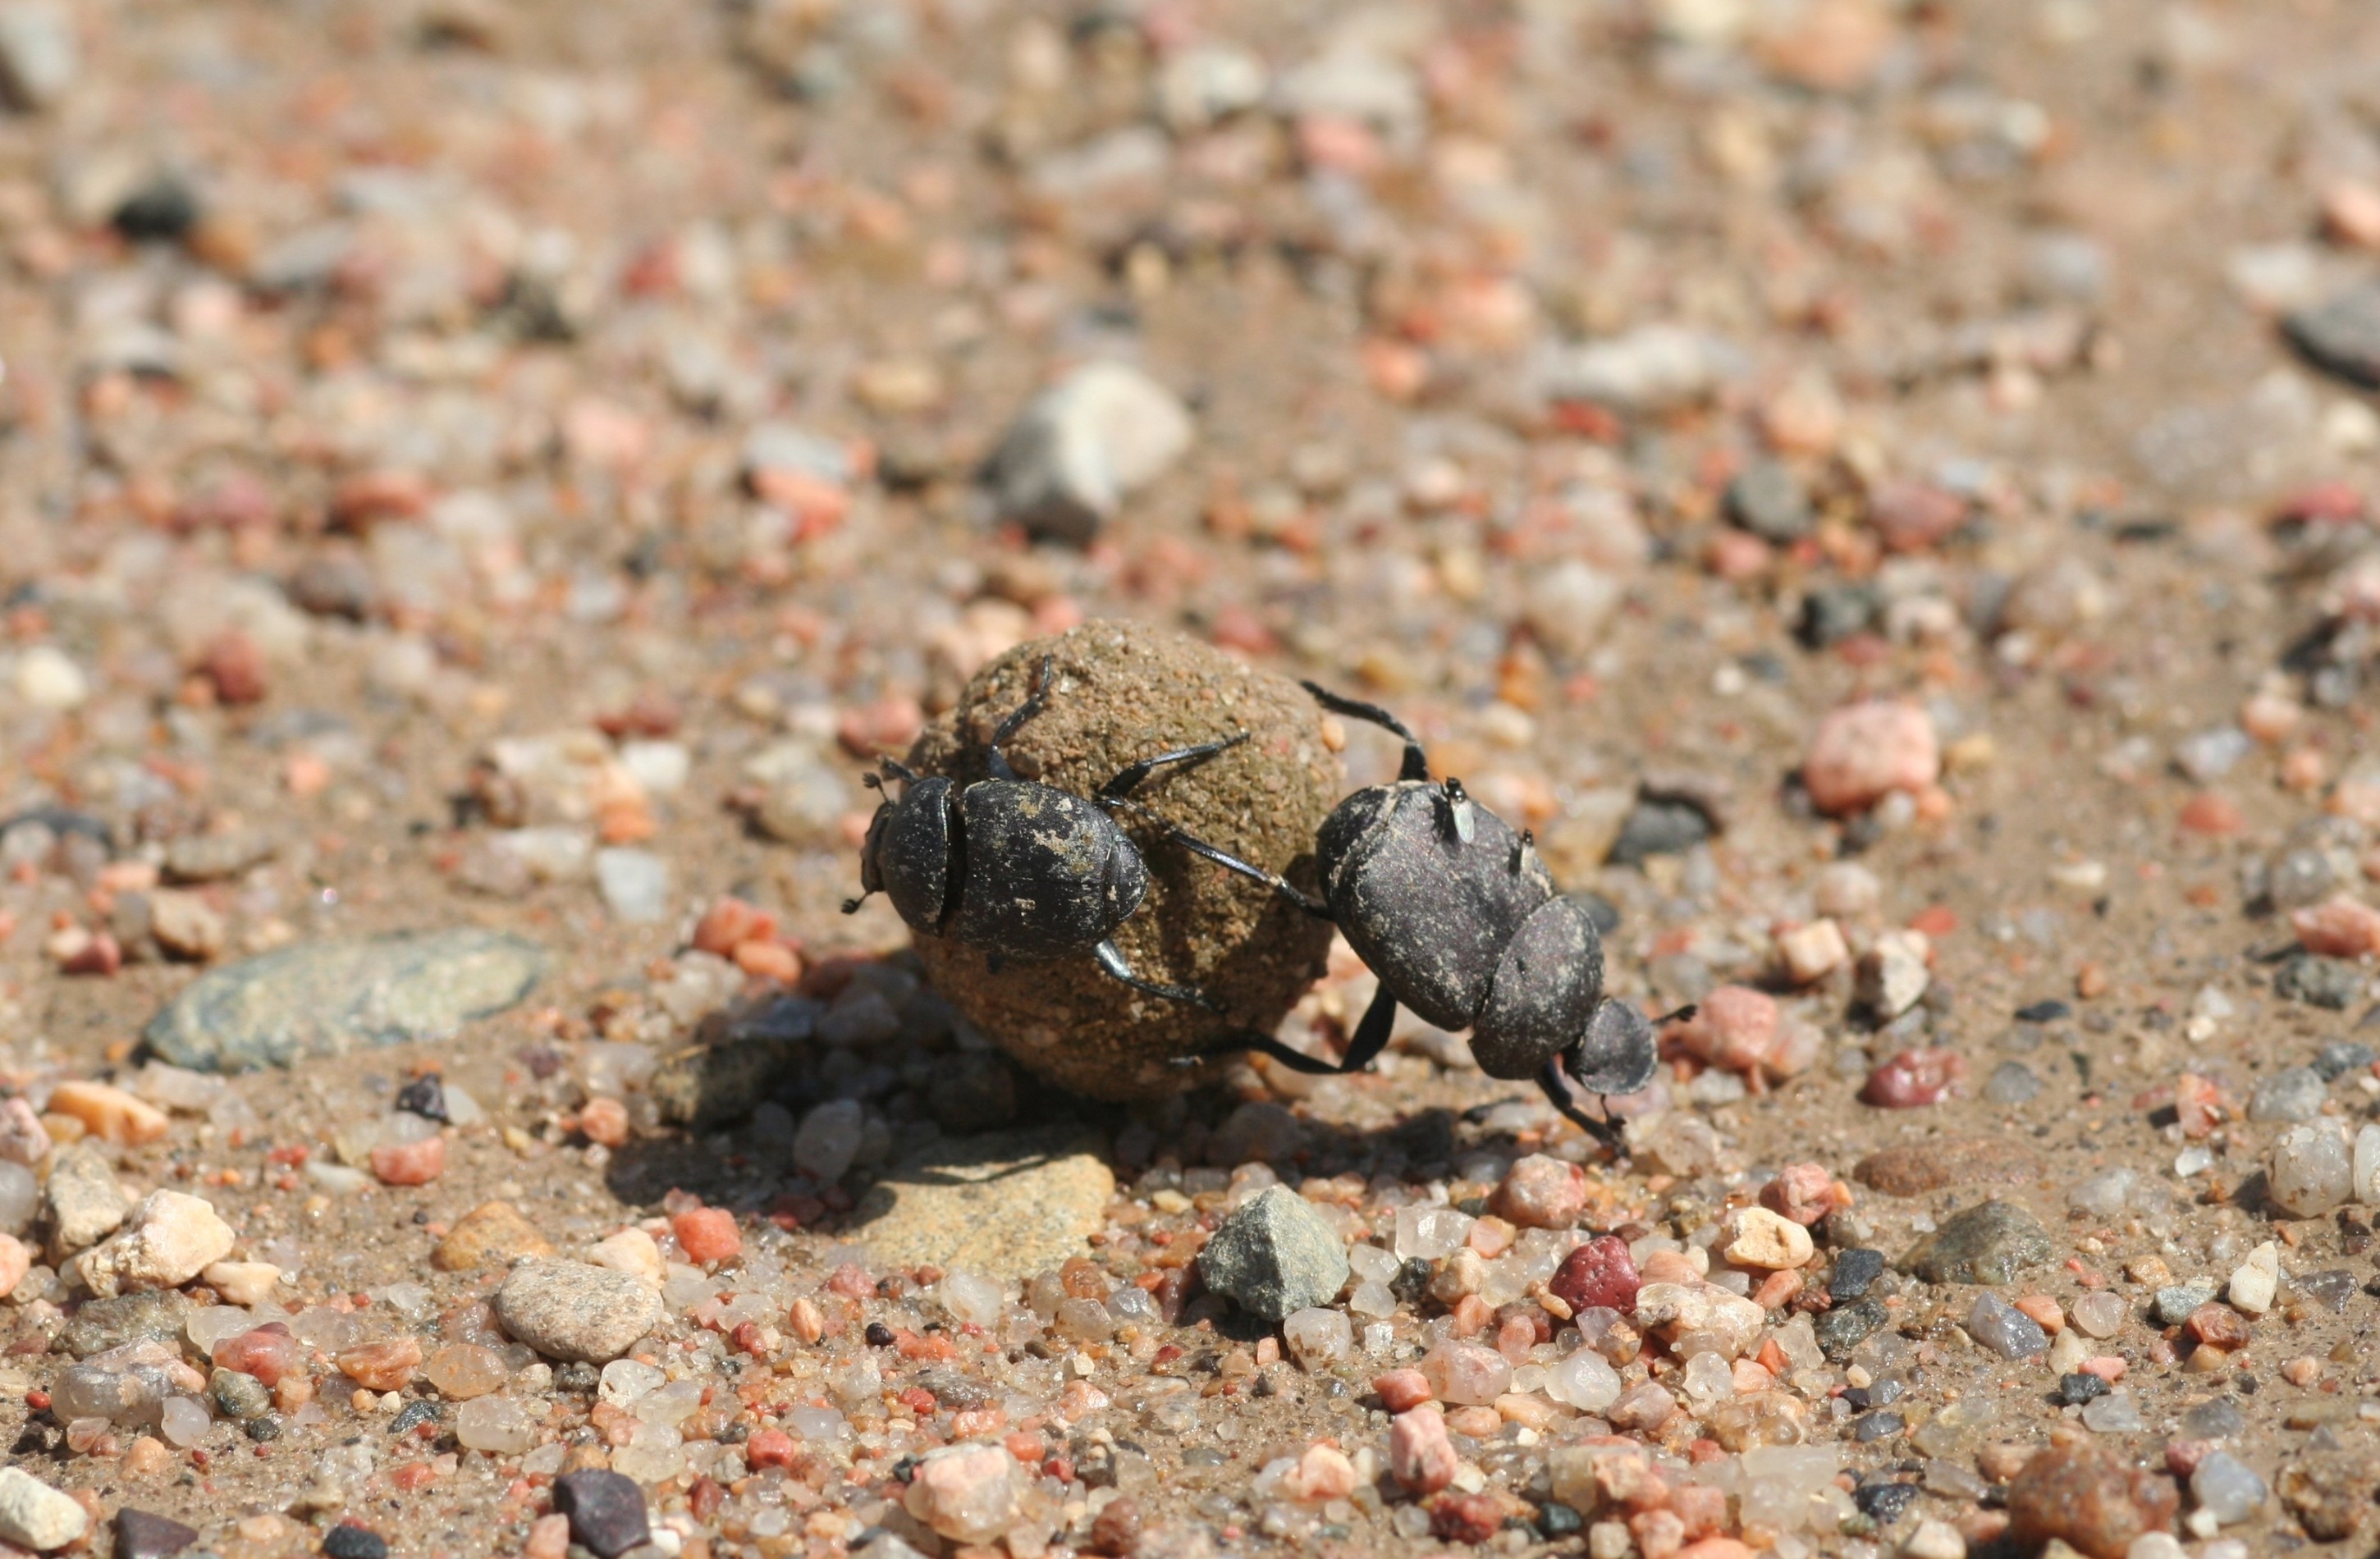
A pair of Canthon imitator beetles with a dung ball – the larger female pushes while the smaller male rides. This rolling behavior is shared with its close Florida relative, the common tumblebug (Canthon pilularius). Photo by Whitney Cranshaw, Colorado State University, Bugwood.org.
Dung Beetles of the Florida Panhandle

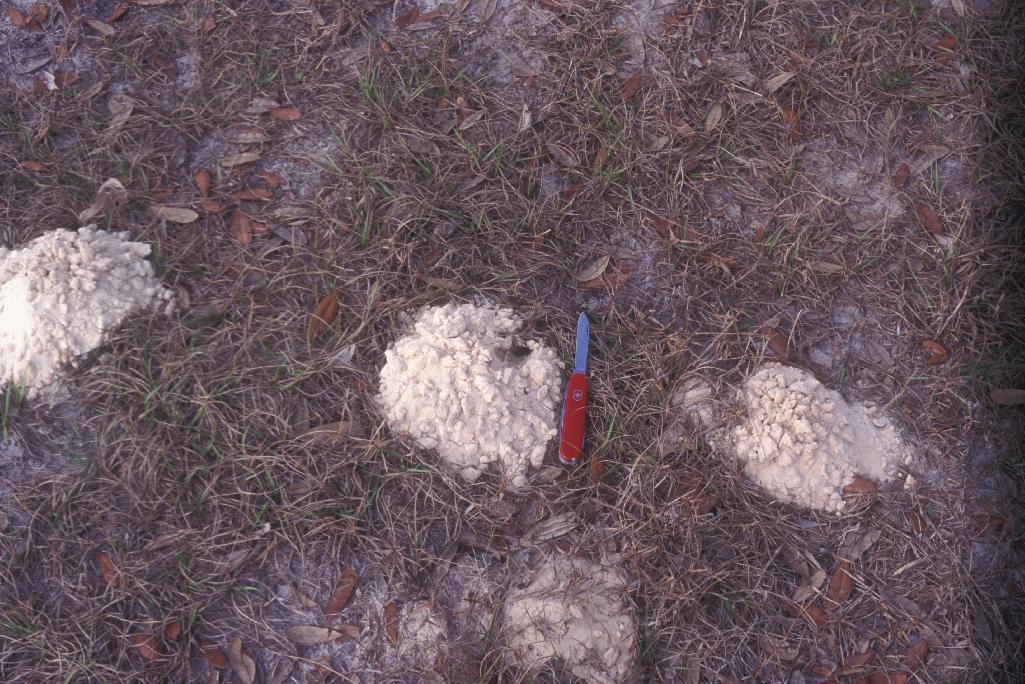
Mounds of excavated sand mark the tunnel entrances of Peltotrupes profundus in a scrubby Florida landscape. Photo by Lyle Buss.
There aren’t many creatures that can stir up a mix of admiration – and possibly some mild disgust – like the dung beetle. But if you spend much time around pastures, the woods, or even in your own garden, you might be surprised to learn these literal poop-pushers are the unsung heroes in local ecosystems – especially when it comes to soil health.
Dung beetles, which are primarily members of the Scarabaeidae family, specialize in feeding on and burying animal feces. That might not sound glamorous, but they more than earn their keep in the ecosystem. These beetles break down waste, aerate the soil, recycle nutrients, and reduce parasite loads in pastures. By quickly burying dung, they limit fly breeding and prevent harmful bacteria from hanging around longer than necessary.
In our part of Florida, where livestock, wildlife, and backyard chickens are common, dung beetles can play a quiet but essential role in keeping both landscapes and gardens healthier. While you might not see them directly in your raised beds, the soil health benefits they bring to the wider environment ripple out in ways gardeners can appreciate.

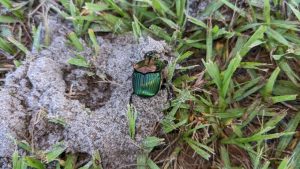
A male rainbow scarab (Phanaeus vindex) with the distinctive horn used in battles over dung. This native beetle is one of Florida’s most colorful nutrient recyclers. Photo by Joseph LaForest, University of Georgia, Bugwood.org.
Not all dung beetles are the ball-rolling athletes we imagine. In fact, most species in Florida are what we call tunnelers – they bury dung directly underneath where it lands, creating little underground pockets of fertility. Others are dwellers, who live inside the pile and lay their eggs right there.
While most of our local dung beetles are underground specialists, we do have at least one native species that performs that famous backward march. If you’re out walking after a summer rain, you just might spot a shiny black beetle with spiny legs rolling a dung ball twice its size – just one of the many native species quietly doing their part beneath our feet.
Native Dung Beetles of North Florida
While most people wouldn’t recognize a dung beetle if it landed on their compost pile, a surprising number of native species are hard at work across the Panhandle – from open fields to pine flatwoods to the edges of suburban backyards.
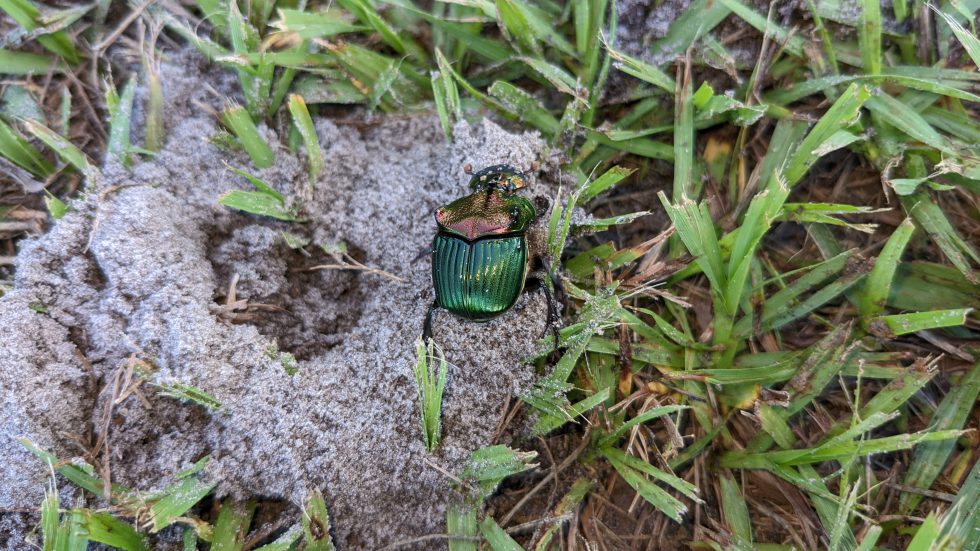
A female fiery scarab (Phanaeus igneus) emerges from a sandy tunnel in the Florida Panhandle. Photo by Erik Lovestrand, UF/IFAS.
One of the flashiest is the rainbow scarab (Phanaeus vindex), a heavy-bodied tunneler with a brilliant metallic sheen – often green or blue with coppery highlights. Males sport a single, curved horn and are known to spar over fresh dung like tiny armored knights. They’re most active in the warmer months and are common in both wild and grazed areas.
Another native jewel is the fiery scarab (Phanaeus igneus), which also shines with a coppery or red metallic glow. A Florida subspecies, P. igneus floridanus, occurs across central and northern parts of the state. These beetles prefer sandy soils and natural areas like longleaf pine uplands or scrub habitats, quietly tunneling through dung from wildlife or livestock.
And then there’s the Florida deepdigger scarab (Peltotrupes profundus), an endemic species found only in Florida. This dark, robust beetle creates conspicuous sand mounds in scrubby or pine-covered landscapes. Below those mounds? Tunnels that can run several feet deep. These beetles aren’t exclusive dung feeders – they mix organic matter into the soil, creating long-lasting soil channels that help roots breathe and water move more freely.
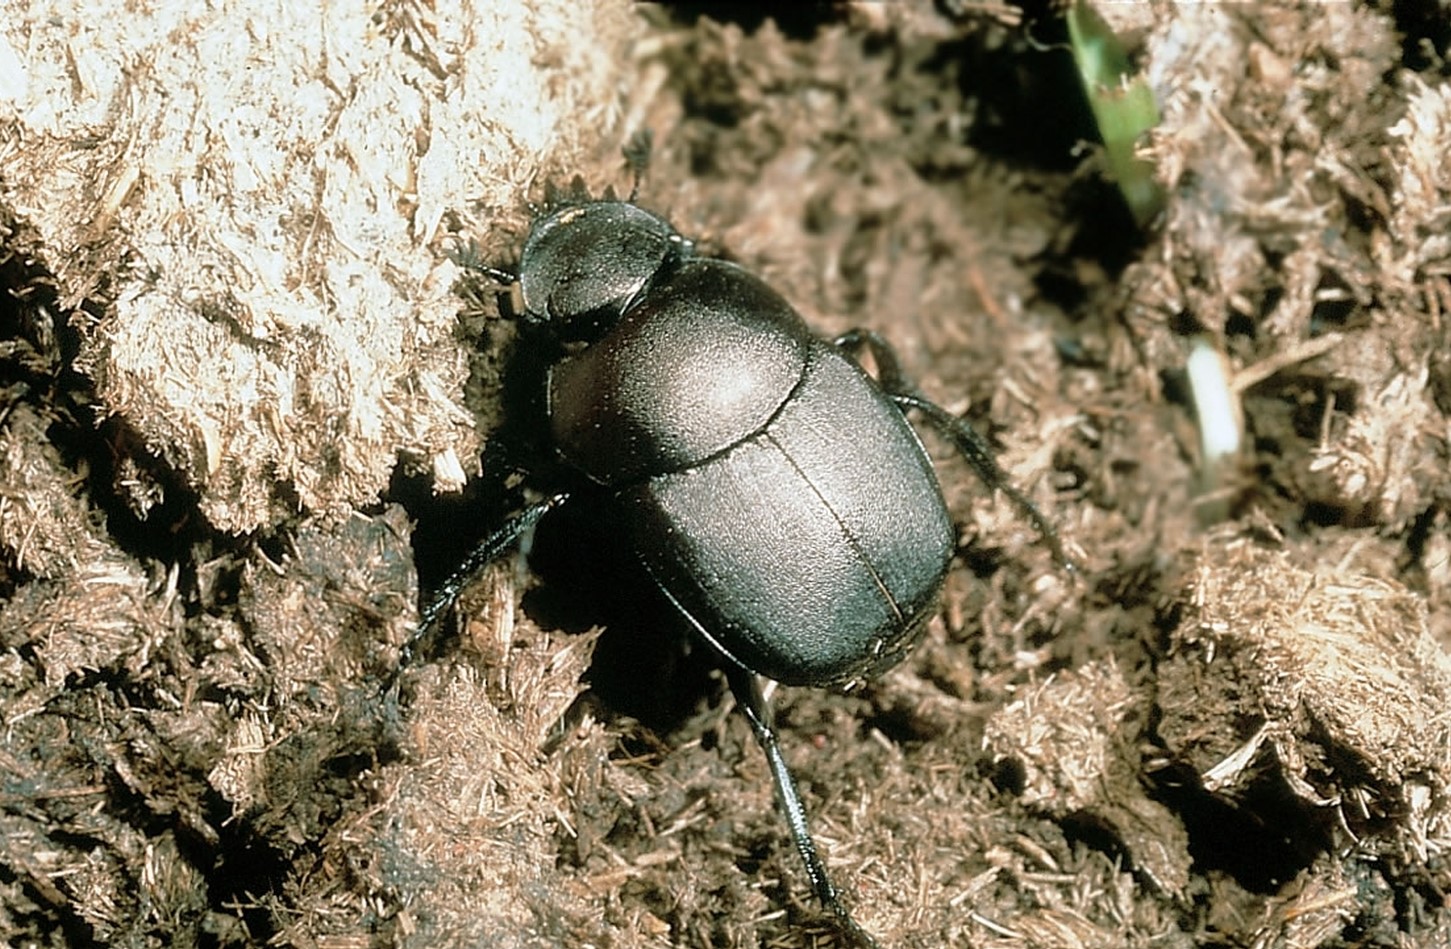
Adult Peltotrupes profundus, a Florida-endemic beetle known for its deep tunnels in sandy soils. Photo by Lyle Buss.
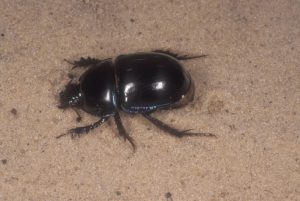
Finally, we have one native species that actually does roll its dung: the aptly named common tumblebug (Canthon pilularius). This smaller black beetle sculpts dung into neat balls and rolls them away to bury. They’re usually seen in open areas and pastures during the warmer seasons. If you spot one, enjoy the show – they’re fast, efficient, and usually gone in minutes.
Non-Native Dung Beetles in Florida
Several non-native dung beetle species have also become established in Florida, introduced in the 1970s to help manage cattle manure in pastures. These include species like the gazelle dung beetle (Digitonthophagus gazella), bull-headed dung beetle (Onthophagus taurus), and the sandy dung beetle (Euoniticellus intermedius). All three are tunnelers that quickly bury fresh dung, reducing fly populations and improving soil fertility. They’re now widespread in pastures across North Florida, especially in the summer and fall. Another common non-native is the European dung beetle (Aphodius fimetarius), a small red-and-black species that acts as a dweller, living and breeding directly within the dung pile itself.

The common tumblebug (Canthon pilularius) is one of the few native dung beetles in Florida that rolls dung into balls. Photo by Kansas Department of Agriculture, Bugwood.org.
While none of these introduced beetles are currently considered invasive, some researchers have raised concerns about how they might compete with native species for dung – especially in heavily grazed pastures. That said, most tend to stick close to livestock areas and haven’t been shown to disrupt natural ecosystems in a meaningful way.
Soil Helpers, Garden Allies
For gardeners and farmers alike, dung beetles are some of our most efficient natural tillers. Their tunneling mixes organic matter deeper into the soil profile, improving structure and water infiltration. That means fewer compaction issues and better moisture retention during our dry spells. In pastures, studies have shown that they can improve grass growth and reduce runoff – pretty remarkable for something that lives in poop.
If you’re already focused on fostering a sustainable landscape, be sure to give dung beetles a spot on your list of wildlife to appreciate and protect. In a world full of tidy lawns and picture-perfect beds, dung beetles remind us that beauty isn’t always what you see on the surface. Sometimes, the real work is happening just below it.
by Molly Jameson | May 15, 2025
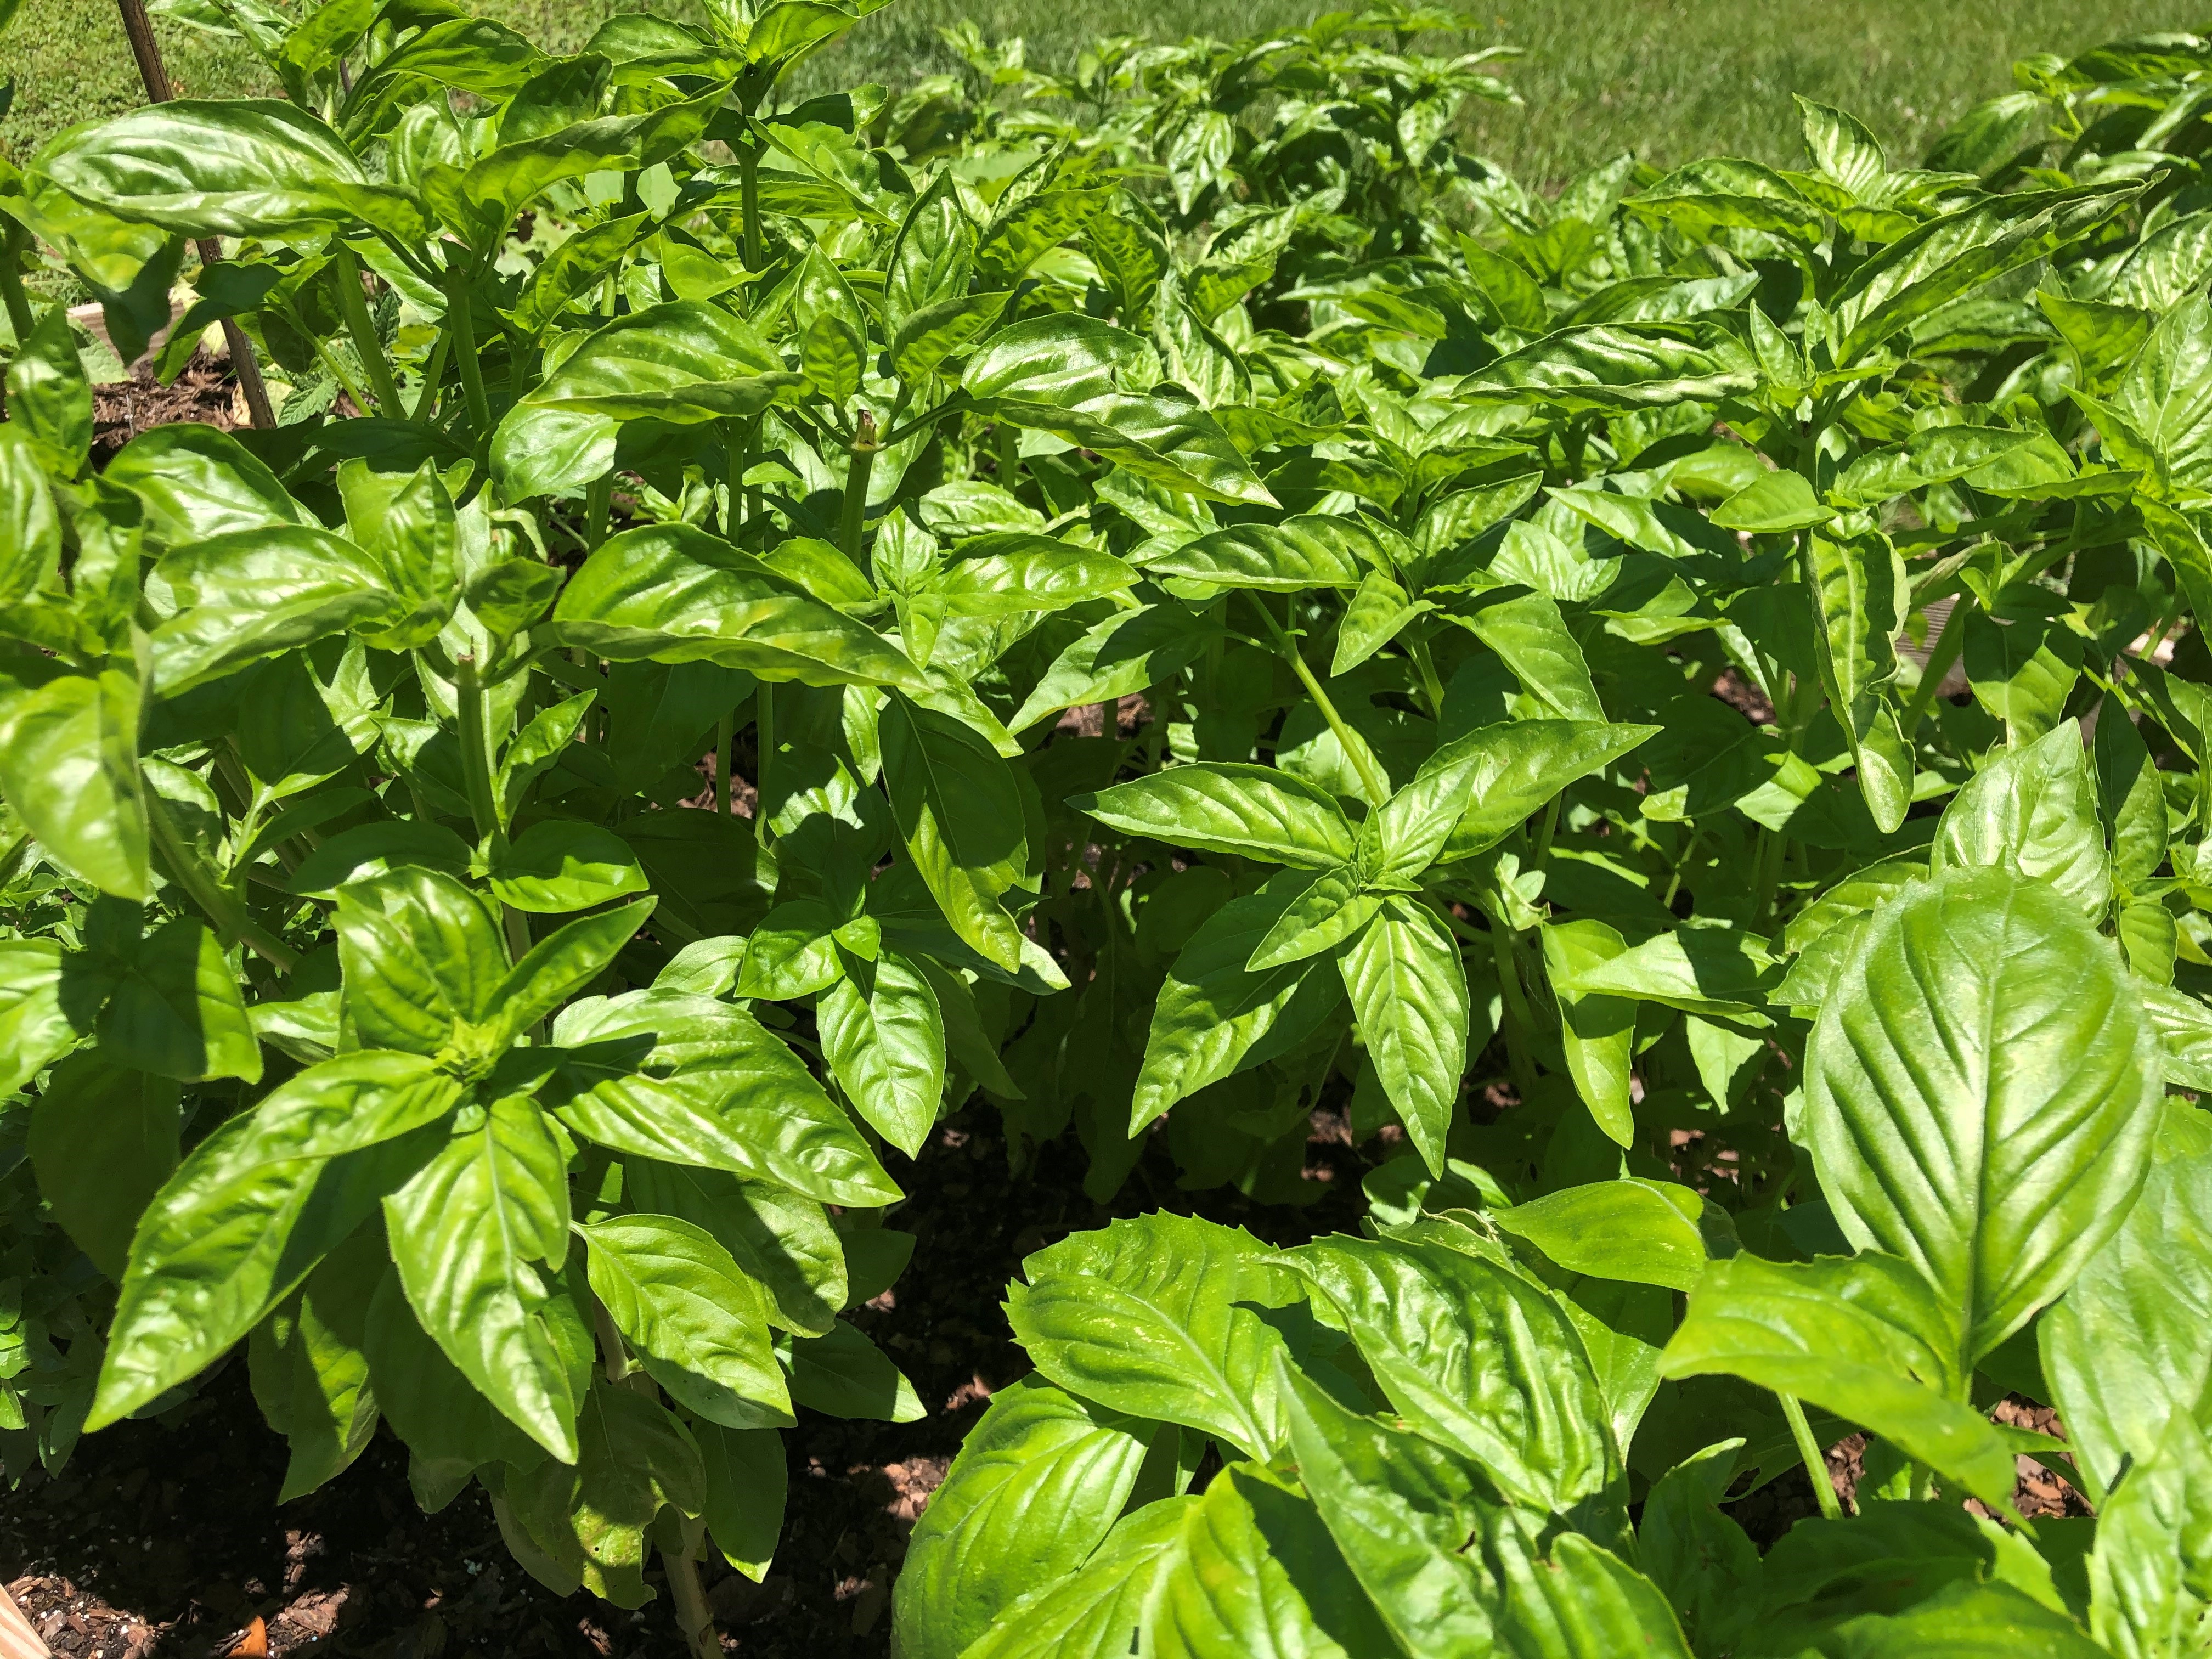
Sweet summer basil thrives in the heat – regular harvesting encourages bushier growth and delays flowering. Photo by Molly Jameson.
As the weather heats up, many spring vegetables begin to bolt, wilt, or shut down entirely. But for gardeners willing to shift gears, summer presents an opportunity to grow a new cast of crops that thrive in high temperatures, intense sun, and even occasional drought. Whether you’re growing in raised beds, in-ground rows, or large containers, these heat-loving vegetables are well-suited to our long summer season in the Panhandle.
Here are some of the best summer veggies to keep your garden productive when the thermometer climbs:
Okra

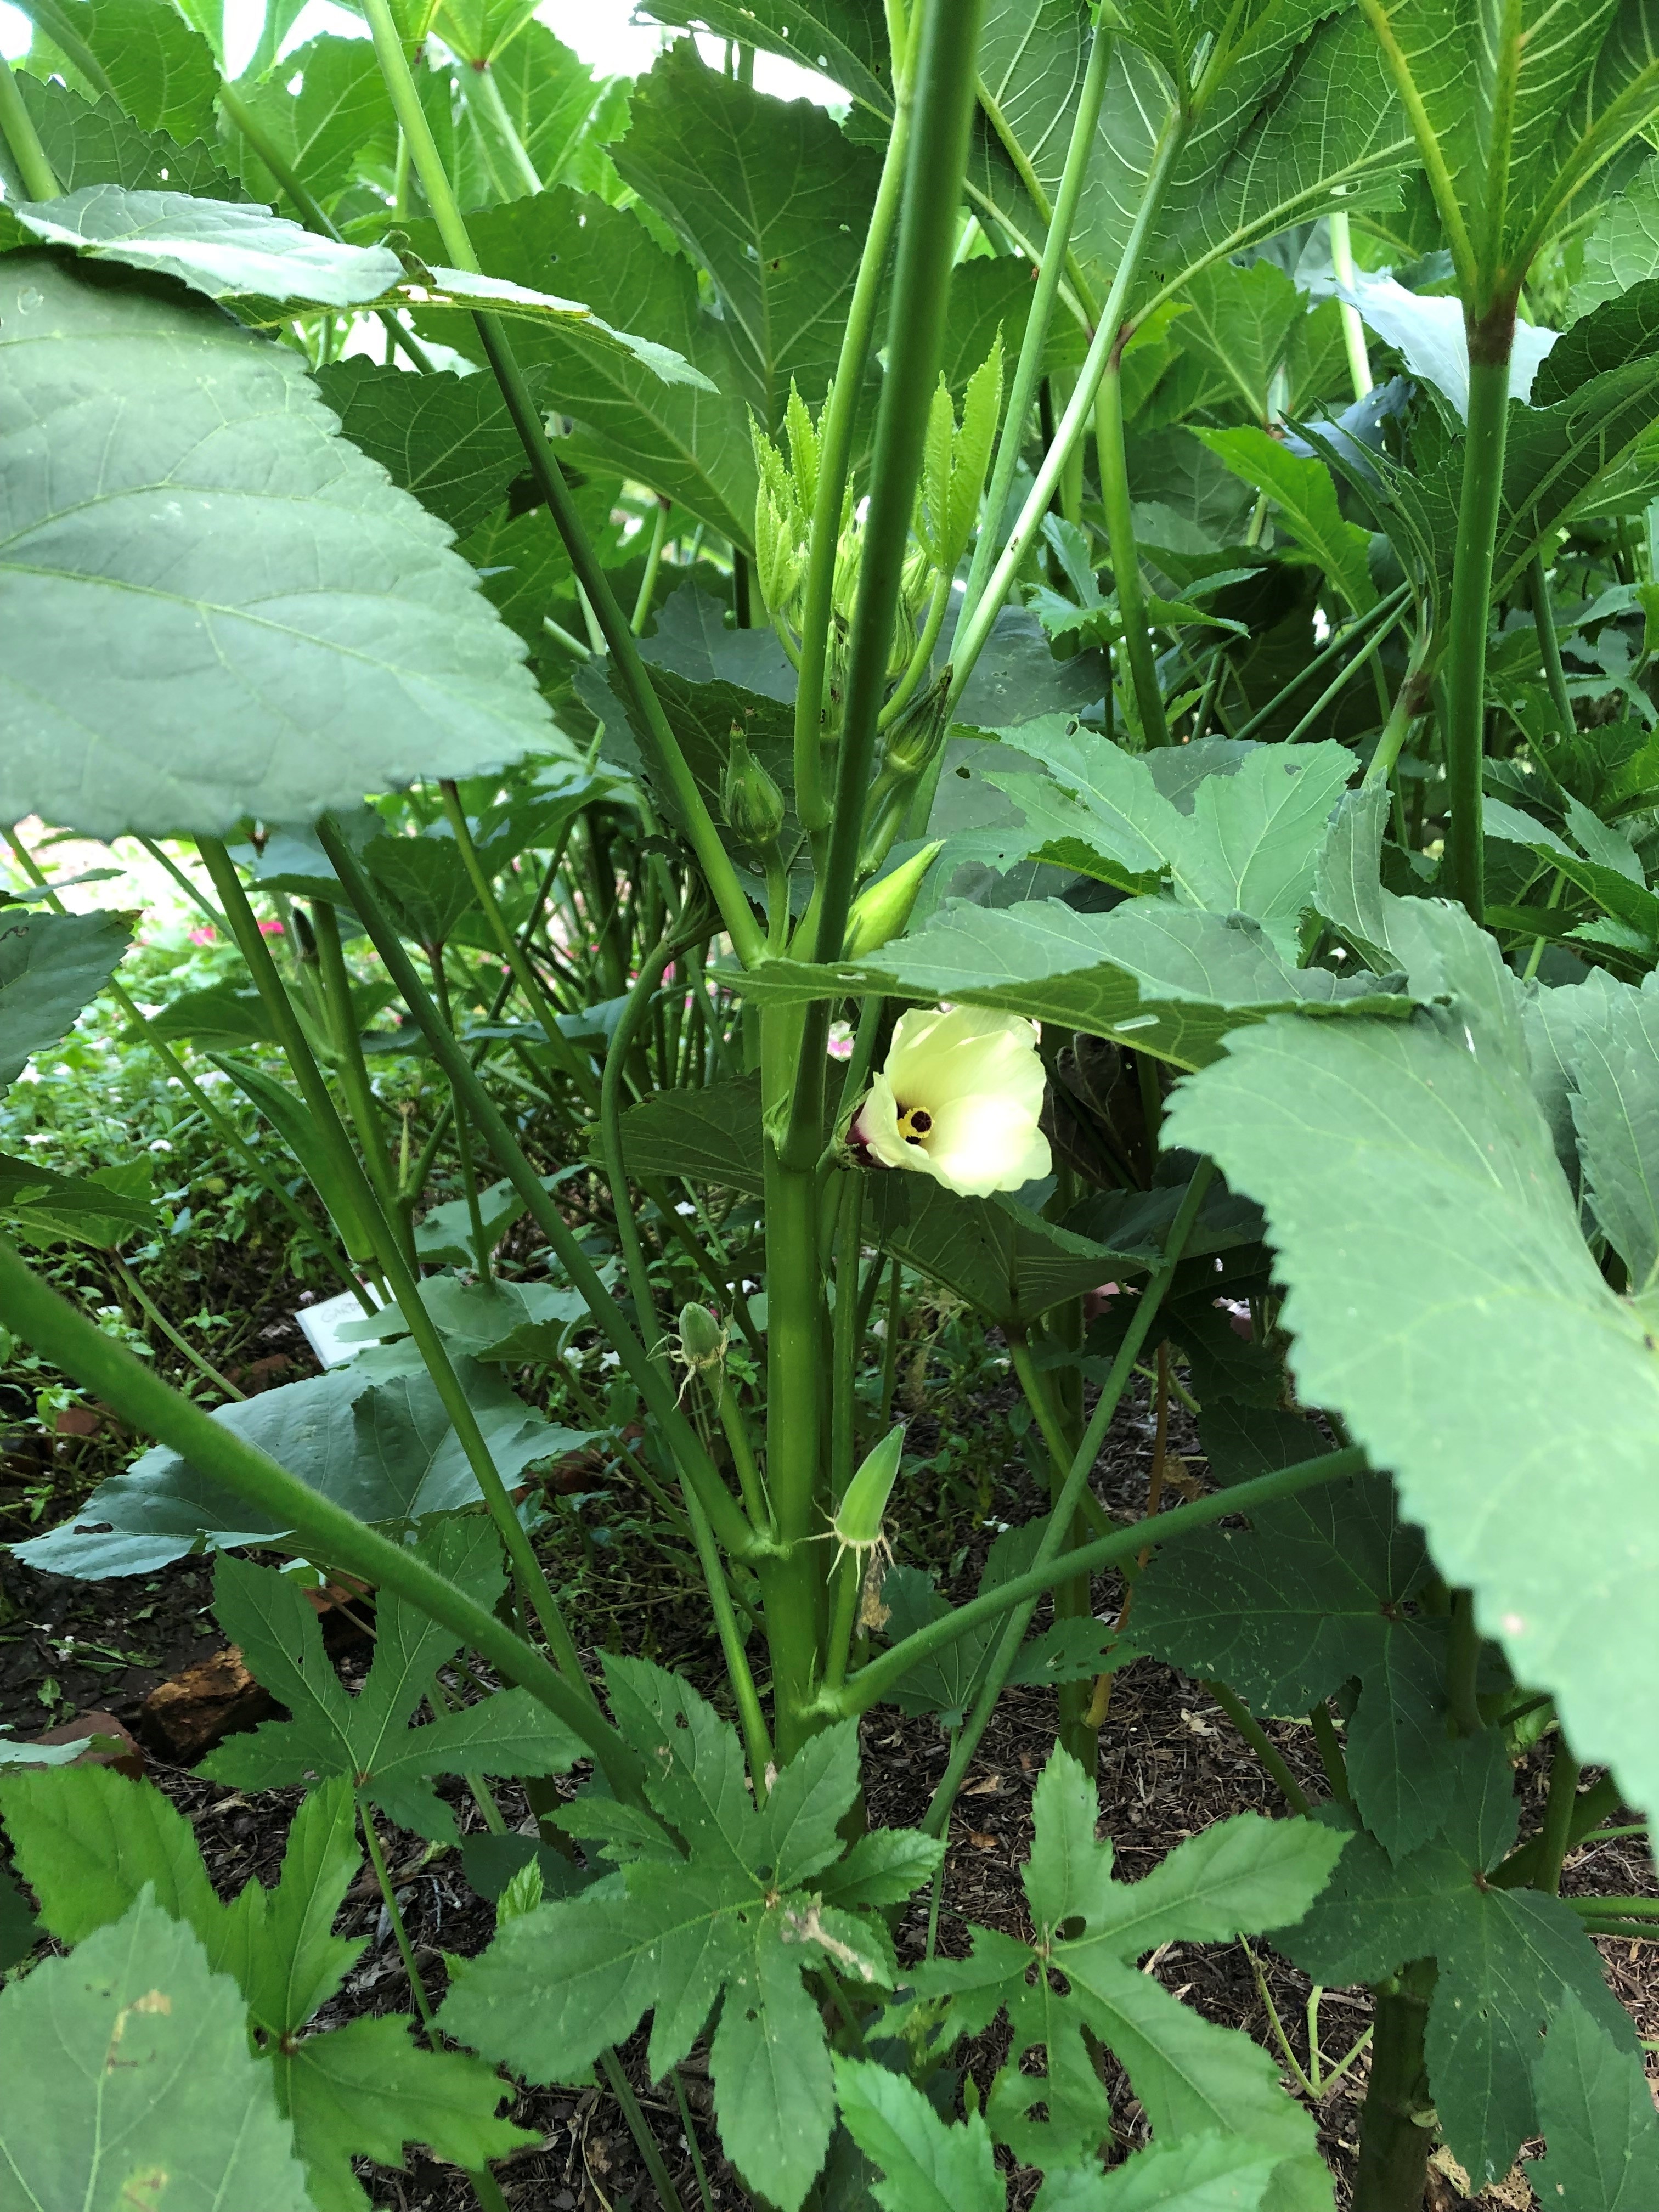
Okra thrives in the summer heat, producing edible pods just days after flowering. Photo by Molly Jameson.
Okra is a true warm-season crop that thrives in the heat and even tolerates periods of drought. For better germination, soak seeds in water for several hours or overnight before planting. Sow seeds directly into the garden once soil temperatures are at least 65°F and the danger of frost has passed – typically from late March through July. Plant seeds 1 inch deep and 4 to 6 inches apart in rows spaced 3 feet apart. Once seedlings are several inches tall, thin them so the remaining plants are spaced 1.5 to 2 feet apart. Pick pods when they’re two to four inches long, usually within a few days of flowering, to avoid tough, fibrous texture. Regular harvesting encourages more production throughout the summer.
Okra varieties well suited for our area include ‘Clemson Spineless’ and ‘Emerald,’ both known for their productivity and tender pods.
Southern Peas

‘Zipper Cream’ southern peas are heat-tolerant and productive, with easy-to-shell pods and creamy, mild flavor. Photo by Molly Jameson.
Also known as cowpeas or field peas, southern peas are a staple crop across the South for good reason – they tolerate heat, sandy soil, and inconsistent rain. Sow seeds directly in June through August, spacing them about 2 to 4 inches apart in rows 18 to 30 inches apart, depending on the variety. Southern peas are nitrogen fixers, so they can improve soil fertility over time.
Popular southern pea varieties include ‘Pinkeye Purple Hull,’ ‘California Black-eyed,’ ‘Creel Crowder,’ and ‘Zipper Cream.’ These plants are also relatively pest- and disease-resistant, making them a great low-maintenance option.
Sweet Potatoes
Sweet potatoes are grown from slips – vine cuttings taken from sprouted tubers. These slips should be planted after the danger of frost has passed and soil temperatures are consistently above 65°F, typically April through June. Space slips about 12 to 18 inches apart in loose, well-drained soil. While mounding isn’t always necessary, creating raised ridges or planting in raised beds can help promote tuber development and improve drainage, especially in heavier or poorly drained soils. Sweet potatoes require a long growing season – around 90 to 120 days – but they produce abundantly and require minimal care once established. Their vines also form a dense ground cover that suppresses weeds and reduces soil erosion.
Two reliable sweet potato varieties for Florida gardens are ‘Centennial’ and ‘Beauregard,’ both known for their sweet flavor, high yields, and adaptability to southern growing conditions.
Malabar Spinach
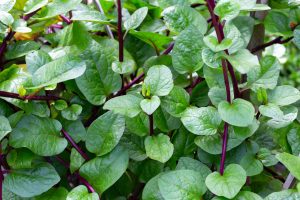
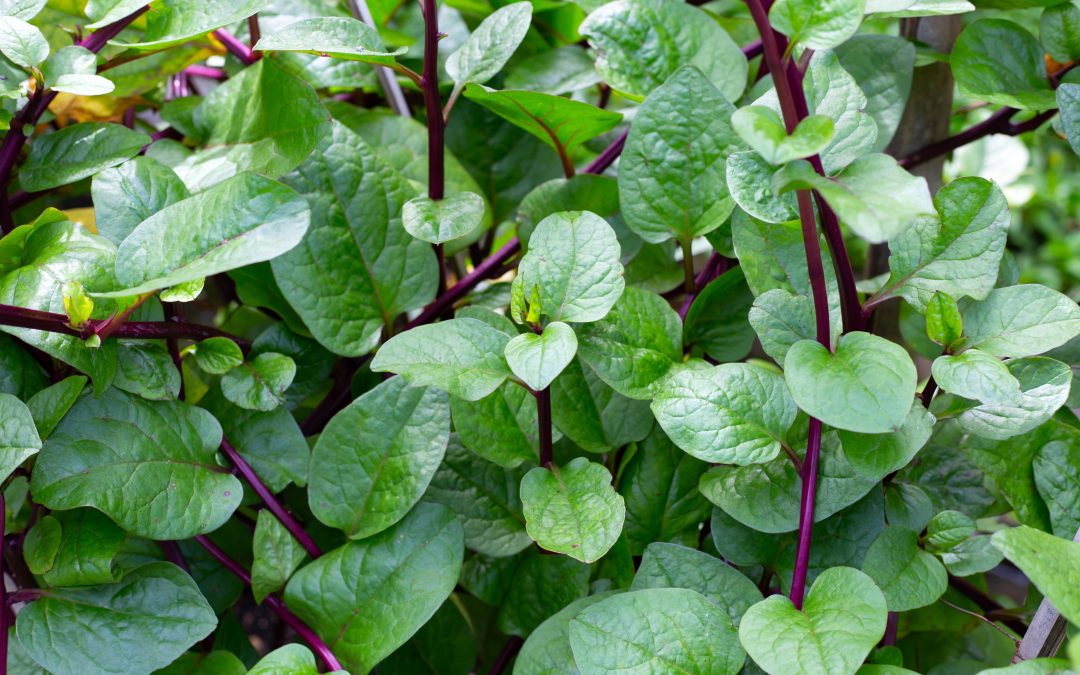
Red-stemmed Malabar spinach thrives in summer heat, producing tender, edible leaves on vigorous climbing vines. Photo by Bowonpat, Adobe Stock.
Malabar spinach is not a true spinach, but it provides tender, edible leaves throughout the hot months when traditional greens fail. It grows as a climbing vine, so give it a trellis or support to climb. Sow seeds directly into the garden or transplant young seedlings from mid-April through early June. This plant enjoys both sun and partial shade, and its thick, glossy leaves can be harvested regularly for salads or to thicken soups and stews. Just like regular spinach, frequent picking promotes new growth.
Both red-stemmed and green-stemmed Malabar spinach types are available, with the red-stemmed variety more commonly grown for its ornamental appeal.
Basil
Basil is a heat-tolerant herb that loves full sun and thrives in the warmth of summer. It can be direct-seeded or transplanted once the weather settles into consistent warmth, typically March through May in North Florida. Space plants about 10 to 12 inches apart and harvest often to prevent flowering and promote bushier growth.
In addition to classic sweet basil, try Thai basil or lemon basil for unique flavors that hold up in hot dishes and drinks alike.
Peppers
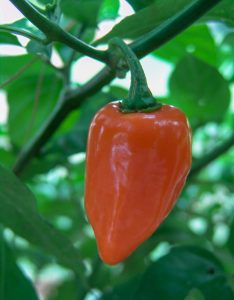
Habanero plants yield intensely hot peppers with a distinct tropical flavor. Photo by Gerald Holmes, Strawberry Center, Cal Poly San Luis Obispo, Bugwood.org.
Peppers – especially hot varieties – are well-adapted to Florida summers, although they benefit from a bit of afternoon shade during the most intense heat. Start with healthy transplants in spring or early summer, spacing them 18 to 24 inches apart. Keep the soil consistently moist and apply mulch to help retain moisture.
For sweet pepper options, try ‘Corno di Toro’ or ‘Sweet Banana.’ For heat lovers, datils, jalapeños, and habaneros all perform well in warm conditions. Just note that some varieties may slow production during extreme heat, then pick up again as temperatures moderate.
Take a Break with a Cover Crop
If summer gardening starts to feel overwhelming, you don’t have to plant every square foot. Consider giving part of your garden a seasonal rest with a warm-season cover crop like cowpeas, velvet beans, buckwheat, or even sweet potatoes. These vigorous growers help suppress weeds, improve soil structure, and add organic matter – and in the case of legumes like cowpeas and velvet beans, they also fix nitrogen to benefit future crops. Sweet potatoes, while edible, can also serve double duty as a weed-smothering ground cover.

Sweet potato vines form a dense summer ground cover that suppresses weeds and protects the soil. Photo by Janis Piotrowski.
For a lower-maintenance splash of color, consider heat-loving flowers like sunflowers, French marigolds, or zinnias – all of which attract pollinators and beneficial insects while brightening up your garden space.
Don’t let the summer heat bring your garden to a standstill! By choosing vegetables that are naturally adapted to our hot, humid conditions, you can keep your garden thriving and productive all season long.
by Molly Jameson | Apr 3, 2025
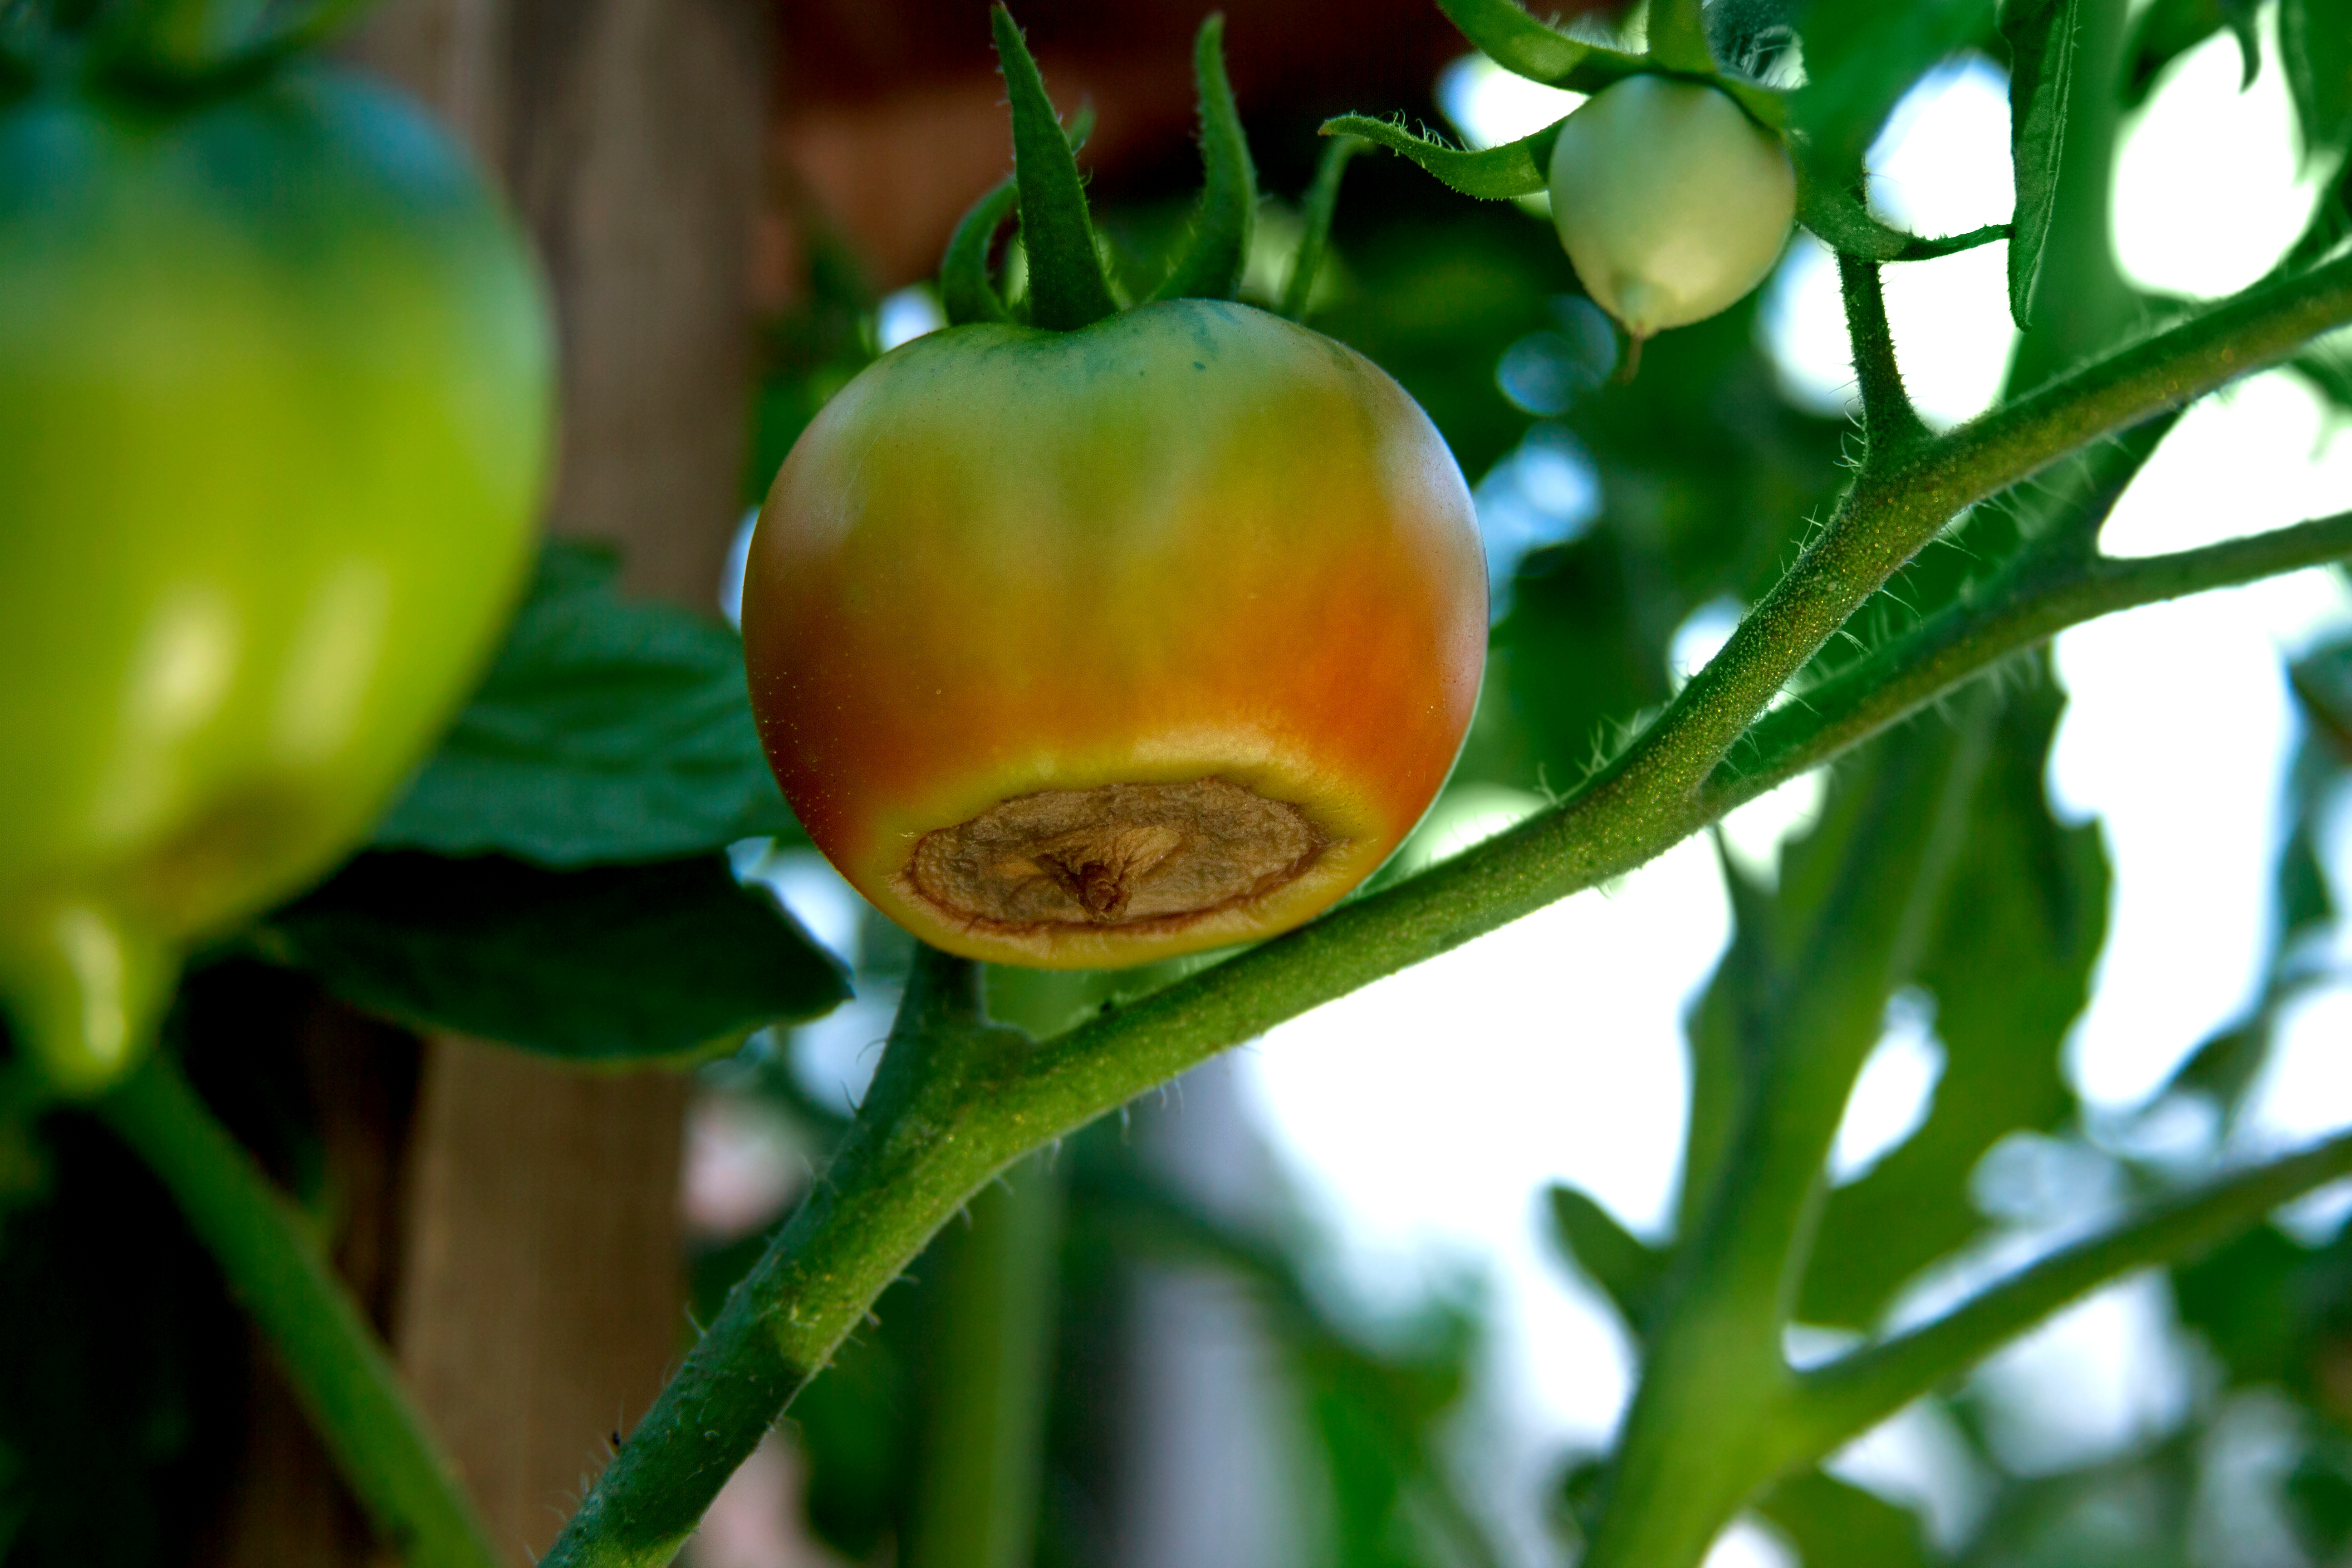
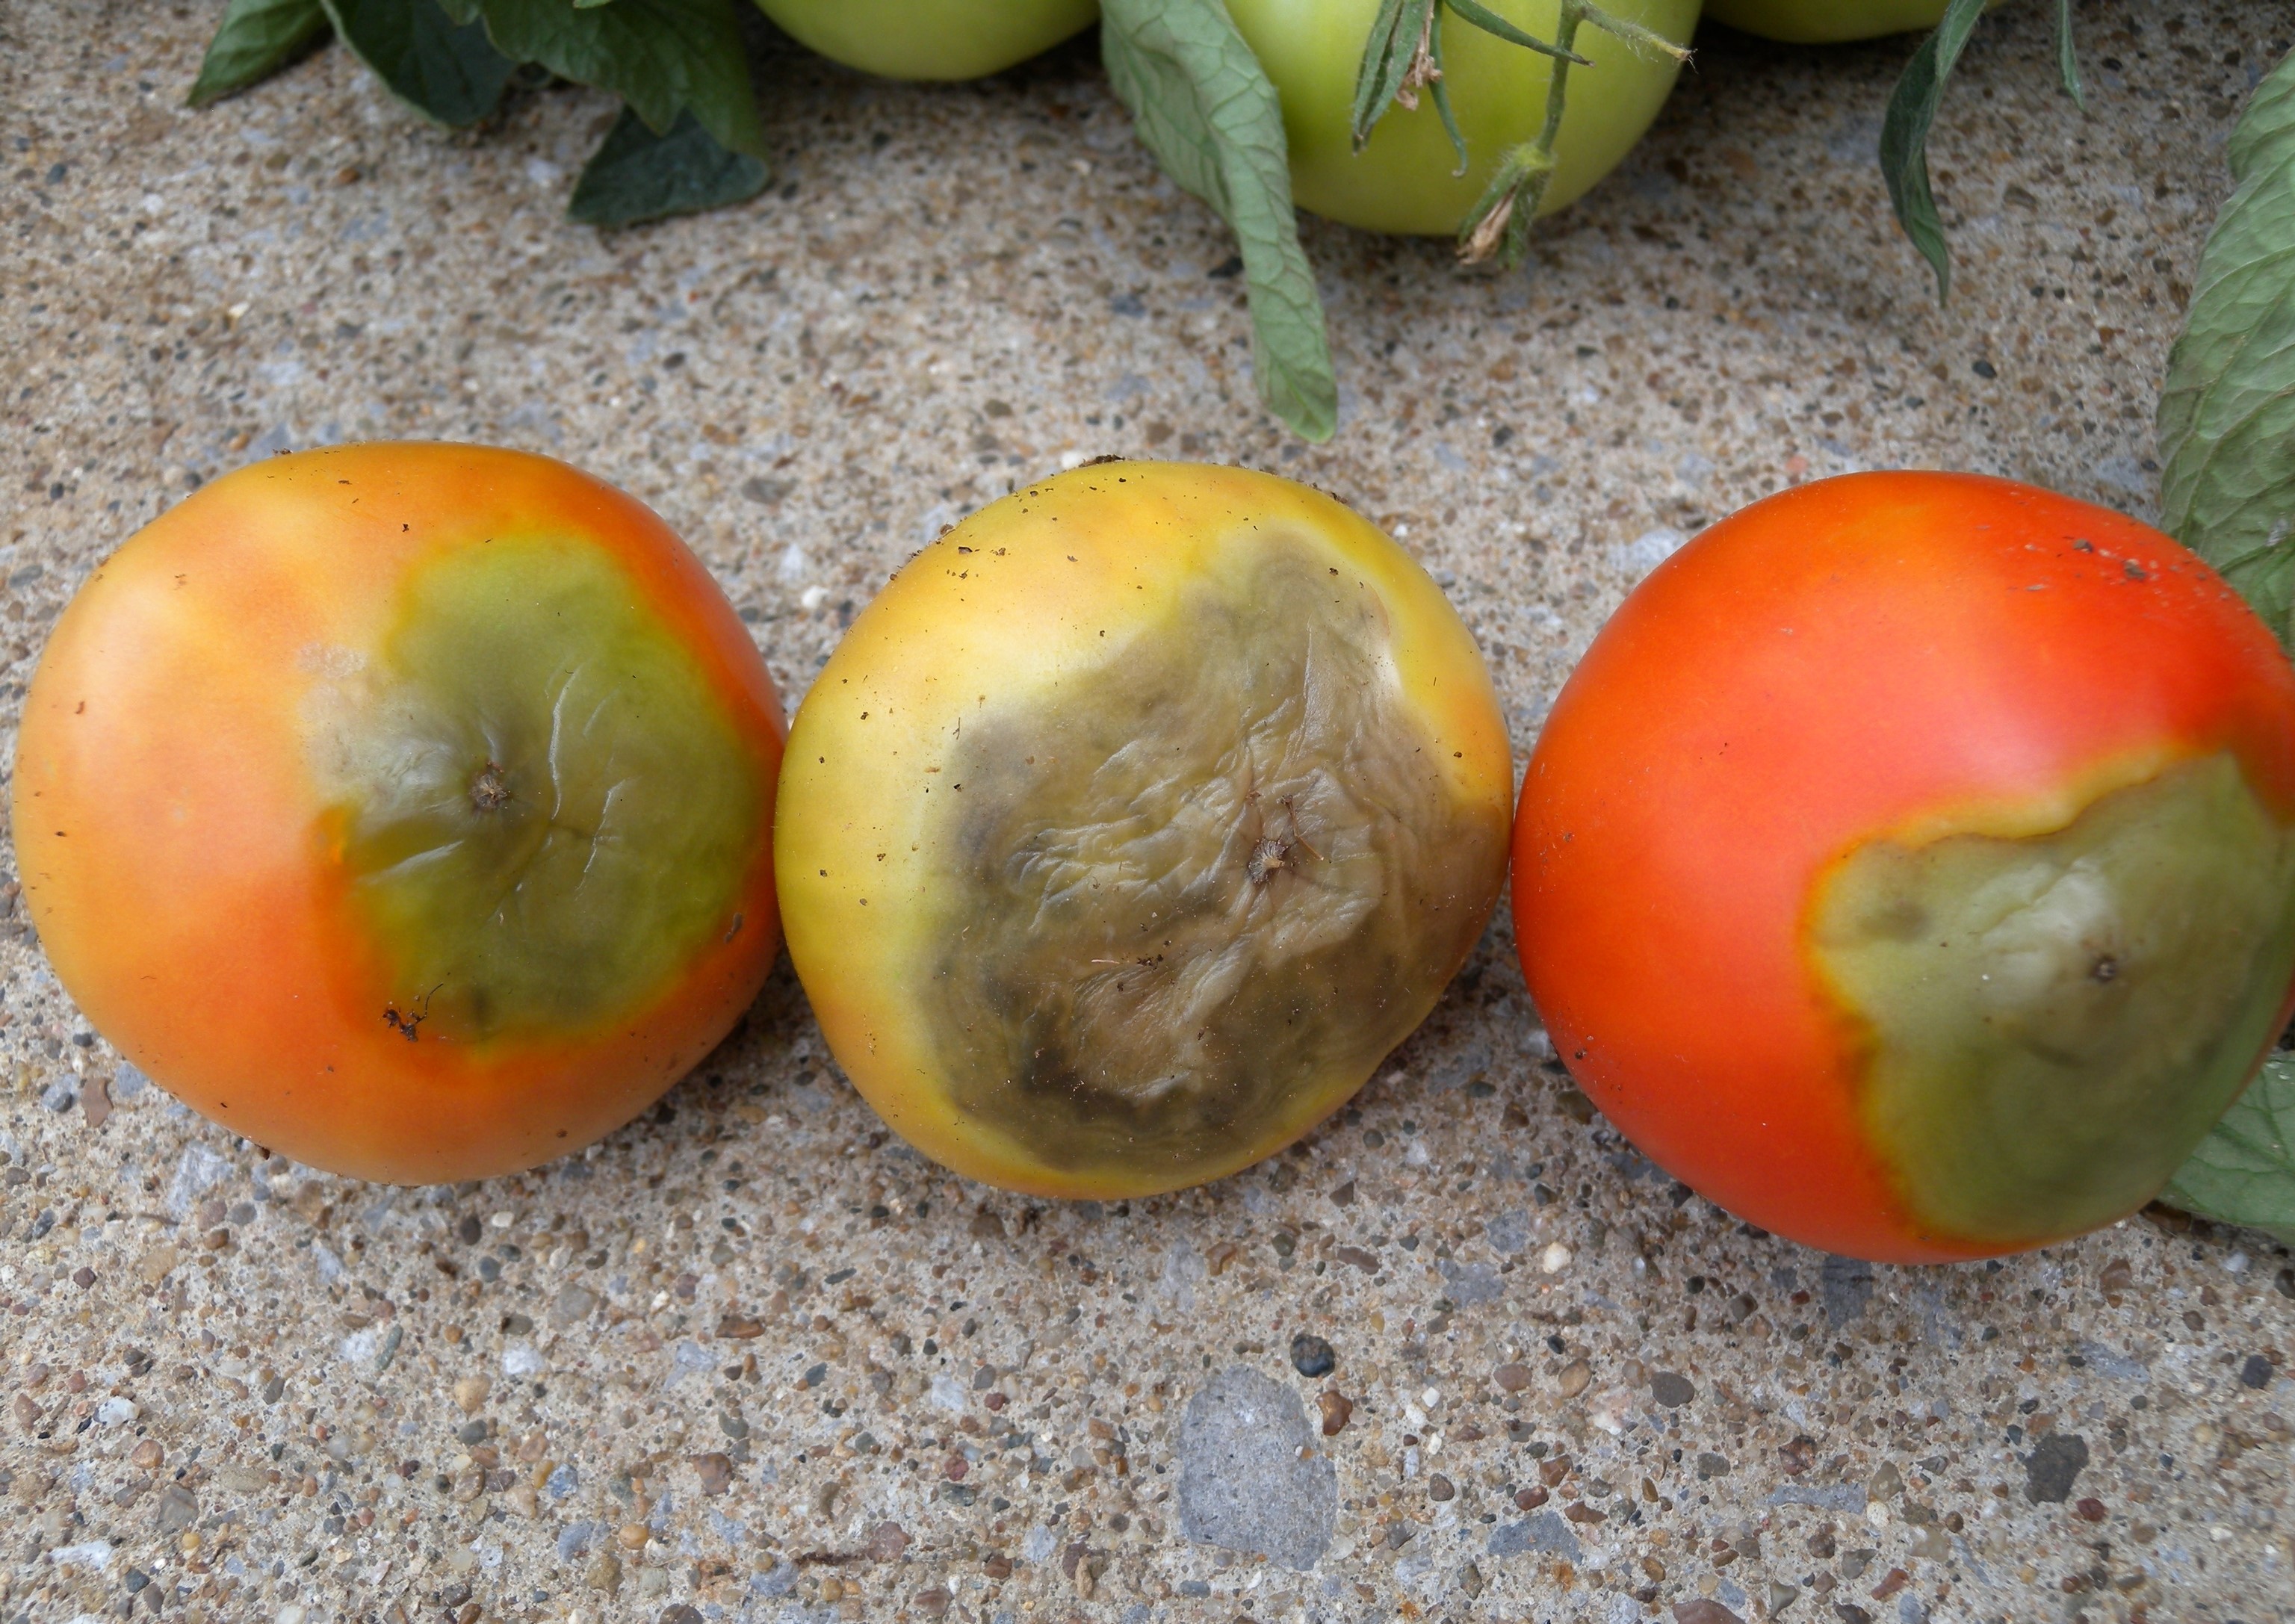
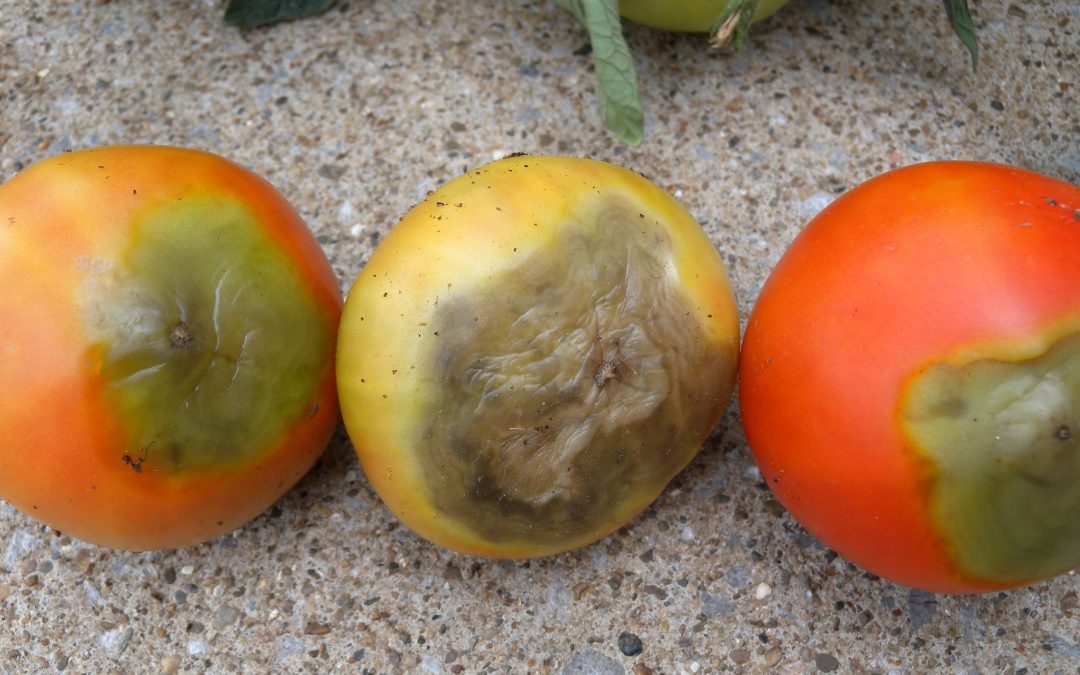
A promising start, until blossom-end rot strikes. Keep your tomatoes healthy by maintaining consistent watering, balanced fertilization, and proper soil pH. Photo by Mila Makhova, Adobe.
It’s the moment you’ve been waiting for – after weeks of careful tending, the first set of tomatoes is beginning to form. Each day, you check your plants with anticipation, imagining the juicy, homegrown harvest to come. But one morning, while inspecting your developing tomatoes, you notice some have sunken, leathery brown patches at the blossom end. Your excitement turns to frustration – what went wrong?
Blossom-end rot is one of the most frustrating disorders for home gardeners and commercial growers alike. This common issue appears as a sunken, leathery brown or black spot at the blossom end of tomatoes, usually occurring on the first fruits the plant produces. Though it may look like a disease, blossom-end rot is actually a physiological disorder caused by calcium deficiency in the fruit. Understanding what triggers it and how to prevent it can help ensure a healthy tomato harvest.
What Causes Blossom-End Rot?

Blossom-end rot can appear at any stage of ripening. These tomatoes developed severe lesions due to calcium deficiency caused by inconsistent watering. Photo by Brenda Kennedy, University of Kentucky, Bugwood.org.
Although blossom-end rot results from calcium deficiency in the fruit, it is rarely caused by a lack of calcium in the soil. Instead, the issue arises when calcium uptake is disrupted due to fluctuations in soil moisture, root damage, or excessive fertilization.
Calcium moves through plants via active transpiration, traveling with water as it evaporates from above-ground plant parts. Since leaves lose more water through transpiration than fruits, calcium is more likely to accumulate in leaves rather than being directed toward developing tomatoes. This imbalance is made worse by excessive nitrogen fertilization, which encourages leafy growth and further diverts calcium away from the fruit.
The following factors contribute to blossom-end rot:
- Inconsistent Watering. Calcium is transported through water in the plant, so periods of drought followed by excessive moisture can hinder uptake.
- Excess Nitrogen Fertilization. Too much nitrogen, especially in ammonium form, can interfere with calcium absorption and promote excessive foliage growth at the expense of fruit development.
- Soil pH Imbalance. Acidic soils (below pH 5.5) can limit calcium availability to plants.
- Root Damage. Over-cultivation or compacted soils can reduce root function, limiting nutrient uptake.
Prevention Strategies

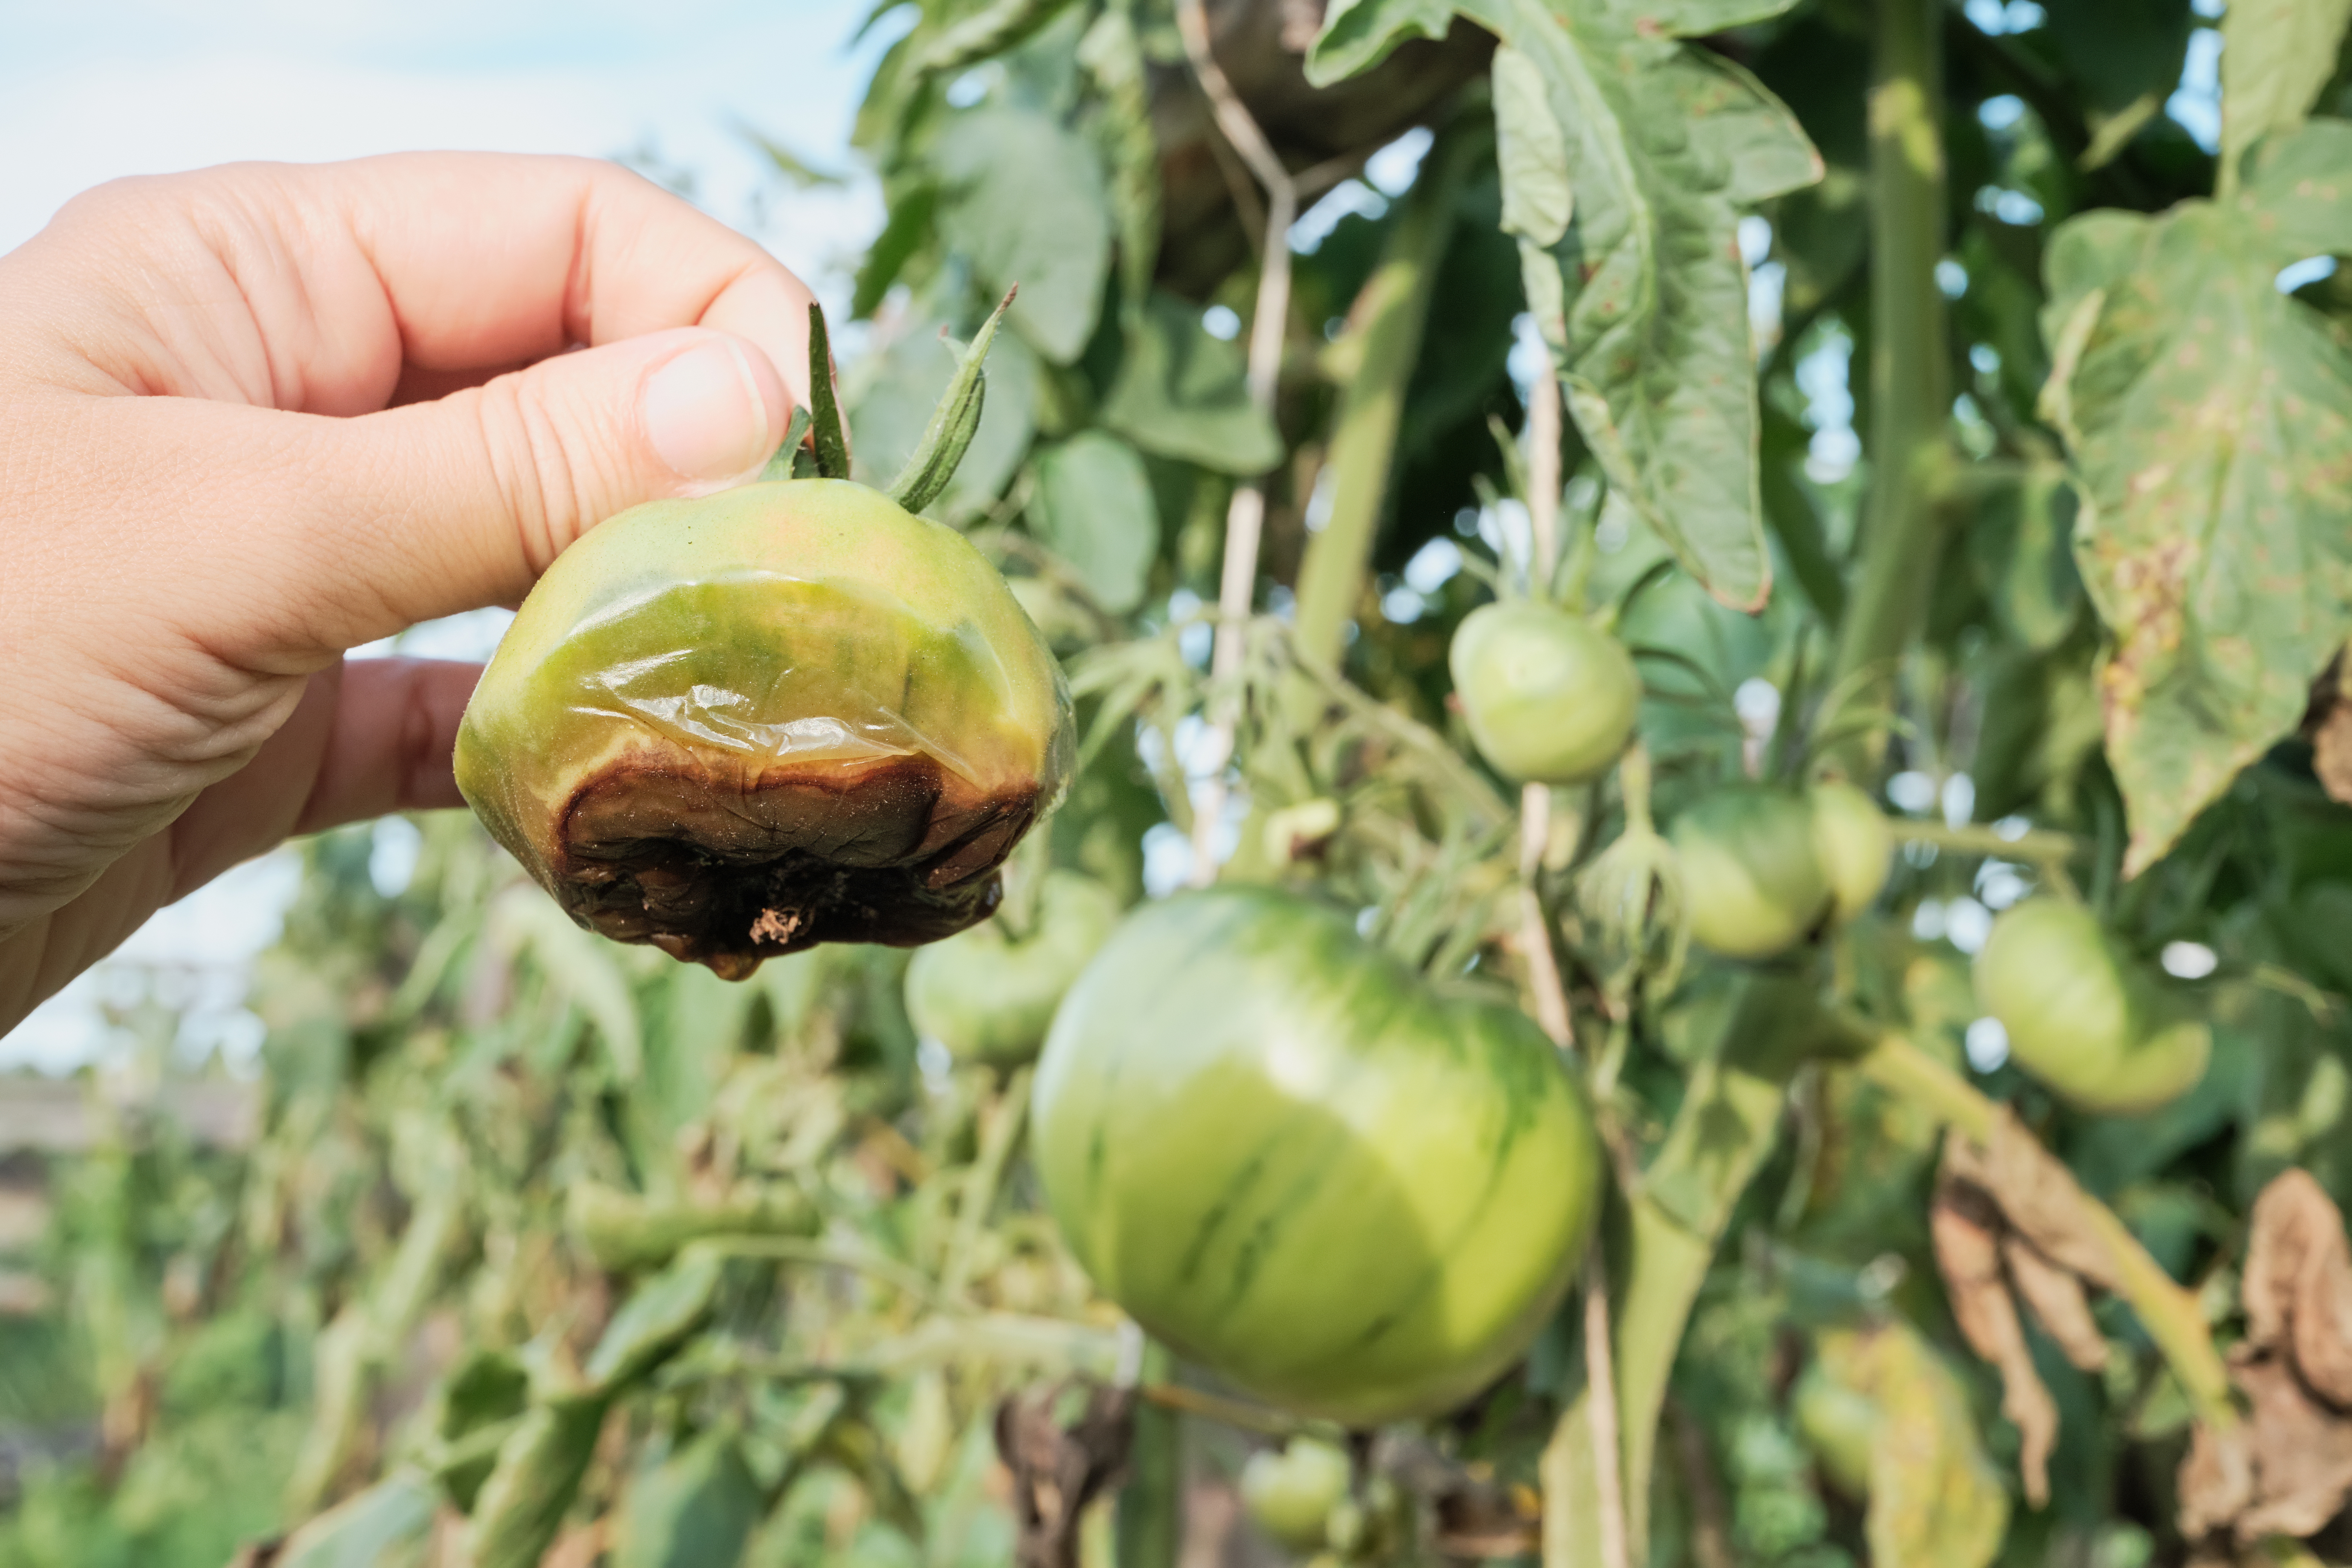
A severe case of blossom-end rot on an unripe tomato. Photo by Col Nihko, Adobe.
Blossom-end rot cannot be reversed once it appears, but often the plant will produce healthy fruit as the season progresses. Several cultural practices can help prevent it from occurring in the first place.
- Maintain Consistent Soil Moisture. Water deeply and consistently, adjusting for temperature and weather conditions. As a general rule, tomatoes need about an inch of water per week, with an additional half-inch for every 10-degree increase above 60°F. In hot summer months, when temperatures reach the 80s and 90s, this means tomatoes may require closer to two inches of water per week to maintain adequate soil moisture. Mulching with straw, pine needles, or shredded leaves helps regulate soil moisture and reduce evaporation. It is also important to avoid letting the soil dry out completely between waterings to ensure steady calcium uptake by the plant.
- Test and Amend Soil. Vegetable gardens, especially those rich in compost, often contain adequate amounts of calcium, but its availability depends on factors like soil pH and consistent watering. A soil test can determine if nutrient or pH adjustments are needed. If the soil pH is below 6.0, applying lime can help raise it to the optimal range of 6.0–6.5, improving calcium availability to plants. If a soil test confirms low calcium levels, adding gypsum (calcium sulfate) can provide a supplemental source of calcium without altering soil pH.
- Fertilize Properly. Using a balanced fertilizer with moderate nitrogen is key to preventing blossom-end rot. Avoid high-ammonium formulations, as they can interfere with calcium absorption. Excess fertilization early in the season encourages vigorous leaf growth, diverting calcium away from fruit development and increasing the risk of blossom-end rot.
- Choose the Right Tomato Varieties. Cherry and other small-fruited tomato varieties tend to be less prone to blossom-end rot than larger slicing types, making them a good option for gardeners concerned about calcium-related issues.
What to Do If You See Blossom-End Rot
Once symptoms appear, affected fruit will not recover, but the plant can still produce healthy tomatoes with proper care. Remove damaged fruit to encourage new growth and address the underlying moisture and nutrient issues. If watering and fertilization practices are adjusted, subsequent fruits should develop normally.
For more information on identifying blossom-end rot, visit the UF/IFAS Plant Pathology U-scout page: https://plantpath.ifas.ufl.edu/u-scout/tomato/blossom-end-rot.html.
by Molly Jameson | Feb 13, 2025
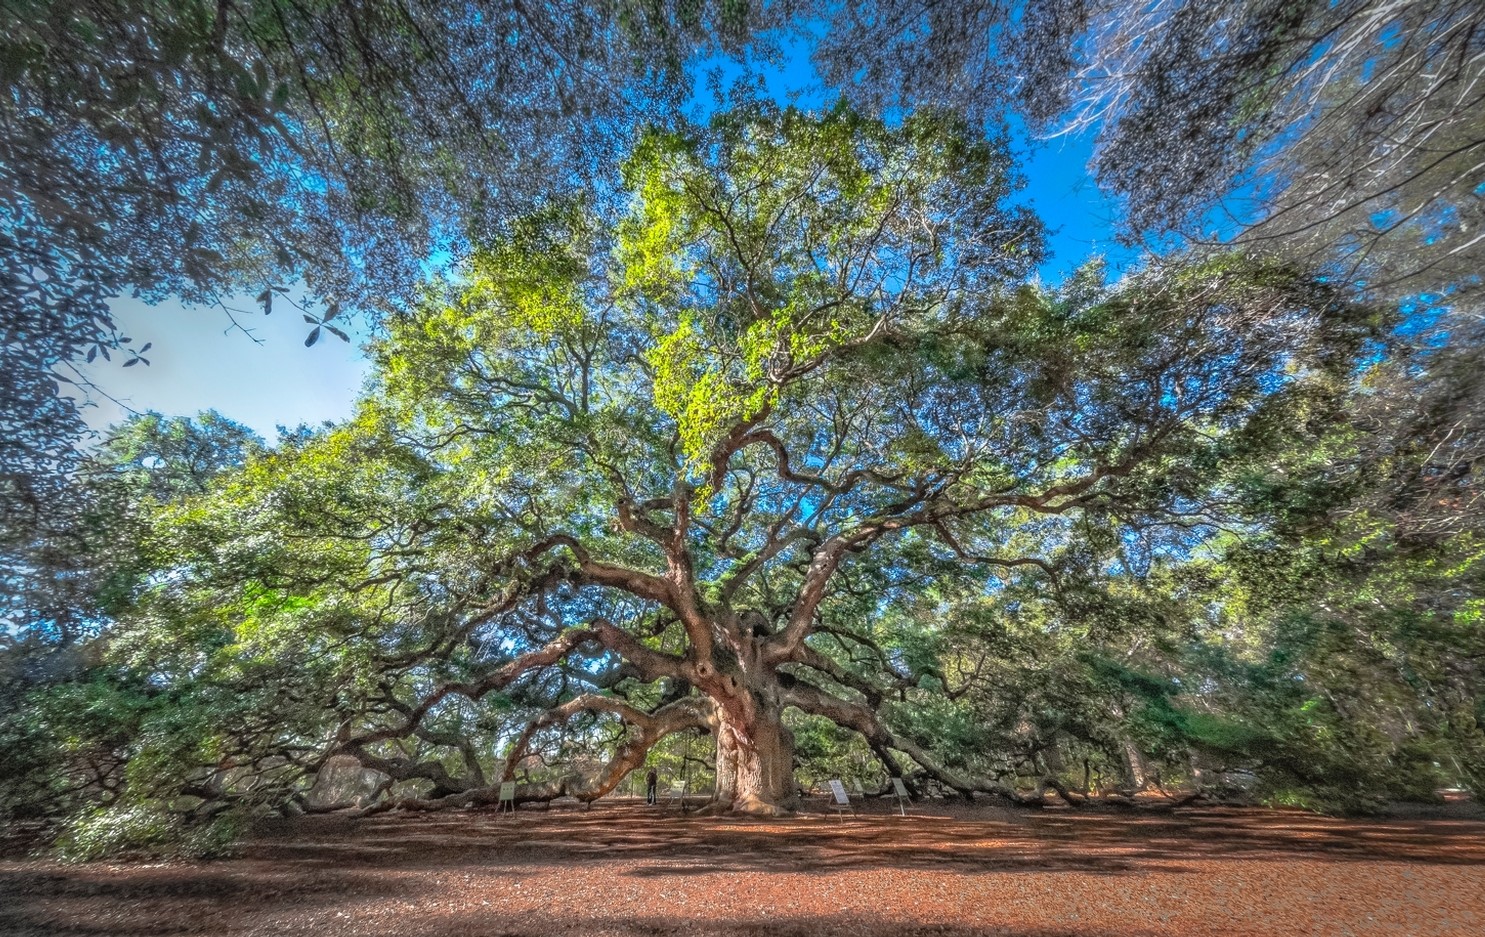
Trees provide shade, habitat, food, clean air, and beauty, but many also release windborne pollen that travels for miles, making spring challenging for allergy sufferers. Photo by Molly Jameson.
Spring in the Florida Panhandle brings blooming azaleas, singing birds, and a familiar yellow haze coating everything in sight. Yes, it’s tree pollen season, and if you’ve ever stepped outside only to feel your sinuses stage a full-scale rebellion, you have the trees to thank. Tree pollen is nature’s glitter – everywhere, impossible to escape, and surprisingly potent in small doses. While trees play a vital role in the environment, for allergy sufferers like me, their pollen can make spring feel like a months-long battle of sneezing, congestion, and itchy eyes.
Many people assume that showy, flowering trees are the biggest culprits, but this isn’t the case. Trees like magnolias and dogwoods rely on insect pollination, meaning their pollen is heavier and doesn’t travel far. The real troublemakers are wind-pollinated trees, which release huge volumes of lightweight pollen that can drift for miles and then straight into your sinuses.
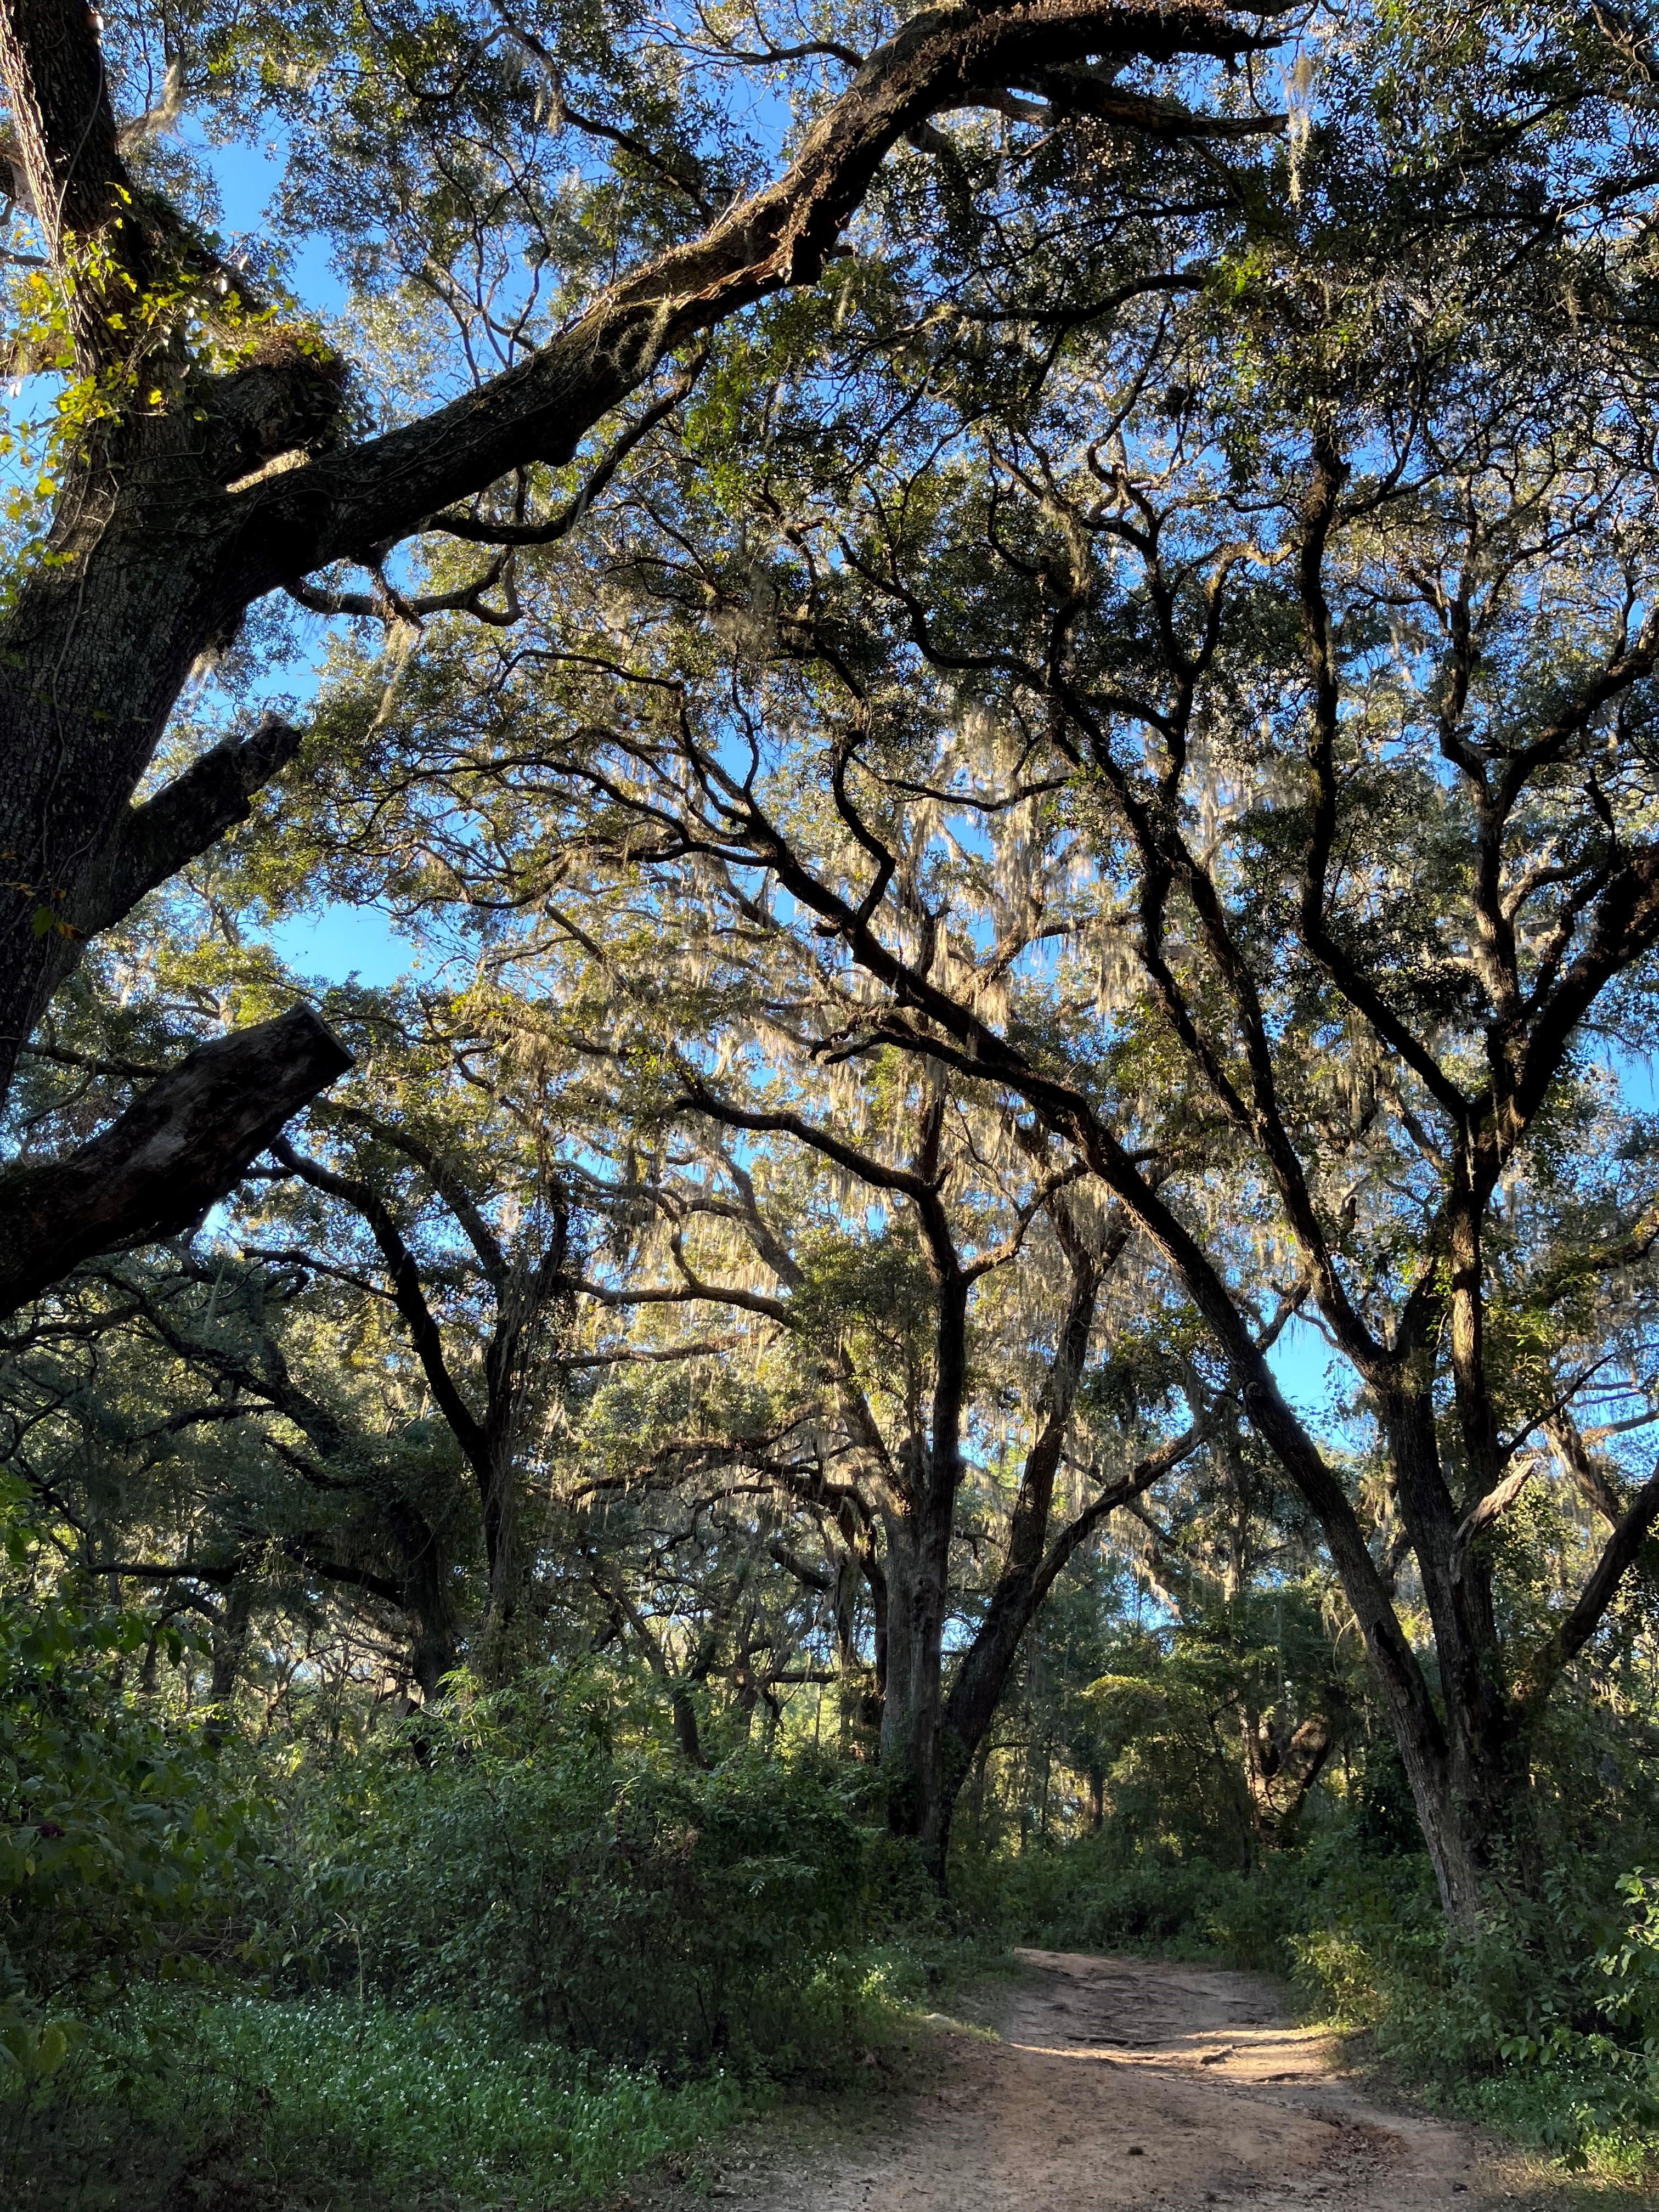
Oak trees are a staple of North Florida’s landscape, but their long pollen season makes them a top allergy culprit. Their lightweight pollen spreads easily, coating surfaces in yellow dust. Photo by Joseph Scopino, Bugwood.org.
Pollen production isn’t the same every year. Weather plays a big role – wind increases pollen spread, while rain helps suppress it. An unusually mild winter can start allergy season earlier and extend it longer, making some years worse than others.
To help you prepare, here are the top tree pollen offenders in our area, ranked using the Ogren Plant-Allergy Scale (OPALS), which rates allergenicity on a scale from 1 (least allergenic) to 10 (most allergenic).
Oak Trees (Quercus spp.)
OPALS Rating: 8
Pollen Season: February – May
Oaks are a staple of North Florida’s landscape, but they’re also one of the worst allergy offenders. Their pollen is light, easily airborne, and can travel miles on the wind. Even if you don’t have an oak in your yard, there’s a good chance one down the street is still making you sneeze.

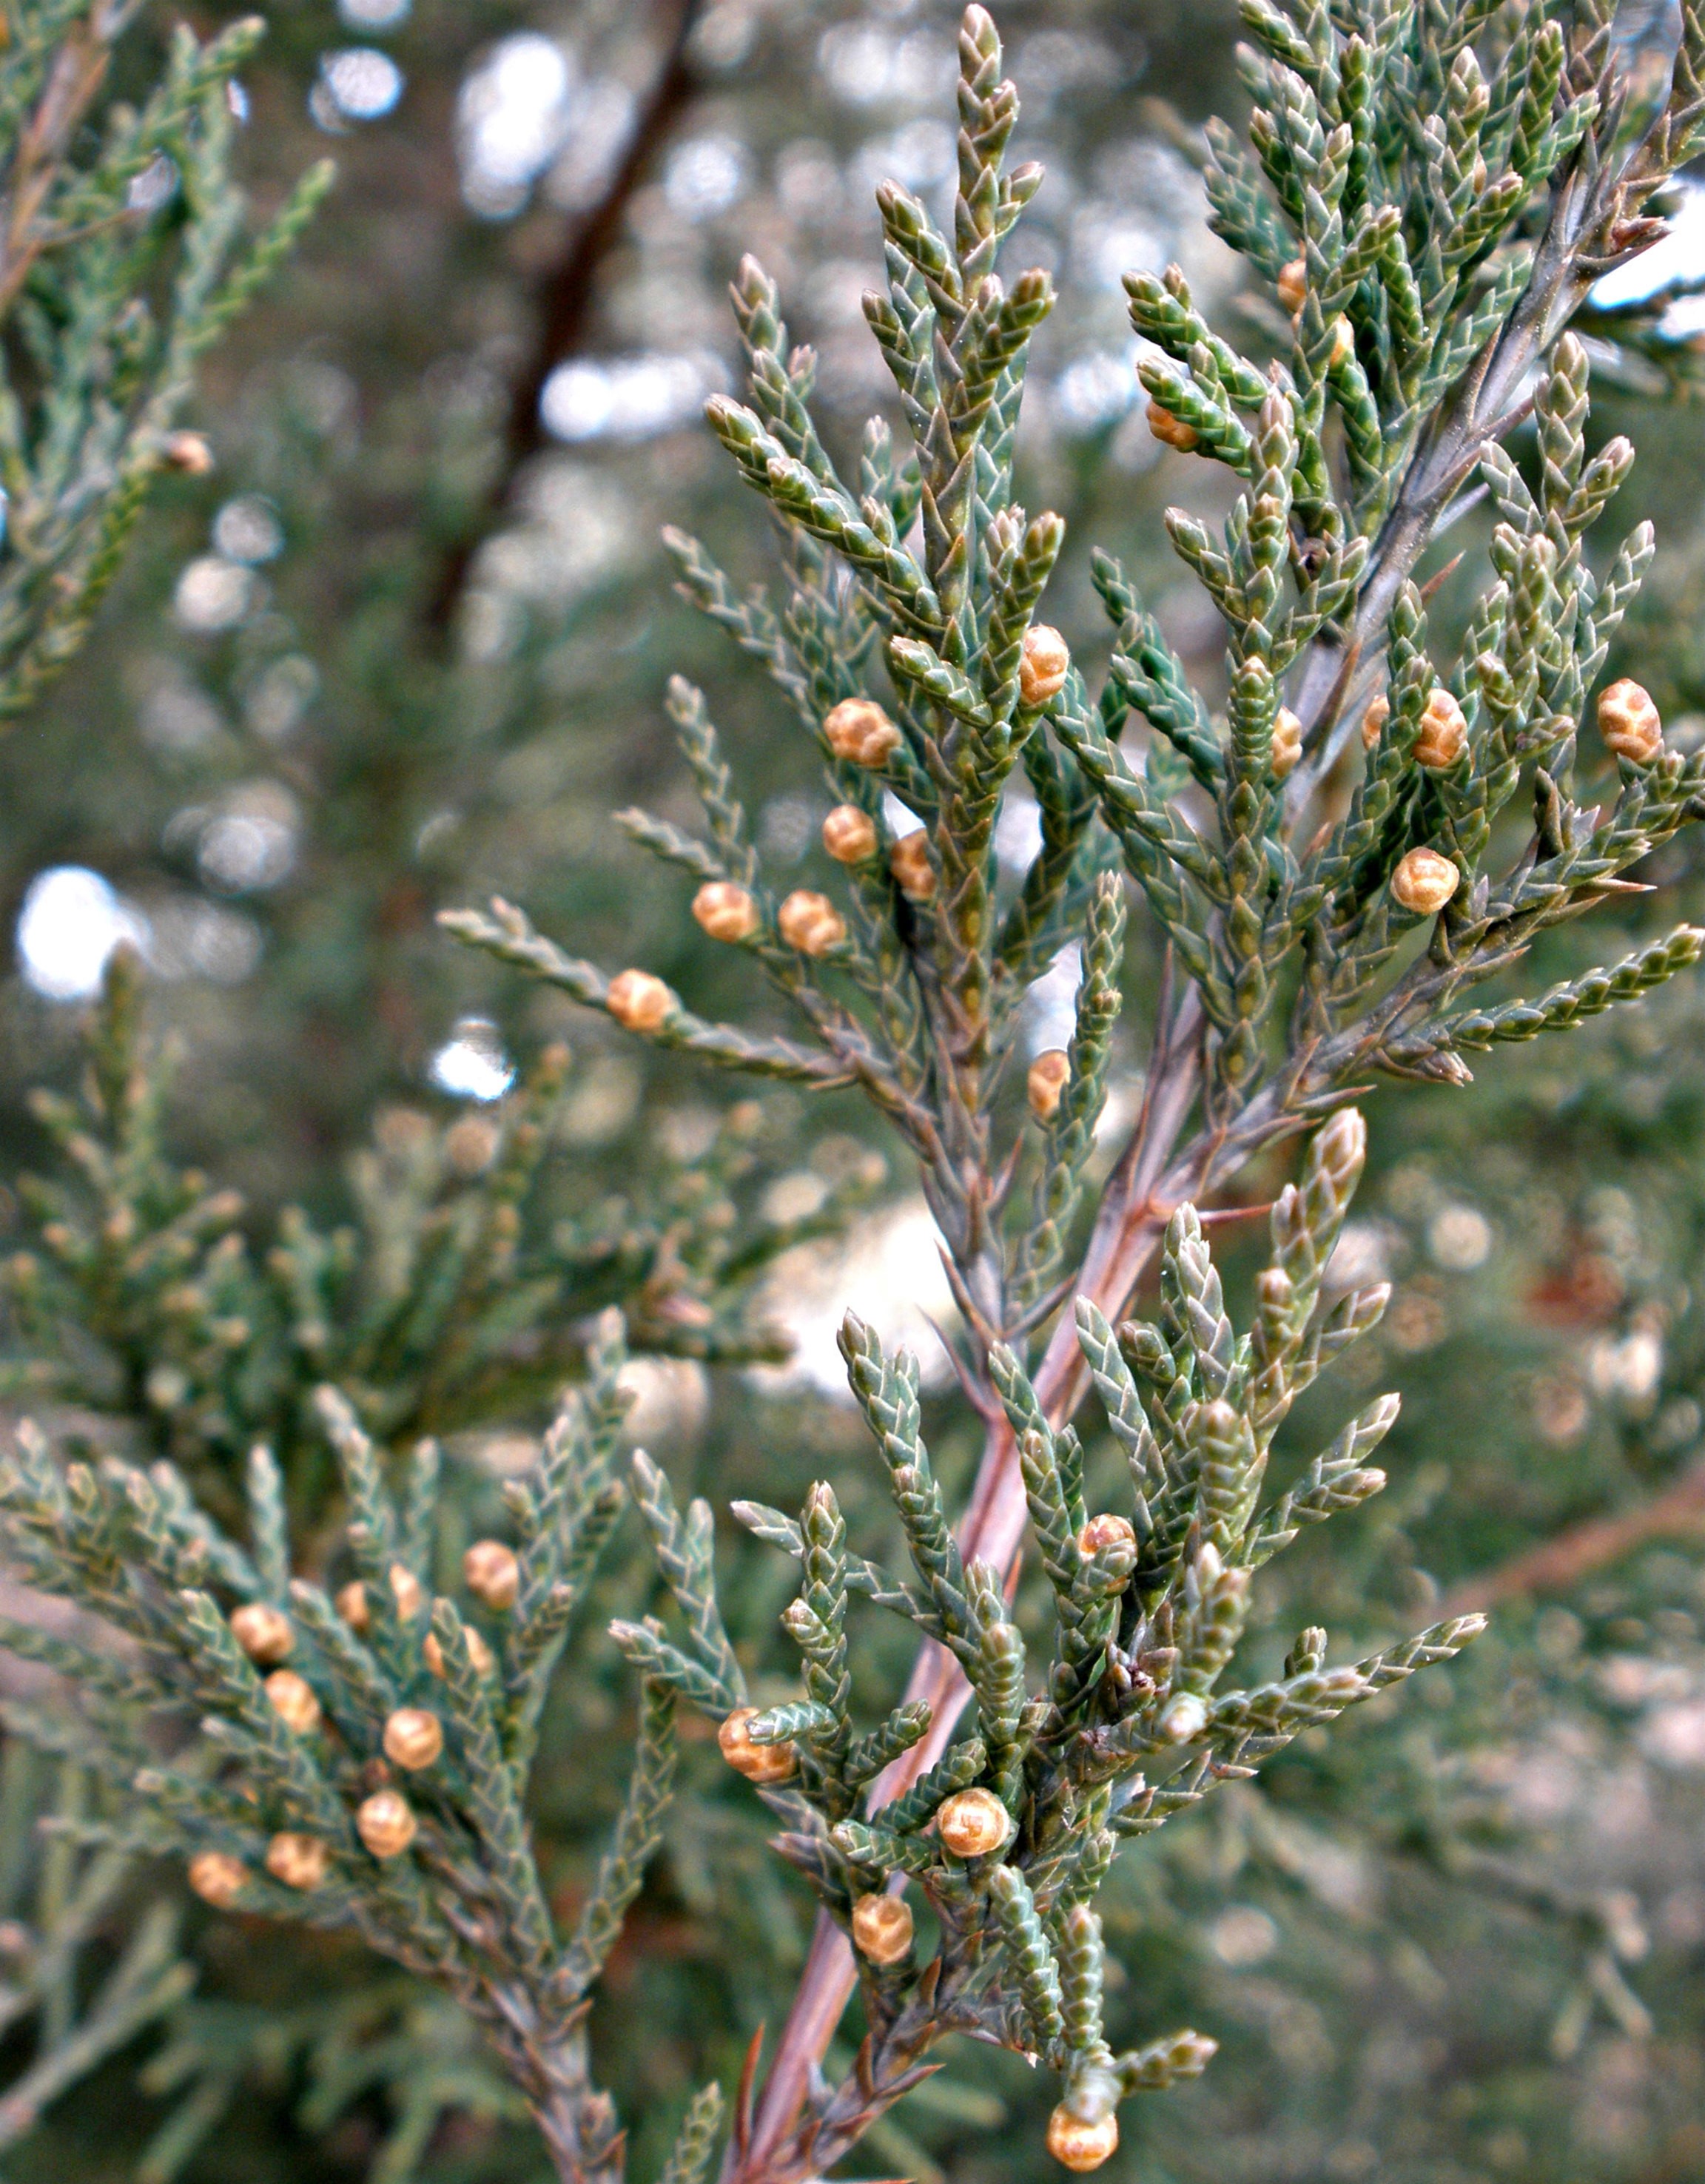
Male cones on Eastern Red Cedar release highly allergenic pollen in winter, often triggering “Cedar Fever.” Photo by Ansel Oommen, Bugwood.org.
Unlike other trees that release pollen in short bursts, oak trees drag out the misery from February through May, ensuring that allergy season lasts as long as possible. Because oaks are so widespread in urban and suburban areas, their moderate to high allergenicity makes them nearly impossible to avoid.
Eastern Red Cedar (Juniperus virginiana)
OPALS Rating: 10
Pollen Season: December – February
If you thought spring allergies were bad, Eastern Red Cedar makes sure some people suffer before spring even arrives. As one of the few trees to release pollen in winter, these evergreens begin shedding their highly allergenic pollen as early as December, peaking through February.
Cedar pollen is light, fine, and easily airborne, meaning it travels far and lingers in the air. The term “Cedar Fever” is well known in the Southeast for a reason – this tree’s severe allergenicity causes congestion, itchy eyes, and sneezing fits for many people, sometimes mistaken for winter colds. While red cedars provide valuable windbreaks and habitat for birds, their OPALS rating makes them one of the most problematic trees for allergy sufferers in North Florida.
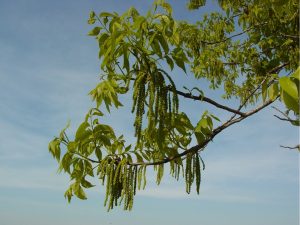
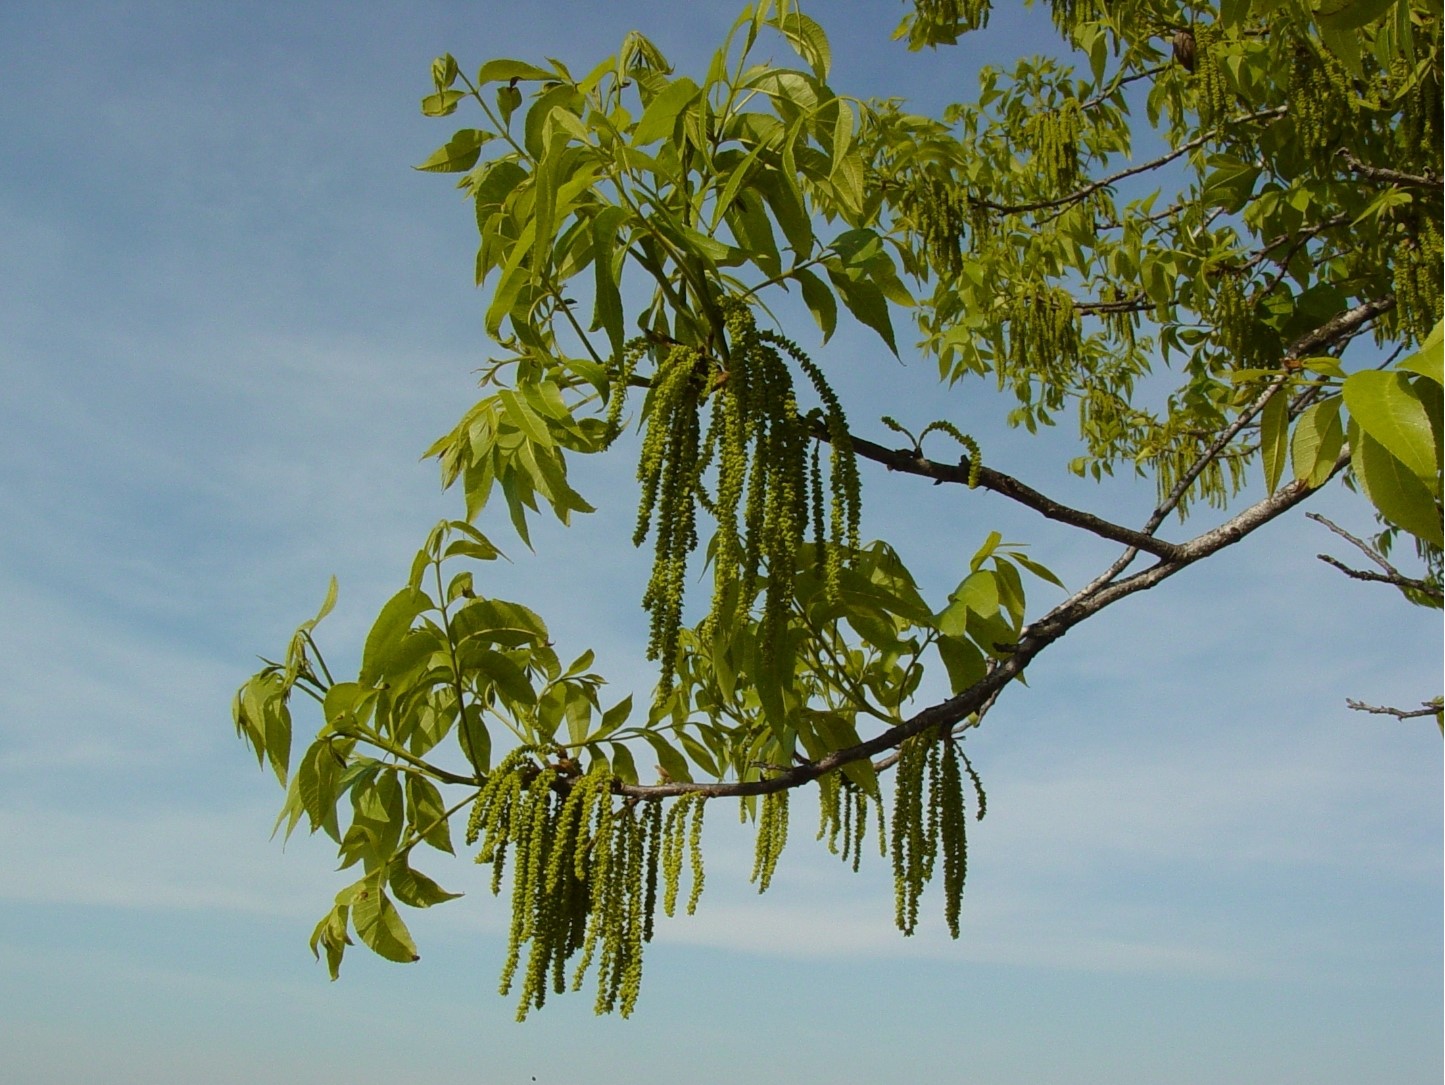
Pecan trees release long, dangling catkins in spring, shedding large amounts of wind-borne pollen. Photo by Charles T. Bryson, USDA Agricultural Research Service, Bugwood.org.
Hickory and Pecan (Carya spp.)
OPALS Rating: 8
Pollen Season: March – May
Closely related members of the walnut family, hickory and pecan trees may produce delicious nuts, but their wind-pollinated pollen is highly allergenic. Released in massive amounts from March through May, their pollen spreads far and often trigger strong allergic reactions.
Hickory pollen is especially potent, meaning even small amounts can cause sneezing, congestion, and itchy eyes. These trees are less common in urban settings compared to oaks, but in rural areas and agricultural landscapes, they can be a significant contributor to allergy misery.
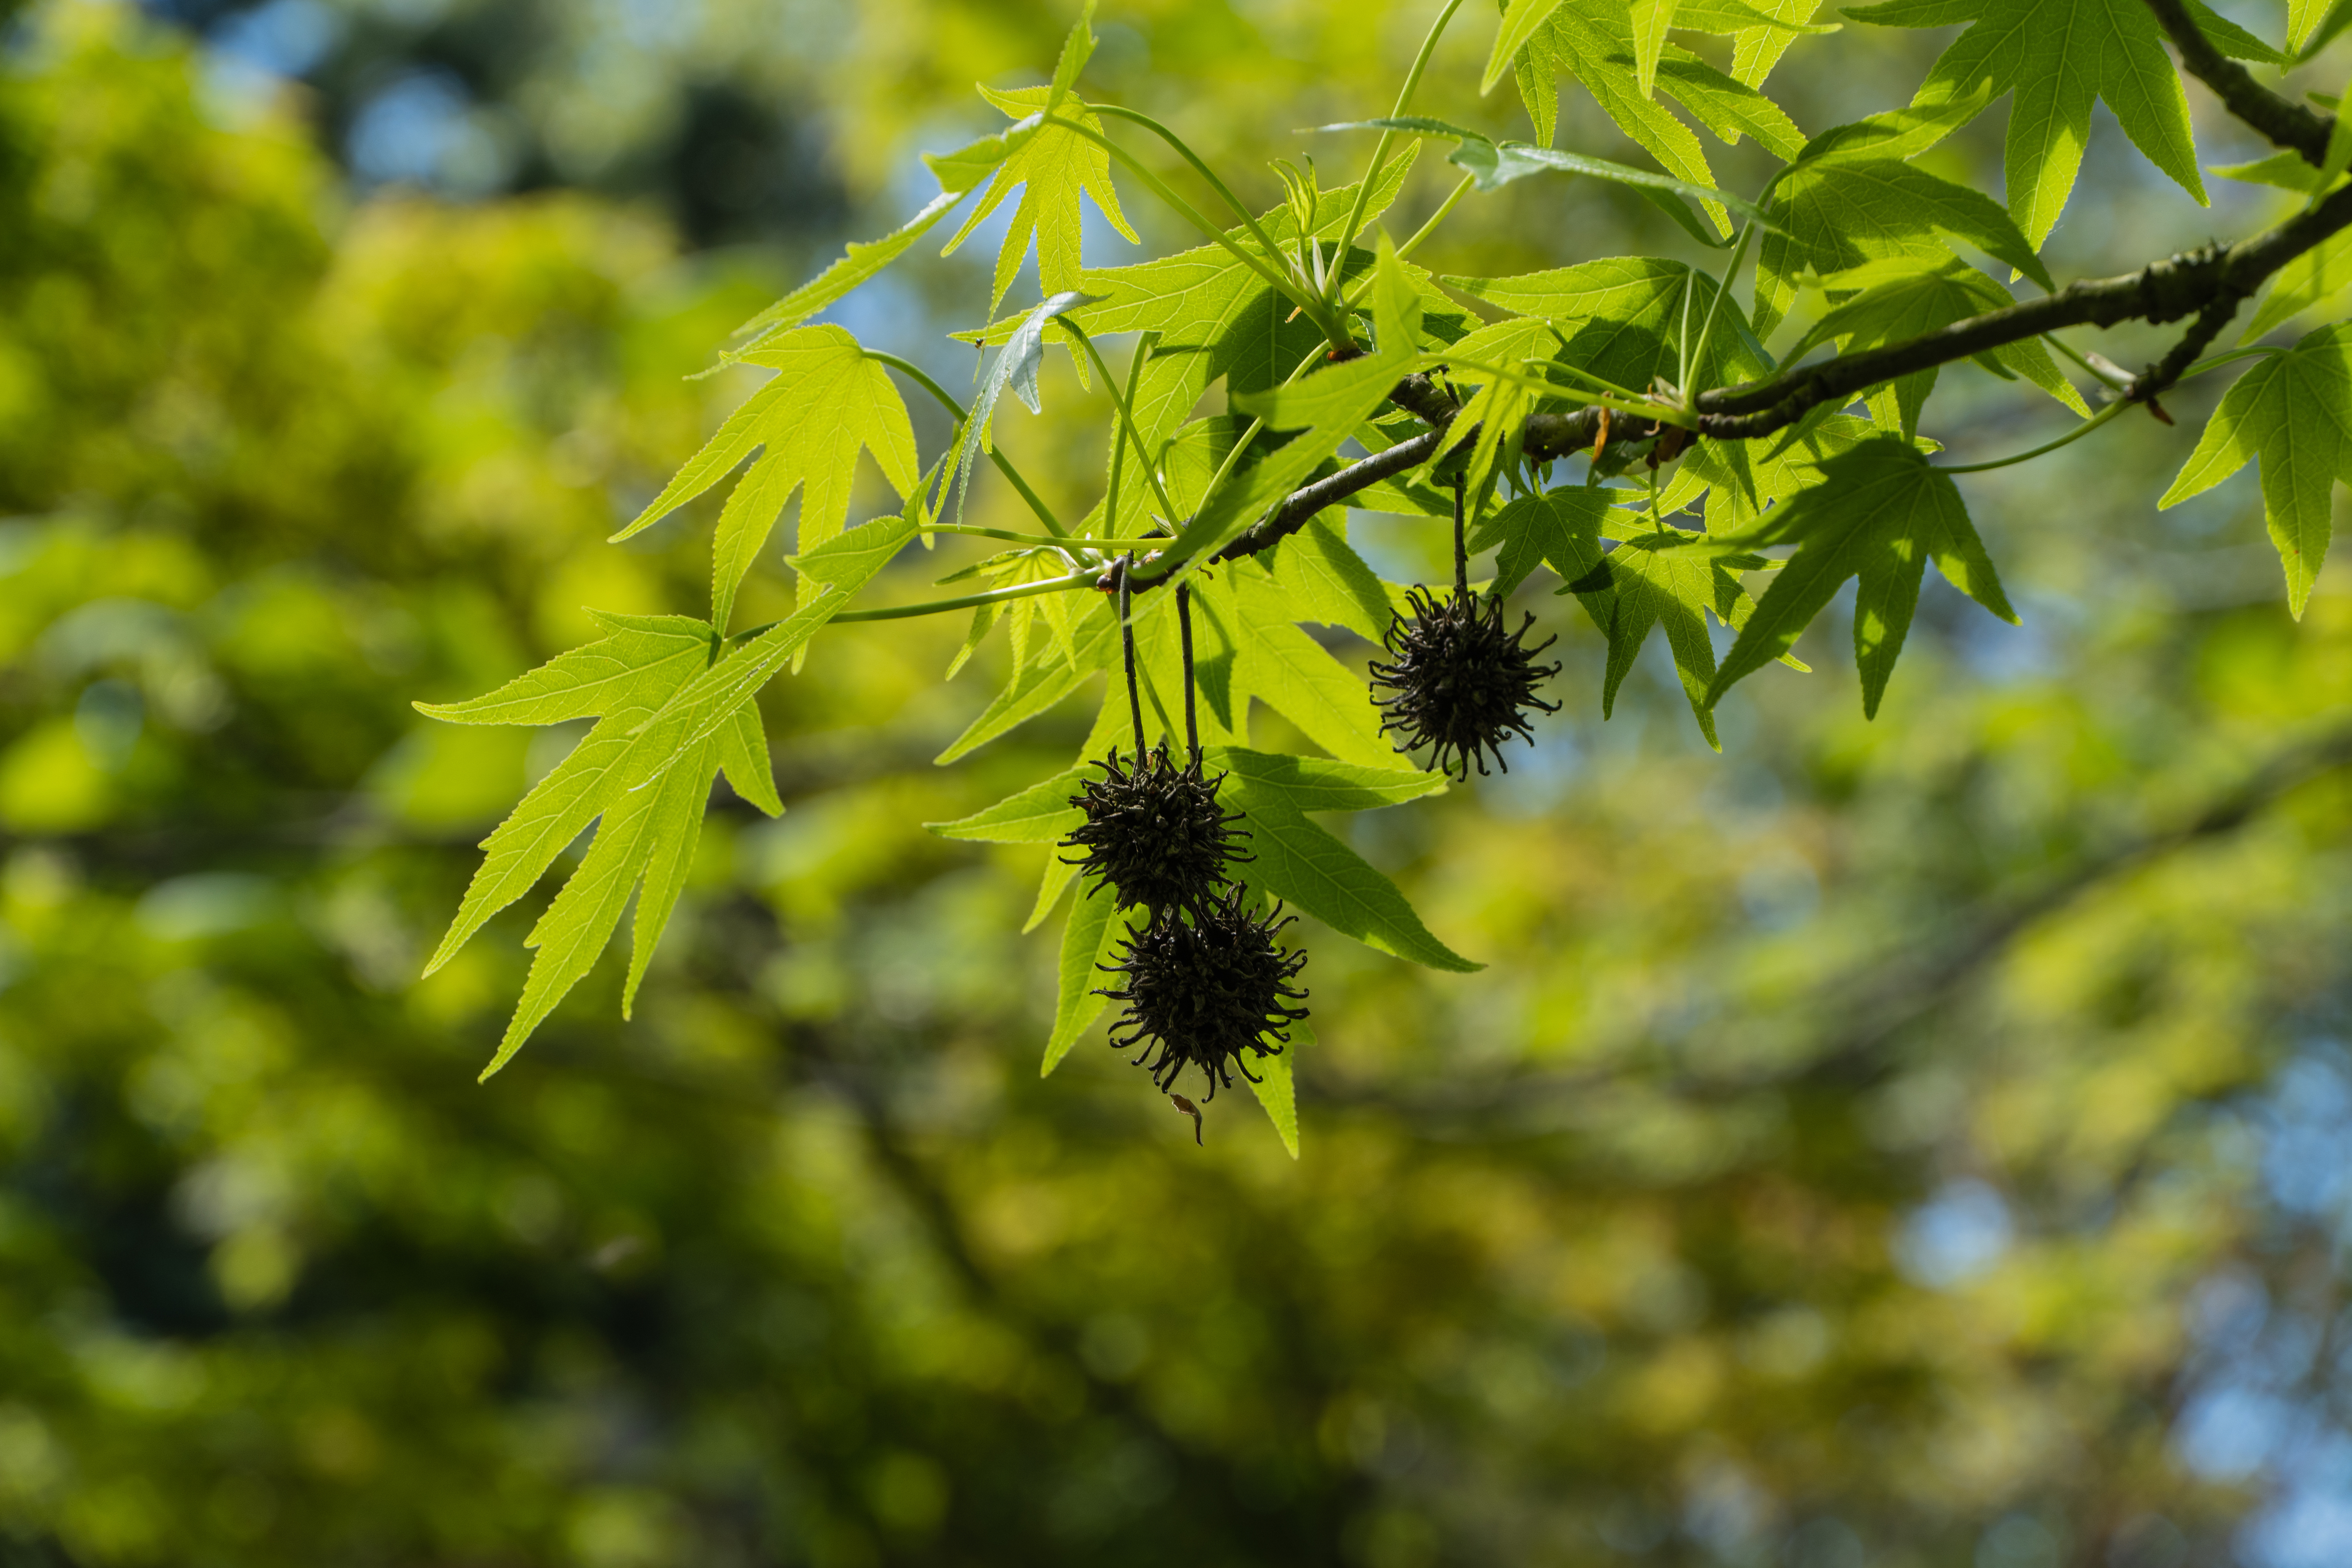
American Sweetgum (Liquidambar styraciflua)
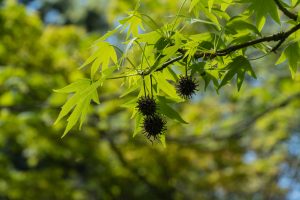
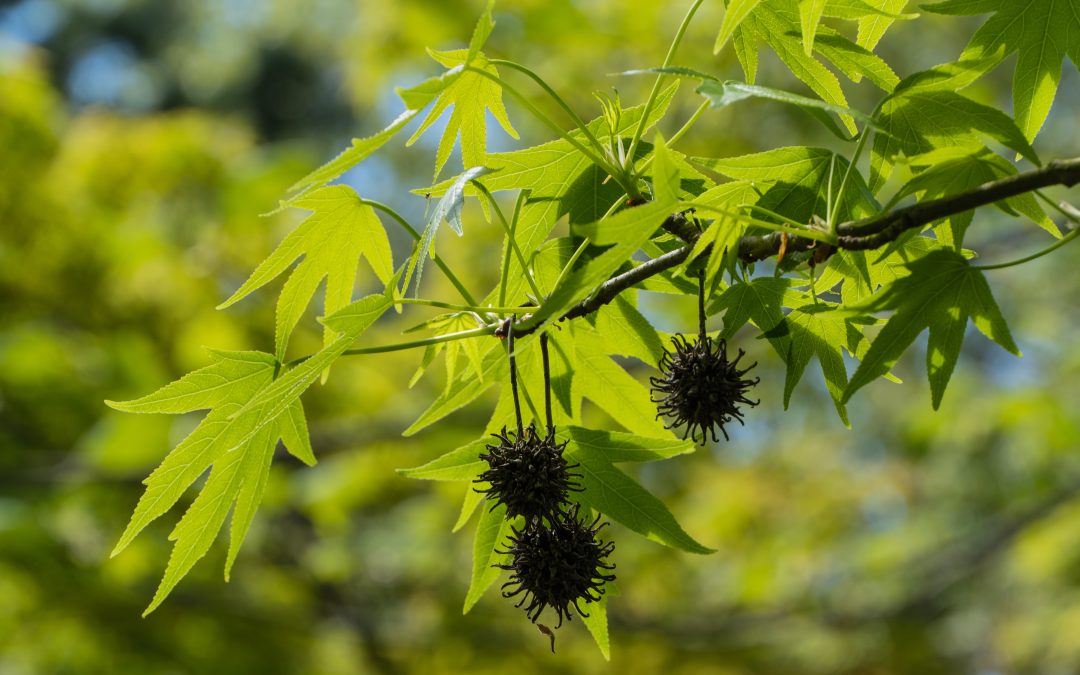
Sweetgum trees release allergenic pollen in spring, while their spiky seed pods linger long after. Photo by Alexander Denisenko, Adobe Stock.
OPALS Rating: 7
Pollen Season: March – May
While sweetgum trees are famous (or infamous) for their spiky seed pods, they’re also a problem during allergy season. Their wind-dispersed pollen, released from March through May, is known to trigger congestion and sneezing fits.
Although sweetgums have moderate to high allergenic potential, they do offer some benefits. They provide excellent fall color and support wildlife, so they’re not all bad – unless you’re allergic, in which case you might prefer to admire them from afar.
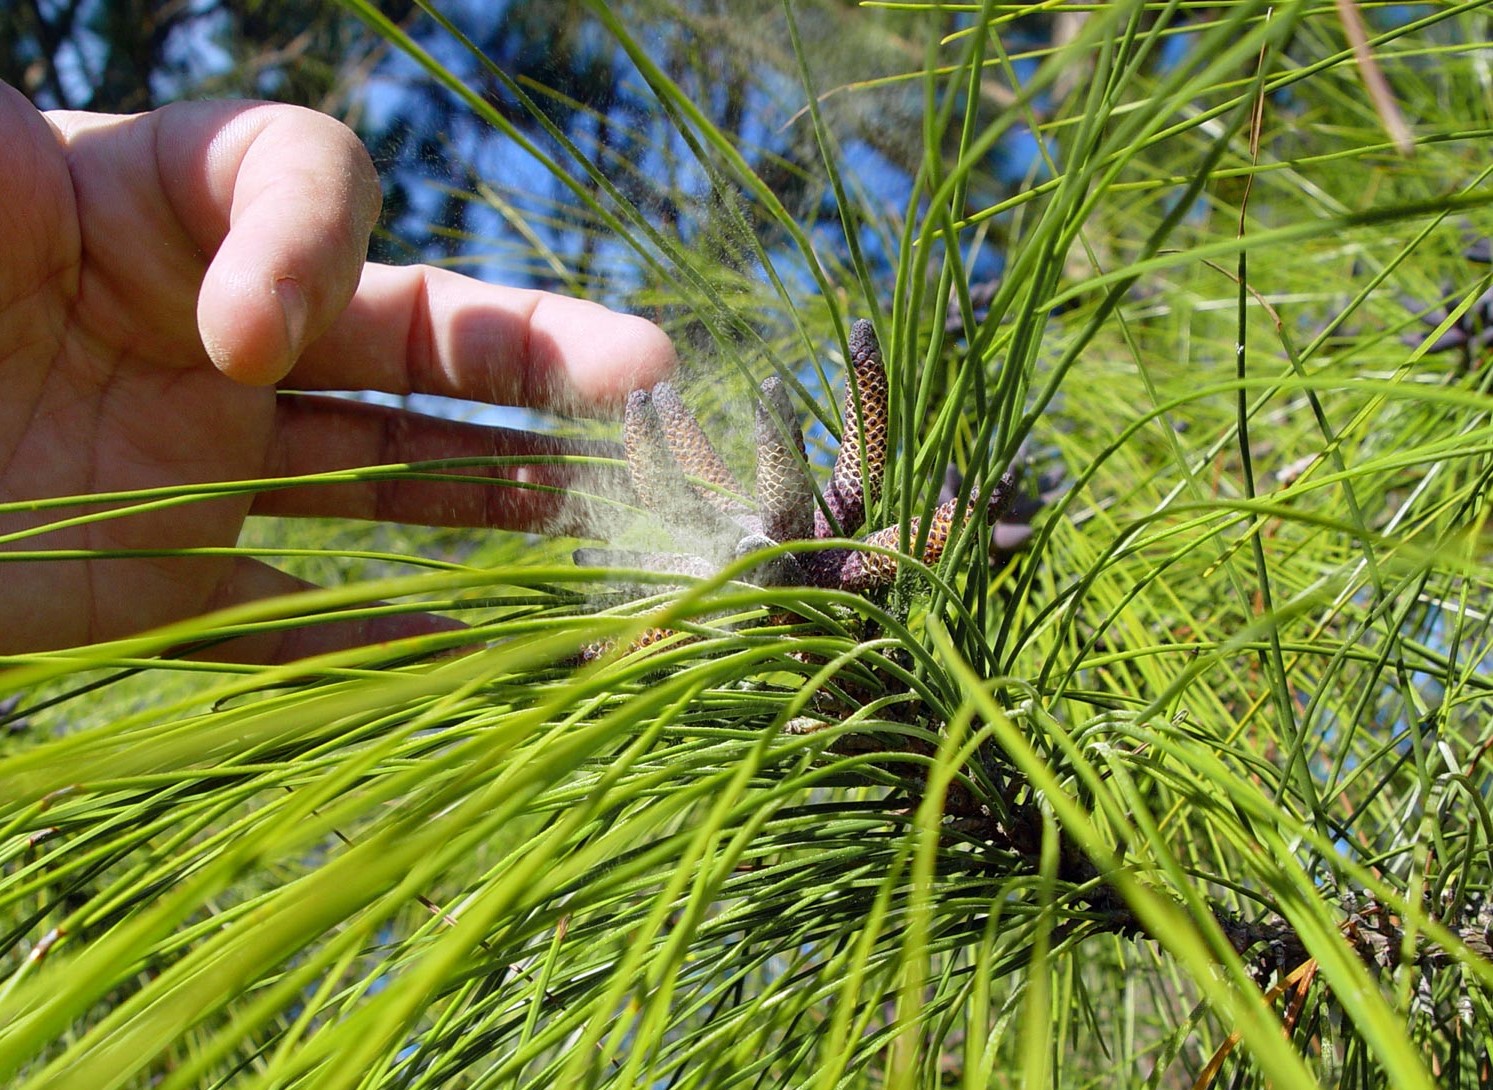
Pines (Pinus spp.), The Surprisingly Milder Offender
OPALS Rating: 4
Pollen Season: February – April

Each spring, pine pollen coats cars and sidewalks in a yellow-green haze. Though abundant, its heavier grains make it less allergenic than oak or cedar. Photo by Chris Evans, University of Illinois, Bugwood.org.
Wait, what about pine trees? If you’ve lived in North Florida for long, you’re probably familiar with the thick yellow-green coating of pollen that covers cars, sidewalks, and ponds every spring. It’s so visible that it seems like a top allergy culprit.
But here’s the twist: pine pollen is not as bad as you think. Despite its overwhelming presence, pine pollen is significantly less allergenic than oak, cedar, or pecan pollen. Its grains are larger and heavier, meaning they don’t stay airborne for long and are less likely to cause severe allergic reactions.
That said, sheer volume makes pine pollen hard to ignore. Pines are among the most common trees in Florida, and they release huge amounts of pollen from February through April. While their low to moderate allergy impact means they don’t cause major issues for most people, prolonged exposure can still be irritating – especially for those already dealing with other tree pollen allergies.
Other Notable Offenders

Red maple trees are among the first to release pollen in late winter, often kicking off allergy season. Their tiny, wind-dispersed pollen grains have a high allergenic impact. Photo by Gitta Hasing, UF/IFAS.
While the trees above may be the biggest allergy triggers, they aren’t the only ones sending pollen into the air. Red Maples (Acer rubrum) have an OPALS rating of 9, making them one of the most allergenic early bloomers. Their pollen often kicks off allergy season before winter fully ends, making them a significant irritant for those sensitive to tree pollen. American Elm (Ulmus americana), rated at 8, is another strong contributor, especially in urban areas where it has been widely planted.
Another surprising allergy trigger is Bald Cypress (Taxodium distichum), with an OPALS rating of 8. Though more commonly associated with wetlands and swamps, Bald Cypress releases significant amounts of pollen in the spring, making it an unexpected culprit. Sycamore (Platanus occidentalis), rated at 9, is a major pollen producer in North Florida, commonly found in parks and near waterways. Its fine, wind-dispersed pollen spreads easily, making it another frequent cause of allergy symptoms.
Managing Pollen Season
Tree pollen season in the Panhandle can be relentless, but a few simple precautions can help reduce exposure. Check pollen forecasts and limit outdoor activities on high-pollen days. Keep windows closed and use air filters indoors to minimize allergens. Since pollen clings to clothes, hair, and skin, showering and changing after being outside can prevent it from following you indoors. If you’re planning new landscaping, opt for low-pollen or female trees to reduce airborne allergens. With a little preparation, you can enjoy spring – without spending the whole season sneezing.
To learn more about trees that cause allergens and how they impact our region, check out the UF/IFAS Extension publication, Urban Trees and Allergies in North Florida.
by Molly Jameson | Nov 6, 2024
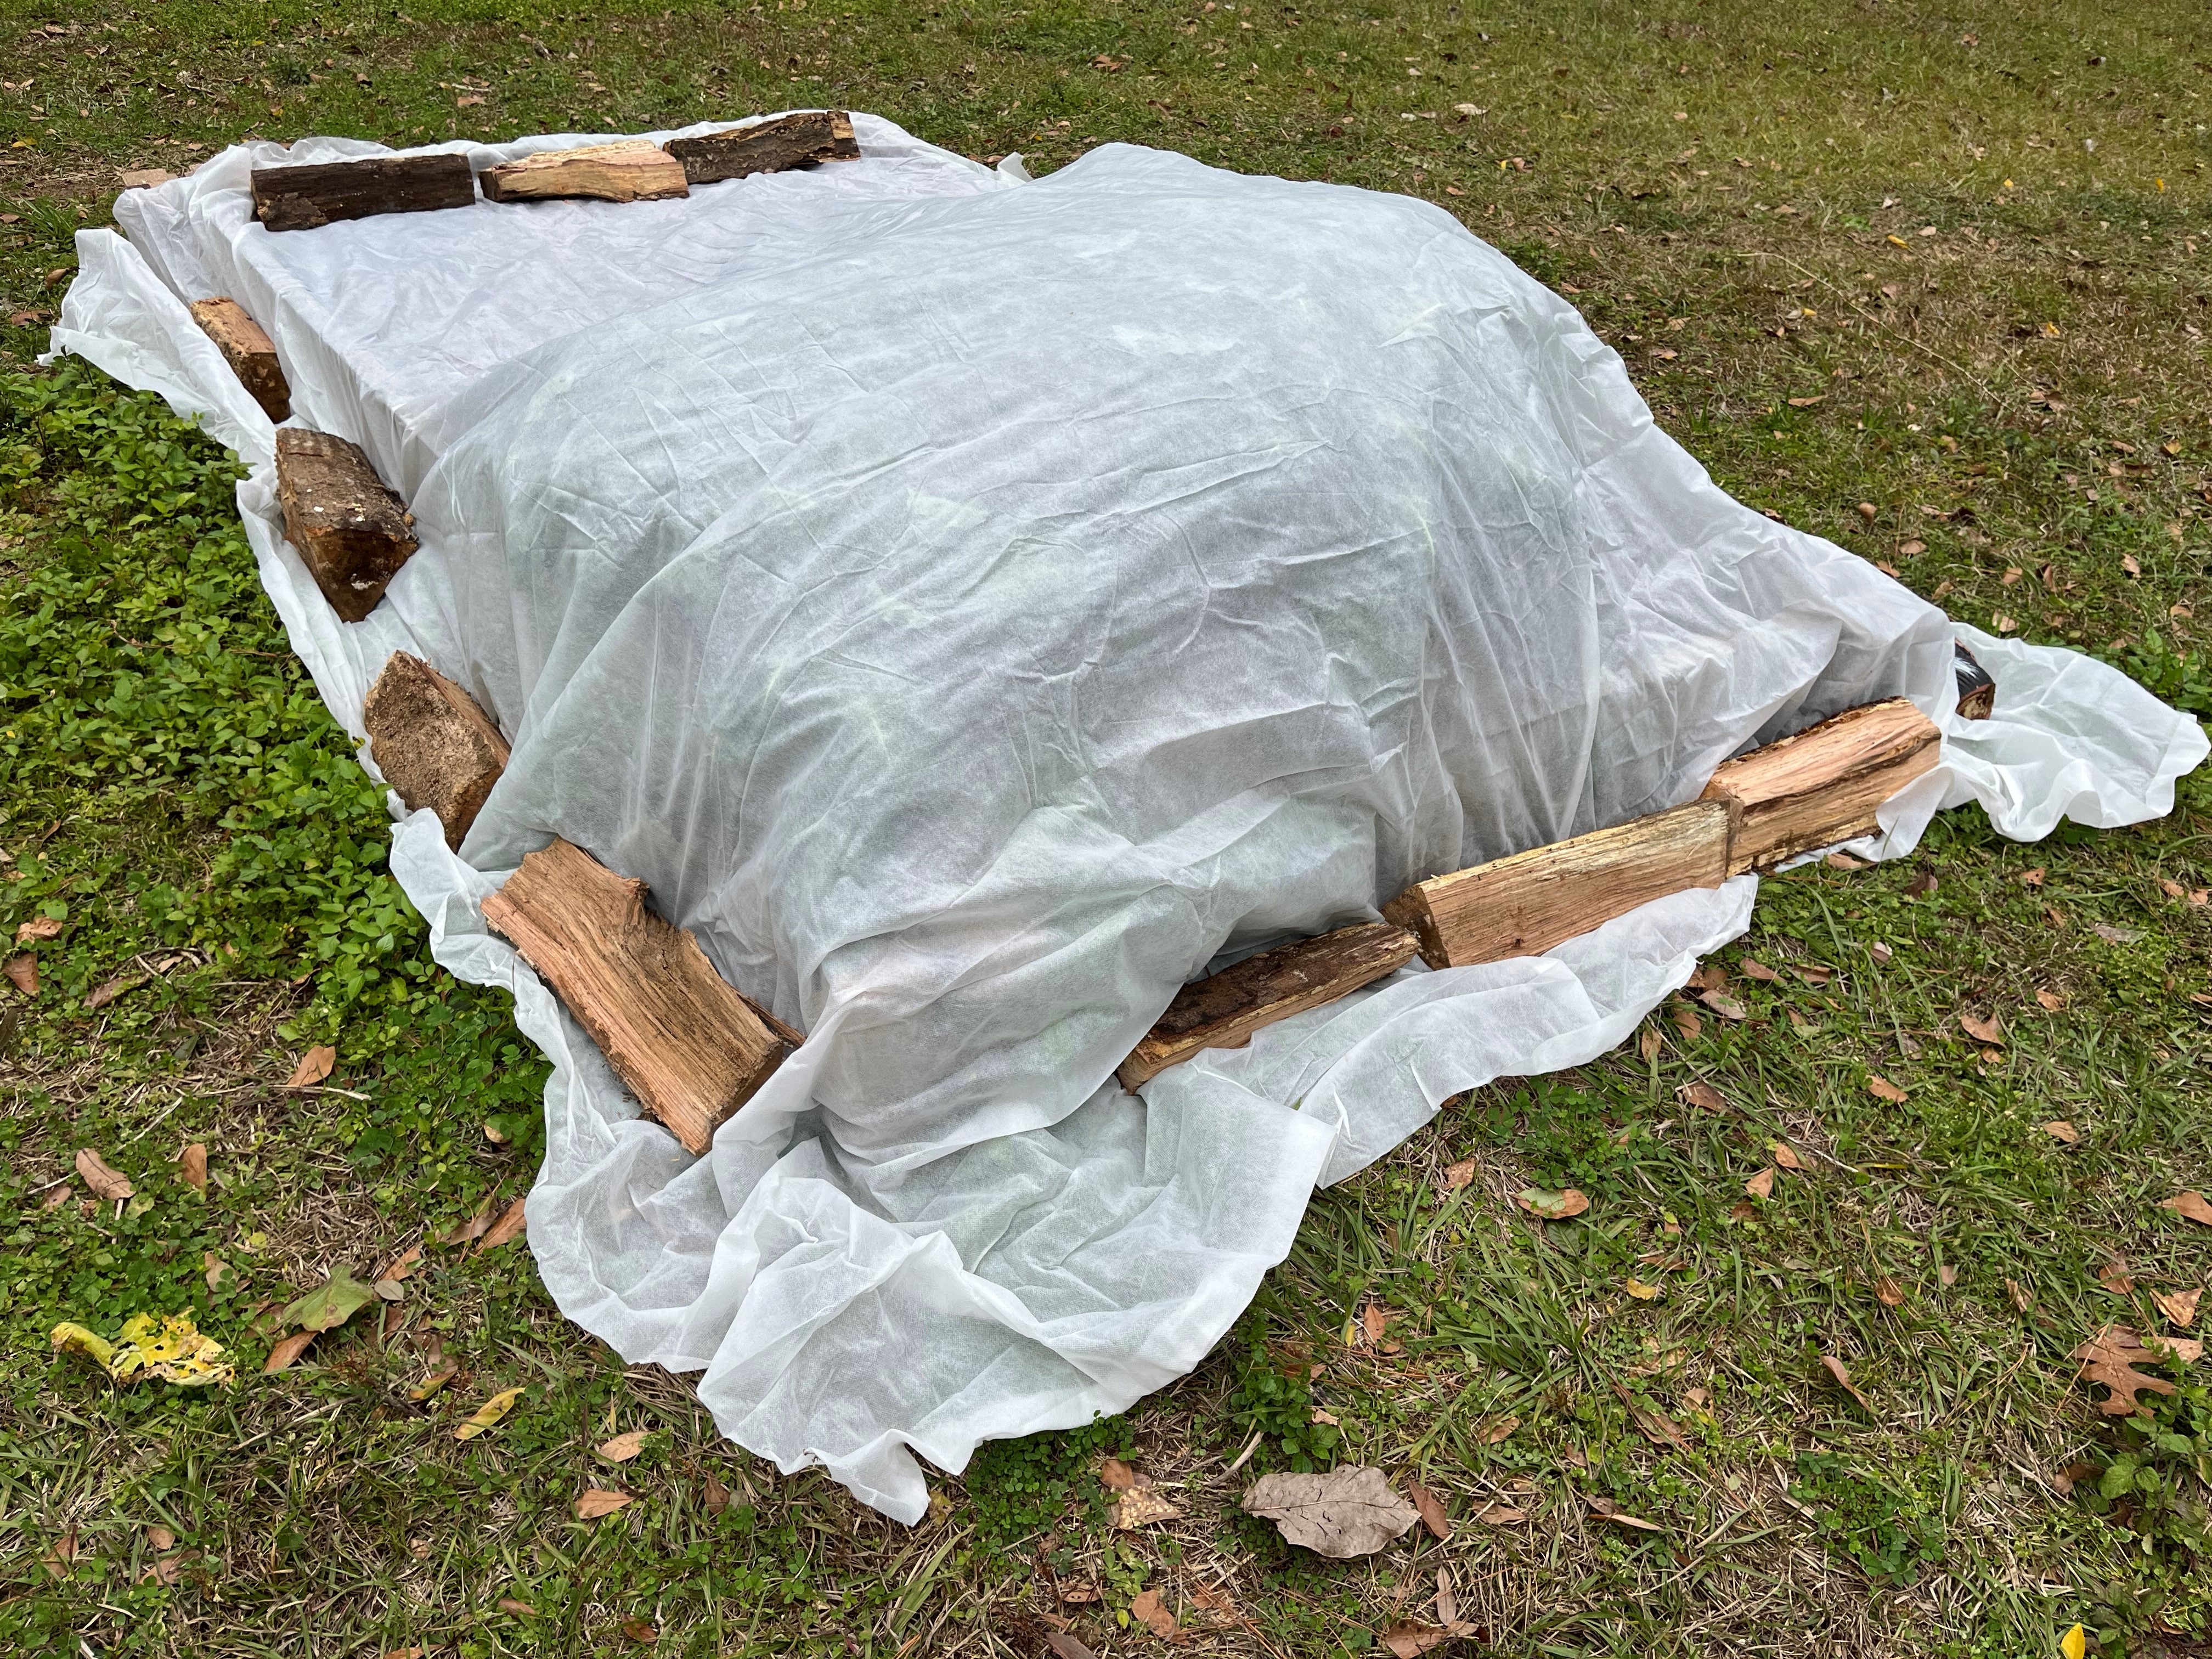
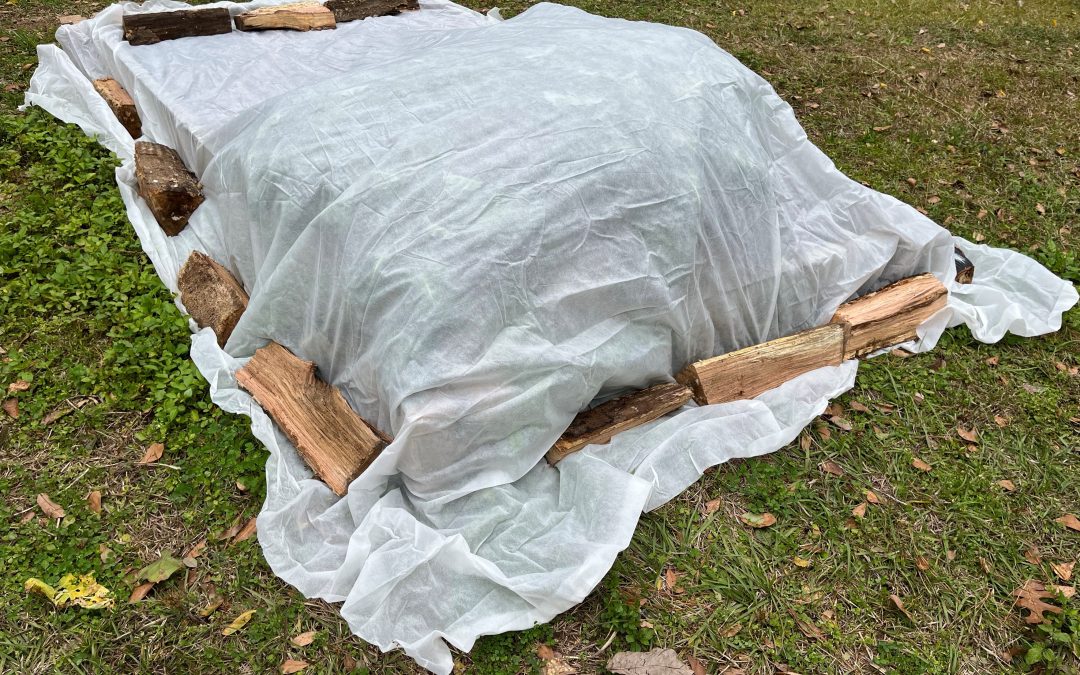
Anchor frost cloth securely to keep it tightly in place, as removing air gaps helps trap ground heat and shield plants from cold air. Photo by Molly Jameson.
Here in North Florida, mild winters are the norm, but our occasional cold snaps can be enough to wreak havoc on our gardens. As you might remember, in December of 2022 the entire Panhandle experienced temperatures dipping into the teens and low 20s for several nights in a row, with some areas reaching as low as 18°F. This kind of unexpected freeze can catch even the most experienced gardeners off guard.
While plant covers are the go-to solution for many of us, pairing them with additional techniques can offer even better protection when temperatures dip. From common cold weather protection myths to practical DIY tips that enhance your plant cover’s effectiveness, knowing your options can make all the difference during an impending cold snap.
Cold Protection Myths and Misconceptions
When a frost or freeze warning hits, there’s plenty of advice flying around. Some of it’s helpful, and some, not so much. Here are a few misconceptions to clear up:
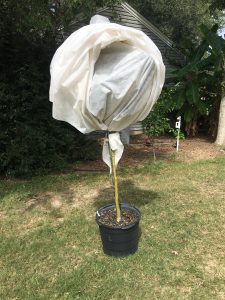
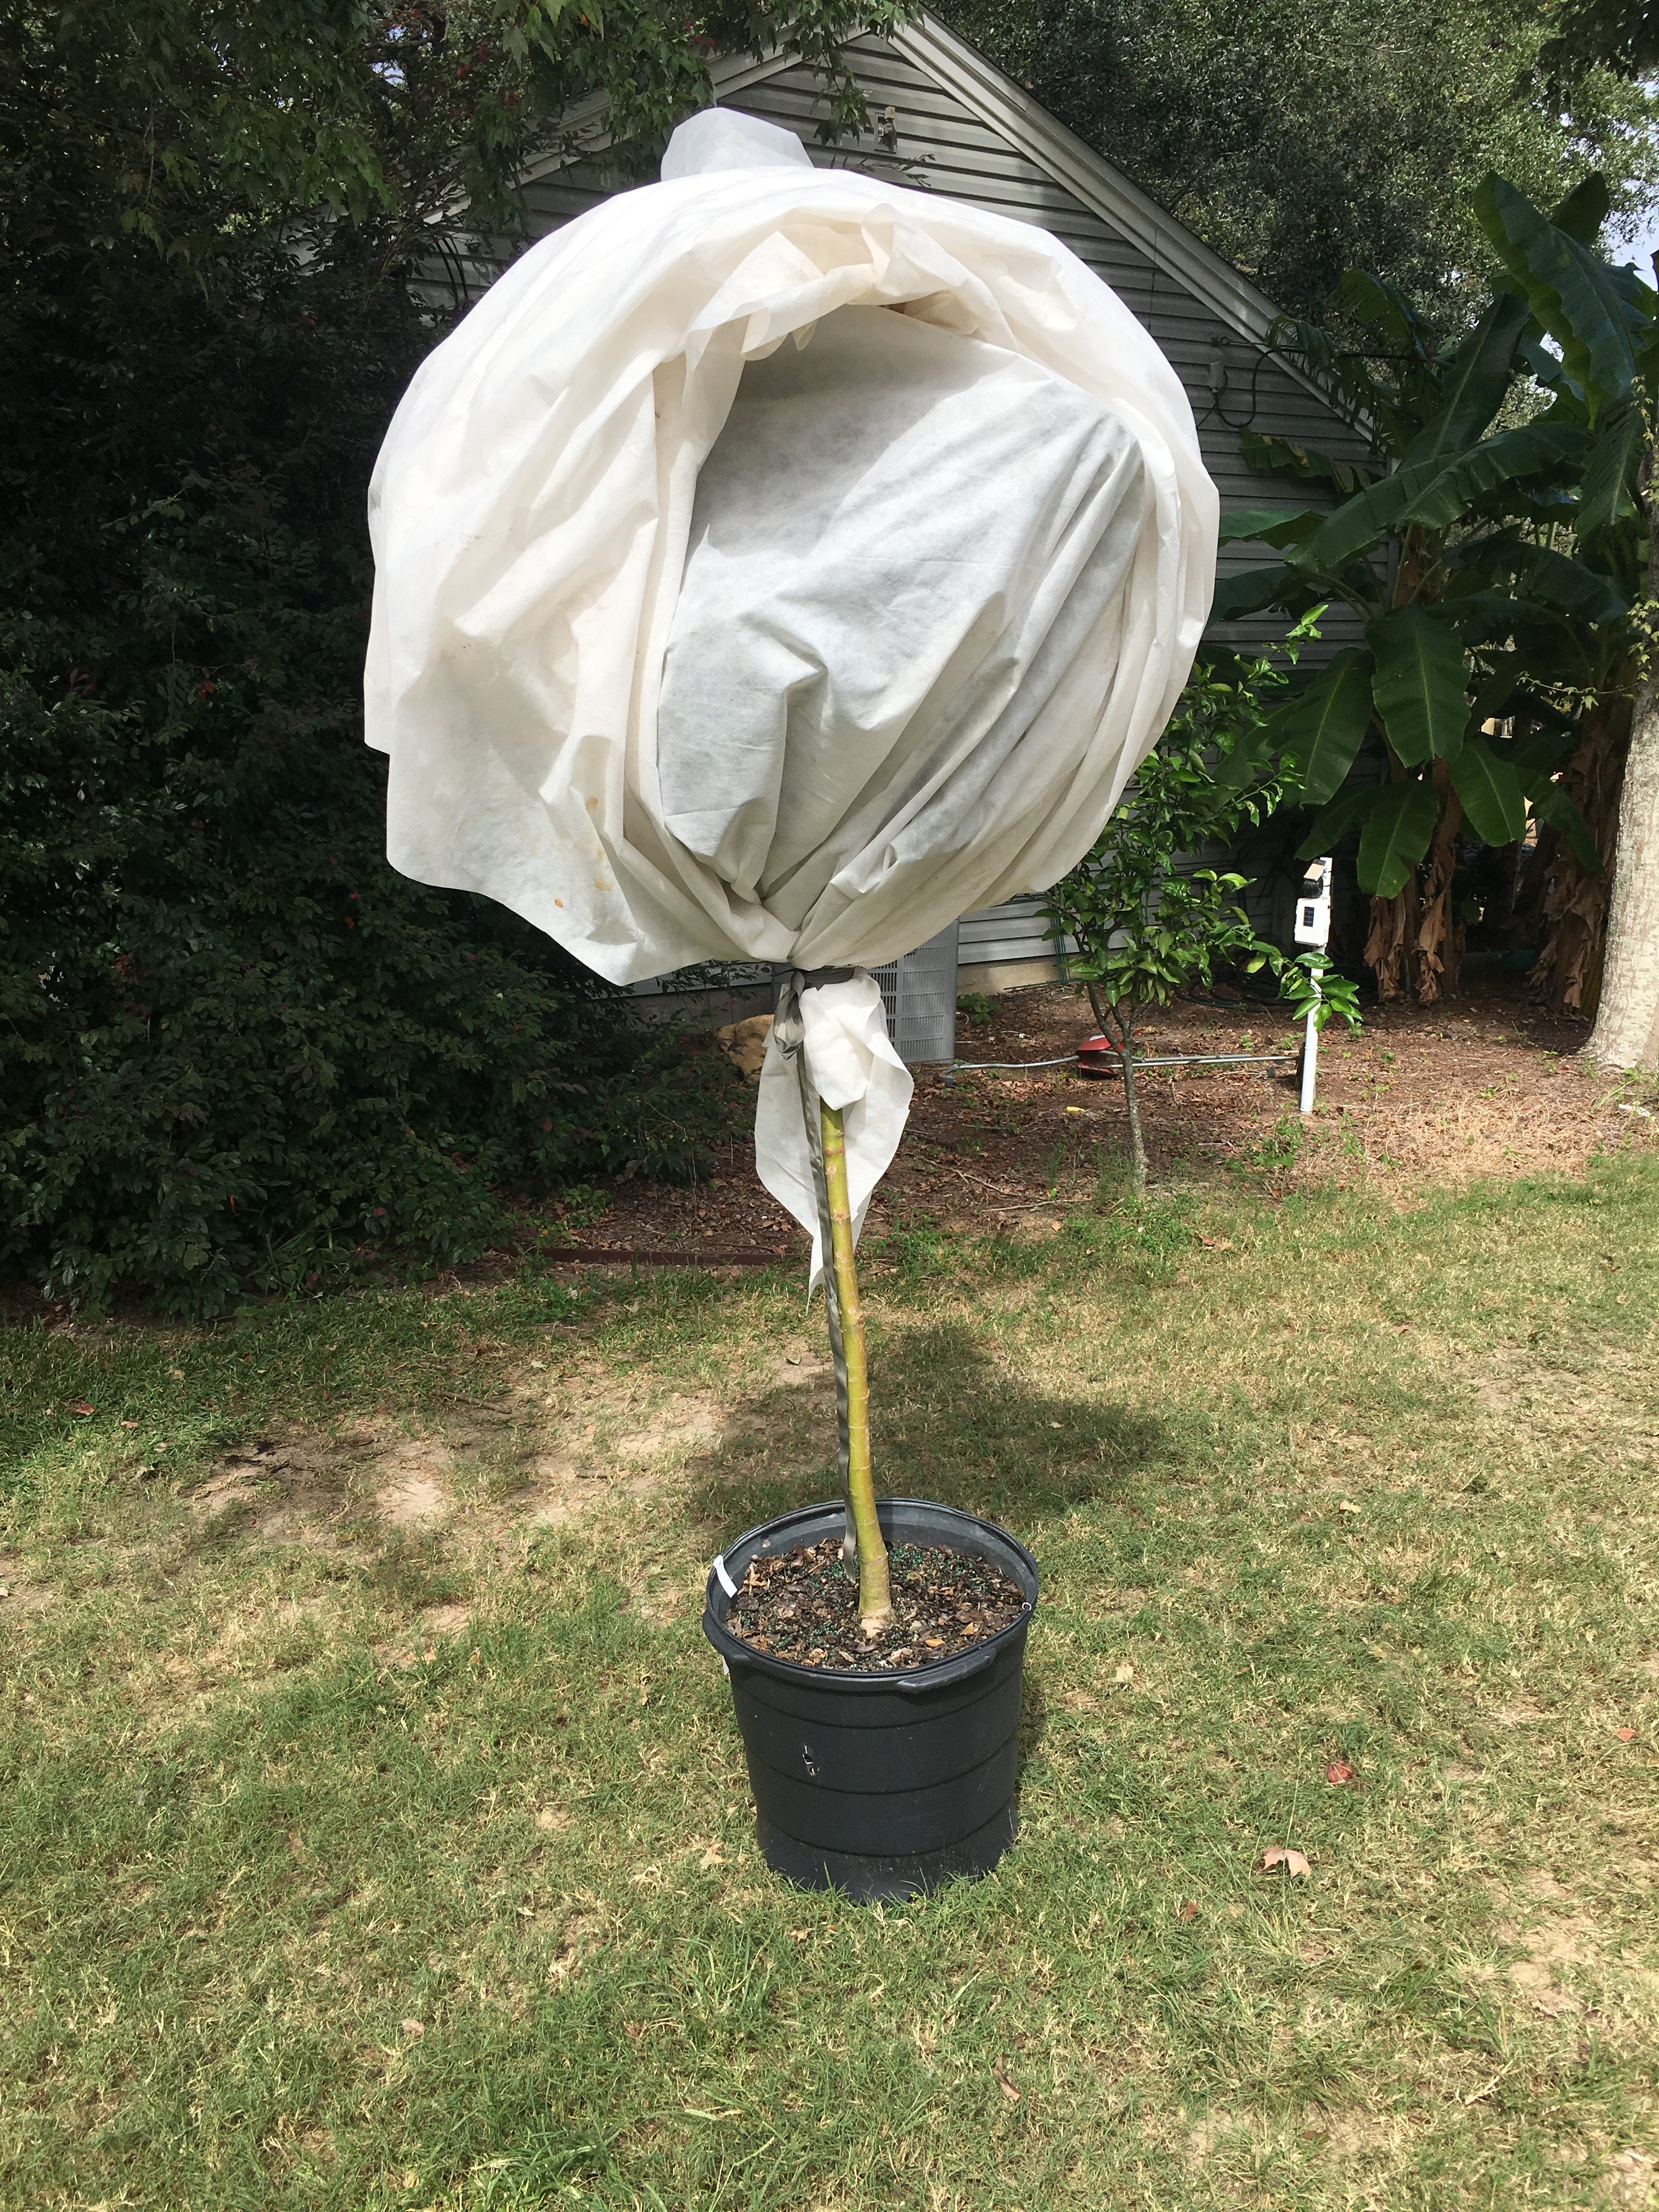
“Lollipop” trees will allow the heat from the ground to escape, giving the tree no cold protection. Photo by Jonathan Burns.
- “It’s All About Covering the Leaves”
Many gardeners believe that simply covering the leaves of their plants will provide adequate protection. However, this can lead to what’s commonly referred to as “lollipop” trees, where only the foliage is covered, leaving the trunk exposed. This is problematic because cold air can still penetrate, and the heat rising from the ground isn’t captured effectively. To ensure proper protection, the plant cover should touch the ground all around the plant to trap heat radiating from the soil, providing insulation from below. For best results, choose a medium-weight frost cloth (about 1 to 1.5 oz/yd²) made from breathable polypropylene or polyester fabric. These materials offer excellent insulation, providing about 4 to 8 degrees of temperature protection, depending on factors like cloth weight, ground heat trapped, and wind conditions. Frost cloth also allows moisture and air exchange, which helps prevent overheating on sunny days.
- “A Plastic Sheet Works Just as Well as Frost Cloth”
Throwing a plastic sheet over your plants might seem like an easy fix, but it often leads to more harm than good. Plastic is non-breathable, which can trap condensation and freeze on the plant’s surface. It also doesn’t insulate well, transferring cold temperatures directly to the leaves and stems. If you must use plastic in a pinch, make sure it doesn’t touch the plants directly and that it’s securely anchored to the ground to effectively trap warmth. Be sure to remove it in the morning once temperatures start to rise to avoid overheating.
- “Covering Your Plants Alone is Enough”

With PVC hoops ready to hold frost cloth and a thick layer of pine straw mulch, these raised beds are prepped for whatever winter throws their way. Photo by Molly Jameson.
While covering plants is crucial, sometimes additional steps can make a big difference. Mulching around the base of plants with a thick layer of pine straw or leaves helps insulate the soil and trap ground heat. It’s a small step that offers big protection to the roots and lower stems.
- “Watering Plants Before a Freeze Doesn’t Help”
Watering the soil around your plants before a freeze is a good practice because moist soil retains heat better than dry soil. This can help keep the root zone warmer overnight. However, it’s important to focus on watering the soil rather than the leaves. Water on foliage can freeze and cause damage, so it’s best to keep leaves dry as the temperatures drop. A deep watering a day or two before the cold hits is ideal for giving your plants a fighting chance.
DIY Cold Protection Solutions
If expensive greenhouses and plant covers are out of your budget or you want to get creative, there are plenty of do-it-yourself solutions for protecting your plants:
- Recycled Materials as Frost Protection
Old bedsheets, towels, or even buckets and cardboard boxes can be used in a pinch to cover smaller plants. Just be sure to anchor them down well, so they don’t blow away.
- DIY Hoop Houses
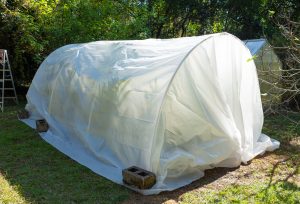
A temporary hoop house can be constructed using PVC pipes as the frame and polyethylene film as the covering to protect cold-sensitive plants during freezes. Photo by David W. Marshall.
For taller or sprawling plants, construct simple hoop houses using PVC piping with breathable frost cloth or lightweight plastic sheeting. Unlike placing plastic directly on plants, hoop houses create an air gap between the plastic and the plants, which helps trap heat from the soil while preventing direct contact damage. If using plastic, seal it tightly at night to trap warmth, and open it partially during the day to prevent overheating or excessive moisture buildup as temperatures rise. These low tunnels are perfect for garden beds or fruiting plants that need a little more room under cover.
- String Lights for Added Warmth
For extra protection, consider using outdoor-rated incandescent string lights (not LEDs, which don’t produce heat). Drape the lights around or near the plant under the covering to create a gentle source of warmth, which can raise temperatures by a few degrees on especially cold nights. For fire safety, keep lights from direct contact with dry materials and use only moisture-safe, outdoor lights.
- Windbreaks to Stop the Chill
In areas with open landscapes, cold winds can make frost damage even worse. Planting a hedge or using temporary barriers like hay bales or pallets can shield your garden from icy gusts and protect your more delicate plants.
Long-term Planning: Choose Cold-Tolerant Varieties
One of the best ways to prepare for cold snaps is to plant cold-tolerant varieties suited to North Florida’s climate. Vegetables like collards, kale, and carrots, or perennials like rosemary and garlic chives, can withstand mild freezes with little effort. If you’re growing fruit trees, look for varieties with proven cold tolerance or dwarf varieties that are easier to cover.
With a little planning and a few simple techniques, you can protect your garden from unexpected cold spells and keep it thriving through our chilliest nights.