by Matthew Orwat | Jun 9, 2022
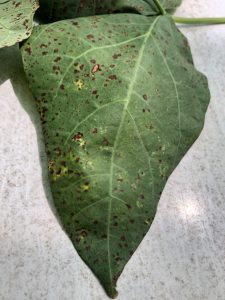
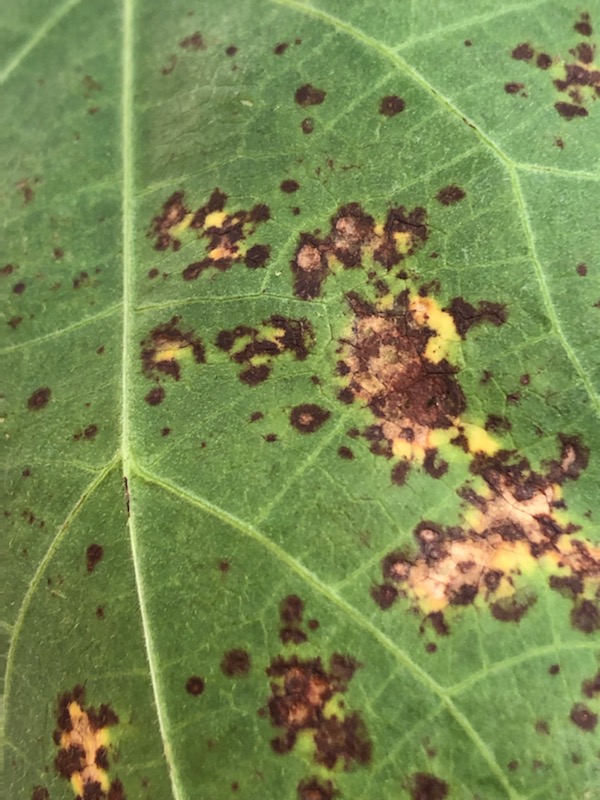
Snap Bean leaf with common bacterial spot – Image Credit Matthew Orwat, UF/IFAS Extension
As snap bean season is winding down and daytime temperatures regularly approach the lower 90s, common bacterial blight is making its presence known. In March or April, when snap bean plants are young and full of fresh growth, vegetable gardeners would never guess that their leafy plants could turn spotty and ugly during harvest time.
That is exactly what happens when daytime temperatures steadily remain in the mid-80s and low-90s, and nighttime temperatures are in the lower 70s. The perfect storm for this bacterial disease occurs when these temperatures combine with afternoon and evening showers, creating sticky, humid nights perfect for the proliferation of the causal agent, Xanthomonas campestris pv. Phaseoli.
Common bacterial blight begins showing up on older leaves first and then slowly spreads to younger growth and pods. If plants are left untreated, disease progression will continue if rainy nights and warm daytime temperatures continue. If weather conditions are consistently dry, daytime temperatures are above 90 and overhead irrigation is limited to mornings or eliminated, the blight will stop progressing to new growth. This disease may also be transmitted by insects.
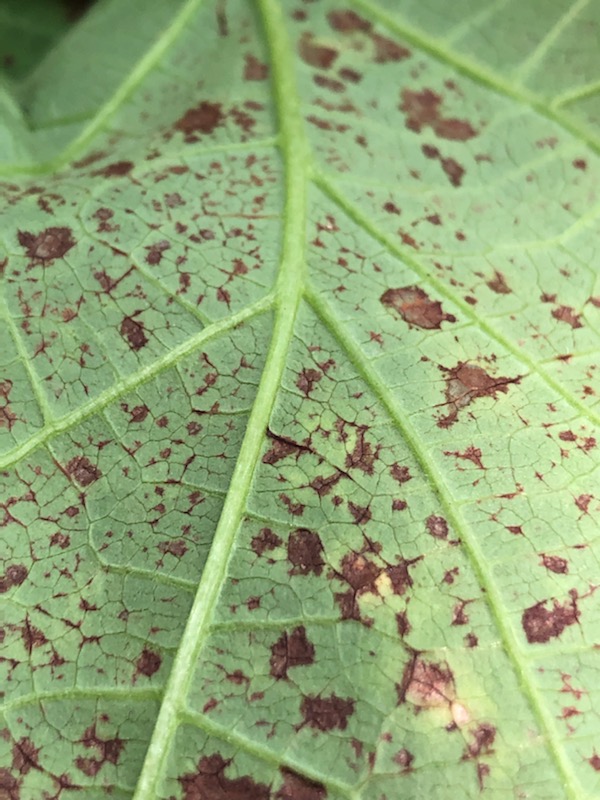
Note the brown, water-soaked spots on the underside of this leaf, typical of a bacterial infection – Image Credit Matthew Orwat, UF/IFAS Extension
If conditions favorable to common bacterial blight exist, preventative sprays of copper fungicide will work to

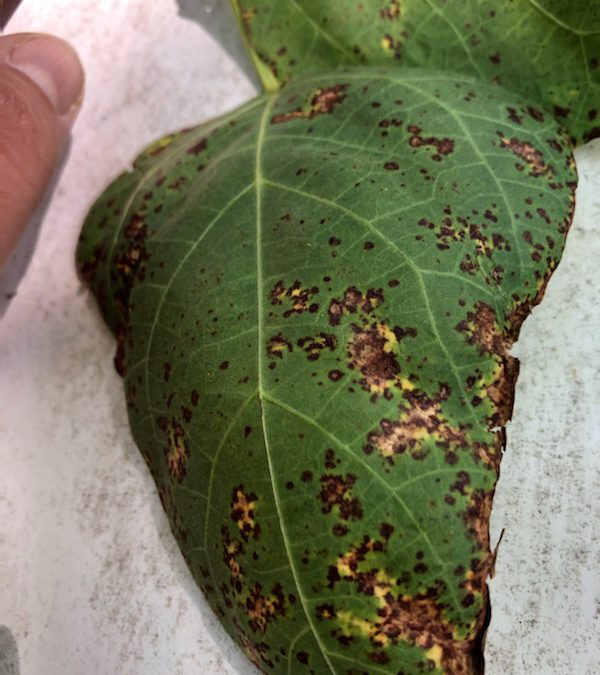
Snap Bean leaf with common bacterial spot – Closeup – Image Credit Matthew Orwat, UF/IFAS Extension
reduce infection and damage to crop, but there is no product to cure what has already been infected.
One of the best techniques available to manage common bacterial blight in beans is to rotate crops regularly so that legumes are not grown on the same ground year after year. This is easily accomplished in a diverse home garden with different raised beds or garden plots.
To learn more about common bacterial blight of bean follow these links to the NFREC Plant Pathology U-Scout page or read IFAS Extension PUBLICATION #PP-62
by Matthew Orwat | Mar 31, 2022
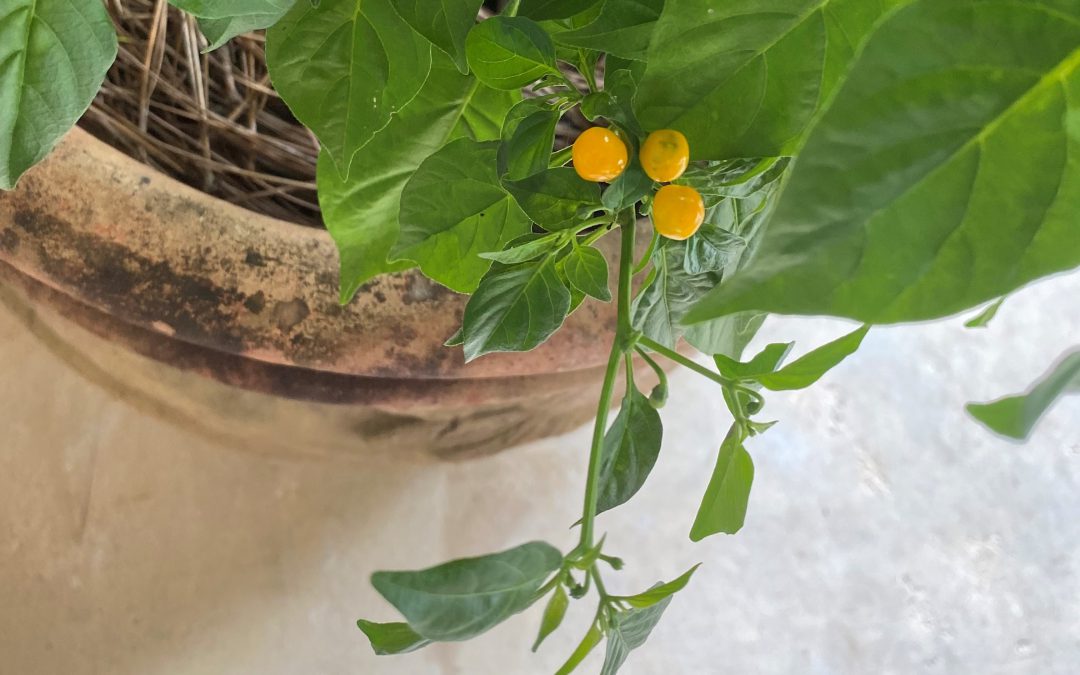
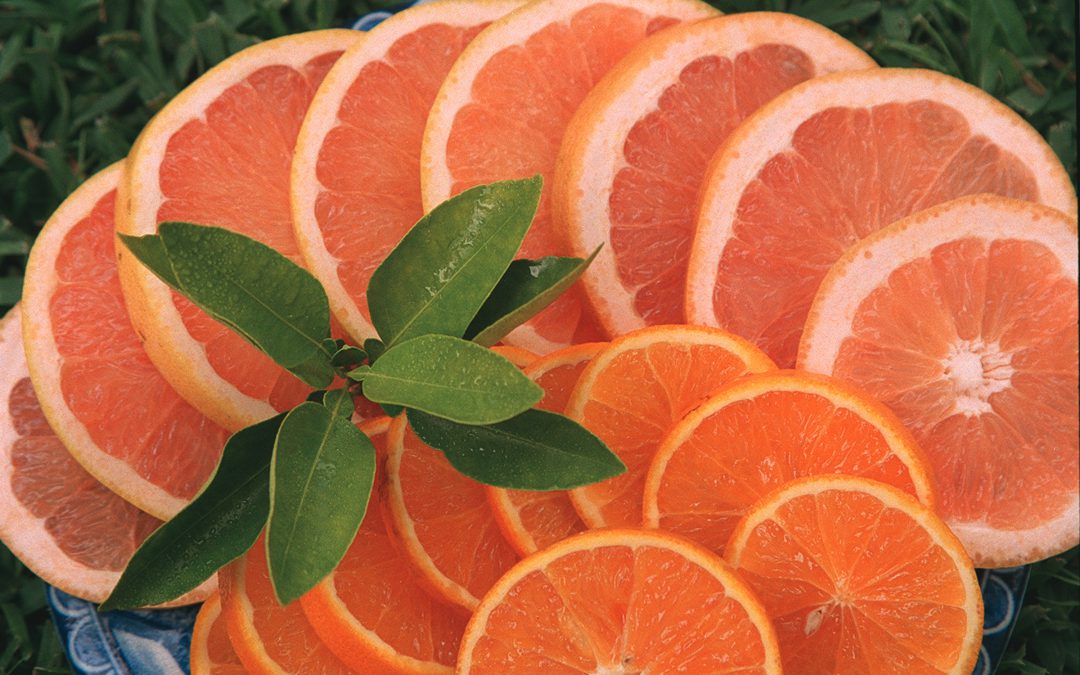
Fruit of the charapita pepper. Image Credit: Stephanie Gainer, UF / IFAS Extension Master Gardener Volunteer
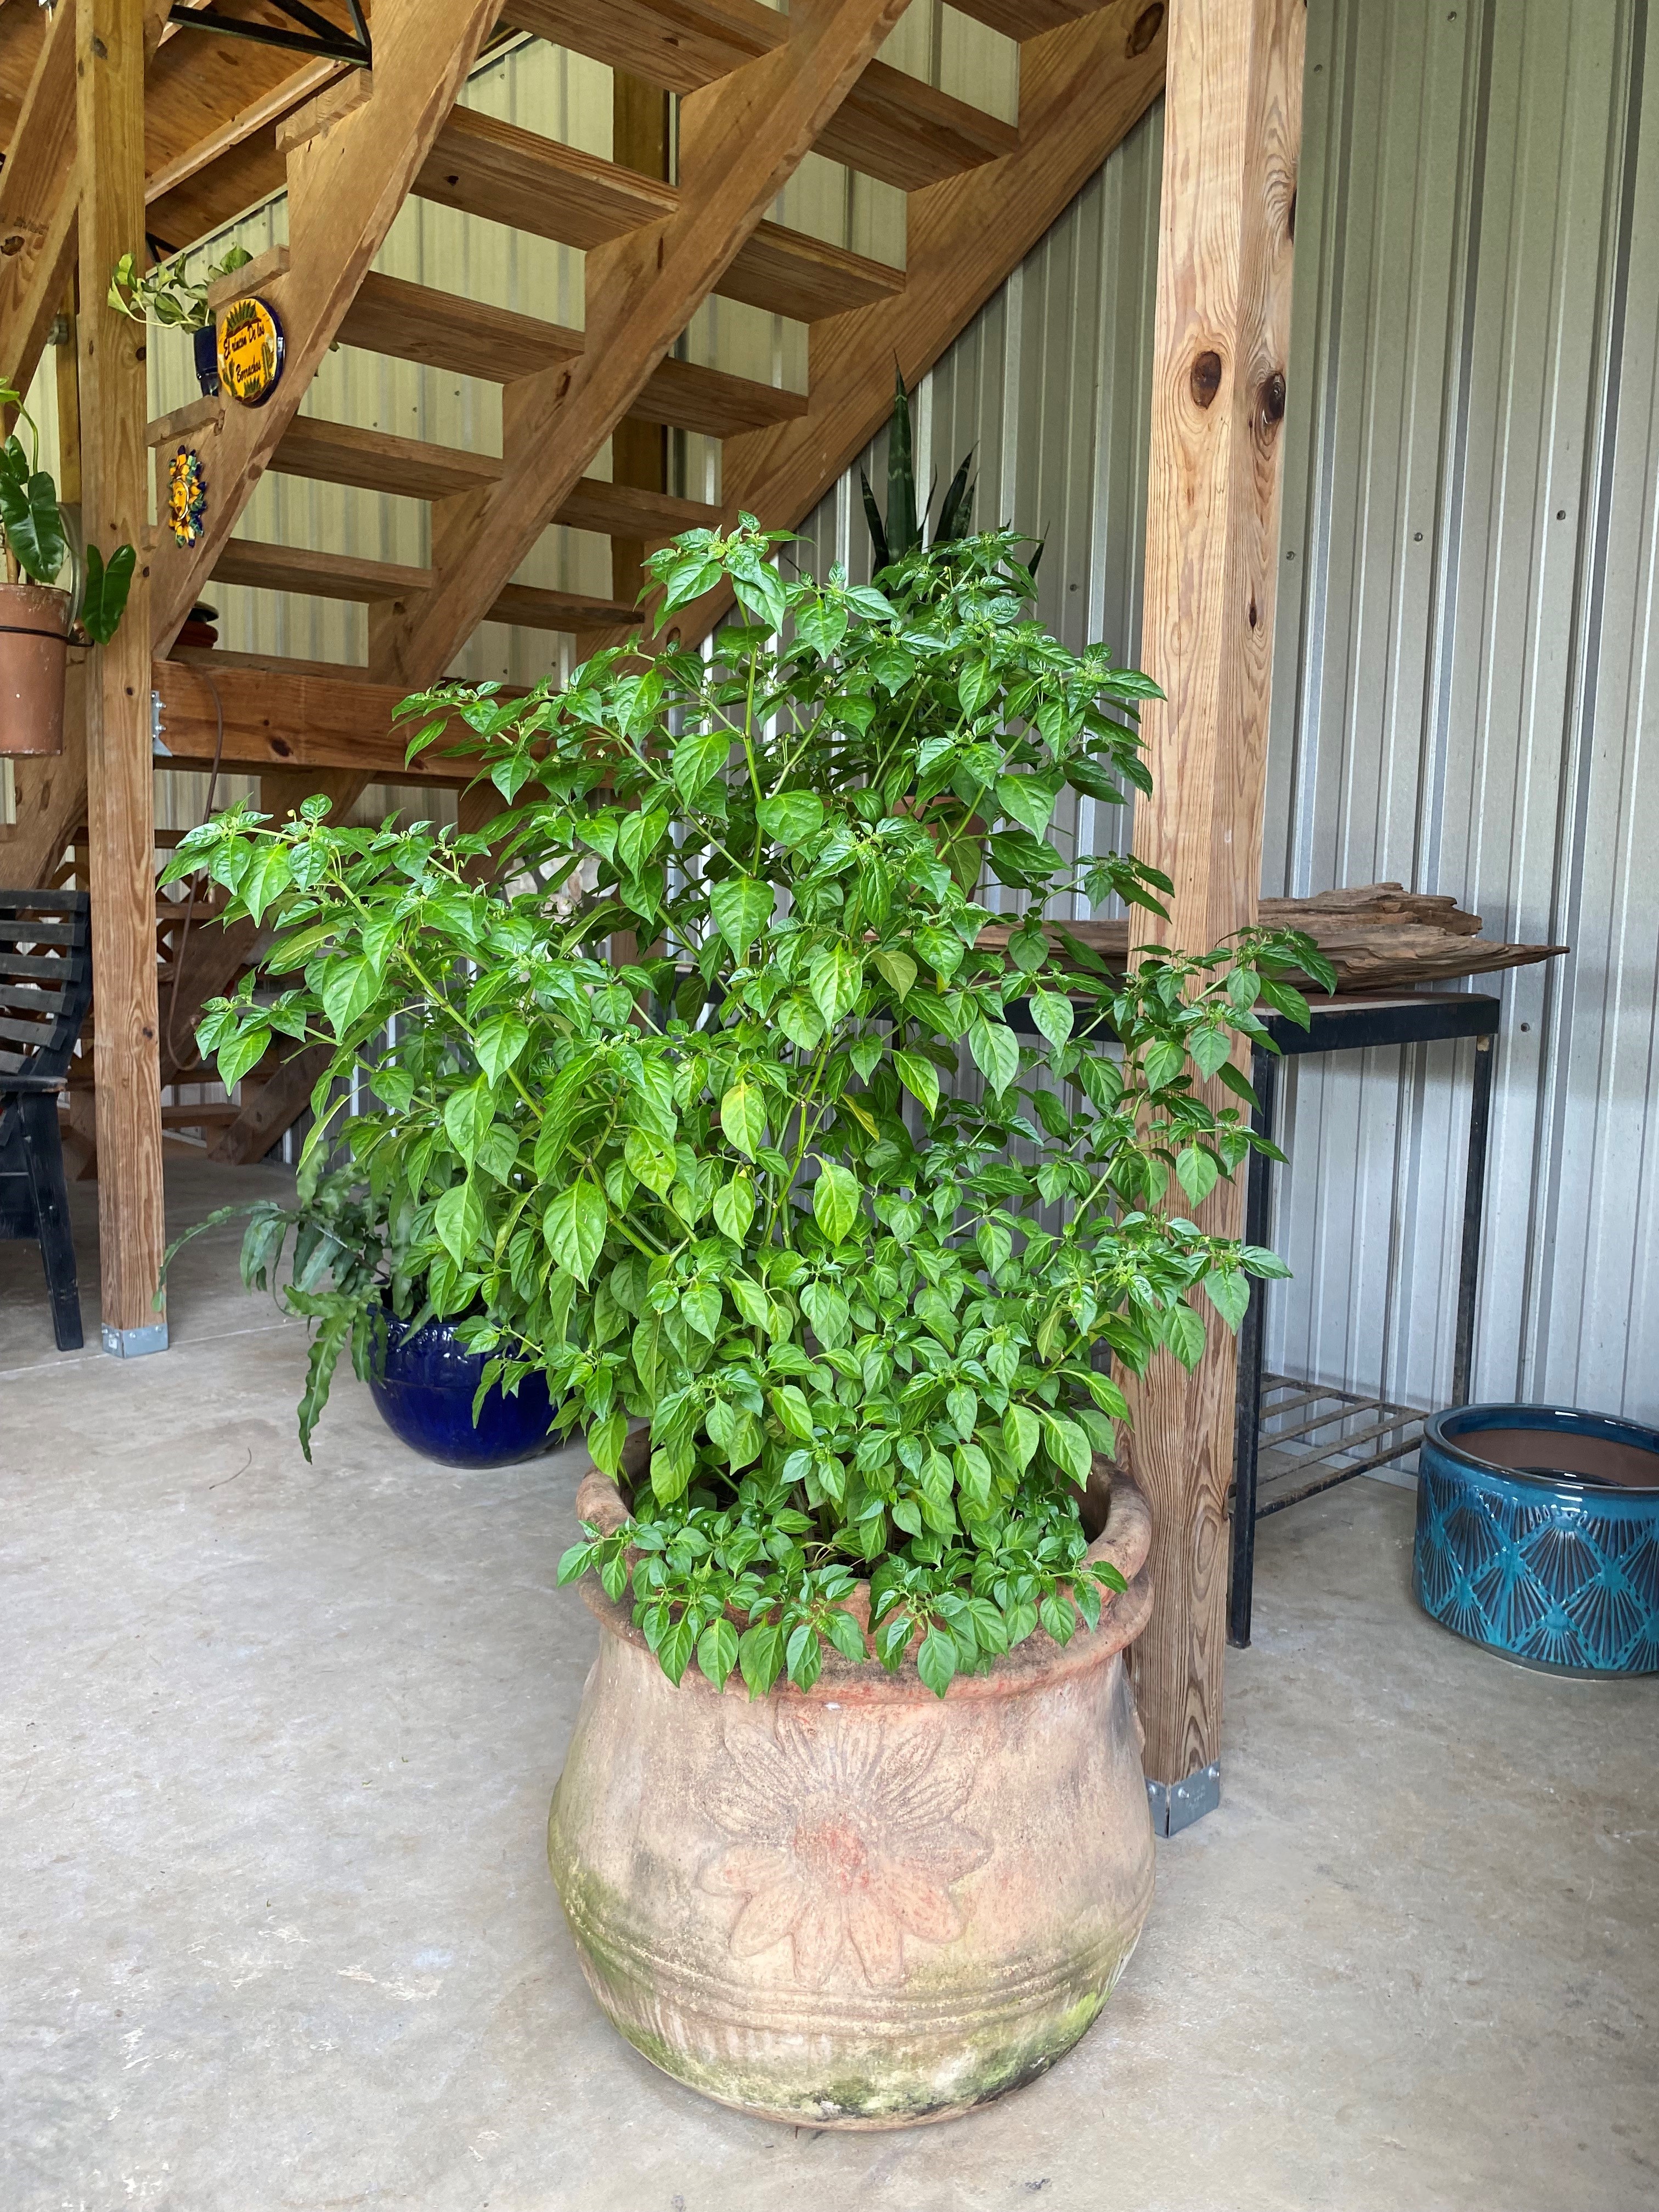
As spring has officially sprung, my mind has been turning to what delectable delights we may be able to grow this year in our Extension Demonstration Vegetable Garden. A few years ago, I was introduced to the very flavorful pepper, aji charapita (to be referred to as charapita) by one of my master gardener volunteers, Stephanie Gainer. When we met Stephanie and I discovered we both shared a love for spicy cuisine, so she introduced me to the charapita. I thought I had heard of all the peppers in cultivation, but when I heard this unusual flavorful pepper, I was astonished!
The charapita pepper is a small pea sized pepper that begins purplish brown and is a bright orange/yellow when ripe. It is a native of the Peruvian Amazon and holds the designation of being the most expensive pepper when sold by dry weight. Reasoning for this is two-fold, since it is very difficult to germinate, and the fruit is very small in size. They also require warm nights to fruit, so production is not suited for every climate. Also, we have found that they do best in the central Florida Panhandle when given afternoon shade after 6-8 hours of full sun in the morning. Aside from these requirements, cultivation is very similar to other hot peppers. As a compact plant, it is ideal for container culture.
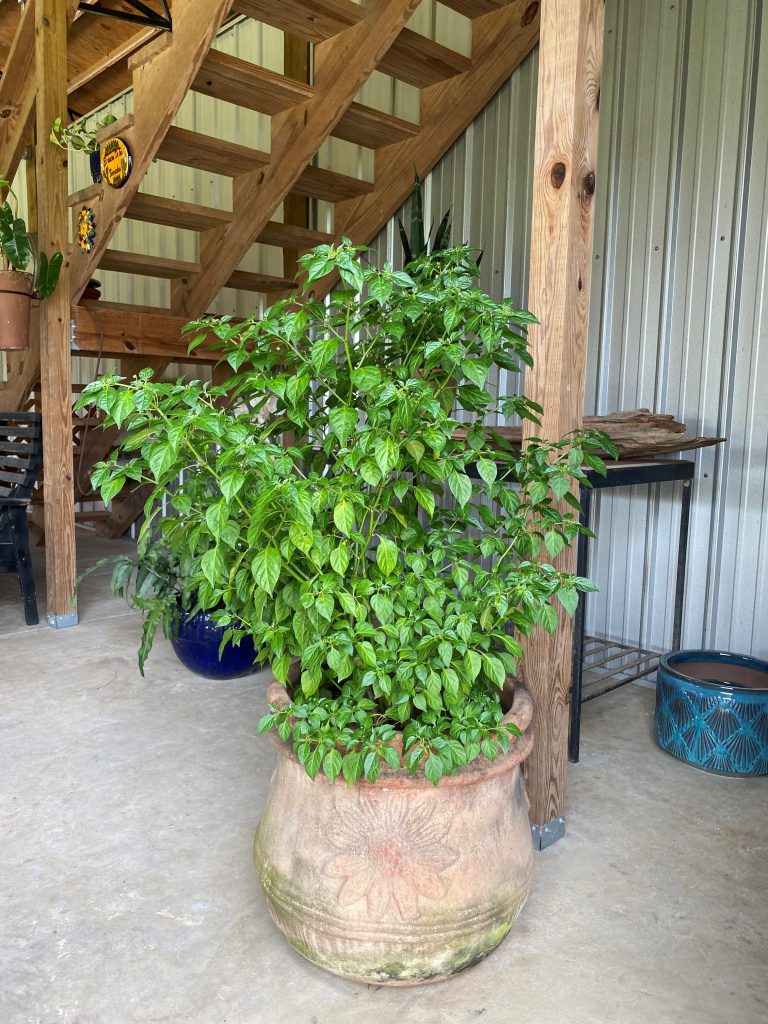
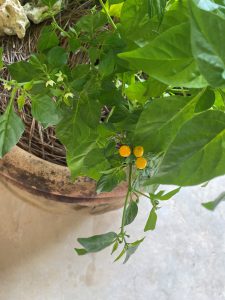
Large but compact charapita pepper plant in a container. Image Credit: Stephanie Gainer, UF / IFAS Master Gardener Volunteer
When germinating seed, it is recommended to grow them indoors, 8-12 weeks before the last frost date in your area, in a very sunny location with a heating pad at the base of the starting pots. Once temperatures are consistently above 50°F during the night it is ok to set them out in the garden.
As with other hot peppers, they should be fertilized with a standard vegetable fertilizer blend at planting and periodically thereafter based on the needs of the plant in ones individual garden.
Charapita has a unique citrus and tropical fruit aroma and taste, providing the usual heat associated with cayenne peppers (about 50,000 Scoville heat units). It is often used fresh in small amounts when flavoring rice and seafood dishes but is also used as a dried ingredient for chili and grilled meat preparations. Some have said it is best added at the end of cooking. Most likely, it would be an excellent addition added fresh to finely chopped salads, to spice up traditional chimichurri or in Pico de Gallo.
In the central Florida Panhandle, we have been unsuccessful at overwintering plants so far, but others by the coast or in central or south Florida might have more success.
For more information about growing peppers in your home garden, please follow this link for a Gardening Solutions publication on the topic.
An Extension colleague of mine, Gary Bachman of Mississippi State University, has penned this excellent article about specialty peppers with a great pickling recipe for charapita. Happy growing!
by Matthew Orwat | Feb 17, 2022
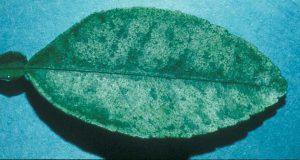
Citrus red mite leaf damage, red mites may overwinter, but are susceptible to control by dormant oil. Image UF / IFAS HS-806
During cold winter weather, one doesn’t often think about spraying fruit trees and ornamental shrubs for spring insects and diseases. It’s just not on the radar, but it turns out that January and February are the best time to apply dormant sprays to combat insect and disease issues. Many ask, “What are dormant sprays”?
Dormant sprays act on insects or disease pathogens differently. Many insects overwinter on trees and shrubs, either as eggs or immobilized in a protective shell (scale insects). Horticultural oils applied during cool dormant conditions work by smothering the eggs of some insect species or encapsulated scale insects. Since they cannot breathe, they die.
On the other hand, dormant sprays containing copper or sulfur actually kill latent fungal spores that are ready to infect the moment weather warms. They also burn tender young plant tissue, so can only be used when the plant is not actively growing. These preventative sprays can delay disease incidence in early spring and allow for reduction or elimination of regular fungicide applications. The old adage “an ounce of prevention is worth a pound of cure” surely applies to these situations.
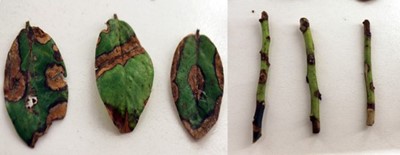
Phomopsis leaf and stem symptoms. Dormant fungicide sprays may lessen the severity of this disease.
Credit: N. Flor, UF/IFAS
There are several products on the market for dormant applications.
Dormant oil is a type of horticultural oil, made of refined petroleum products, for application on trees or shrubs when the trees are not actively growing. It has been in use for over 100 years. They are effective in the suppression of scale insects and mites. Care must be used to not apply them when daytime temperatures are above 75 degrees or night temperatures below 28 degrees. Other horticultural oils exist that may be applied during the growing season to control soft-bodied insects, but not during extremely hot weather. Many different brands exist, some are certified organic. They can be purchased at most garden centers, but the best selection is usually found at your independent nursery or farm store.

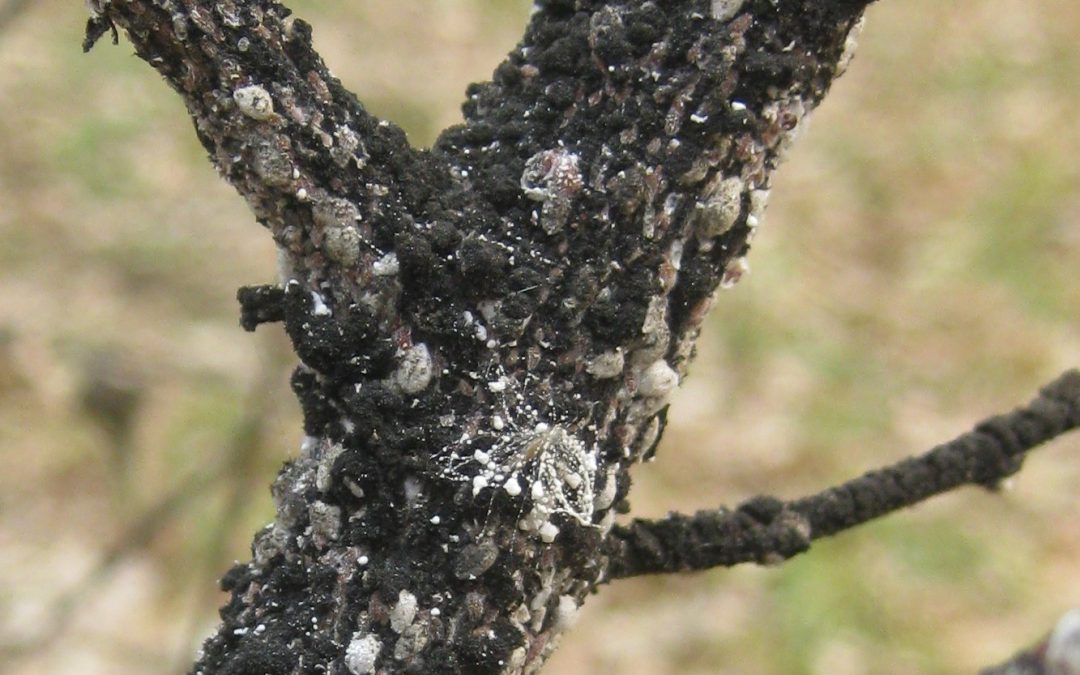
Cottony Cushion Scale, often controlled by Dormant Horticultural Oil. Image Credit, Matthew Orwat, UF / IFAS Extension
Dormant fungicides can be classified into two groups. Those that contain copper and those that contain sulfur. The most common preventative remedy for fungal disease had been lime-sulfur. It is no longer available in small home garden quantities due to shipping container restrictions, it can be purchased online in larger quantities for use in Florida. When applied to dormant plants, lime sulfur actually works by sanitizing the stem, killing all fungal spores. It cannot be used during the growing season since it burns leafy tissue. Caution must be taken when mixing and loading since, being an acidic product, can burn the skin. Wear chemical resistant gloves when applying (bought at your local hardware store for $4.00-$10.00), safety goggles and follow all label directions carefully since it is caustic and labeled DANGER. Also, never apply lime-sulfur within one month of horticultural oil applications. It should be applied in early to mid February, avoiding hard freezes for the 24 hours around application time. Sulfur based fungicide sprays may also be used instead of Lime-Sulfur as a dormant application.
Dormant copper sprays are effective on both bacterial and fungal pathogens and used primarily on fruit crops for the suppression of many fruit diseases including fire blight, bacterial leaf spot, powdery mildew, downey mildew and anthracnose. There are several different brands of copper fungicide preparations on the market, most nurseries and garden supply centers will have some in stock. Always read the label for proper personal protective equipment and dosage rates, to avoid copper buildup in the soil over time.
For more information, contact your local extension agent or consult these extension publications from: Disease Management Strategies, Florida Blueberry Disease Guide and Pest Control Using Horticultural Oils .
This article was originally published on January 2016, and has been modified to reflect current information.
by Matthew Orwat | Nov 22, 2021
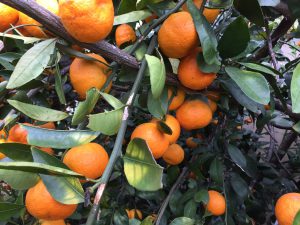
Citrus: Bearing Branches. Image Credit Matthew Orwat, UF/IFAS
Many dooryard fruit growers have asked me this Fall: When is the correct time to prune citrus? How do I prune Citrus right now? The answer may seem obvious, but when we delve into the question further, we find out that it is not.
Two different pruning strategies exist depending upon the citrus plants age. When training young citrus plants, it is essential to develop three to four main scaffold branches with wide crotch angles. This is done by selecting branches growing different directions that intersect with the trunk or each other at the widest angle possible. Other branches need to be pruned off and these need to be left alone to develop into the main scaffold. Once the branching system has been developed, traditional heading back, as seen in peaches and apples, is unnecessary.
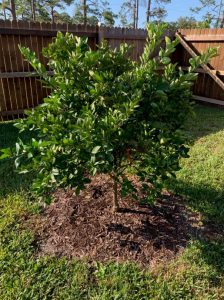
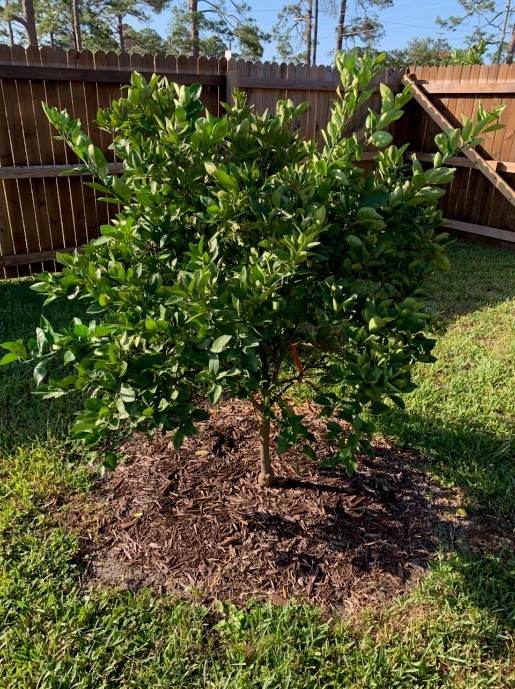
Young Citrus Tree with good vase shape
There are several instances in which pruning mature citrus trees is beneficial. First, branches should be pruned approximately one foot off the ground so developing fruit is not sitting on the ground. This also helps with weed control and fertilization. Next, it is important to remove growth that is positioned extremely upward or inward to promote an open, vase-shaped habit. Finally, it is necessary to remove any dead wood resulting from winter dieback.
Many growers are eager to remove branches that have been bent downward by heavy citrus crops. This is not necessary; they will bear well in subsequent years.
The last pruning item to consider is removal of suckers from below the rootstock. If the tree is grafted, this is necessary so that the rootstock does not overtake the scion cultivar. Trees propagated from seedage or cuttings will not need this type of pruning since root suckers will be true to type.
It has been noticed that when trees are not over pruned, they exhibit greater cold hardiness. Keeping that in mind, any pruning of citrus should be done at the beginning of March or later, not in the fall or early winter. With proper pruning practices, gardeners should expect healthy trees with bountiful harvests. For further information please consult the publications listed below or contact your local Extension office.
Citrus Culture in the Home Landscape
Cold Hardy Citrus for North Florida
Louisiana Home Citrus Production Manual
by Matthew Orwat | Oct 1, 2021
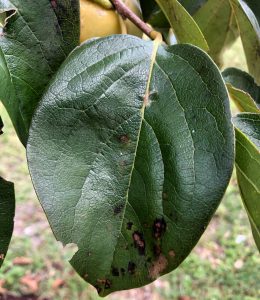
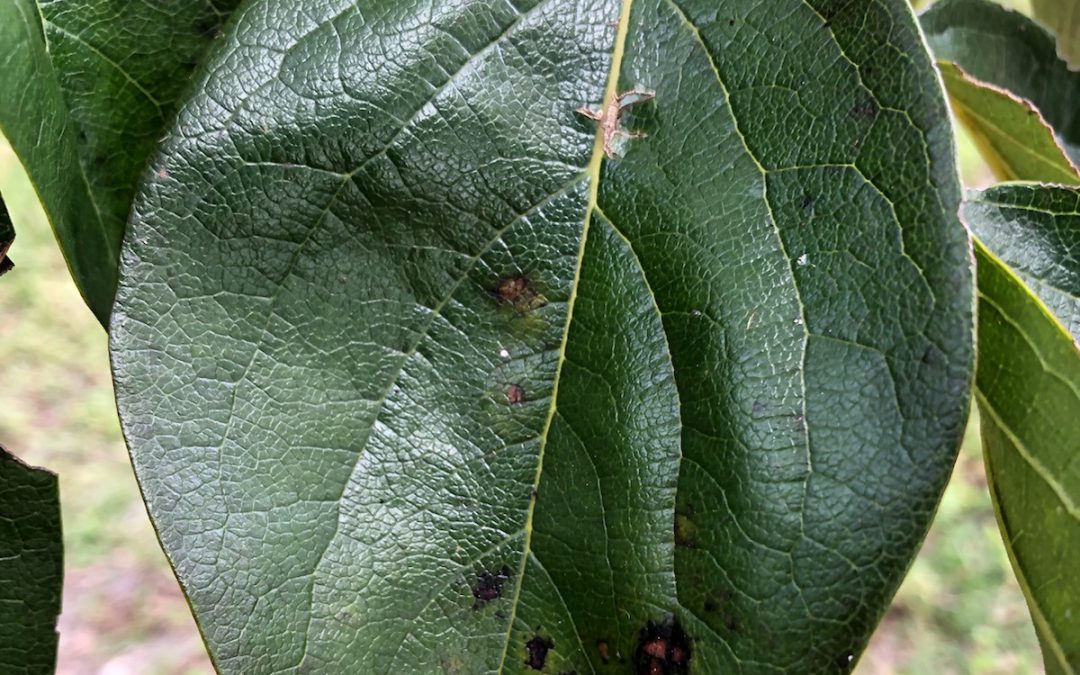
A spotted Japanese Persimmon leaf, Image Credit: Matthew Orwat
In gardening, brown or black spotted leaves are most often an indicator of disease problems or growth issues. This causes us to worry and seek answers as to why this is occurring. This is good since the first step in solving a plant growth or disease issue is diagnosis.
During Fall, the presence of brown or black spots on leaves of shade and fruit trees is usually not cause for alarm, as it might be in the spring or summer. Certain shade trees such as Southern Magnolia, Japanese Magnolia, various maple, persimmon and oak in the Red Oak group show substantial brown and black leaf spotting as Fall arrives. This is due to the fact that these leaves have been attacked by fungal pathogens and insects since Spring and resistance to damage has broken down over time. As Fall progresses, these leaves will senesce (purposeful deterioration due to age, such as at end of season) and fall to the ground. Therefore, this ugly spotting is part of natural seasonal leaf decomposition in deciduous trees.
Although Fall leaf spotting may not be something to worry about, oftentimes we run into plant problems that need quick diagnosis. Fortunately, your local Extension Office and the Plant Disease Diagnostic Clinic at NFREC exists for these situations. If you need help with plant problems, feel free to contact your local Extension Agent or Master Gardener Volunteer group and they will figure it out or send it along to the Diagnostic Clinic (small diagnostic fee if using NFREC clinic services).
If you happen to live in or near Washington County, we are launching our Second Mondays Free Plant Clinic. Staffed by knowledgeable and friendly UF / IFAS Master Gardener volunteers and your County Extension Agent, we will be available every second Monday of the month from 10am to 2pm at the Washington County Ag Center, which houses the UF / IFAS Extension Office. We will be located in the Master Gardener Volunteer Library which is just left of the central auditorium double doors. The launch date of this plant clinic is Monday, October 11th. See you then!