Some years it can be hard to tell that the season has shifted from winter to spring in Northwest Florida, but this year we are seeing ideal temperatures for summer vegetable gardens as we shift into April. Soil temperature is affected by ambient temperature and the last few weeks of warm weather has helped to make the ground more conducive to germination of warm season seeds and support growth of transplants. If you have not started your garden yet, do not despair, you still have time to get things growing!
Below is a short list of ideas for your vegetable garden, and you can find more detailed information in the Florida Vegetable Gardening Guide.
Direct seed (plant seeds directly into the garden instead of transplant) recommendations:
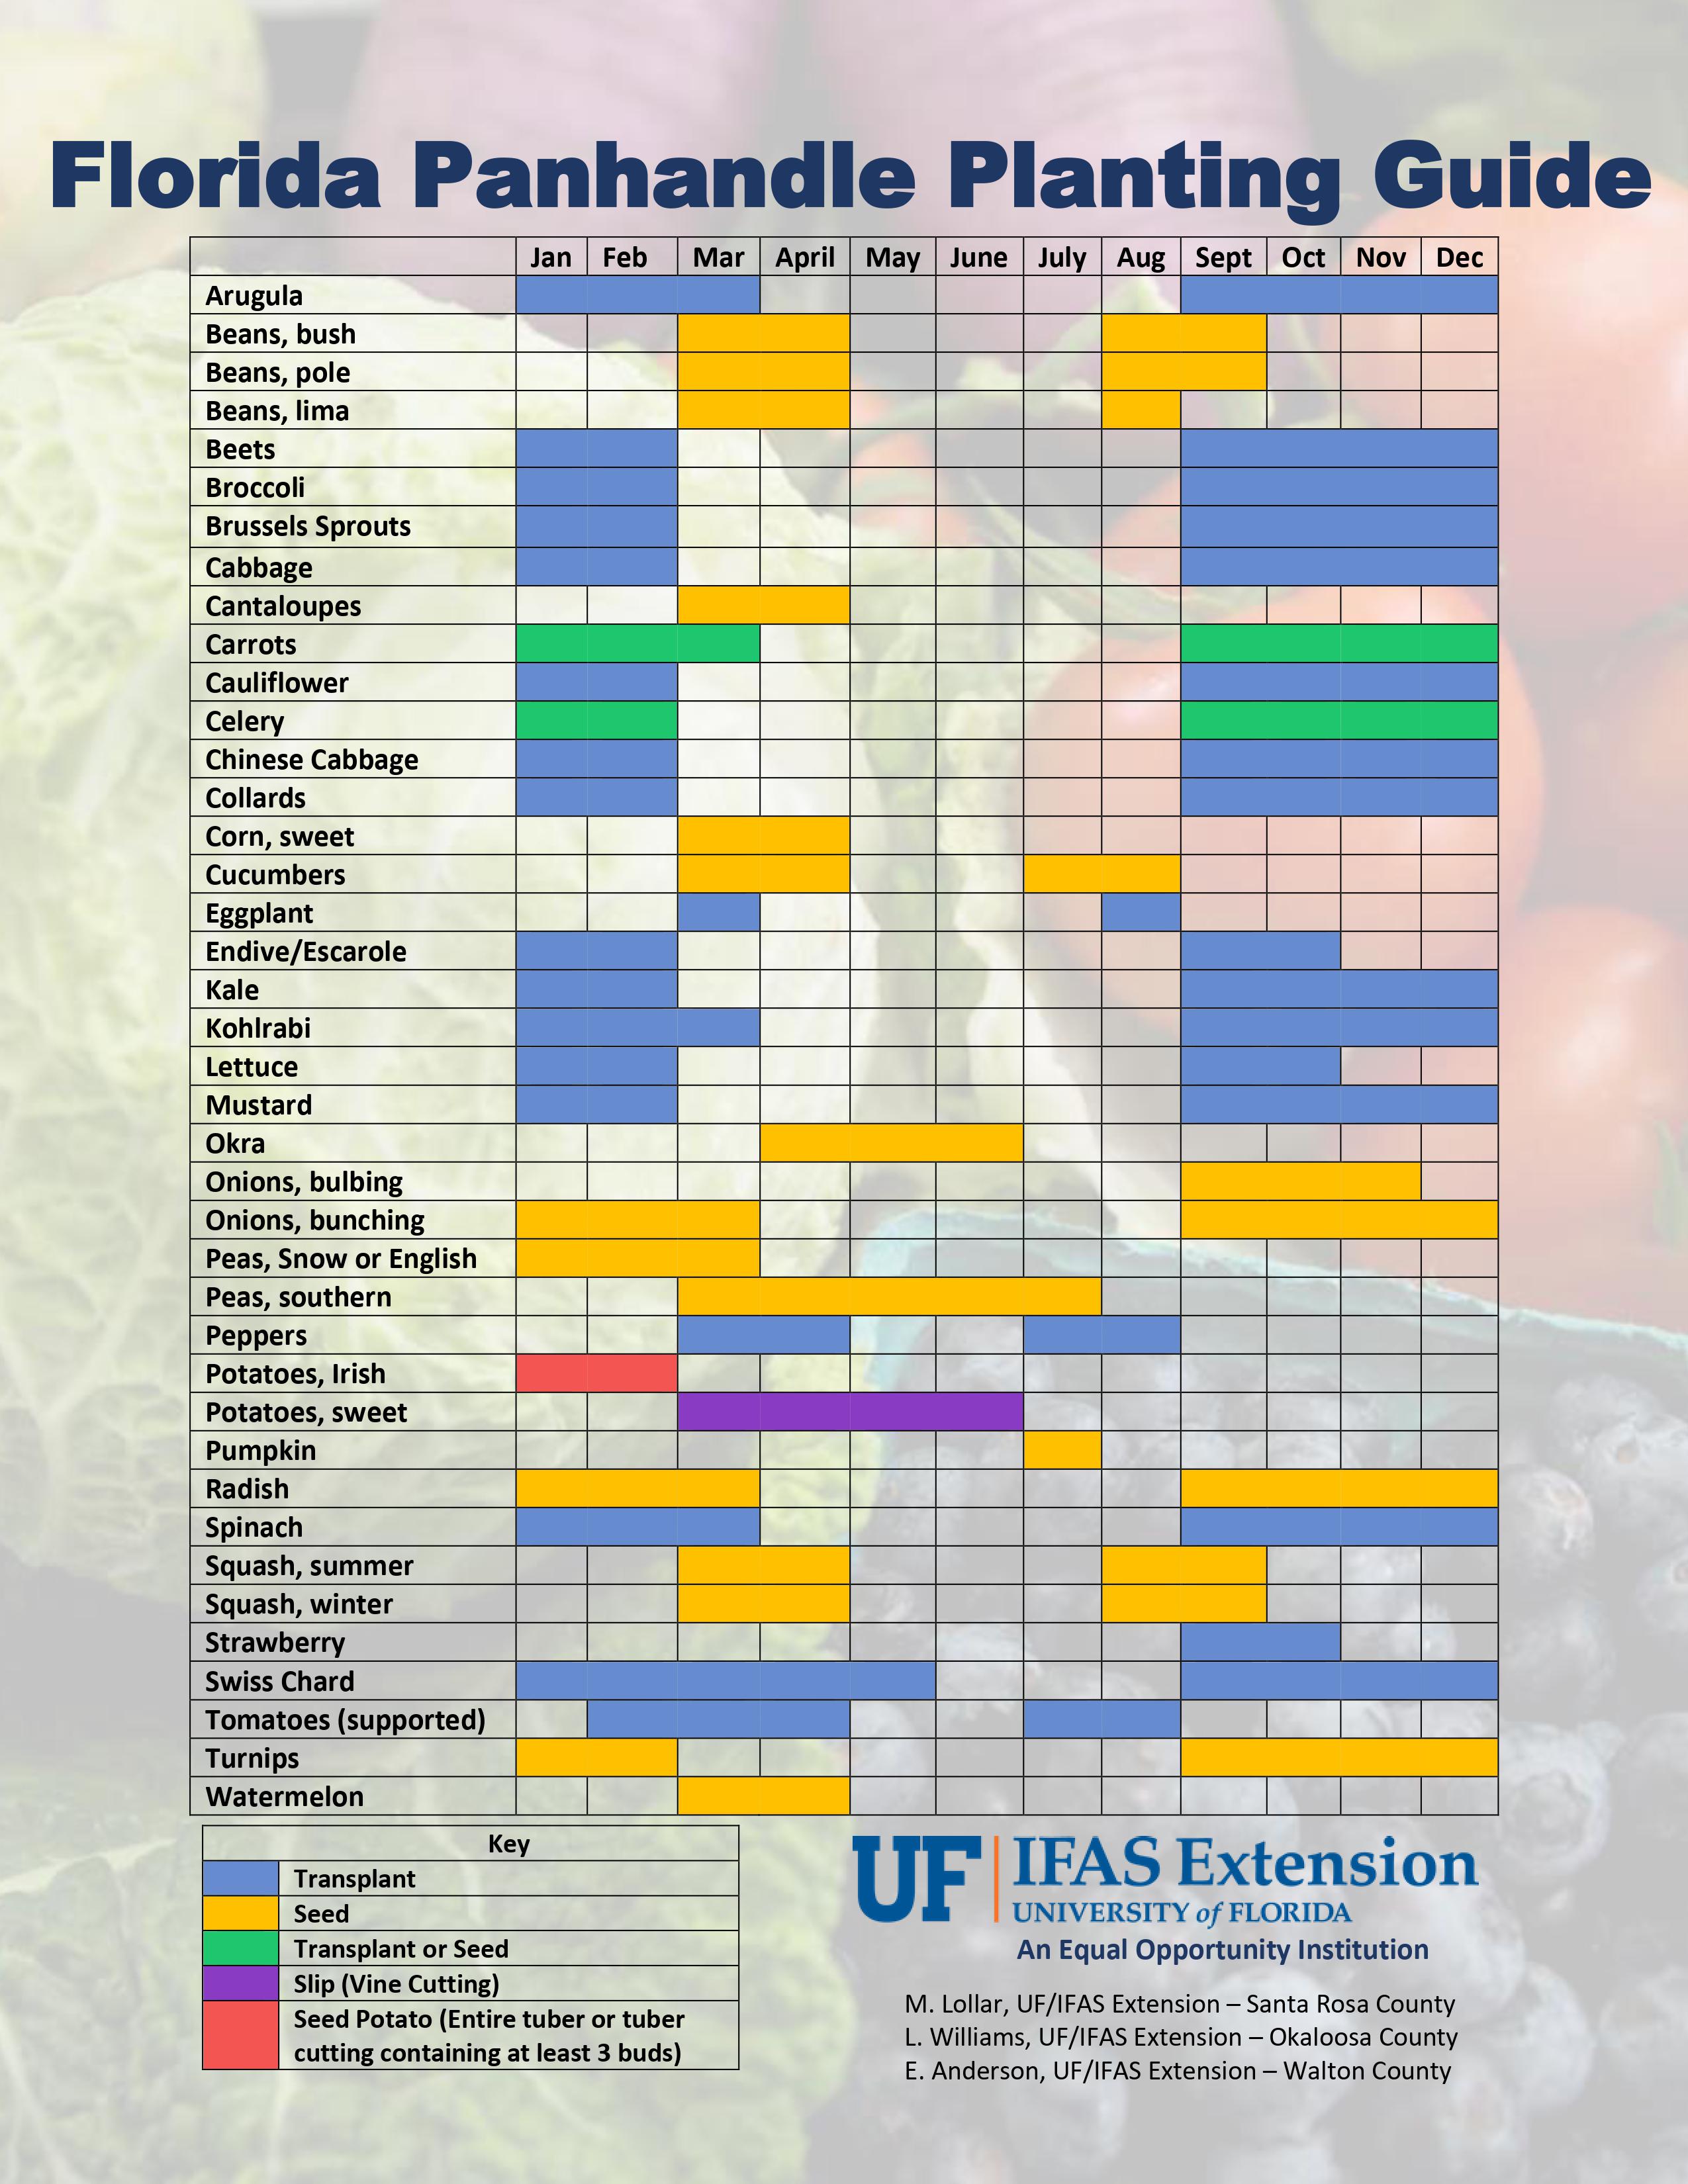
It’s a new year and if you’re still contemplating resolutions, here’s one for you. Stay organized with your vegetable planting schedule. Since it’s January, let’s start with what you can do now. Crops like beets, broccoli, and Brussels are best planted as transplants in January. But carrots and celery can be started from seed and potatoes can be planted as seed potatoes, which are usually pieces of potato tubers containing at least 3 buds (eyes). January is also a good time to start transplants indoors for the spring garden. Tomato and pepper transplants can be planted in the garden as early as February or March depending on the year. If all this planting talk is overwhelming, then at least consider collecting and mailing off a soil sample for nutrient analysis. More information on soil testing can be found on askIFAS. This will give you a head start on adjusting pH with lime and improving soil health with compost and other organic materials. To help plan this “Year of the Vegetable Garden” please click below to enlarge the image of the handy “Florida Panhandle Planting Guide”.
Tomatoes rank high among the favorites for home gardeners, cherished for their versatility and flavor. Whether planted in traditional garden beds, confined to containers, nurtured in hydroponic setups, or suspended in hanging baskets, tomatoes thrive in the Florida Panhandle given the right care and understanding of essential growing principles. With a bit of advice and a dash of perseverance, achieving a beautiful harvest of delicious tomatoes is not only fun but also fulfilling. Check out these tips for successfully growing tomatoes in your home garden.
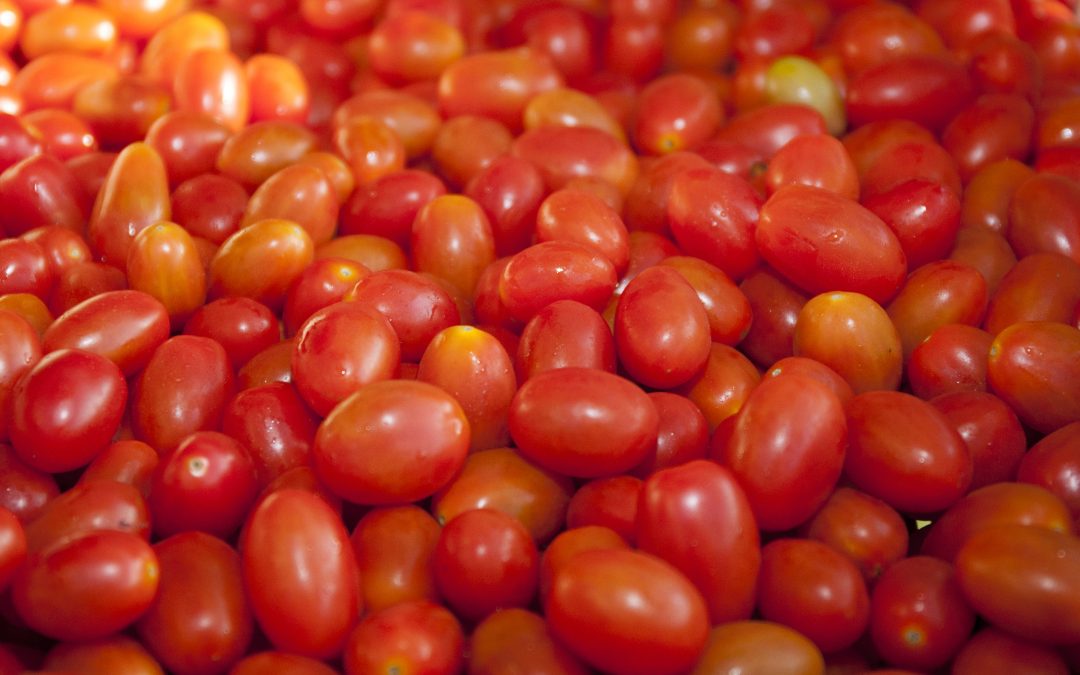
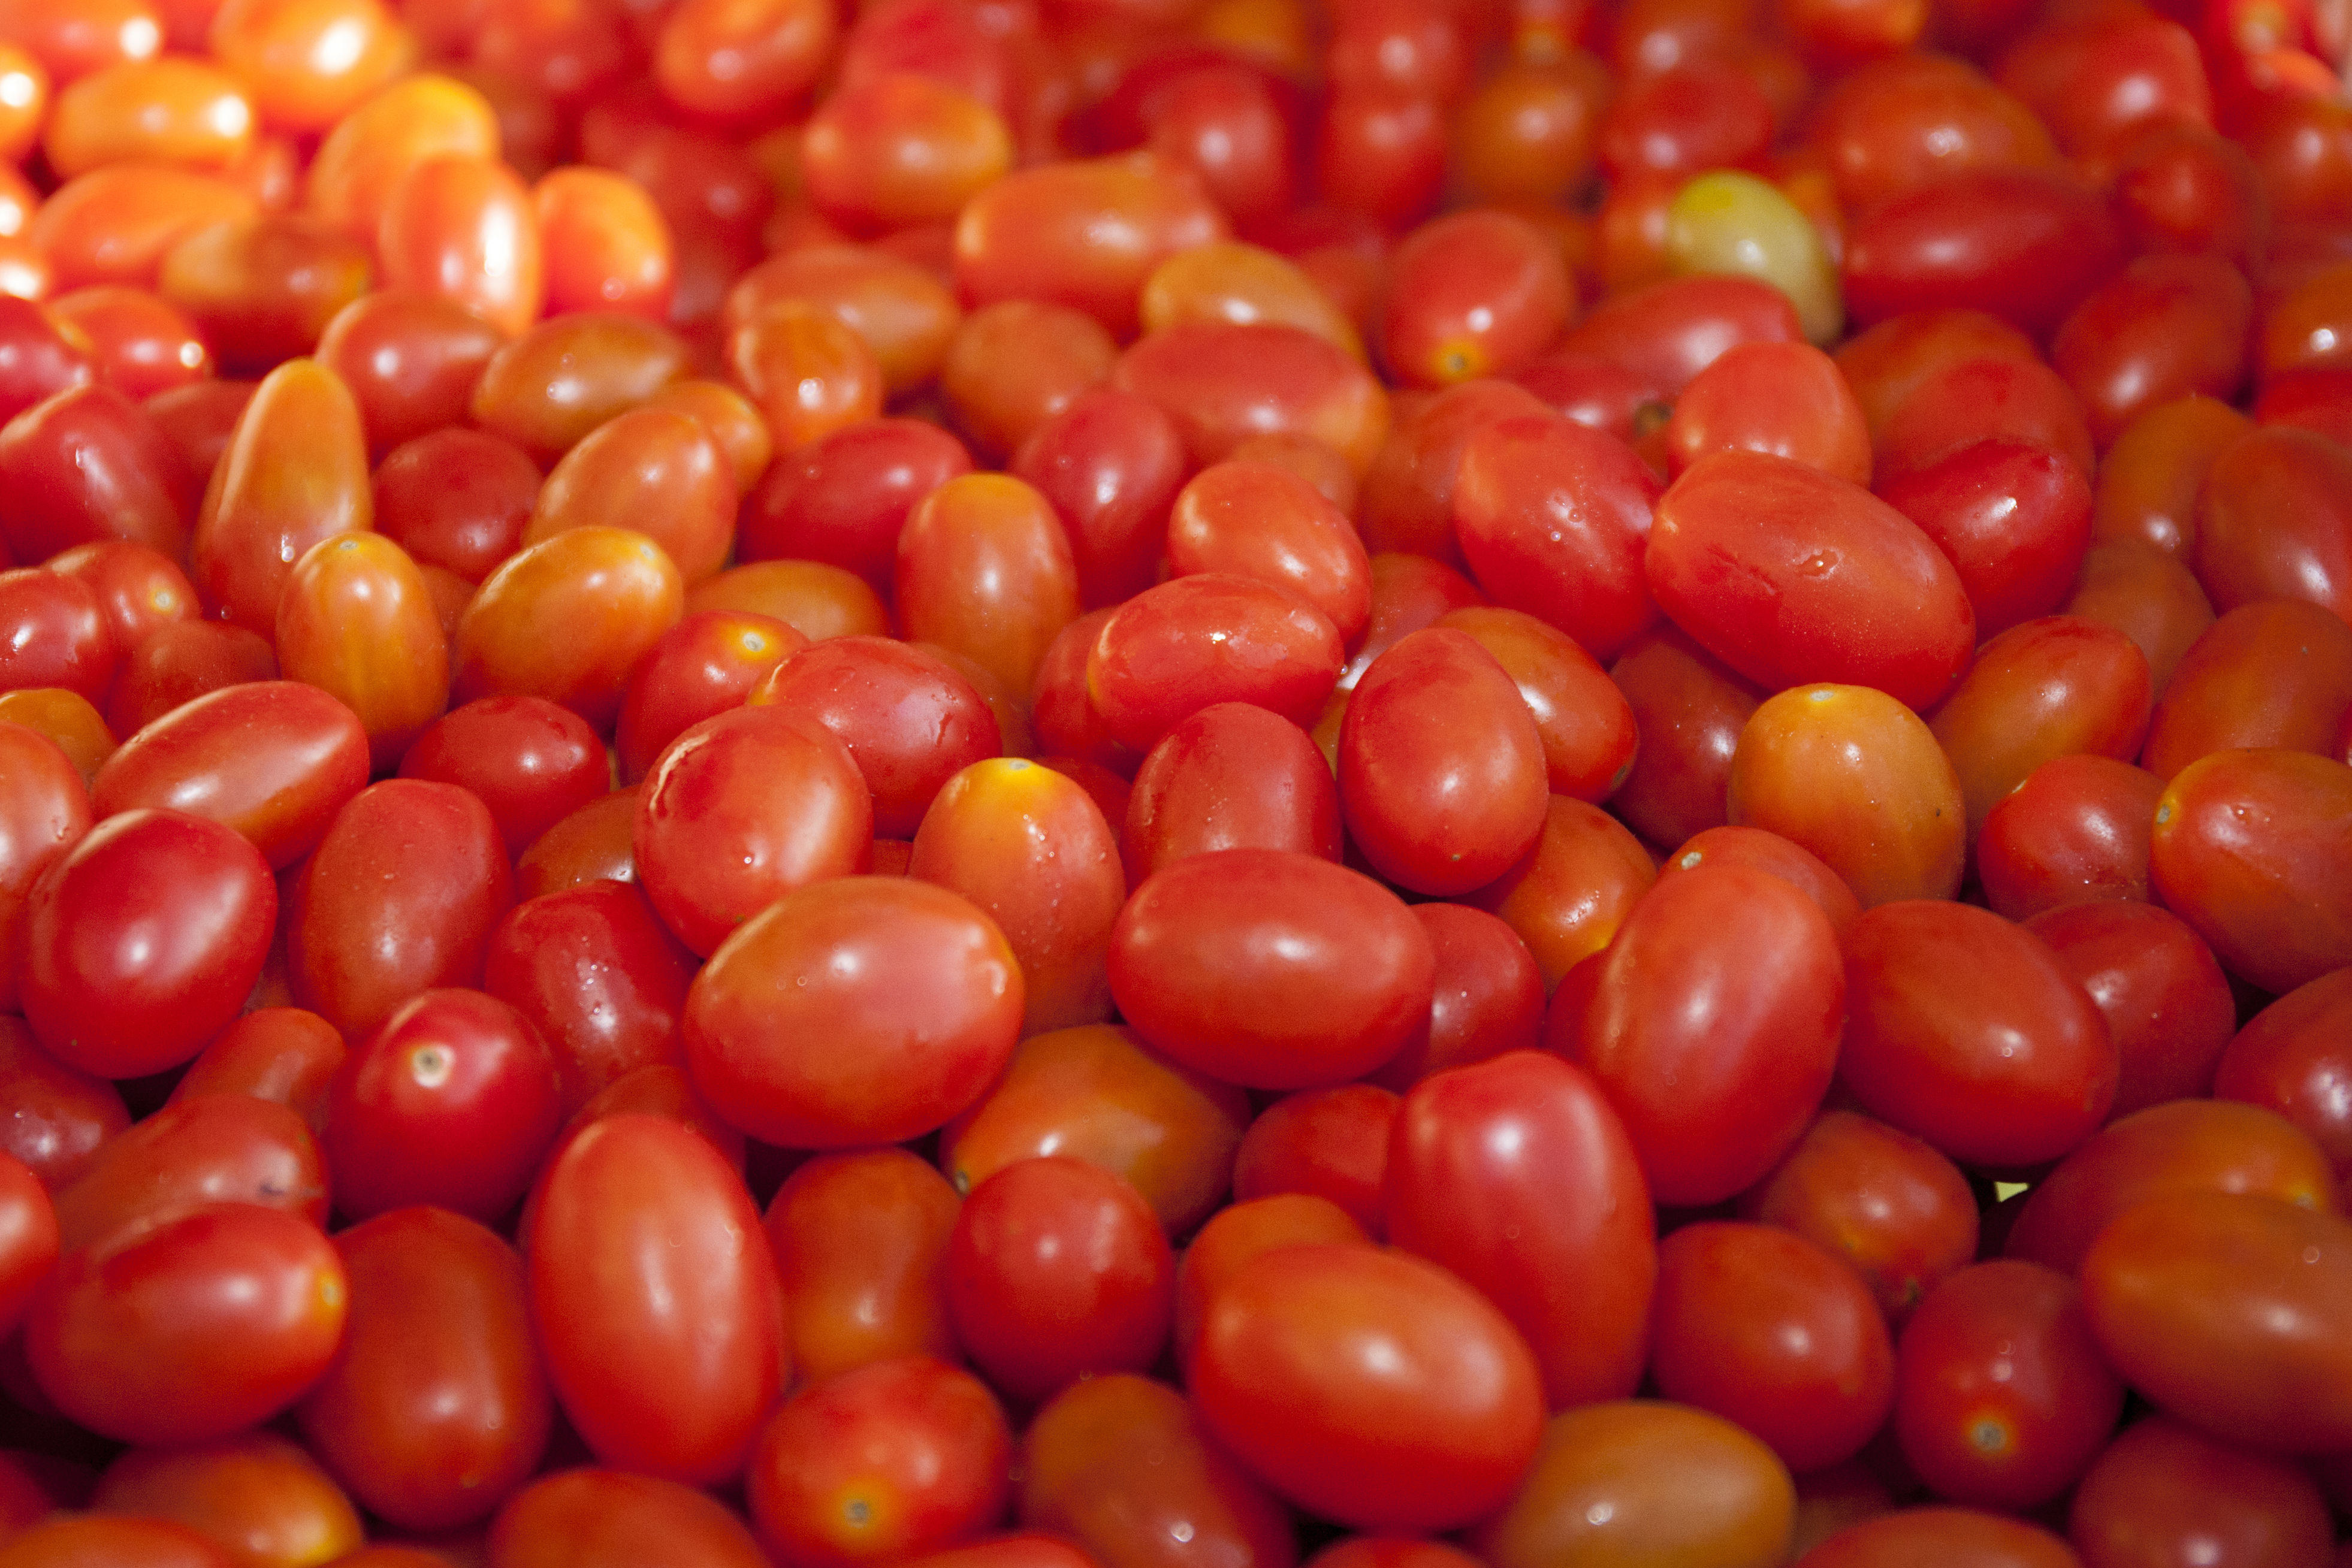
A bin of cherry tomatoes UF/IFAS Photo by Amy Stuart
PERFECT TIMING In the Panhandle, we’re fortunate because we can start planting tomatoes earlier than many other places. But because tomatoes thrive in warm weather, it’s important to wait until the risk of frost is gone before putting them outside. If you’re eager to begin, you can start growing tomato seedlings indoors. Once the weather warms up, you can move these seedlings outside. Another option is to plant tomatoes in lightweight containers. This makes it easy to protect them if there’s a late frost or freeze by moving them to a safer spot. However, don’t delay planting your tomatoes for too long! They need time to grow and produce fruit before the summer heat sets in. Once nighttime temperatures stay above about 80 degrees consistently, larger tomatoes might stop growing fruit. But smaller types like cherry and grape tomatoes usually do just fine.
DETERMINATE OR INDETERMINATE Some tomatoes, called determinate or “bush” types, grow to a specific size and don’t need pruning. Their fruits all ripen together within 1-3 weeks, which is great for container gardening and canning. Then there are indeterminate or “vine” tomatoes, which keep growing and producing fruit all season long. These kinds need support like stakes and some pruning to keep them neat and tidy in the garden.
RIGHT PLANT, RIGHT PLACE Tomatoes are sun-lovers, needing about four to six hours of sunlight every day. So, when planting them, choose a sunny spot in your yard. Before planting, consider getting your soil tested by your local Extension office. You’re aiming for a soil pH between 6.2 to 6.5, which is ideal for tomatoes. Also, enrich your soil with organic materials like composted manure. When planting your tomatoes, it’s helpful to bury them slightly deeper than they were in their original pots. This encourages better root growth.
TOP TOMATO VARIETIES FOR THRIVING IN NORTH FLORIDA’S CLIMATE Florida’s warm and sometimes damp weather can cause problems with insects and diseases that harm tomatoes. To avoid these issues, it’s smart to pick tomato types that can resist common diseases such as verticillium wilt and fusarium wilt, as well as pests like nematodes. Check the seed package for information about resistance. For this region, some good choices are the ‘Better Boy’ and ‘Celebrity’ varieties. If you prefer heirloom tomatoes, think about trying ‘Cherokee Purple’ and ‘Green Zebra’.
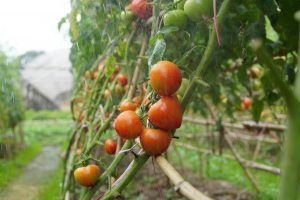
Tomatoes are better able to resist disease and dry off quickly after rain showers when they are trellised. Photo credit Anh Ngo Hoang (Pixabay)
PROVIDE SUPPORT For tomatoes that keep growing, like indeterminate ones, people often use wire cages, stakes, or trellis systems to support them. It’s a good idea to put these supports in place either right before planting or shortly after, so you don’t mess up the plant’s roots. As the tomato plants get bigger, you can use clips or ties to attach them to the support. Another way is to put stakes between each plant in a row and weave string through them to help support the plants as they grow taller.
FEEDING THE PLANT & TAILORING FERTILIZATION Just like people need food to grow, tomatoes also need specific nutrients to thrive. Using a fertilizer with a ratio like 6-8-8 or something similar will provide these essential nutrients for your plants. You can choose between a liquid fertilizer mix or granular fertilizer. It’s important to fertilize when you plant your tomatoes and continue to do so regularly during the growing season to keep them healthy and strong.
DROPLETS OF SUCCESS Pick a location for your garden that’s near a water source, like a hose or watering can. Drip irrigation is a good choice because it gives the right amount of water and helps keep leaves dry to prevent diseases. Make sure watering your plants is convenient for you. Aim to water your garden with about 1-2 inches of water each week to keep your tomatoes healthy.
Tomatoes growing on a vine. Photo taken 05-20-21
Successfully growing tomatoes requires attention to detail and consistent care. Ultimately, providing your tomatoes with the proper care such as adequate water, sunlight, and nutrients, is essential for their health and productivity. With these practices in mind, you can look forward to a harvest of delicious tomatoes from your Panhandle garden. For more information about growing tomatoes in the Florida Panhandle, contact your local County Extension Office.
Looking for a mid-season vegetable to plant in your garden? Look no further, Chinese cabbage is a great option. This cabbage matures quickly and is ideal for growing in winter’s shorter days and cooler temperatures.
Figure: Bok Choy Harvested & Prepared in a dish. Credit: Jieli Qiao, Guiyang, Guizhou, China
Growing Asian vegetable crops in Florida has become an increasing trend over the last decade, mostly due to health benefits and profitability by producers. However, the crop is new to many, who are interested in growing and consuming these vegetables. There are two sub-species of Chinese cabbage. The Pe-Tsai group are the broad leaved, compact heading varieties. The head may be six inches across and either round or cylindrical, in shape. The second group is known as Bok Choy (figure). These are non-heading Chinese cabbage varieties that have several thick, white leaf stalks, and smooth glossy, dark green leaf blades clustered together, similar to the way celery grows.
Again, cooler temperatures are key. Warm temps cause the plant to uptake more calcium, making the heads soft and bitter and may contribute to early seed development through bolting. Chinese cabbage matures in around forty to seventy-five days from planting, depending on variety. There’s no specific requirements to growing this cabbage in Florida, just follow the same soil preparation, liming, fertilization, and cultivation practices that you would use for other leafy vegetable garden crops. The main pests and diseases that occur are leaf blight, downy mildew, aphids, and cabbage caterpillars. Leaf blight and downy mildew usually occur in warmer times of the year, with higher temperatures and rain.
Chinese cabbage is very versatile. It’s great in salads, stir fry, pickled and even as a replacement for lettuce on your favorite sandwich. Enjoy!
Information for this article can be found at the UF/IFAS EDIS Publication, “Bok Choy, an Asian Leafy Green Vegetable Emerging in Florida”: http://edis.ifas.ufl.edu/hs1337 & “Cabbage, Chinese – Brassica Campestris L. (Pekinensis Group)”: http://edis.ifas.ufl.edu/mv036.
UF/IFAS Extension is an Equal Opportunity Institution.
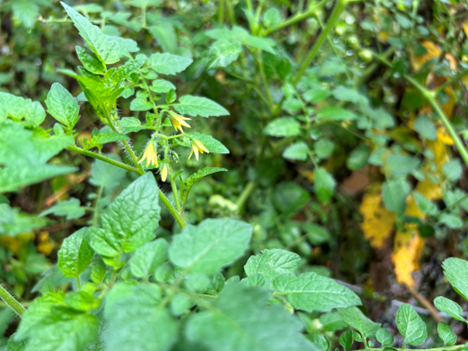
For me, tomatoes are the most difficult (and expensive) vegetable to grow. I even try to discourage people from growing tomatoes in Florida. Tomatoes are susceptible to damage from a plethora of diseases and insect pests AND they require a lot of maintenance and fertilizer. However, I now have a tomato variety I can recommend – The Everglades Tomato.
The Everglades tomato (Solanum pimpinellifolium) is a different species than the traditional tomato (Solanum lycopersicum). Other names for this tomato are the wild tomato or currant tomato. The plant produces an abundance of small tomatoes (about 1/2 inch diameter) with thin skin. Unlike most tomatoes, Everglades tomatoes keep producing throughout the heat of summer. They are even tolerant of brackish water and salt winds.
Everglades tomatoes should be cared for like any other indeterminate (vining type) tomato. Like most gardeners, I like to plant tomatoes a little deeper (two inches or so) than they were planted in the tray/pot. This allows for more adventitious roots to develop from the buried portions of the stems. I also like to trellis these plants with tall stakes and twine or some other support to improve air circulation. However, I have read that Everglades tomatoes grow just fine rambling on the ground. Make sure to give them a little more space than other tomatoes regardless if you stake them or not. Fertilize and irrigate just the same as you would for other tomatoes.
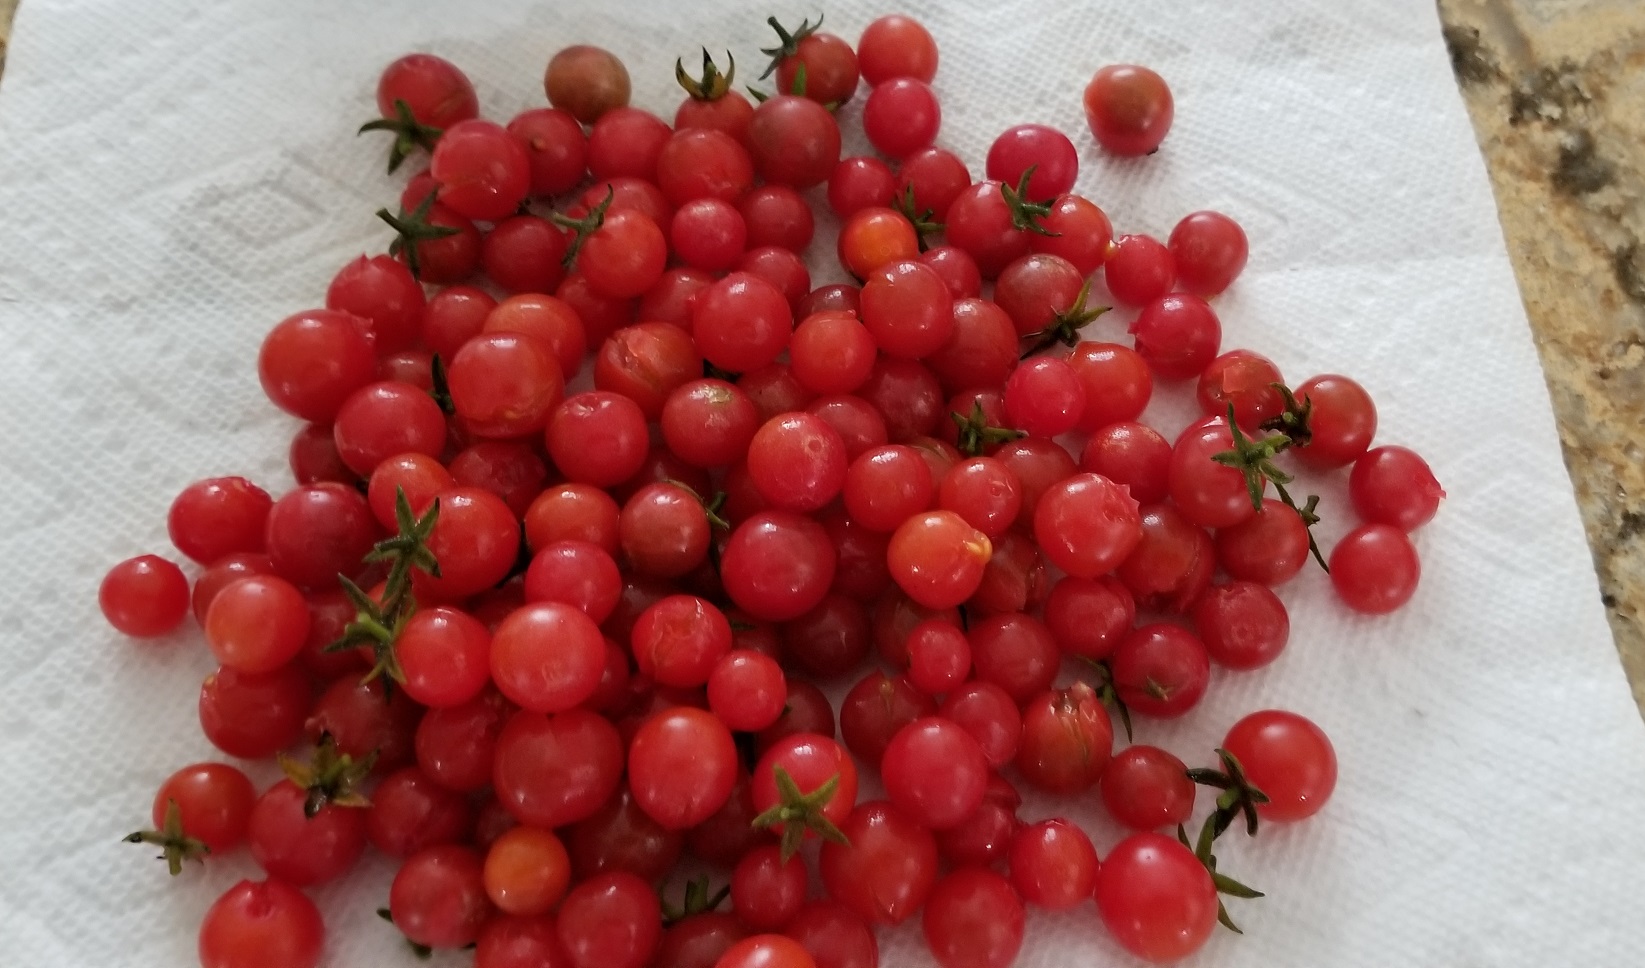
A bountiful harvest of Everglades tomatoes. Photo Credit: Connie Gladding, Master Gardener Volunteer, University of Florida/IFAS Extension – Clay County
Of course, just like any plant, Everglades tomatoes aren’t perfect. Their small size makes harvesting a little more labor intensive and their thin skin is easily torn. But I’m able to look past these faults because of their excellent flavor. I’ve also noticed Everglades tomatoes are not immune to caterpillar/moth pests. Fortunately the caterpillars only seem to feed on the leaves, because the tomatoes are so small.
Whether you’re a chef or just want a sweet snack, you should give Everglades tomatoes a try. Just search the internet for seed sources or ask a friend for a cutting.