by Donna Arnold | Jan 22, 2026
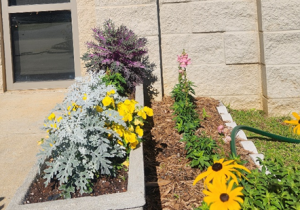
Photo Credit: Donna Arnold. FAMU Extension
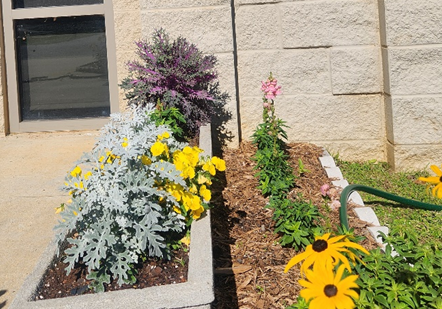
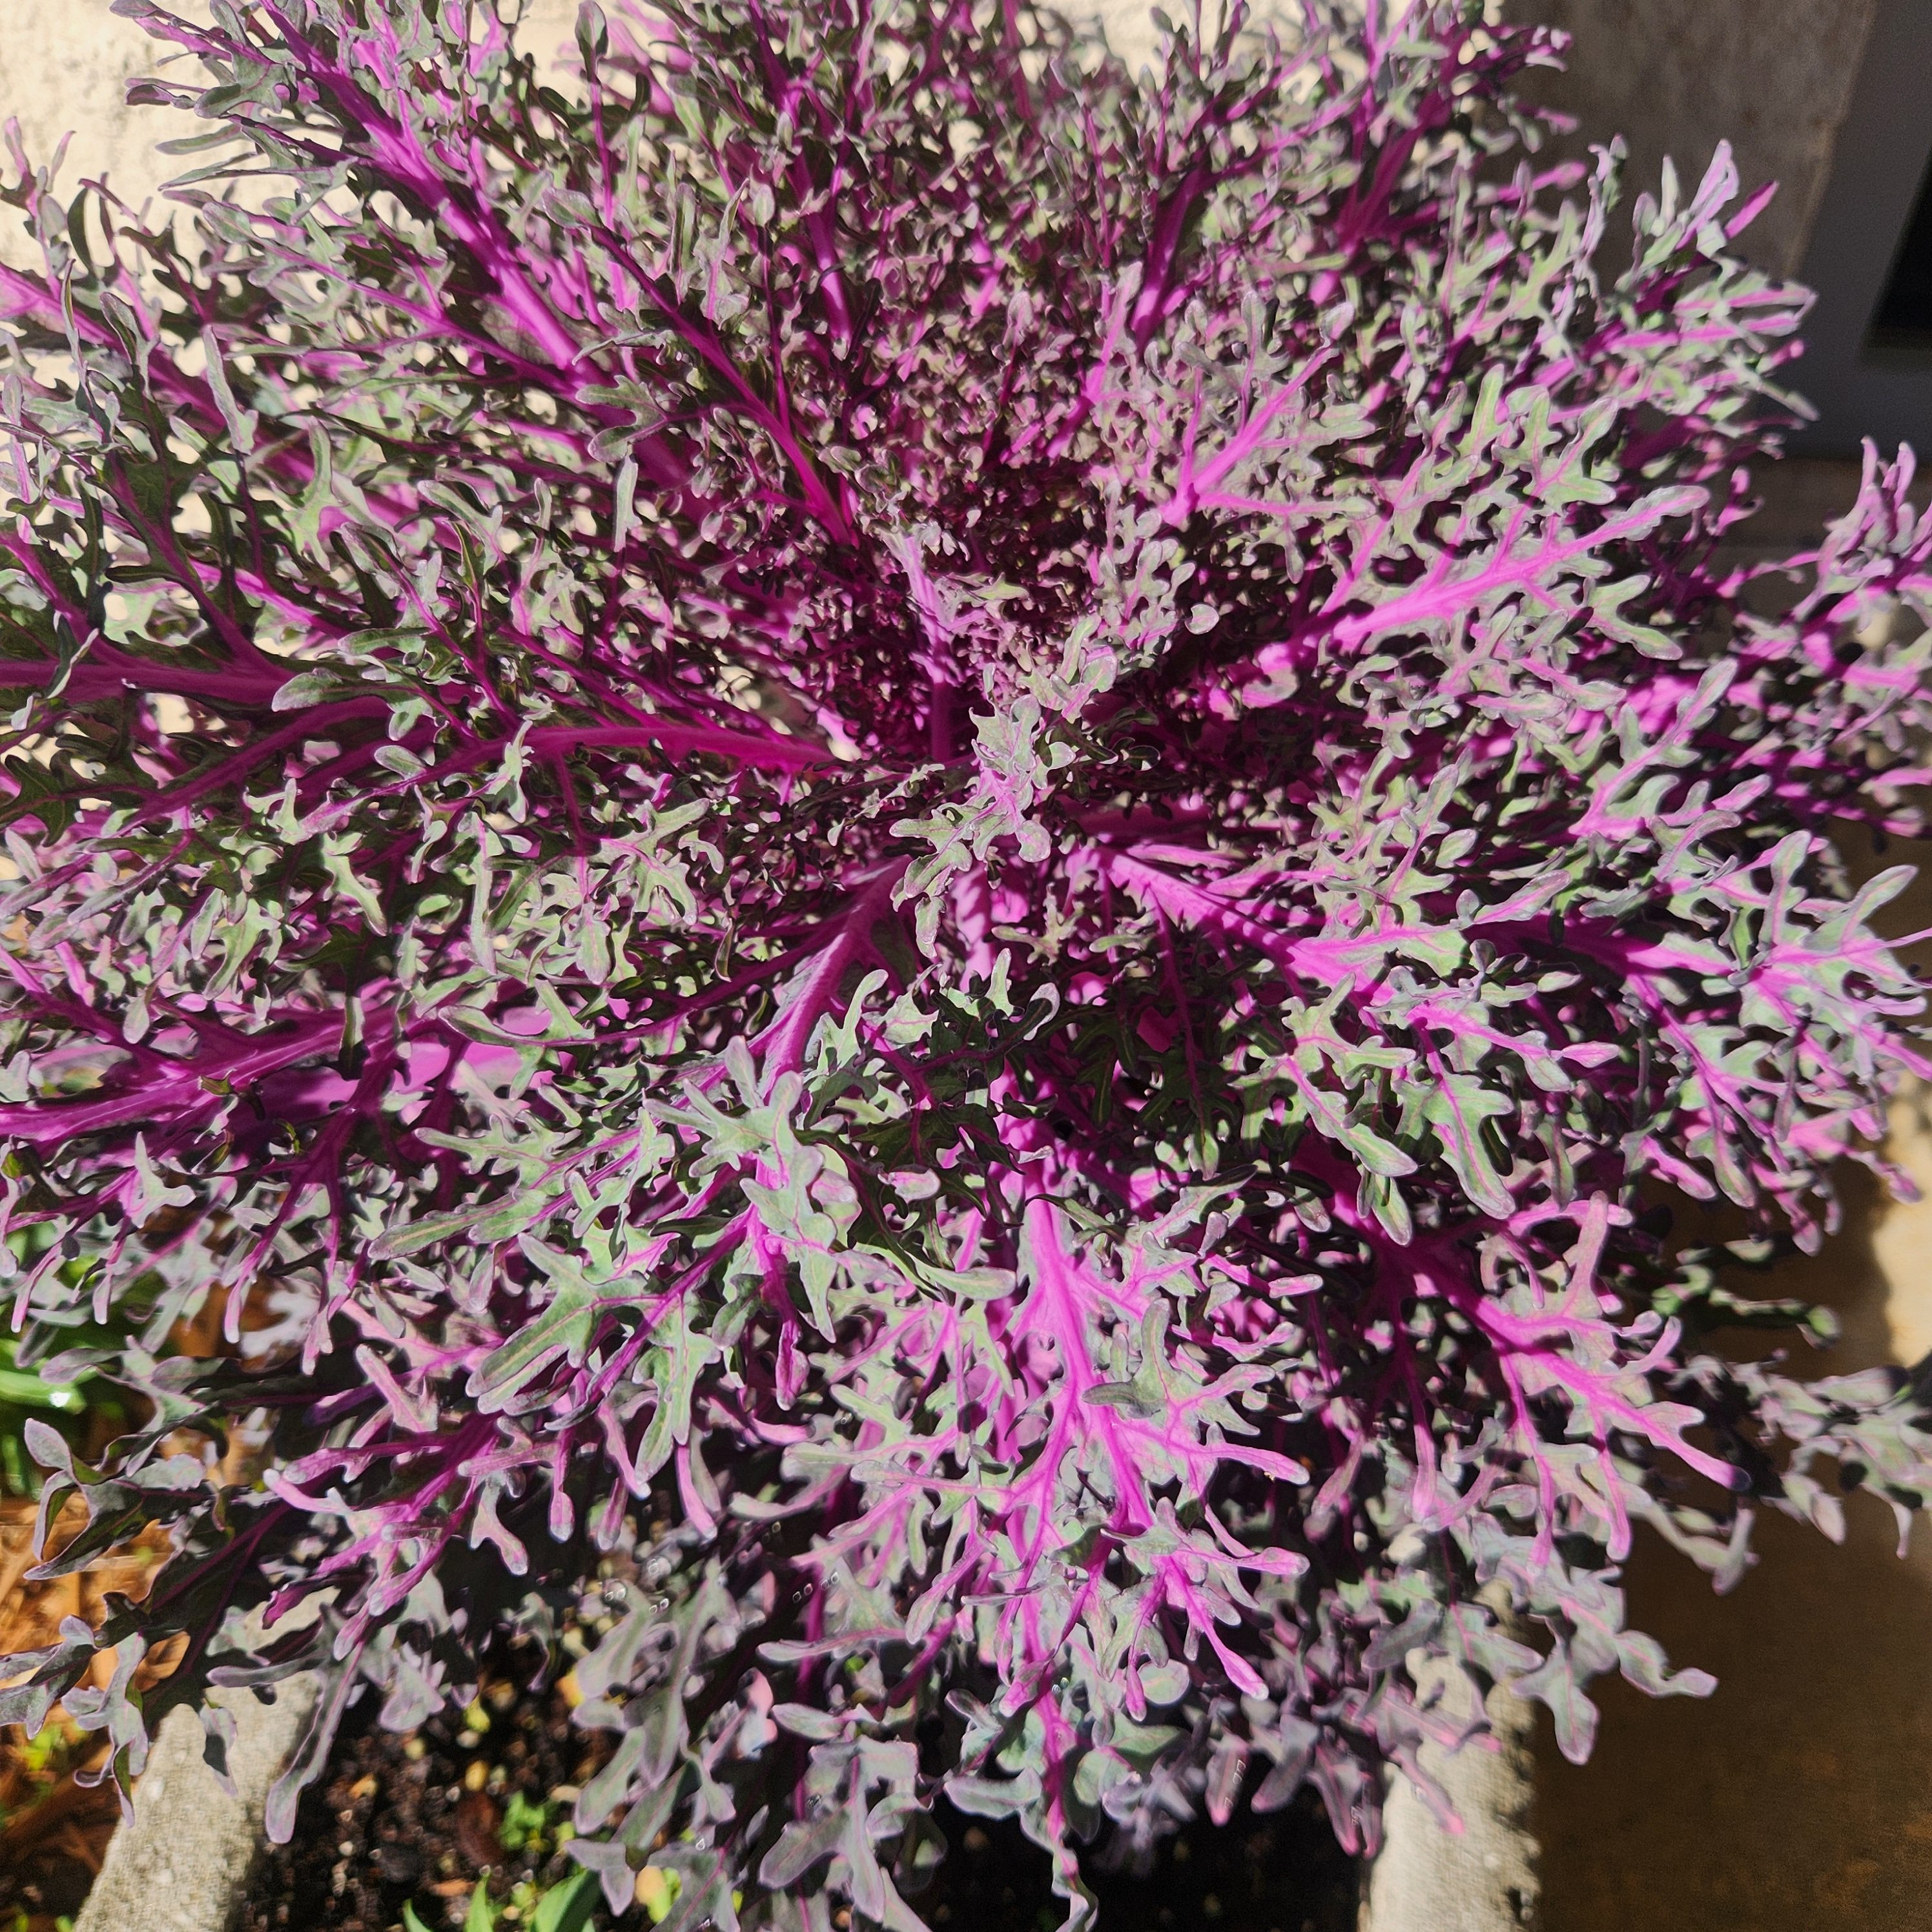
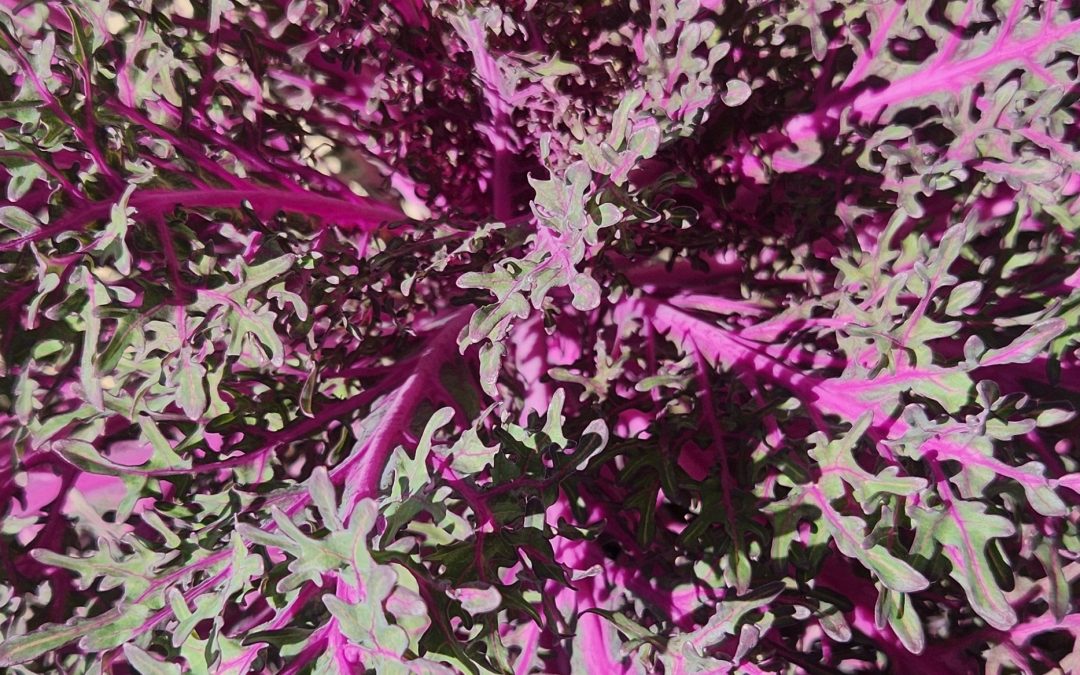
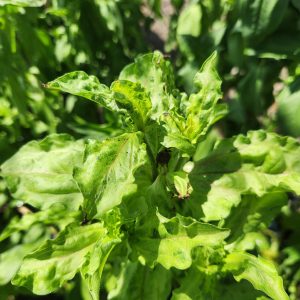
As cooler weather settles across the Florida Panhandle, many homeowners refresh their landscape beds with plants that provide vibrant seasonal color. Ornamental kale (Brassica oleracea var. acephala) and ornamental cabbage are reliable, eye-catching choices for fall and winter landscapes. Their ruffled foliage and colorful rosettes, ranging from deep purple and rose to creamy white deliver long-lasting visual interest throughout the coldest months, even after many other seasonal plants have faded.
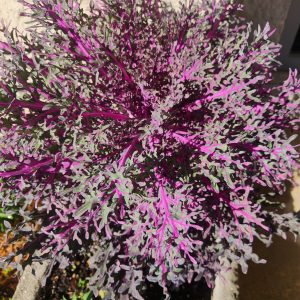
Photo Credit: Donna Arnold. FAMU Extension
Why Choose Ornamental Kale & Cabbage?
Unlike flowering annuals, ornamental kale and cabbage provide colorful foliage rather than blooms. Their dramatic rosette shapes create strong focal points in landscape beds, containers, and entryway plantings. These cool‑season ornamentals thrive in the Panhandle’s mild winter temperatures and tolerate light frost, making them dependable choices for winter interest.
Planting & Care Tips
Planting Time: October through December for best cool‑season results.
Sunlight: Full sun brings out the richest pigmentation in the leaves.
Soil: Moist, well‑drained soil with added compost.
Spacing: 12–18 inches apart to allow the rosettes to fully develop.
Maintenance: Water consistently but avoid soggy soil; remove yellowing leaves; fertilize lightly.
Their care needs are minimal, making them ideal additions for busy homeowners seeking low‑effort winter color.
To Eat or Not to Eat?
Although ornamental kale and cabbage are edible, they are grown primarily for their appearance rather than flavor. Their leaves are typically tougher and more bitter than those of culinary varieties. While cooking can help soften the texture and reduce bitterness, most homeowners choose to enjoy these plants as decorative landscape features rather than as part of a meal.
Design Ideas for Winter Color

Photo Credit: Donna Arnold. FAMU Extension
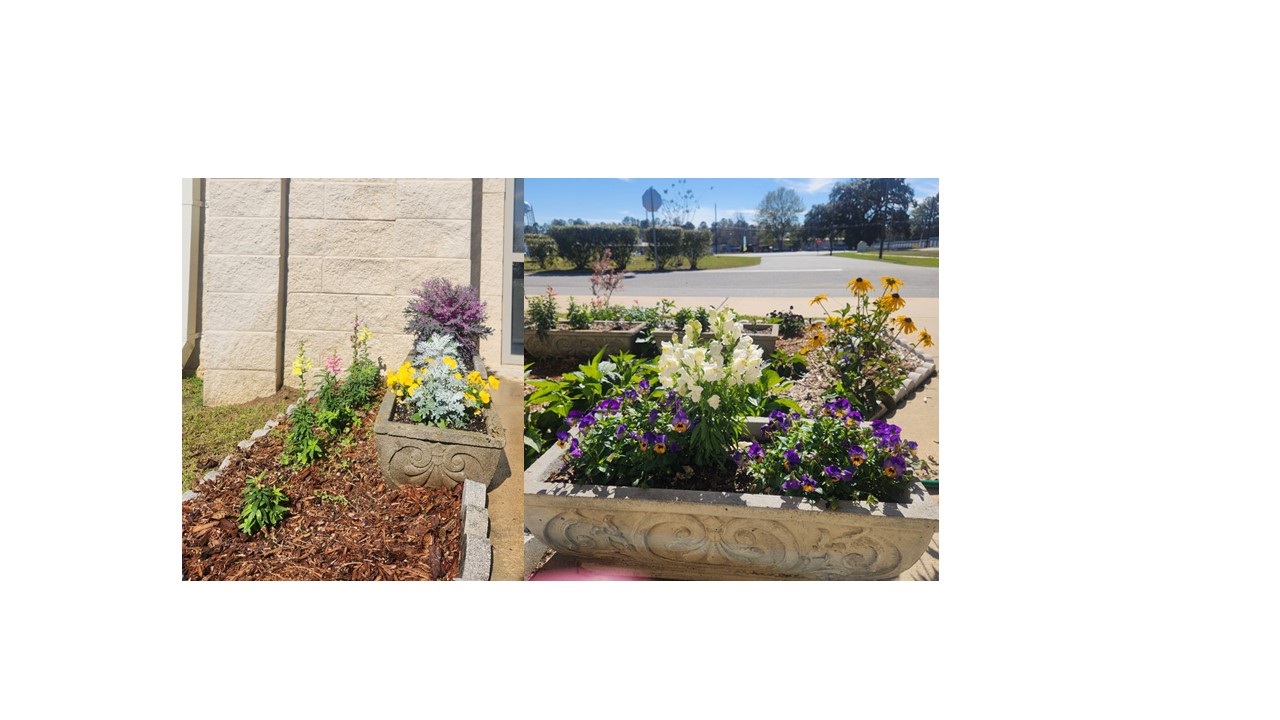
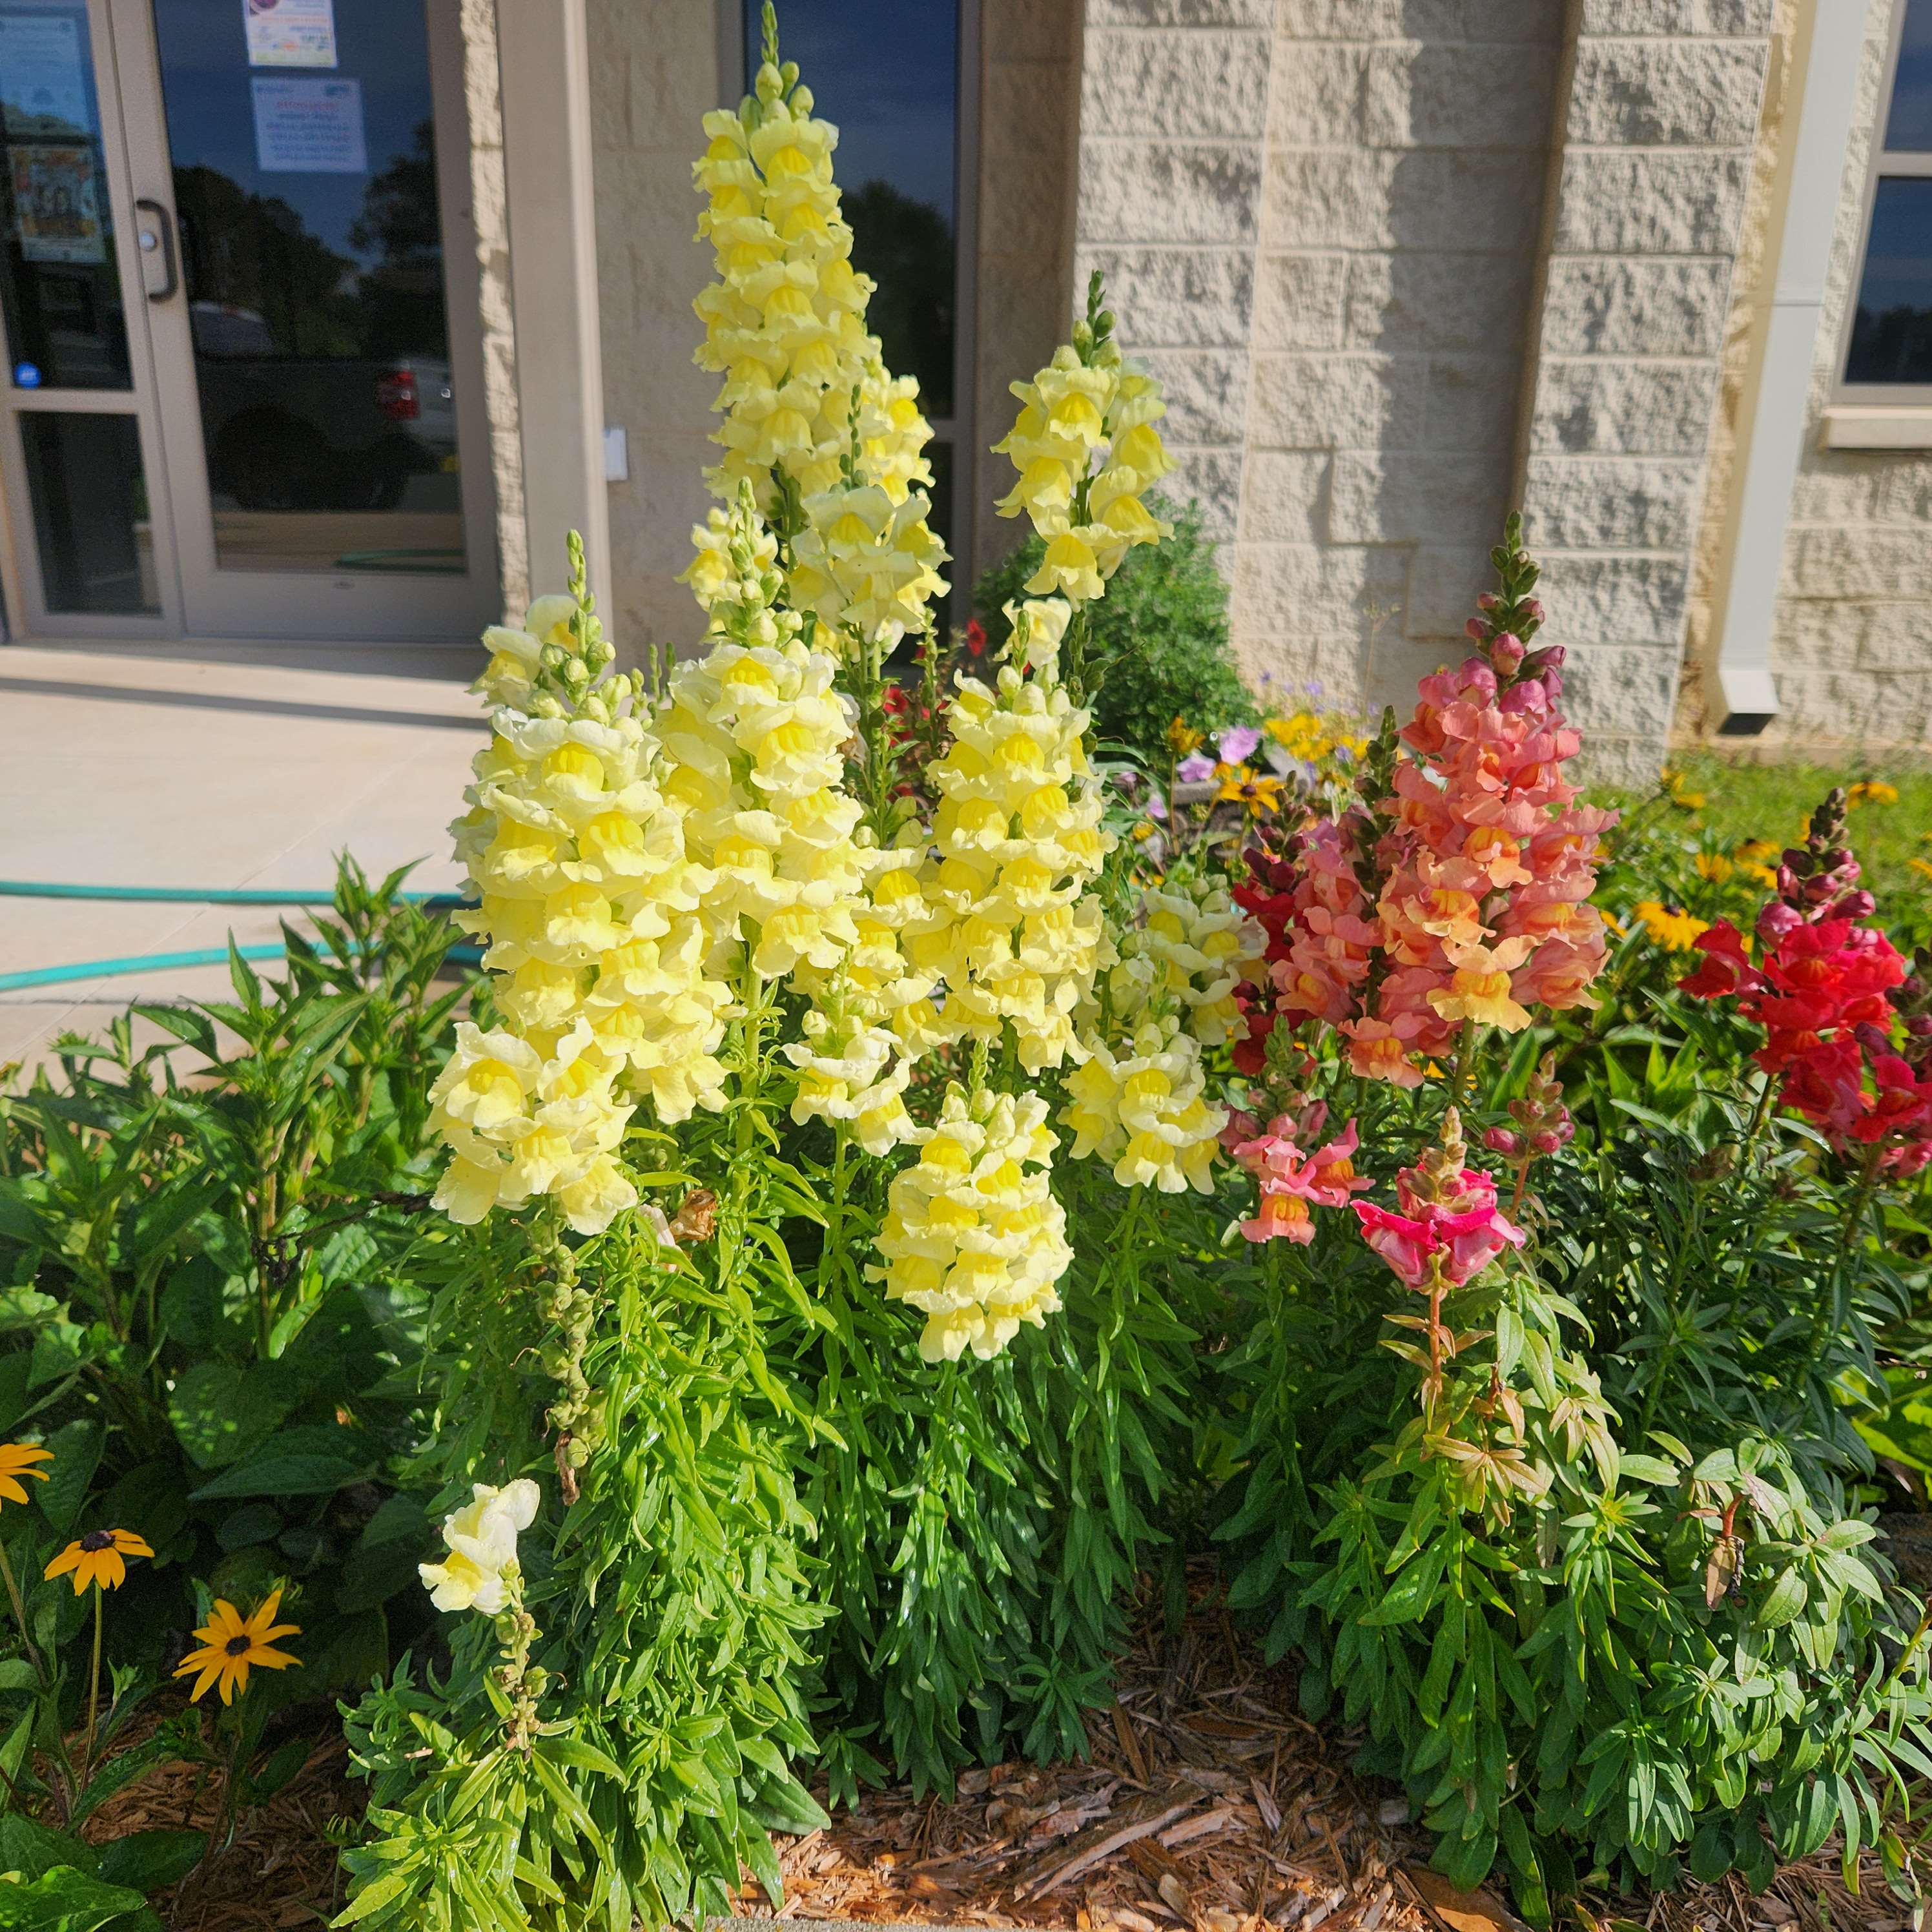
Create eye‑catching combinations by pairing ornamental kale and cabbage with pansies, violas, and snapdragons. Pansies and violas add cheerful pops of color that blend beautifully with the textured rosettes. Snapdragons provide vertical accents that balance the low, rounded form of the cabbages. These combinations work well in mixed beds, large containers, or along entryways where color can be appreciated up close. For striking displays, try pairing purple kale with yellow pansies or white cabbage with deep blue violas. These pairings brighten winter landscapes and bring life back to garden spaces during the cooler months.
Pest & Disease Snapshot
Ornamental kale and cabbage are generally hardy but can be affected by a few common pests and diseases during the cool season. Aphids, caterpillars, and cabbage loopers may feed on foliage, causing visible holes and damage. In humid conditions or areas with poor air circulation, fungal diseases such as powdery or downy mildew may develop.
Prevent problems by practicing good garden sanitation, spacing plants to improve airflow, and avoiding overhead watering. UF/IFAS recommends using Integrated Pest Management (IPM) strategies, including hand-removal of pests, encouraging beneficial insects, and applying control measures only when needed to keep plants healthy throughout the season.
For more information contact your local extension office.
by Donna Arnold | Dec 11, 2025
Winter Bliss and Climate Challenges in North Florida Gardens
Gardening is far more than a pastime, it’s an endeavor that demands patience, skill, and dedication. Every plant requires careful attention to thrive, and every gardener knows the challenge of protecting their landscape against nature’s shifting moods.
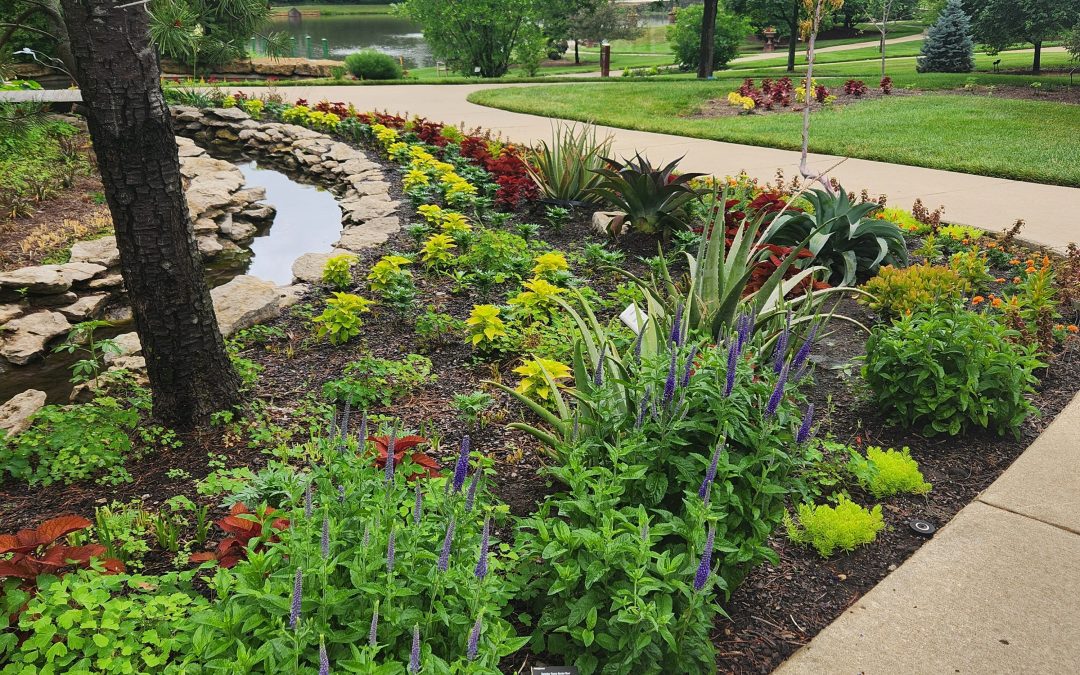
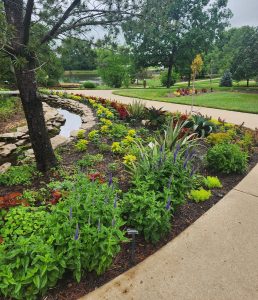
In North Florida, winters from December through February are typically mild, offering residents the chance to cultivate cool-season vegetables, hardy ornamentals, and lush greenery that brighten homes even in the colder months. These gardens are more than decoration; they are living investments in beauty, wellness, and community pride.
Yet, the increasing instability of seasonal patterns has thrown gardeners off balance. Sudden frosts, unexpected heat spikes, and shifting rhythms test both resilience and creativity. What once felt like a predictable cycle now requires constant vigilance, as climate change reshapes the very environment in which these gardens grow. For North Florida residents, tending a garden is not just about nurturing plants, it’s about nurturing joy, identity, and a connection to place, even as the climate itself becomes more uncertain.
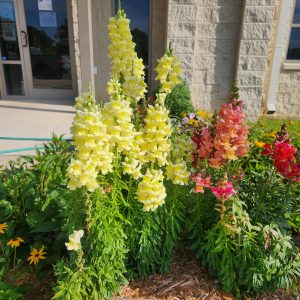
Photo credit: Donna Arnold,FAMU Extension.
The Growing Challenge of Climate Change
In recent years, gardeners have faced out-of-season frosts that damage cold-sensitive plants such as citrus, hibiscus, and tropical ornamentals. Unlike commercial growers with greenhouses, most homeowners lack protective infrastructure, leaving their landscapes exposed. The financial loss of damaged plantings can be significant, but the emotional toll of watching cherished gardens succumb to sudden freezes is equally profound.
Climate change intensifies these challenges. Stronger cold fronts and occasional winter heat spikes disrupt plant growth, weakening resilience and reducing vitality. Homeowners often resort to improvised measures, blankets, plastic sheeting, or makeshift covers, that provide only temporary protection. Without specialized forecasting tools, residents rely on local news or apps, which may overlook microclimate variations across neighborhoods.
Weather vs. Climate: Why It Matters
It’s important to distinguish between weather and climate.
- Weather refers to the day-to-day conditions, temperature, rainfall, humidity, and more, that we experience locally.
- Climate is the long-term average of these conditions, measured over seasons, years, or even decades, across regions or globally.
Florida, for example, has a wet season and a dry season, but rainfall within those periods can vary greatly from day to day. While climate patterns help us anticipate seasonal trends, the unpredictability of weather events, like sudden frosts or heat spikes, creates challenges for gardeners. Understanding this distinction helps residents prepare for short-term weather swings while adapting to long-term climate shifts.
Adapting for Resilience
Climate change is no longer a distant concept; it’s a daily reality for North Florida gardeners. To adapt, communities must embrace:
- Education programs on cold protection and plant selection.
- Affordable protective solutions like frost cloths and portable covers.
- Resilient landscaping strategies, including native plants better suited to fluctuating conditions.
For further reading on climate impacts and gardening adaptation in Florida, see: Cold Protection for North Florida | UF/IFAS Extension; Climate Change and Florida’s Native Plants – Florida Wildflower Foundation; Surviving Winter Storms: Smart Gardening; Frost in the Panhandle? Practical Tips for Protecting Your Garden | Gardening in the Panhandle Practices for Northern Florida Gardens
by Donna Arnold | Sep 25, 2025
When the Ground Moves.
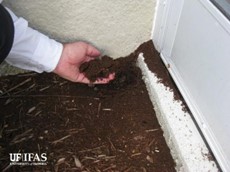
It started with a quiet day, and a curious bag of sand brought into the extension office but inside was more than just sand. It was crawling with tawny crazy ants (Nylanderia fulva), one of Florida’s fastest-spreading invasive pests. Known for their erratic movement and massive colonies that can make the ground seem alive, these reddish-brown ants are now a growing concern for gardeners across some Florida counties. Unlike fire ants, tawny crazy ants don’t sting, but they can nip with their chewing mouthparts. Their sheer numbers can overwhelm outdoor spaces, crawling on people and spoiling the enjoyment of patios, gardens, and recreational areas. They nest in moist, protected areas such as leaf litter, potted plants, and under debris, often forming sprawling colonies with multiple queens.
Beyond being a nuisance, these ants pose serious risks. They’ve been known to cause electrical shortages by infiltrating equipment, sometimes leading to costly damage. In some Caribbean islands, they’ve harmed organic crops, and in Colombia, infestations have even led to the death of small animals due to asphyxiation. Larger animals have been attacked around sensitive areas like the eyes and hooves. Tawny crazy ants also disrupt local ecosystems. Their aggressive spread displaces native ant species and reduces biodiversity. While Florida hasn’t reported agricultural damage yet, the potential remains, especially in organic farming systems.
Identification Tips
Workers are small (less than 1/8 inch), monomorphic, and covered in fine hairs that give them a matte appearance. They have one petiole segment and 12 antennal segments, including a long first segment called the scape. Colonies don’t form mounds but may tunnel in sandy soil. Queens are often found among workers, especially in warmer months. If you suspect an infestation, contact your local UF/IFAS Extension office.

Management Challenges
Controlling tawny crazy ants is notoriously difficult. Spraying alone is ineffective, and most insecticides only work for a few days before ants’ return. Integrated Pest Management (IPM) is the recommended approach. IPM combines multiple tactics, starting with accurate identification and monitoring, followed by strategic product application and habitat modification. Professional pest control services that specialize in IPM are often necessary. Timing is critical, and overuse of products is not only ineffective but may violate legal limits. Keep records of infestation locations to anticipate reinvasion, which typically occurs annually. While complete eradication is unlikely in established areas, population suppression is achievable. Interestingly, research suggests that within about a decade, populations may naturally decline, allowing native species to rebound.
Tawny crazy ants are more than just a backyard annoyance they are a complex ecological and household threat. Awareness, early identification, and professional management are key to minimizing their impact. As these ants continue to spread, staying informed and proactive will help protect your property and Florida’s delicate ecosystems.
For more information call or visit your local extension office or follow the link below.
https://edis.ifas.ufl.edu/publication/IN1076
by Donna Arnold | Aug 15, 2025
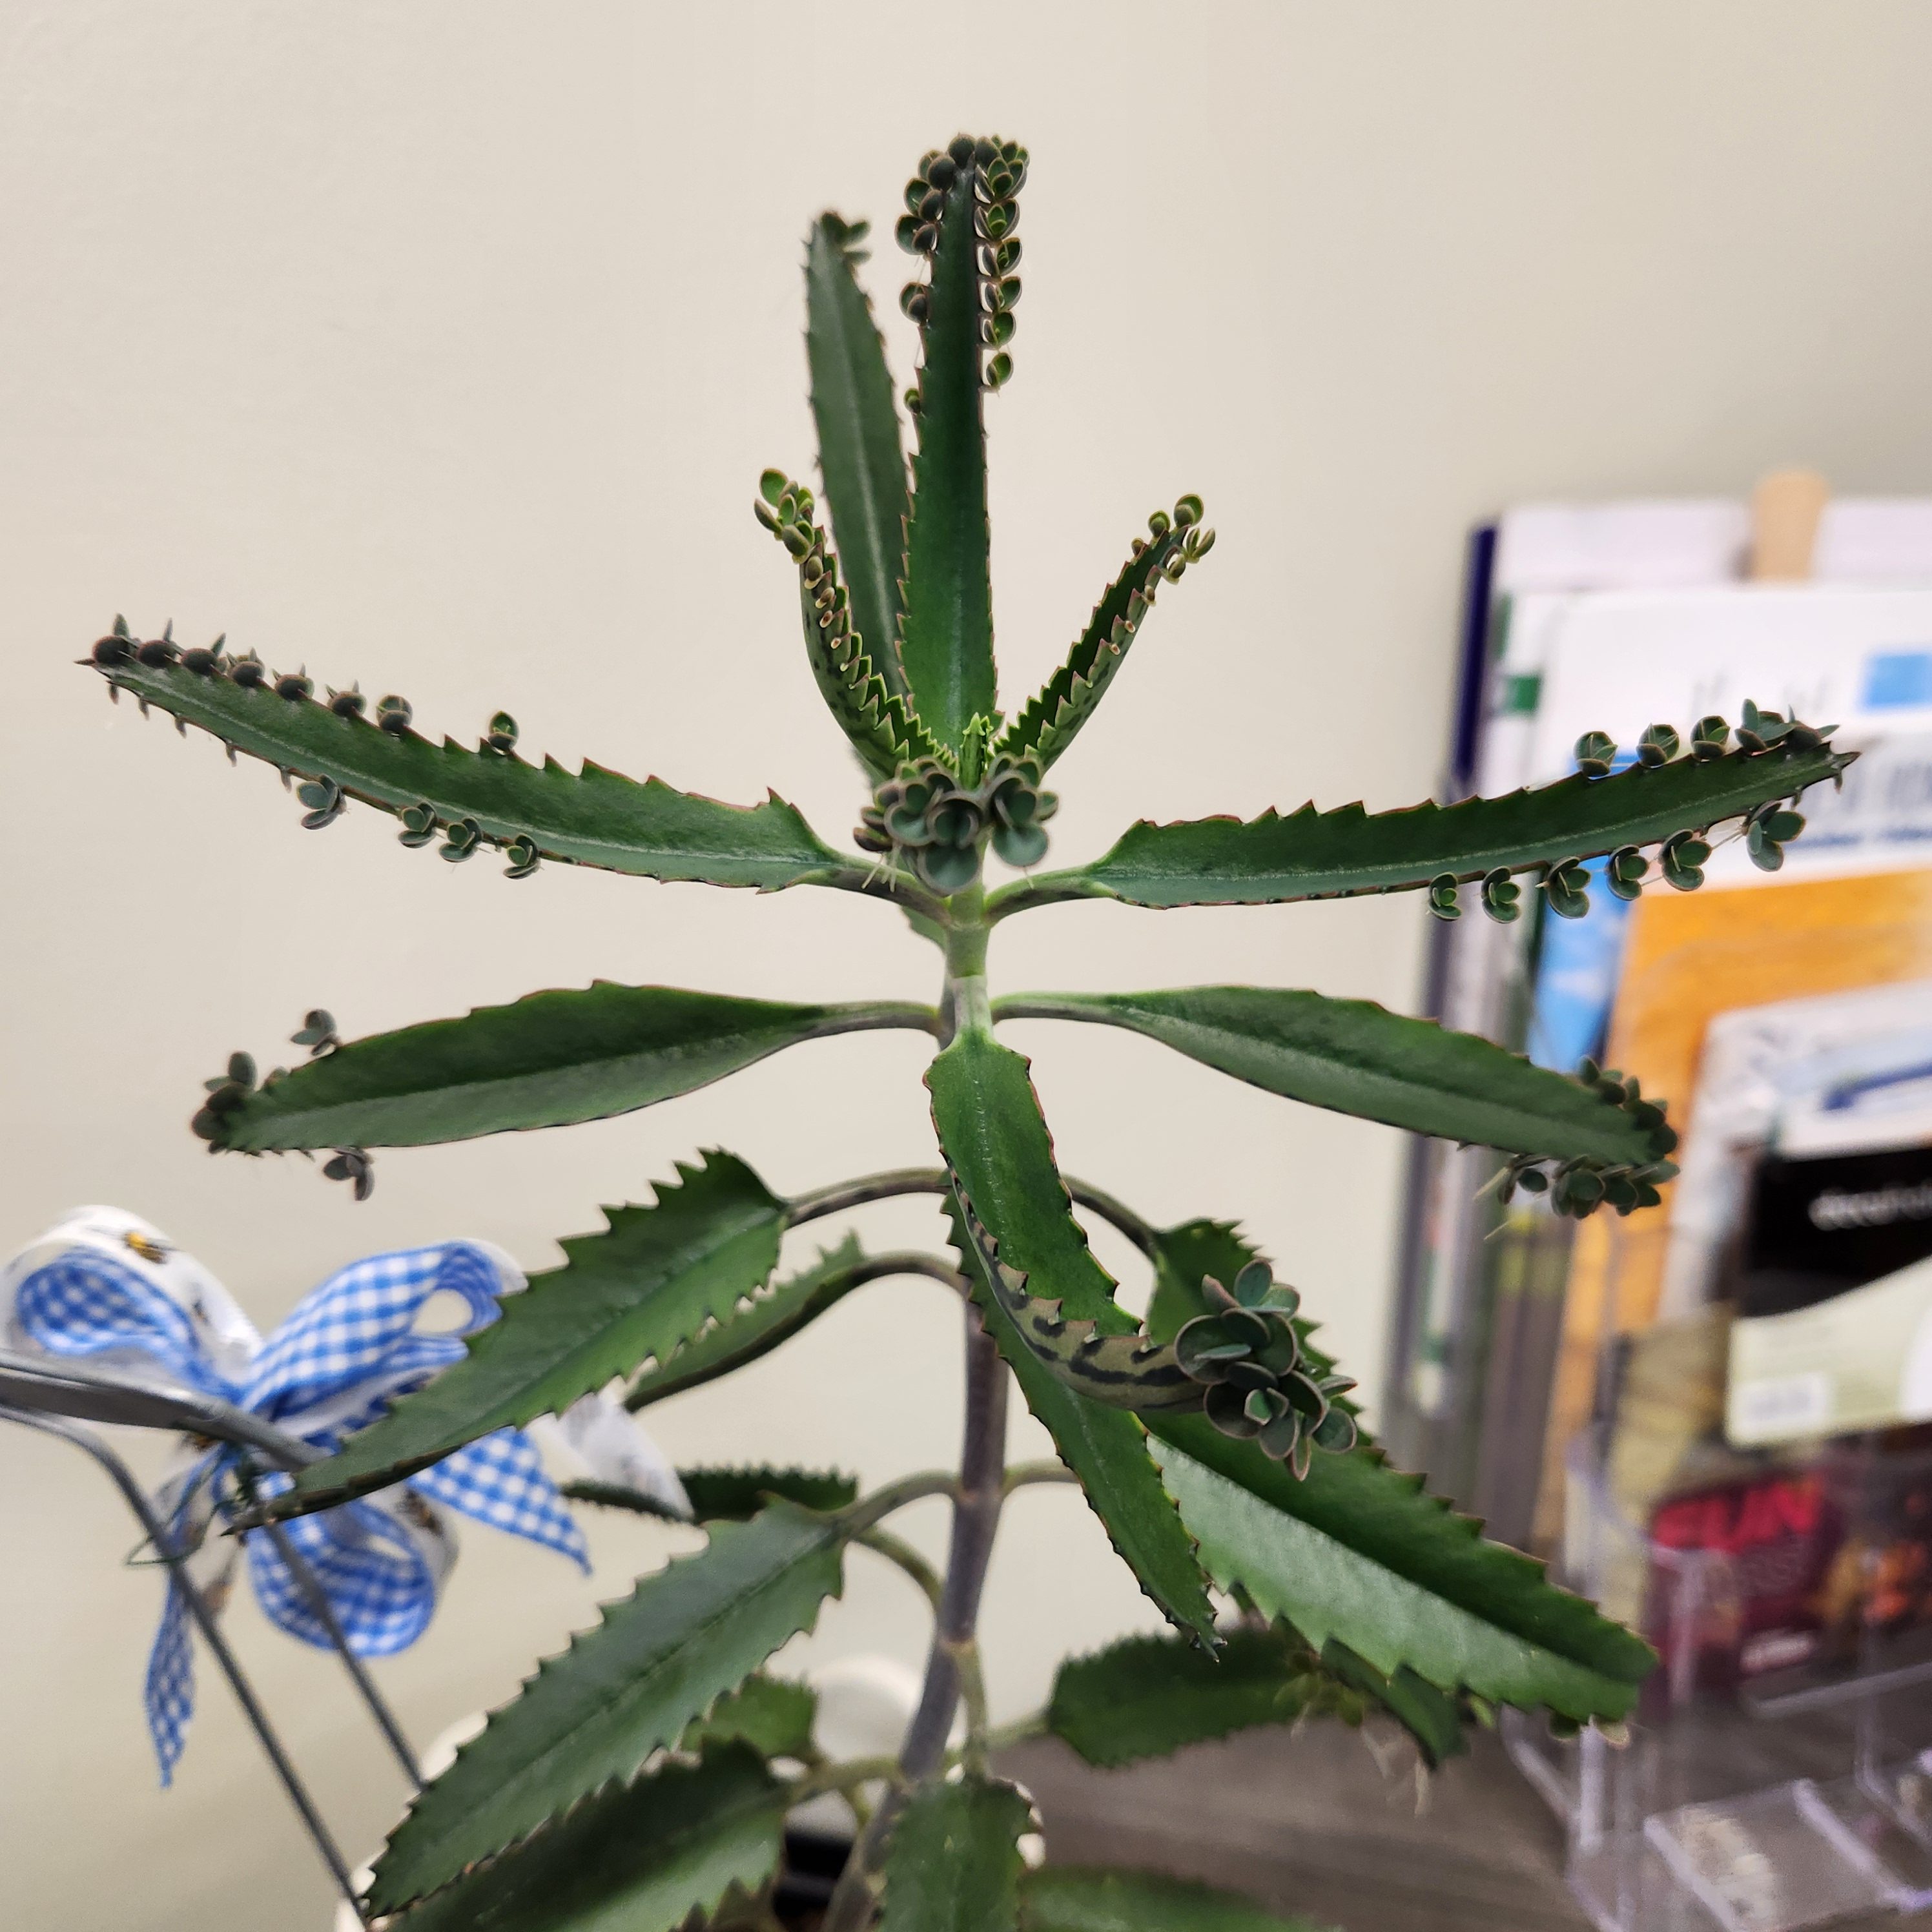
Kalanchoe Species in Florida: Invasive Threats and Management
Several species of Kalanchoe, widely distributed through horticulture as popular containers and landscape plants, have escaped cultivation and become invasive in Florida. Of the approximately seven species reported outside of cultivation, two have been documented as particularly problematic: Kalanchoe pinnata (commonly known as Cathedral Bells) and Kalanchoe × houghtonii (known as Mother of Millions). Both are listed as Category II invasive plants by the Florida Invasive Species Council (FISC), indicating they have the potential to disrupt native ecosystems. “In Central and South Florida, the plant is listed as invasive; hhowever, there is a cautionary note for North Florida.”
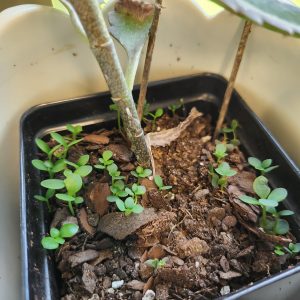
Photo Credit: Donna Arnold, FAMU Extension
Kalanchoe × houghtonii is a hybrid of K. delagoensis and K. daigremontiana, which has led to some confusion in reporting and distribution records. These species belong to the Crassulaceae family and are characterized as succulent herbs with hollow, fleshy stems. K. pinnata features rounded, scalloped leaves, while K. × houghtonii has slender, pointed, fleshy leaves. Their bell-shaped, pendulous flowers range in color from green to red. In Florida, these plants are primarily found in South Florida and along the East Coast, extending as far north as Nassau County.
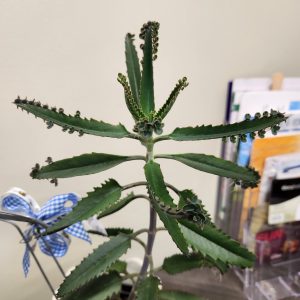
Photo Credit: Donna Arnold, FAMU Extension
The ecological impacts of Kalanchoe species are significant. Reproduction occurs both sexually and vegetatively, with plantlets forming along leaf margins and even on inflorescences. This species high reproductive rate and ability to thrive in dry, arid environments allow them to invade coastal dune habitats, where they form dense carpets that crowd out native species. Shallow root systems contribute to destabilization of sandy areas by displacing native plants such as sea oats, which are essential for anchoring sand and preserving dune integrity.
Effective management begins with prevention. Homeowners are advised not to plant Kalanchoe species and to avoid dumping landscape material in natural or disturbed areas. Physical control methods include hand-pulling and secure disposal of plant material to prevent regrowth. Chemical control can be achieved using a 5% glyphosate foliar spray, which is effective in killing individual leaves that might otherwise produce new plantlets. Follow-up removal of detached leaves is essential to prevent further spread. Currently, there are no known biological control methods for these species.
For more information and personalized management recommendations, homeowners should consult their local UF/IFAS Extension office. Additional resources are available through the UF/IFAS Center for Aquatic and Invasive Plants, and the Florida Invasive Species Council Plant List.
by Donna Arnold | Jul 6, 2025
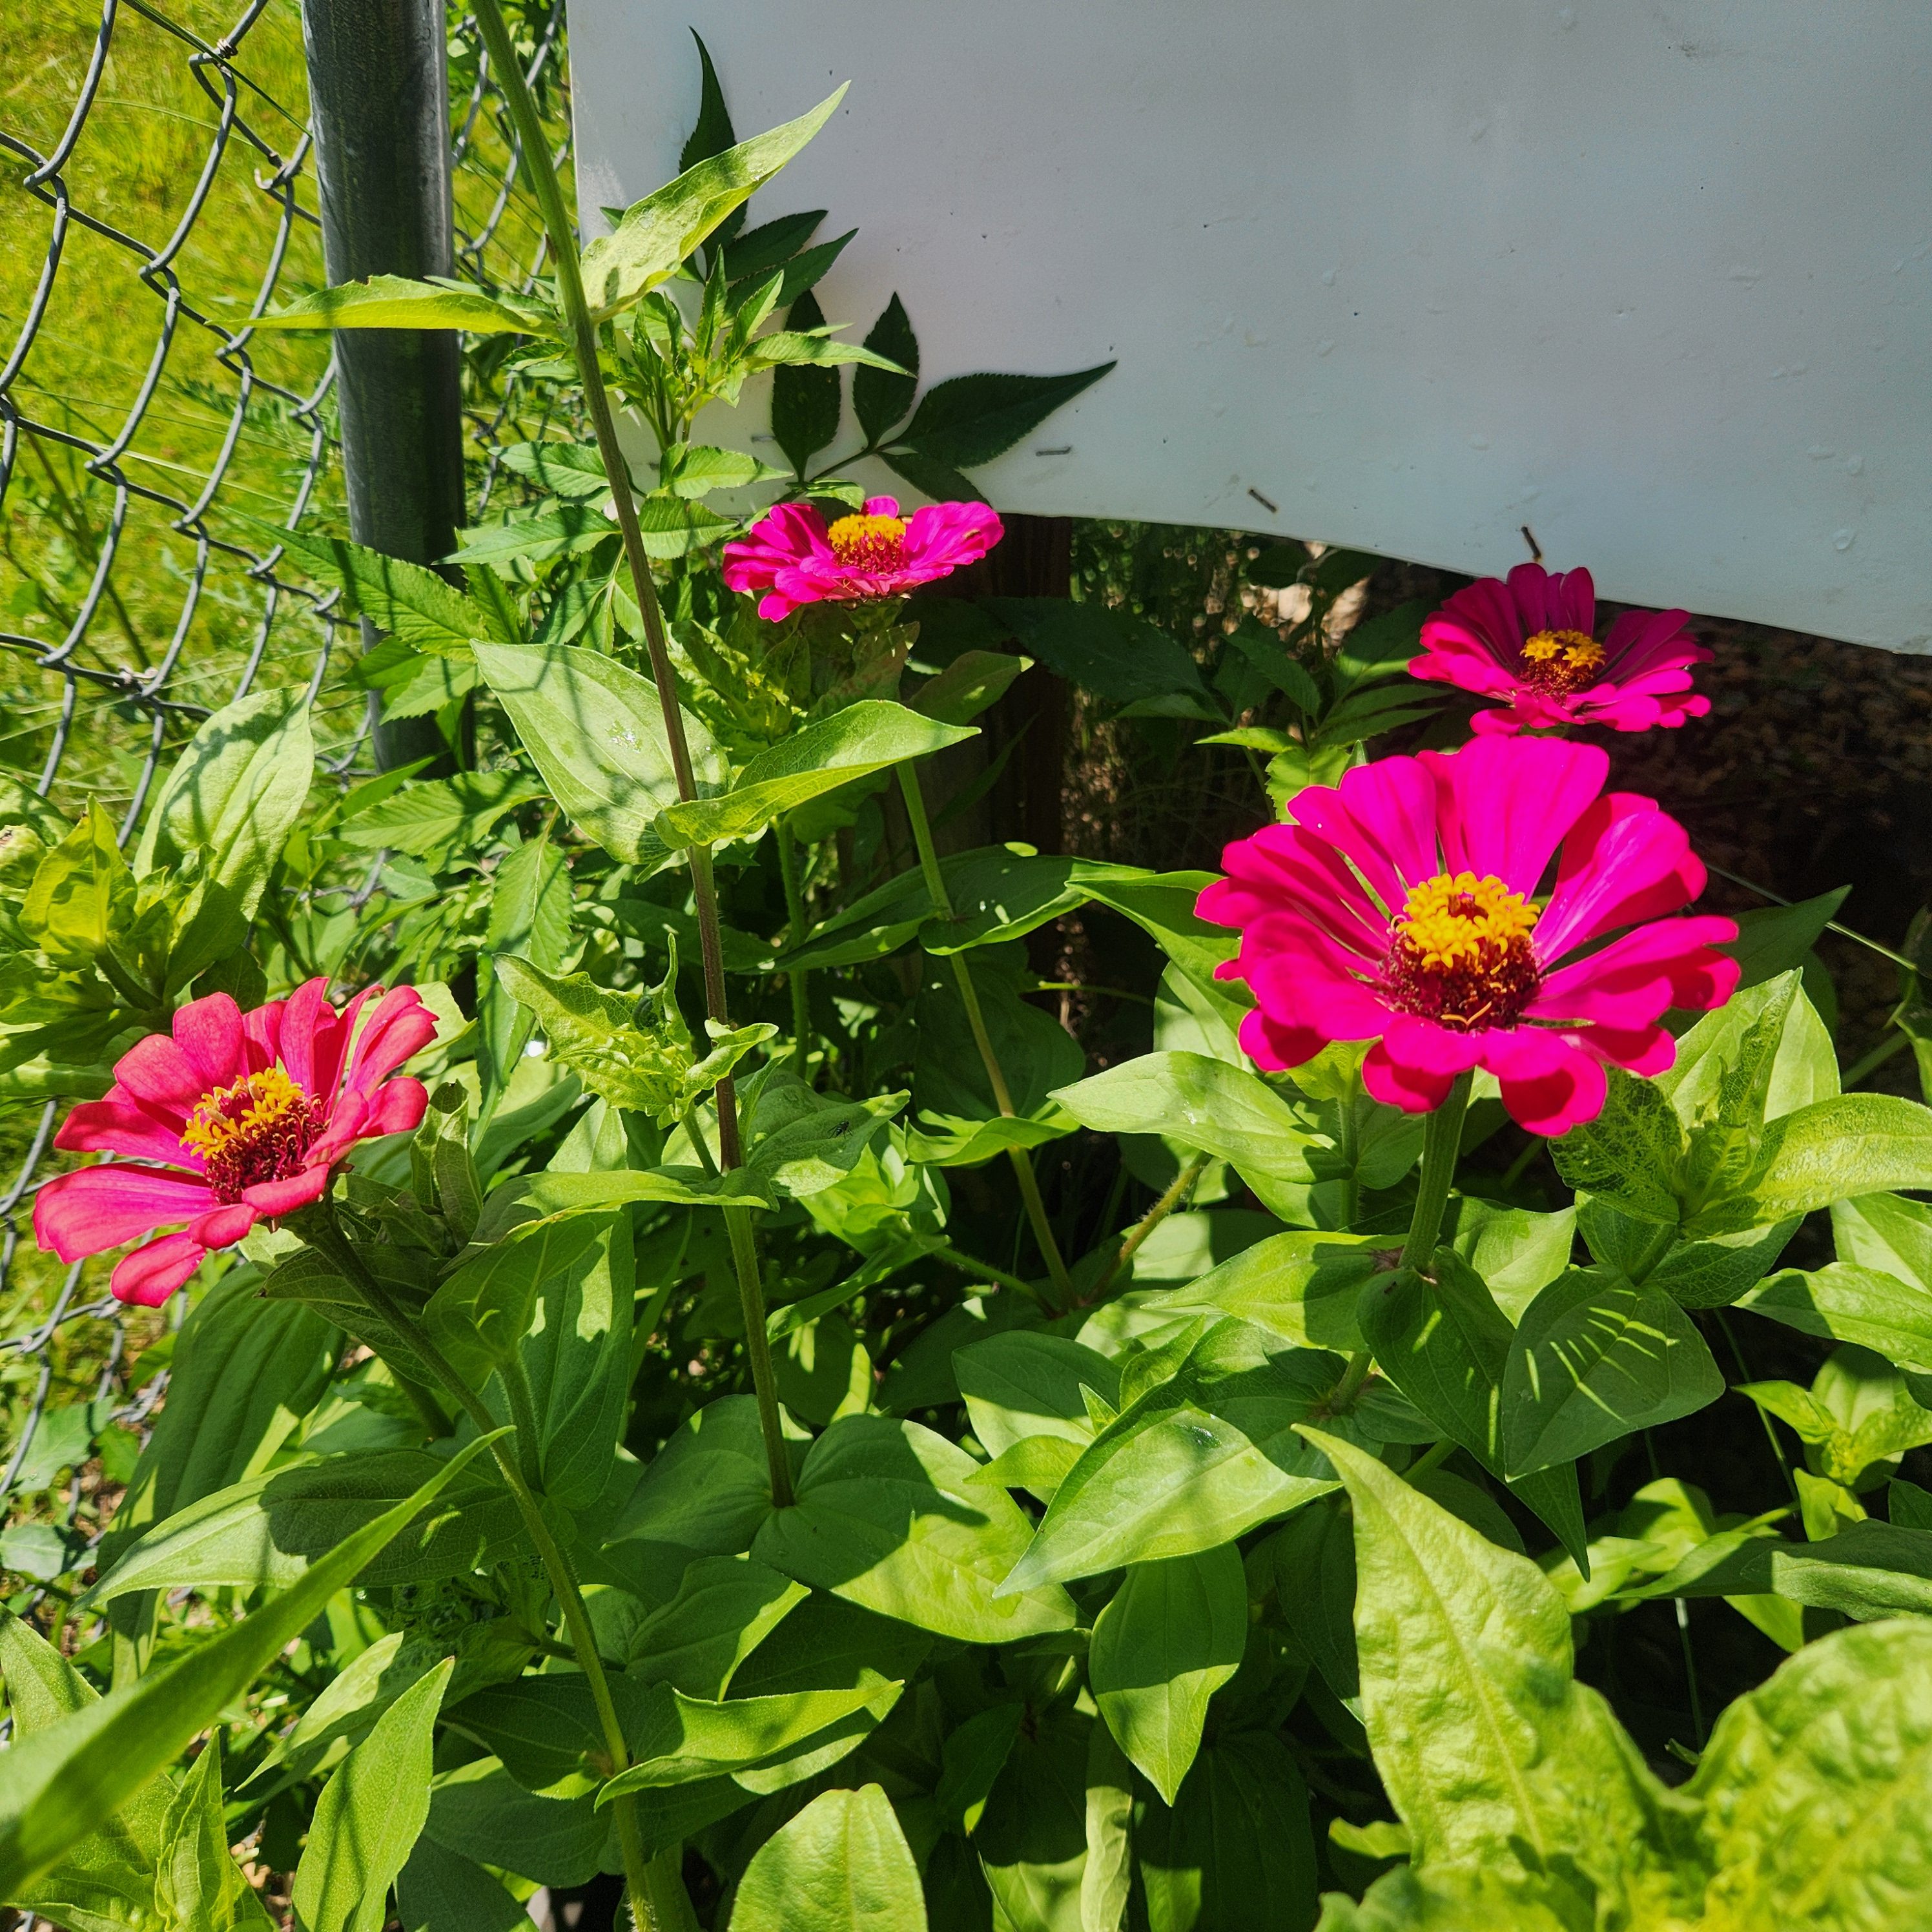
Zinnia Woes: What’s Causing Terminal Shoot Curling?
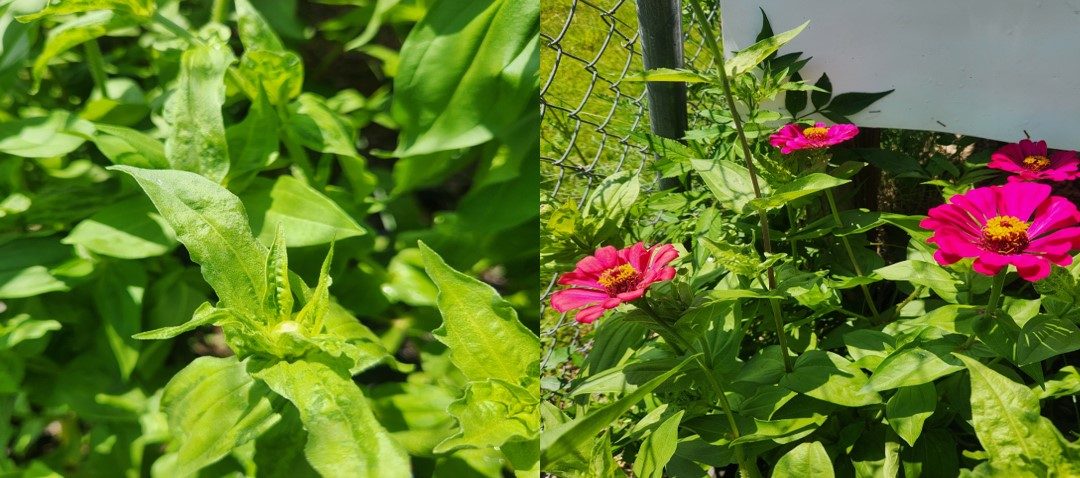
On a quiet stroll to the greenhouse early Monday morning, something unusual caught my eye—our zinnia plants looked noticeably different. Their vibrant green shoots had begun to curl at the tips, a subtle but clear sign that all was not well. Do not be alarmed if your zinnias are showing similar symptoms—it is a common issue. Curling at the terminal shoots is often a plant’s way of signaling stress. Whether it is due to environmental factors, pest activity, or nutrient imbalance, these twisted tips are clues worth investigating. Understanding the “why” behind the curl is the first step toward helping your zinnias return to their radiant, blooming selves
Common Culprits Behind Curling Zinnias
Environmental Stress: Zinnias are sun-lovers, but extreme heat, strong winds, or sudden temperature swings can cause their terminal shoot to curl as a defense mechanism.
Watering Woes: Both overwatering and underwatering can lead to leaf curls. Too much water suffocates roots, while too little causes drought stress—either way, the plant reacts by curling its leaves.
Pests: Aphids, thrips, and spider mites are notorious for feeding on tender new growth. Their sap-sucking habits distort leaves and can transmit viruses.
Diseases: Fungal infections like powdery mildew or bacterial leaf spot can cause curling, especially when combined with poor air circulation.
Nutrient Deficiencies: A lack of nitrogen, magnesium, or manganese can lead to curling and yellowing of new growth. Soil testing can help pinpoint the issue.
What You Can Do:
- Ensure consistent watering—moist but not soggy soil is ideal.
- Inspect regularly for pests and treat with neem oil or insecticidal soap.
- Improve air circulation by spacing plants properly and pruning overcrowded areas.
- Feed with a balanced fertilizer and consider a soil test if symptoms persist.
- Remove and destroy severely affected plants to protect the rest of your garden.

Healthy zinnias reward you with bold, cheerful blooms. A little detective work now can keep your garden dazzling all season long. For more information on Zinnias, contact your local Extension office or follow the links below.
https://gardeningsolutions.ifas.ufl.edu/plants/ornamentals/zinnia/
https://edis.ifas.ufl.edu/publication/FP623
https://nwdistrict.ifas.ufl.edu/hort/category/annuals-2/page/2/#:~:text=When%20planting%20zinnias%2C%20it’s%20recommended,than%20the%20foliage%20whenever%20possible.