by Molly Jameson | Jan 22, 2026
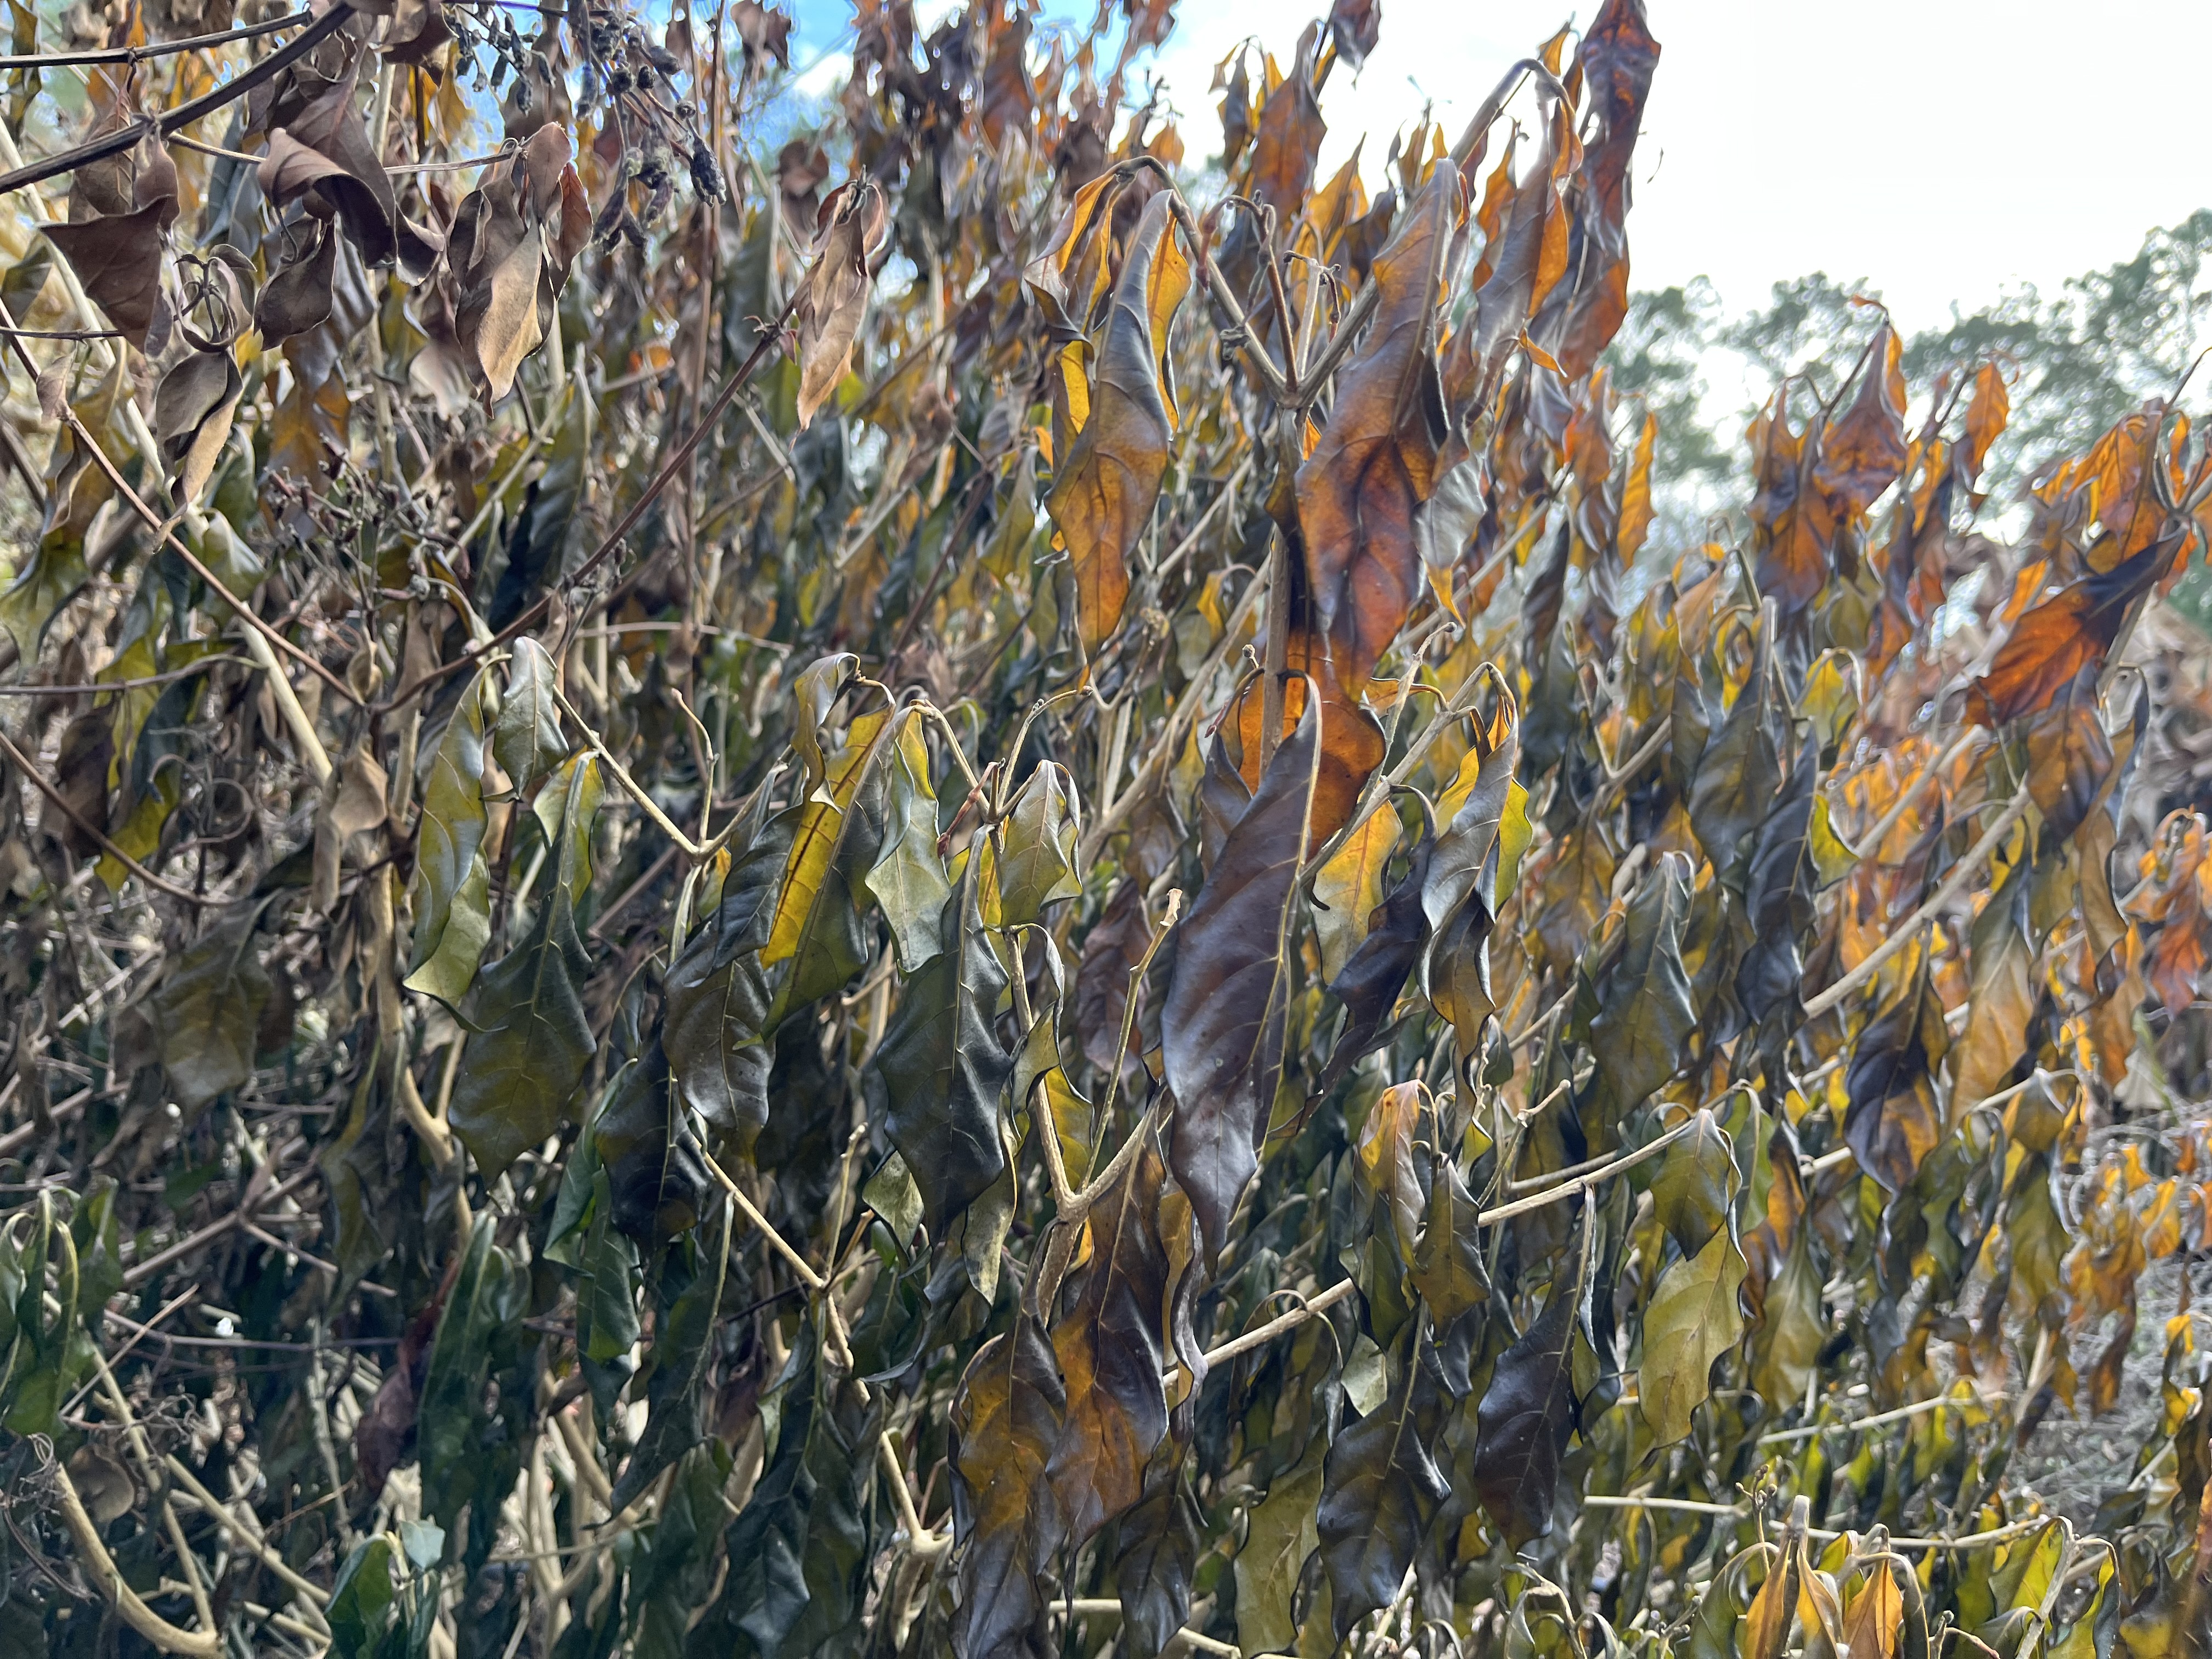
Firebush is often affected by freezing temperatures, but this winter dieback helps protect the plant, which typically resprouts in the spring. Photo by Molly Jameson.
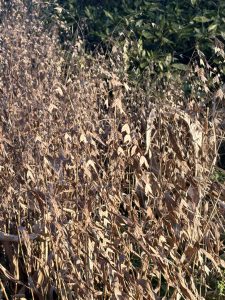
Indian wood oats hold flattened seed heads through winter, adding movement and warm tan tones to the landscape. Photo by Molly Jameson.
As we move through the coldest part of the year, you’ve probably noticed many perennial landscape plants turning brown. Your first instinct might be, yuck – where are my pruners? Those crispy leaves, spent flower stalks, and dark masses look like they need to go.
But take another look.
Consider the protection that foliage provides to the plant’s crown and buds underneath. Consider the habitat it offers overwintering wildlife. And take a closer look at the low-angled sunlight beaming through the leaves – you just might notice shades of amber, cinnamon, terra cotta, burgundy, chocolate, and gold.
Winter landscapes in north Florida don’t look like they do in spring, and they’re not supposed to. Instead of fresh growth and bright blooms, we get texture and layers of seasonal color. Dormant grasses catch the light differently than growing ones. Seed heads sway and rattle in the breeze. Large leaves collapse inward and angle downward, quietly signaling the change underway.
Brown as Built-In Frost Protection

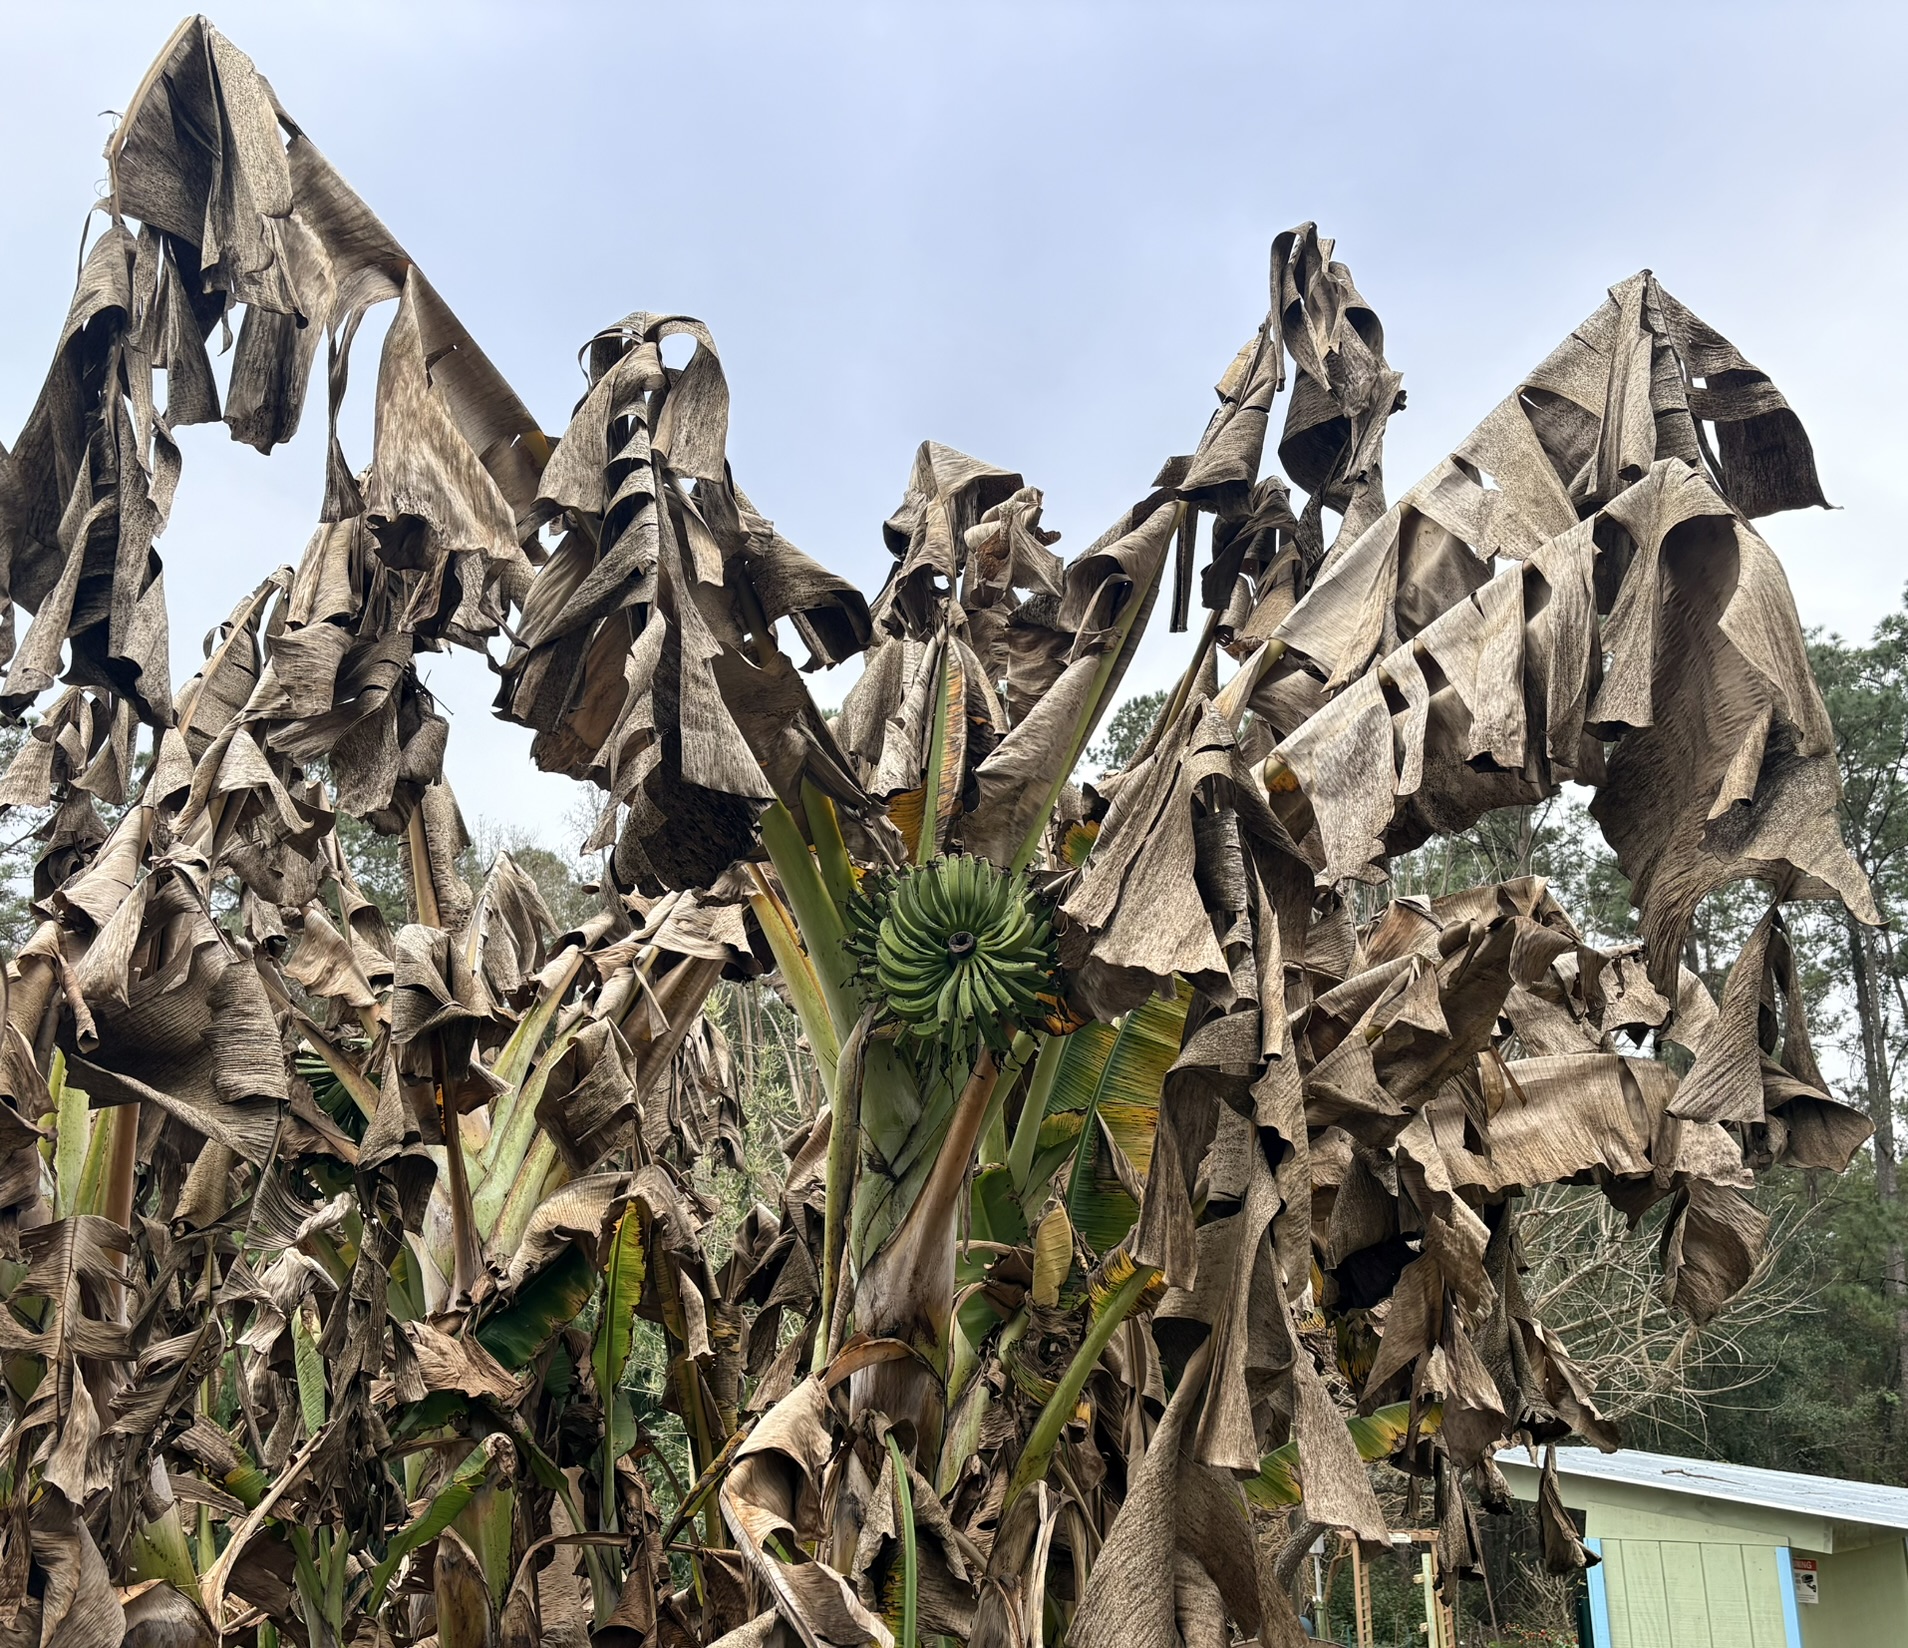
Freeze-damaged banana leaves turn brown and collapse after cold weather, helping protect the trunk and crown when left in place. Photo by Molly Jameson.
Beyond aesthetics, leaving dead or dormant foliage in place serves a very practical purpose – it helps protect plants from cold damage.
When temperatures dip into the 20s – which we experience a few nights most years – dead leaves act like a blanket. They insulate the plant crown, shield tender growing points, and reduce rapid temperature swings. This is especially important for semi cold-hardy plants and anything with a crown close to the soil surface.
Plants like ornamental ginger, firebush, beautyberry, bananas, and many tropical-looking perennials often look rough after a hard freeze. While it’s tempting to clean everything up immediately, the dead leaves are actually helping buffer plants against future cold snaps. Removing them too soon can expose sensitive new growth to damage if we get another freeze – which, in January or February, is always a possibility. In USDA Hardiness Zone 9a, it’s not unusual for the last frost to occur as late as mid-March.
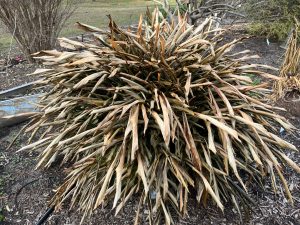
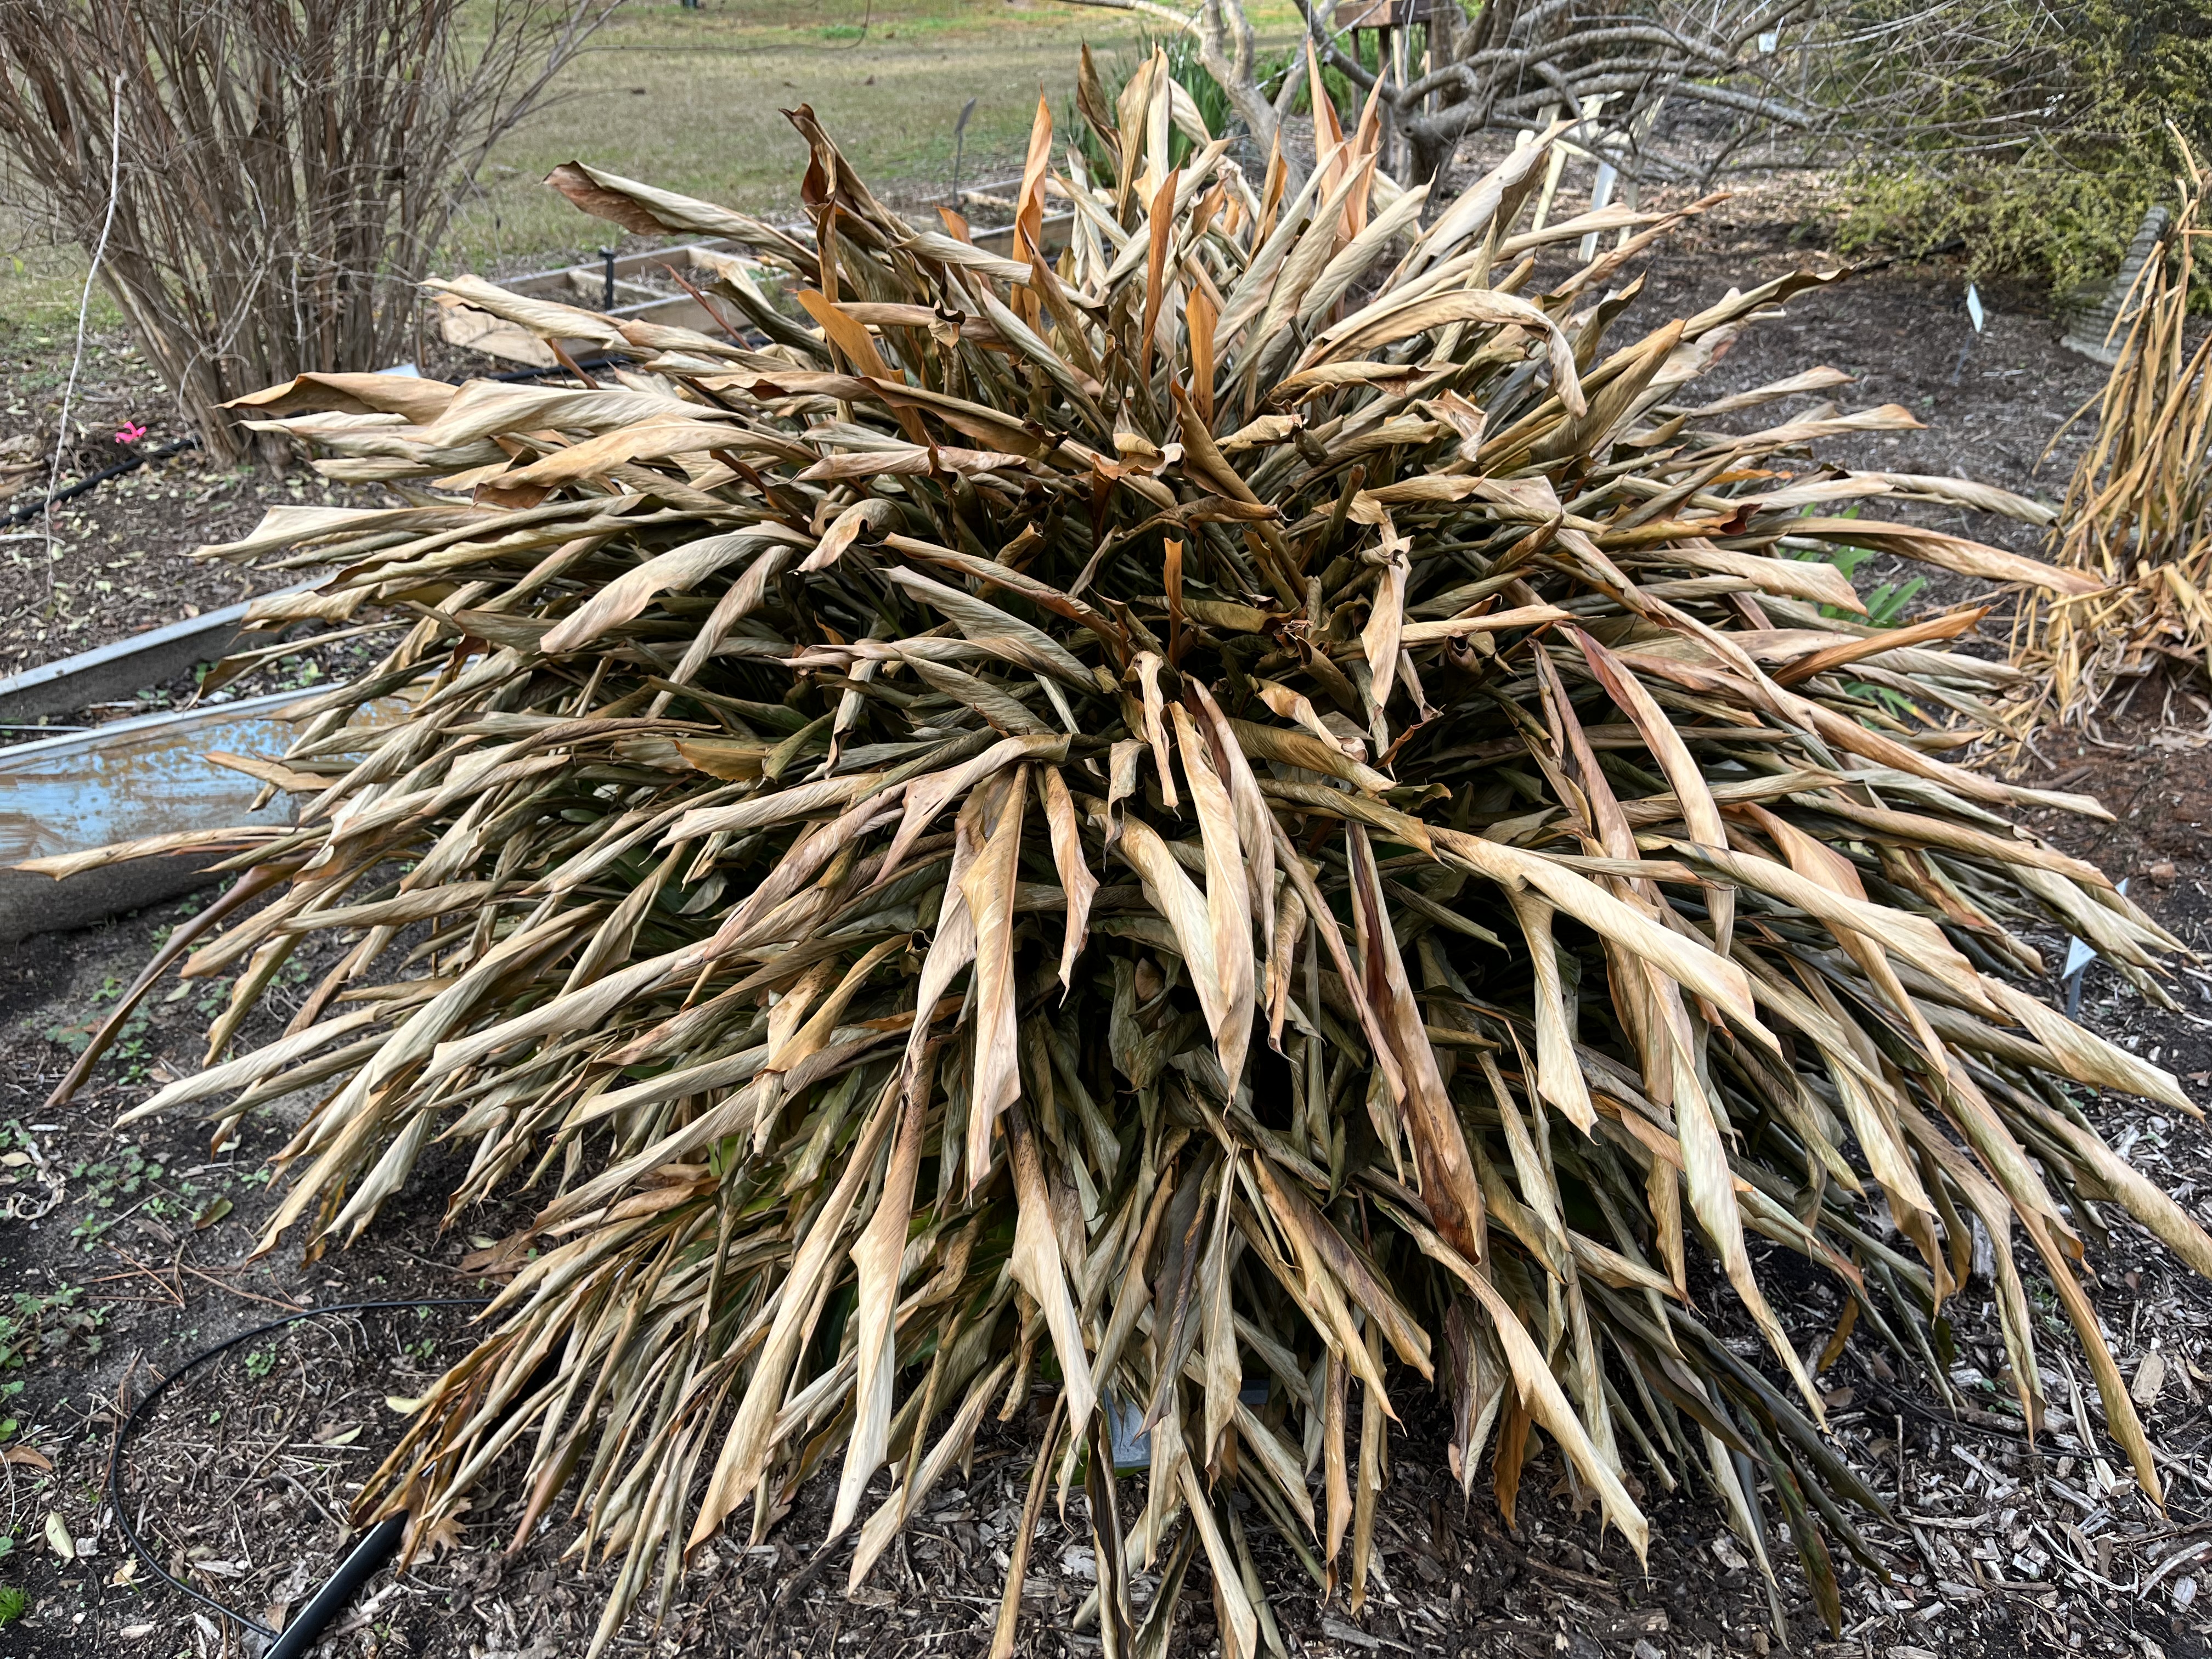
Ornamental gingers naturally die back in winter, and leaving the dried foliage in place helps protect underground rhizomes until new growth begins in spring. Photo by Molly Jameson.
Delaying pruning until spring gives plants the best chance to come back strong. It also makes cleanup easier. Instead of guessing where to cut, you’ll be able to trim back to healthy, actively growing stems. Many plants surprise us by pushing new growth from what looked like dead tissue just weeks earlier.
A Few Important Exceptions
Of course, there are times when brown shouldn’t be ignored. Plants that show signs of disease, active pests, or rot may need to be cut back sooner to prevent problems from spreading.
It should also be acknowledged that some plants simply struggle year after year, no matter how patient we are. In those cases, winter can be a useful time to employ the Right Plant, Right Place Florida-Friendly Landscaping principle. If a plant routinely suffers from cold damage, disease, or stress, it may be worth considering a tougher alternative – ideally one better suited to our climate. Native plants and other well-adapted species tend to handle unpredictable weather far better than plants already living on the edge of their comfort zone.
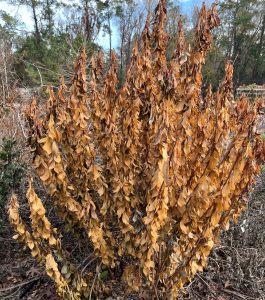
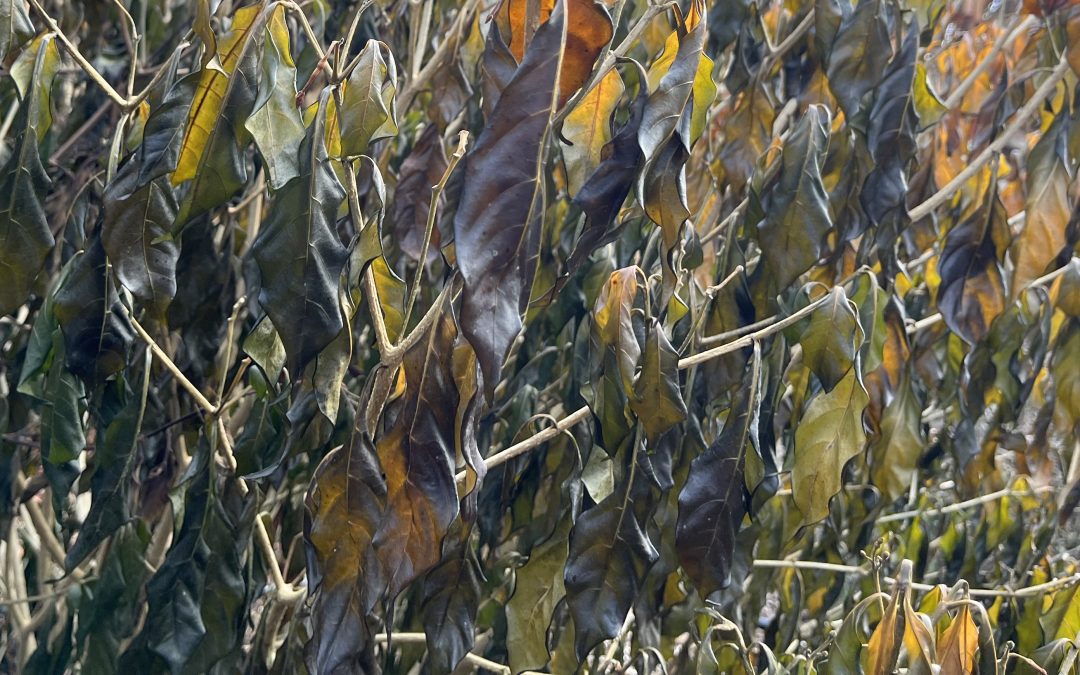
Cold-sensitive shrubs like Jatropha integerrima can show dramatic leaf browning after a freeze. Photo by Molly Jameson.
The key, of course, is intention. Leave the brown when it’s protecting the plant, but don’t feel obligated to keep it when it’s causing problems.
A Shift in Mindset
Learning to appreciate winter brown requires a small mindset shift. It asks us to value patience over order and function over perfection. It reminds us that gardens don’t need to look like the front of a garden magazine year-round to be healthy or have beauty.
So, the next time you’re tempted to declare your landscape “ugly” in winter, take another look. Notice the textures, the range of color, and the protection happening beneath that layer of brown.
After all, brown is a color too – and in winter, it’s doing exactly what it’s supposed to do.
by Molly Jameson | Dec 11, 2025
Parsley establishes well in late fall and provides steady harvests throughout the winter. Photo by Molly Jameson.
Cool Season Annual Herbs to Plant in December

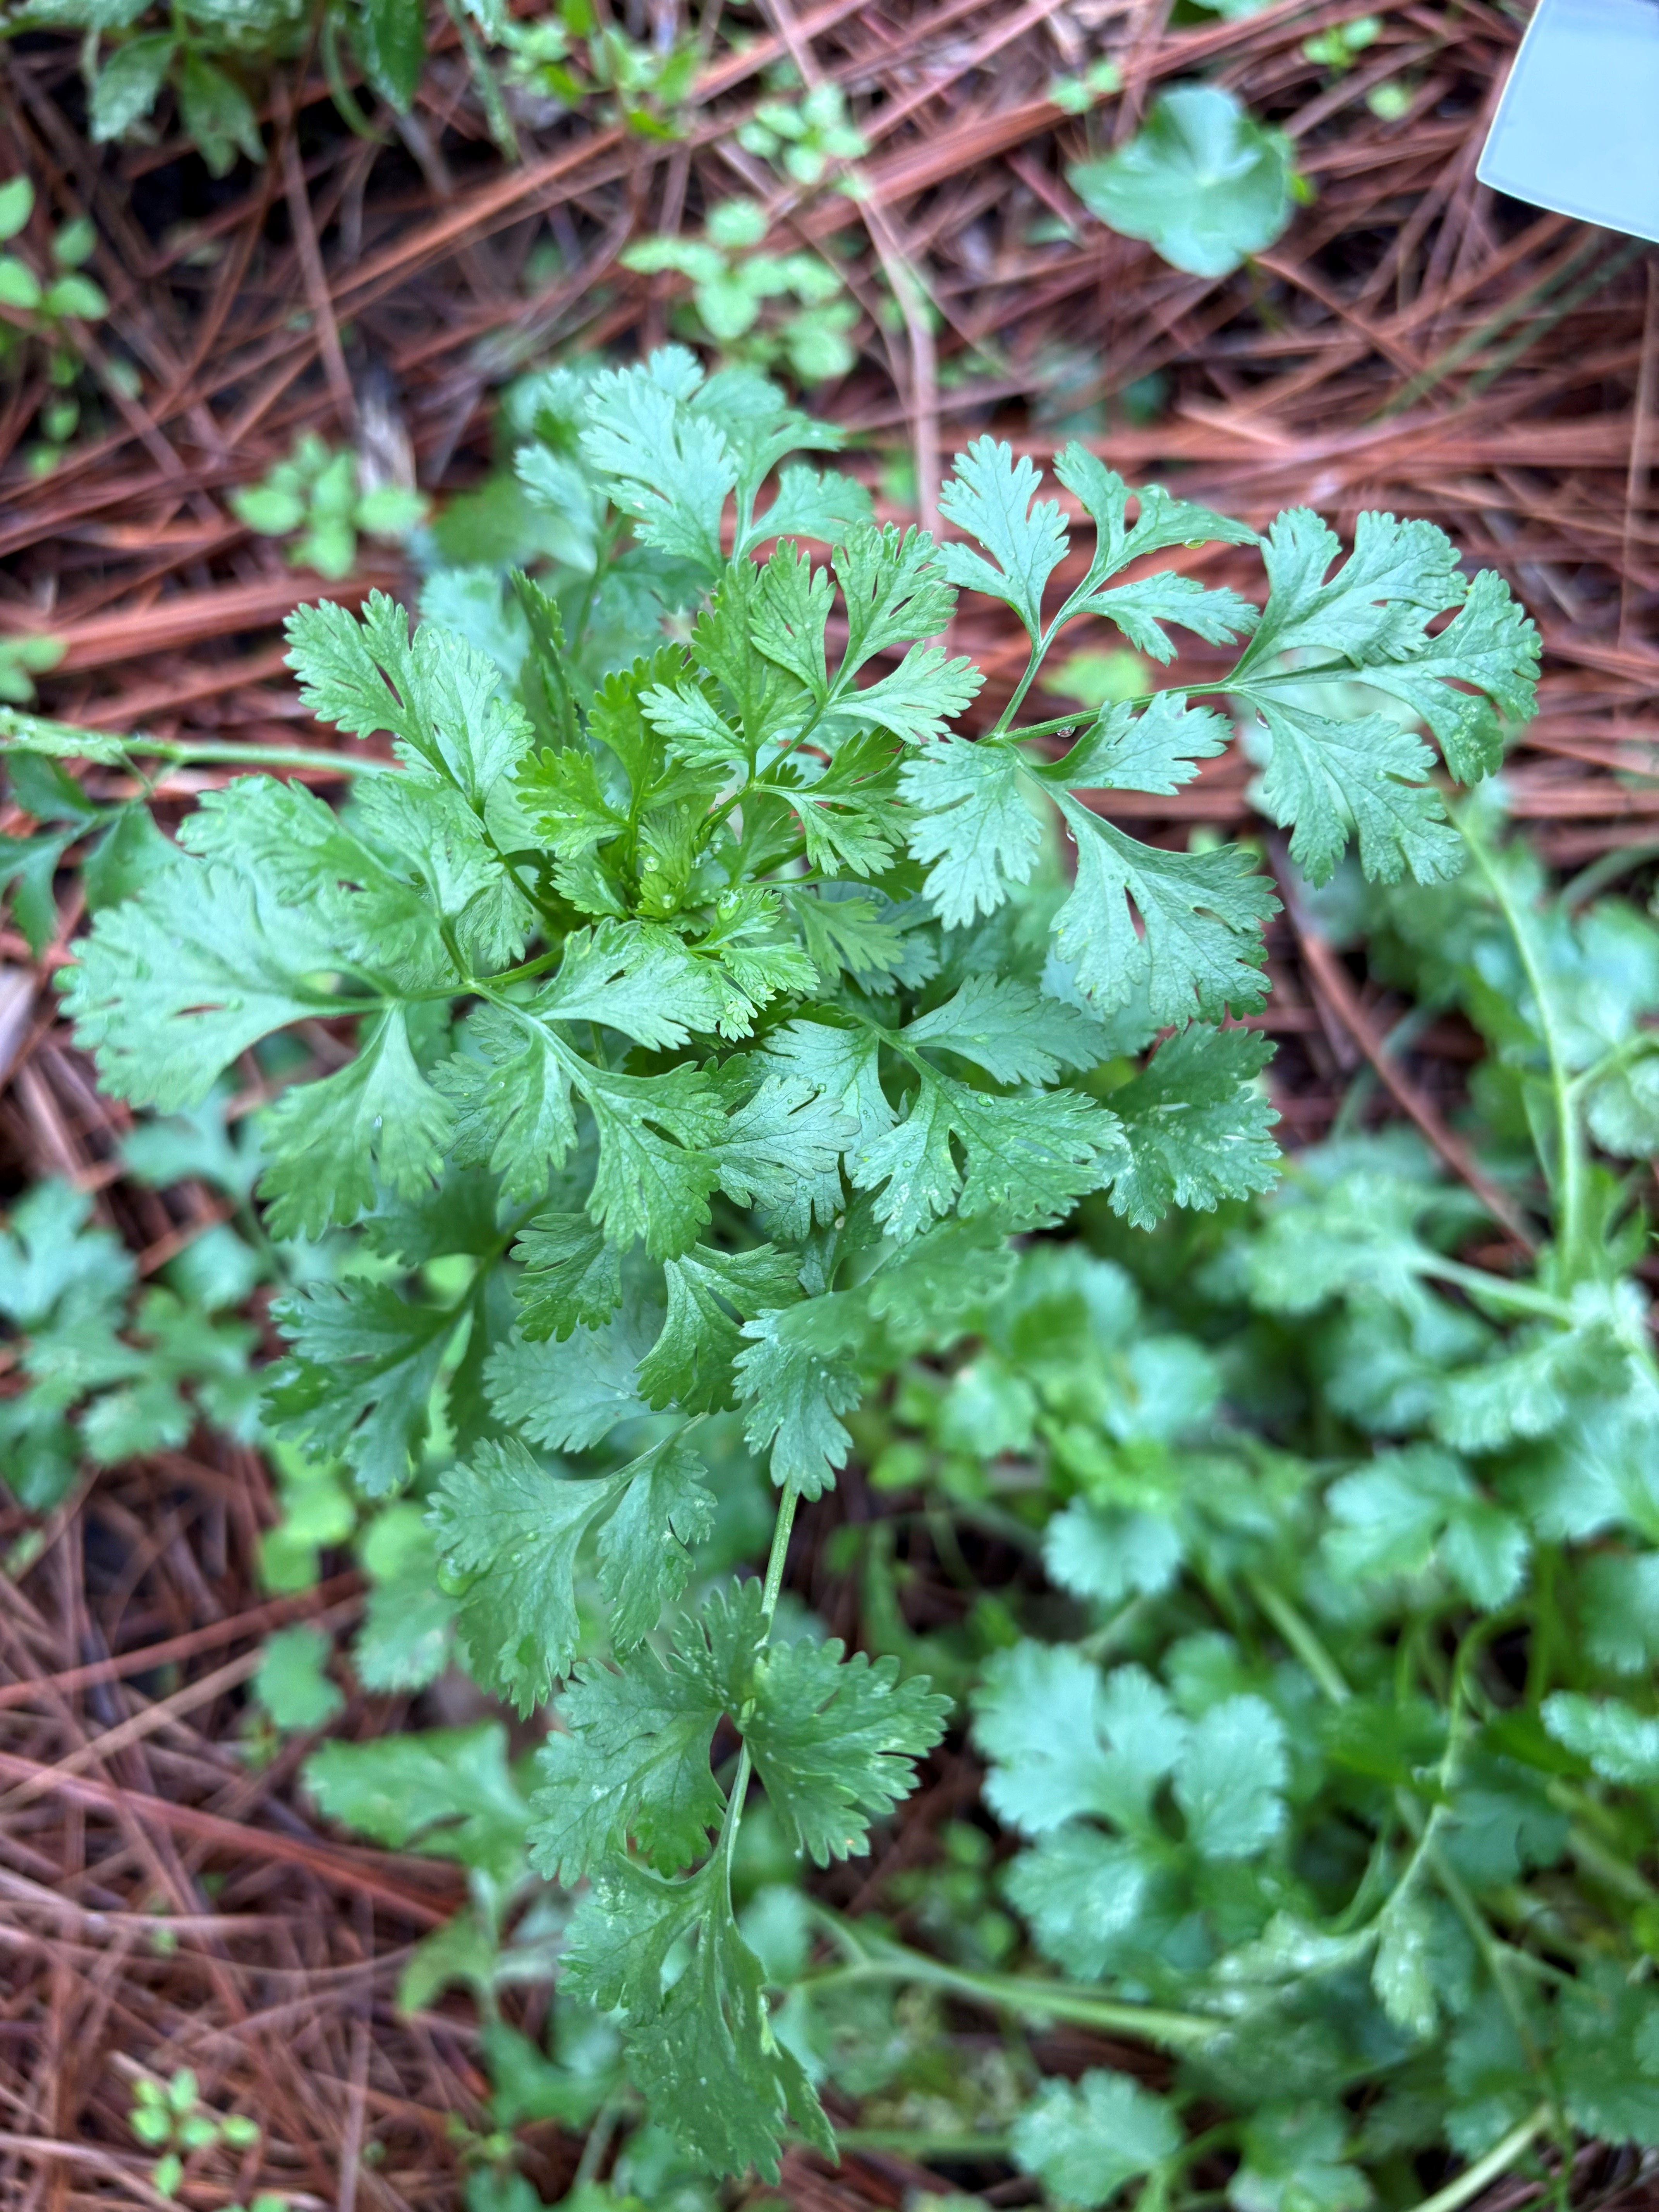
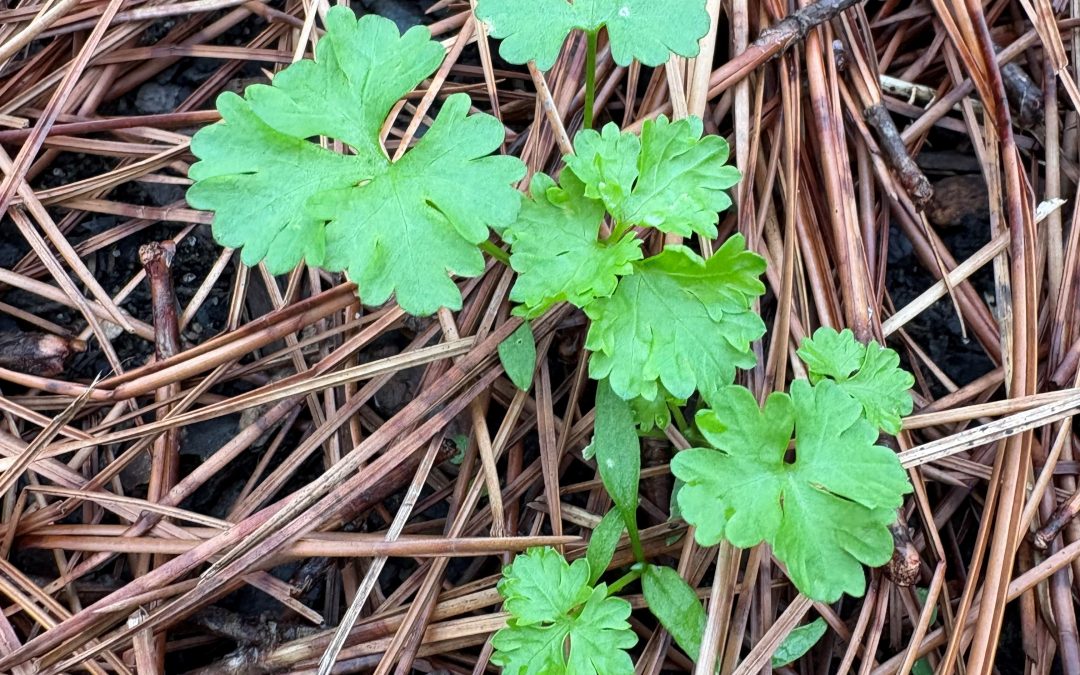
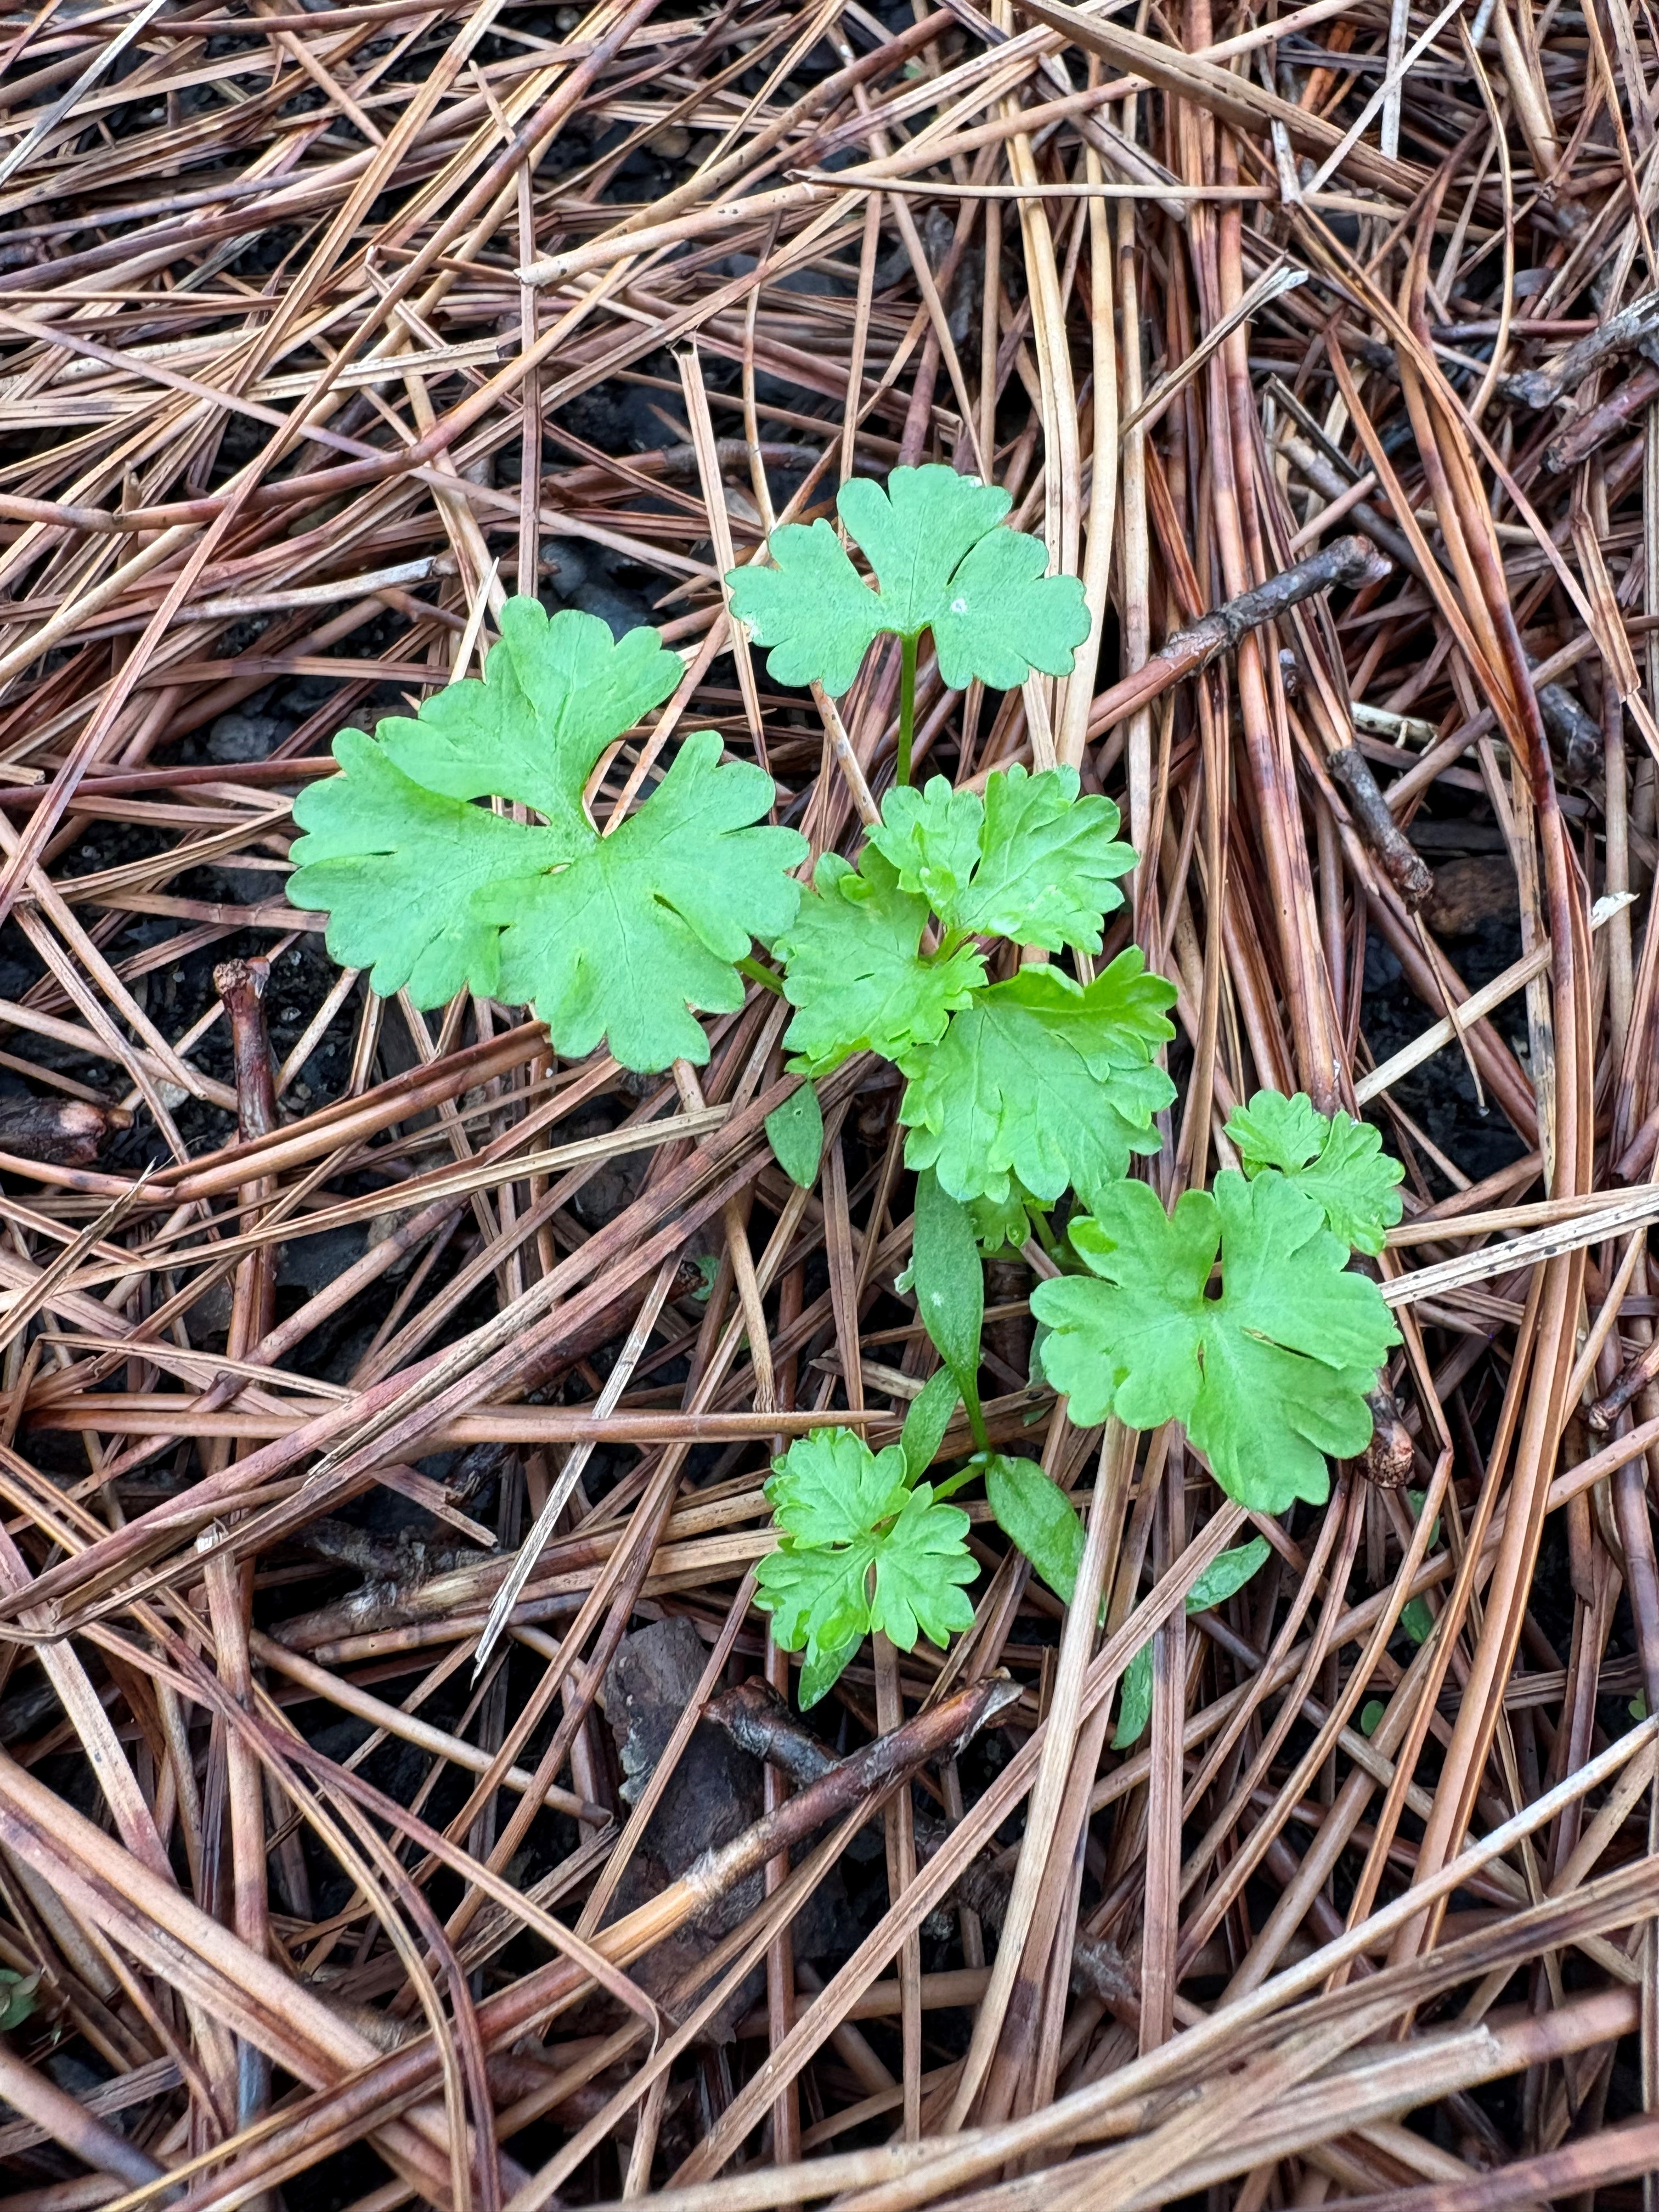
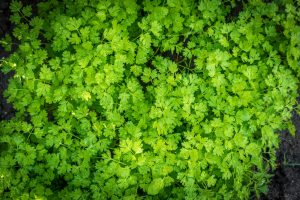
Cool-season cilantro grows quickly in mild weather and benefits from regular harvesting. Photo by Molly Jameson.
Winter might seem like the quiet season in the garden, but for cool-season herbs, it’s the time they settle in and really show off. While tomatoes and peppers and other warm-season crops may have succumbed to our first cold snaps, many herbs absolutely love the mild, bright, chilly weather we get from December through early spring.
If you’re itching to plant something right now, annual herbs are one of the easiest ways to keep the garden feeling lively through the colder months.
Cilantro (Coriandrum sativum)
Cilantro is one of the most reliable herbs you can grow in winter. It thrives in cool temperatures and short days, which makes December an excellent time to plant. You can scatter the seeds directly into containers or a raised bed, thin seedlings to six to eight inches apart, and harvest regularly to keep them producing.
Once warmer days return, cilantro will bolt and complete its life cycle, but that’s not always a bad thing. If you let the plants go to seed, the little green fruits ripen into the familiar brown coriander seeds. They’re useful in the kitchen, and you can save a handful to start next year’s crop.
Parsley (Petroselinum crispum)
Parsley is technically a biennial, but here in Florida, we treat it as a winter annual. Plant it in late fall and it usually settles in without much complaint, producing a steady mound of leaves you can snip all season. Flat-leaf parsley tends to have stronger flavor, while curly parsley is often used as a garnish, though both types are perfectly good in salads, sauces, and soups.
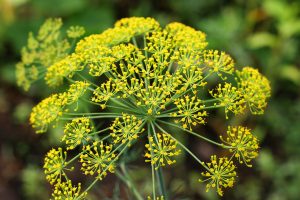
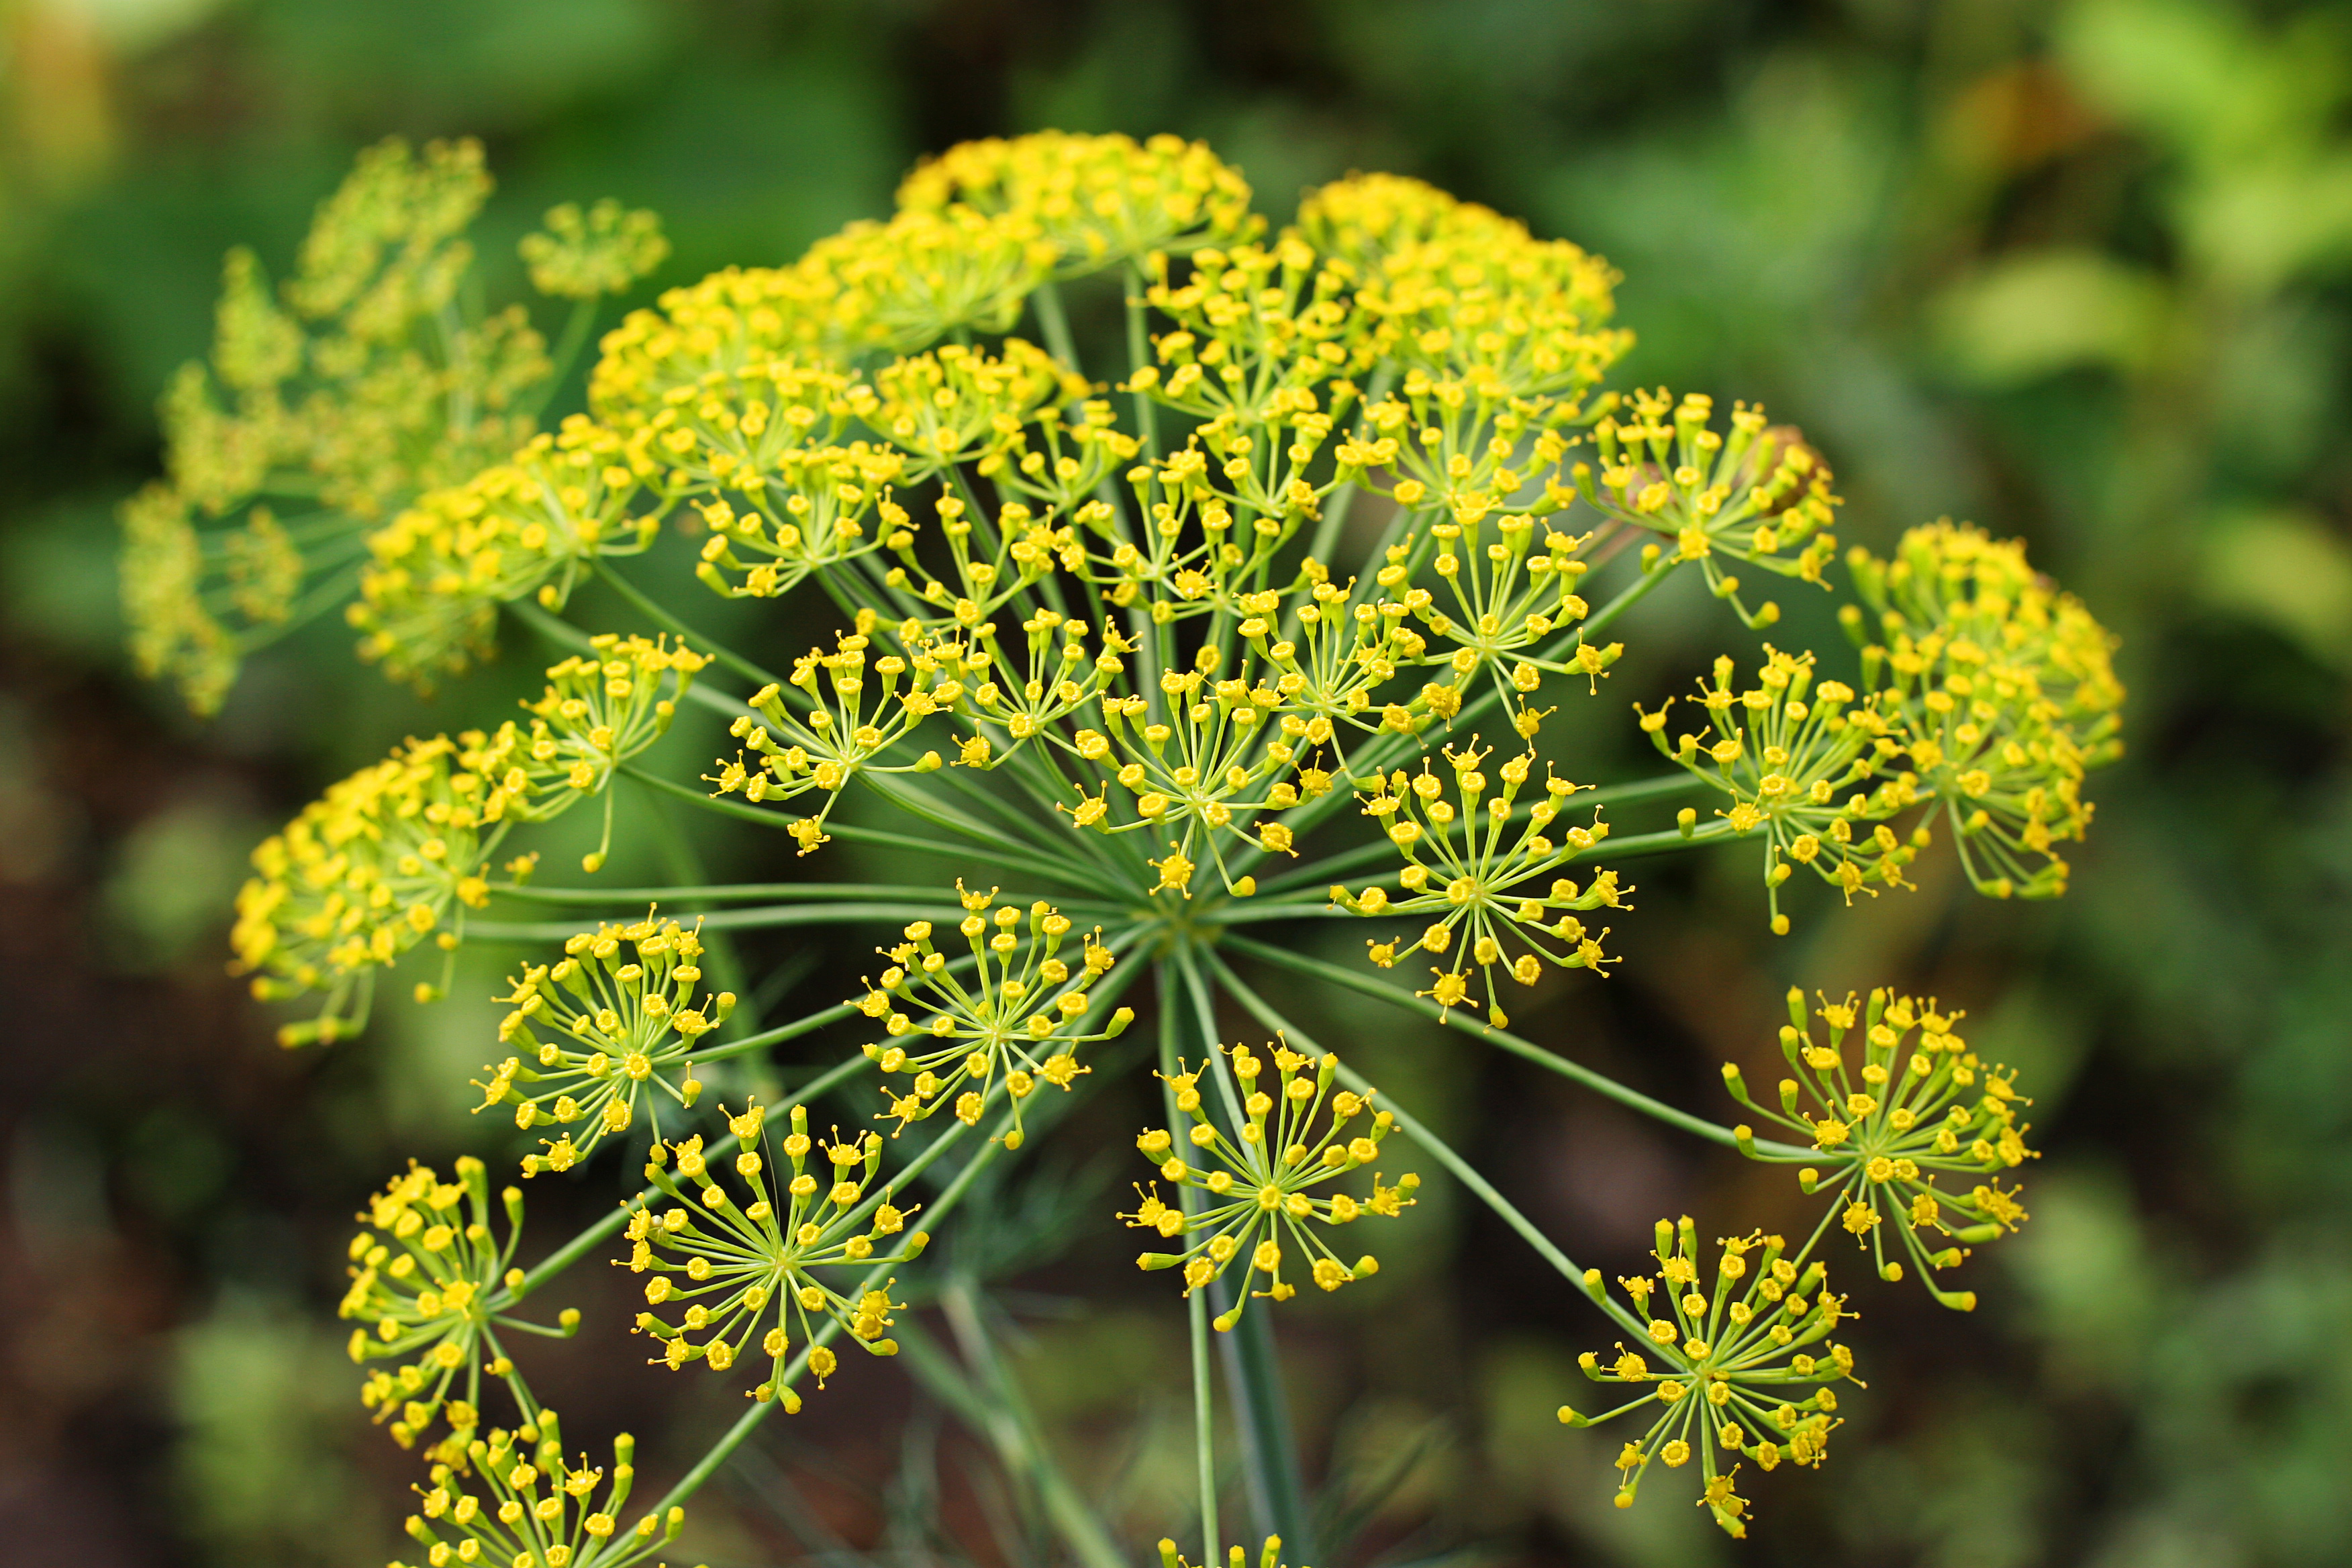
Dill produces umbrella-shaped clusters of tiny yellow flowers that attract pollinators. Photo by Irina Khomenko, Adobe Stock.
Give parsley sun or light shade and soil that doesn’t dry out too quickly. By the time the weather starts warming again, it naturally shifts its energy toward flowering, which signals the end of its leafy season.
Dill (Anethum graveolens)
Dill is one of those herbs you can spot from across the garden thanks to its fine, feathery texture. The scent alone makes it worth growing. The leaves, stems, and seeds all bring that familiar dill flavor to roasted vegetables, yogurt dips, potatoes, and seafood. The plants can stretch surprisingly tall if they’re happy, especially once the yellow flower heads start forming seeds.
And as long as the weather stays cool, dill usually keeps right on going. Give it a sunny spot with well-drained soil, and you’ll be harvesting for months. Like parsley and fennel, it also draws black swallowtail caterpillars. Many gardeners plant a little extra simply because the payoff – a few bright swallowtails drifting through the garden – is worth sharing.
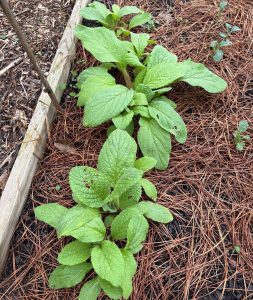
Borage produces edible leaves and flowers throughout the winter. Photo by Molly Jameson.
Borage (Borago officinalis)
Borage isn’t as widely grown as some of the other herbs here, but it’s one of the more charming additions to a winter bed. The leaves have a faint cucumber scent, and the blue, star-shaped flowers look like something out of a fairytale. Both are edible, and the flowers especially tend to disappear quickly into salads or iced drinks once you start using them. Bees seem to find borage immediately, even on cool days, and it often reseeds itself in the same spot for years.
It doesn’t ask for much – sun, a bit of space, and soil that drains reasonably well. Coming from the Mediterranean, it handles dry weather and even deer browsing better than many soft-leaved herbs.
Chervil (Anthriscus cerefolium)
Chervil, sometimes called French parsley, is a delicate, ferny herb with a mild anise flavor that’s perfect for winter cooking. It’s one of those herbs you want to use fresh – just toss a handful in at the end of cooking and it melts right into whatever you’re making. A few specialty forms even produce edible roots similar to small carrots, though the leafy types are what you’ll most often see.
Chervil’s delicate, fern-like leaves thrive in cool weather. Photo by Jiri D., Adobe Stock.
Chervil grows best in full to part sun with rich, moist soil, and it handles cold weather well. Warm temperatures, however, will quickly cause it to bolt and turn bitter, so winter is the ideal window for growing it here.
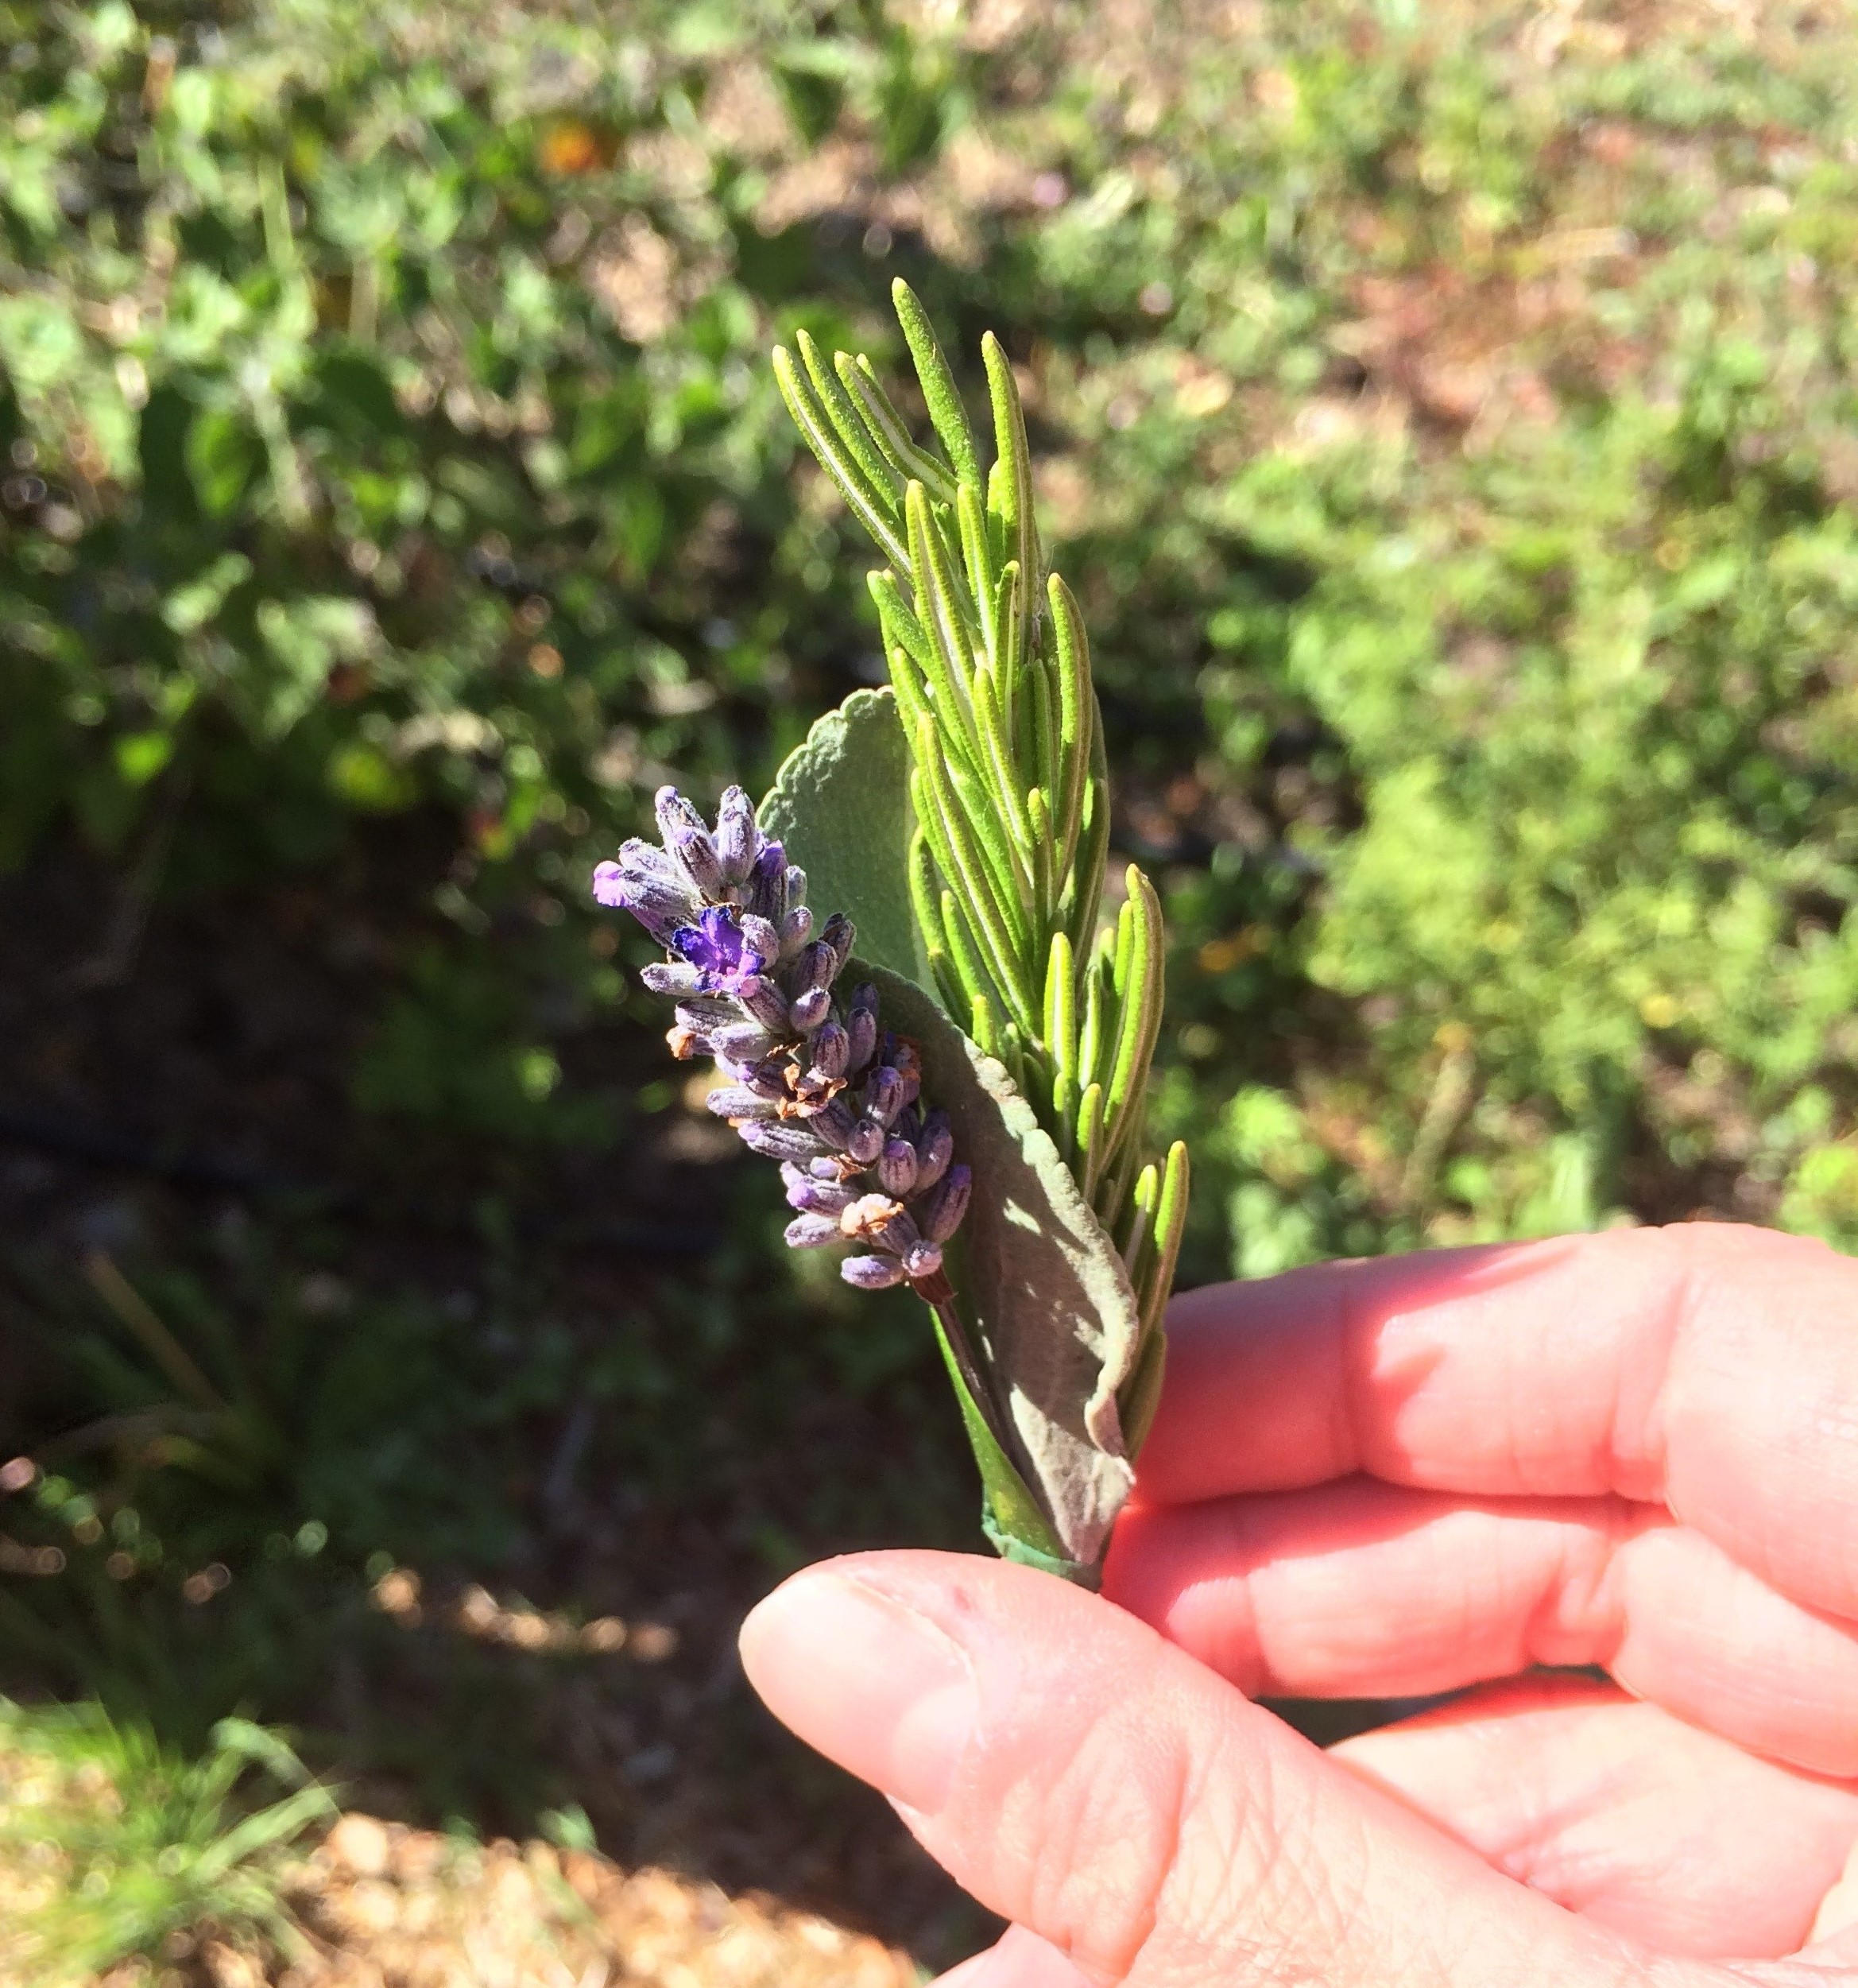
Lavender (Lavandula spp.)
Lavender always seems to lend a sense of calm to a garden. Most of us know it for the soothing scent used in soaps, lotions, and oils, but it’s also showing up more often in the kitchen. A tiny pinch can add a gentle floral note to pastries, syrups, jams, or a cup of tea.
Because it evolved in the dry hills of the western Mediterranean, lavender appreciates our winter weather far more than our humid summers. Spanish and French types generally handle our climate better than the classic English lavender, but be sure to give it the right conditions, including full sun, well-drained soil, and good air movement.

Spanish lavender blooms during Florida’s cool season and pairs well with rosemary in the kitchen. Photo by Molly Jameson.
Water lavender lightly as it settles in, then let the soil dry between waterings. Once established, it is one of those plants you end up brushing against every time you pass it, simply to enjoy the fragrance.
Fennel (Foeniculum vulgare)
Fennel is both ornamental and practical. The feathery foliage brings a soft, airy look to winter beds, and the flavor of the fronds works beautifully with citrus, fish, or hearty winter salads. If you let fennel grow tall, it eventually produces large umbrella-shaped flower clusters that draw in pollinators and later ripen into seeds you can use in the kitchen.
Most gardeners grow the non-bulbing type for its foliage, though bulb fennel can be planted in early winter if you want to experiment. Like dill and parsley, fennel is a host plant for black swallowtail caterpillars, so it’s worth planting extra if you enjoy watching the full butterfly life cycle. Fennel grows best in full sun with well-drained soil.
Growing Tips for Winter Herbs
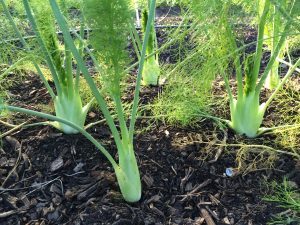
Fennel grows well in the cool months, producing feathery foliage and sweet, anise-flavored fronds. Photo by Molly Jameson.
Our winter sun is gentle enough that most herbs appreciate as much light as you can give them. Containers and raised beds work well because they drain quickly, which is important for almost all cool-season herbs. Keep soil evenly moist, and on nights with hard freezes (less than 28°F for over an hour), a light sheet or frost cloth over young plants offers protection. Most of these herbs will rebound quickly after brief cold snaps.
Cool-season herbs are some of the easiest plants you can grow this time of year. They’re fast, flavorful, and usually much less bothered by pests or disease than anything you grow in summer.
A few pots of cilantro, parsley, dill, borage, chervil, lavender, or fennel can brighten up both your meals and your garden all the way to spring.

by Molly Jameson | Oct 30, 2025
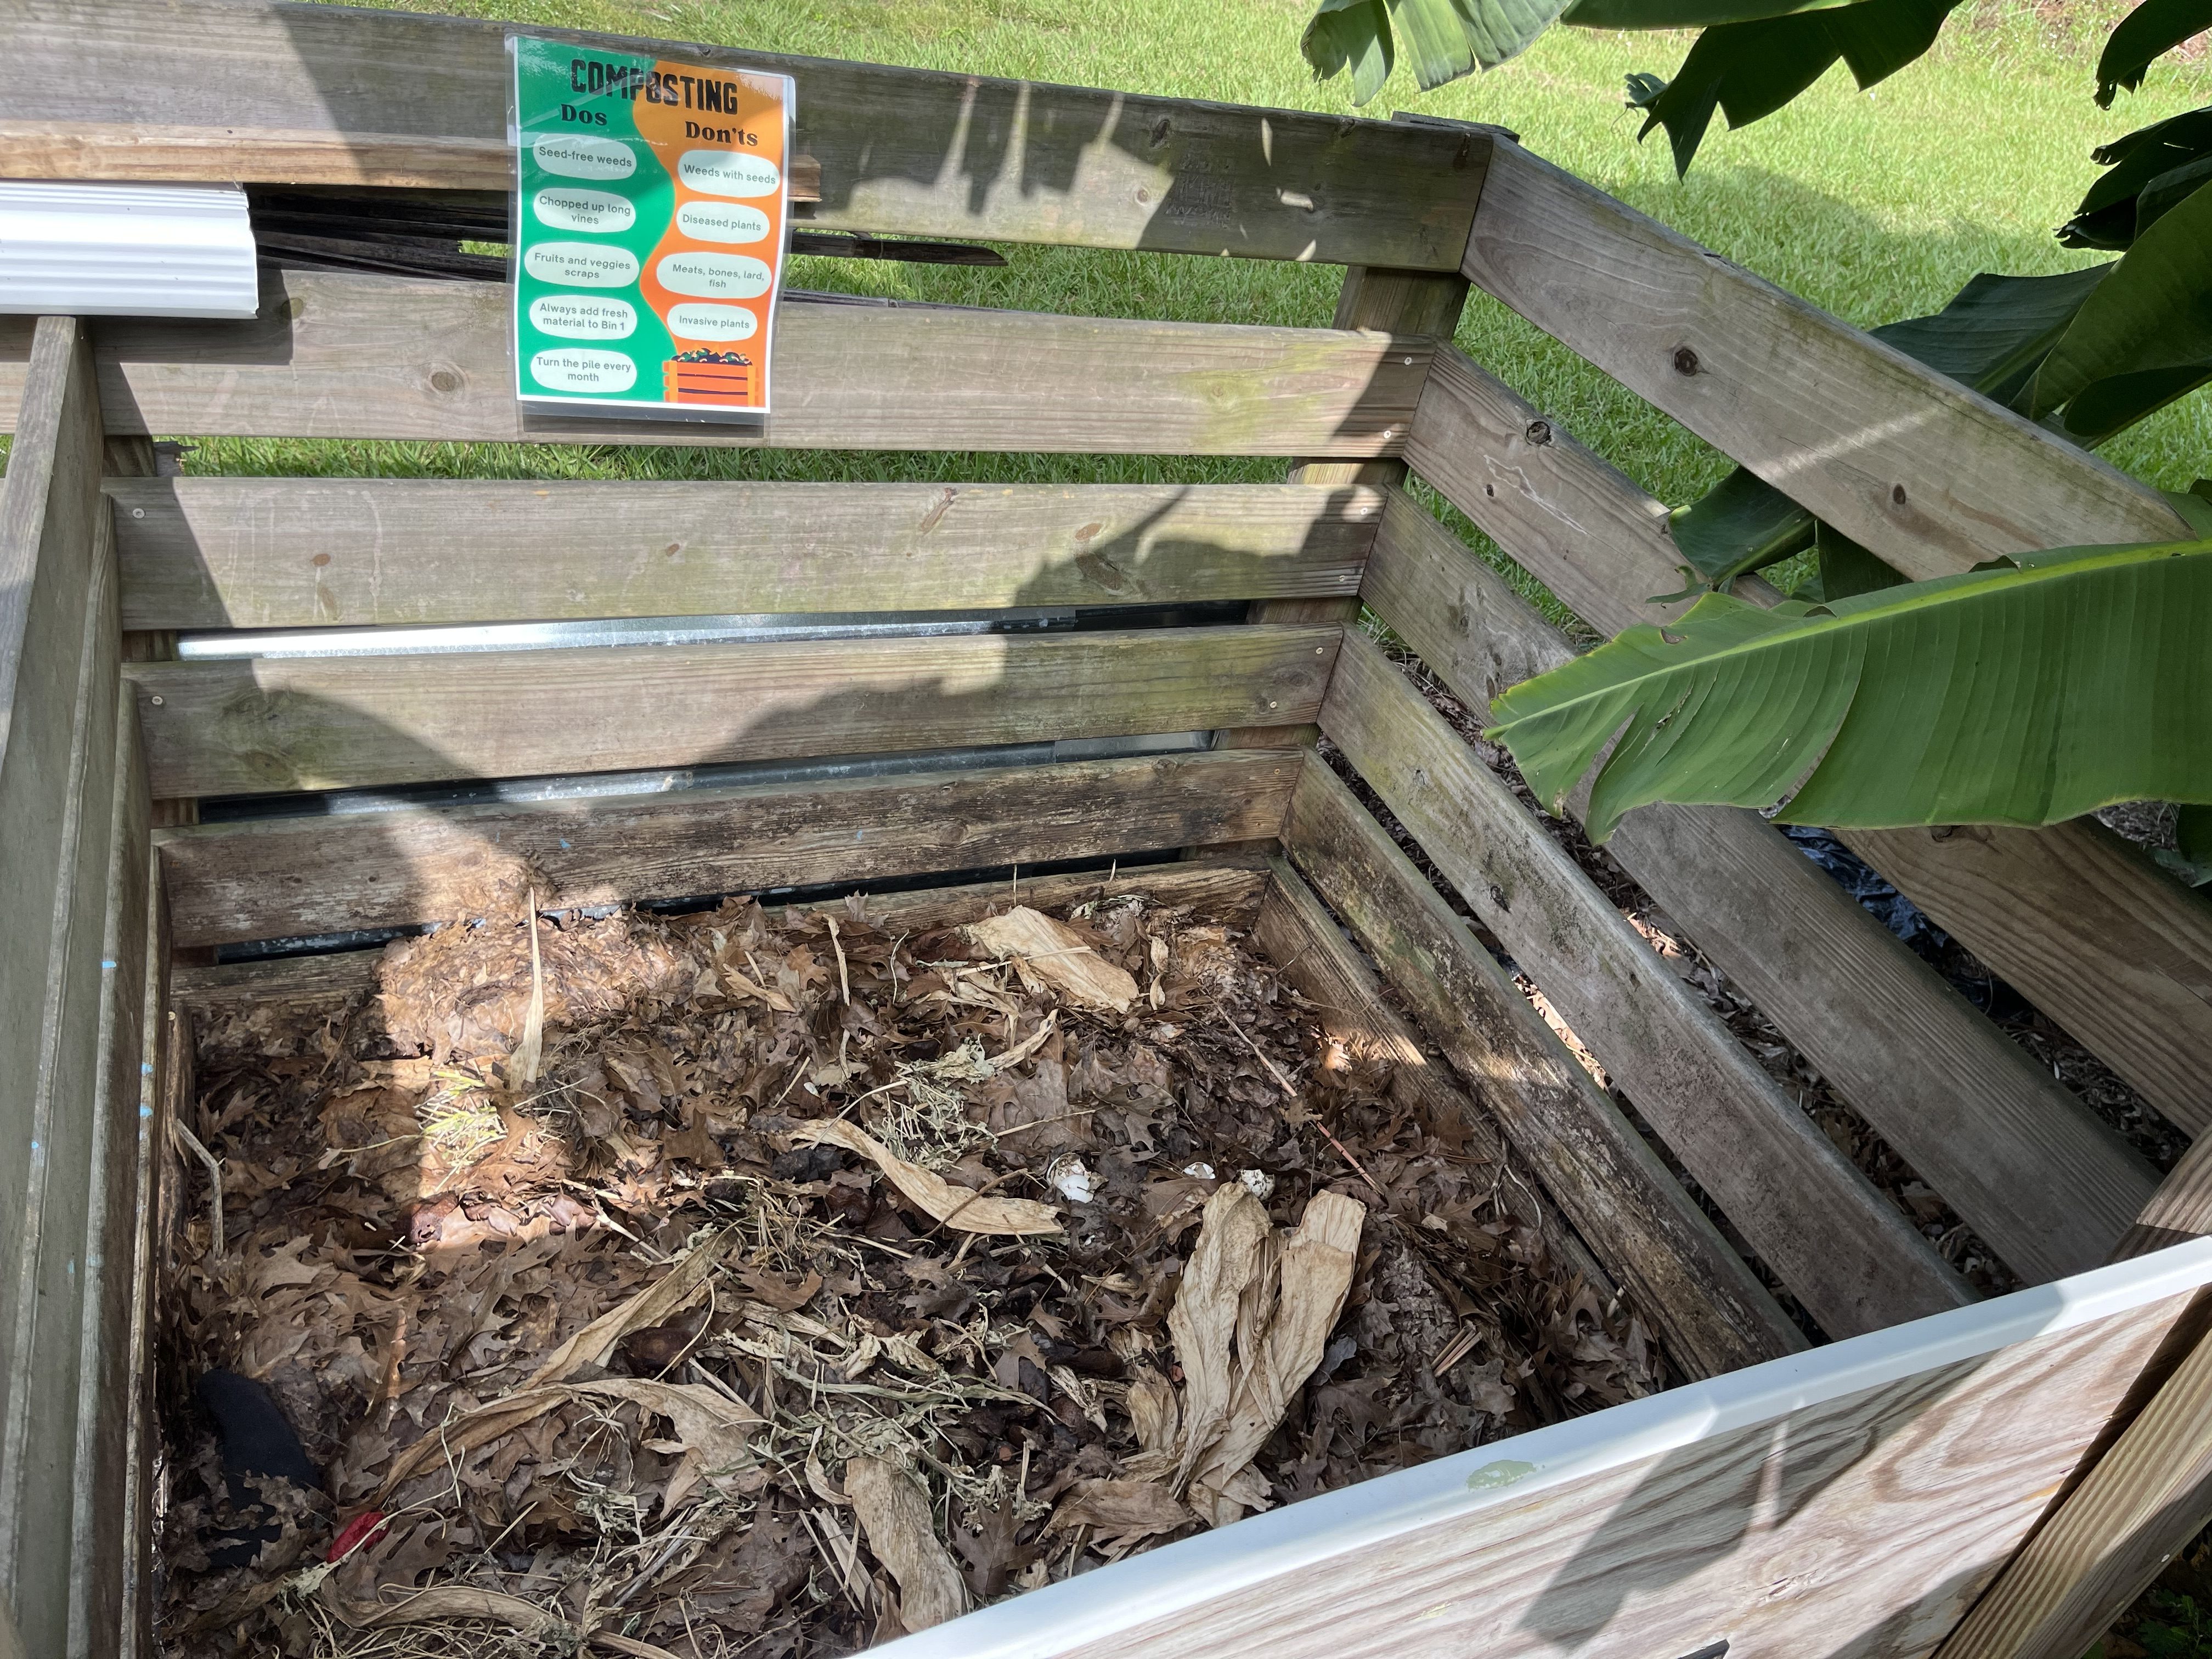
A simple wooden bin provides airflow and space for layering “browns” and “greens” to create balanced compost at home. Photo by Molly Jameson.
The Dirt on Compost: Hot and Worm Composting at Home
Every week, many of us dump spoiled food or leftovers into the trash and haul yard waste to the curb, not realizing that all of that organic material could be turned into something incredibly useful. Composting is the answer. It’s a simple, natural process that transforms food scraps and yard debris into a rich soil amendment that feeds your plants and improves soil health.

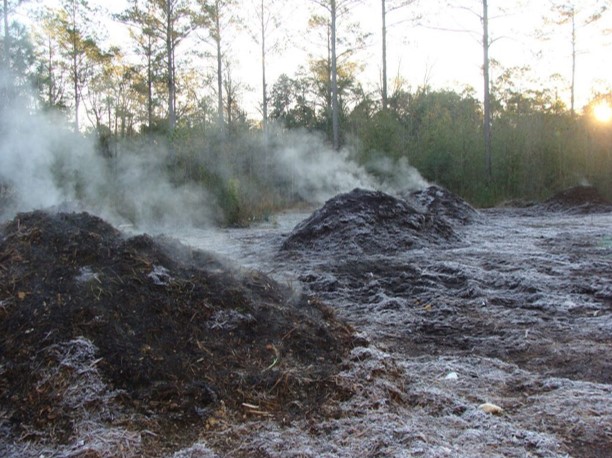
Microbial activity generates heat as organic matter breaks down, causing visible steam to rise from active thermophilic compost piles on cool mornings. Photo by Turkey Hill Farm.
There are two main ways to compost at home: thermophilic (hot) composting and vermicomposting (composting with worms).
Thermophilic composting is the classic backyard method that relies on heat-loving microbes to break down organic material. With the right mix of “browns” (carbon-rich materials like dried leaves, cardboard, and straw) and “greens” (nitrogen-rich materials like vegetable scraps, coffee grounds, and grass clippings), the pile heats up to between 130–160°F. This high heat speeds up decomposition and kills weed seeds and harmful pathogens. Turn the pile occasionally and keep it moist, and in a few months, you’ll have dark, earthy compost ready to mix into your garden beds.
Hot Composting Fun Facts
- Food scraps and yard waste make up nearly 30% of what we throw away, most of which could be composted instead.
- Microbes in a hot compost pile can double their population every 20–30 minutes under the right conditions.
- A compost pile needs at least one cubic yard (3x3x3 feet) of material to build enough mass to heat up properly.
- Steam rising from a compost pile on a chilly morning isn’t smoke – it’s water vapor from microbial activity.

Red wiggler earthworms transform food scraps into nutrient-rich worm castings. Photo by Leon County.
Vermicomposting is a little different – and a bit squirmier. This method uses red wiggler earthworms (Eisenia fetida) to process kitchen scraps into a fine, nutrient-rich material called worm castings. Earthworm bins can be kept indoors or outside in a shaded area, making them a great option for those with limited space. It’s clean, odor-free when managed properly, and a surprisingly fun way to recycle your food waste.
Worm Composting Fun Facts
- Red wigglers can eat up to half their body weight in food scraps each day.
- Worms breathe through their skin and need moist bedding to survive and stay active.
- Worm castings contain five times more nitrogen and seven times more phosphorus than average topsoil.
- Worm castings contain beneficial microbes that help suppress certain plant diseases in soil.
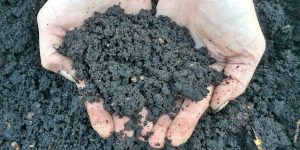
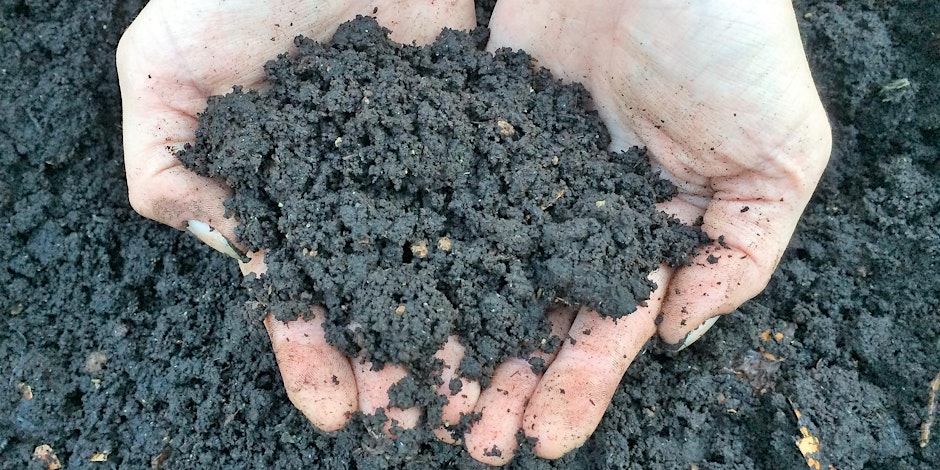
Finished vermicompost is dark, crumbly, and nutrient-rich – the result of red wigglers breaking down organic waste. Photo by John Edwards.
Both methods keep organic material out of the landfill, reduce methane emissions, and build healthier soil – something every gardener can appreciate.
If you’d like to learn even more about composting and hear additional fun facts about how nature recycles, join UF/IFAS Extension Agents Mark Tancig and Molly Jameson for The Dirt on Compost: Hot & Worm Composting at Home on Wednesday, November 12, from 6:00 to 8:00 p.m. at the Leon County Extension Office (615 East Paul Russell Road).
Register on Eventbrite: https://UFIFASLeonCompostingFall2025.eventbrite.com
This free workshop will explore the science behind composting and provide practical tips for both hot composting and worm composting systems.
by Molly Jameson | Oct 3, 2025
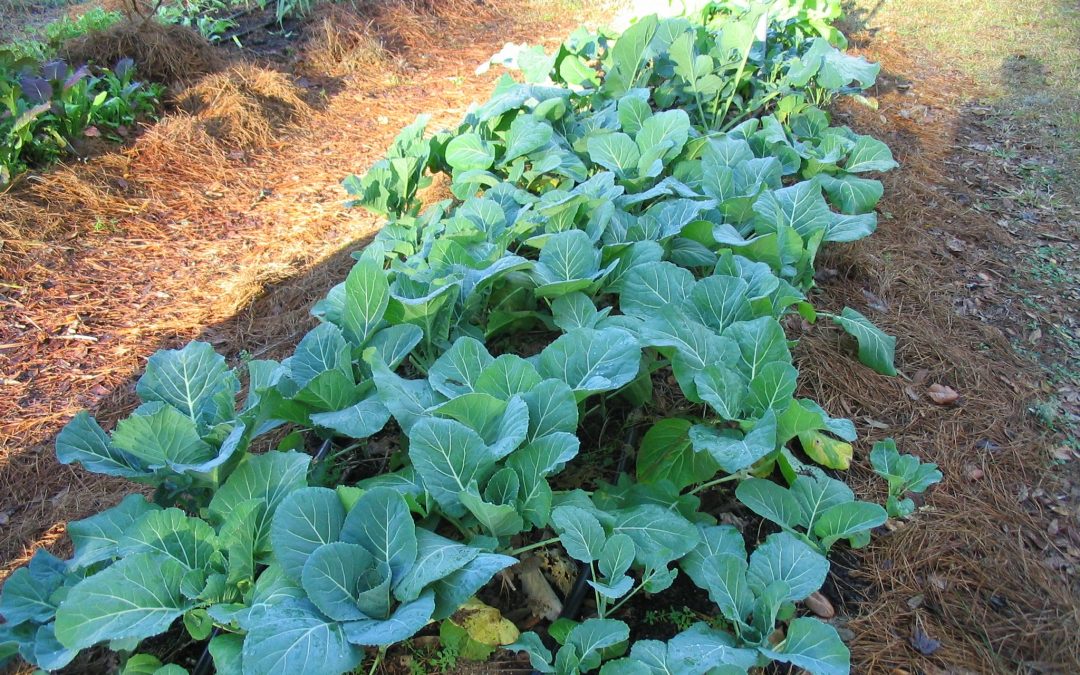
Even a short row of collards can yield basket after basket of tender leaves. Photo by Donna Legare.
Fall Gardening Spotlight: Collard Greens
When cooler weather finally rolls into the Panhandle, collard greens (Brassica oleracea var. acephala) are one of the most reliable crops you can grow. Members of the cabbage family, Brassicaceae, collards are hardy, low-maintenance, and don’t mind a little frost – in fact, a nip of cold will sweeten their flavor. In my neighborhood, it’s not unusual to see collards thriving in gardens all the way through winter and early spring.
Collard seeds can be directly sown starting in late August, with transplants best set out from September through November. If you start from seed, expect to harvest in two to three months. For a quicker turnaround, grab transplants from a local nursery and you’ll be cooking collards by Thanksgiving.
When late summer and early fall heat lingers, young plants may need a little extra care. Providing afternoon shade with a 40 to 50% density shade cloth can keep seedlings from wilting and help them establish more smoothly during warm spells in September. Regular, even watering is also important, but make sure the soil drains well.

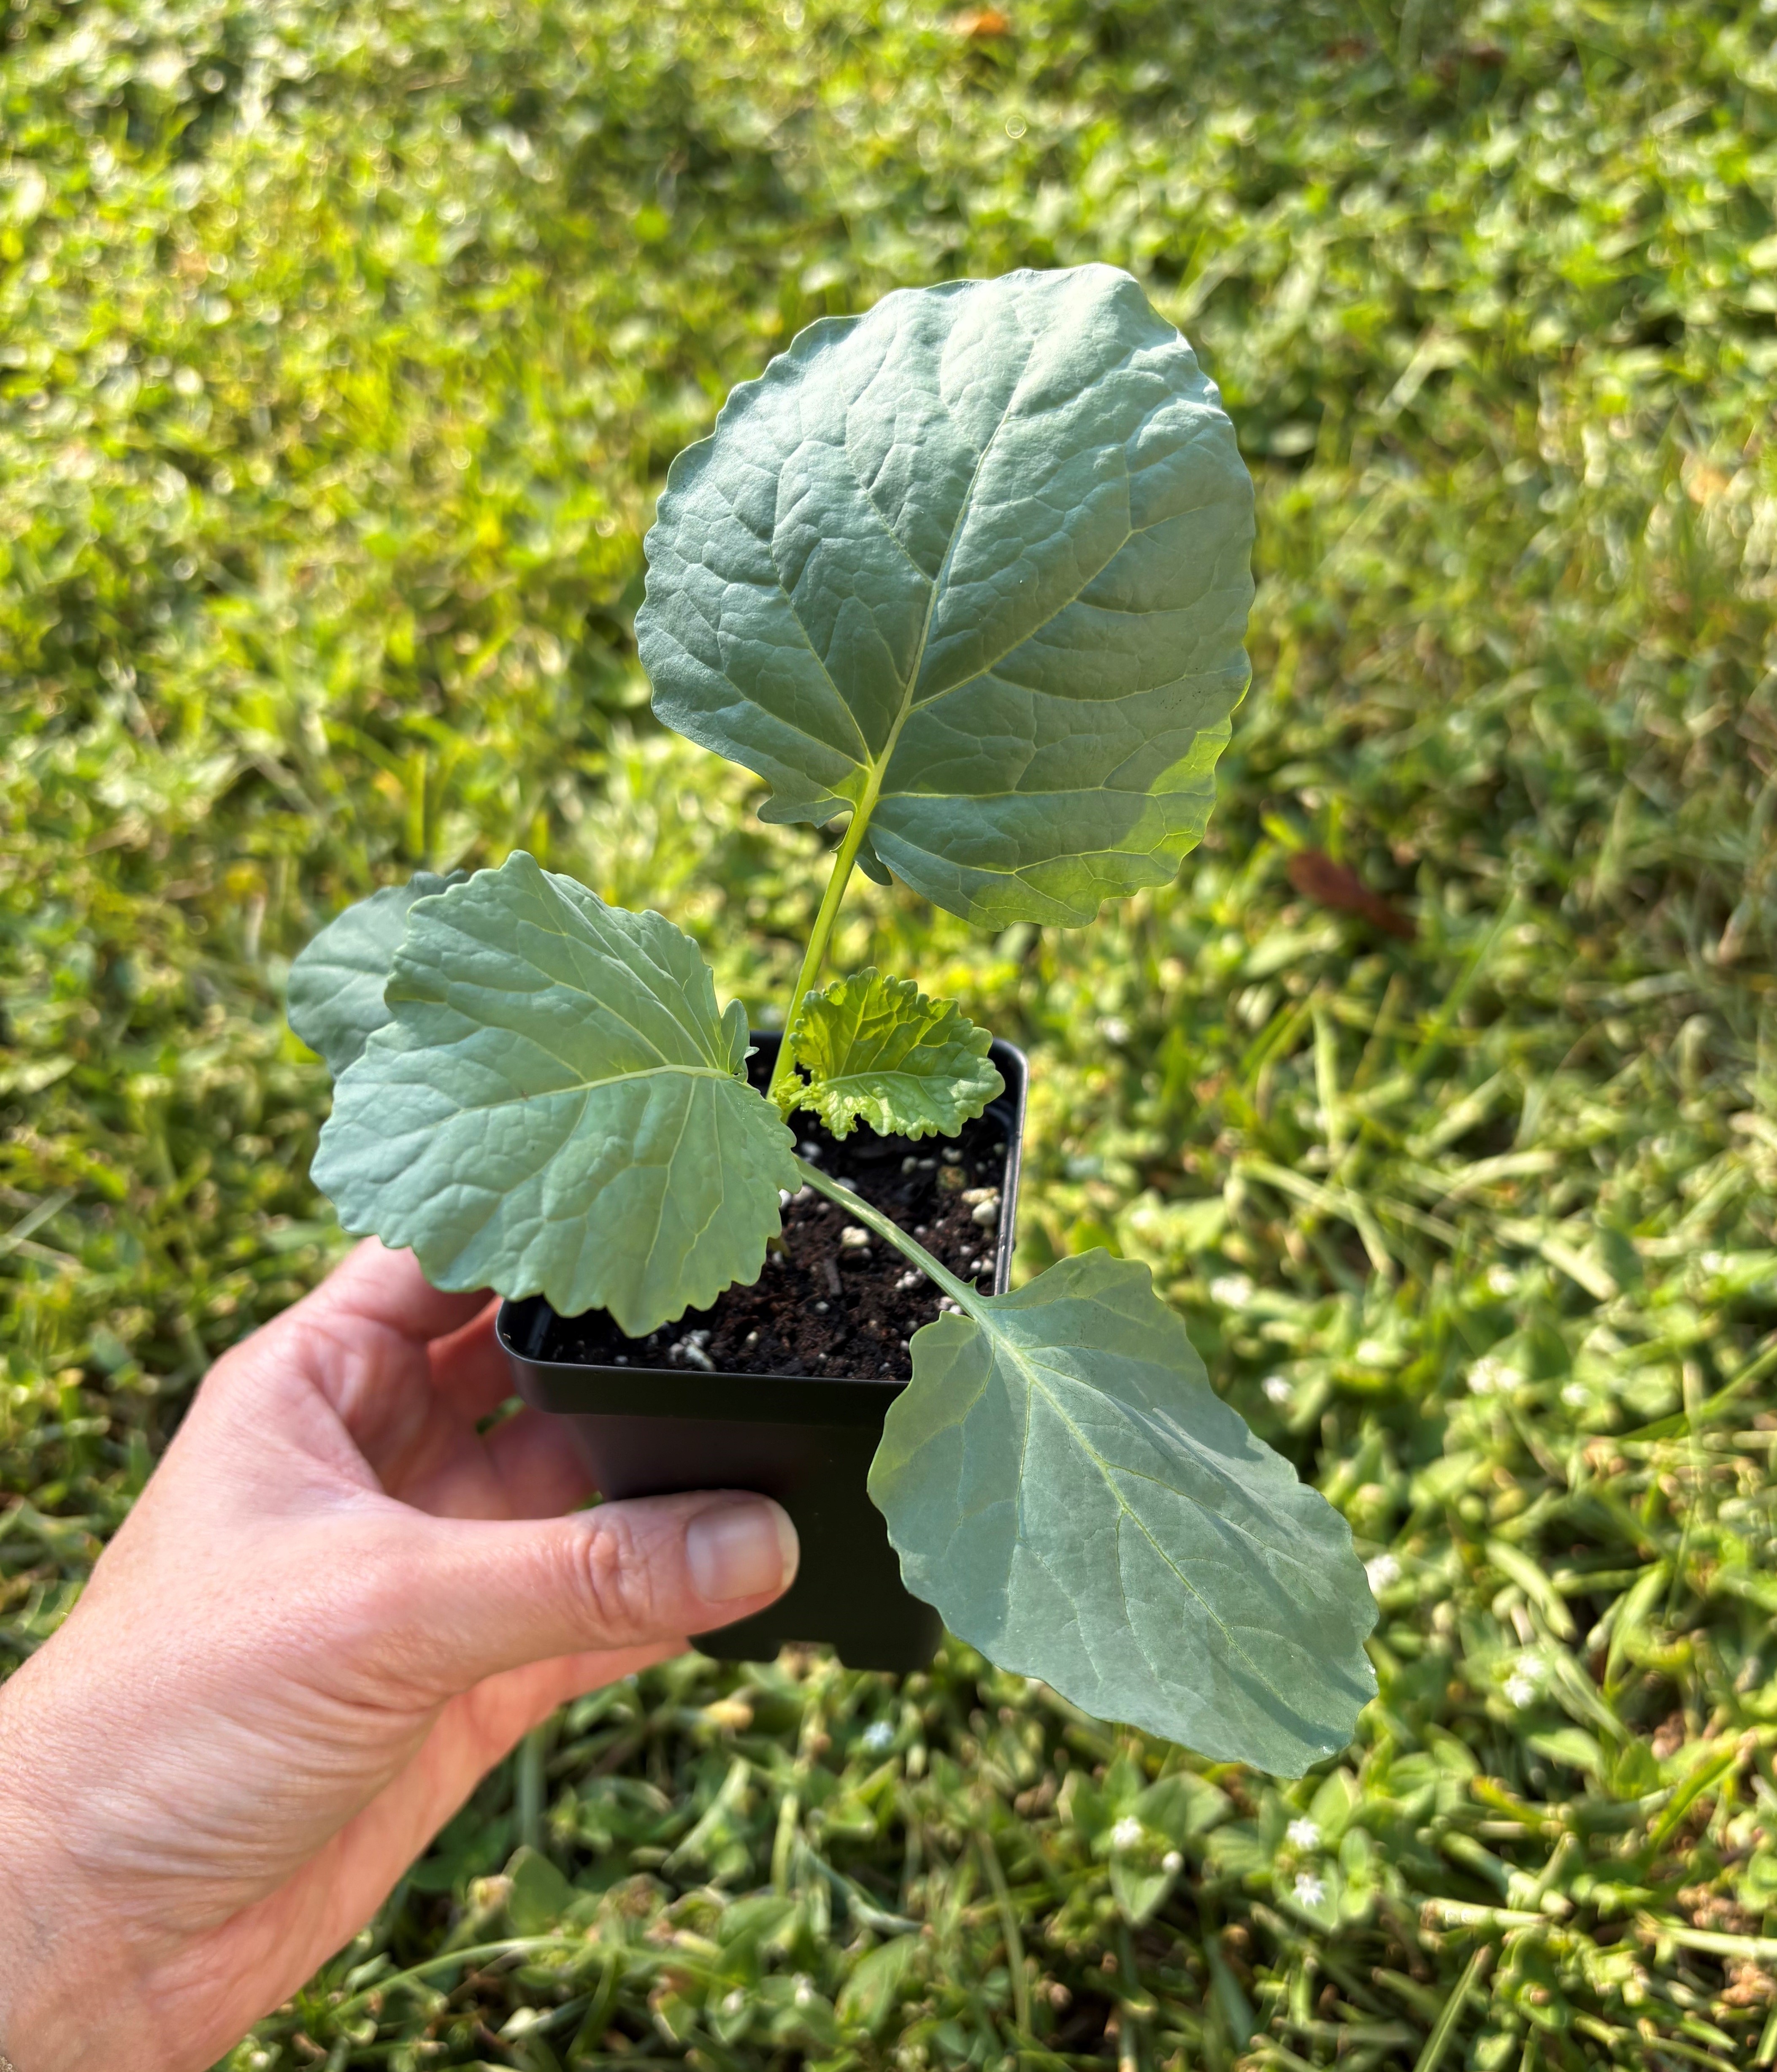
A Georgia Southern collard started indoors in August and up-potted in early September, now ready for transplanting into the fall garden. Photo by Molly Jameson.
Space plants 12 to 18 inches apart in rows two to three feet wide, since collards grow large and need room to spread. In raised beds, you can space plants the same 12 to 18 inches apart in all directions, often in a staggered grid, to make the most of the space. For a steady supply, consider staggering plantings every couple of weeks through early November. Collards are among the more forgiving fall crops – just give them at least six hours of sun, nutrient-rich soil, and steady moisture.
One thing I’ve learned from experience: don’t be shy about picking leaves. Collards will keep producing as long as you harvest from the bottom up, leaving the center growing tip alone. I’ve found the leaves taste best when they’re picked young, around 10 to 12 inches long. If you leave them on longer, they’ll toughen up a bit but hold up well in slow-cooked dishes. Even a short row in the garden can keep a family in collards for much of the season, which helps explain why they’ve been a fixture in Southern kitchens for generations.
Some varieties that do well in our area include several open-pollinated classics. ‘Georgia Southern’ has stood the test of time for its tender, large leaves, while ‘Vates’ is another reliable option, known for its compact size and resistance to bolting. For a collard that’s as pretty as it is productive, try the heirloom ‘Alabama Blue.’ Its bluish leaves are streaked with purple, adding beauty to the garden as well as the plate. If you’d like to try hybrid varieties, look for ‘Champion,’ bred from ‘Vates’ with improved cold tolerance and disease resistance, or ‘Top Bunch,’ which grows quickly and recovers fast after harvest. You’ll usually find at least one or two of these on the racks at local plant nurseries.
While collards are tough, do keep an eye out for caterpillars such as cabbage loopers and diamondback moths, which can chew holes in the leaves. Picking them off by hand usually can keep them under control if you scout often, though a light spray of Bacillus thuringiensis (Bt) can also help if they get ahead of you. Be sure to follow the label directions carefully when applying.
Once you’ve got a basket full of collards, you can make them as simple or as dressed up as you like. I usually just sauté them in olive oil with garlic, salt, and a pinch of smoked paprika. They also slip nicely into soups, mix well with pasta, and can even be blended into green smoothies.
Collards are tough, productive, and delicious – and if you plant a few this fall, you might just find yourself sharing leaves with neighbors well into the new year.
by Molly Jameson | Jun 26, 2025
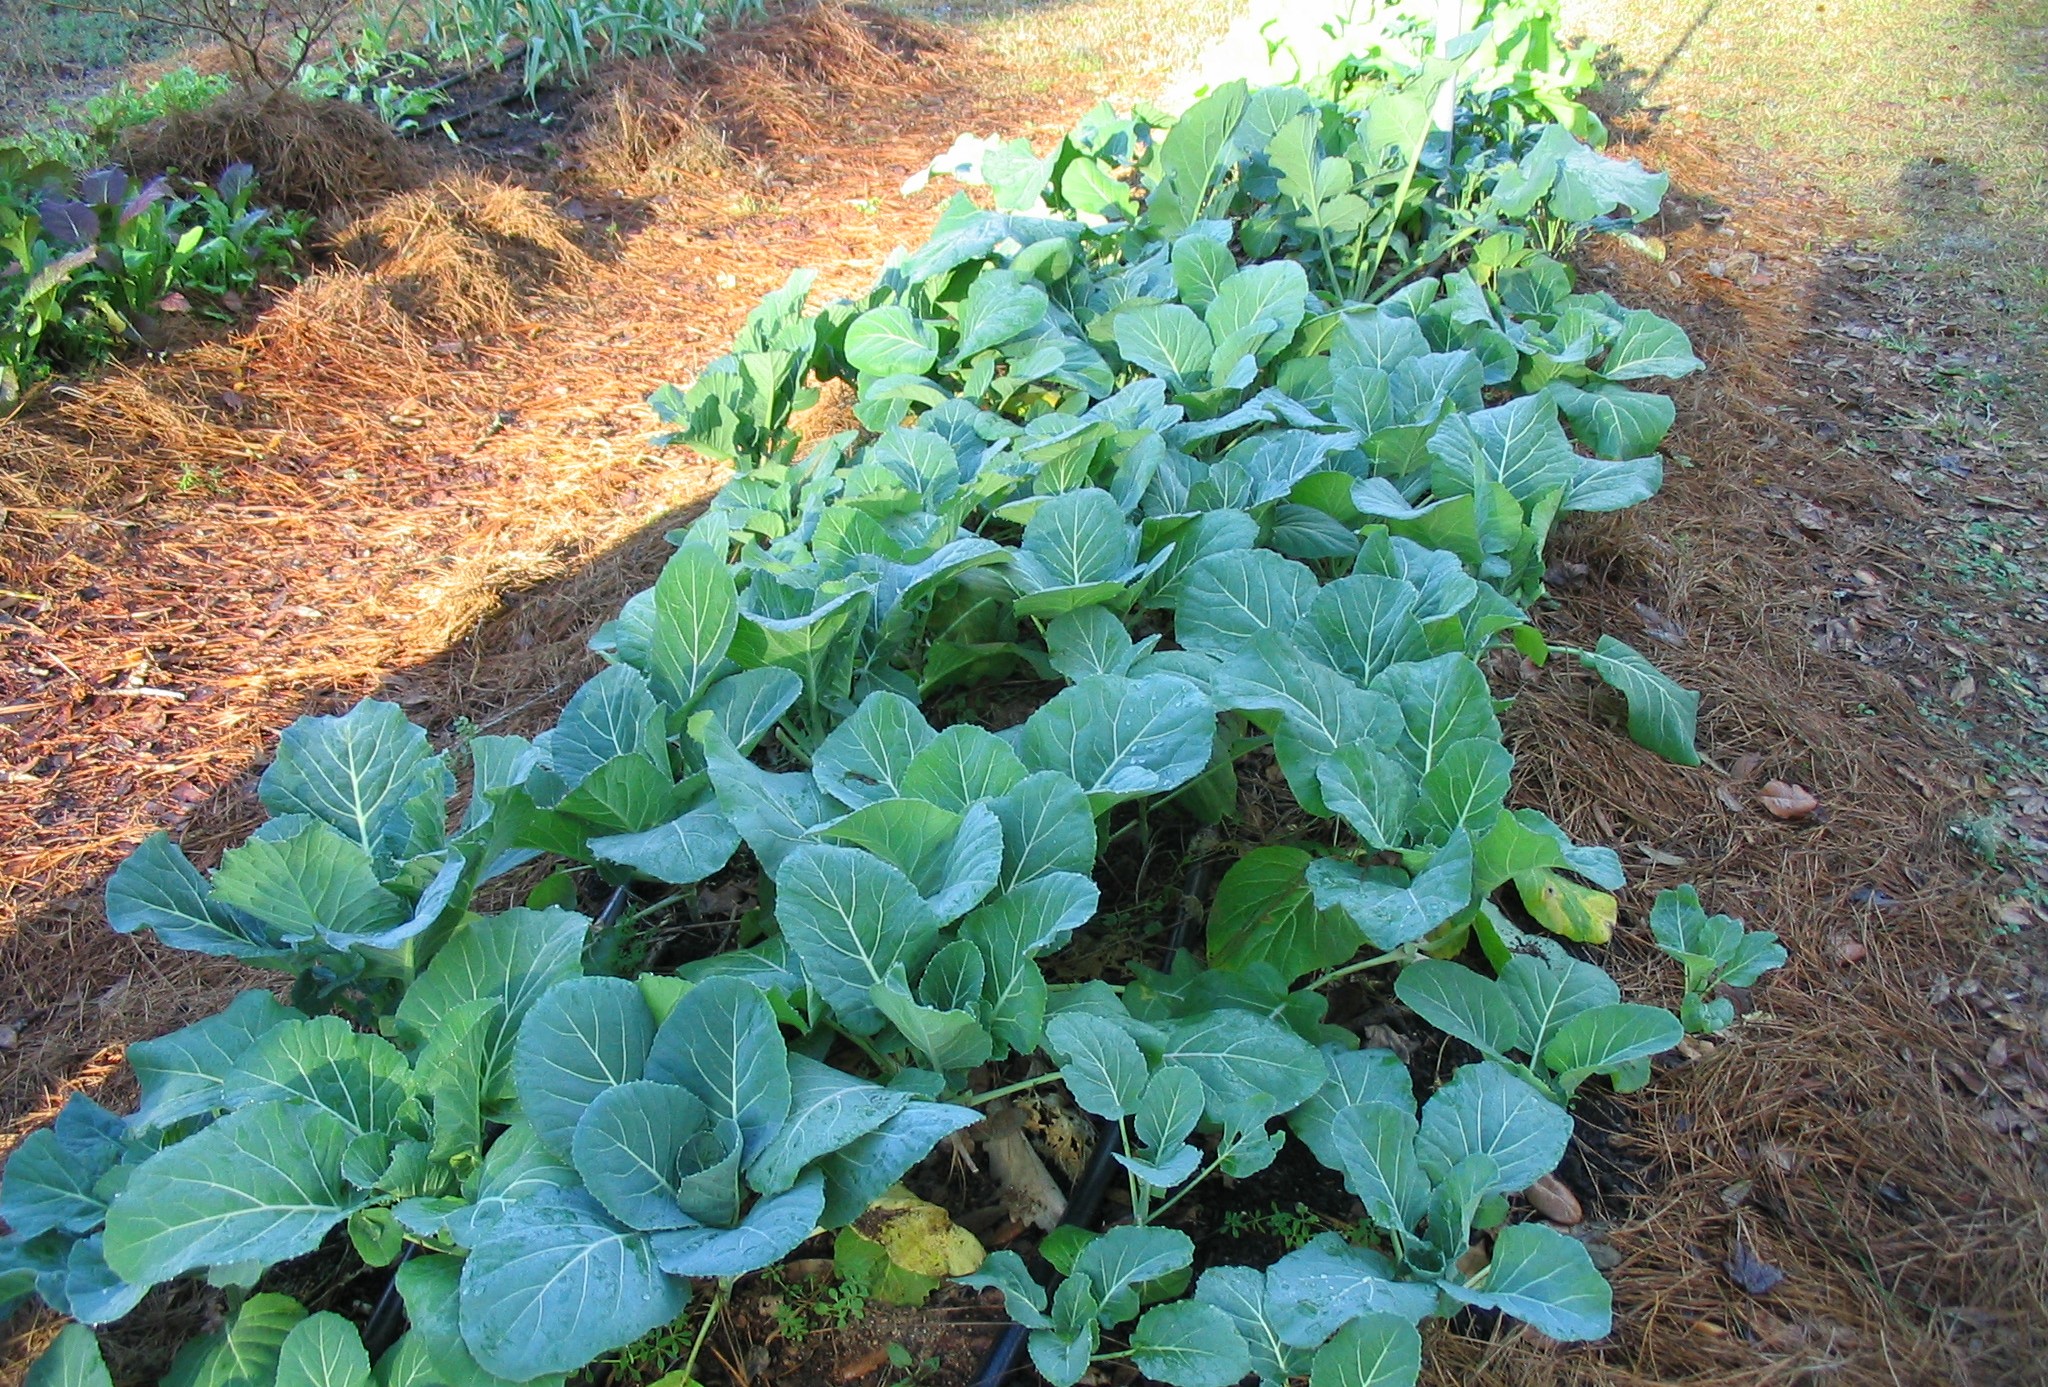
A pair of Canthon imitator beetles with a dung ball – the larger female pushes while the smaller male rides. This rolling behavior is shared with its close Florida relative, the common tumblebug (Canthon pilularius). Photo by Whitney Cranshaw, Colorado State University, Bugwood.org.
Dung Beetles of the Florida Panhandle

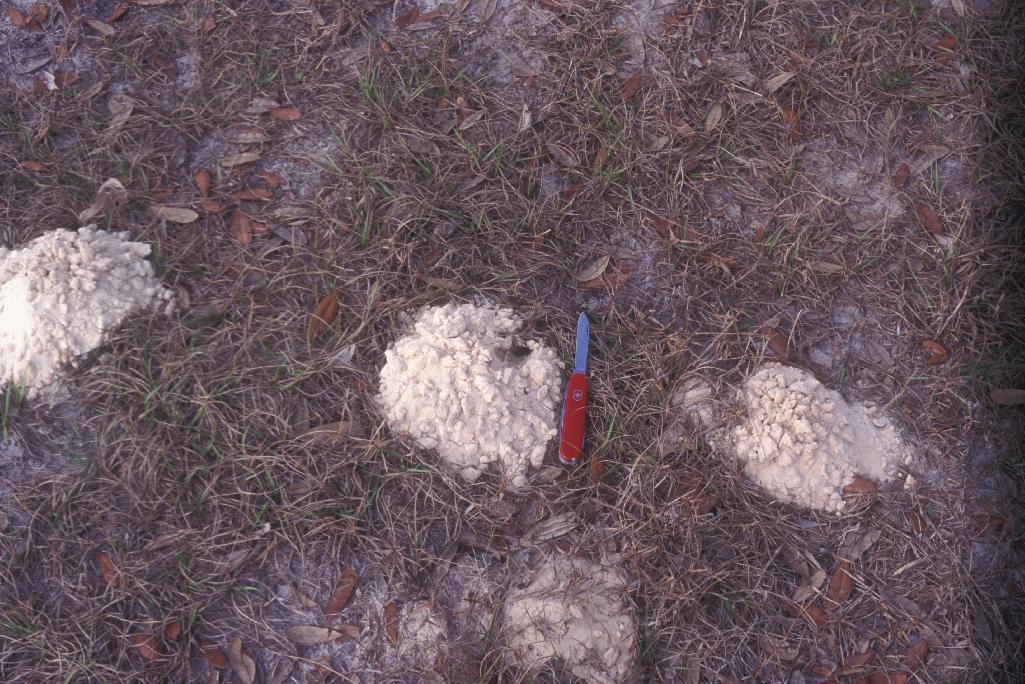
Mounds of excavated sand mark the tunnel entrances of Peltotrupes profundus in a scrubby Florida landscape. Photo by Lyle Buss.
There aren’t many creatures that can stir up a mix of admiration – and possibly some mild disgust – like the dung beetle. But if you spend much time around pastures, the woods, or even in your own garden, you might be surprised to learn these literal poop-pushers are the unsung heroes in local ecosystems – especially when it comes to soil health.
Dung beetles, which are primarily members of the Scarabaeidae family, specialize in feeding on and burying animal feces. That might not sound glamorous, but they more than earn their keep in the ecosystem. These beetles break down waste, aerate the soil, recycle nutrients, and reduce parasite loads in pastures. By quickly burying dung, they limit fly breeding and prevent harmful bacteria from hanging around longer than necessary.
In our part of Florida, where livestock, wildlife, and backyard chickens are common, dung beetles can play a quiet but essential role in keeping both landscapes and gardens healthier. While you might not see them directly in your raised beds, the soil health benefits they bring to the wider environment ripple out in ways gardeners can appreciate.

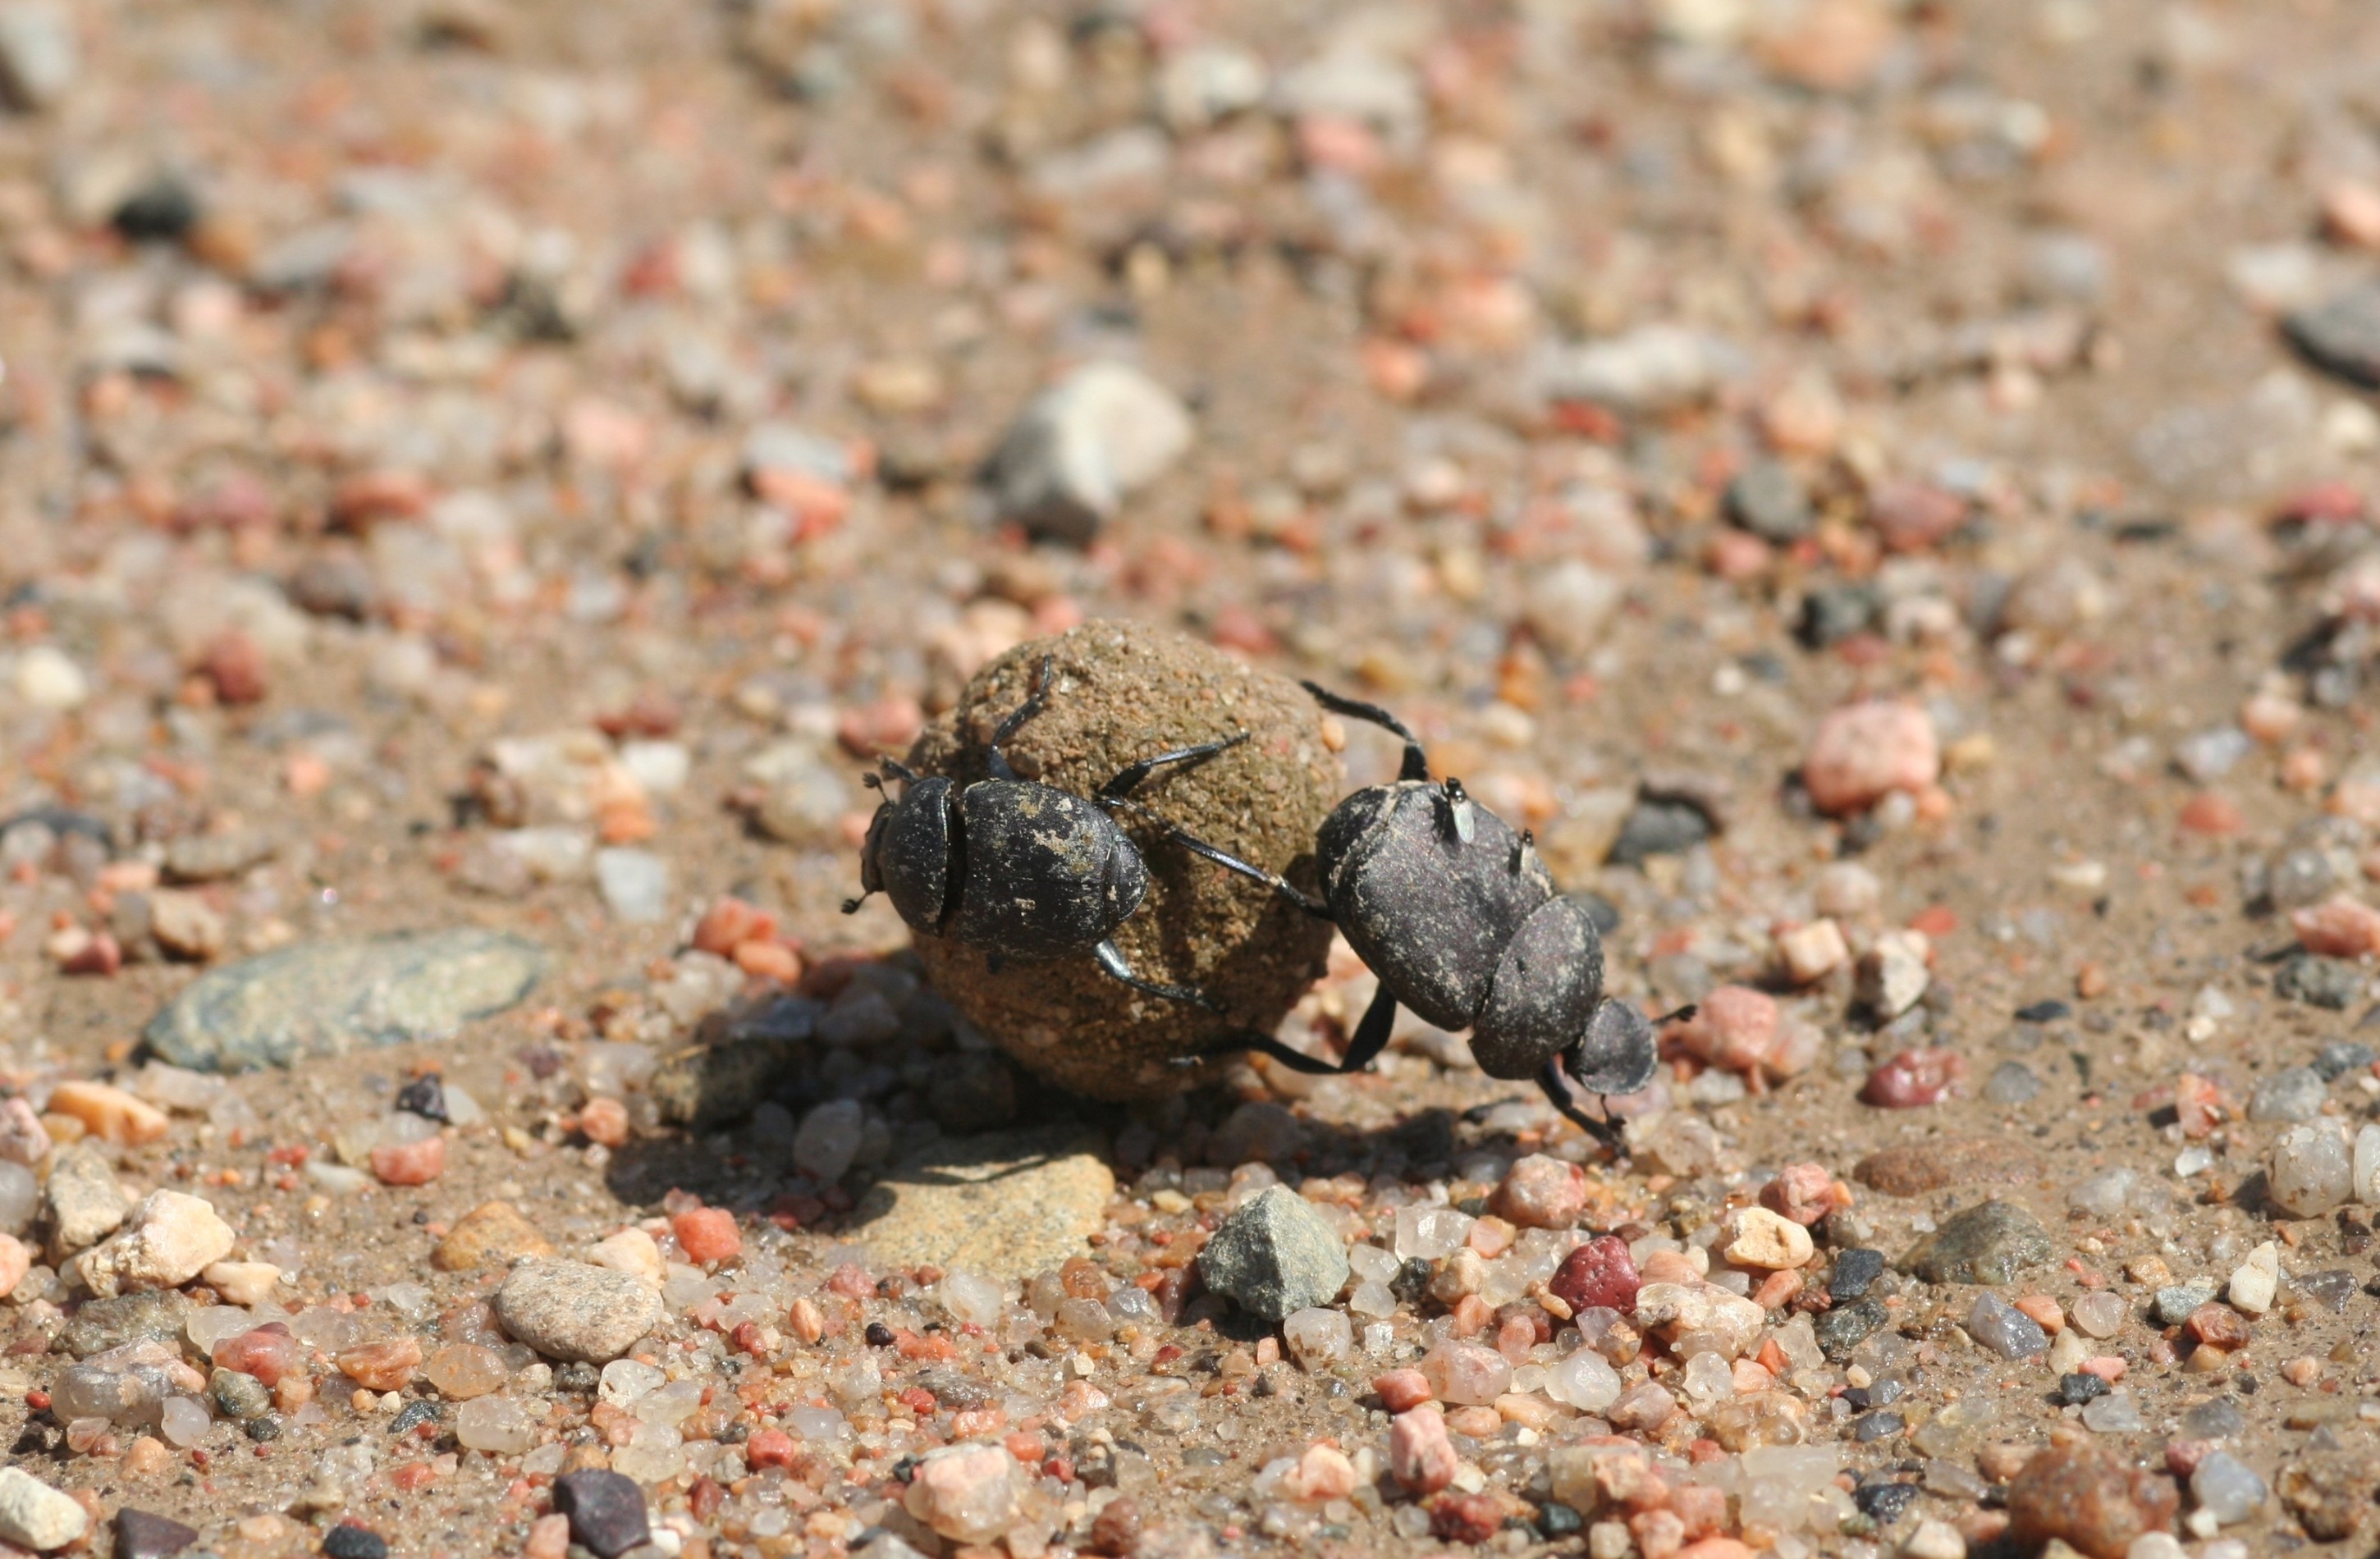
A male rainbow scarab (Phanaeus vindex) with the distinctive horn used in battles over dung. This native beetle is one of Florida’s most colorful nutrient recyclers. Photo by Joseph LaForest, University of Georgia, Bugwood.org.
Not all dung beetles are the ball-rolling athletes we imagine. In fact, most species in Florida are what we call tunnelers – they bury dung directly underneath where it lands, creating little underground pockets of fertility. Others are dwellers, who live inside the pile and lay their eggs right there.
While most of our local dung beetles are underground specialists, we do have at least one native species that performs that famous backward march. If you’re out walking after a summer rain, you just might spot a shiny black beetle with spiny legs rolling a dung ball twice its size – just one of the many native species quietly doing their part beneath our feet.
Native Dung Beetles of North Florida
While most people wouldn’t recognize a dung beetle if it landed on their compost pile, a surprising number of native species are hard at work across the Panhandle – from open fields to pine flatwoods to the edges of suburban backyards.
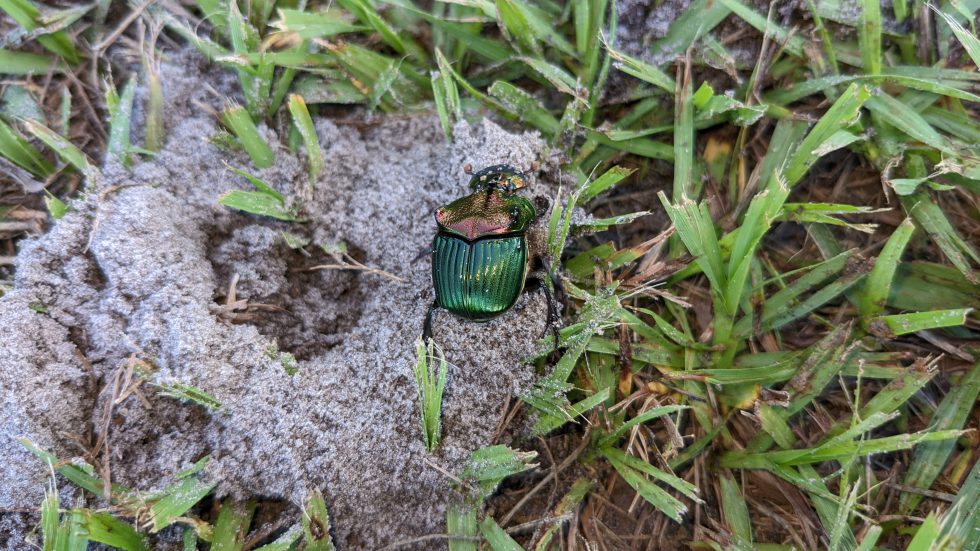
A female fiery scarab (Phanaeus igneus) emerges from a sandy tunnel in the Florida Panhandle. Photo by Erik Lovestrand, UF/IFAS.
One of the flashiest is the rainbow scarab (Phanaeus vindex), a heavy-bodied tunneler with a brilliant metallic sheen – often green or blue with coppery highlights. Males sport a single, curved horn and are known to spar over fresh dung like tiny armored knights. They’re most active in the warmer months and are common in both wild and grazed areas.
Another native jewel is the fiery scarab (Phanaeus igneus), which also shines with a coppery or red metallic glow. A Florida subspecies, P. igneus floridanus, occurs across central and northern parts of the state. These beetles prefer sandy soils and natural areas like longleaf pine uplands or scrub habitats, quietly tunneling through dung from wildlife or livestock.
And then there’s the Florida deepdigger scarab (Peltotrupes profundus), an endemic species found only in Florida. This dark, robust beetle creates conspicuous sand mounds in scrubby or pine-covered landscapes. Below those mounds? Tunnels that can run several feet deep. These beetles aren’t exclusive dung feeders – they mix organic matter into the soil, creating long-lasting soil channels that help roots breathe and water move more freely.
Adult Peltotrupes profundus, a Florida-endemic beetle known for its deep tunnels in sandy soils. Photo by Lyle Buss.
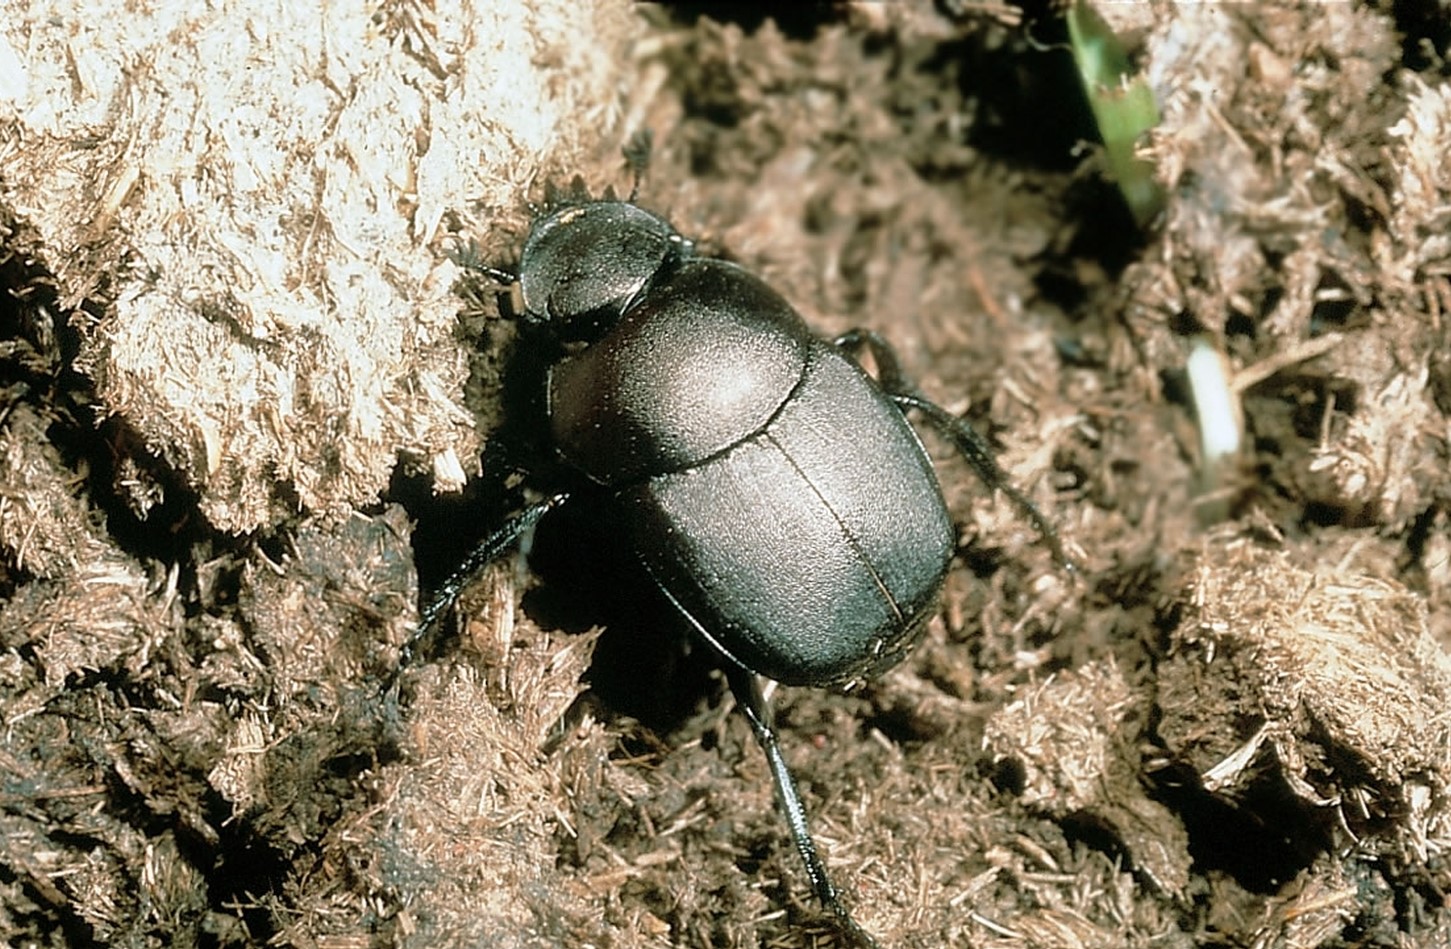
Finally, we have one native species that actually does roll its dung: the aptly named common tumblebug (Canthon pilularius). This smaller black beetle sculpts dung into neat balls and rolls them away to bury. They’re usually seen in open areas and pastures during the warmer seasons. If you spot one, enjoy the show – they’re fast, efficient, and usually gone in minutes.
Non-Native Dung Beetles in Florida
Several non-native dung beetle species have also become established in Florida, introduced in the 1970s to help manage cattle manure in pastures. These include species like the gazelle dung beetle (Digitonthophagus gazella), bull-headed dung beetle (Onthophagus taurus), and the sandy dung beetle (Euoniticellus intermedius). All three are tunnelers that quickly bury fresh dung, reducing fly populations and improving soil fertility. They’re now widespread in pastures across North Florida, especially in the summer and fall. Another common non-native is the European dung beetle (Aphodius fimetarius), a small red-and-black species that acts as a dweller, living and breeding directly within the dung pile itself.

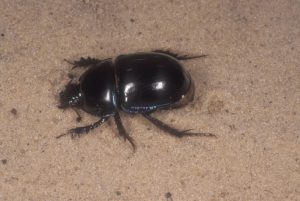
The common tumblebug (Canthon pilularius) is one of the few native dung beetles in Florida that rolls dung into balls. Photo by Kansas Department of Agriculture, Bugwood.org.
While none of these introduced beetles are currently considered invasive, some researchers have raised concerns about how they might compete with native species for dung – especially in heavily grazed pastures. That said, most tend to stick close to livestock areas and haven’t been shown to disrupt natural ecosystems in a meaningful way.
Soil Helpers, Garden Allies
For gardeners and farmers alike, dung beetles are some of our most efficient natural tillers. Their tunneling mixes organic matter deeper into the soil profile, improving structure and water infiltration. That means fewer compaction issues and better moisture retention during our dry spells. In pastures, studies have shown that they can improve grass growth and reduce runoff – pretty remarkable for something that lives in poop.
If you’re already focused on fostering a sustainable landscape, be sure to give dung beetles a spot on your list of wildlife to appreciate and protect. In a world full of tidy lawns and picture-perfect beds, dung beetles remind us that beauty isn’t always what you see on the surface. Sometimes, the real work is happening just below it.