by Matthew Orwat | Feb 15, 2013
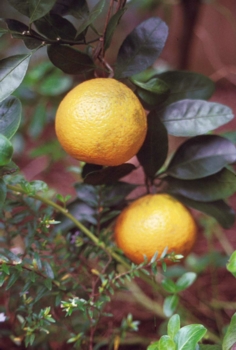
According to the National Weather Service a mild freeze is predicted for Northwest Florida this weekend, specifically Saturday night to Sunday morning. Washington County Horticulture extension agent Matthew Orwat says,” While mature, dormant Satsuma trees are cold hardy down to 14° – 18 °F, young trees need protection if temperatures dip into the upper 20s.”

Photo Credits David Marshall
Here are a few techniques to protect young citrus trees from late-season freezes:
- Wrap the trunk with commercial tree wrap or mound soil around the base of the tree up to 2 feet. This will protect the graft of the young tree. Thus, if the branches freeze the graft union will be protected.
- Cover the tree with a cloth sheet or blanket. For additional protection, large bulb Christmas lights may be placed around the branches of the tree. This will increase the temperature under the cover by several degrees. Be sure to use outdoor lights and outdoor extension cords to avoid the potential of fire.
- Water your Satsuma trees. Well watered trees have increased cold hardiness.
- Frames may be installed around young trees to hold the cover. This option keeps the blanket or sheet from weighing down the branches.
- For homeowners with lemon, lime or other less cold hardy citrus, micro-irrigation is an option. This practice will protect citrus trees up to 5 feet, but must be running throughout the entire freeze event. For additional information click here.
- Always remember to remove cold protection once the temperature rises so that the trees do not overheat
- Do not cover trees with plastic tarps, these will not protect the tree and can “cook” the tree once temperatures rise.
Please see the following publications by retired UF / IFAS Extension agents Theresa Friday and David Marshall for additional information regarding freeze protection of citrus.
by Matthew Orwat | Feb 8, 2013
 To be sure, this week’s warm spring-like weather and refreshing rains have reminded many gardeners that it is about time to prepare this year’s vegetable and flower beds. Before home gardeners fertilize or lime, however, it is vital to understand the condition of the soil.
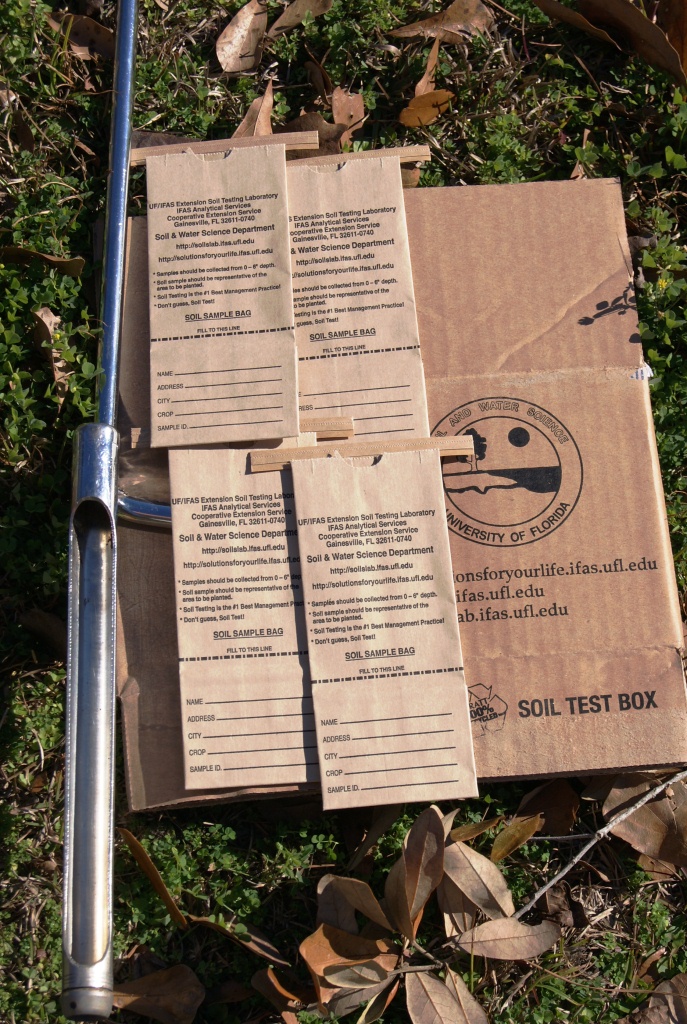
One of the easiest methods to assess the condition of a gardens soil is to obtain a soil test. Soil tests effectively determine the pH and nutrient levels of the soil in a given area. It is essential that the test be collected correctly so that it accurately reflects the nutrient levels in the garden. All that is needed to take an accurate soil sample is shovel or soil probe, and a plastic bucket. Metal buckets will contaminate soil sample results, so a plastic bucket is an absolute requirement. To collect your soil sample, follow these guidelines:
- Identify the garden area(s) to be sampled. Use one soil sample bag for each area. Uncharacteristic or problem areas (such as depressions, etc.) within the garden should be sampled separately.
- Using a shovel (or soil probe), remove soil from a number of locations. The more soil collected from the sample area, the more accurate the results will be. Soil should be removed from the top 6 inches.
- Discard any plant material (such as leaves or roots) and deposit the soil into the plastic bucket. When you are done collecting soil, mix all the soil in the bucket to ensure it is well blended. You will have much more soil than you need to fill the sample bag, but a well-mixed representative sample is important for good results.
- Spread the soil from the bucket onto newspaper and allow it to dry thoroughly. This may take up to 24 hours. A dry sample is very important because moisture may affect the results.
- Once dry, pack approximately 1 pint of soil into the soil sample bag (filled to the dotted line) These bags are available free from your county Extension office..
The best soil test value is the $ 7.00 soil test which includes analysis of phosphorus (P), potassium (K), calcium (Ca), and magnesium (Mg) in addition to soil pH and liming requirement. The proper form should be filled out and mailed to the University of Florida with the soil sample and payment. Results will usually be sent back within 1-2 weeks. Click here to view a sample soil test report.
The soil sample report will include lime and fertilizer requirements. Remember that the recommended fertilization rates in the report are in pounds of nutrient, not pounds of fertilizer. For example, if it is recommended that the home gardener apply 2 pounds of nitrogen 1000 square feet and their fertilizer analysis is 10-10-10, they would need to apply 20 pounds of fertilizer. This is because 10-10-10 fertilizer contains 10% nitrogen.
For more information, consult your local county extension office, visit the UF/IFAS Extension Soil Testing Laboratory website, or the UF/IFAS publication Soil Sampling or Testing for the Home Garden.
by Matthew Orwat | May 10, 2012

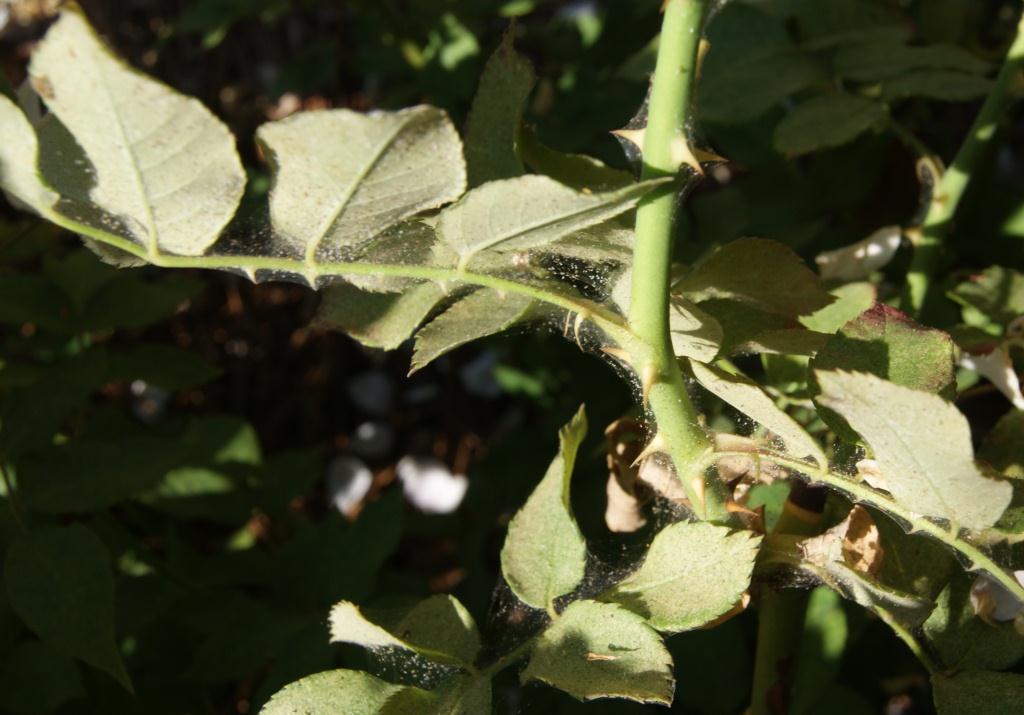
Spider mites and thier "webbing" on a Blush Noisette Rose. Photo Credits: Matthew J. Orwat
Spring is rapidly turning into an early summer. As heat increases so will the incidence of spider mites on ornamental shrubs.
The first indicating factor of damage is a yellow mottling on the leaves of the plant, which is caused by the piercing and sucking mouthparts of the spider mite. As they feed they damage leaf tissue, eventually disfiguring the leaves and causing complete abscission. Additionally, fine webbing will be noticed on the stems and leaves on which the mites will lay their eggs. Although the most obvious damage to the plant is disfigurement, this leaf damage weakens the plant and may lead to eventual death of plants already weakened by other insects or diseases.
Scouting and rapid action is necessary to prevent spider mite damage, since the spider mite life cycle ranges from 5-20 days. The optimum temperature for development of spider mite infestations is 80 ° F.
Spraying broad spectrum insecticides might seem like a good solution, but these insecticides will eliminate the numerous natural predatory insect species which feed on spider mites. The popular insecticide, Carbaryl, has been shown to actually increase mite populations in some studies. One simple, non-toxic solution for spider mite control is to use a forceful stream of water to wash off spider mites and their web-like structures. This would need to be carefully performed to reach all affected parts of the plant, particularly the undersides of the leaves. Repeating this process several times will achieve reasonable mite control. Additional low-toxicity methods include the application of insecticidal soaps and high grade horticultural oils. These need to be applied carefully, since application of these products in high temperatures can damage certain shrub species. Please consult your labels carefully.
As a last resort, if insecticides are needed, the most narrow-spectrum product possible needs to be selected. It is also advisable to rotate insecticides, since mites are known to develop resistance to a particular product when used alone.
For a table of available miticides or to learn more please cosult “Selected Miticide Use for Ornamantal Plants” and “Twospotted Spider Mite”
Submitted by Matthew J. Orwat, Washington County Horticulture Extension Agent

Spider mite leaf damage on a Blush Noisette Rose. Photo Credits: Matthew J. Orwat

Spider mites and thier "webbing" on a Blush Noisette Rose. Photo Credits: Matthew J. Orwat