by Matt Lollar | Sep 7, 2019
A couple weeks ago, I was on a site visit to check out some issues on Canary Island Date Palms. The account manager on the property requested a site visit because he thought the palms were infested with scale insects. He noticed the issue on a number of the properties he manages and he was concerned it was an epidemic. From a distance, lower fronds were yellowing from the outside in and the tips were necrotic. These are signs of potassium deficiency with possible magnesium deficiency mixed in.
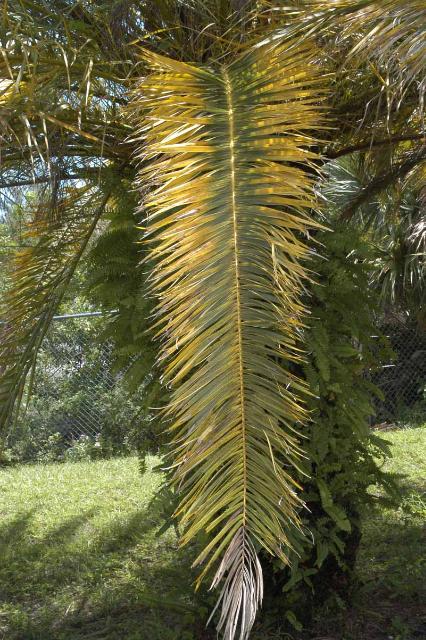
Transitional leaf showing potassium deficiency (tip) and magnesium deficiency (base) symptoms. Photo Credit: T.K. Broschat, University of Florida/IFAS Extension
Nutrient deficiencies are slow to correct in palm trees. It’s much easier to prevent deficiencies from occurring by using a palm fertilizer that has the analysis 8N-2P2O5-12K2O+4Mg with micronutrients. Even if the palms are part of a landscape which includes turf and other plants that require additional nitrogen, it is best to use a palm fertilizer with the analysis previously listed over a radius at least 25 feet out from the palms. However, poor nutrition wasn’t the only problem with these palms.
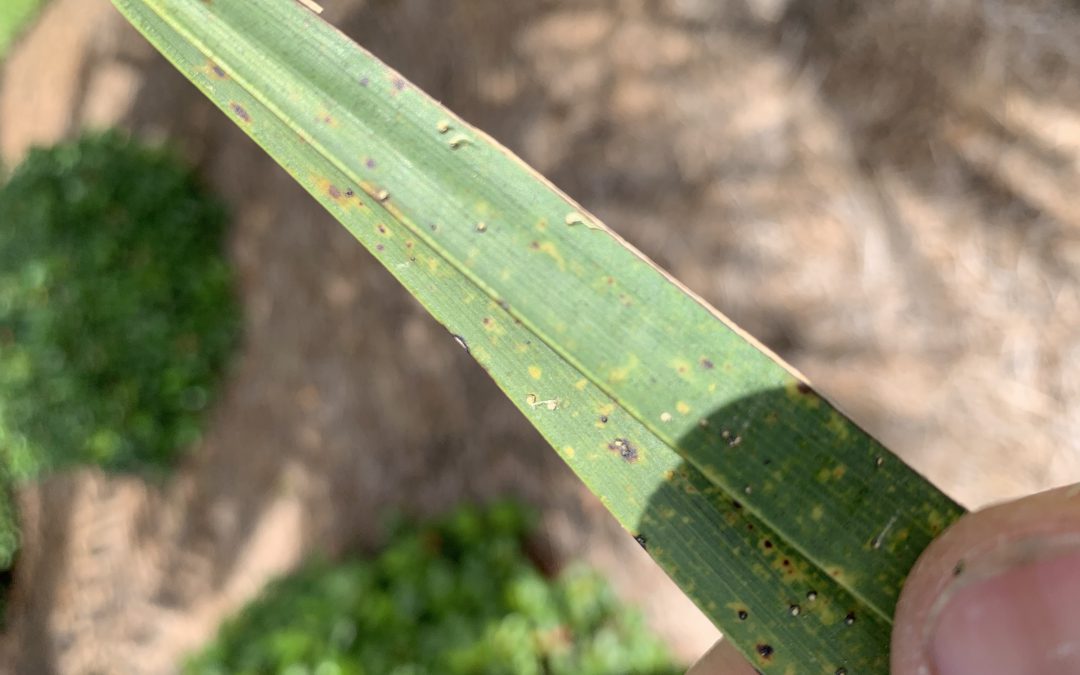
Upon closer look, the leaflets were speckled with little bumps. Each bump had a little white tail. These are the fruiting structures of graphiola leaf spot also known as false smut.
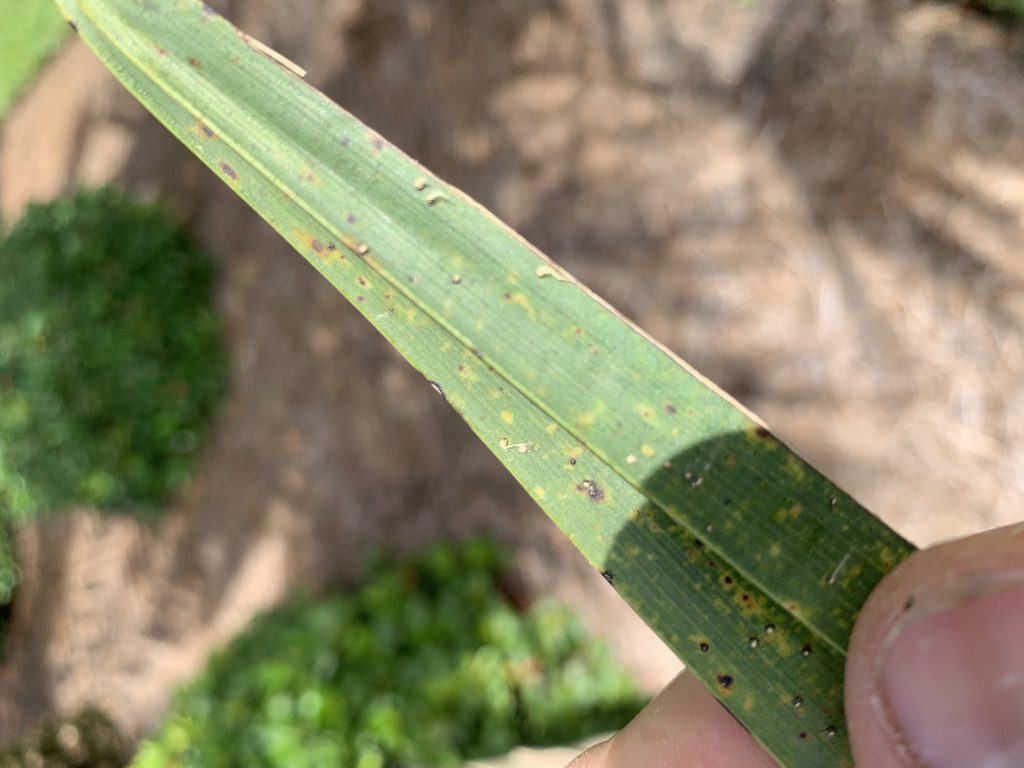
Graphiola leaf spot (false smut) on a Canary Island Date Palm. Photo Credit: Matt Lollar, University of Florida/IFAS Extension – Santa Rosa County
Graphiola leaf spot is a fungal leaf disease caused by Graphiola phoenicis. Canary Island Date Palms are especially susceptible to this disease. Graphiola leaf spot is primarily an aesthetic issue and doesn’t cause much harm to the palms infected. In fact, the nutrient deficiencies observed in these palms are much more detrimental to their health.
Graphiola leaf spot affects the lower fronds first. If the diseased, lower fronds are not showing signs of nutrient deficiencies then they can be pruned off and removed from the site. All naturally fallen fronds should be removed from the site to reduce the likelihood of fungal spores being splashed onto the healthy, living fronds. A fungicide containing copper can be applied to help prevent the spread of the disease, but it will not cure the infected fronds. Palms can be a beautiful addition to the landscape and most diseases and abiotic disorders can be managed and prevented with proper pruning, correct fertilizer rates, and precise irrigation.

by Matt Lollar | Aug 1, 2019
Large patch Rhizoctonia solani (known as brown patch in cool season grasses) is a common disease of many turfgrass species. It usually occurs during the cooler months from October through May when temperatures are below 80 degrees Fahrenheit. However, signs and symptoms of large patch and other Rhizoctonia diseases can be observed throughout the summer. Less common Rhizoctonia species that occur during the summer months are Rhizoctoni zeae and Rhizoctonia oryzae. Extended periods of turf wetness from excessive rainfall or overwatering provide ideal conditions for the disease to develop and spread.
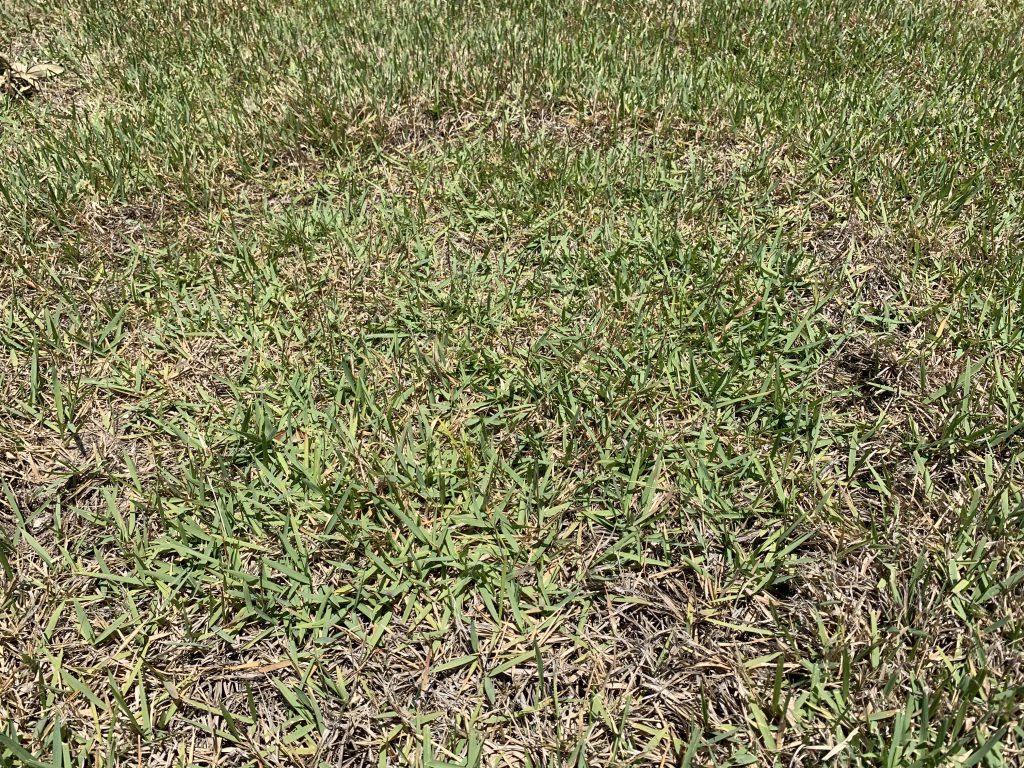
Rhizoctonia in a zoysiagrass lawn. Photo Credit: Matt Lollar, University of Florida/IFAS Extension – Santa Rosa County
This summer in Santa Rosa County, Rhizoctonia has been positively diagnosed in both St. Augustinegrass and zoysiagrass lawns and suspected in a number of centipedegrass lawns. The disease usually starts as small, yellow patches (about a foot in diameter) that turn reddish brown, brown, or straw colored as the leaves start to die. Patches often expand to several feet in diameter. It is common to see rings of yellow or brown turf with otherwise healthy turf in the center. The fungus infects portions of the blades closest to the soil, eventually killing the entire leaf. Grass blades can easily be pulled off their stems, but roots are not affected by the disease.
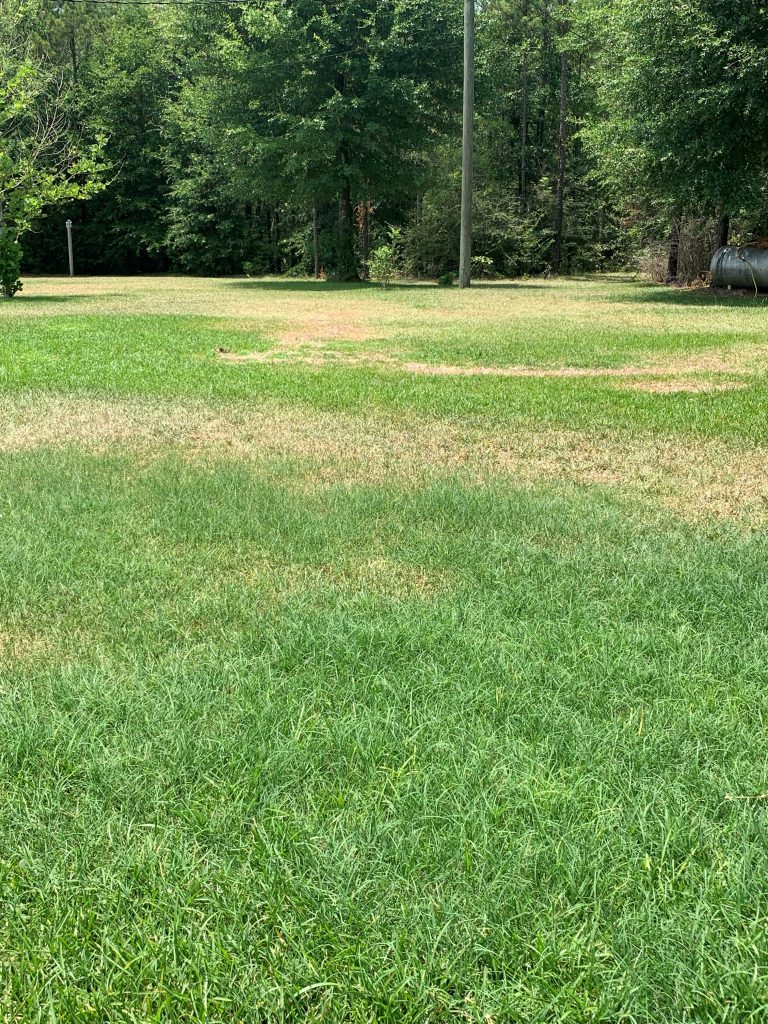
Rhizoctonia in a St. Augustinegrass lawn. Photo Credit: John Atkins, University of Florida/IFAS Extension – Santa Rosa County
Overwatering and excessive fertilization can both contribute to the development of Rhizoctonia disease. Improper timing of fertilizer application can also promote disease development. In the Florida Panhandle, turfgrass is actively growing from April to October. Slow-release fertilizers are recommended to allow for a more even distribution of nutrients over the course of multiple months. Recommended fertilizer rates are based on turfgrass species, geographical location, and fertilizer analysis. Please refer to the UF/IFAS Publication: “Urban Turf Fertilizer Rule for Home Lawn Fertilization” for rate recommendations.
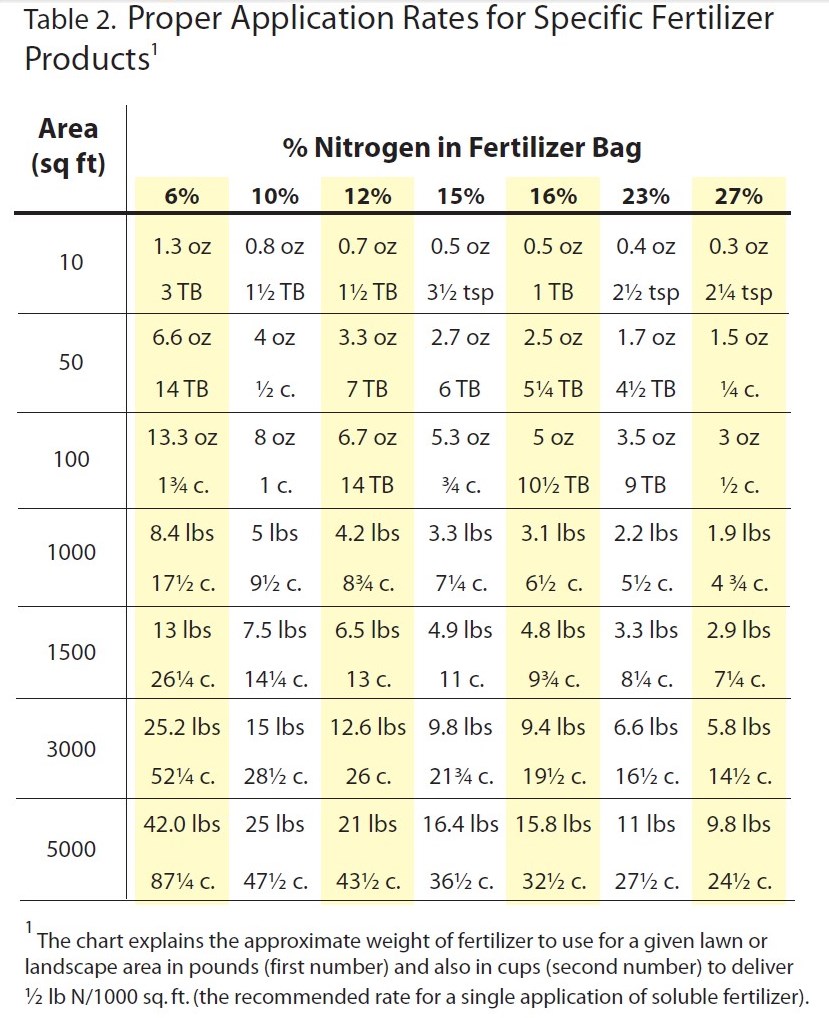
Chart excerpted from Florida-Friendly Landscaping publication.
If large patch or another Rhizoctonia disease is confirmed in your lawn, then chemical controls are necessary to keep the disease from spreading. Fungicide products containing the active ingredients azoxystrobin, chlorothalonil, fludioxonil, flutolanil, iprodione, mancozeb, metconazole, myclobutanil, polyoxin D, propiconazole, thiophanate-methyl, thiram, triadimefon, trifloxystrobin, or triticonazole are viable options for keeping the disease from spreading. For best results, follow the fungicide label for application instructions. It’s important to not only treat the affected areas, but also the healthy turf surrounding these areas in order to keep the diseased spots from growing in size.
Unfortunately, turf diseases are often not noticed until large patches of declining and dead turf are noticed. In these cases when large dead patches exist in the lawn, it is usually necessary to resod these areas. As with most problems that arise in the landscape, good cultural practices are the most proactive way to mitigate the chances with turfgrass diseases. The UF/IFAS Florida Friendly Website provides up-to-date solutions and recommendations for caring for Florida landscapes.

by Matt Lollar | May 27, 2019
Nobody likes weeds in their garden. Weeds are not only ugly, they can host insects and diseases that later spread to your garden. This situation commonly occurs when weeds belong to the same plant family as the desired landscape or vegetable species, but some insects and diseases have diverse palettes. For example, I recently witnessed a looper caterpillar on a pokeweed plant.
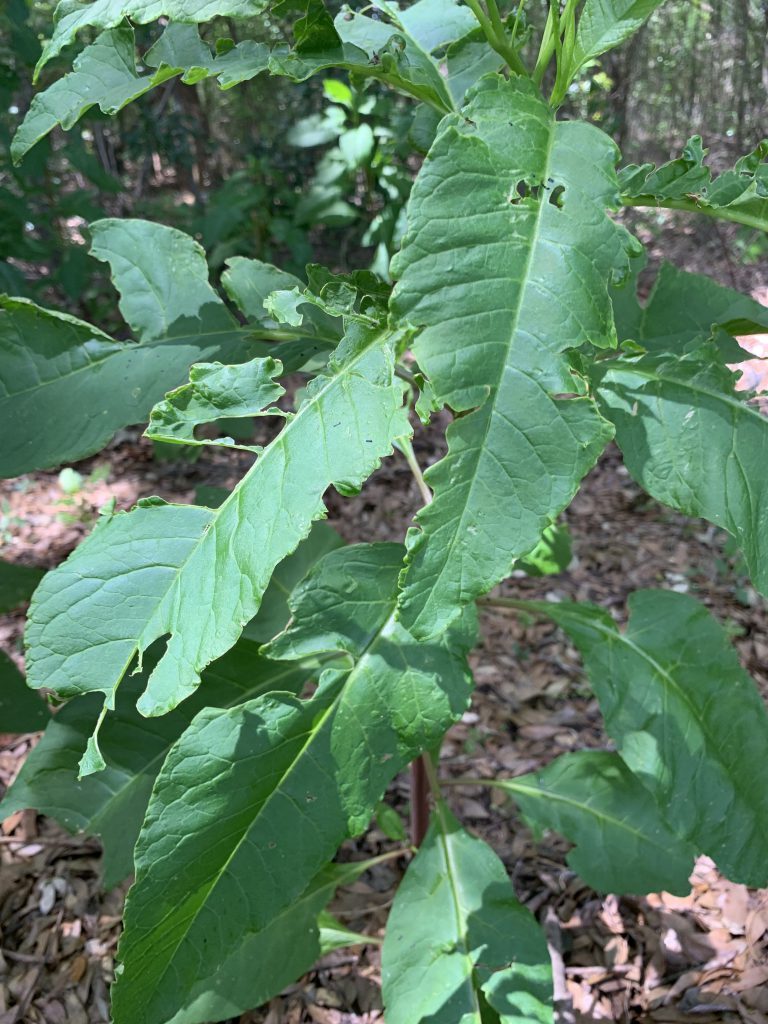
Looper damage on a pokeweed plant. Photo Credit: Matt Lollar, University of Florida/IFAS Extension at Santa Rosa County
Loopers are common pests of vegetable gardens and in the landscape. Probably the most common loopers found in North Florida gardens are cabbage loopers (Trichoplusia ni) and soybean loopers (Chrysodeixis includens). Cabbage loopers can be found feeding on cabbage, of course, as well as leafy greens, cucumbers, tomatoes, chrysanthemums, and snapdragons. Weeds that attract this looper are lambsquarters, dandelions, and curly dock. Soybean loopers like to feed on sweet potatoes, tomatoes, watermelons, geraniums, and sunflowers. They can also be found feeding on oxalis, kutzu, and lantana.
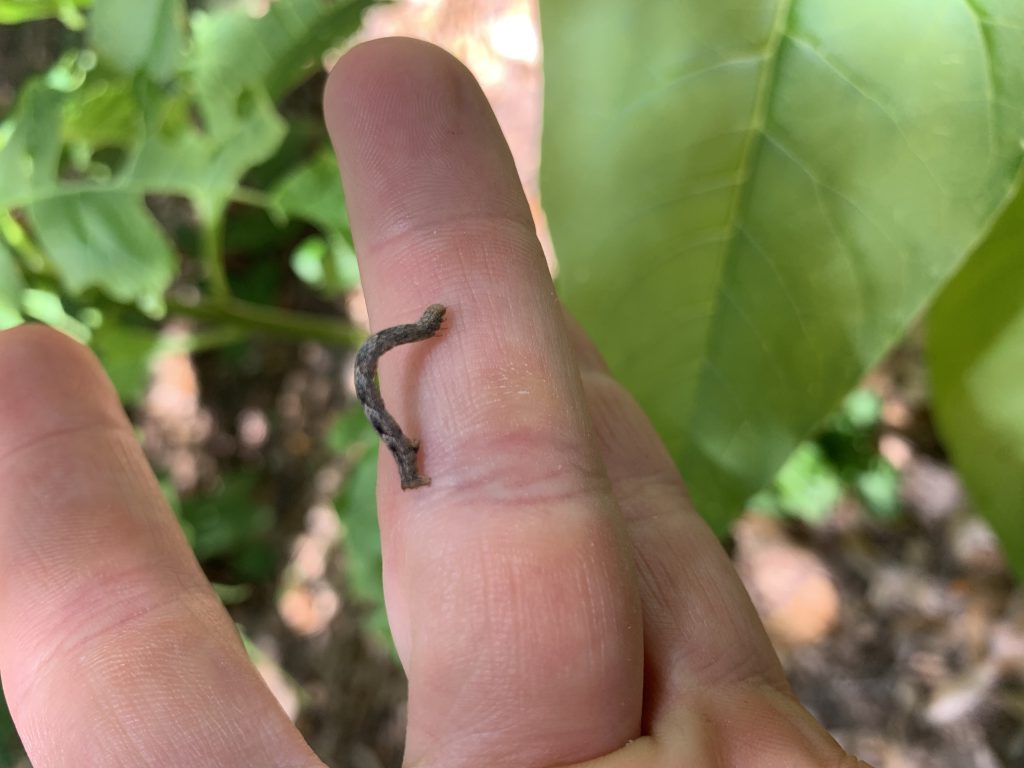
Looper found on pokeweed plant. Photo Credit: Matt Lollar, University of Florida/IFAS Extension at Santa Rosa County
Although weeds can be hosts for pests, they may be used advantageously. Trap crops can be planted at a garden’s perimeter or windward portion to attract pests away from the desired crop. A trap crop draws the pest crop away from the main crop. The trap crop is then destroyed or sprayed with insecticide when the pest insect is found feeding on it. This allows for a reduction or elimination of insecticidal use on the desired crop. However, it is important that both the trap crop and the desired food crop or ornamental crop are regularly scouted to keep track of pest populations.
For more information on trap crops and other insect and disease diversion methods you can read the EDIS Publication: Intercropping, Crop Diversity and Pest Management.

by Matt Lollar | May 17, 2019
Are you looking for more selective herbicide options for annual beds and around shrubs and trees? The Santa Rosa County Extension Office will be hosting guest speaker Dr. Chris Marble from the UF/IFAS Mid-Florida Research & Education Center on Thursday, May 23. Dr. Marble is a Nationally Renowned Weed Scientist who has published numerous research and extension publications. 2 CEUs available in LCLM, Limited Lawn & Ornamental, Commercial L&O, O&T, Natural Areas, ROW, and Private Ag. Pre-registration fee is $15, or $20 registration at the door the day of the event (includes lunch and resources). Pre-register online at Eventbrite Ticket or bring cash, check, or money order to the Santa Rosa County Extension Office, 6263 Dogwood Dr., Milton, FL before May 23. For additional questions, please contact Matt Lollar at mlollar@ufl.edu or 850-623-3868.
SCHEDULE
9:30 Registration & Welcome
9:45 Presentation Begins
11:30 Question & Answer w/Dr. Marble
11:45 Evaluation & CEUs
12:00 Lunch & Discussion on Glyphosate Registration
12:30 Adjourn
by Matt Lollar | Apr 9, 2019
The UF/IFAS Extension and FAMU will be bringing the Florida Pest Management Conference to Milton on April 17th. Attend to earn CEUs for your PCO License. Attendance is free and we are currently seeking sponsors at $80 per sponsoring business/organization. For more details and to register, please visit the conference webpage at Northwest Pest Management Conference.


