
by Roy Carter | Apr 27, 2015

UF/IFAS Photo: Tyler Jones.
Most people know that an attractive landscape adds to the value of a home. For most of us, the landscape also represents a hefty investment of money, time and work so it’s important to know enough about landscape design to do the job right.
An important step in developing an attractive landscape is spacing plant materials correctly. Plants should be placed in the landscape in relation to each other, and with some understanding of their ultimate height, spread, and growth rate. However, the endless variety of plant sizes and shapes can easily complicate this matter for the home gardener.
How the plant is used in the landscape will determine its shape to a large extent. For example, if a plant is part of a hedge row, it should be placed close to the other plants so that in a few years, all of them grow together. If you want to retain the individual shape of each plant space the plants further apart.
Spacing trees correctly is very important as trees are the largest and most permanent of all landscape materials. Here are a few examples of some ways to use trees effectively around the home:
- Pine trees look very good as a tall background screen in the landscape. To have the trees work as a screen, plant them eight to twelve feet apart measuring from the center of one tree to the center of the next.
- Mass planting of dogwood, redbud and crape myrtle make brilliant assets to your landscape. If these trees are spaced about 12 to 15 feet apart, the top foliage should meet in a few years. When these trees are in bloom, the mass plantings will enhance their show of flowers.
- An oak tree planted on the west side of your lot will provide shade for your home, the tree should be planted about thirty feet from side of the house, to prevent tree limbs from eventually crowding the house.
As you can see, it’s important to learn as much as possible about trees you select for your landscape. In spite of the few examples given you, there is no single standard recommendation on spacing trees in the home landscape. This is because most of the popular landscape trees can range from 10 to 100 feet in height, and vary as much in spread. Specialists recommend that the minimum spacing for landscape trees should be one half of the spread of the tree’s mature canopy from other trees, from walls and other existing structures. But even this minimum spacing may vary among different varieties of the same species. For specific spacing requirements for the tree you are interested in check with your local County Extension Office.
by Roy Carter | Oct 28, 2014

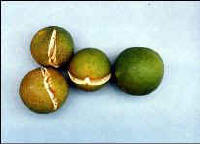
Split citrus fruit. Image credit UF / IFAS
Citrus trees require a lot of care and attention to produce good quality fruit, yet even the most careful gardeners may run into the problem of split-fruit on their citrus trees. Split-fruit is a condition which strikes citrus trees in September and October and can wipe out a hundred or more fruit on a single tree. Researchers at the University of Florida have been studying fruit splitting for many years. Clear cut causes or solutions have not been found. My information on fruit splitting was provided by Extension Fruit Crop Specialist, Dr. Pete Andersen with IFAS located at Quincy, North Florida Research and Education Center.
Researchers have found that certain varieties of citrus tend to split more often than other. “Sweet Oranges” Tangelos” and certain varieties of Satsuma’s tend to split more than citrus which is not sweet. Grapefruit and acid fruits, such as lemons and limes rarely split.
The condition is known to be more common in seedlings and young trees than in older, more settled trees. However, split-fruit can be a very serious problem when it occurs on mature trees, because they usually have more fruit to lose.
Another condition which will cause fruit to split is insufficient copper in the soil. This used to be a much greater problem than it is today, due to the wide-spread use of copper in most fertilizer and spray programs. Potassium deficiency results in small, firm fruit with thin peels and increased fruit splitting. However, added potassium doesn’t correct splitting related to citrus varieties.
The most commonly held belief is that fruit splitting is caused by climatic conditions, since it only seems to occur at one time of the year. During the late summer and high humidity, followed by periods of drought. After a series of heavy rains, the trees absorb a great deal of moisture and force it into the fruit. Since the fruit is near maturity, the rind becomes less pliable and can’t expand rapidly enough to absorb the great volume of water from the trees. As a result the fruit splits.
Despite these findings, there are numerous cases of fruit splitting that doesn’t appear to be related to any of the above conditions. When the cause of the split is not fully understood, there is not absolute method of control. Also, there is no way to stop fruit splitting while it is occurring. The problem must be prevented before it starts. Attempts to control splitting through irrigation practices, fertilization and growth regulators have met with some success.
Fertilizer and irrigation practices won’t cure splitting, but may help to avoid large increase in the number of split fruit. In addition, growth regulators are available which can thicken the peel of the orange. Thicker peels have been found to split much less often that the thinner peels, due to their ability to withstand extra water pressure during the critical moths of the year.
If fruit splitting is a problem this year follow a recommended fertilizer program next year. This will insure a good supply of minor nutrients, especially copper. Make sure to keep the trees well watered during the dry periods of late summer and early fall. This will keep the fruit from swelling too rapidly, and splitting as a result.
by Roy Carter | Sep 23, 2014
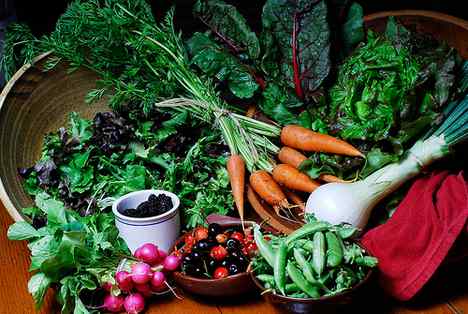
Healthful outdoor exercise, a feeling of accomplishment, and potential saving on the family food bill are good reasons why more and more Floridians are turning to home vegetable gardening.
Image Credit: FAMU
Usually, the most physically challenging part of a vegetable gardening project is to get the soil ready for planting. However, whatever you do, don’t give in to the temptation to cut corners on this phase of the operation. If you do a poor job of preparing the soil, you can expect poor results from your garden, even if you work hard on planting and cultivation. If you’re planning a large garden, you may want to rent a rototiller or even a small tractor and plow, to use in preparing the soil. But, for a small backyard garden, you can do the work with a spade or shovel.
The time to begin soil preparation depends to some extent on what’s growing on your garden site now. If you have heavy weeds, or a cover crop, you intend to turn under; you should start a month to six weeks before planting. This also is the time to add lime, if needed.
If you’ve kept the garden site fallow, or you plan to remove all vegetation and no lime is required, you could prepare the soil and plant within two or three days. However, if you plan to work extra organic matter into the soil before planting, you should start two or three weeks ahead of time.
To prepare the soil, dig down six to eight inches, and turn each shovelful completely over. If you’re turning in weeds, or a cover crop, you should remove all the woody plant material as it won’t decompose very well.
After the soil is turned, break clods and level with a rake. Do this as soon as you can, to prevent excess drying of the soil, and to keep good soil texture. This is important, because a finely pulverized soil surface will make planting easier, give you better seed germination and help insure a more even stand of vegetables. It’s especially important to have fine textured soil when planting small-seeded crops, like carrots.
In some soil, it’s also necessary to add some kind of liming material well before planting at the same time you turn the soil. Lime reduces soil acidity. Without going into a chemistry lesion, lime adds calcium to the soil and makes minor elements move available to plants. The most commonly used form of lime is dolomite. Besides calcium, dolomite provides magnesium another important plant nutrient. [important]You should add lime only when a soil test indicates the need for it. Too much can be as bad as too little. [/important]
If a soil test indicates your soil is too sweet, or alkaline, you may need a special fertilizer program. The best thing to do before liming or adding sulfur to reduce soil pH is consult your local County Extension Office.
To summarize briefly, to have a good garden, you need to prepare the soil properly. Be sure to start far enough ahead of planting to allow organic matter to decompose fairly well. Turn the soil to a depth of six or eight inches. Make sure you have a level, finely textured surface before planting. If a soil test indicates lime is needed to give your garden plot the right acid level, it should be applied when your turn the soil.
For more information on garden plot preparation:
Florida Vegetable Gardening Guide
Soil Preparation and Liming for Vegetable Gardens
by Roy Carter | Sep 16, 2014

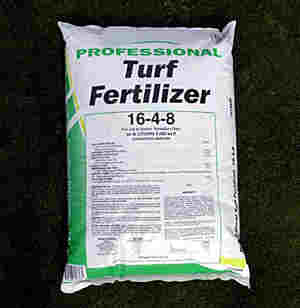
Image Credit Dan Culbert, UF / IFAS Extension
You can’t judge fertilizer by appearance. Fortunately, state law requires each fertilizer label to include specific content facts. However, these can be confusing.To obtain the proper types of fertilizers for various applications, you must understand the label. At the top you’ll find the identification of the manufacturer or distributor. Of course, this doesn’t tell how well the fertilizer will help your lawn, ornamentals, or vegetables.
Next, if the term “organic” is used, these will be a statement identifying the type of material, as well as how much is natural, and how much is synthetic. This is an important indication of how the fertilizer will react in your soil. For example, natural, natural organic nitrogen is released slowly. A fertilizer containing a high percentage of this material would be good for lawns, helping them stay green, without causing spurts of extra fast growth.
The key information is found in the guaranteed analysis section of the label. A series of numbers, such as 8-8-8 or 10-10-10, tell you which, and how much, of the primary plant nutrients the fertilizer contains. That is, the numbers show the guaranteed amount of nitrogen, phosphorus, and potassium. For example, a fertilizer labeled 10-10-10 contains ten percent nitrogen, ten percent phosphorous, and ten percent potassium. Thus, a hundred pounds of this product contains 30 pounds of plant food. The other 70 pounds is conditioner and filler, required for even spreading. These may include some incidental trace elements. If the fertilizer contains significant amounts of secondary plant foods, such as calcium, magnesium, copper and others, they will be listed near the bottom of the tag.
The most difficult part of the label to understand is the information listed right after the total nitrogen figure, in the guaranteed analysis section. In addition to the total amount, the label gives percentages of each of several types of nitrogen in the mix. This tells you a lot about how the fertilizer works.
You’ll see the terms nitrate nitrogen, ammoniacal nitrogen, water soluble organic nitrogen, urea nitrogen, and water insoluble nitrogen. Plants use nitrate, water soluble organic, and urea nitrogen fairly quickly. They might work well in a vegetable garden. But, they won’t last very long, because they’re rapidly leached out of the soil by rain and irrigation water. On the other hand, ammoniacal and water insoluble nitrogen will last longer in sandy Florida soils.
Following the basic analysis, is a statement of the maximum amount of chlorine the fertilizer contains. Excess chlorine may be injurious to certain plants, both vegetables and ornamentals species. Small amounts can be beneficial under some condition.
Unfortunately, I can’t fully explain anything this complicated in one short article. I hope I’ve clarified a few of the basic points. To obtain the proper fertilizer for your specific vegetable and ornamental gardening needs, you must understand the information on fertilizer labels when in doubt; we suggest you check with your County Extension Agent.
For More Information:
The Florida Fertilizer Label
by Roy Carter | Jul 15, 2014

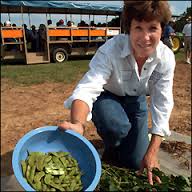
Vegetable Soybean Pods
Image Credit Ann Blount, NFREC, UF IFAS Extension
I am sure you are familiar with soybeans, but probably not in the way we’ll describe it. If you frequently visit health food stores, or the health food section of your supermarket, you’re bound to have seen this vegetable in its dried form. It’s a substitute for meat in many dishes, and it’s used to enhance the nutritional value of numerous foods.
Surprising as it may seem, the soybean is a nutritious and versatile green vegetable. While we’re all fairly familiar with the many uses of dried soybeans, most of us haven’t had much exposure to fresh soybeans. My information was provided by retired Extension Vegetable Specialist Jim Stephens.
There are two main types of soybeans. The one cultivated most frequently is the agronomic or field soybean. It represents 99 percent of all soybeans grown in our country. The second type, which we’re emphasizing, is the vegetable soybean, which is grown for fresh or green mature consumption. The vegetable type is about one-and-a-half to three times larger seeded than the field type.
While few Americans think of soybeans as a vegetable, it has been used as a vegetable in Asia for over 1,000 years. The varieties suitable as a vegetable are different from those used as a field crop. Major vegetable varieties are “Verde”, “Disoy”, “Bansei”, “Gaint Green”, Fuji”, and “Seminole”.
Aside from their good taste and high yield, green soybeans have excellent nutritional value. Fresh soybeans are very high in vitamin c, and they’re also high in protein, containing about three times the protein of milk and about half that of red meat. Fresh soybeans are relatively high in calories, because of their seven percent fat content. Fortunately, this is good quality vegetable fat. Soybeans also contain sizeable amounts of other vitamins and minerals.
As with most fresh vegetables, soybeans should be eaten as soon after harvest as possible. Eating quality and nutrition value begin to decrease within several hours after the beans are picked.
You’ll have an easier time removing the seeds if you place the unshelled beans in boiling water for about three minutes. This will soften the pods, and allow the tender beans to be split out by hand. As a garden-fresh vegetable, soybeans can be prepared like any other fresh shelled beans. Soybean seeds also make excellent bean sprouts.
For more information on edible soybeans contact your county extension office or www.http://edis.ifas.ufl.edu and see Vegetable Gardening in Florida by James M. Stephens, Vegetable Production Handbook for Florida, Vegetable Gardening Guide or IFAS Publication SP 103/VH 021: Florida Vegetable Garden Guide.


