by Larry Williams | May 11, 2017

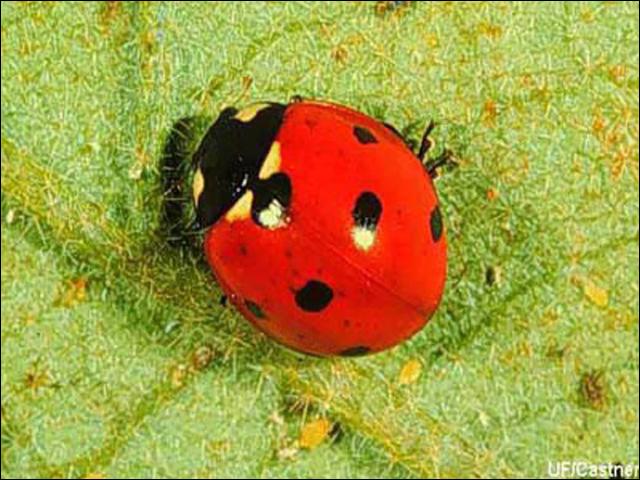
Adult Ladybug. Photo Credit: James Castner University of Florida
A number of summers ago, I noticed whiteflies on a confederate rose plant in my landscape. I considered using an insecticide to control the whiteflies but decided against doing so after taking a closer look. What I found was a population of ladybugs – eggs, larvae, pupae and adults.
Ladybug adults and larvae eat whiteflies, as well as other soft-bodied insects such as aphids. So, I waited to see what would happen.
At first I was seeing mostly adult whiteflies, which look like tiny white moths. Adult whiteflies mate and then lay eggs on the underside of leaves. The eggs hatch into flat translucent scale-like nymphs that suck the “juice” from the underside of the leaves.
Eventually, some of the leaves developed a black coating called sooty mold. As certain insects (primarily aphids, some scales and whiteflies) feed, they excrete plant sap that coats the leaves. Sooty mold then grows on this sugary sap. It’s not a pathogen. It just makes the leaves look ugly.
Knowing that the whiteflies would not kill the confederate rose, I was willing to tolerate the sooty mold and allow the ladybug population to build.
Allowing whiteflies to live on your plants may not always be the best option. But in order to have beneficial insects in your landscape, there must be some “bad” insects for them to eat.
Insects such as ladybugs, lacewings and praying mantises eat many pest insects. Encouraging these beneficial insects can allow you to reduce the amount of pesticides applied.
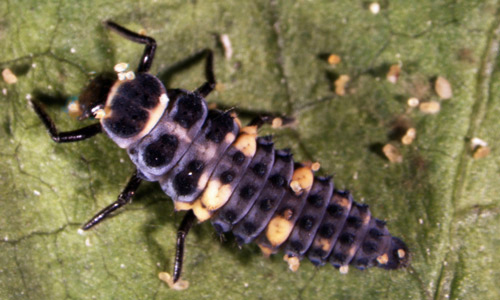
It’s important to learn to recognize the adult and immature stages of these beneficial insects. Ladybugs have larvae that look nothing like

Ladybug larva. Photo credit: Aristizabal University of Florida
the adults. Some ladybug larvae look like small orange and black alligators. Others may resemble mealybugs. Many gardeners that would never kill adult ladybugs mistake their larvae as pests and kill them with insecticides.
The following UF/IFAS Extension website will help you learn to recognize many of our beneficial insects. http://edis.ifas.ufl.edu/topic_beneficial_insects
Once you find beneficial insects in your landscape, reduce or eliminate the use of insecticides. When an insecticide is needed, use environmentally friendly options such as insecticidal soaps, horticultural oils and products that contain Bacillus thuringiensis (Bt).
Sometimes a heavy stream of water from a water hose is all that is needed to remove pest insects from plants and reduce their numbers to an acceptable population.
Remember, leaving a few pest insects is a great way to attract beneficial insects. Tolerating a minor infestation and a little plant damage will benefit the helpful insects, your pocketbook and the environment.
by Sheila Dunning | Apr 13, 2017
 This month, recognized by the Senate and Florida’s governor, reminds diggers why calling 811 before all outdoor digging projects is important to your safety. Before installing a mailbox, fence, deck, garden or tree make sure to call Sunshine 811 to have underground lines marked. 811 is the free national number designated by the Federal Communications Commission. It notifies utility companies, who in turn send their professional locators to identify and mark the appropriate location of underground line with paint and flags in colors that identify the utility type. The following colors represent the seven various utilities: red – electric, orange – communications (telephone, cable tv), blue – potable water, green – sewer, yellow – gas, purple – reclaimed water, and white – site of intended excavation. To learn more about color designation and their corresponding utility go to: http://www.call811.com/faqs/default.aspx. Locating marks are good for 30 calendar days. Any work beyond that requires another call to 811. If the marks are destroyed before your project is done, stop digging and call 811.
Hitting an underground utility line while digging can cause injuries. Utility service outages can also impact an entire neighborhood and damage the environment. The depth of utility lines varies, and there may be multiple utility lines in one common area. Even if you think you know where an underground line is, time tends to change things. Erosion or tree roots can shift those utility lines. Failure to call before digging results in one unintentional utility hit every eight minutes nationwide. You could also be financially affected with costly fines and high repair costs.
The Common Ground Alliance (CGA) Damage Information Reporting Tool (DIRT) provides industry stakeholders with a way to anonymously submit data into a comprehensive database for analysis of the factors that lead to events. An event is defined by the CGA DIRT User’s Guide as “the occurrence of downtime, damages, and near misses.” The number of events submitted to DIRT for 2011 totaled 207,779. However, according to CGA DIRT “when a call is made to the one call center (811) prior to excavation, 99% of the time there will be no damage”.
Calling 811 in Florida is the law. At least two full business days before digging, do-it yourselfers and professional excavators must contact 811 by phone to start the process of getting underground utility lines marked. This is a free service. Be sure that all utilities have been marked before grabbing the shovel. If you don’t see locate marks, don’t assume there are no underground utility lines. Verify with the Sunshine 811 Positive Response system. Follow up on your one call ticket by contacting 811 again on the third day. Sunshine State One Call is a not for profit corporation which began with the 1993 adoption of the “Underground Facility Damage Prevention and Safety Act,” Chapter 556, Florida Statutes. Online you can visit: www.online811.com, or call (800) 852-8057. If you provide a valid e-mail when requesting your locate ticket, positive response updates will automatically be sent to you when all utilities have responded. For more information on Florida’s law, visit www.Sunshine811.com.
by Molly Jameson | Apr 7, 2017
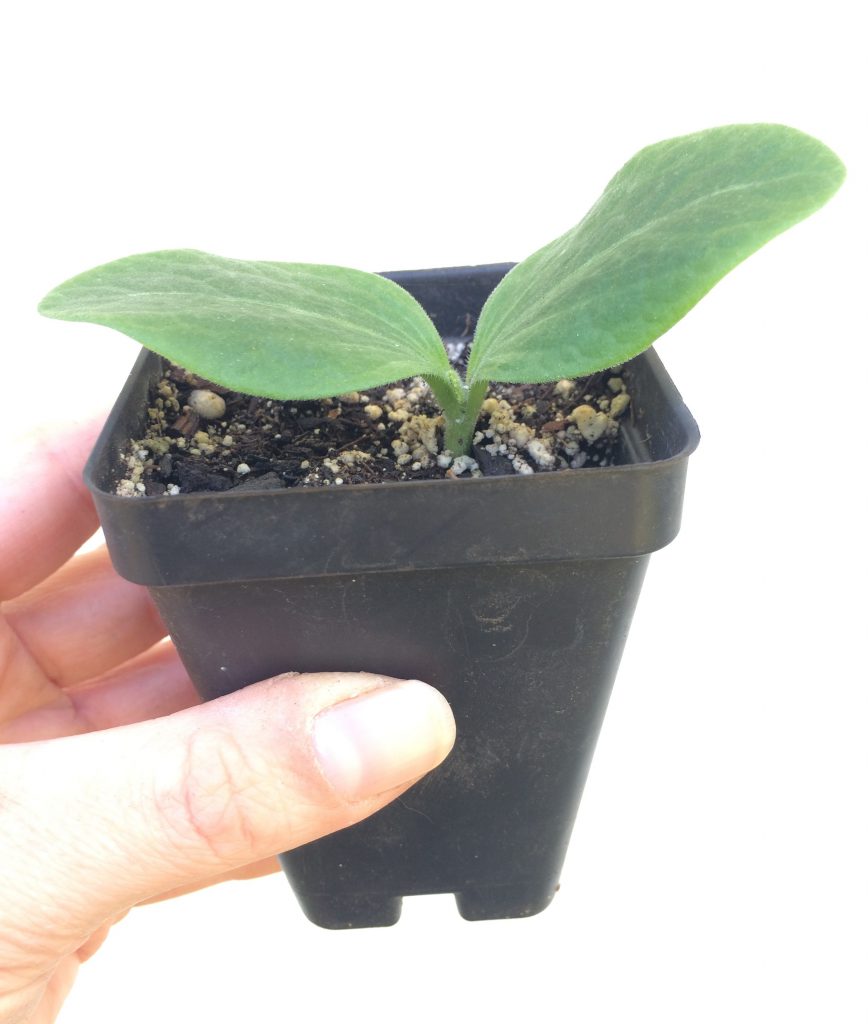
Be careful planting cucurbit transplants, as they have sensitive roots. Photo by Molly Jameson.
When I think of the end of winter and the hot temperatures that will soon be here to stay in the Florida Panhandle, I often feel a little melancholy. But the one silver lining that always picks me back up is remembering what warmer temperatures will mean in the garden. This is the start to all the fun, colorful, fruiting crops. Think of the oranges, reds, yellows, and even purples that will soon fill their vines.
As an extension agent, one of the questions I am often asked is whether to start summer vegetables from seed directly in the garden, or to start seeds in pots and transplant them later. The answer is – as is often the case – it depends.
Are you planting tomatoes, peppers, or eggplant? Well, the beginning of April is too late to start from seeds with these crops in our neck of the woods. Buy transplants! Are you growing beans, okra, or root crops? Now that we are past the risk of frost, put those seeds directly into your garden. Are you growing cucurbits, like squash, cucumbers, or melons? You have a choice. You could seed them directly, or you could start seeds in pots. What is the advantage of starting in pots, you ask? Well – this will give you the chance to pick the strongest plants and will allow you to transplant them exactly where you want them. The disadvantage? Other than the extra work, cucurbits tend to be sensitive to disturbance. Be sure to handle with care and do not over water once your seedlings have sprouted.
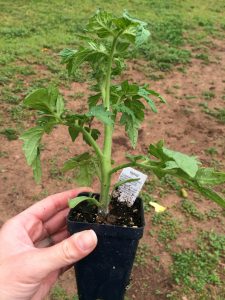
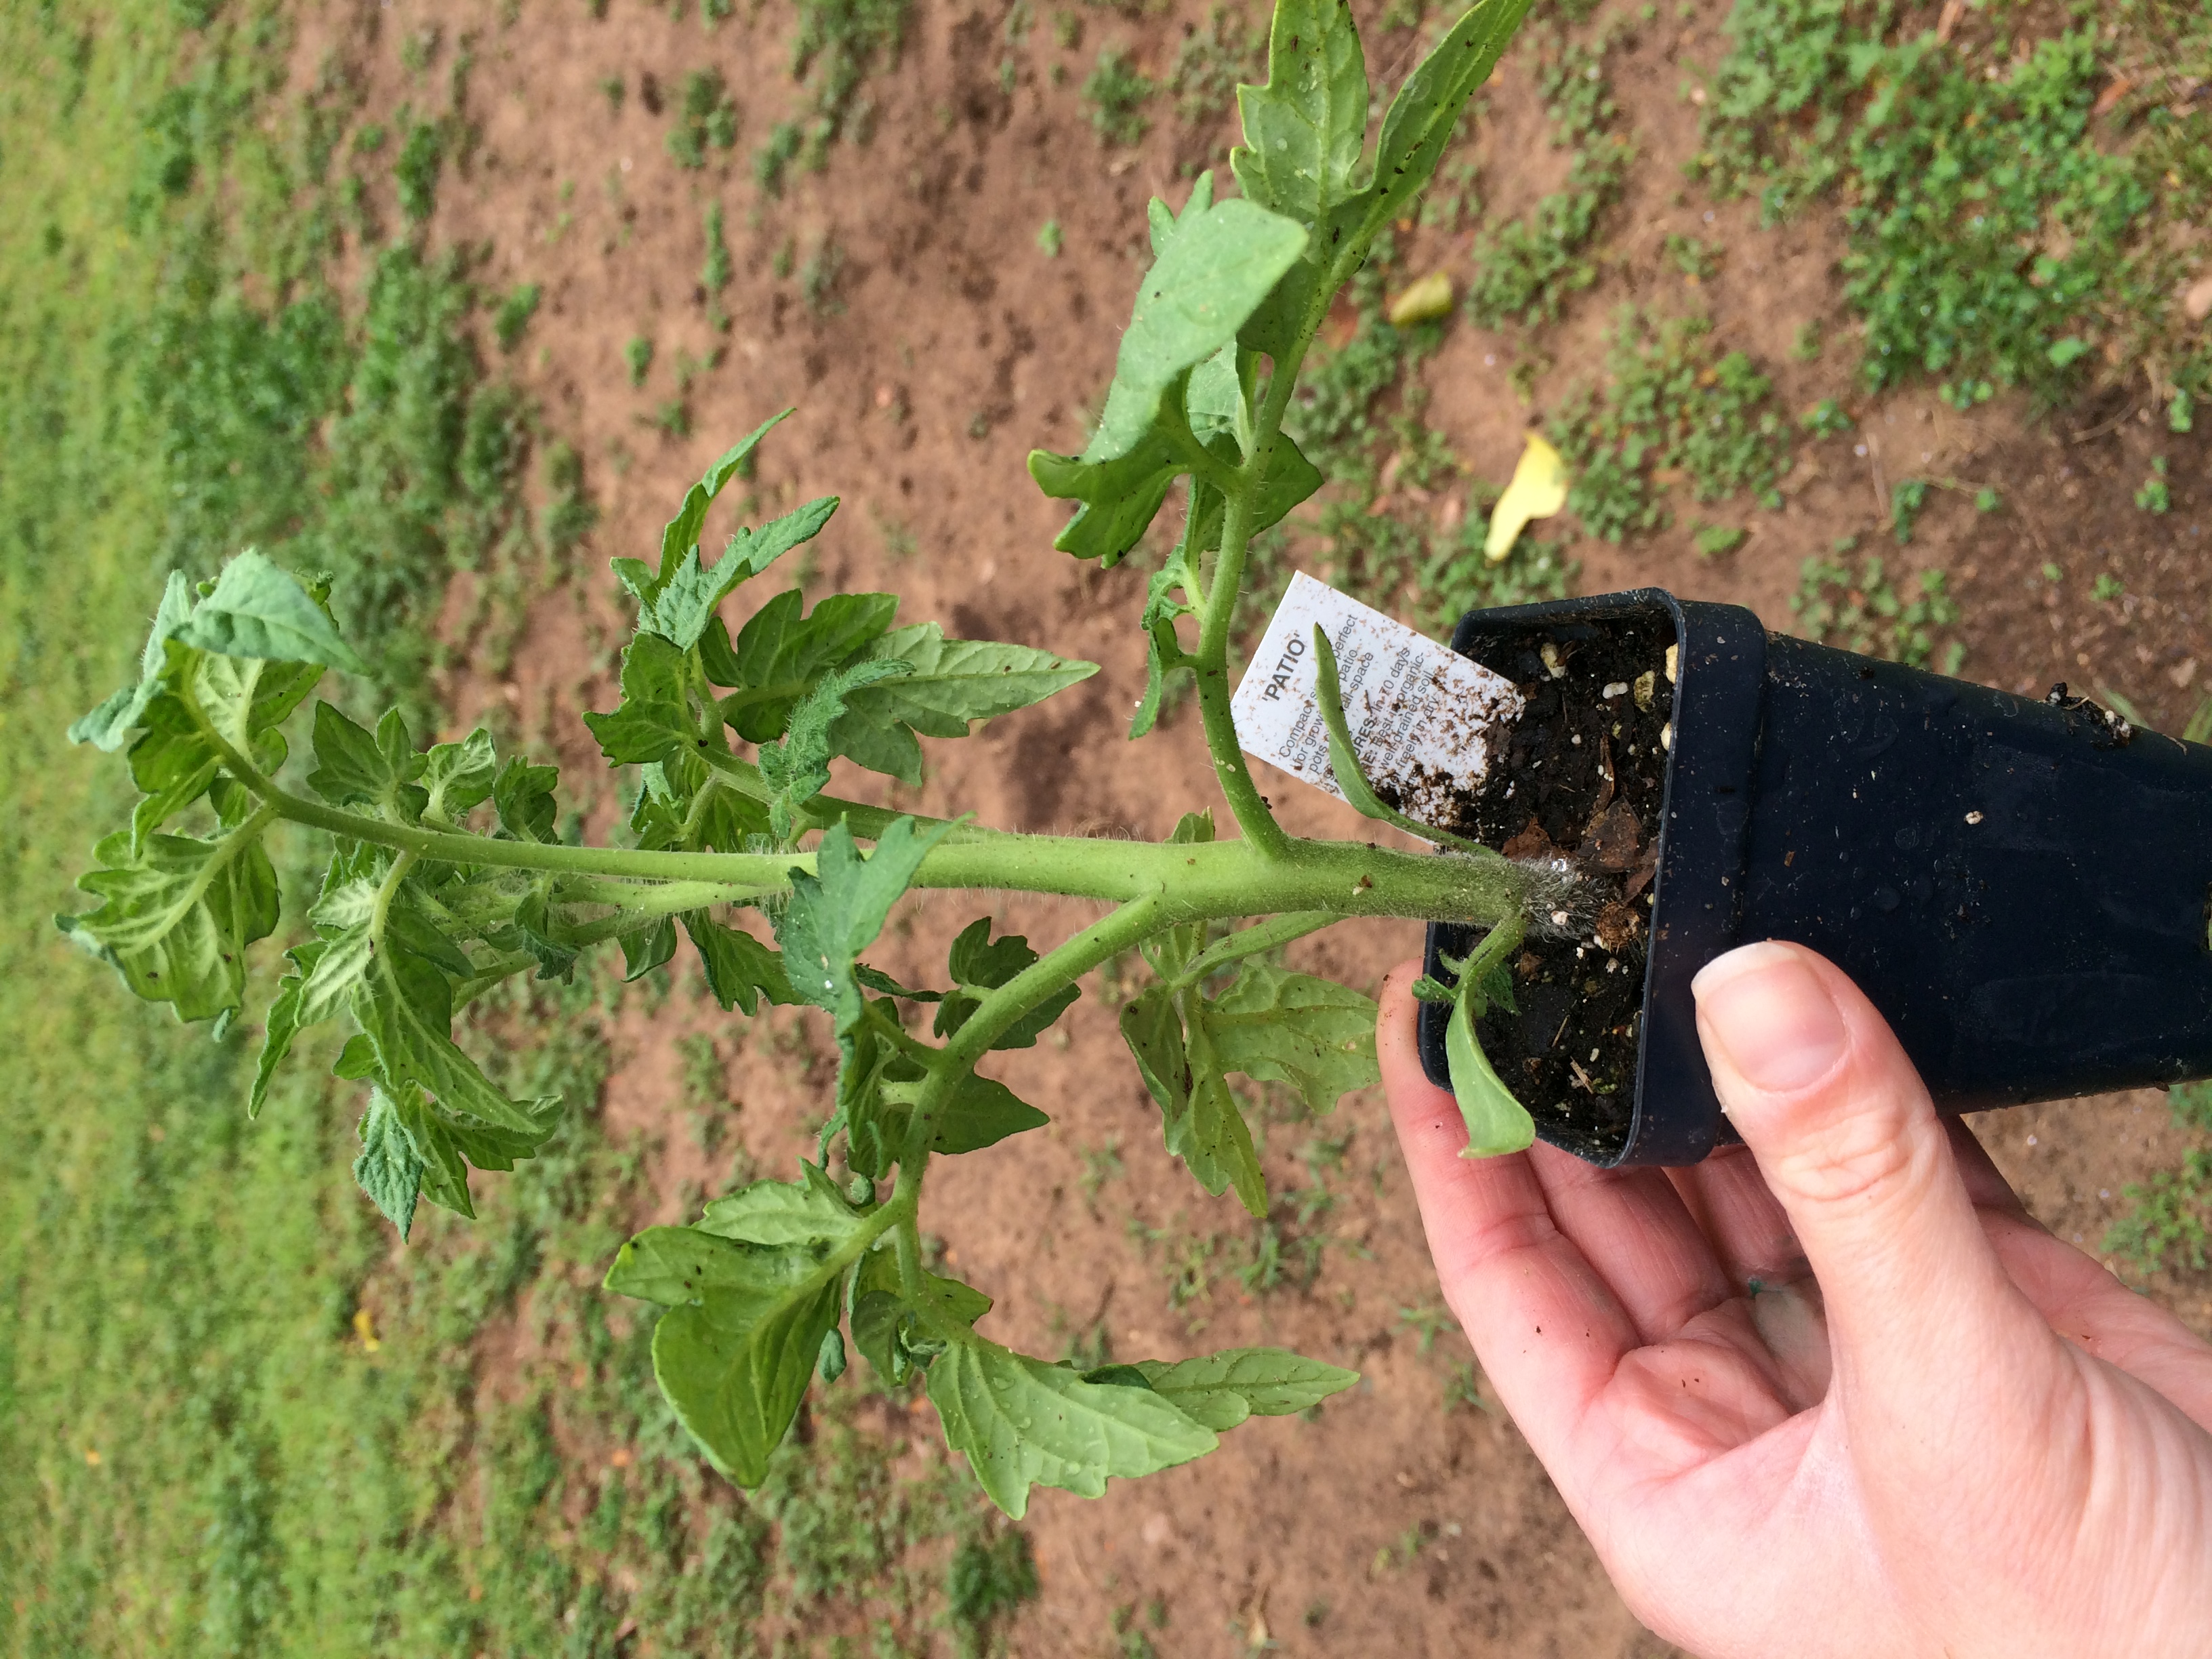
Transplant into the garden when the plant is about the length of its pot. Photo by Molly Jameson.
Whether you grew the seeds in pots yourself or acquired transplants elsewhere, there are certain practices you can follow to ensure your plant babies have a good start. Here are a few tips when it comes to transplanting into the garden:
What should be considered when purchasing transplants? When purchasing transplants, it is important to make sure the plant is healthy. Look for plants with strong stems, green leaves, and no signs of pest or disease damage. Ideally, the plant should not be much taller than the length of its pot, and should be about as tall as it is wide. Also, avoid vegetable plants that are already producing fruit, this is an indication they have been in their pot too long, prompting them to become stressed. When stressed, annuals often feel they need to hurry and produce seeds to carry on the next generation.
When should transplants be planted into the garden? For spring gardens, plant transplants once danger of frost has passed (late March in the Panhandle), when the transplant has had time to develop a strong root system, and when the transplant is about the length of its pot. If you are growing your seeds indoors or in a greenhouse, allow the plant to “harden-off” by placing the plants outdoors in partial shade for a few hours a day for about a week before transplanting.
What is the transplanting process?
- First, prepare your garden site with compost and other soil amendments.
- Water your plants very thoroughly just before planting to decrease transplant shock. The entire root system should be completely wet.
- Dig a hole that is at least double the width of the plant’s root ball.
Add fresh compost or worm castings to each planting hole to give your plants an extra nutrient boost. Photo by Molly Jameson.
- Add one to two handfuls of fresh compost or worm castings to each hole. These soil amendments will improve soil health, introduce beneficial microbes, and provide a slow- release nutrient source for your growing seedlings.
- Avoid covering any leaves or stems under the soil surface. Remove these lower leaves and stems with sharp garden clippers to minimize the size of the wound.
- Avoid touching the stem and avoid disturbing the root ball when removing the transplant from its pot. Gently squeeze the pot to loosen the potting soil and turn the transplant sideways or upside down with the palm of your hand to gently “catch” the transplant.
- Unless the transplant is a tomato, plant it so that the soil level is about the soil level of the transplant, making sure the plant has good structure to decrease susceptibility of falling over as it grows.
- If transplanting a tomato, plant deeper than the soil level of the transplant, as tomatoes can grow what are called “adventitious” roots – roots that grow from their stem – that will improve overall root development.
- Make sure to cover up all roots, and water the soil around the plant thoroughly. Continue to water deeply, keeping the soil moist but not soggy, for the next three to four days while the plant becomes established. You can then begin to switch to a normal watering pattern.
- Always water the soil around the plant, not the plant leaves, throughout the season to decrease susceptibility to disease.
Remember: gardening is a science and an art! And just like art, there are many aspects that are open to interpretation. Have fun gardening – experiment and try new techniques. Keep a journal tracking all your gardening adventures. With time, this can become your road map to the sweetest of summer fruit.

by Sheila Dunning | Mar 20, 2017
 Now is the time to prevent your azaleas from being attacked by lace bugs. The azalea lace bug, Stephanitis pyrioides, overwinters as eggs on the underside of infested leaves. Eggs hatch in late March and early April. The insect then passes through five nymphal instars before becoming an adult. It takes approximately one month for the insect to complete development from egg to adult and there are at least four generations per year. Valuable plants that are susceptible to lace bug damage should be inspected in the early spring for the presence of overwintering lace bug adults, eggs and newly hatched nymphs. Inspect these plants every two weeks during the growing season for developing lace bug infestations.
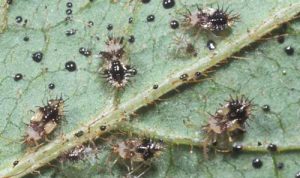
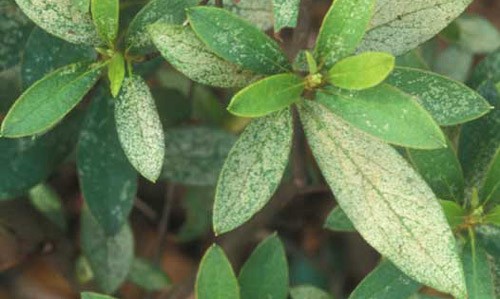
Both adults and nymphs have piercing-sucking mouthparts and remove sap as they feed from the underside of the leaf. Lace bug damage to the foliage detracts greatly from the plants’ beauty, reduces the plants’ ability to produce food, decreases plant vigor and causes the plant to be more susceptible to damage by other insects, diseases or unfavorable weather conditions. The azalea can become almost silver or bleached in appearance from the feeding lace bug damage.
 However, lace bugs often go undetected until the infested plants show severe damage sometime into the summer. By then several generations of lace bugs have been weakening the plant. Inspecting early in the spring and simply washing them off the underside of the leaves can help to avoid damage later and the need for pesticides.
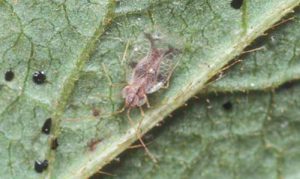
Adult lace bugs are flattened and rectangular in shape measuring 1/8 to 1/4 inch long. The area behind the head and the wing covers form a broadened, lace-like body covering. The wings are light amber to transparent in color. Lace bugs leave behind spiny black spots of frass (excrement).
Lace bug nymphs are flat and oval in shape with spines projecting from their bodies in all directions. A lace bug nymph goes through five growth stages (instars) before becoming an adult. At each stage the nymph sheds its skin (molts) and these old skins often remain attached to the lower surface of infested leaves.
Azalea lace bug eggs are football-shaped and are transparent to cream-colored. Lace bug eggs are found on the lower leaf surface, usually alongside or inserted into a leaf vein. Adult females secrete a varnish-like substance over the eggs that hardens into a scab-like protective covering.
For more information go to: http://entomology.ifas.ufl.edu/creatures/orn/shrubs/azalea_lace_bug.htm
by Beth Bolles | Dec 22, 2016
A new tree or shrub is an investment for the future. When we pick an ornamental plant, we have the hope that it will survive for many years and offer seasons of beauty that enhance our landscape. Time is often spent picking a suitable spot, preparing the planting hole, and watering until establishment. We give it the best of care to make certain that our new plant becomes a more or less permanent feature.
With all of our tender love and care for new ornamentals, there is one important practice that we may neglect. Most homeowners purchase plants in containers and it is common to find root balls with circling roots. If any root ball problems are not addressed before installation, the life of your plant may be shorter than you want.

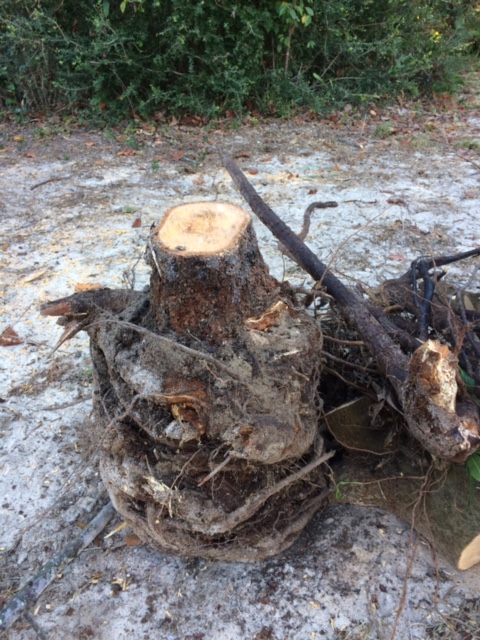
Ten years after installation, this plant was ultimately killed by girdling, circling roots. Photo by Warren Tate, Escambia County Master Gardener.
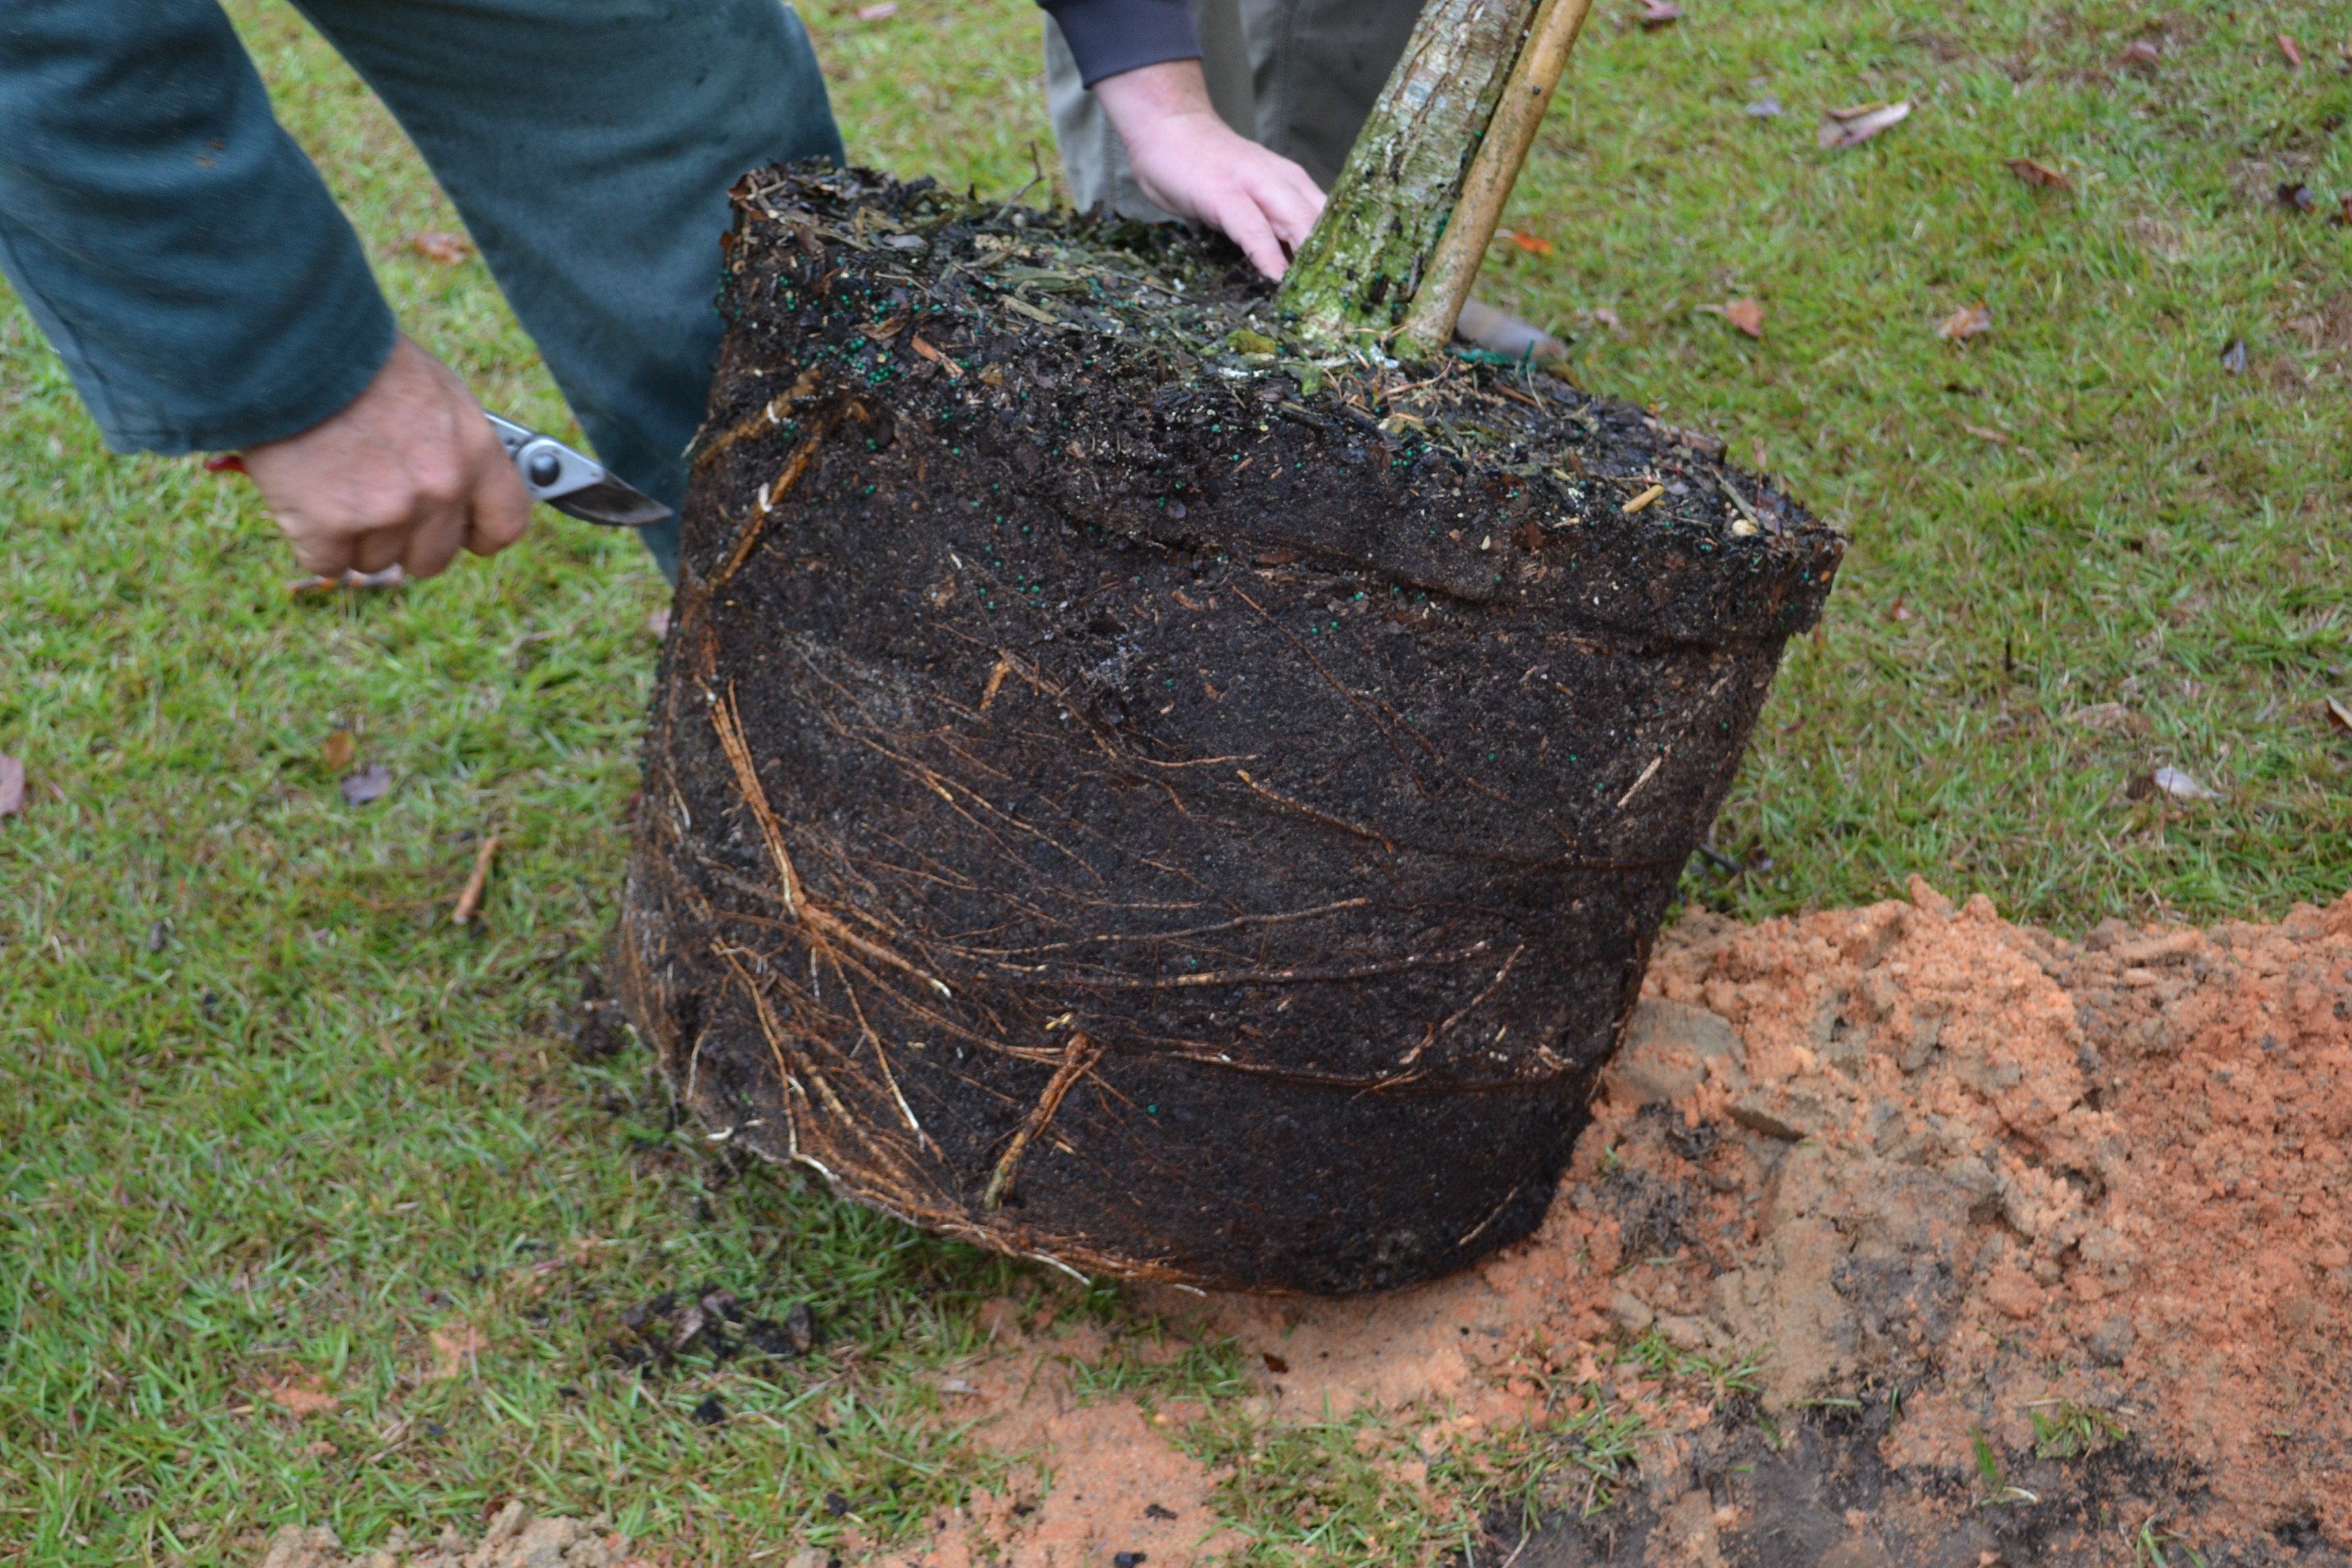
The best practice for woody ornamentals is to cut any roots that are circling the trunk or container. Homeowners may slice downward through the root ball around the entire plant. For shrubs, it is recommended to shave off “the entire outside periphery of the rootball” to eliminate circling roots. These practices allow the root system to grow outward into new soil and greatly reduce the possibility of girdling roots killing your plants years after establishment.

Circling roots are cut before installation. Photo by Beth Bolles, Escambia County Extension.
For more information on shrub establishment, visit the UF Publication Planting Shrubs in the Florida Landscape.
by Beth Bolles | Nov 22, 2016
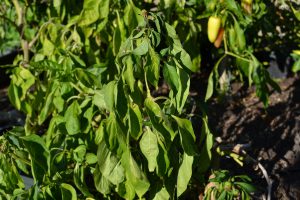
Leaf wilt may indicate more than just dry soil. Photo by Beth Bolles
Plants have specific ways of telling gardeners that there is a problem, but not all plant symptoms lead us directly to the cause. During drier conditions, we often use wilting leaves as an indicator that water is needed. This can be a reliable symptom that the soil is lacking moisture but it is not always the case. Wilting leaves and herbaceous branches actually tell us that there is not adequate water in the plant. It does not necessarily indicate lack of moisture in the soil.
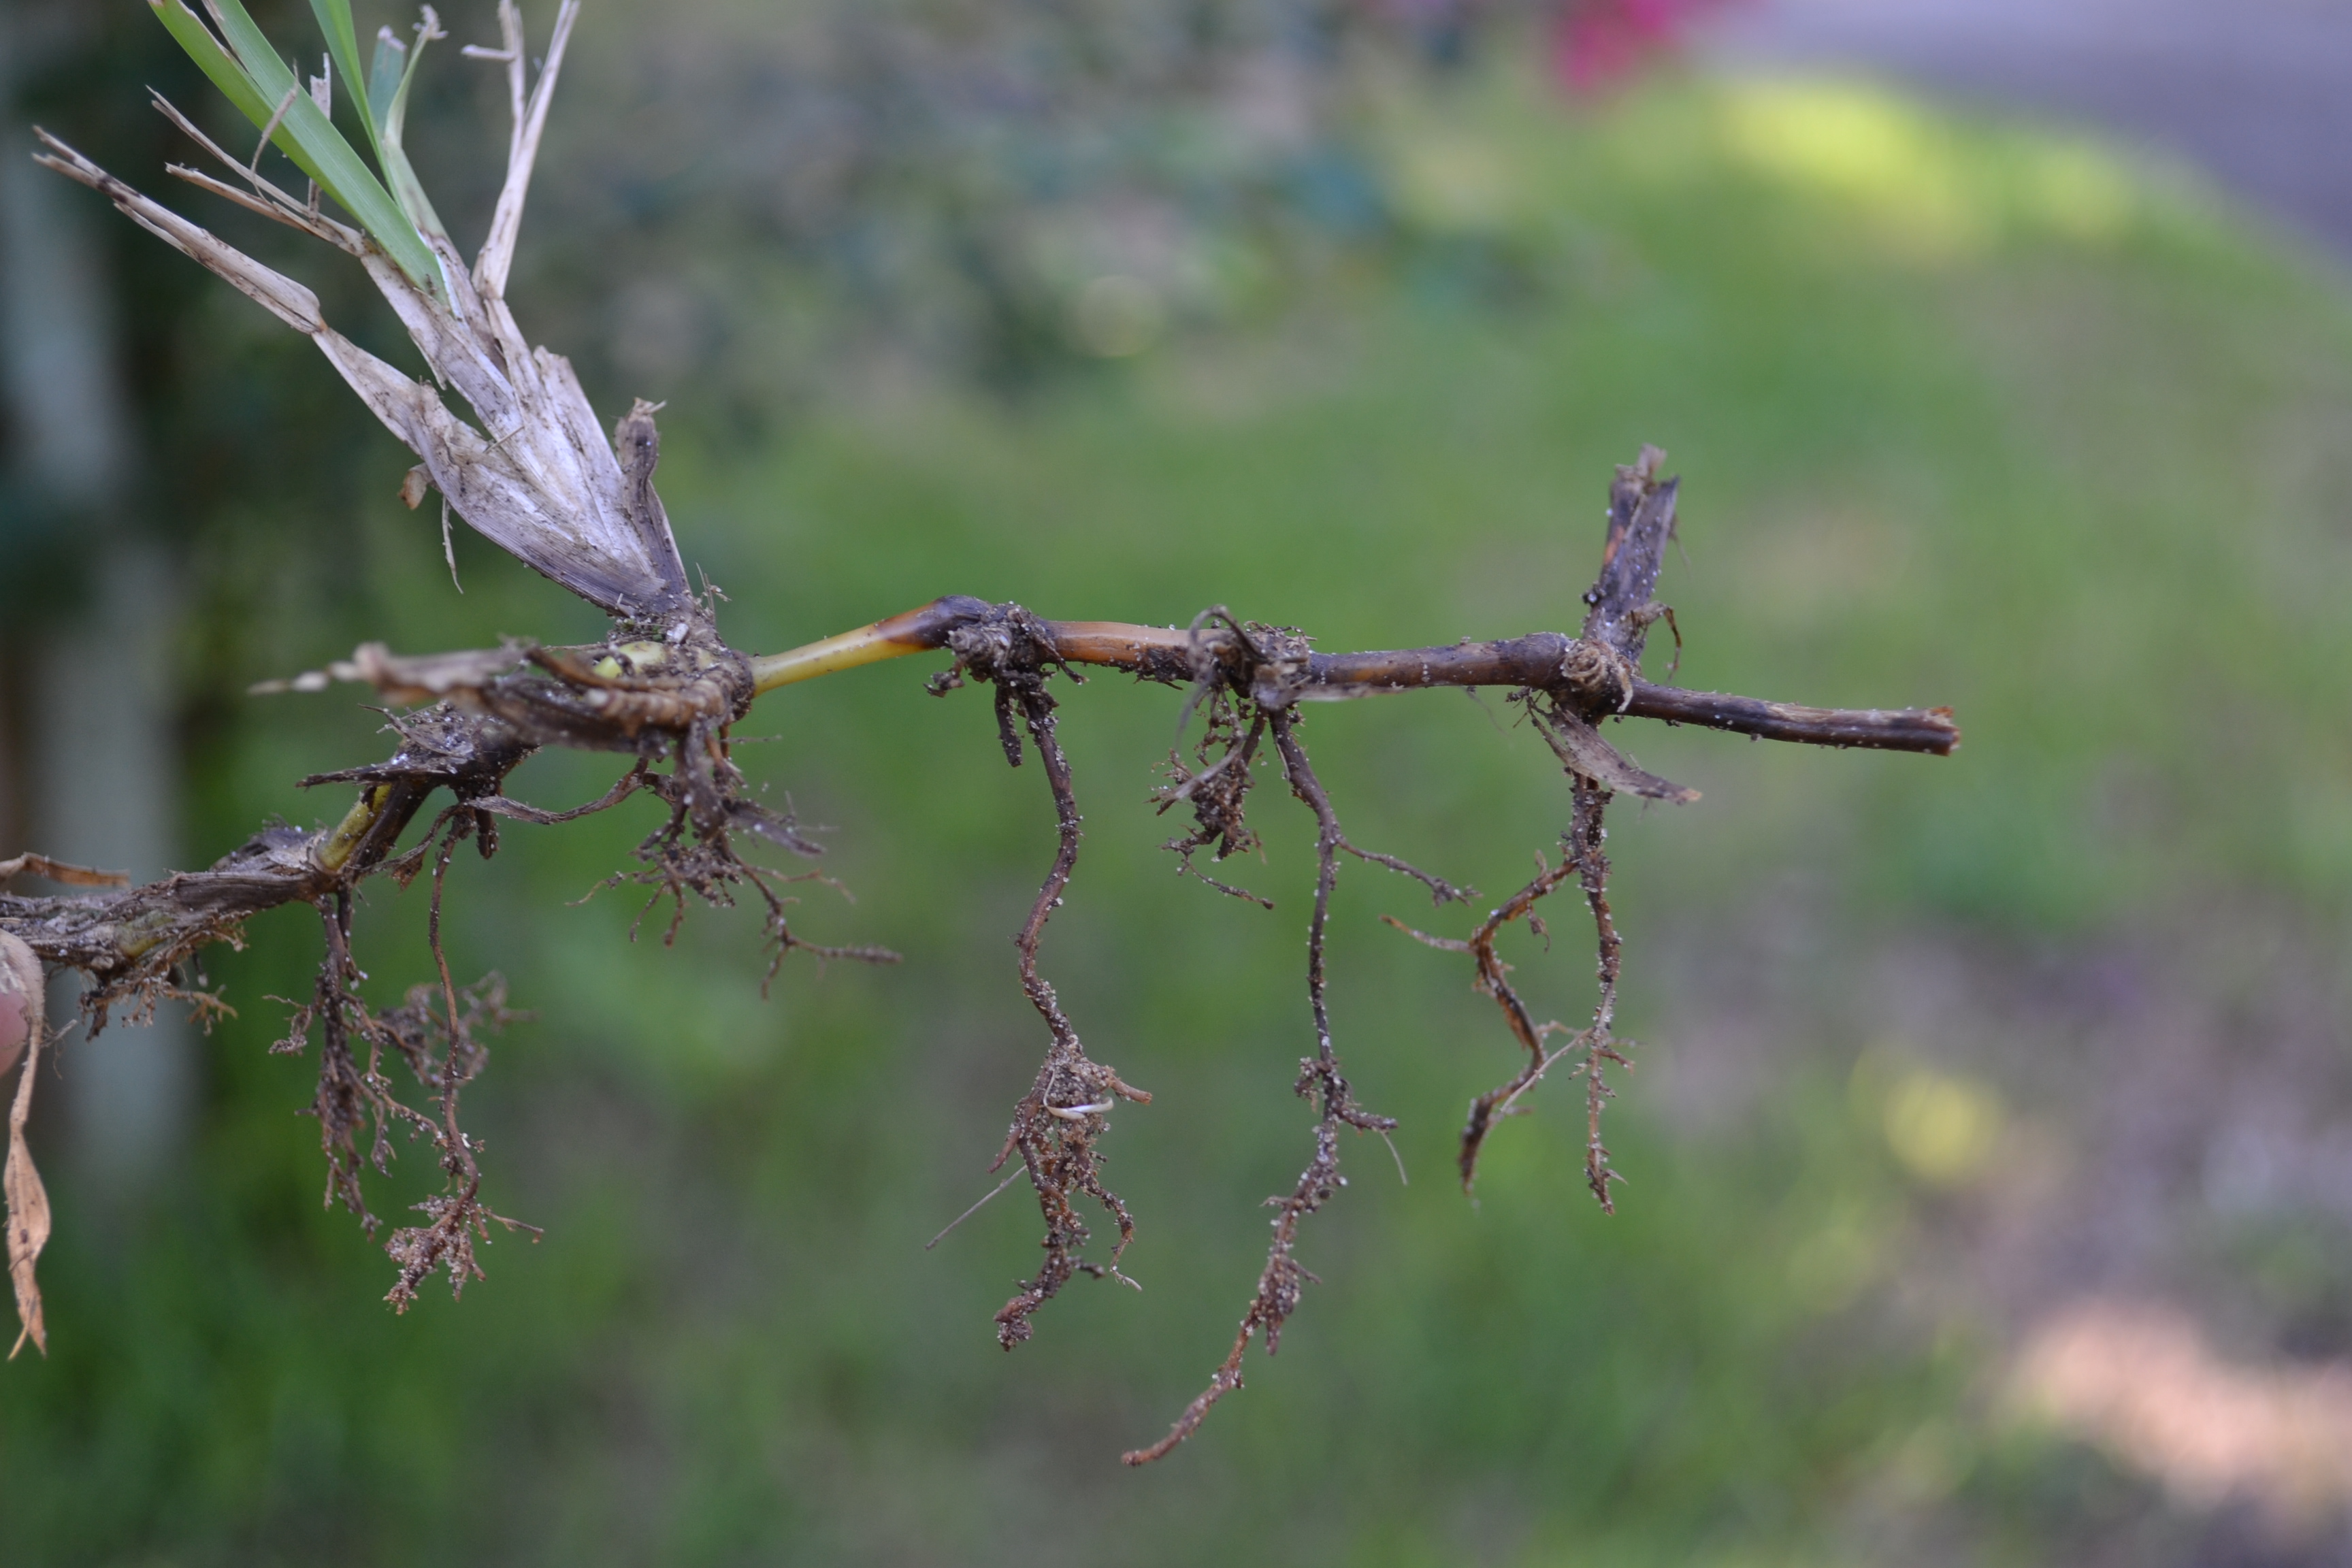
There can be many reasons why water is not being absorbed by roots and moved to tissues in the plant. The obvious place to start is by checking soil moisture. If soil is powdery several inches deep around the plant, water is likely needed. However, if you ball the soil up in your hand and it holds together, there may be another reason for lack of water reaching the upper plant parts. The harder part is determining why the root system is not taking up water. Causes can be a rotted root system from too much water, a poorly developed root ball that has circling or kinked roots, and even problems in the soil such as compaction. Insects, diseases, and other pathogens can also injure root systems preventing the uptake of water.
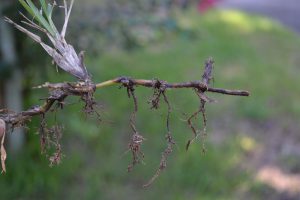
Too much water can cause roots to decay, preventing the uptake of water. Photo by Beth Bolles
So before automatically grabbing the hose or turning on the sprinkler, do a little soil investigation to make sure that the plant wilt is really indicating lack of water in the soil. If you need help in your diagnosis, always contact your local Extension office.