January to February is the ideal time to plant trees. During dormancy, all the energy in a tree is in the root system. They will establish very quickly. In the spring, they will be ready to grow leaves. Planting and establishing trees is all about managing air and moisture in the soil. The exception is palms. They are not technically trees and should only be planted in the late spring and summer. Three of the most common causes of poor plant establishment or tree death are planting too deep, under watering, and over watering. If appropriate trees are planted at the right depth and they are irrigated properly, the trees will thrive for years to come. As simple as this sounds, problems often arise that lead to poor establishment or plant failure.
Following ten critical steps can ensure proper tree planting:
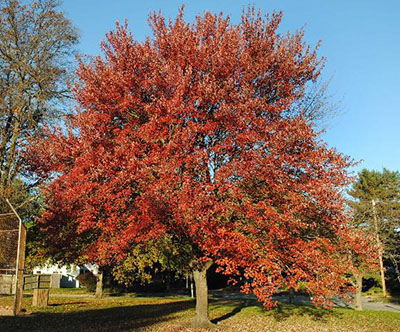
1. Look up for wires and lights. Make sure that the tree species’ mature size will not interfere with any utility lines.
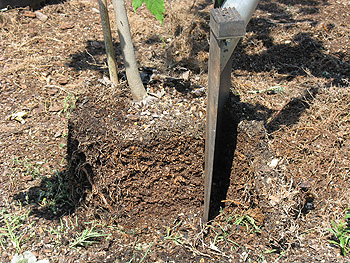
2. Find the topmost root and treat root defects. After removing the pot from the tree, remove all excess soil on the top of the root ball, until a root that is similar in diameter to the lower branches is located. That is the topmost root. Look for any roots that encircle the rootball, particularly close to the trunk. Remove any roots that will strangle the trunk. Cut all encircling roots at the point they turn to encourage root branching. Then, rough up or shave off all the roots on the perimeter of the rootball. If the tree is balled and burlapped, use a metal skewer to locate the depth of the topmost root.
Remove an inch or more for extremely rootbound trees.
3. Dig shallow and wide hole. Using the corrected rootball as a gauge, dig the hole slightly less shallow that the rootball. Loosen the top six inches of soil around the entire rootball.
4. Carefully place tree in hole. Lower the tree into the hole slowly.
5. Position top root 1-2 inches above landscape soil. Make sure that the rootball is above the surrounding soil grade. If balled and burlapped, the nylon straps, metal pins, burlap on top of the rootball, and wire basket above the grade will need to be removed.
6. Straighten tree. Check the tree from two directions at 90% angles from each other.
7. Add and firm backfill soil. Tamp soil with fingers, not feet. Do not stomp on the soil. It will compact the soil and reduce the oxygen to the roots.
8. Add mulch. Apply a 2–3-inch layer of natural mulch out to the perimeter of the trees branches, or beyond if possible. However, there should be 1 inch or less mulch on top of the rootball. Do not allow mulch to touch the trunk.
9. Stake and prune if needed. If there is a strong steady wind, staking is necessary. Otherwise, don’t stake. Make sure to do all structural pruning is done at planting time. Establish a central leader and remove crossing branches. But do not remove the lower branches. Just reduce the length. The tree needs to bring food to the lower portion of the trunk to increase the diameter.
10. Water the tree. Don’t walk away until the tree has been watered. Apply at least ½ gallon. The tree will need to be watered twice a week for 20-30 weeks. The larger the tree, the more water needed at each event. However, if the water doesn’t perk in within a few minutes, reduce the amount being applied. Overwatering can be as harmful as underwatering.
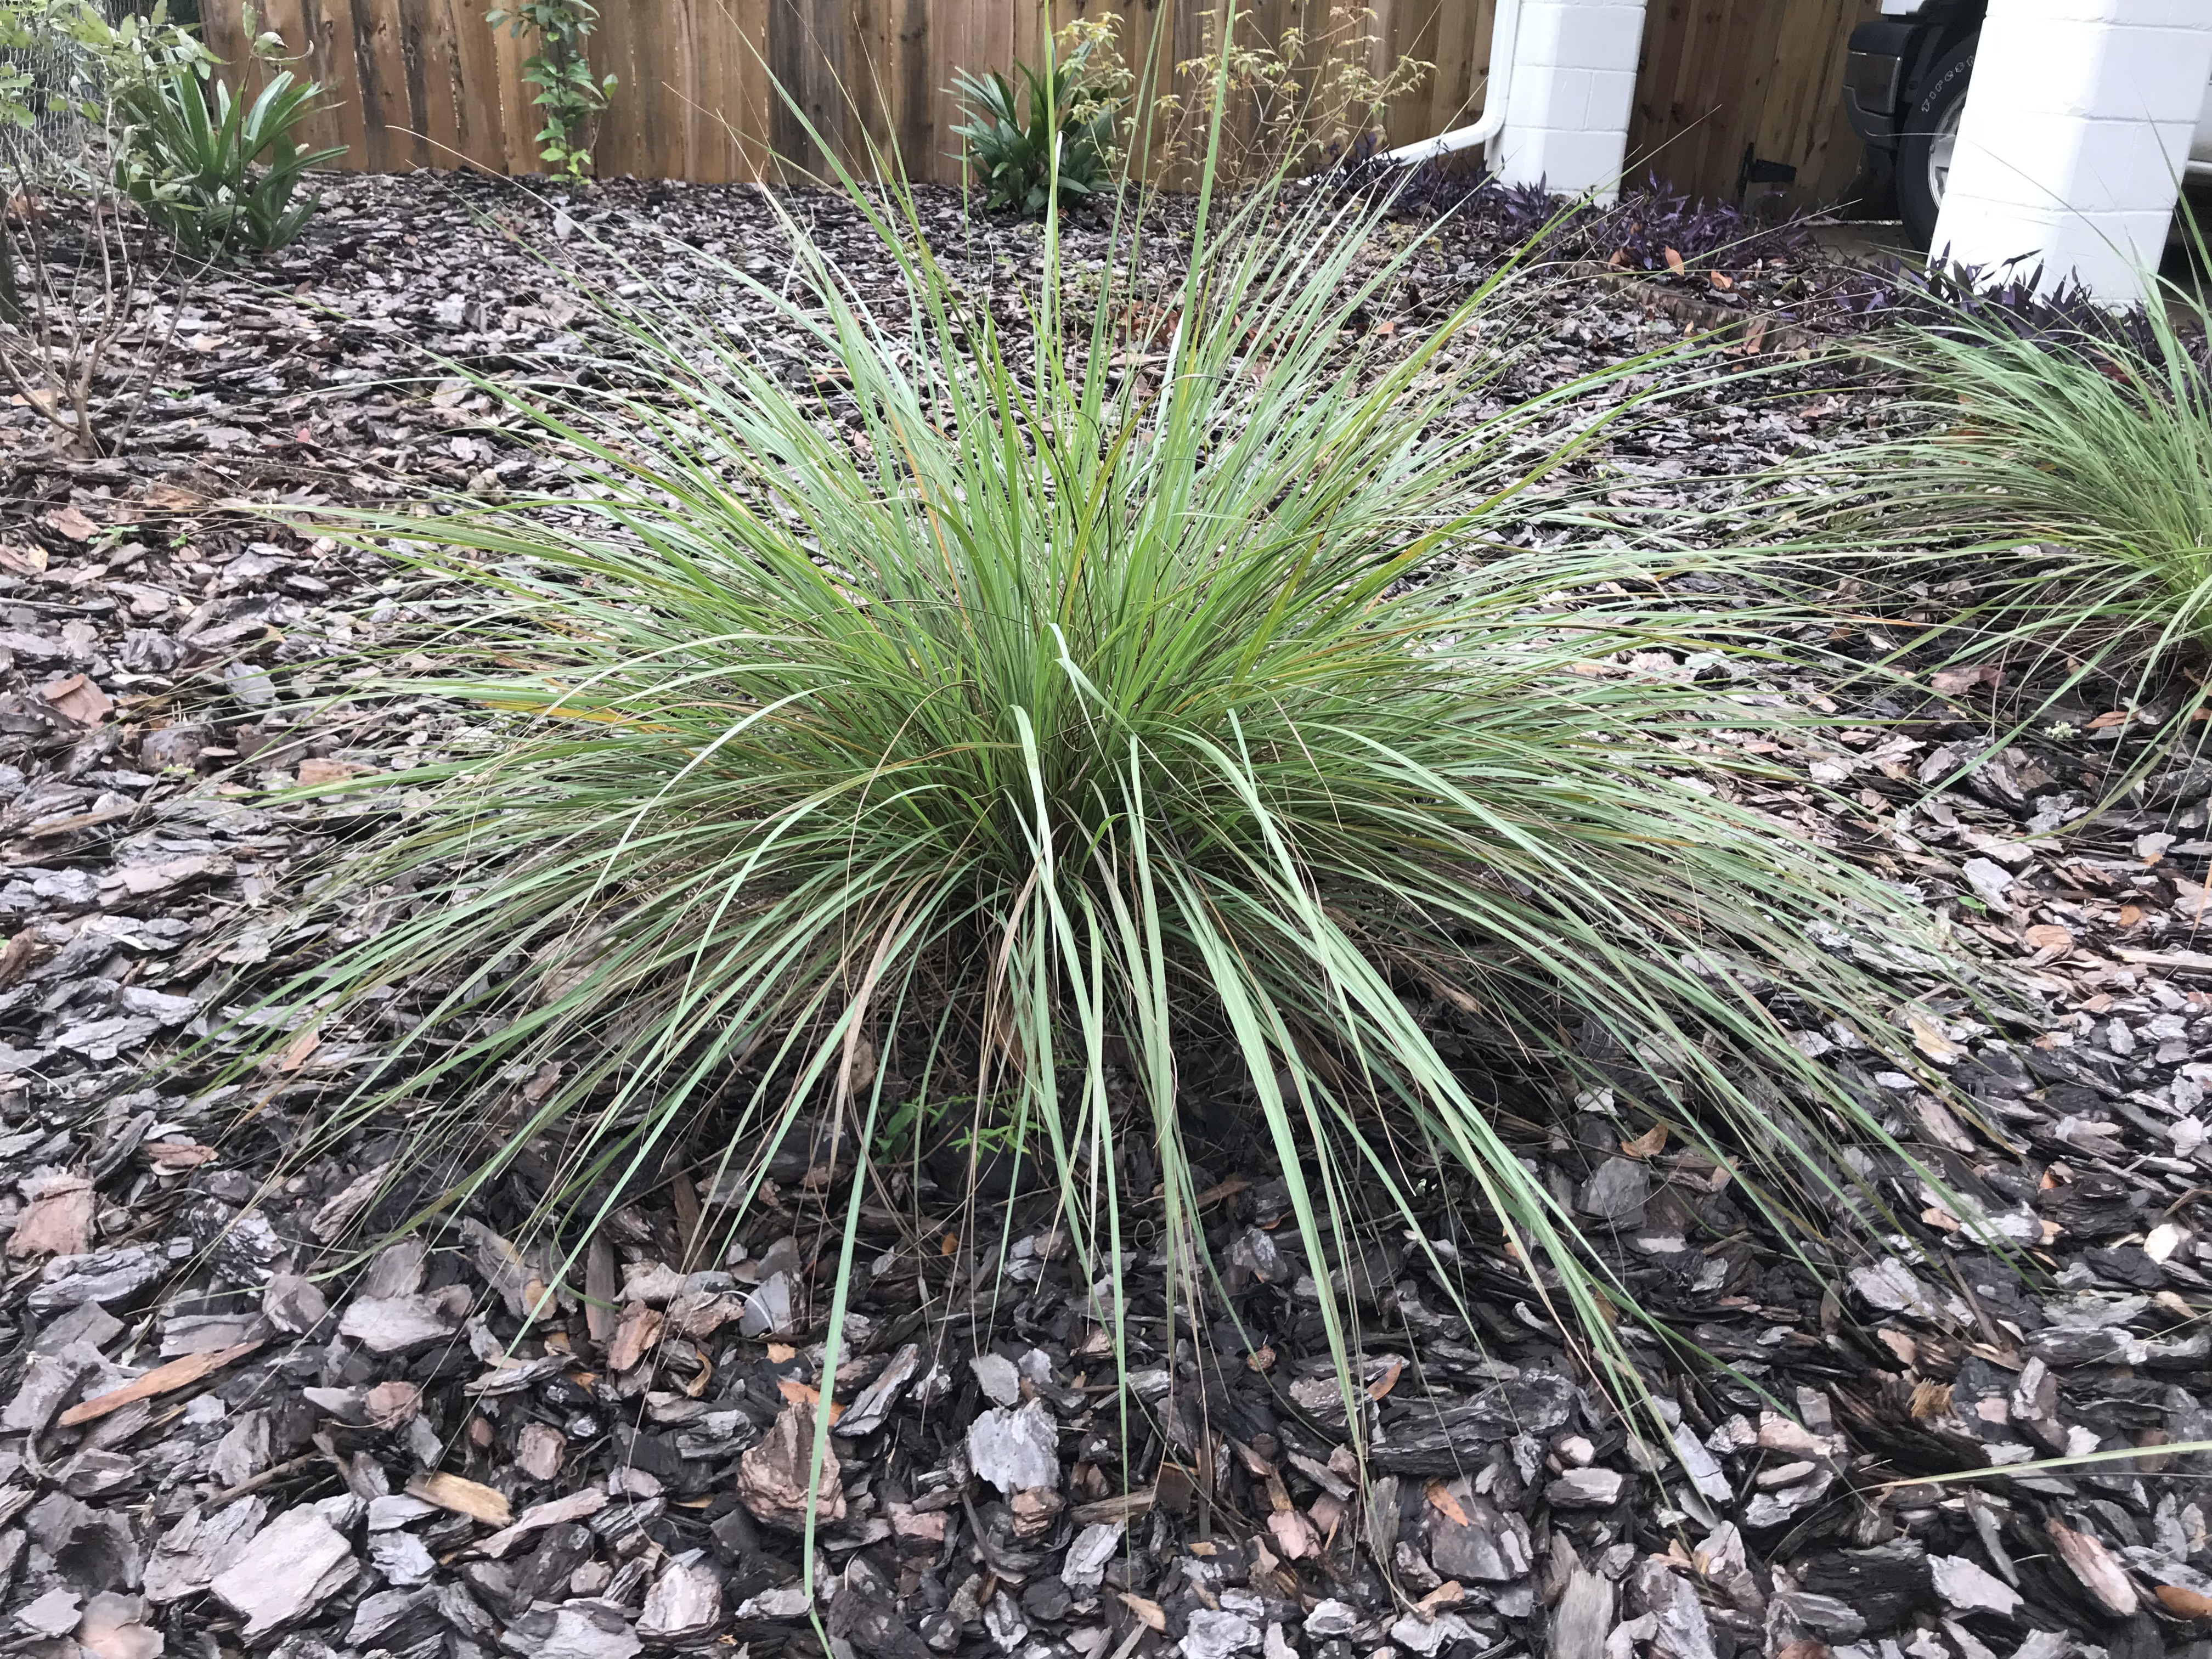
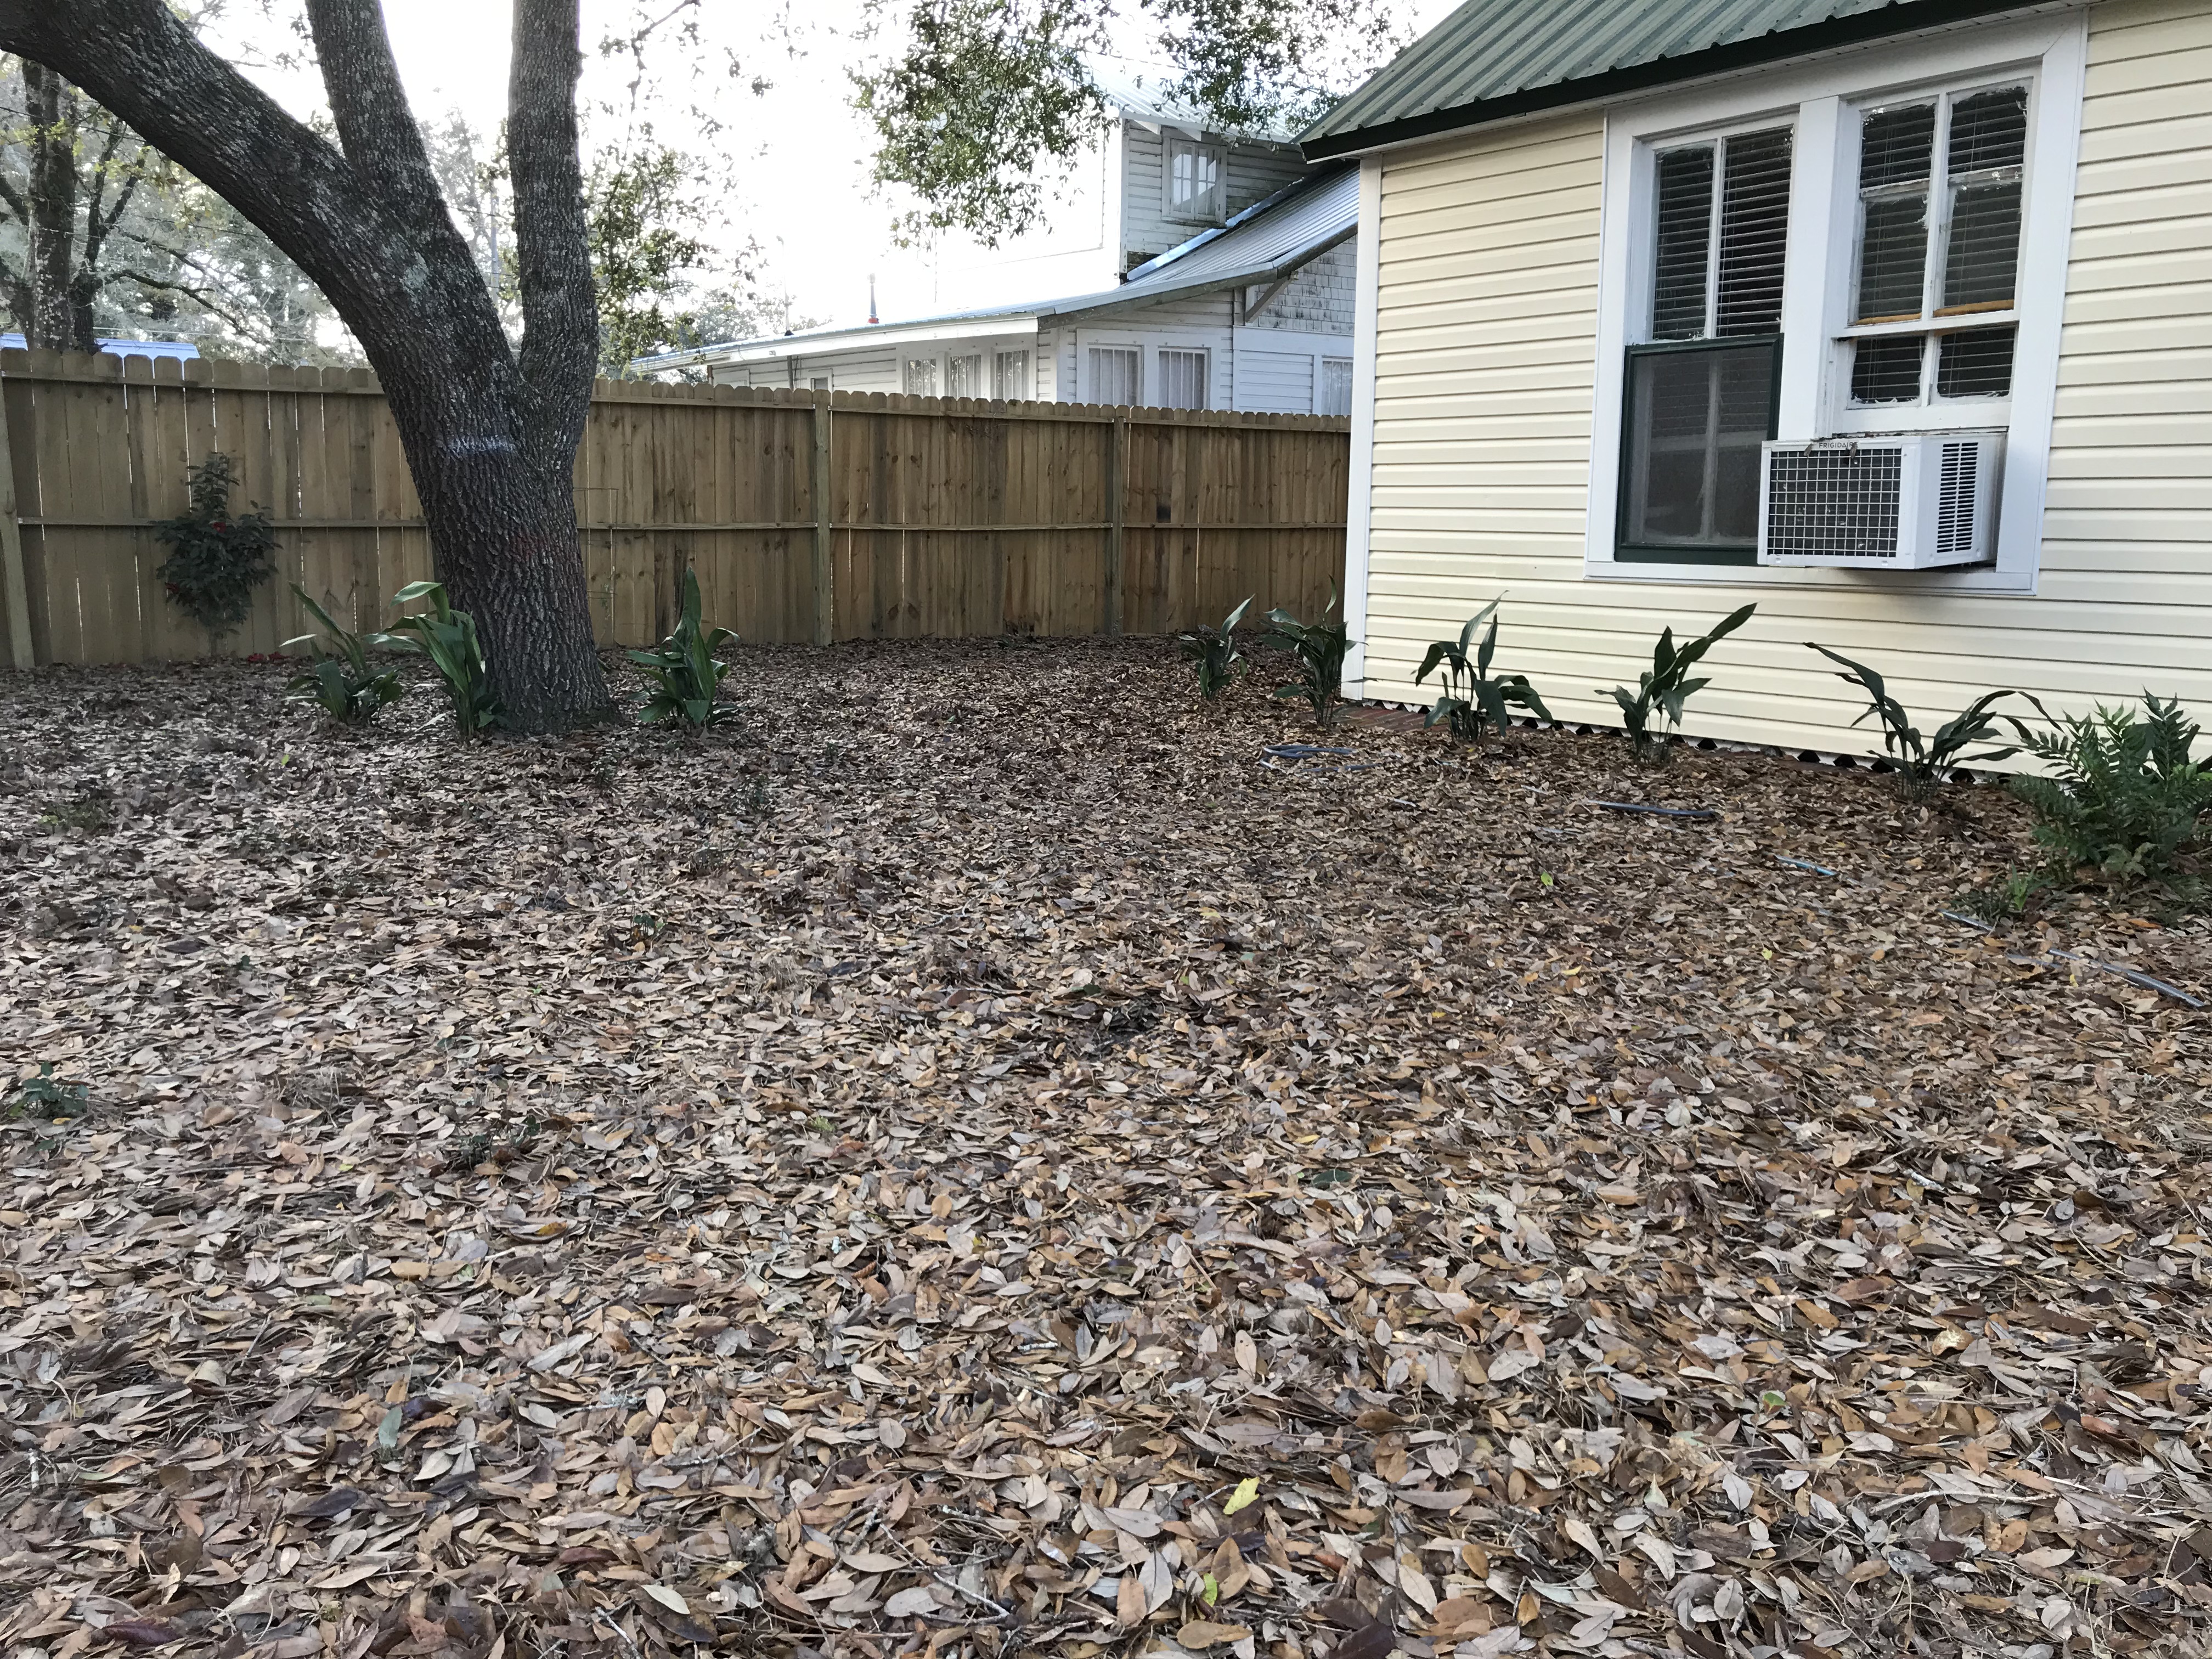
Mulch provides nutrients to soil and plants, reduces weed growth, controls soil temperature, and improves the look of lawns and gardens. It gives the landscape a neat, uniform appearance and is an excellent Florida-Friendly choice for hard-to-mow areas and shady spots. One should keep a 2- to 3-inch-deep layer of mulch on plant beds. Always leave at least 2 inches of space around tree trunks to prevent rot. Create self-mulching areas under your trees by allowing fallen leaves to stay in place. Though bark and wood chips are typically the most common mulch, other forms are just as beneficial. The following are the best overall mulches for Panhandle gardeners!
Bark and Wood Chips
Bark and wood chips are frequently used on flower beds and around small bushes and shrubs. As they decay, the material provides nutrients to the soil. Both materials are inexpensive and can be found at most gardening supply stores. Cedarwood chips are popular for their repellent properties, keeping fleas and other pests away.
Pebbles and Rocks
Pebbles and rocks are effective in retaining soil moisture and minimizing weed growth. They are excellent mulch alternatives for flower beds. Rocks are economical in cooler climates, where heat retained by rock mulch can extend the growing season. Since rocks do not decompose, they don’t provide nutrients to the soil. If you’re looking for a nutrient-rich mulch alternative, rocks are not a good choice. This can be easily remedied by fertilizing your landscape to provide more nutrients. If you decide to use pebbles or rocks, keep in mind that they can be difficult to remove if you switch to a different type of mulch a season or two.
Leaves and Pine Needles
Leaves and pine needles are an affordable nutrient-rich mulch alternative. Rake and gather fallen leaves each season and redistribute them above your soil. For the best results, one should shred the leaves. Let the shredded leaves dry before adding them to your garden to reduce bacteria growth and pest infestations. Pine needles decompose and add nutrients to the soil, just like other organic forms of mulch. They work best with plants that prefer acidic soil conditions, like holly gardenias, roses, and chrysanthemums. You can buy bundles of pine needles at your local gardening store or gather them from your own trees and spread them around your garden.
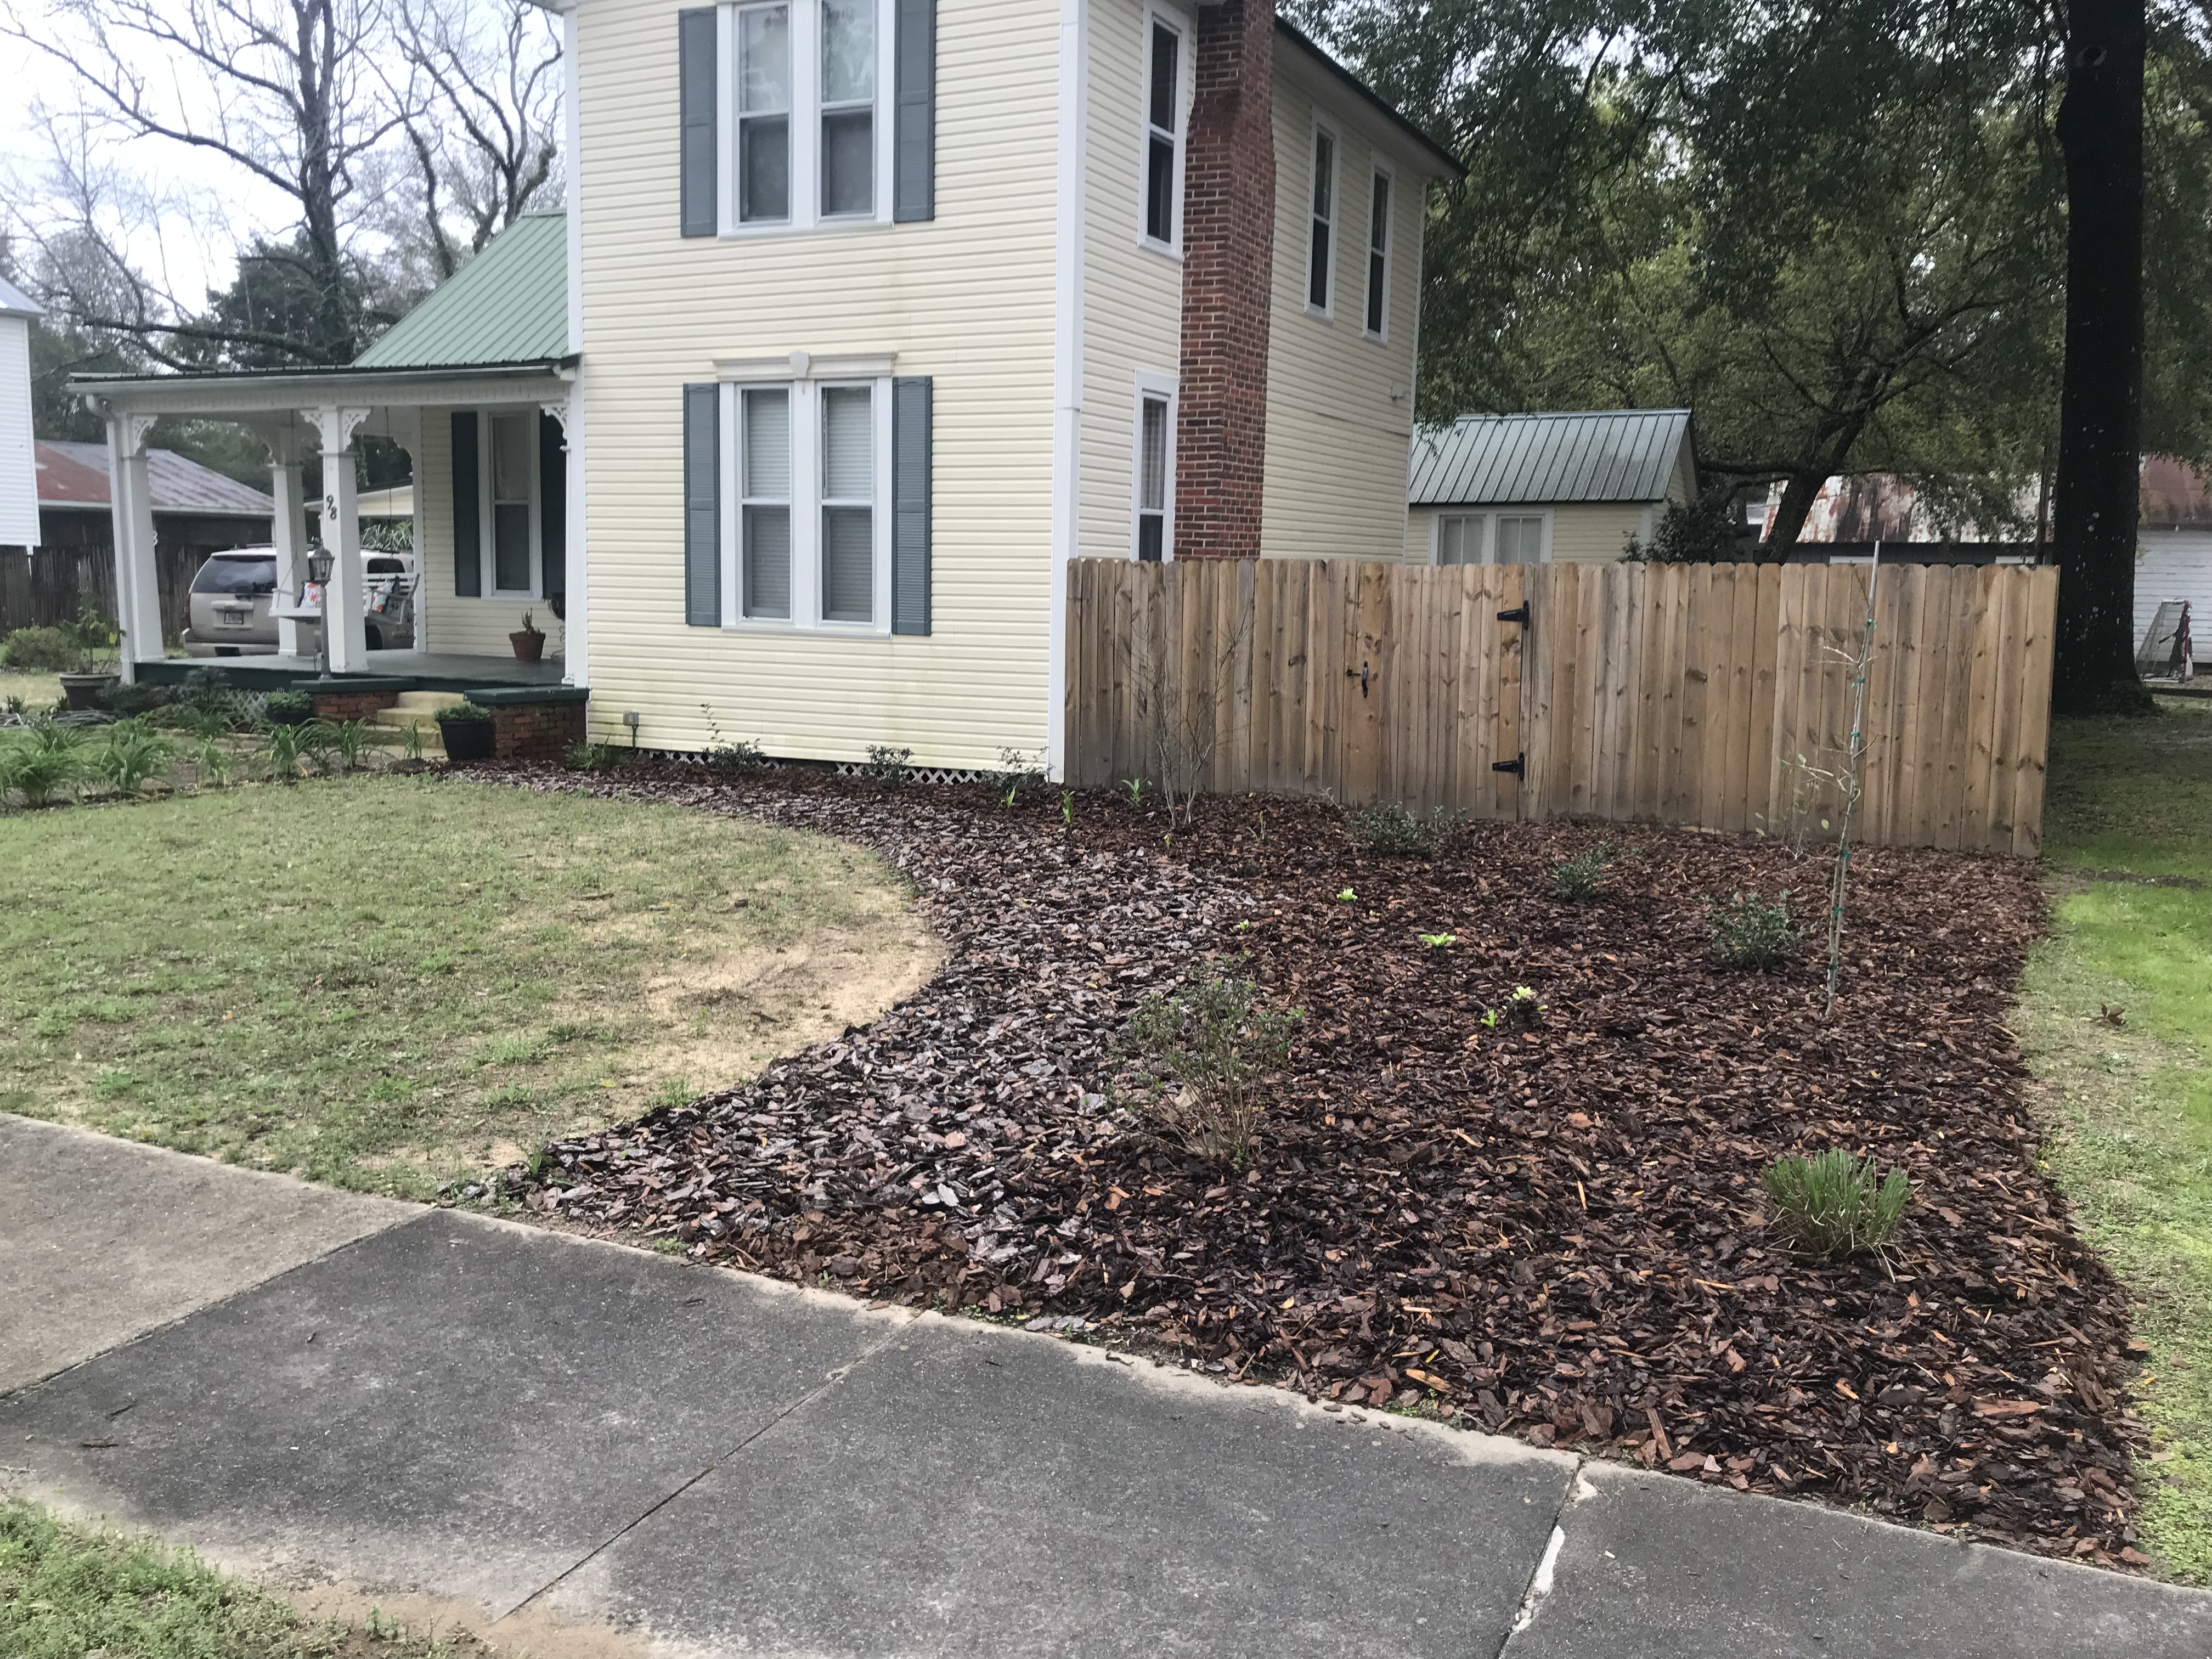
Pine bark in a Panhandle planting bed. Tree bark makes great mulch! Photo courtesy of Daniel Leonard.Pine bark is an excellent, regionally available mulch. Photo courtesy of Daniel Leonard.Pine straw is a popular mulch in the Panhandle. Photo courtesy of Daniel Leonard.Leaves make wonderful mulch! Photo courtesy of Daniel Leonard.
Grass Clippings
Grass clippings are a cost-efficient alternative to traditional mulch. However, they must be dried out or composted before use to prevent potentially damaging heat from affecting plants. If you treat your lawn with chemicals, don’t use grass clippings in your flower or garden bed.
Compost
Compost is an affordable mulch alternative and enriches the soil by adding essential nutrients. Apply compost above your garden or lawn in a thin layer. Compost improves the soil, adding nutrients such as phosphorus, potassium, and nitrogen to your garden. One can make it yourself with discarded vegetable scraps, coffee grounds, dead leaves, and water.
Newspaper
Newspapers effectively keep weeds at bay, retain moisture, and regulate soil temperatures. Newspaper is equally functional compared to traditional mulches, but is not as visually appealing as other options. Moisten the newspaper slightly before laying it above the soil so that it stays in place. Then, add a thin layer of organic mulch on top. Apply five to eight sheets of newspaper at a time. If using newspaper without another mulch on top, shred it before applying it to your garden. Newspaper is biodegradable and will deteriorate like other mulches.
Would you like to make money off your land? Are you looking to diversify your current plans on your property? Jackson County is hosting a fruit and vegetable meeting on January 26, 2023, and this just may be the perfect way to start off your new year!
Photo by Molly Jameson.
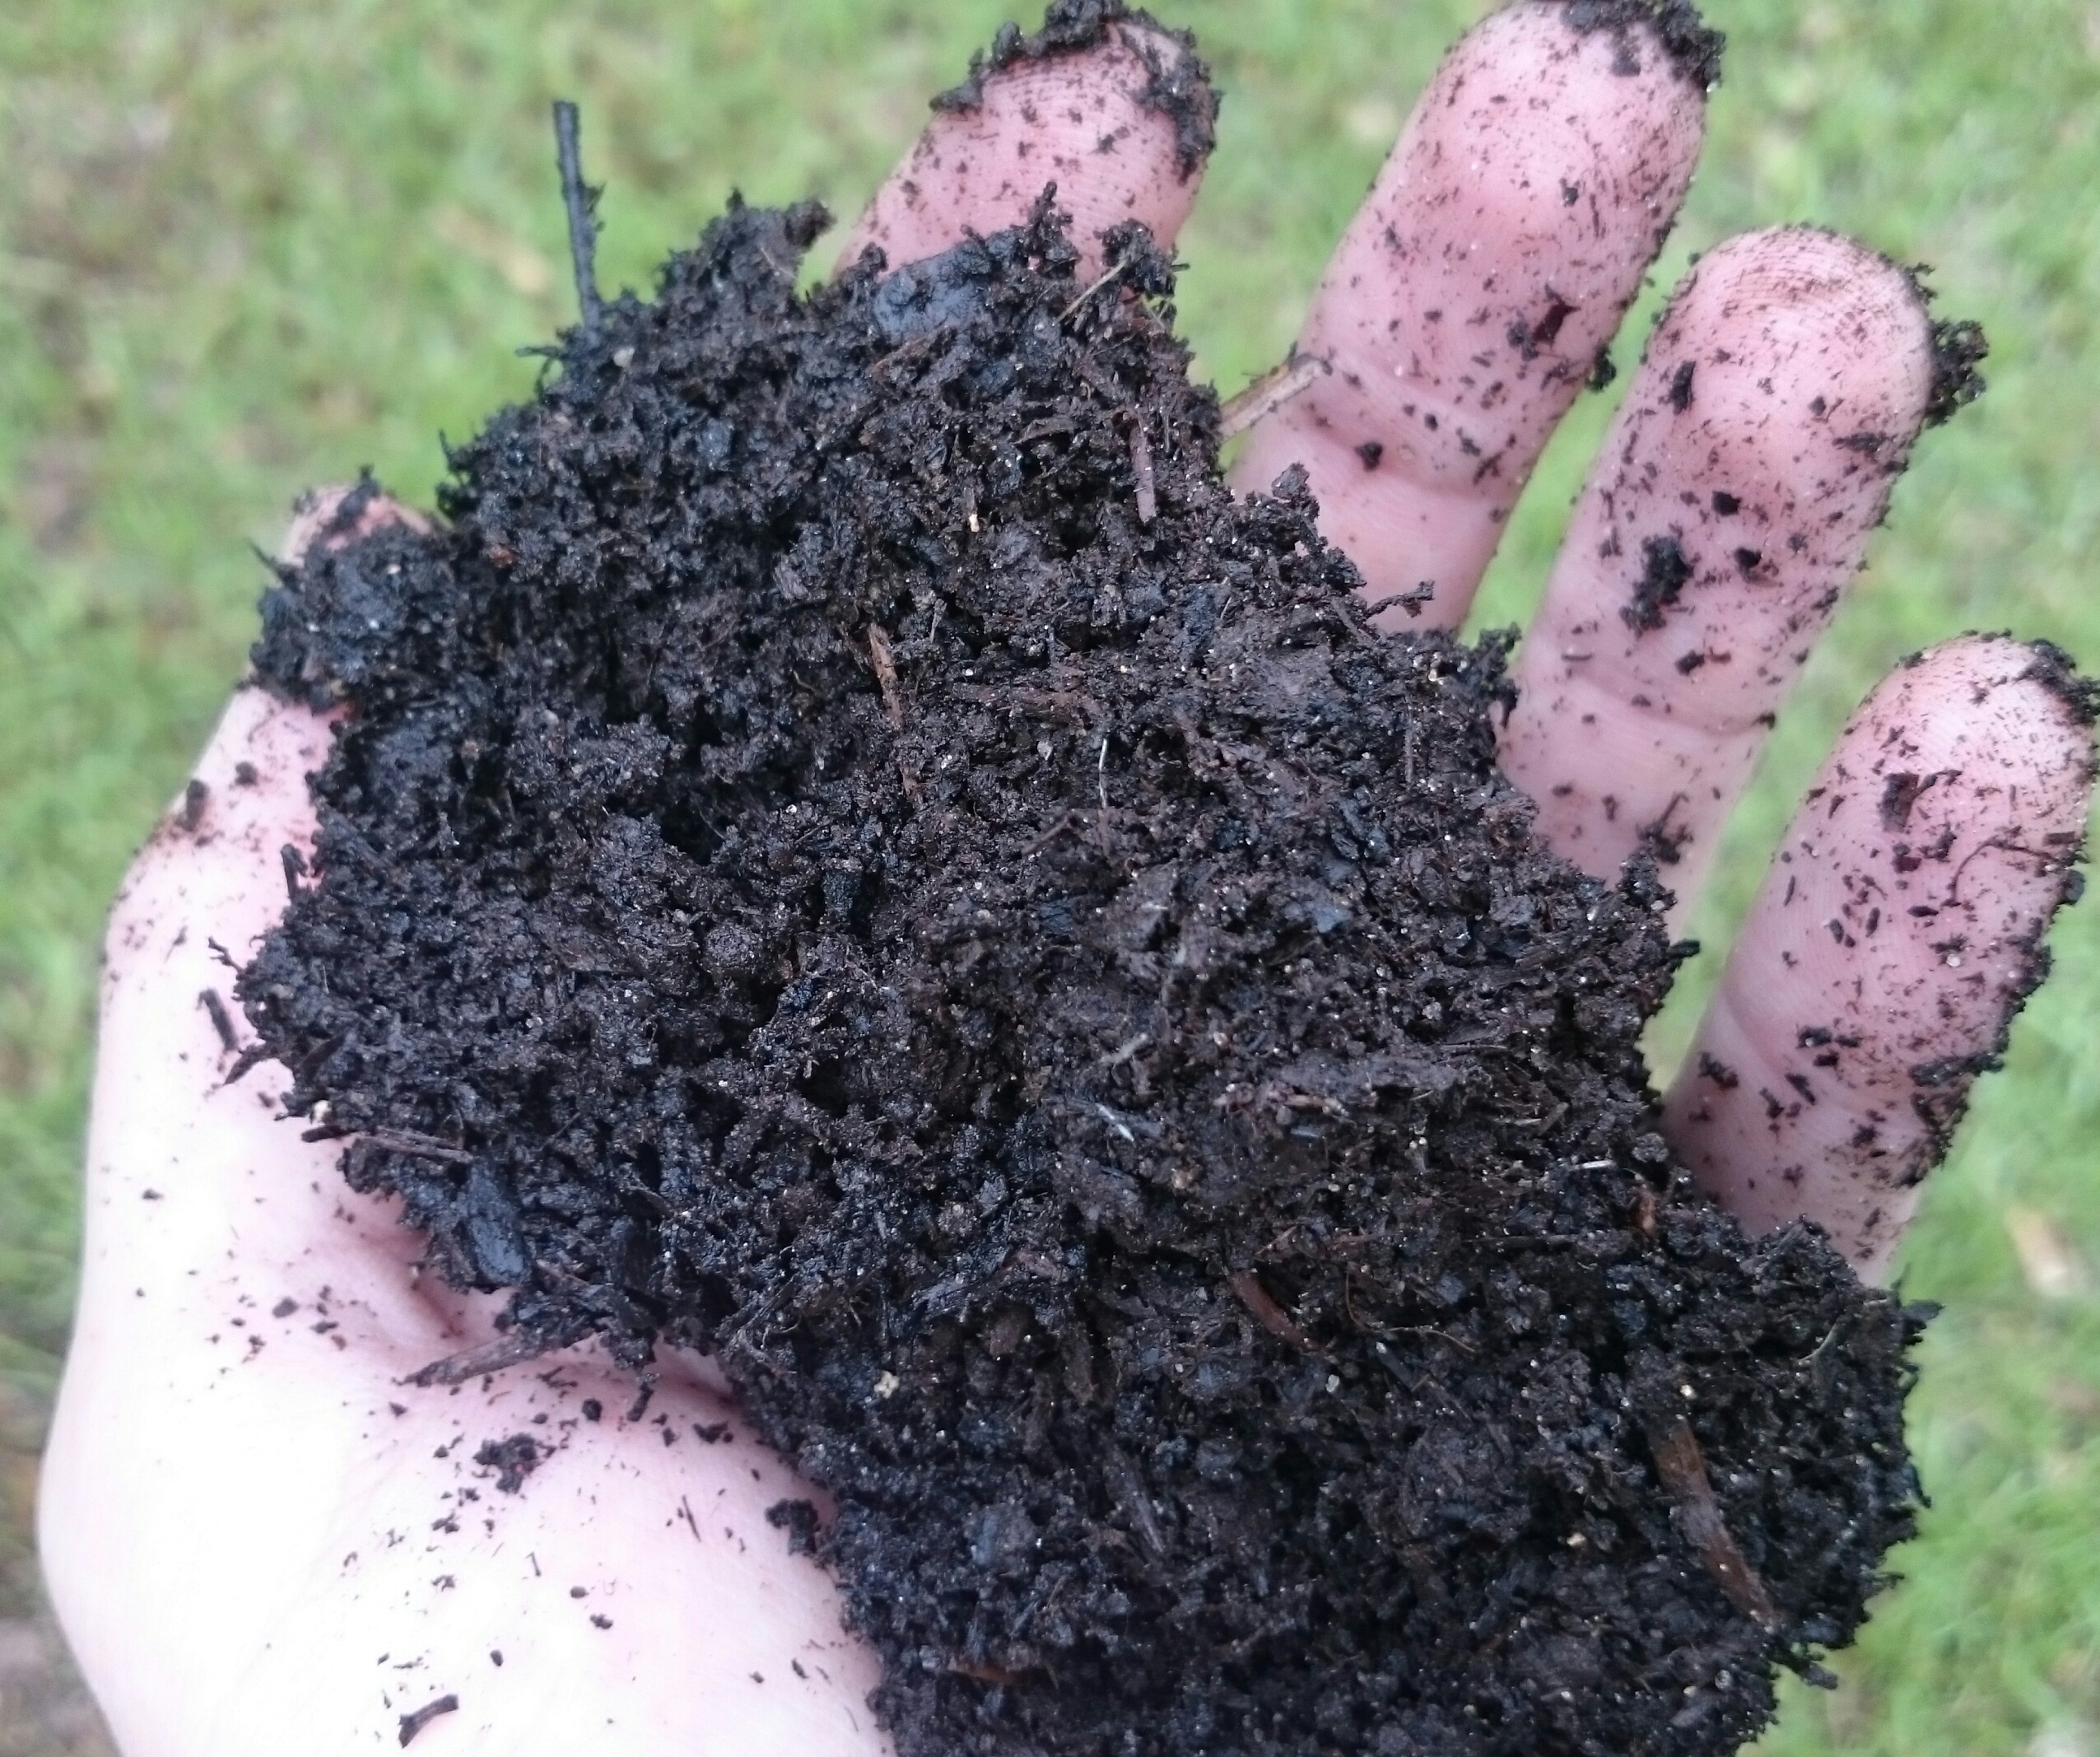
When thinking about what it means to be successful in planting your garden or having fruit trees, often the first thing that comes to mind is a healthy quality crop. This starts with the health of your soil. We will have two specialists that cover soil health and the benefit of adding cover crops to your rotation during the off season. The second thing that might come to mind when wanting to be successful is how to start? how much time do I have to devote to gardening? and how much do I want to do? This meeting will also have a specialist coming to Marianna to cover how to get started on a property with a specialty crop. Even though this information may be geared towards new farmers, it could also be very useful to new land owners and community residents just wanting to do more on their property. You may find that you have so much extra produce that you want to have a little fruit stand!
There will also be a session on the importance of drip irrigation, fertigation and how to implement these practices. Drip irrigation will not only save you money in the long run with the use of less water, but it is also much better for overall plant health by reducing pest and disease problems. Fertigation is the process of adding soil amendments, water amendments and other water-soluble products into an irrigation system. This process can be both beneficial to the plants and cut back on the time it would take to fertilize by hand.
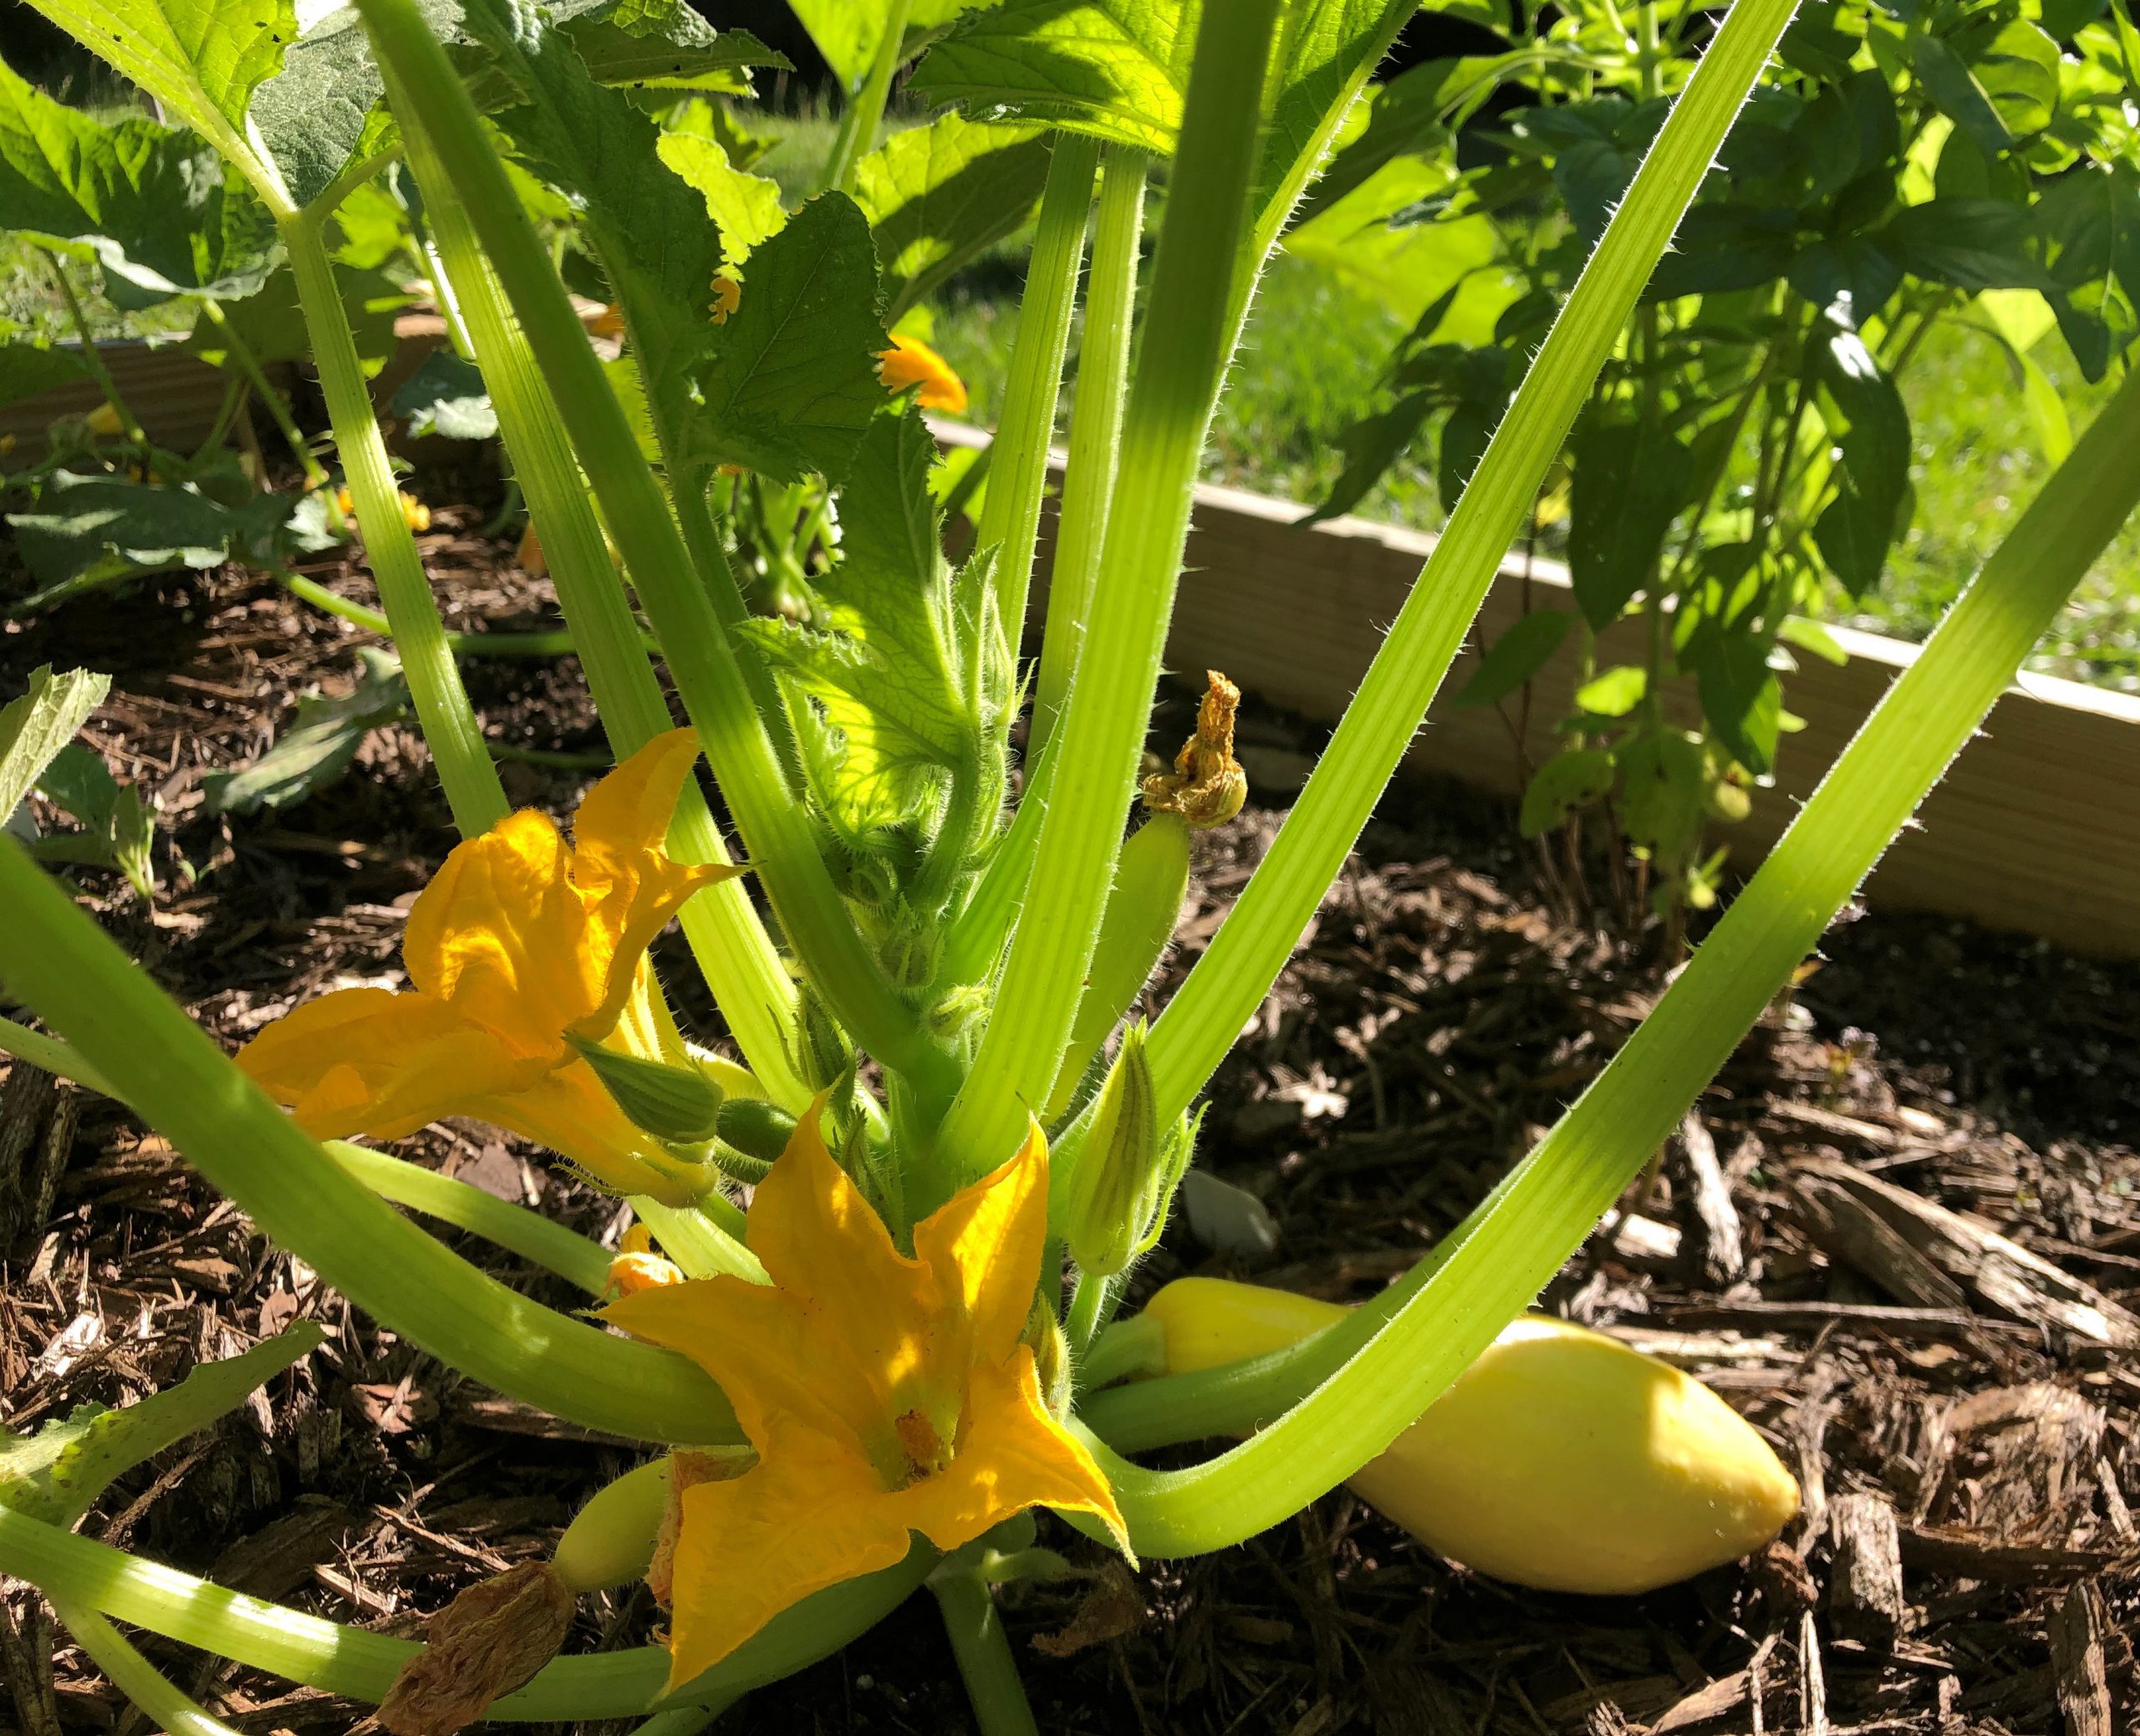
The next session on specialty vegetable and fruit crops will teach about the various exciting specialty crop opportunities in the Tri-State area such as artichokes, blackberries, Seminole pumpkins, and more. Finally, the meeting will also cover cucurbit disease updates and will be extremely useful if you already have a field or garden of watermelons, cucumbers, or squash! Come with questions! CEUs will be offered as well if you are a homeowner that holds a pesticide license.
Organic matter is the “glue” that will hold your soil together. Photo by John Edwards.
While, the audience for this conference is primarily small to medium sized, diversified cucurbit and vegetable producers in the tri-state region including the counties in the Panhandle, Alabama, and Georgia, the residential community is welcome to attend and will truly benefit with learning about soil health, cover crops, fertigation, drip irrigation, and specialty crops. The conference will be held at the Jackson County Extension Office in the Peanut Hall. We are planning a full morning with educational sessions and lunch to follow.
This meeting will be $5 at the door and pre-registration is highly encouraged. Please call our office at 850-482-9620 to reserve your seat and if you have any questions.
Tri-State Fruit and Vegetable Meeting
Thursday, January 26, 2023, 8:00 am- 1:00 pm at the Jackson County Agriculture Offices Auditorium, 2741 Penn Ave., Marianna.
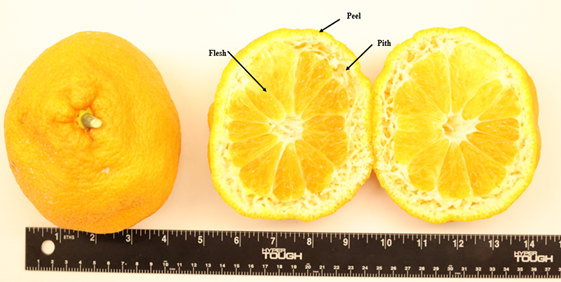
Taste and size of citrus fruits are important attributes that determine profit. Since, consumers prefer firm citrus fruit, packing houses only accept fruits of specific size without softness. Therefore, fruit that grow too large and don’t fill out properly are unmarketable and growers discard all these types of fruits. This condition is called puffiness. As fruit diameter becomes ever larger, fruit pith (the area between flesh and the peel of fruits) becomes thick and causes the fruit to shrink inward and lose its normal spherical shape. So far, this problem has been observed in both backyard and commercial Satsuma groves in North Florida, South Georgia, and Southeast Alabama. Citrus puffiness is a threat for all growers from an economic and overall yield point of view, because puffed fruits are unmarketable resulting reduced profit margins.
With increasing puffiness, the pith of the citrus fruit increases that makes it soft and fruits lose its usual round appearance.
Possible causes
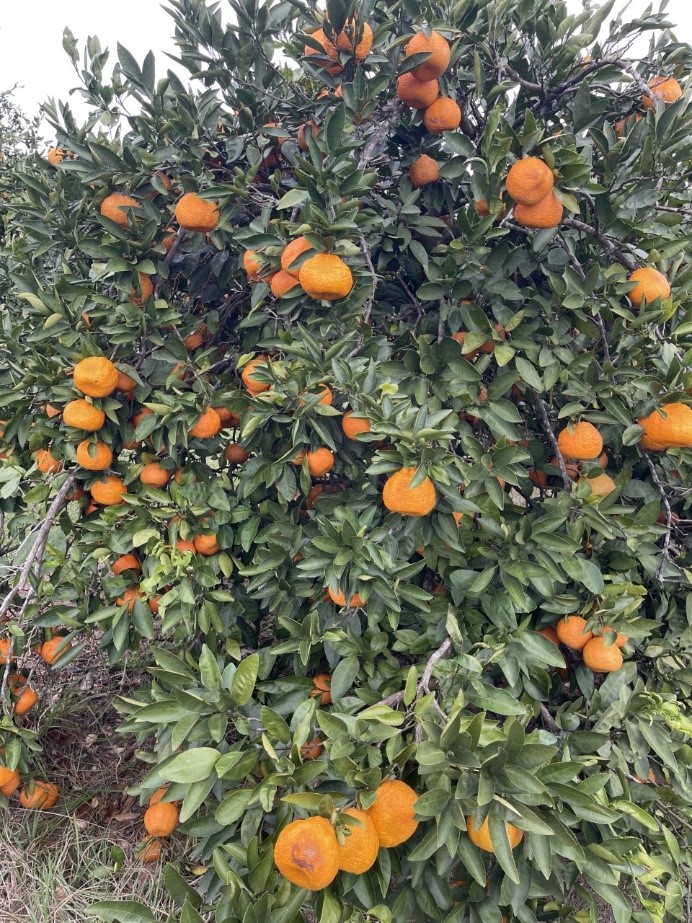
A few scientific reports suggest that low fruit loads on citrus trees can cause puffiness, but the actual mechanism of puffiness still need to be explored. Based on observations, the team from our lab (Fruit Physiology lab, NFREC, Quincy) and collaborators lead by Dr. Muhammad Shahid has concluded that there are three possible causes of puffiness in citrus i.e., genetic, environmental, or nutritional. In our next phase of research, we will dig deep into this issue and try to determine what is the actual cause of puffiness. Fruit puffiness is observed more in young (4-6 years) satsuma groves than in mature groves. Puffiness on old trees could be due to fruit setting on late blooms during hot conditions. Overall, fruit puffiness is less of a concern in sweet oranges, limes and lemons as compared to satsumas.
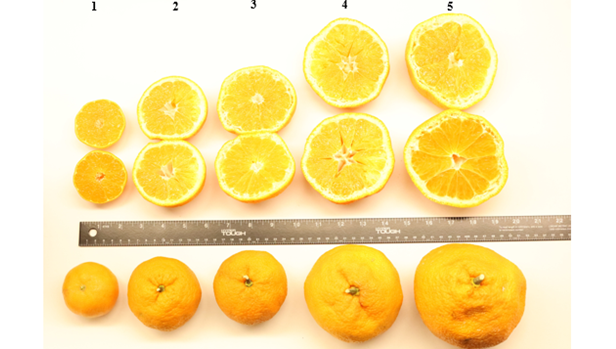
Satsuma (Owari) tree with lots of puffy fruits (PC: Muhammad Shahid)Various levels of puffiness in citrus fruits.
Puffiness study by Fruit Physiology Lab, NFREC, Quincy
In our preliminary study, we divided puffiness into five different grades based on fruit size. Grade one is marketable fruits (firm without puffiness). Fruit diameter and puffiness increase gradually in grades 2, 3, 4, and 5, respectively. We have collected fruits from different groves in north Florida and the common denominator among these fruit was decreased Brix value (a common measure of sweetness) with increased puffiness. Average fruit diameter with maximum puffiness was around 40cm and these puffy fruit weighed around 475g. With increasing puffiness, peel weight was increased while juice contents were reduced – not great!
Most satsuma groves in North Florida have some degree of puffiness. However, amount and grade of puffiness varies by grove. In our observations, citrus groves in South Georgia also have puffy fruit, which clearly indicates that puffiness is not geographically specific and can develop in any citrus growing region. After visiting a number of farms in North Florida, we concluded that puffiness is mostly an issue with the Satsuma cultivar ‘Owari’ regardless of different rootstocks. Having said this, we can’t say with confidence that puffiness couldn’t appear on other varieties of citrus without further study. We are carefully monitoring all our variety evaluation trials at the UF/IFAS North Florida Research and Education Center (NFREC), Quincy, in collaboration with citrus breeding and postharvest experts from Citrus Research and Education Center (CREC) and Indian River Research and Education Center (IRREC). We are working on different aspects of citrus production including nutrition, crop load, and pruning to identify the actual cause of puffiness and how to effectively mitigate it in Satsuma groves in north Florida.
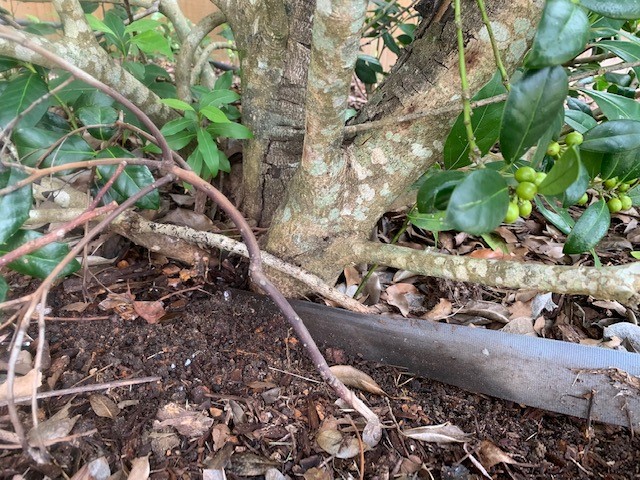
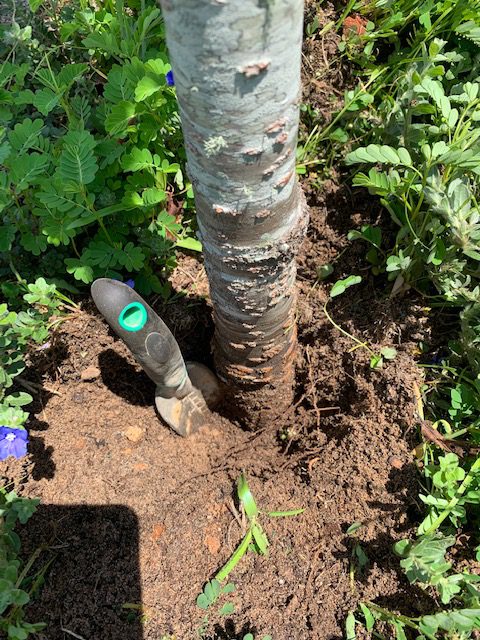
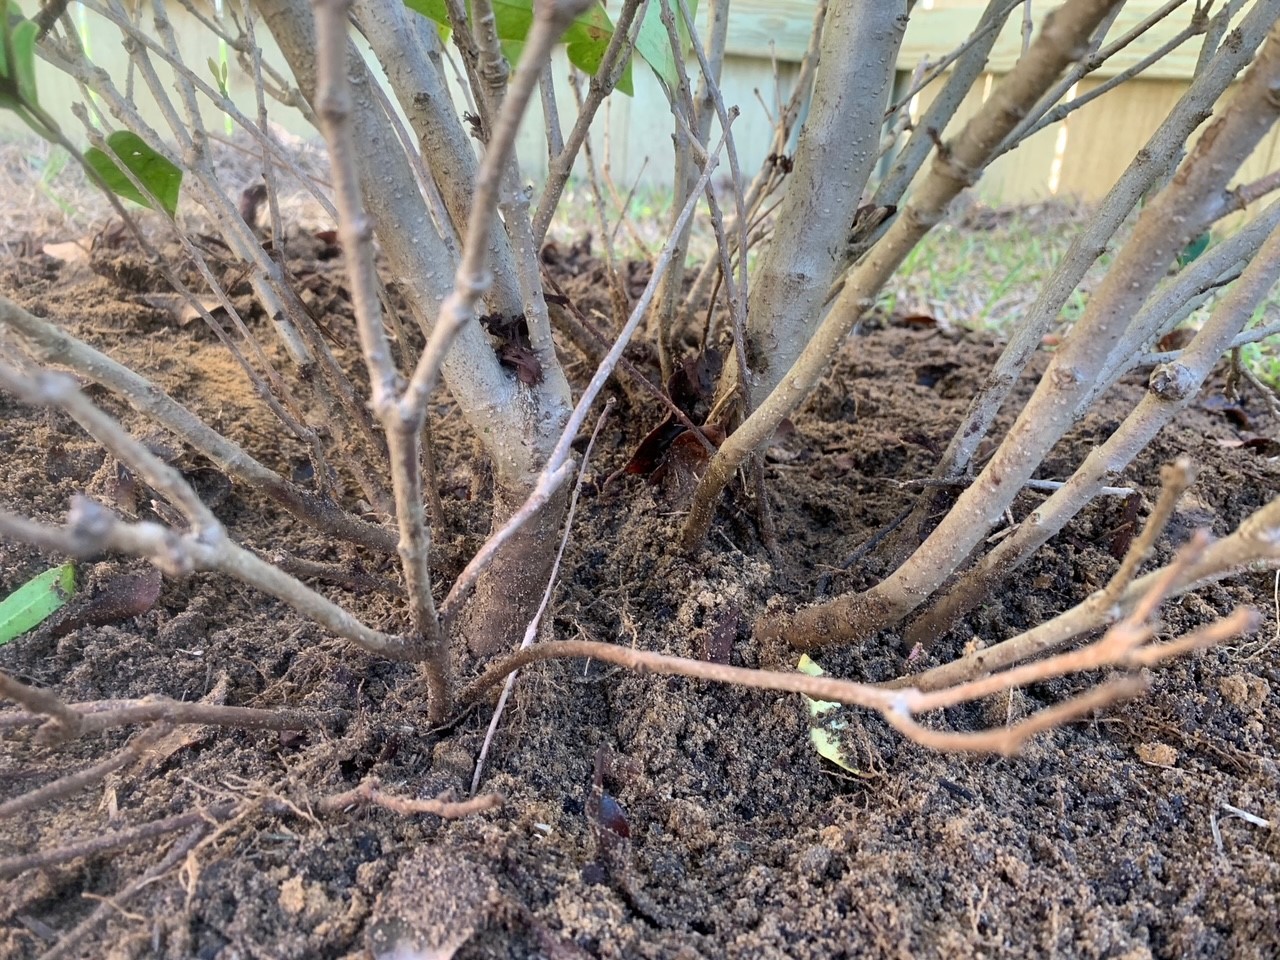
Several times each month I am diagnosing shrub and tree problems in Escambia County that are related to the same issue, improper planting. Symptoms of this problem can be slow growth, leaf browning, and dieback. Sometimes under stressful weather conditions like drought, plants completely die.
The trunk was covered with several inches of soil. Photo by Beth Bolles, UF IFAS Extension Escambia County. Shrub stems should never be below the soil level. Photo by Beth Bolles, UF IFAS Extension Escambia County.
This is a difficult sight for homeowners who have invested time and money in a tree or shrub to enhance the landscape. In some cases, the planting issues can be fixed but there are other times when a new plant will need to be installed.
The good news for homeowners is that this is a completely preventable issue. The University of Florida has excellent publications with photos about installing and caring for trees and shrubs. My Panhandle colleagues and I have also shared numerous articles and videos on proper plant installation.
Care must be taken during installation to set your plant at the correct depth. Even if a landscaper or nursery is installing the plant for you, check their work. Make sure the rootball is cut or sliced, it is not set below grade, that any straps holding the rootball are cut after it is set, and proper backfilling occurs without soil over the top of the rootball.
You don’t want to find out later in the season or even year’s later that your plant declined just because of planting problems.
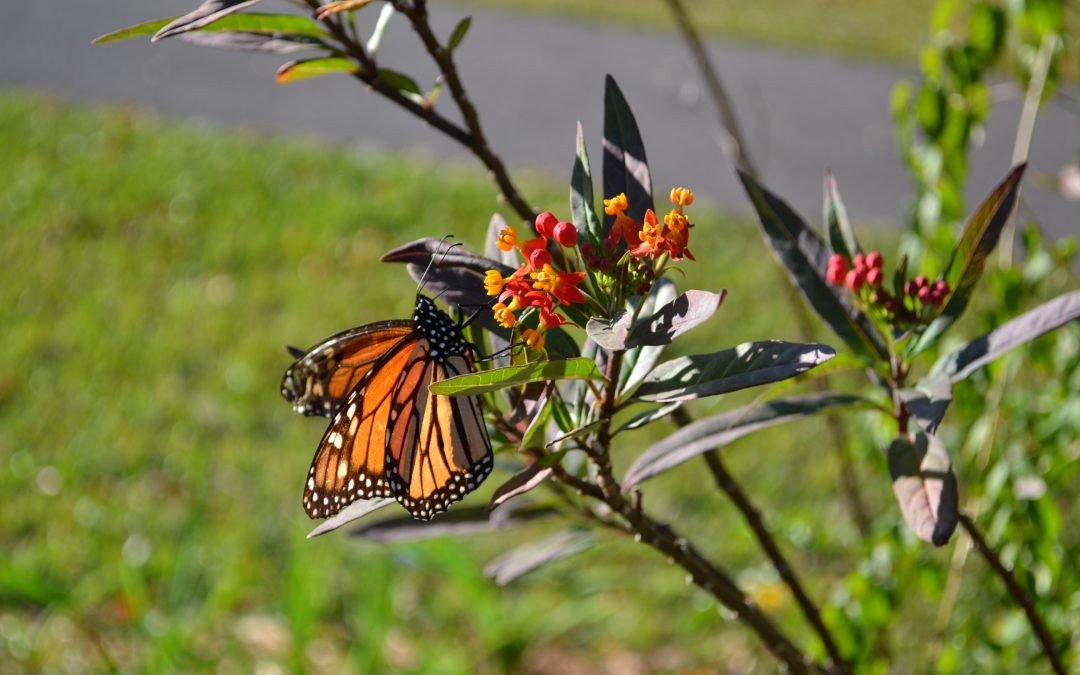
Tropical milkweed, Asclepias curassavica, has become a commonly grown monarch host plant in many gardens. It grows very well in our climate and survives into Fall and Winter during many years. This long life of Tropical milkweed is not necessarily a good trait for the monarch butterfly. In the Fall, monarchs are in migration mode and need to move out of our area to overwinter in warmer climates. Live host plants that are found during migration may interrupt the process. An additional problem is that Tropical milkweed may be host to a disease caused by a parasite that can impact the health of Monarch butterflies. The best tip to help our migrating Monarch butterflies, is to cut back your Tropical milkweed to the ground each Fall or better yet, grow native milkweeds that usually die back on their own.