No plant is as closely associated with Florida as a palm tree – the native sabal palmetto is the state tree, in fact! While this and several other species of palm are hardy even into the cooler regions of the panhandle, there are occasionally problems that arise with them. Palms tend to be sturdy in the wind, handle salt spray, and deal with drought without much issue. A few diseases can strike them, however, and the fungal pathogen Ganoderma zonatum is one of them.
Symptoms of a tree infected with Ganoderma butt rot. Image credit: M.L. Elliott
Ganoderma butt rot, caused by this pathogen, can affect any palm tree no matter the species. It only attacks palms, so nearby hardwoods or conifers are safe from it. As a fungal disease, it spreads by spores, which are produced on a conk (a type of mushroom that is wide and flat, usually growing on decaying wood). By the time the conk is visible on the trunk of a palm, the damage is done. The fungus slowly rots away the lower four to five feet of the trunk, working invisibly until it is ready to reproduce. The trunk of the palm will not become soft or spongy as the disease develops. There may be other outward symptoms of the disease, including slower growth, off-color foliage, and wilting and dying of fronds starting from the older bottom fronds. These symptoms occur with other diseases and problems as well, making it difficult to diagnose Ganoderma butt rot until the conk is visible.
A conk will start out as a small, white, button-like growth on the trunk. As it grows, it expands, flattens out, and develops a brown or reddish-brown coating on top. Old conks turn fully brown. It is uncertain how long it takes a newly infected palm to develop conks; it may be months or even years.
Once a tree is infected with this fungus, there is no cure. Removal of the tree is the only option, and as much of the trunk, stump, and roots as possible should be taken out. Conks may form on stumps after the palm is cut down, which can help to spread the disease. The fungus, unfortunately, persists in the soil even after the palm is removed, so infected palms should be replaced with other types of plants.
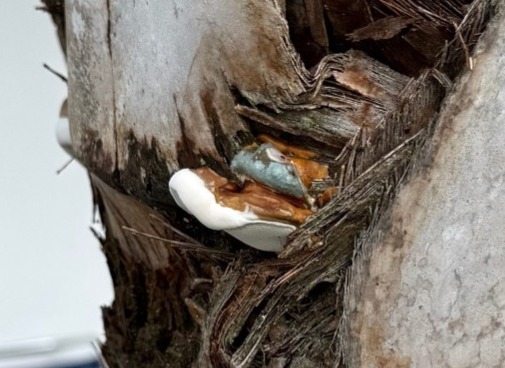
A small, relatively newly formed conk.
Frustratingly, the disease is difficult to predict. There do not seem to be any conditions that favor the disease in particular – it has been observed on otherwise healthy plants as well as stressed ones, and on naturally growing palms as well as those that have been transplanted. Still, keeping plants of any sort as healthy as possible can help them to resist pests and diseases, so fertilize, irrigate, and prune palms properly.
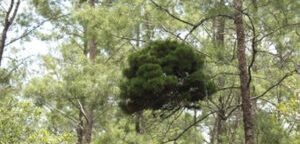
The telltale intense growth of a witches’ broom in a pine tree. Photo credit: Keith LeFevre
Our topic today might seem better suited to late October, but it can be observed in the woods year-round. During a recent Master Naturalist class, we discussed the various species of pines that grow in northwest Florida. All seven Florida native species—longleaf, loblolly, pond, slash, shortleaf, sand, and spruce—grow in our area of the state. While they can be differentiated based on growing location, needle length, and growth pattern, one of our class members had seen something really bizarre in the local pines.
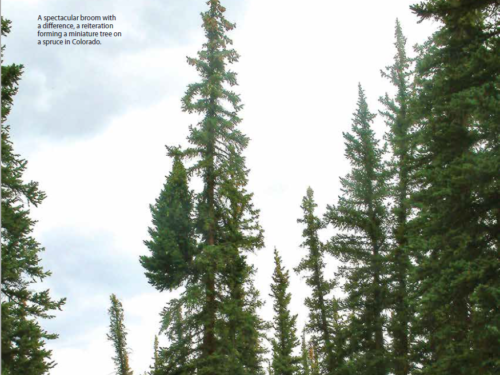
A witches’ broom in this spruce tree has resulted in a miniature version growing along its primary trunk. Photo credit: American Conifer Society
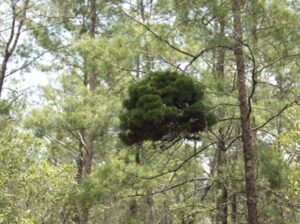
What he described was essentially an intense burst of pine needle growth at the tip of a branch. It stands out as deep green, dense, and unusual among the regular growth pattern of needles. The end result is essentially the production of a “mini-me,” a miniature copy of the normally growing tree, hanging off one of the branches. That afternoon while touring Blackwater River State Forest with a professional forester, we asked him about the strange phenomenon. He’d seen it many times and referred to it as a “witches’ broom.”
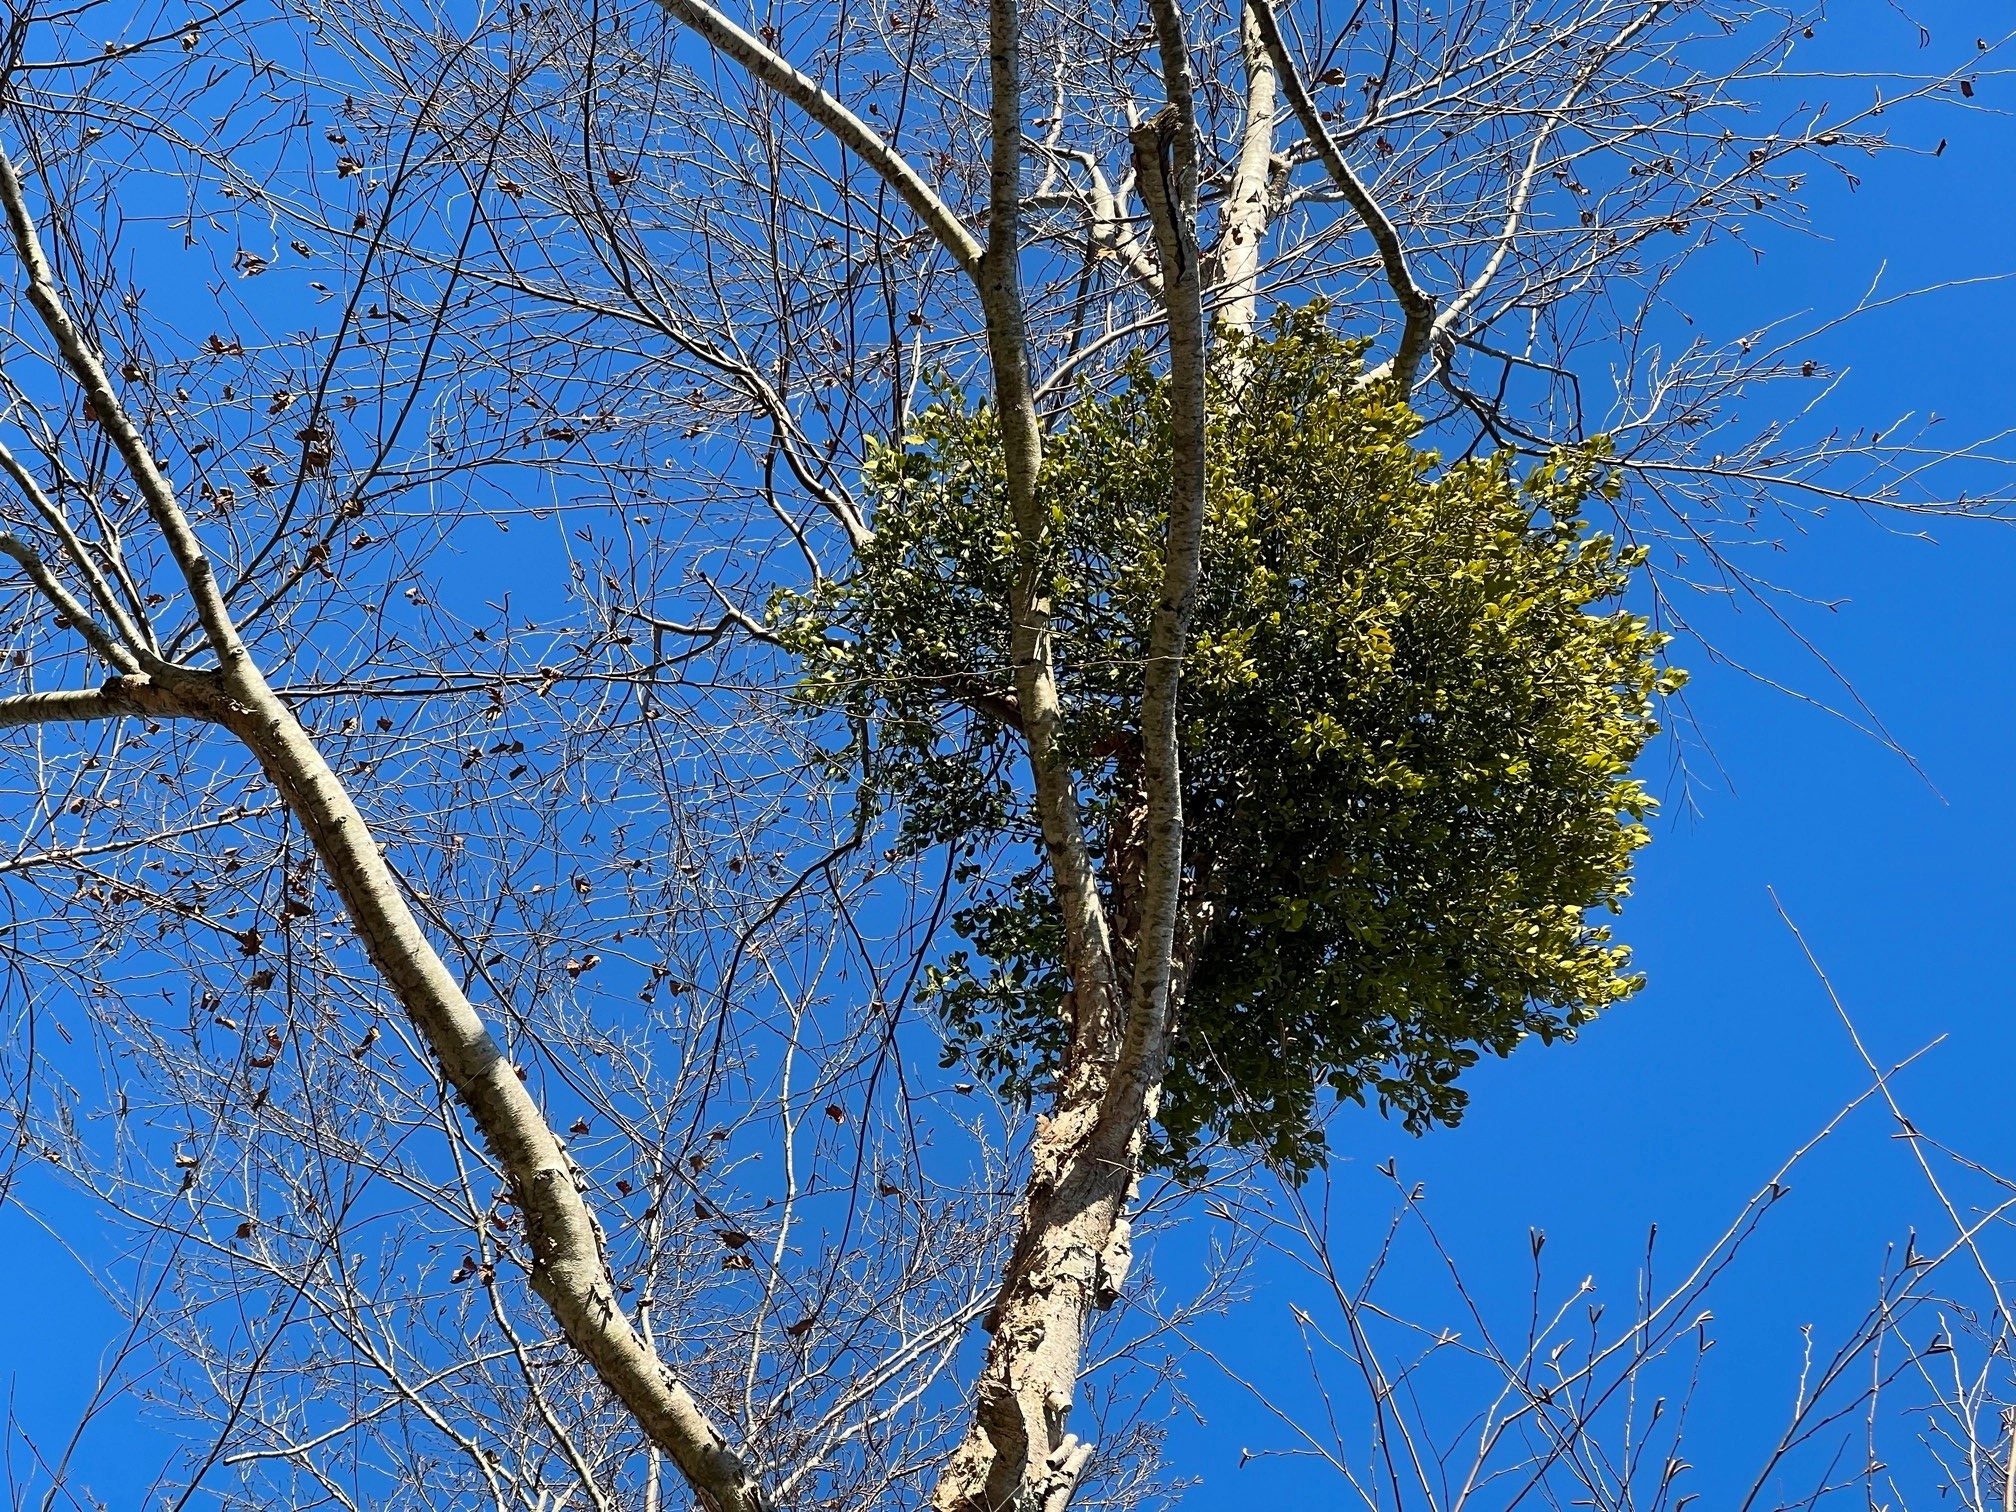
Mistletoe growing in a tree results from the same type of auxin disturbance as witches’ brooms. Photo credit: Carrie Stevenson, UF IFAS Extension
In normal tree growth, the trunk produces hormones called auxins, which control the division, expansion, and differentiation of cells. The hormones are concentrated in the growing tips of roots and shoots, and auxins maintain normal growth and keep smaller branches from overtaking the “leader.” Unusual growth occurs when the presence and concentration level of auxin is interfered with by an outside factor. The intense growth seen in these affected trees may be triggered in several ways, including pest, fungus, or mistletoe infestation, or death of terminal buds by environmental conditions. Phytoplasmas—bacteria that infect the phloem tissues—transferred by insect vectors (usually leafhoppers) are also blamed for the odd growth in some plants. Pines aren’t the only species affected; witches’ brooms can be found in other conifers like firs and junipers, nut species like hickory, pecan, and walnut, or in ashes, peaches, and elms.
The prolific growth of witches’ brooms is of great interest to horticulturists hoping to propagate dwarf varieties of the trees. This post by the American Conifer Society goes into great detail on how to “hunt”, cultivate, and encourage the growth of witches’ brooms into dwarf plants for the home landscape. Ecologically, witches’ brooms are not a huge problem for their host trees. Unless vulnerable to a massive outbreak of parasitic mistletoe, trees usually continue growing around them and live normal lifespans. The dense brush can even benefit wildlife, becoming a ready-made nest for birds or tree-dwelling mammals.
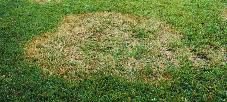
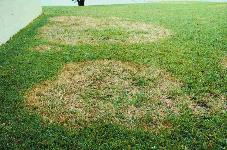
As the temperatures warm into the 60’s (or greater) and the rain chance remains good, keep an eye open for disease in your lawn. Large patch disease is common in turfgrass this time of the year. It is caused by the fungus Rhizoctonia solani. The fungus is present in the soil and thatch layer year-round. When the temperatures rise into the 60’s and 70’s it begins to spread. Large patch thrives under these conditions, especially when the soil is wet. With frequent showers the disease spreads quickly. The first symptom of large patch is circular, discolored areas within the lawn. The outer borders of the patches are orange to yellowish in color. In the center of the circle there are grass blades trying to green up again. They are usually unsuccessful, resulting in odd-shaped patches of dying grass that begin to connect to each other.
Picture from UF publication
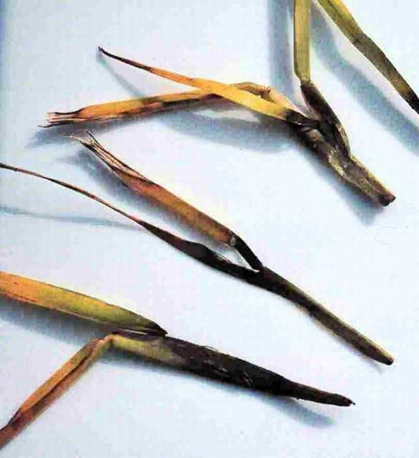
A simple field diagnostic techniques to confirm large patch disease is to pull on the diseased grass shoots near the edge of the circle. The blades will come loose from the stolon easily. At the base of the leaves the stem and sheaths will appear dark brown and rotten. Yes, it is large patch.
Photo from UF publication
If the weather gets colder or hotter very quickly, the disease will go back into dormancy. Looking at the long-range temperature predictions, the rest of February will be going up and down. Remember, the groundhog said six more weeks of winter. So, start looking for a fungicide or two or contact your pest control service. However, remember fungicides don’t cure existing problems. They are utilized as a protectant for the unaffected portions of the grass. When favorable conditions are present, the turf should be sprayed in order to keep the fungus from penetrating the grass blades. Repeat applications will be needed for as long as the weather is cool and wet. Check the product label for the correct intervals. Several cultural practices promote large patch infection including over-fertilization, over-irrigation, low mowing height, poor drainage and excess thatch. This spring, after the grass has greened-up on its own, is a good time to look at these factors and make corrections. Keep a close eye because as soon as the temperatures drop again in the fall, large patch can reappear if the corrections were not complete. For more information: https://edis.ifas.ufl.edu/lh044
Normal fall leaves on deciduous crape myrtle. Credit: Larry Williams
Imagine you’re a leaf on a deciduous tree. In spring, you emerge and are blemish-free. You experience the first rays of light. You’ve never existed before. You begin to photosynthesize. This is what green leaves do. You’re normal.
The first windstorm occurs in April, blowing you into other leaves, branches and stems. You sustain a puncture wound. Trees don’t heal. So, any damage is permanent.
In May, a small population of aphids dine on the tree’s leaves. Ladybugs consume most of the aphids and a blowing rain dislodges the remaining few.
During the extended hot, dry weather of June and July, the tree’s owner is not watering properly and the tree begins dropping leaves. This is a normal process in many tree species during periods with insufficient moisture.
But you stay firmly attached.
The tree’s owner overdoes it in fertilizing his lawn and burns some of the tree’s leaves as a result. Most tree roots are shallow, having access to lawn fertilizer. Your leaf margin becomes brown and crisp as a result.
In August, you’re exposed to direct sunlight all day, partly because of the longer day length and partly because of the loss of other leaves that once shaded you.
In September, the tree’s owner applies weed and feed to his lawn. Tree roots growing in the lawn pull up some of the herbicide.
Tree roots grow two to three times beyond the branches, having access to herbicides applied to adjacent lawn areas. The herbicide injures many of the leaves, including you.
Shorter days and cooler temperatures of fall bring on changes in your physiology. The green pigment chlorophyll that has allowed you to produce sugars through photosynthesis since you first emerged is now breaking down.
As a result, your green color fades and fungal spots, sun scald and the puncture wound from spring become visible.
During October and November, many neighboring leaves turn loose and fall to the ground. This is part of the normal senescence process on deciduous trees.
Before you fall, the tree’s owner notices that you don’t look so good and becomes concerned about your brown spots instead of the uniform green color you had in spring. He has visions of another dead tree and rushes to his County Extension Office carrying you in hand.
A Master Gardener Volunteer explains to the tree’s owner that the spots are a natural part of the senescence process. The leaf is at the end of its life.
The tree’s owner is provided information on proper tree care.
The following spring, the tree produces new, healthy leaves, is provided better care and lives happily ever after!
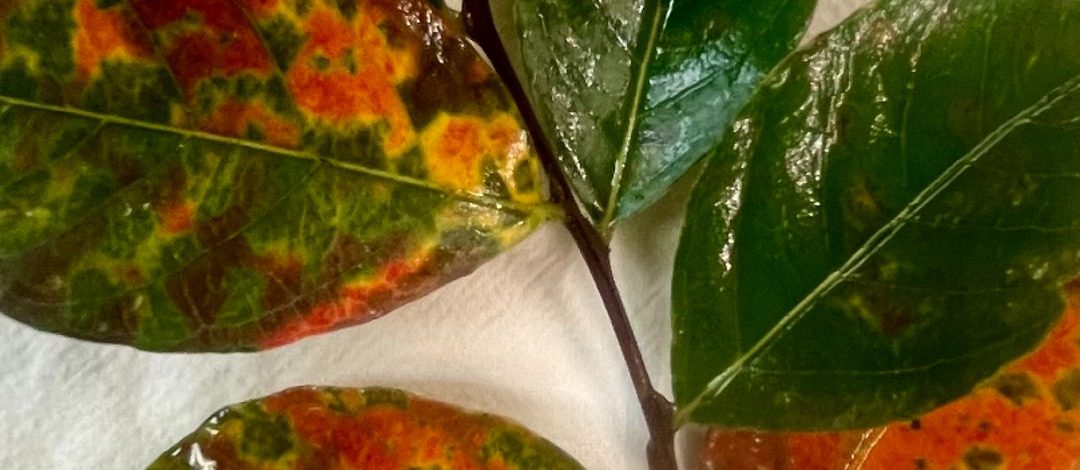
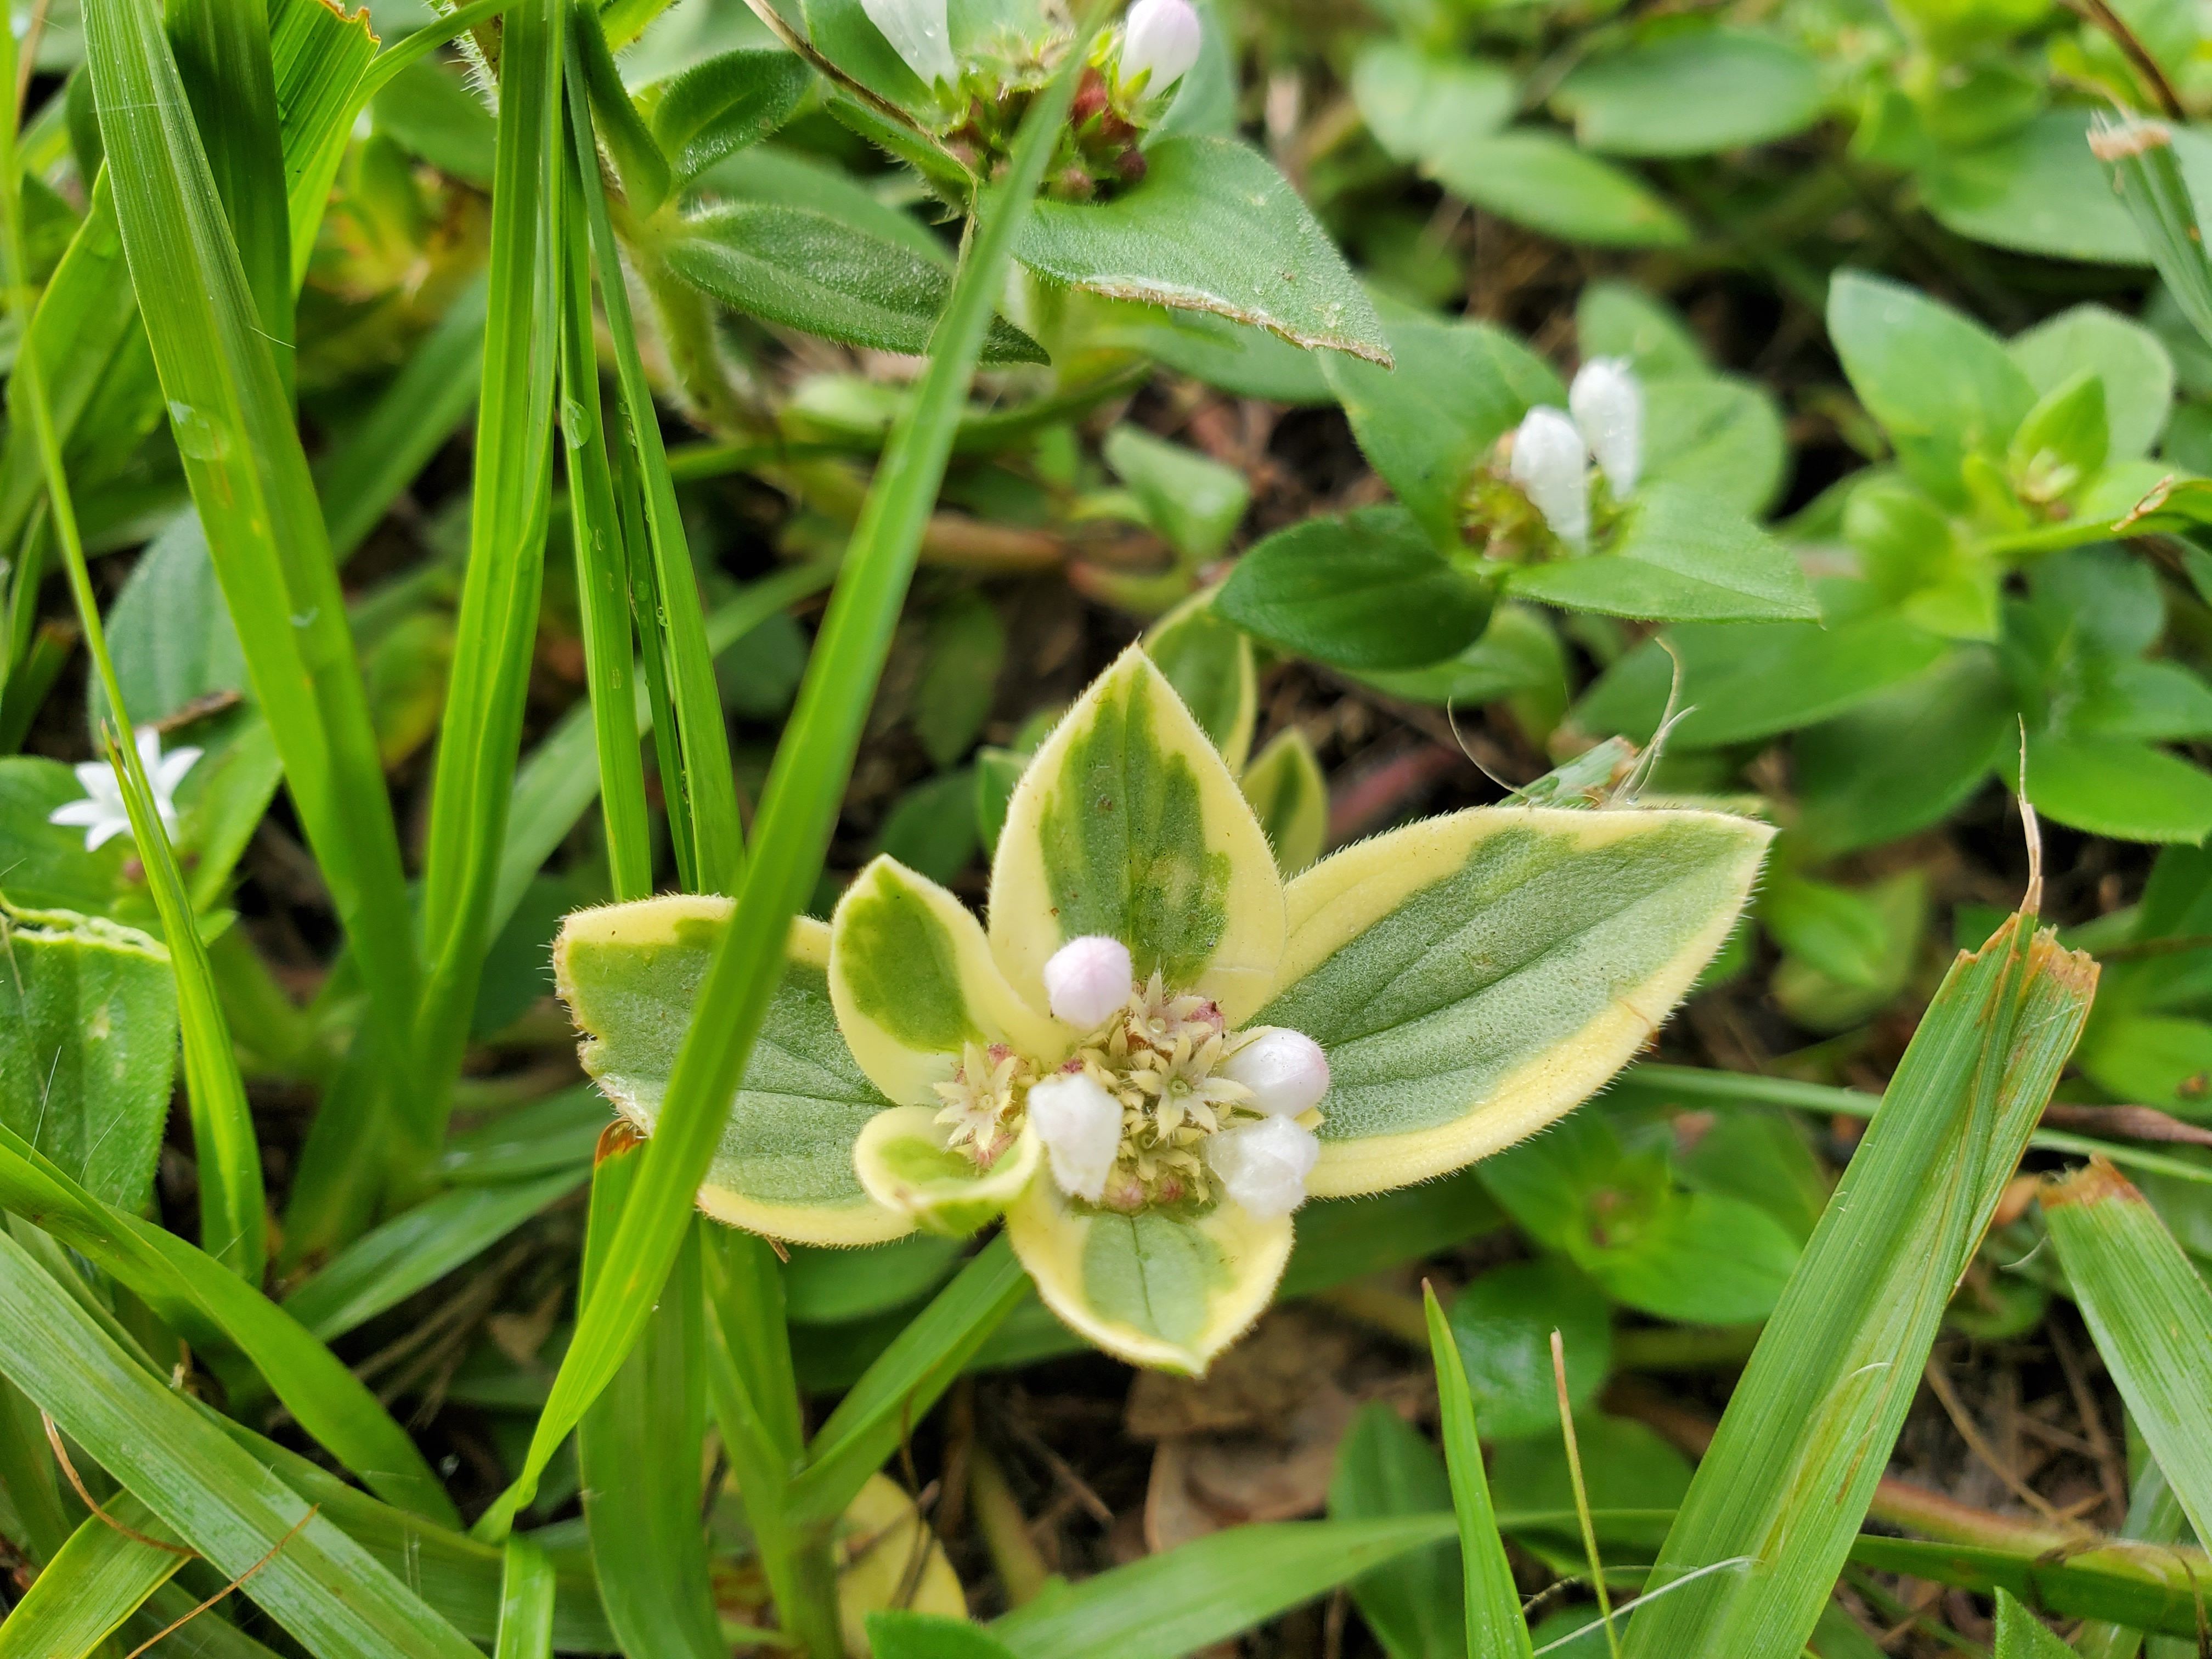
An interesting phenomenon turned up in my camellia this spring. What has, for years, been a perfectly normal bush – growing its glossy, dark green leaves year ‘round and its showy flowers in the fall – suddenly changed. Its leaves started becoming variegated!
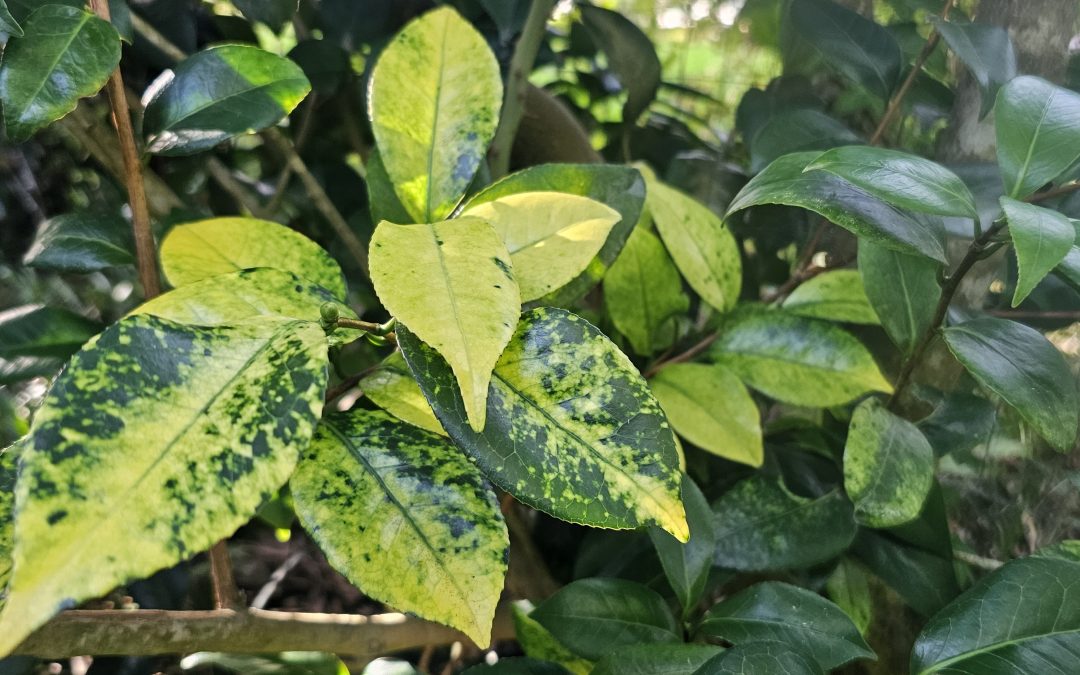
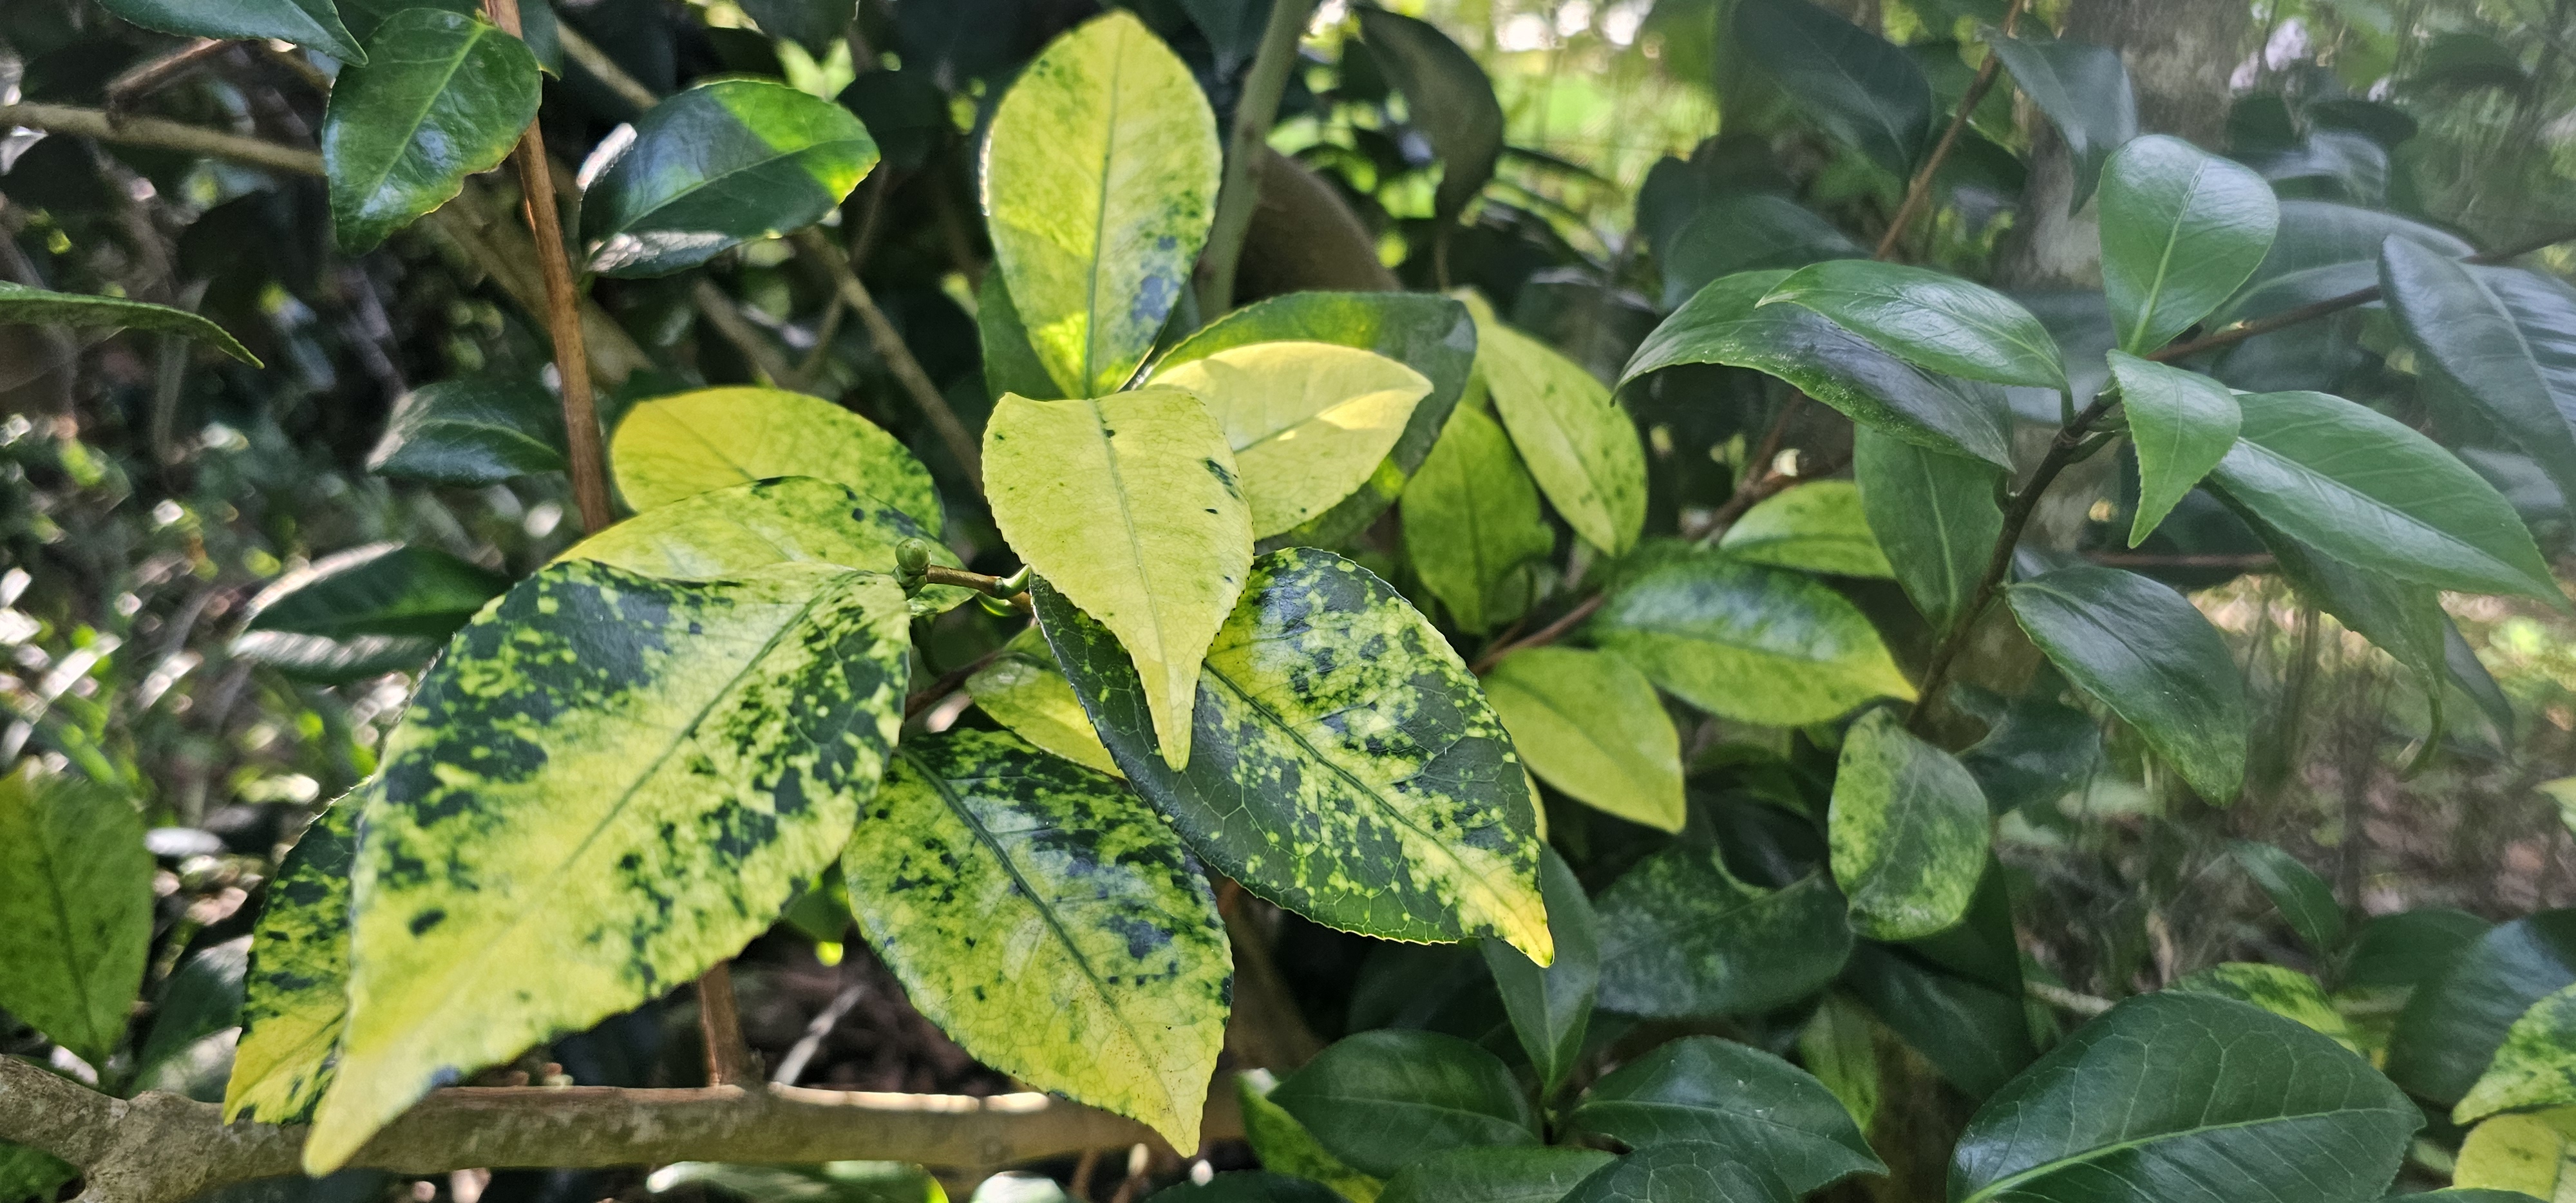
Symptoms of Camellia Yellow Leaf Mottle Virus.
Variegation refers to different colored areas of plant tissue. Most commonly, a plant will have stripes or patches of white leaf tissue along with the normal green. Sometimes, colors can vary or the placement can include stems or fruit. Many cultivated varieties of ornamental plants are selected for these interesting patterns, and sometimes food crops as well. A novel, attractive pattern can make for a very profitable plant. In the 1630s, the price of variegated tulips skyrocketed for several years in the Netherlands. During this period of ‘tulip mania’, a single tulip bulb could potentially sell for ten times the annual income of a skilled artisan. Imagine paying $200,000 for one flower!
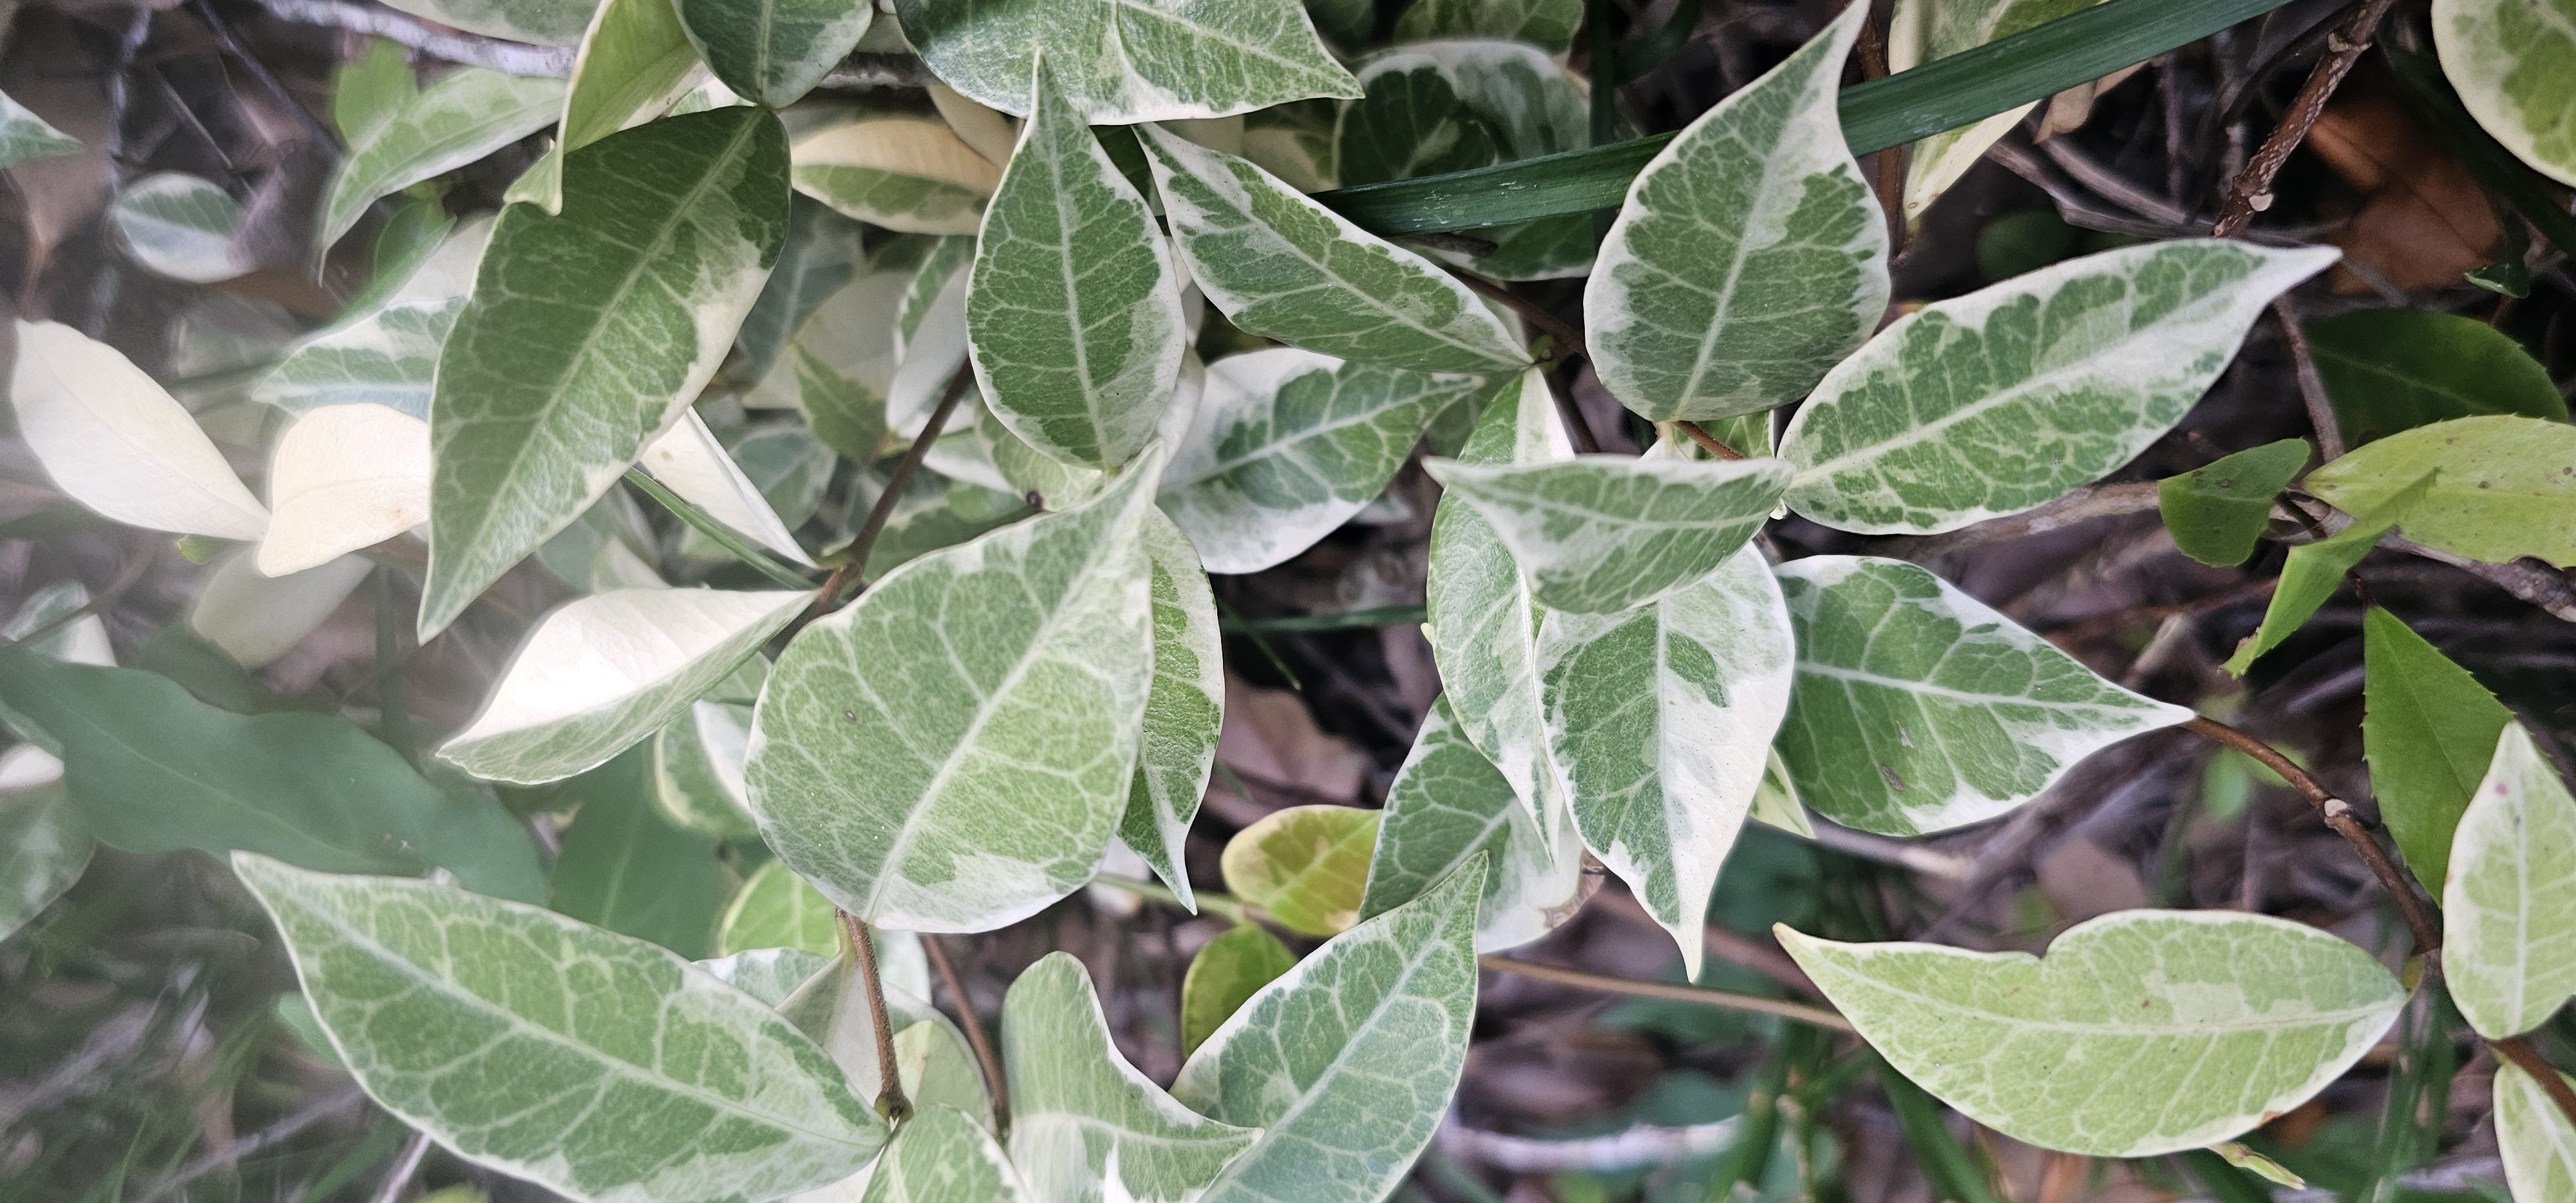
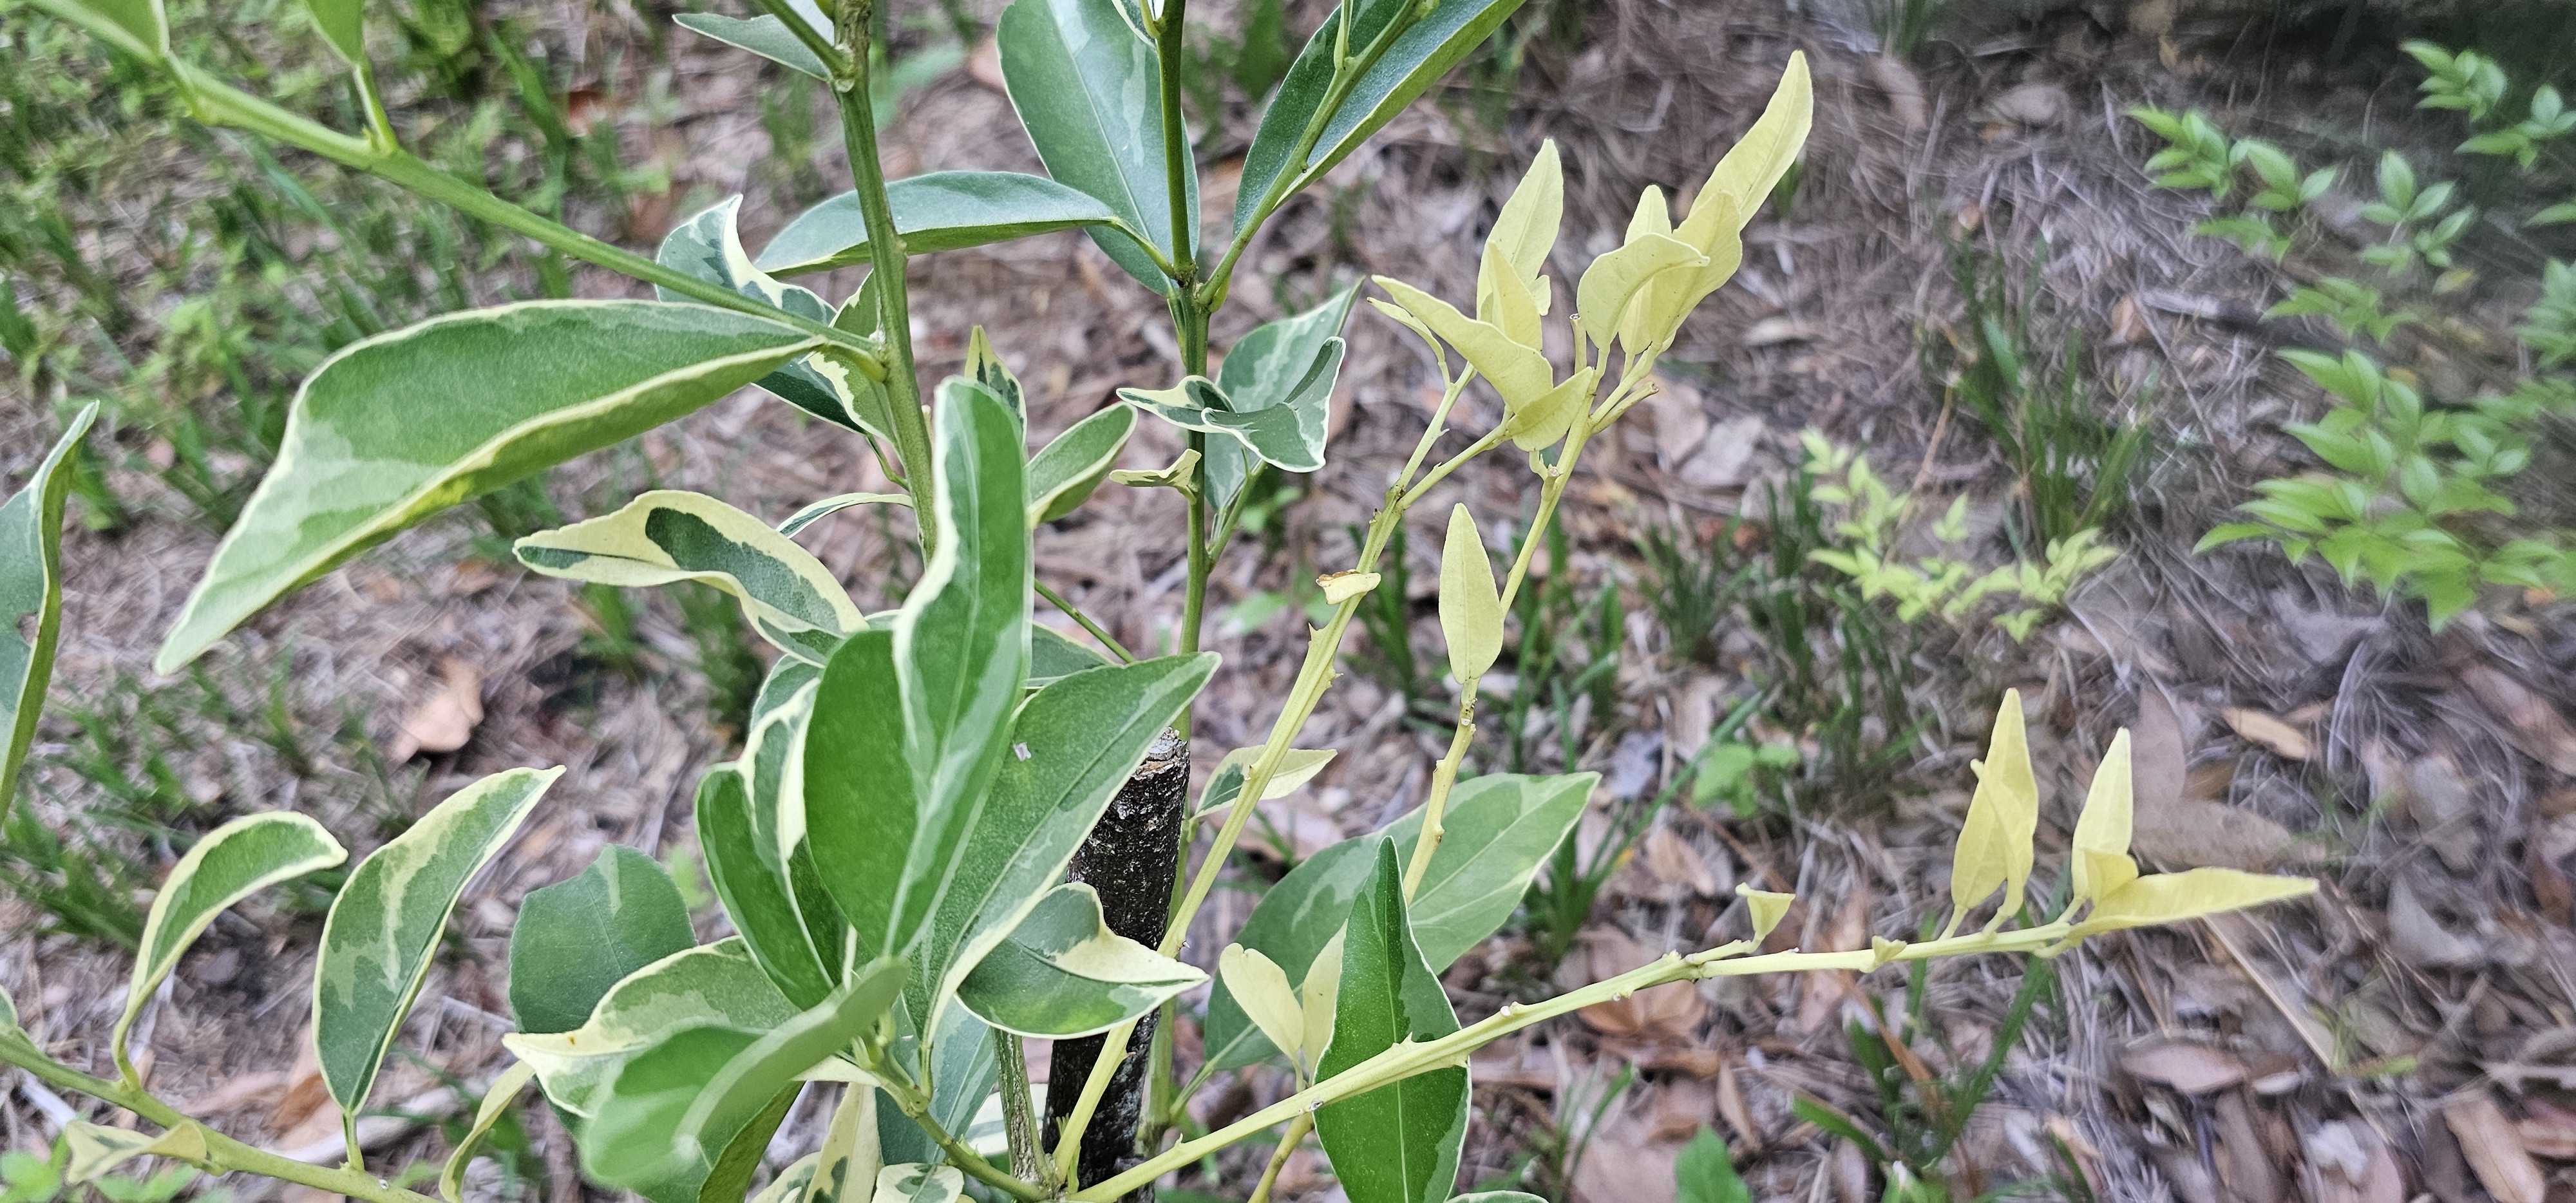
A variegated variety of star jasmine, propagated for its coloration.
Some variegations are caused by genetic mutations. Plants that are chimeras have cells with different genetic makeups. These varieties must be propagated by cutting or grafting to preserve both sets of genes. Even if successfully propagated, sometimes individual leaves or branches of these plants might lose one color or the other. A leaf that is completely white won’t thrive; it contains no chlorophyll, which gathers energy from sunlight. A leaf that becomes completely green may outcompete the rest of the variegated plant, leading to a loss of variegation over time.
A randomly occurring genetic mutation in Florida pusley, a common weed of lawns.
Other variegations, such as those Dutch tulips and my camellia, are caused by viruses. Most are not desirable, as they decrease the health of the plant even if they don’t kill it outright. Others will quickly lead to decline and death. A mosaic virus, for example, might make your tomato leaves look interesting, but it will eventually kill the plant. In the case of a camellia, ‘camellia yellow leaf mottle virus’ is usually transmitted during the propagation or grafting process, whether intentionally or not. Camellias affected by this virus are usually not harmed, though a lack of chlorophyll in leaves leads to less energy for the plant to use in growth and producing flowers. Still, sometimes the tradeoff for fancy foliage is worth it!
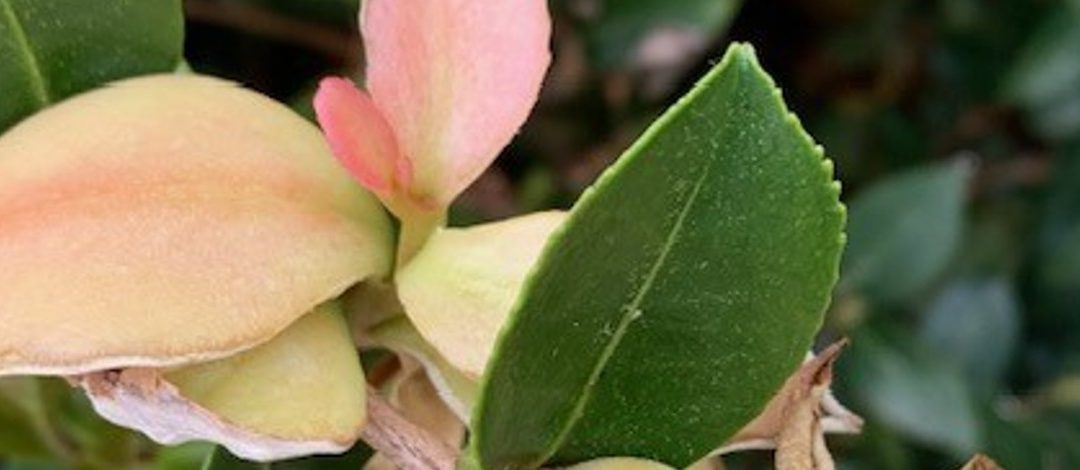
Some branches on variegated plants may turn completely white (or green).
My camellia must have received a bug bite that transmitted the virus, as I haven’t done any grafting on it. I’ve noticed a few others nearby with similar symptoms. If you see this starting on your plant, you may be able to prune out the affected area before it spreads. Make sure to sanitize pruning equipment with alcohol between cuts, and dispose of infected material if you do remove it. For other unwanted viruses, the solution may be a bit more extreme. If you cannot prevent infection in the first place through sanitation and insect control, disposal of the entire plant is often the only option that will keep the virus from spreading to other nearby plants. For any plant disease or pest issue, scout regularly and address the issue before it becomes too big. Consult your local Extension office for information or check out our EDIS publications on specific topics at https://edis.ifas.ufl.edu/.
Q. Some of the leaves on my azalea and/or camellia are swollen and light green. What caused this?
A. This is caused by a fungus that has been relatively common this spring.
The fungus Exobasidium vaccinii causes leaves and flowers to become swollen or thickened, curled and waxy in appearance. This fungus causes leaves, and in some cases flower petals, to enlarge abnormally and is commonly referred to as azalea or camellia leaf and flower gall.
Exobasidium leaf gall on camellia. Credit: Larry Williams
Symptoms vary somewhat based on the host plant. In addition to azalea and sasanqua camellia, it can occur on blueberry, as well. Infected blueberry leaves turn an unusual bright red in spring with almost no swelling of tissue. With azaleas and camellias, leaves become large and distorted and eventually a white powder covers the galls. The white growth consists of spores, which is how the fungus reproduces. Galls ultimately turn brown and harden. Not every leaf will be infected. It’s more common for the plant’s lower leaves to be the most heavily infected but under humid conditions and in shaded locations galls may form on leaves throughout the plant canopy.
The disease relies on airborne spores produced in the whitish mold on the surface of galls in late spring to early summer to reproduce. The galls then form the following spring. It’s important to remove and dispose of infected leaves before they turn white with spores.
Once you see evidence of infected leaves, it’s too late for chemical control. Besides, there currently is no effective or practical fungicide to control this disease in the home landscape. But you can reduce the amount of infection on your plants the following year by pruning infected leaves and throwing them away before spores are produced. After removing infected leaves with galls, never leave them on the ground around the plants.
It’s best to bury, burn or place the infected leaves in a plastic bag and throw them away. This disease is more severe during a cool, wet spring. It’s advisable to not add to the problem by artificially providing the “wet weather” the spores need by frequently using an overhead sprinkler and keeping the foliage wet in the spring during disease development. This is exactly what this and many other plant diseases need – wet conditions. Yet another reason to water during early morning and on an as needed basis, versus allowing an irrigation system to frequently run when there is already adequate moisture from rain.
In the home landscape, the fungus does not cause any long-term problems for the plant. It just makes the plant’s leaves look ugly. The infected leaves will usually fall prematurely.