by Daniel J. Leonard | Nov 13, 2025
Fall is in the air. Halloween decorations, candy corn, mums… houses and landscapes are decked out in shades of yellow, orange, and red. However, one of the Panhandle’s absolute easiest perennials bucks the trend of autumnal hues, sports flowers of deep, brilliant blue, and is blooming right now – Blue Ginger (Dichorisandra thyrsiflora).
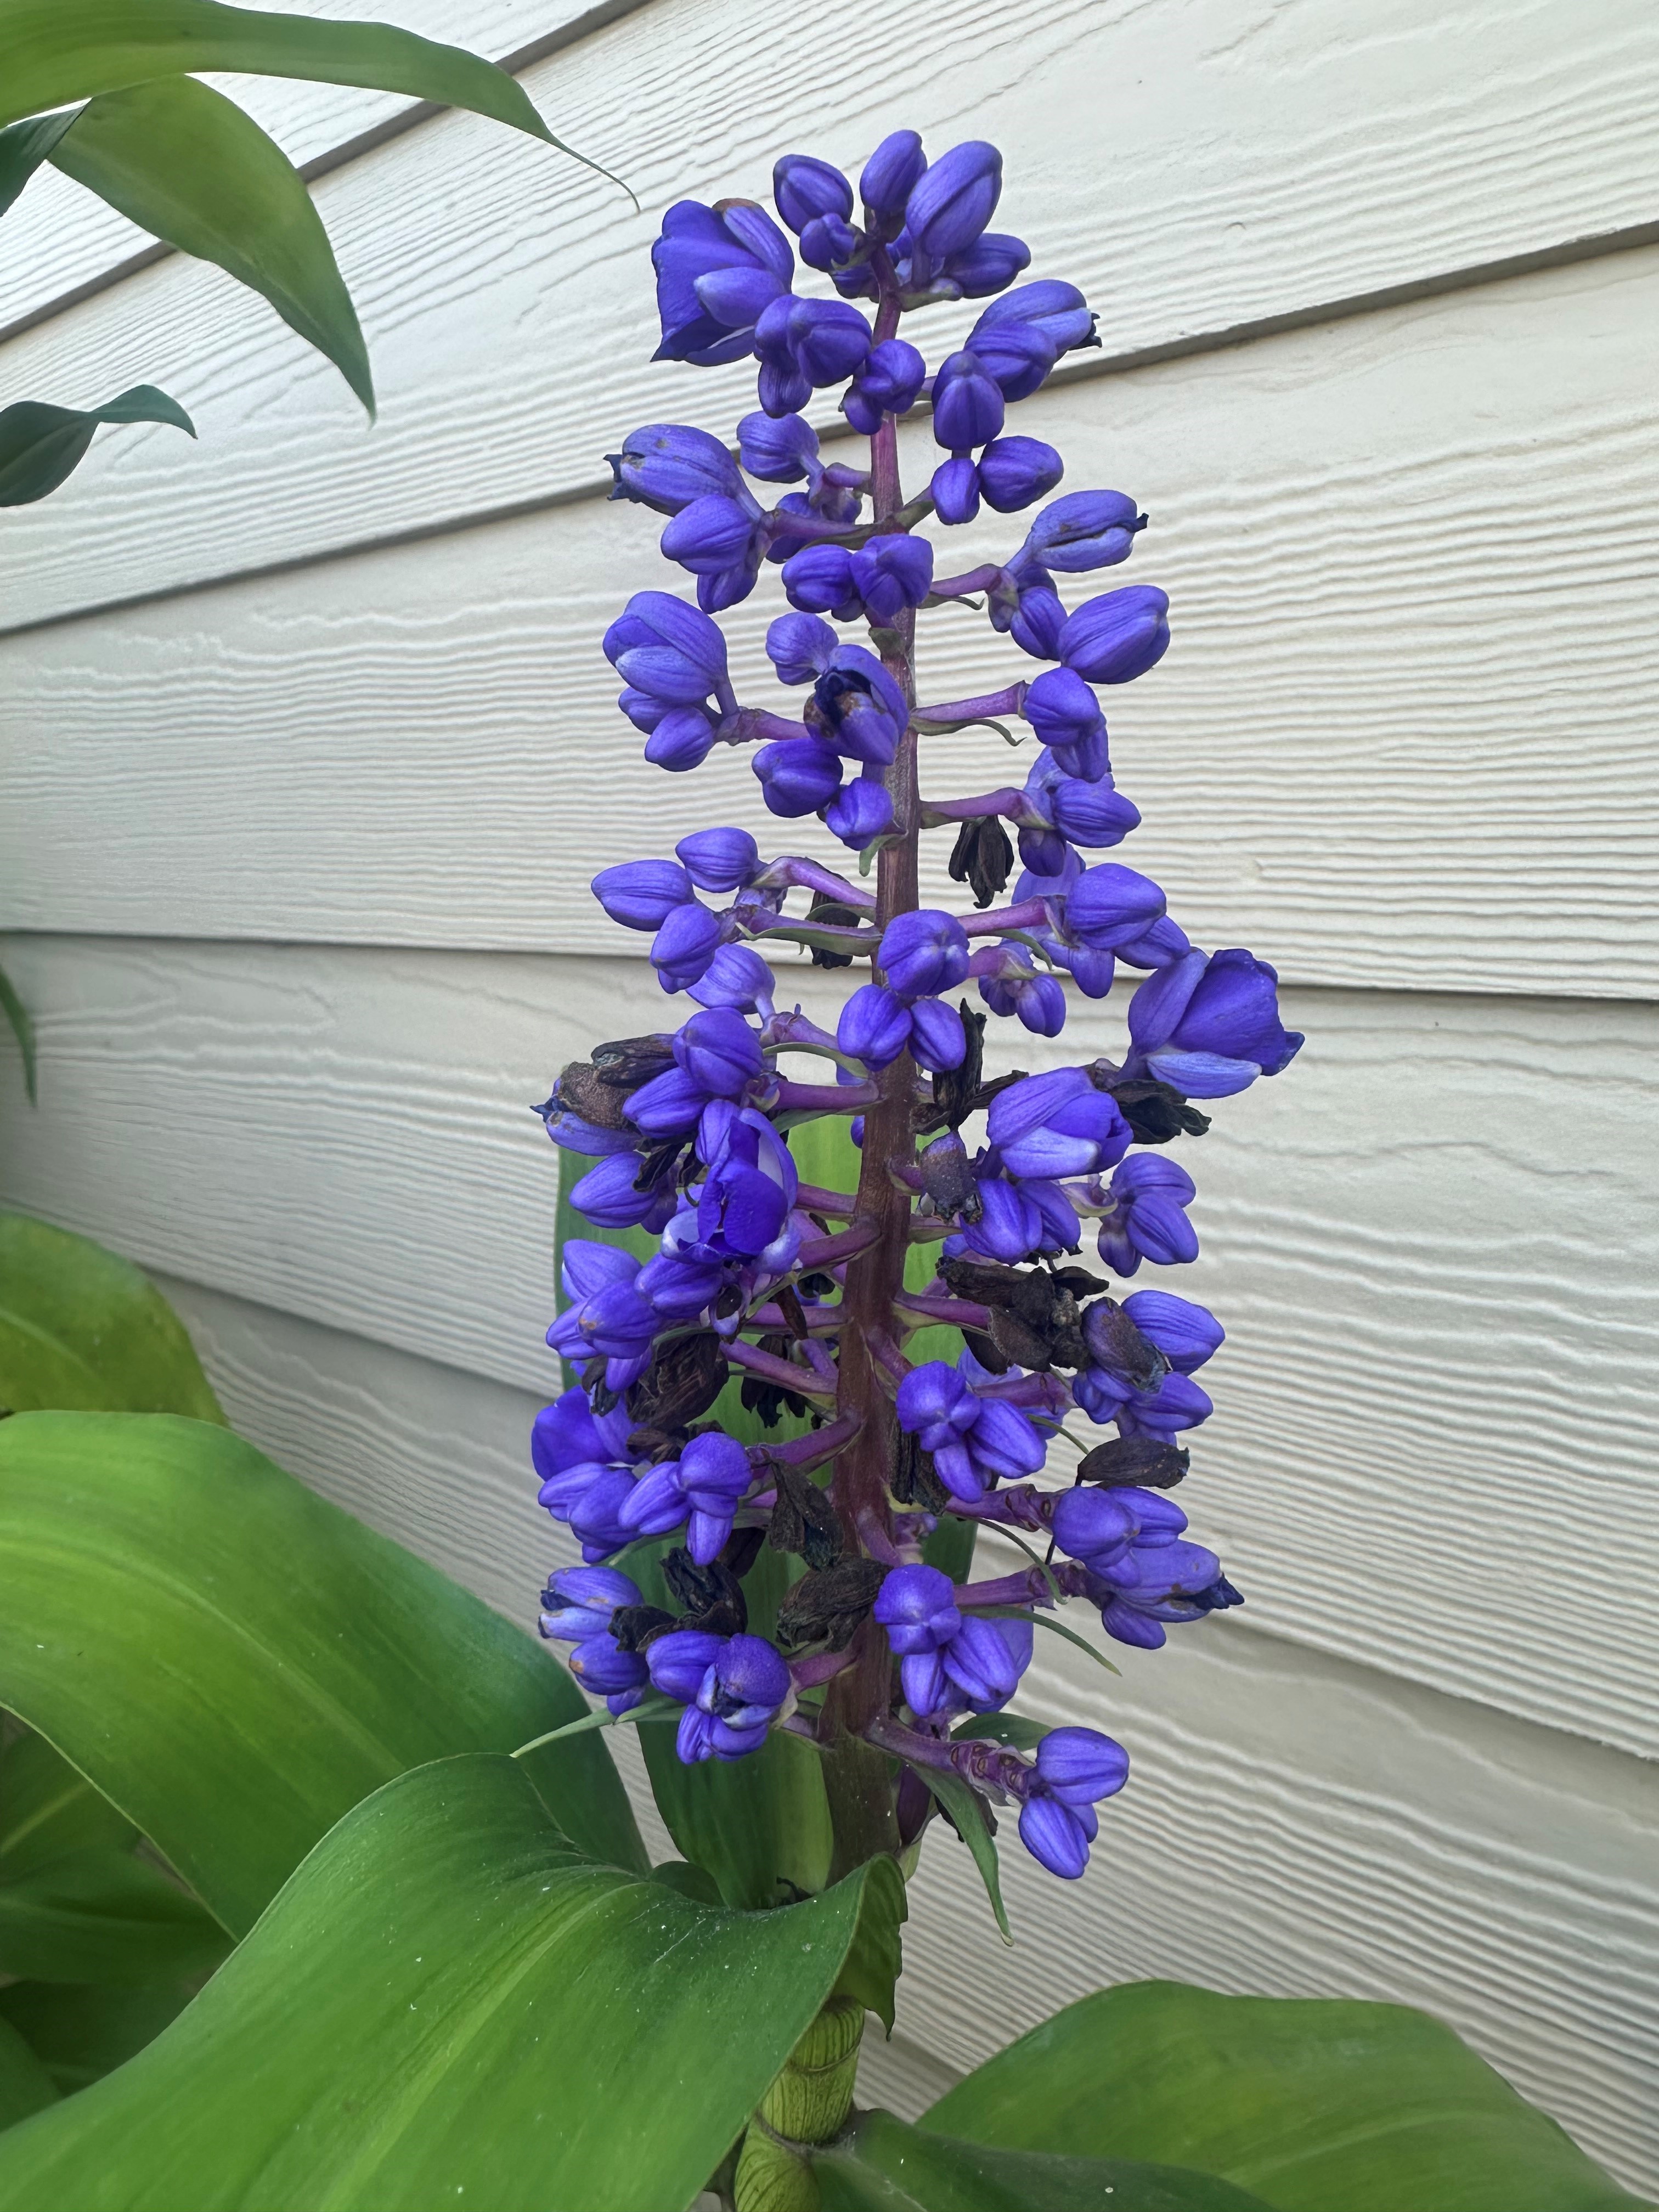
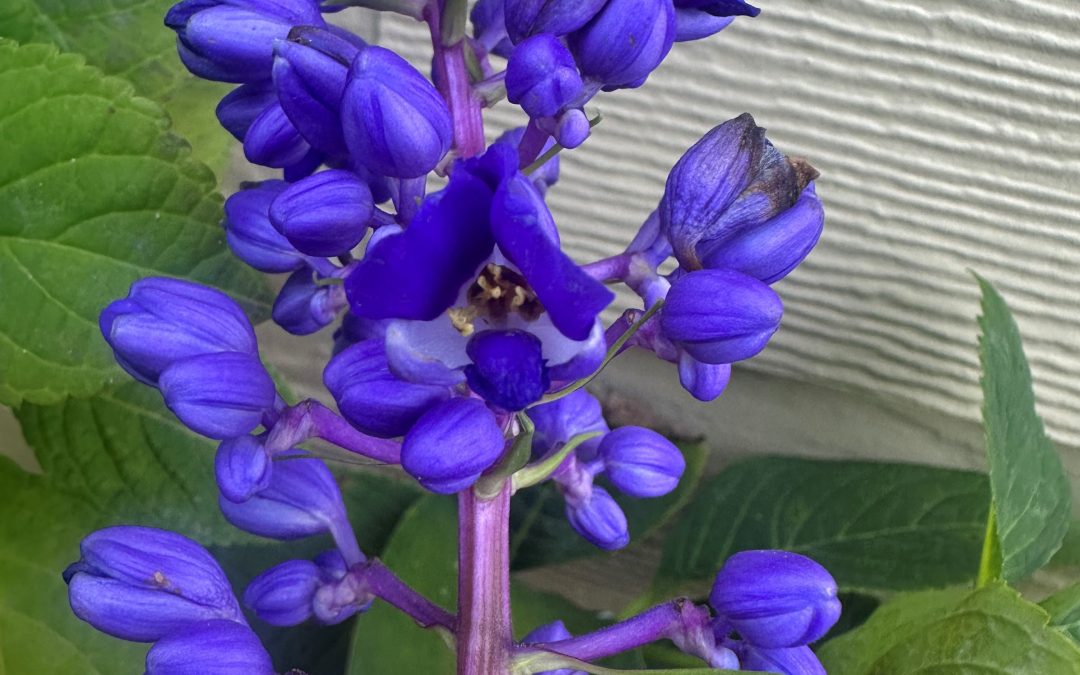
Blue Ginger is an unusual landscape plant for several reasons. First, the name Blue Ginger is a little bit of a misnomer. The spreading perennial species, native to southern Brazil and hardy into our zone 9, isn’t a true ginger at all, rather it resides in the Spiderwort plant family Commelinaceae, making it a close relative of other blue/purplish hued plants like Purple Heart Plant and Spiderwort. Second, it’s 10” flower spikes emerge here when few other landscape plants do (October) – after many of our summer annuals have finally sputtered out but before sasanquas and other cool season bloomers make their appearance. Rounding out Blue Ginger’s unique role in fall Panhandle landscapes is the color of its flowers. Simply calling them blue does the otherworldly color a disservice. Imagine the most striking, deep, brilliant blue you can and that will get you in the neighborhood. A Blue Ginger in flower has to be seen to be fully appreciated!

Blue Ginger flower spike. Photo courtesy of Daniel Leonard.
Adding to the appeal is that Blue Ginger is exceptionally easy to grow. However, the species does have specific growing condition needs. The ideal landscape placement for Blue Ginger is a shady oasis protected from the hot afternoon sun and blustery breeze that keeps its roots cool and moist and its succulent leaves from excessive drying. My specimen has performed excellently for over a decade on the north wall of an outbuilding, in relatively rich soil, mulched well to retain moisture, and shielded by a nearby fence. It has been years since I’ve either fertilized or watered it and the plant returns each summer, growing to about 4’ in height, and blooms each October, asking for nothing in return. One must remember the saying “Right Plant, Right Place”, as Blue Ginger can be the easiest plant ever to cultivate or a problem child that never performs like you want it to, all depending on where one sites it in the landscape.
If Blue Ginger has one drawback, it’s that it is uncommon in the nursery trade. When shopping for one, choose independent nurseries who are known to have a wide assortment of plants, maybe even a greenhouse/tropical section. I’ve never once seen Blue Ginger in a large chain nursery or box store. The best, cheapest, and most fun method of obtaining one though is to get a friend that has one to give you a cutting of their plant, as the stems root easily into new plants!
Think outside the box this fall and add some blue to your landscape with Blue Ginger. Give it a protected shady spot and a little water and it will reward your landscape with brilliant blues every October for years to come. For more information about Blue Ginger or any other horticultural topic, contact your local UF/IFAS County Extension office. Happy Gardening!
by Carrie Stevenson | Nov 6, 2025
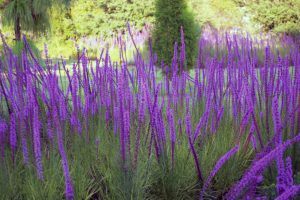
A spectacular array of blazing star in bloom. Photo credit: Troy Springer, Florida Wildflower Foundation
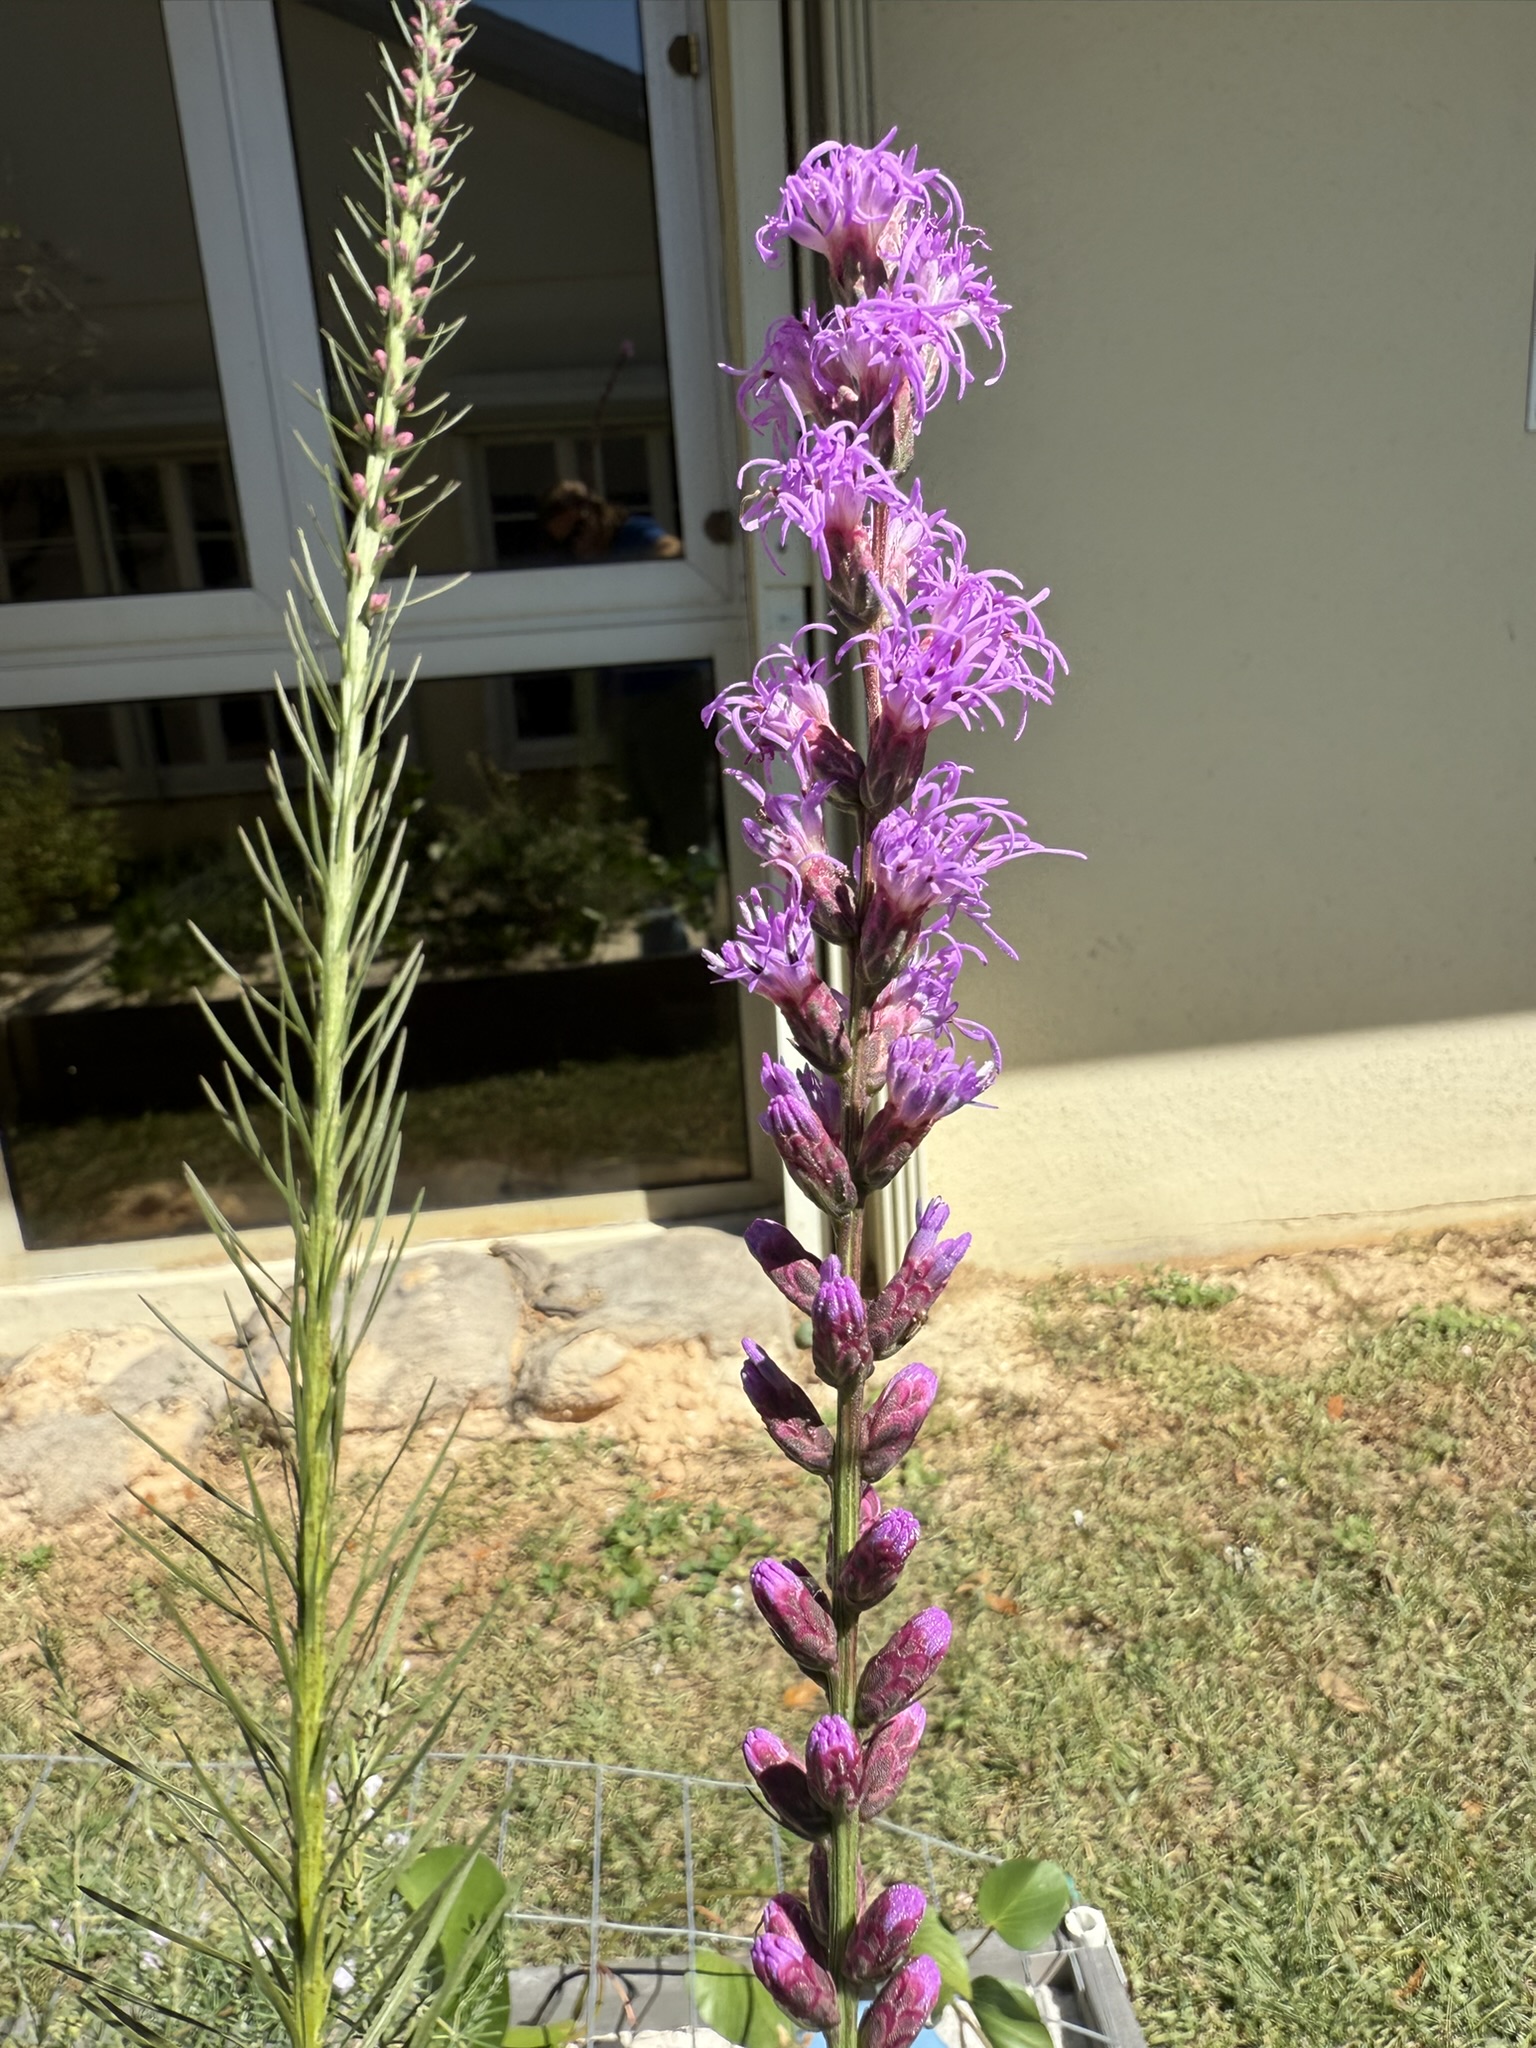
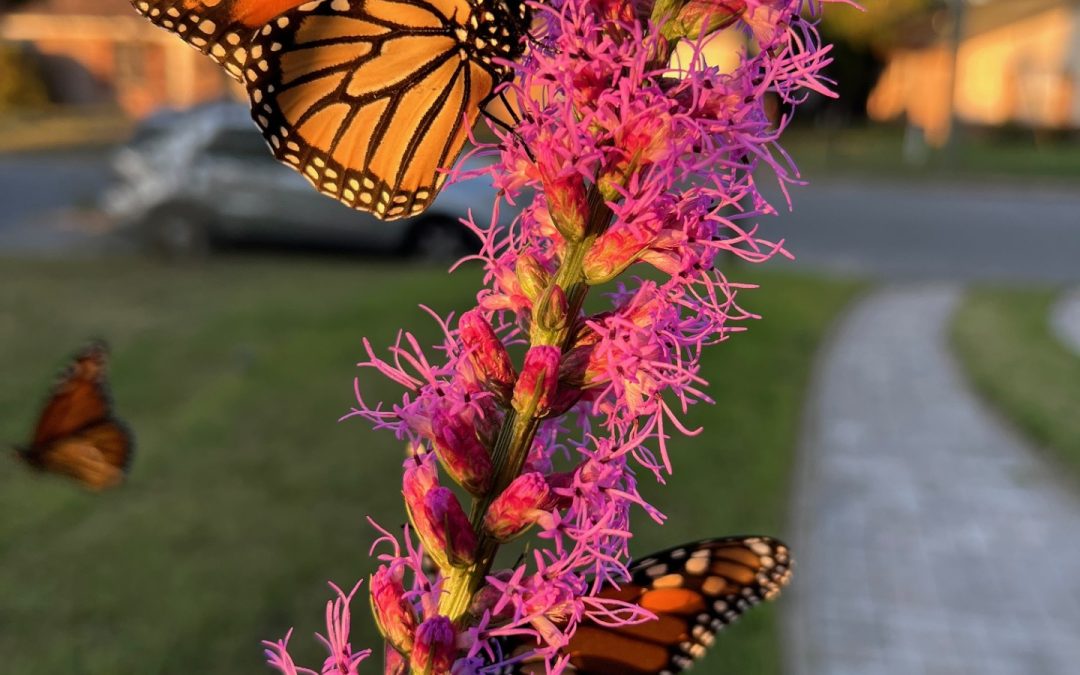
Walking through a northwest Florida wildflower prairie in autumn, the star of the show is Liatris. Known as dense gayfeather or blazing star, this tall (up to 7’!) stunner of a plant is covered up with clusters of small purple flowers. The flowers are are composed of tiny, frilly five-petaled florets. Each cluster may have groups of up to 18 flowers at a time, crowding the stalk with color.
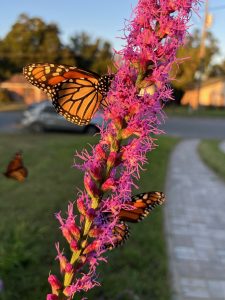
Migrating monarchs feed on blazing star in late fall. Photo credit: Whitney Scheffel
Before blooming, the spiky grasslike structure grows upright and produces a series of dozens of green leaflets, similar in form to rosemary.
While delicate in appearance, the blazing star is a hardy plant adapted to a wide range of habitats. Some varieties can grow in the pure sand of beach dunes and scrub, while Liatris spicata thrives in the soggy wet soils of bogs and pine flatwoods. The species is known for attracting bees, butterflies, and hummingbirds, so it makes a great addition to a pollinator garden. The flowers perform best in full sun.

Side-by-side, the bottlebrush-like blazing star plant before and after blooming. Photo credit: Carrie Stevenson, UF IFAS Extension
Blazing star is particularly impressive in a large group, so you can plant dozens together (by seed or container) for a beautiful effect. After blooming deep purple this time of year, they’ll turn a goldish bronze that adds to the interesting fall color of a garden. Liatris will also re-seed every year after dying back in the winter.
There are many plants native to the United States known commonly as colic root, including blazing star. This nickname arose from its traditional medicinal use treating stomach cramps. Additional uses of a tea made from the plant were used for everything from sore throats and kidney issues, while an incense made from dried roots was burned for sinus relief.

by Abbey Smith | Oct 17, 2025
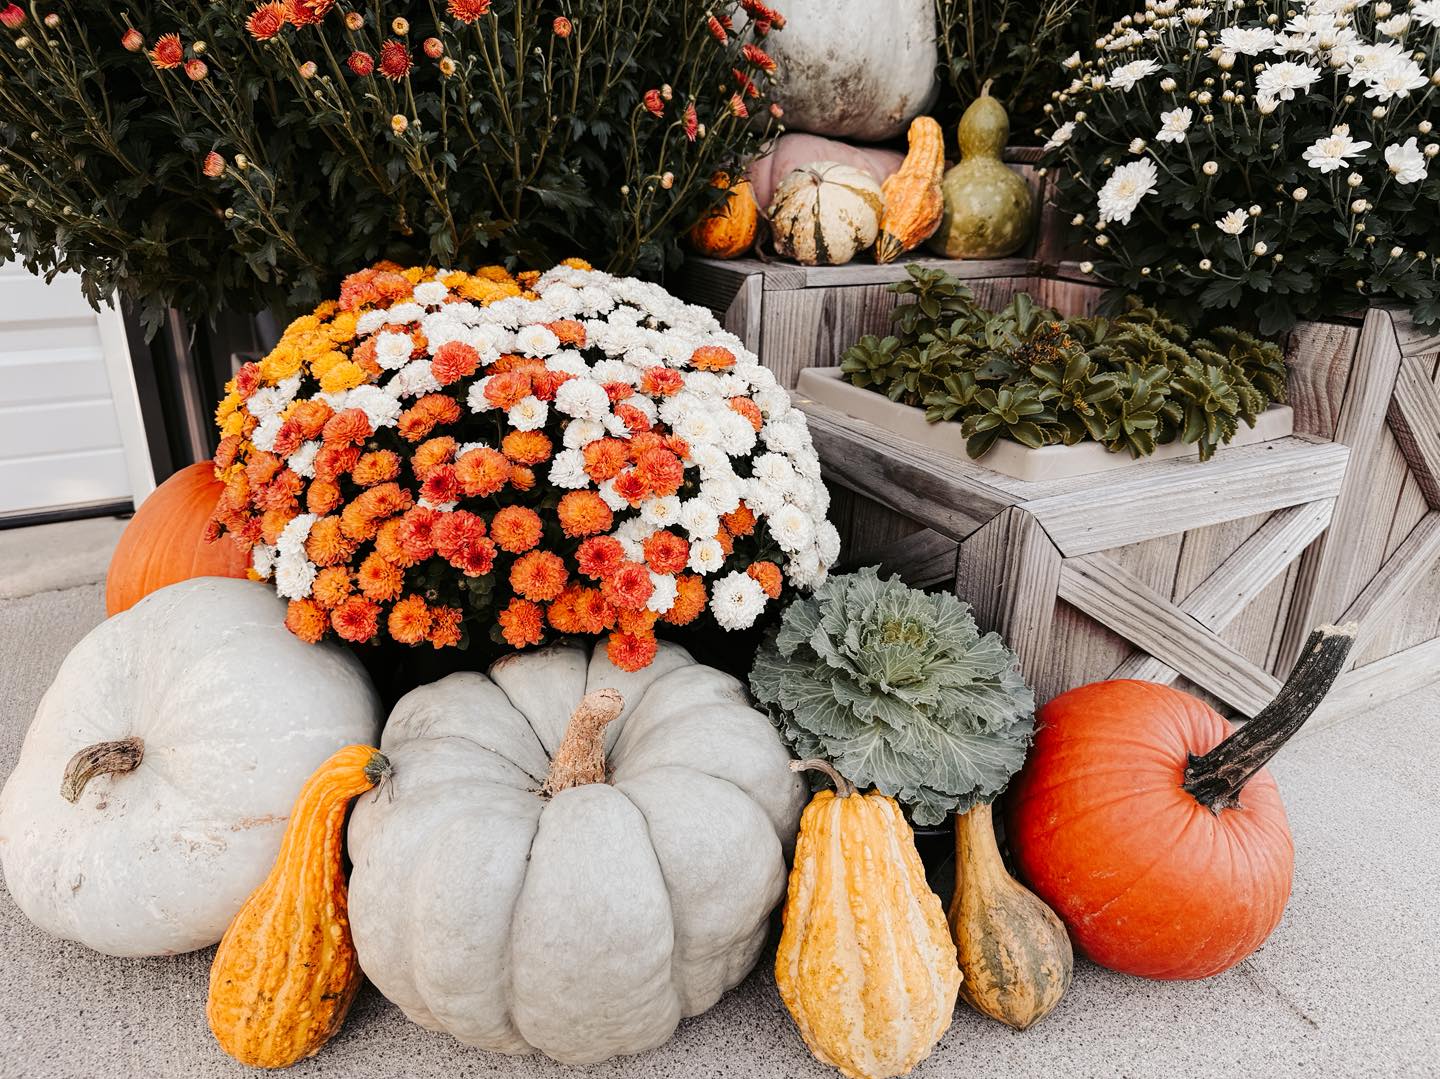
If you have walked through any retail garden centers lately, you probably have seen some bright colored fall flowers. These pretty plants are what we call mums, or chrysanthemums. Mum flowers are a fall staple in the south to see on a front porch or any fall decorated scape. They pair great with an heirloom pumpkin or some ornamental kale. Growing up in Kentucky, mums are everywhere you turn this time of year. But how can you make the most of your mums this fall? Follow along for great tips to keep your mums fresh for the next several weeks.
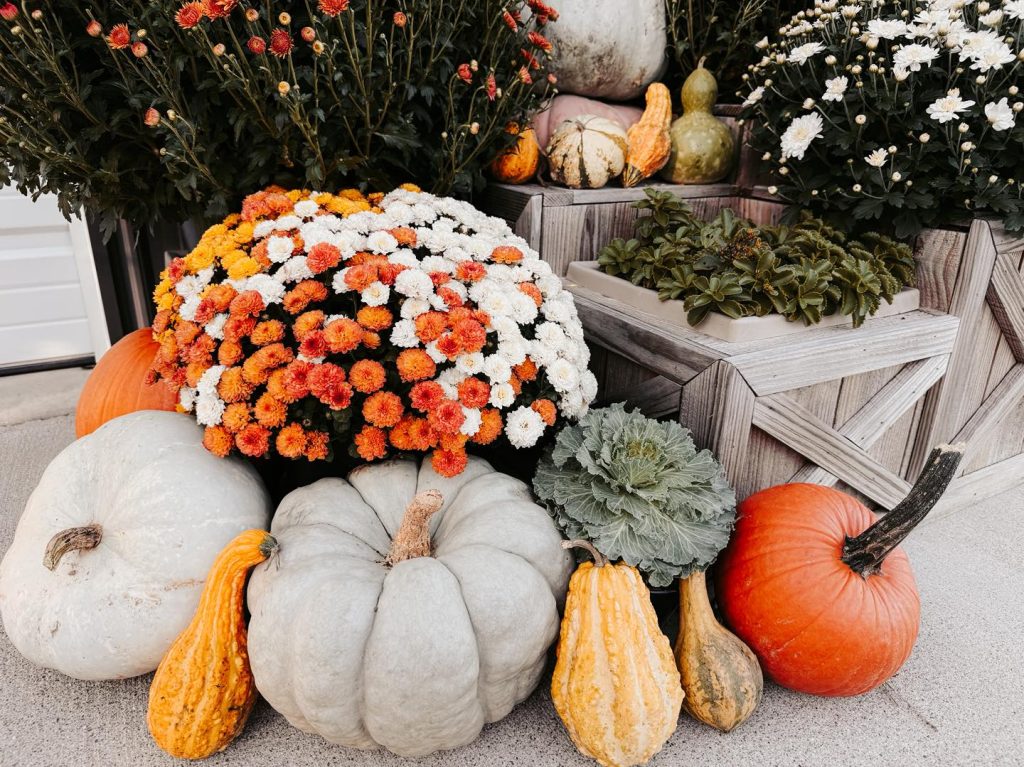
Mum Fall Design. Photo Credit: Danielle Allen, Glory Goods- Irvington, KY
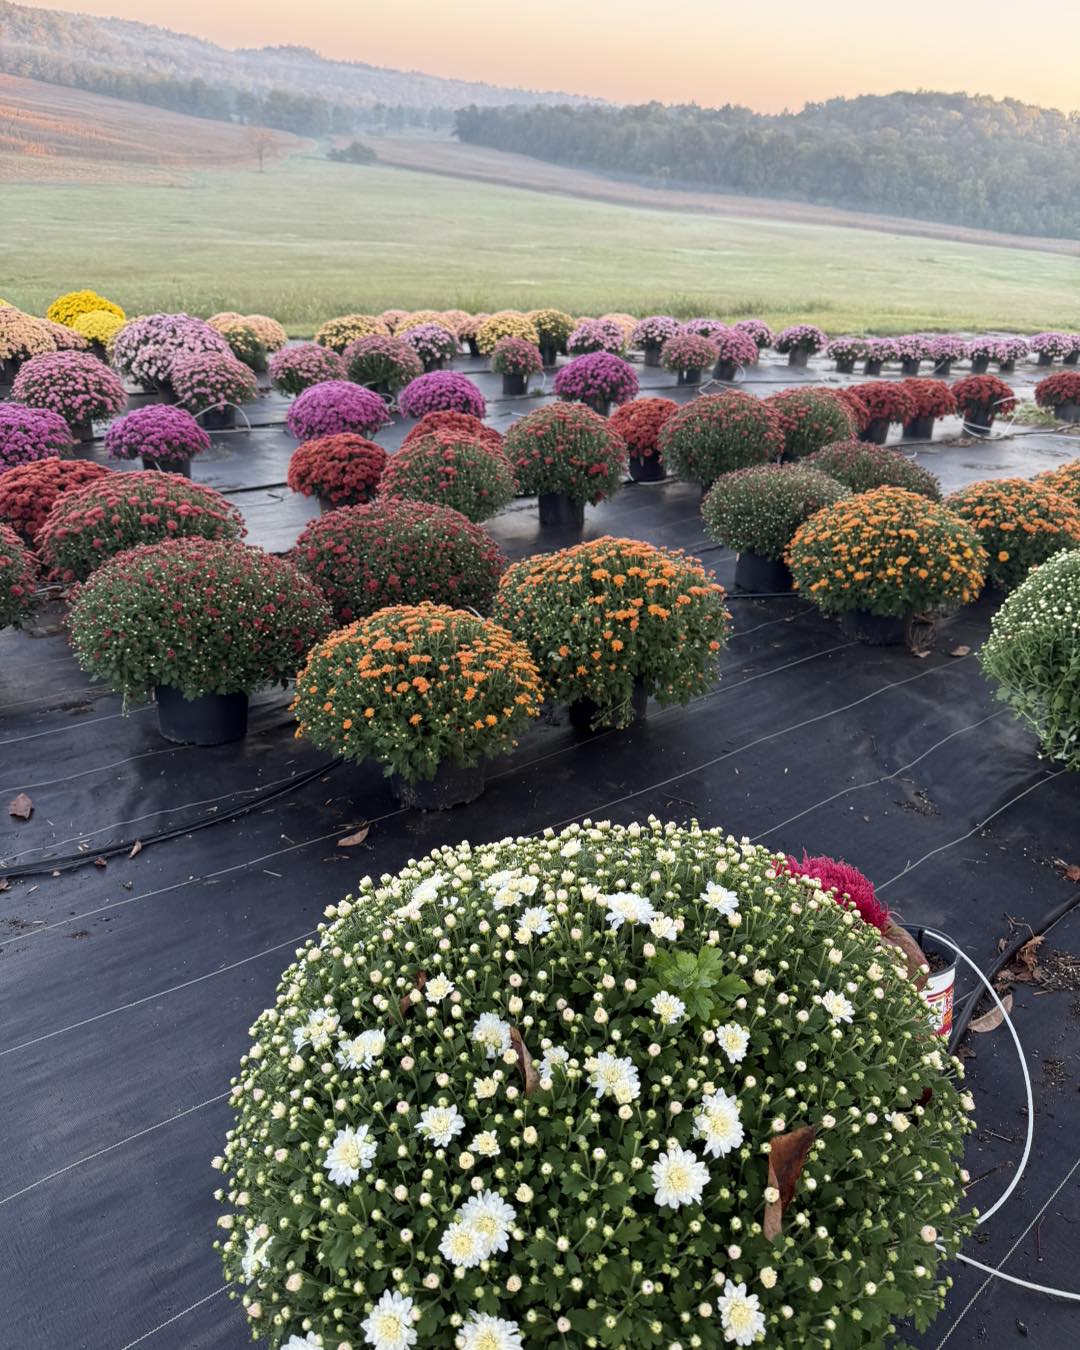
When shopping for the perfect mum for your porch, it is best to try and select a pot that has not fully bloomed yet. Chrysanthemums come in a variety of colors and some varieties even bloom more than one color (I love Candy Corn Mums!), but it is crucial to choose a plant that is not showing any color at all yet. The more blooms, the less life span you will get. Many wholesale mum growers will “de-head” the blooms or remove the buds appearing closest to opening when they are closer to market time to keep the inventory prettier for the consumer. It’s also important to select plants that look healthier. Mums bloom in a mounding fashion, so having uneven bloom patterns or discoloration is not a good sign. It’s also good practice to remove blooms as they begin to die off to make room for new ones.

Glory Goods Mum Wholesale Growing Pad. Photo Credit: Danielle Allen, Glory Goods- Irvington, KY
In the last several weeks in Jackson County there has been little to no rain fall. It’s important during dry spells like these to keep your mums saturated but not sopping wet. Mum flowers love to be watered from the bottom. To do this, set the pot in a bucket of water no longer than 15 minutes at a time to allow the soil to hydrate thoroughly. Watering your mum from the top can increase chances of bacteria and fungus growing on your blooms and can cause uneven blooming patterns. Mums need full sun to grow, so monitoring their dryness is important so your plants don’t dry out completely.
Okay, so Halloween is over, you hear the turkey gobbling, and Santa’s sleigh is on the horizon; this doesn’t mean throw out your mums! You can easily keep your mums in containers until December, but there is a risk of frost. When the temps drop below 40 degrees Fahrenheit at night, covering mums with old towels or sheets and removing them in the morning is best practice to keep your blooms frost-safe. You can also plant your mums in the ground. If you chose to do this, it is best to amend with compost as most mums are not acclimated to sandy soil.
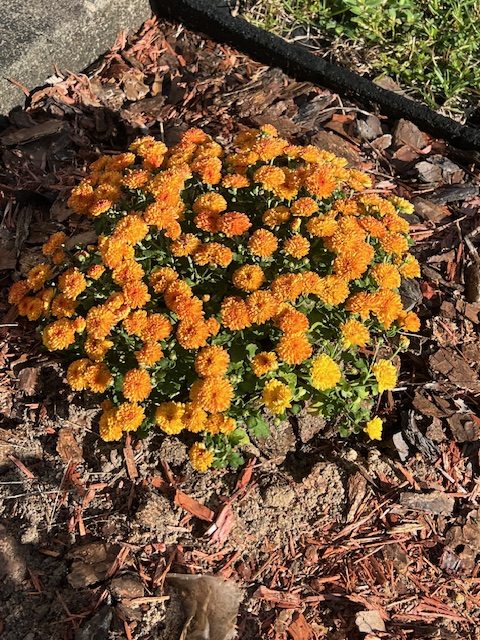
Mum in the Ground. Photo Credit: Abbey Smith, UF/IFAS Extension
For more information, please visit:
https://gardeningsolutions.ifas.ufl.edu/plants/ornamentals/chrysanthemums/
https://nwdistrict.ifas.ufl.edu/hort/2024/10/17/mums-the-word-on-fall-color/
by Molly Jameson | Oct 3, 2025
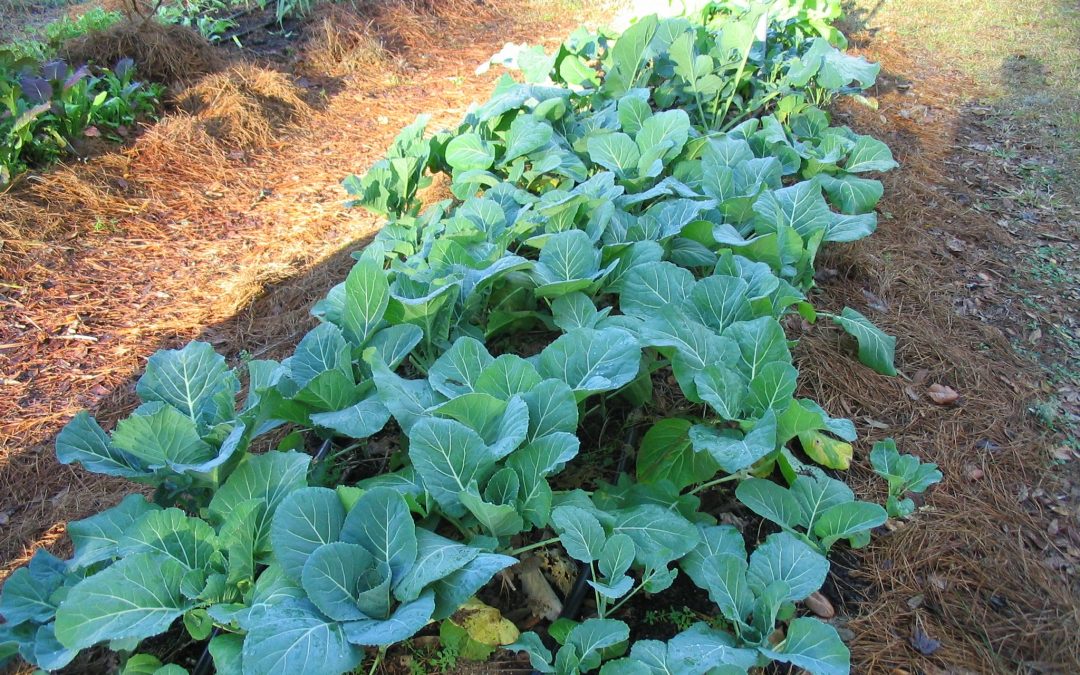
Even a short row of collards can yield basket after basket of tender leaves. Photo by Donna Legare.
Fall Gardening Spotlight: Collard Greens
When cooler weather finally rolls into the Panhandle, collard greens (Brassica oleracea var. acephala) are one of the most reliable crops you can grow. Members of the cabbage family, Brassicaceae, collards are hardy, low-maintenance, and don’t mind a little frost – in fact, a nip of cold will sweeten their flavor. In my neighborhood, it’s not unusual to see collards thriving in gardens all the way through winter and early spring.
Collard seeds can be directly sown starting in late August, with transplants best set out from September through November. If you start from seed, expect to harvest in two to three months. For a quicker turnaround, grab transplants from a local nursery and you’ll be cooking collards by Thanksgiving.
When late summer and early fall heat lingers, young plants may need a little extra care. Providing afternoon shade with a 40 to 50% density shade cloth can keep seedlings from wilting and help them establish more smoothly during warm spells in September. Regular, even watering is also important, but make sure the soil drains well.

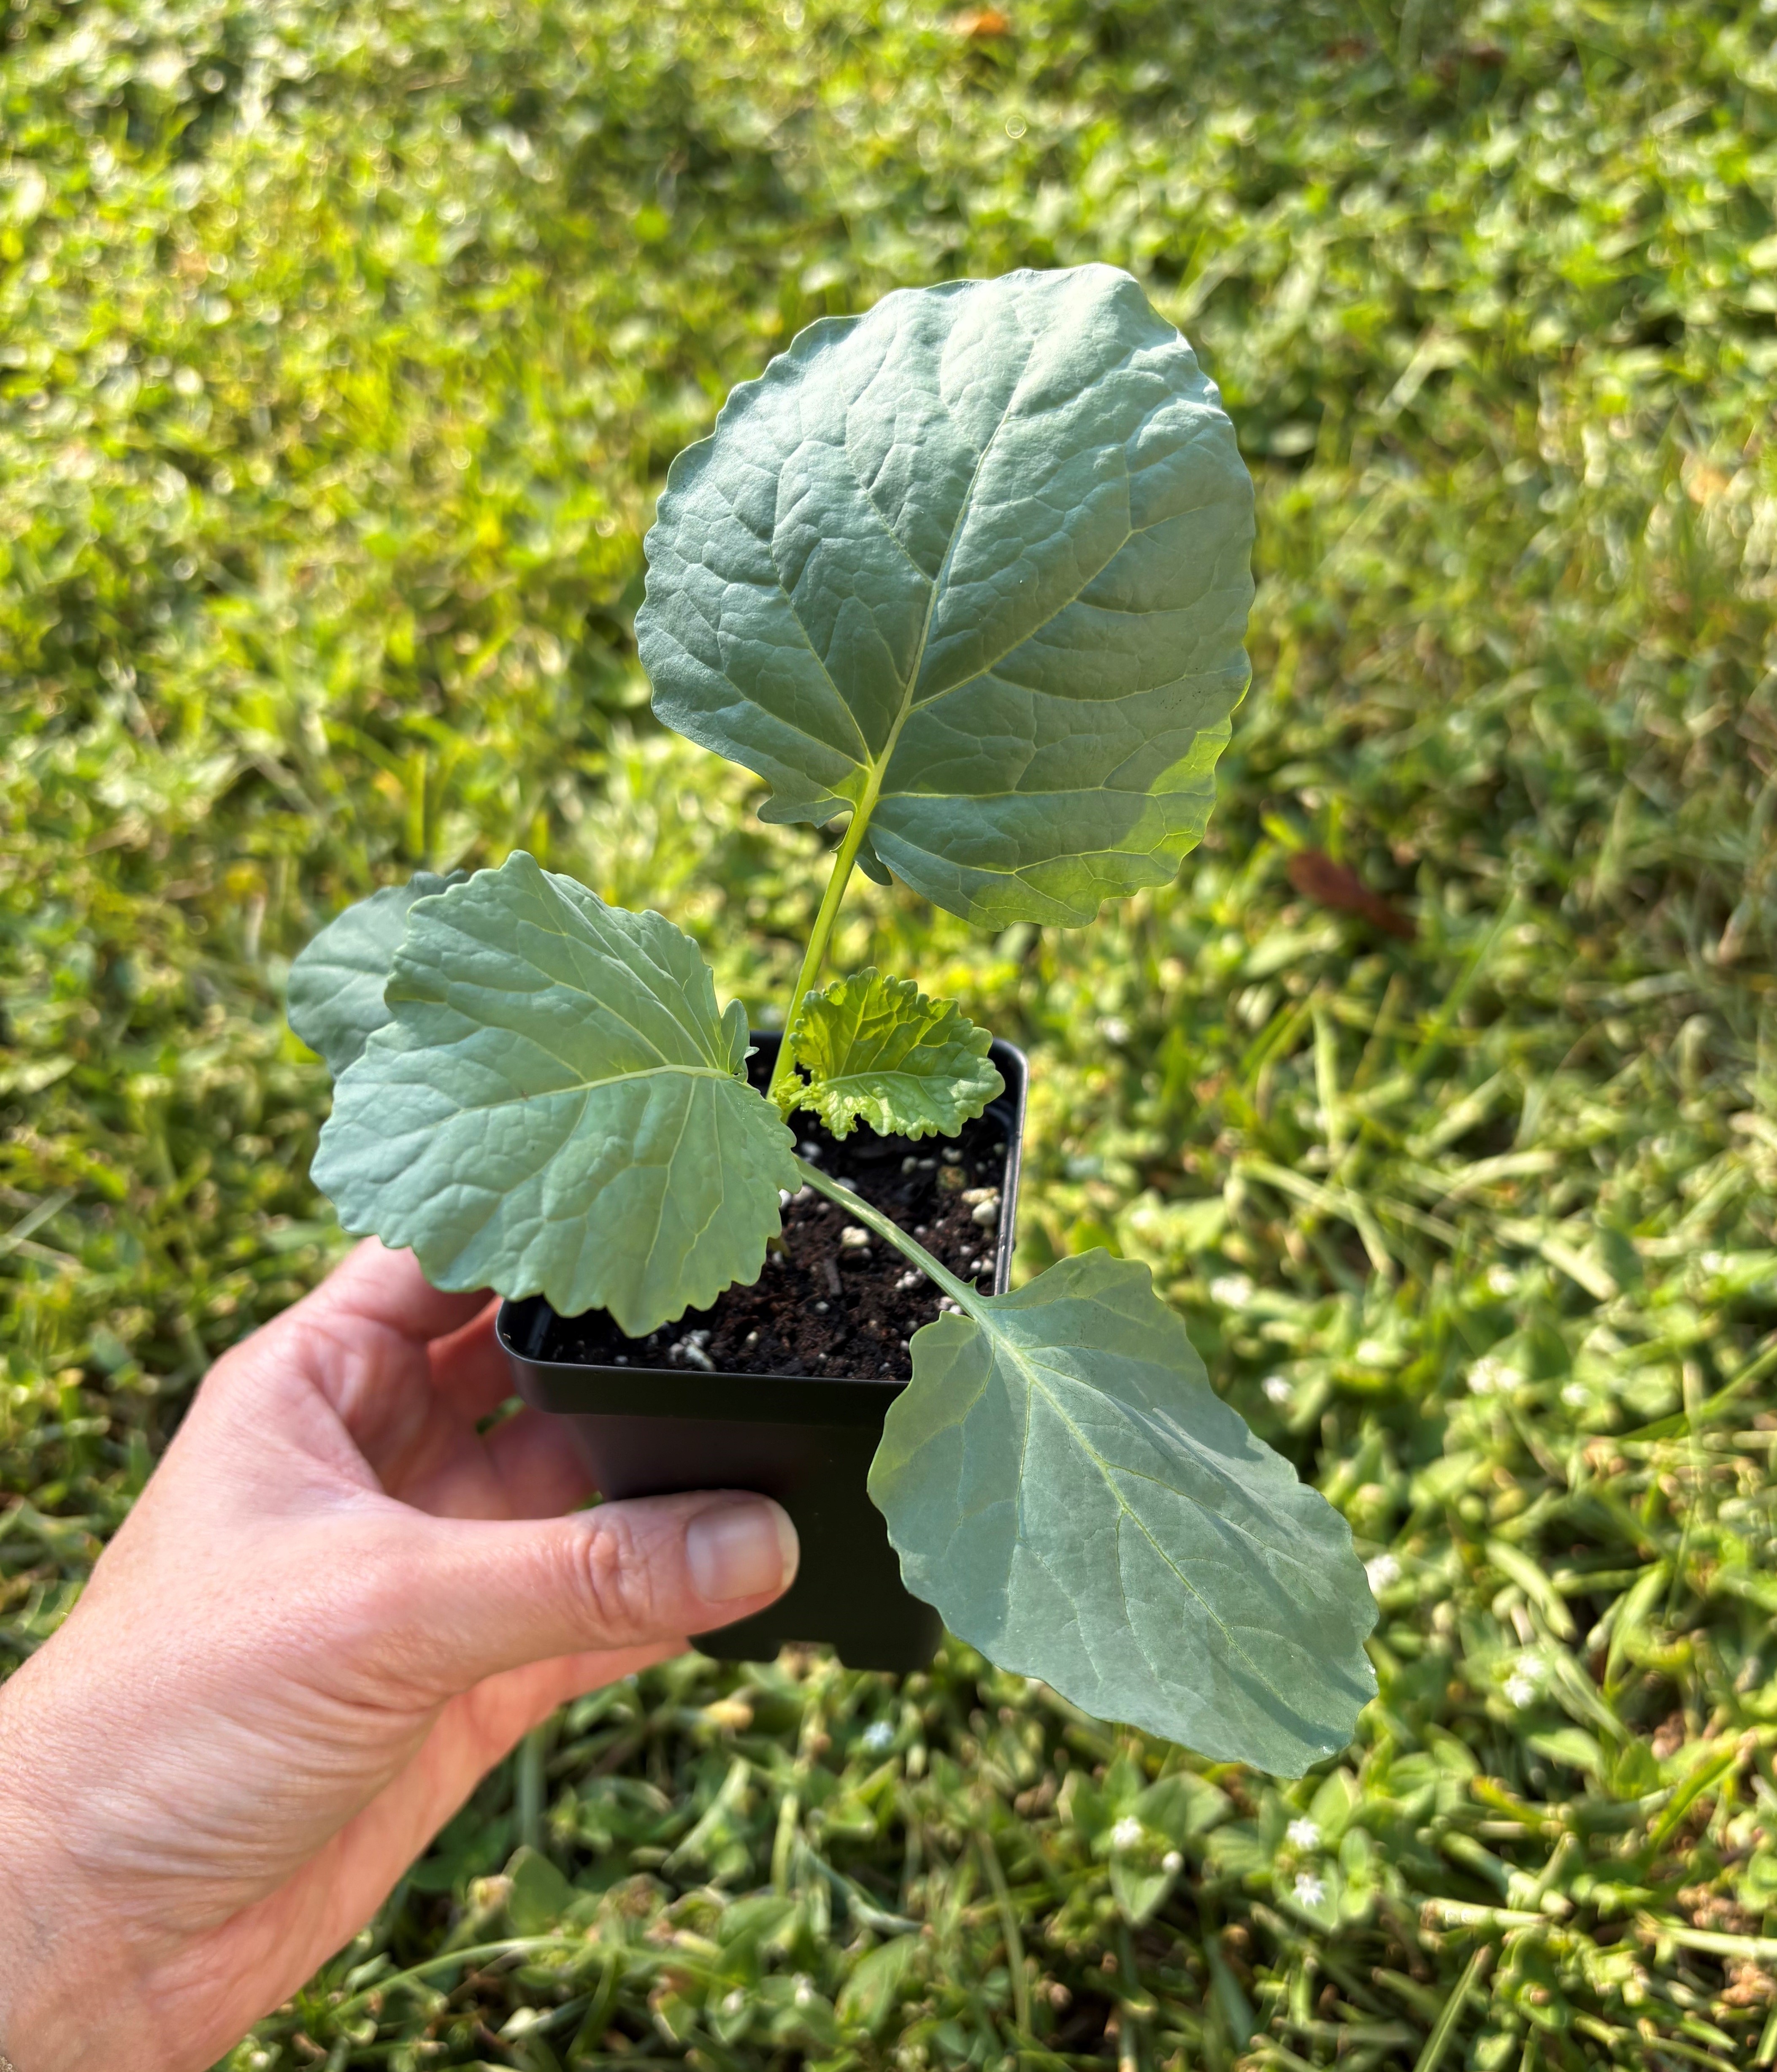
A Georgia Southern collard started indoors in August and up-potted in early September, now ready for transplanting into the fall garden. Photo by Molly Jameson.
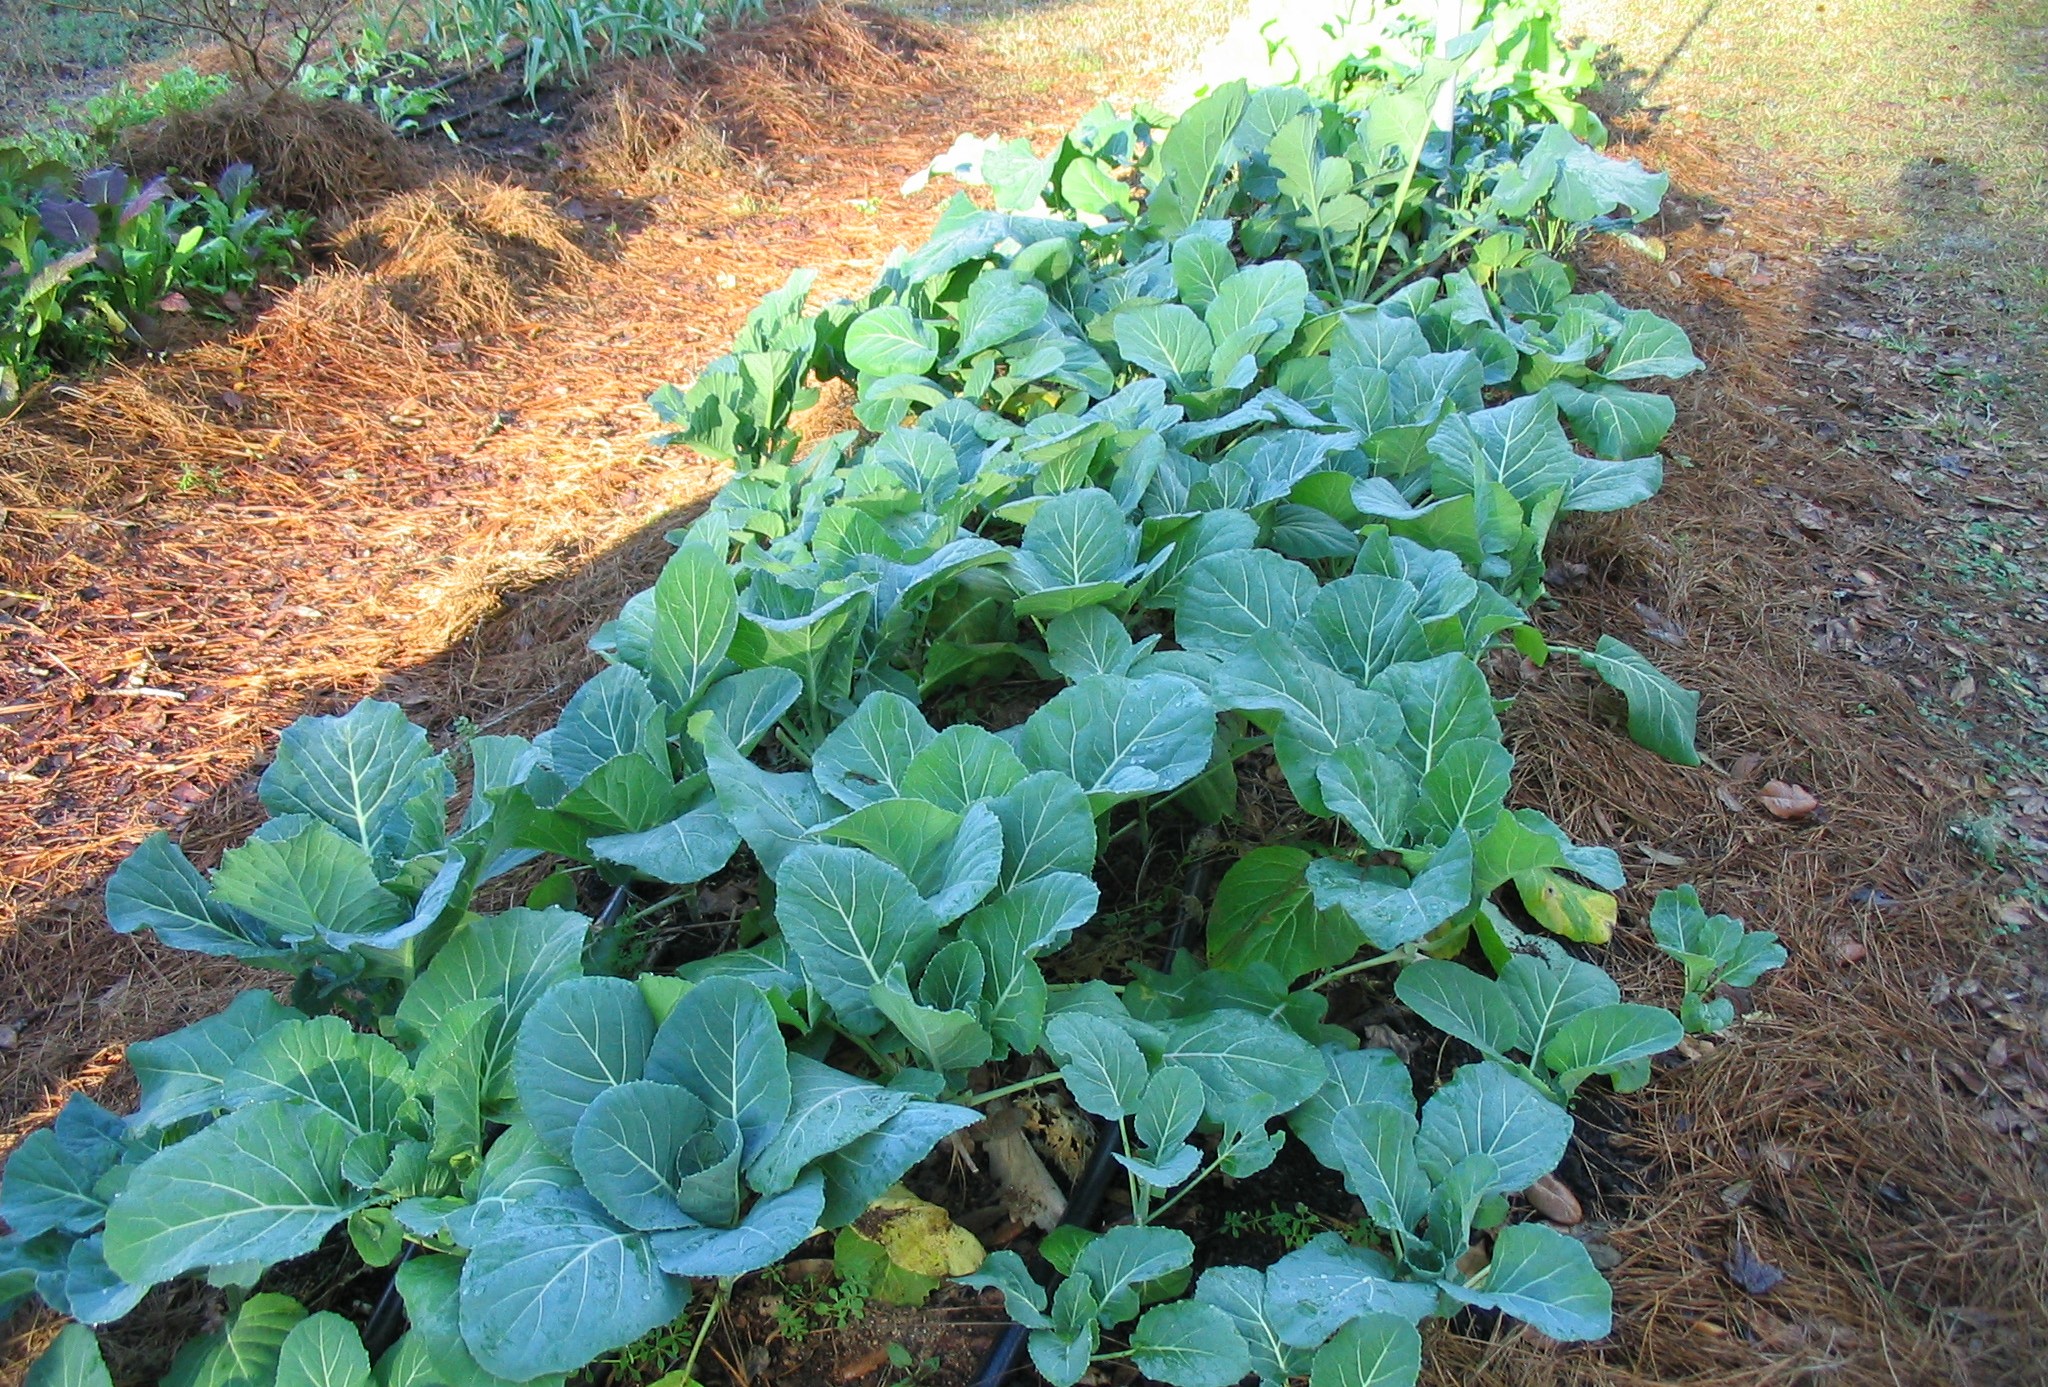
Space plants 12 to 18 inches apart in rows two to three feet wide, since collards grow large and need room to spread. In raised beds, you can space plants the same 12 to 18 inches apart in all directions, often in a staggered grid, to make the most of the space. For a steady supply, consider staggering plantings every couple of weeks through early November. Collards are among the more forgiving fall crops – just give them at least six hours of sun, nutrient-rich soil, and steady moisture.
One thing I’ve learned from experience: don’t be shy about picking leaves. Collards will keep producing as long as you harvest from the bottom up, leaving the center growing tip alone. I’ve found the leaves taste best when they’re picked young, around 10 to 12 inches long. If you leave them on longer, they’ll toughen up a bit but hold up well in slow-cooked dishes. Even a short row in the garden can keep a family in collards for much of the season, which helps explain why they’ve been a fixture in Southern kitchens for generations.
Some varieties that do well in our area include several open-pollinated classics. ‘Georgia Southern’ has stood the test of time for its tender, large leaves, while ‘Vates’ is another reliable option, known for its compact size and resistance to bolting. For a collard that’s as pretty as it is productive, try the heirloom ‘Alabama Blue.’ Its bluish leaves are streaked with purple, adding beauty to the garden as well as the plate. If you’d like to try hybrid varieties, look for ‘Champion,’ bred from ‘Vates’ with improved cold tolerance and disease resistance, or ‘Top Bunch,’ which grows quickly and recovers fast after harvest. You’ll usually find at least one or two of these on the racks at local plant nurseries.
While collards are tough, do keep an eye out for caterpillars such as cabbage loopers and diamondback moths, which can chew holes in the leaves. Picking them off by hand usually can keep them under control if you scout often, though a light spray of Bacillus thuringiensis (Bt) can also help if they get ahead of you. Be sure to follow the label directions carefully when applying.
Once you’ve got a basket full of collards, you can make them as simple or as dressed up as you like. I usually just sauté them in olive oil with garlic, salt, and a pinch of smoked paprika. They also slip nicely into soups, mix well with pasta, and can even be blended into green smoothies.
Collards are tough, productive, and delicious – and if you plant a few this fall, you might just find yourself sharing leaves with neighbors well into the new year.
by Abbey Smith | Sep 4, 2025
As we transition from the dog days of summer into (hopefully) the cool weather of fall, it is a great time to consider the nutrient levels of your garden soil. One of the best things you can give your garden is the foundation of healthy soil, but to do that you may have to add some things over time. A natural way to boost your garden’s nutrient levels is through composting. But what exactly is compost and where can you get it?

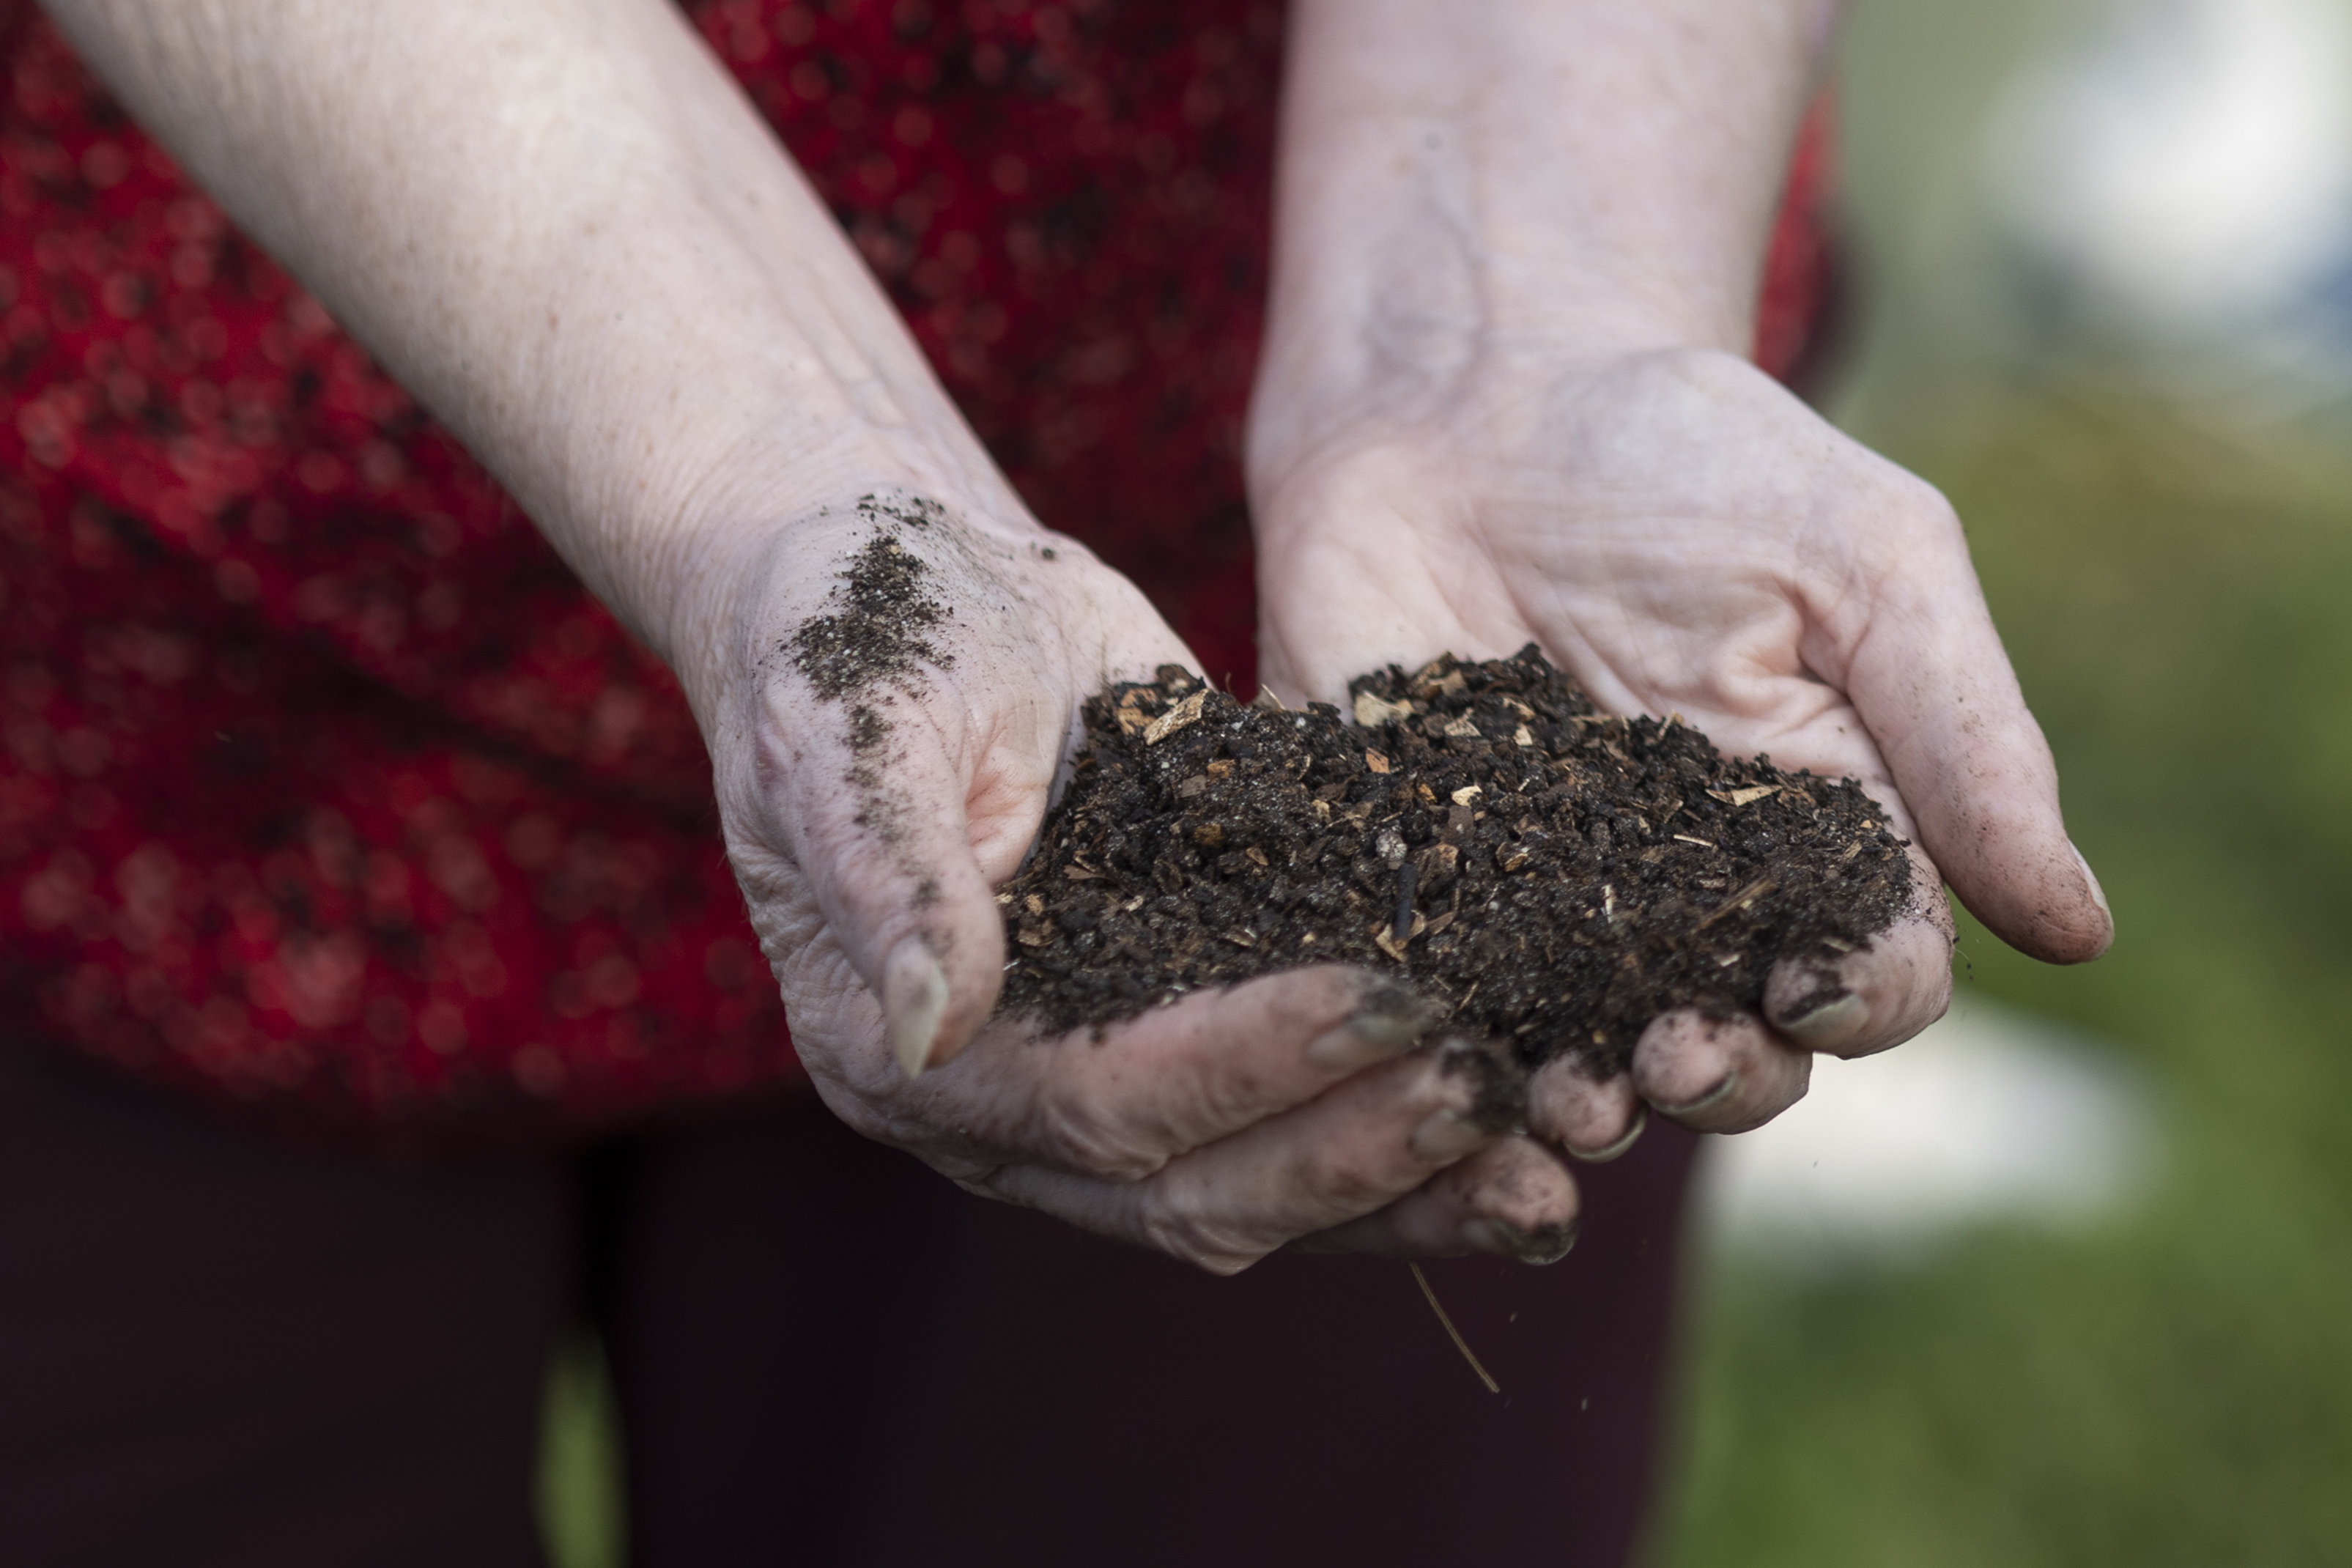
Handful of finished compost soil. Photo Credit: UF/IFAS Tyler Jones
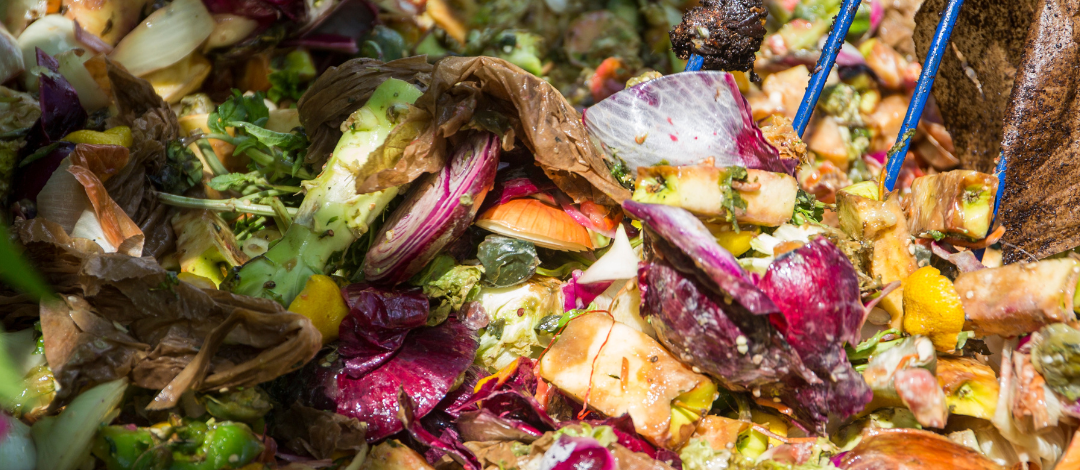
Compost is often referred to as “black gold” by gardeners because of its nutrient dense consistency. And even better, you can make your own compost from home. Compost is the makeup of an even ratio of carbon and nitrogen by-products that naturally decompose over time to create a brown-soil like substance. Carbon products are often referred to as “browns” and nitrogen products “greens.” Examples of browns are straw, cardboard, and old leaves. Green materials are often food scraps, lawn clippings, and animal manures. Compost can be added and tilled into your garden or depending on the type of compost, it can also be used as a potting soil alternative.
It is easy to create a compost bin at home. It does not have to be fancy or expensive to create. Some people opt for a pre-made compost tumbler bin to make turning their pile easier, while others use old wood pallets for their siding. You can even create a vermicompost bin inside a storage tote and use worms to do the composting for you. There are many possibilities. But it is important to note that bins do create a slight odor, because they are breaking down waste products. Location of your bin should be kept in mind if you don’t want close neighbors or even family members making complaints about the smell. However, if there is a strong odor overtaking, it could indicate an issue with the bin and will need to be addressed. Keeping a 1:25 ratio of greens to browns will keep odors at a minimum.
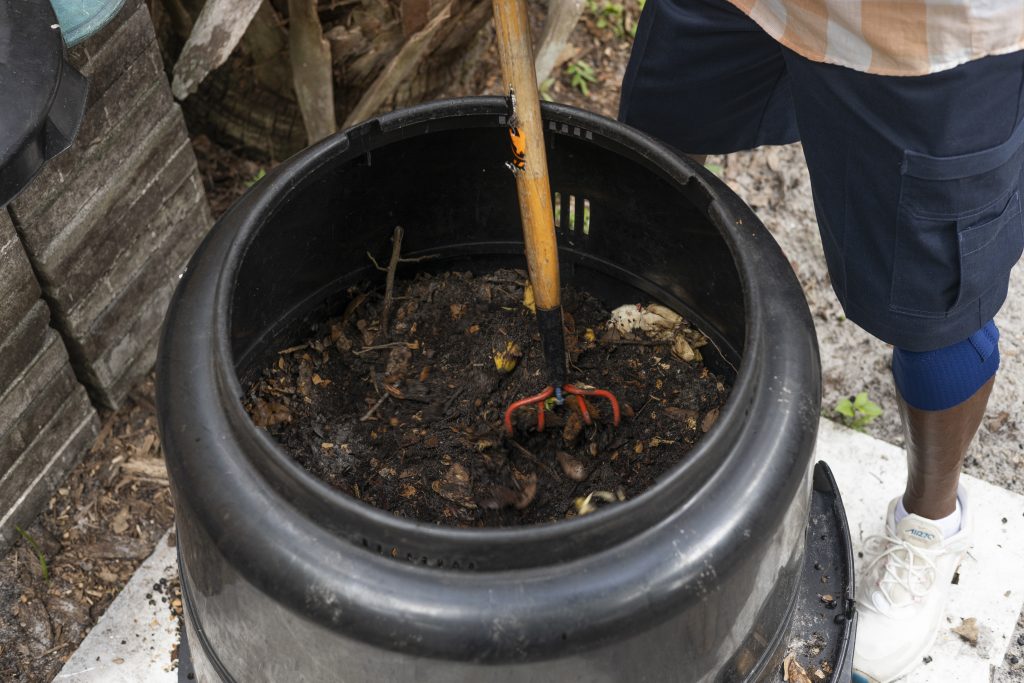
A compost bin being stirred. Photo Credit: UF/IFAS Cat Wofford
If you are interested in hearing more about compost and getting a hands-on demonstration on how to build a compost bin at home, the Jackson County Master Gardener Volunteers are hosting an informational workshop called Backyard Composting 101 on September 20 at 9:00 am at the Jackson County Extension Office. Admission is $7 per person. Space is limited for this class, so be sure to call 850-482-9620 to pre-register today.
For more information, please visit:
https://gardeningsolutions.ifas.ufl.edu/care/fertilizer/compost/
https://sfyl.ifas.ufl.edu/sarasota/natural-resources/waste-reduction/composting/what-is-composting/methods/
by Beth Bolles | Dec 13, 2024
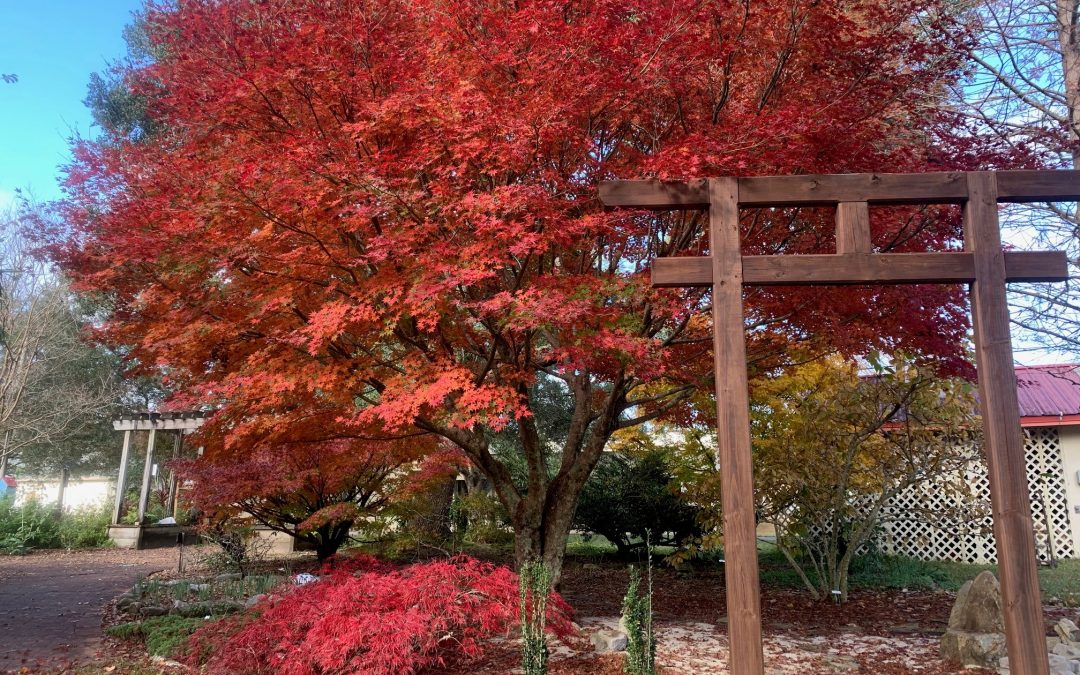
When looking for a small tree that provides a visual impact in the landscape, nothing beats a Japanese maple.
In North Florida, we have landscapes with some suitable conditions for growing a Japanese maple but these trees are not for every site. Japanese Maple plants prefer some shade, especially in the afternoon, and protection from winds. If you have a high tree canopy that allows for filtered sun throughout the day, many cultivars will grow well with this light. Soils should be moist but well drained with good organic matter. Areas with higher pH soils such as home foundations or around concrete patios usually show plants with poorer growth and nutrient issues.
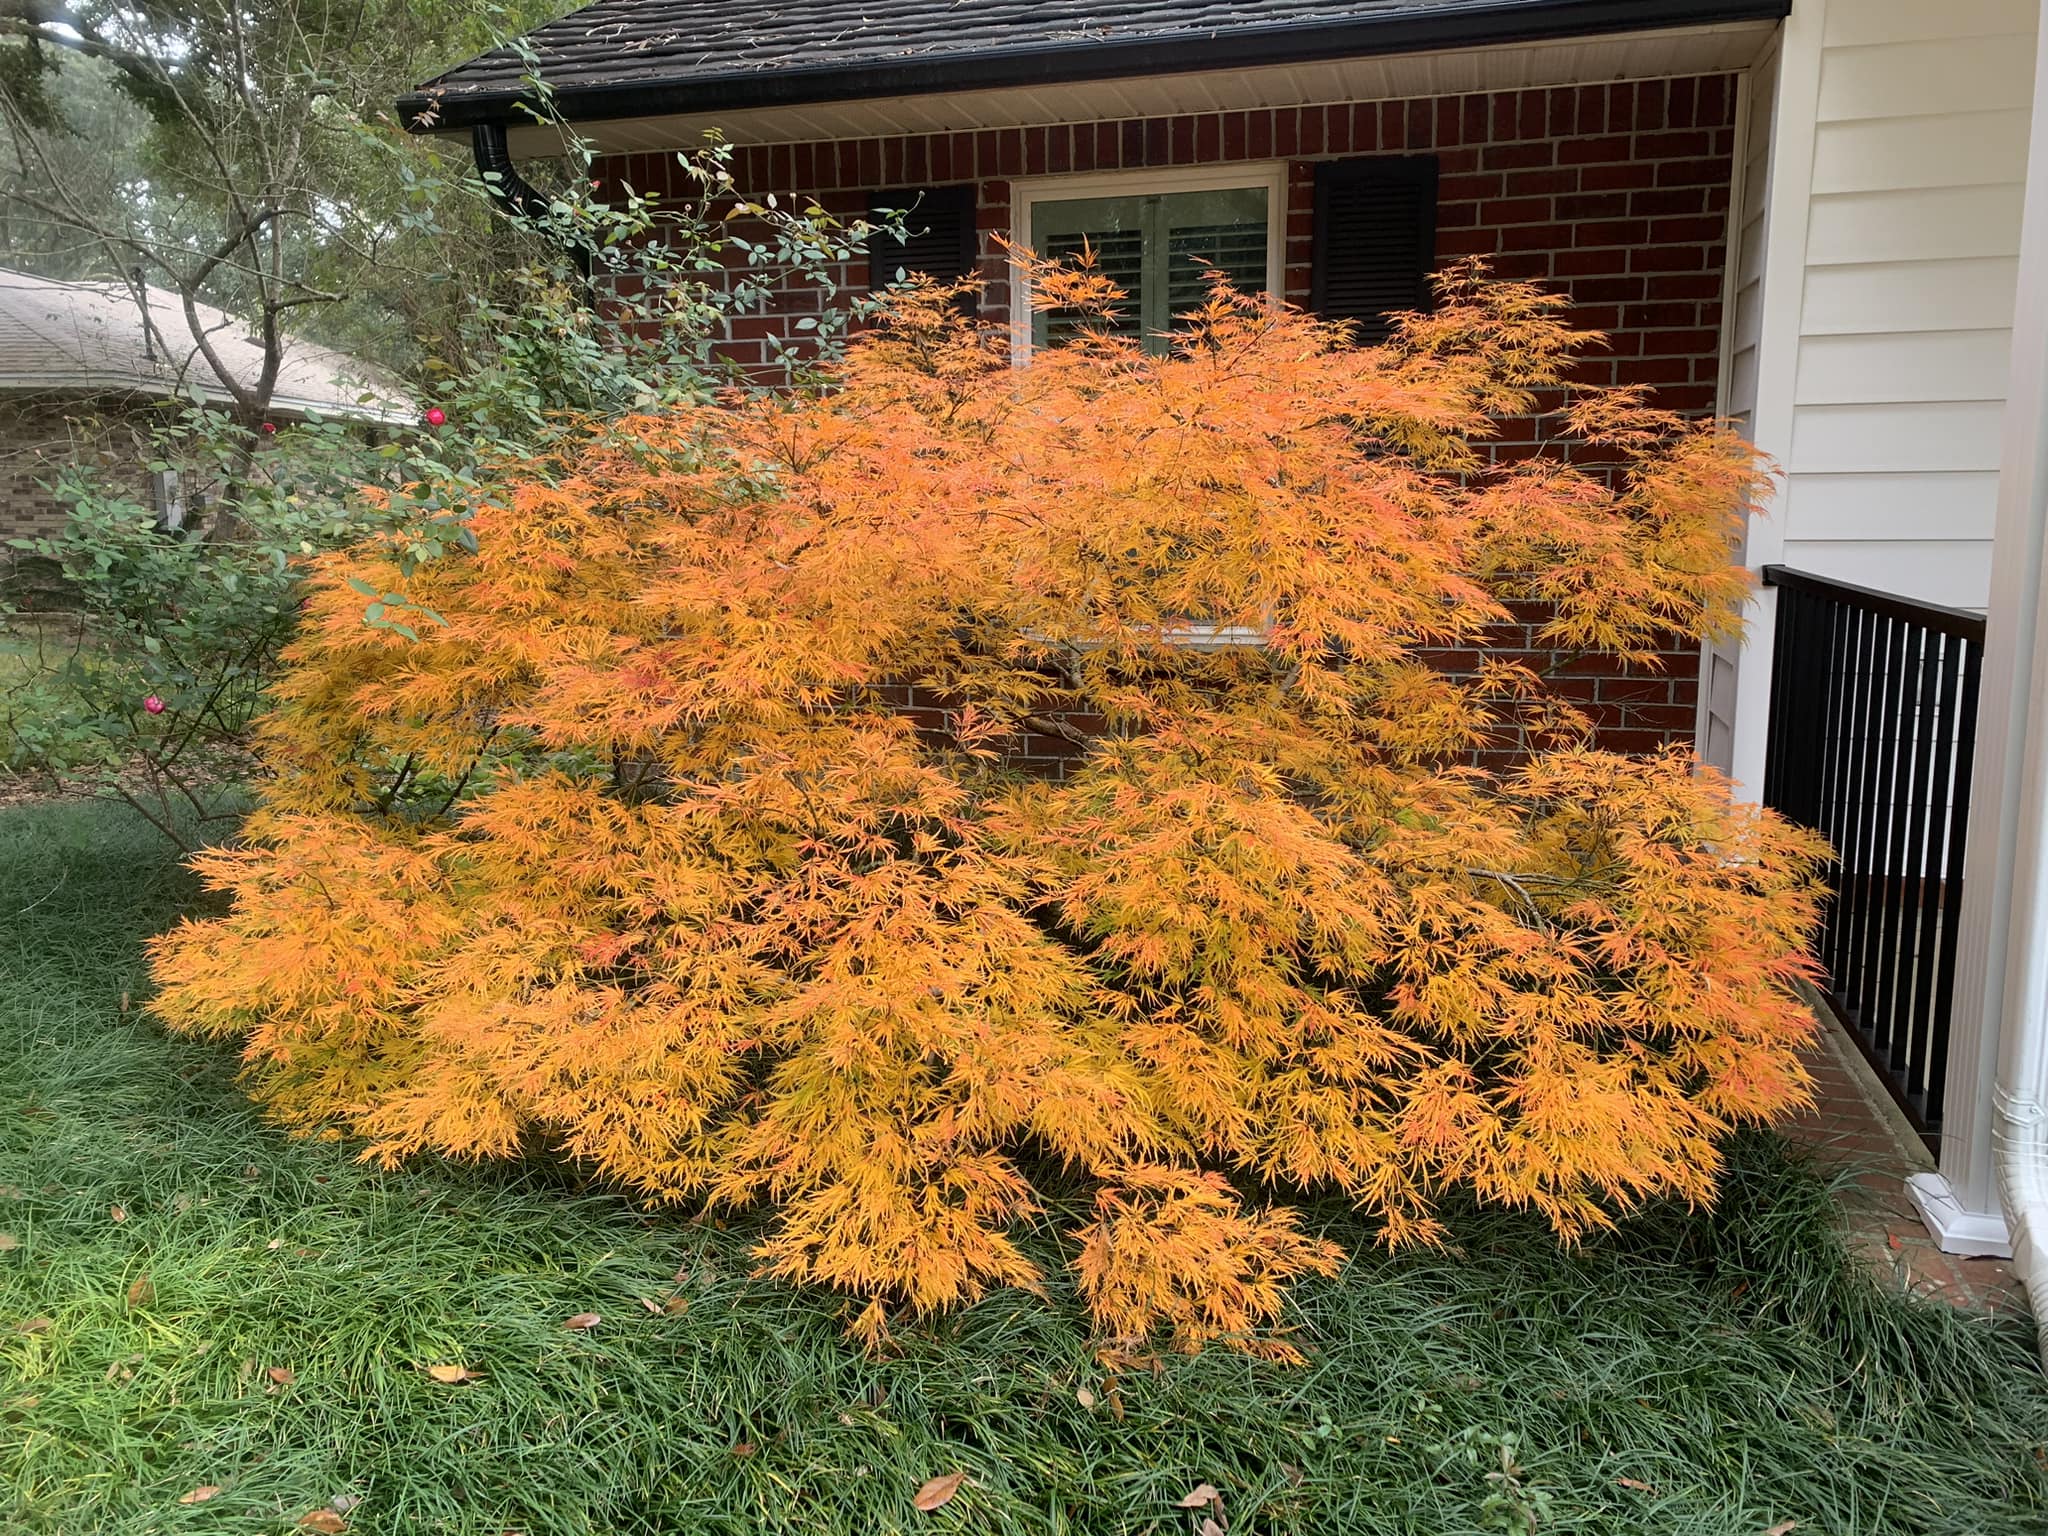
This specimen is suited to its spot with acid soil with a high Live oak tree canopy. The fall color is beautiful. Photo by Beth Bolles, UF IFAS Extension Escambia County.
Many people love the leaf color of Japanese maples, either burgundy leaf forms or selections with beautiful fall color. The palmate leaf shape also adds interest, along with varying degrees of coarse to finer textures.
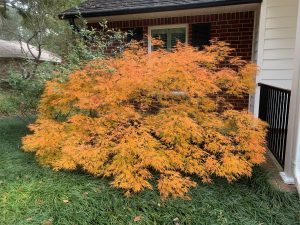
My favorite characteristic of the Japanese maple is the growth form. Trees often have a layered appearance with branches extending outward, making a beautiful small canopy. Many selections have smooth bark but one cultivar, the Pine bark maple, has plated bark that looks like a pine tree.

Pine bark Japanese maple form and fall leaf color. Photo by Beth Bolles, UF IFAS Extension Escambia County.
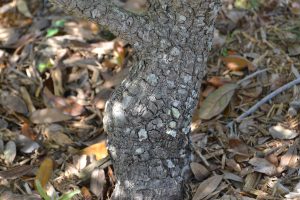
Interesting bark of the Pine bark maple. Photo by Beth Bolles, UF IFAS Extension Escambia County.
Although the growth rate is slow to moderate, be sure to research the plant size of the cultivar you want. There are small tree forms that will reach an average of 20 feet and plants that only grow about 5 feet in twenty years. Our cool season is the best time to plant a Japanese maple if your landscape is suited for this tree.