by Julie McConnell | Mar 13, 2018
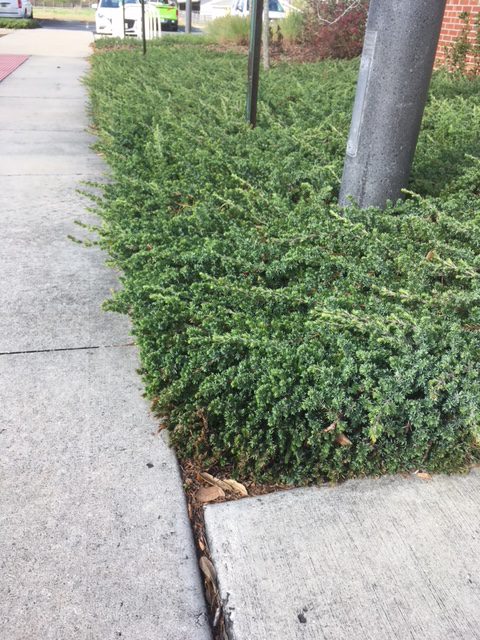
Shore juniper forms a thick groundcover and tolerates hot, dry sites. Photo: J_McConnell, UF/IFAS
We all know that when you have bare ground in Florida, eventually something unwanted moves in or the soil moves out. To avoid either of these negative outcomes, a good practice is to grow robust vegetative groundcovers, especially if the soil slopes and is at high risk of eroding. Turfgrass is one option, but what if you don’t enjoy caring for a lawn or the site is difficult to maintain or even unsafe to mow? An often overlooked option in our area is Shore Juniper Juniperus conferta.
Although some people find this plant less than exciting, its easy to explain why it can be a good option in certain situations.
- Easy to find at nurseries
- Inexpensive
- Low water requirements once established (you’ll need to turn the irrigation off on these!)
- Salt tolerant
- Evergreen
- Cold tolerant
- Low, spreading growth habit (won’t block view)
- Do not require pruning (junipers cannot tolerate heavy pruning!)
A common cultivar of shore juniper is Blue Pacific Juniper which grows to be about one foot tall but spreads two to three feet wide. The new foliage has a blue cast that gives it the common name. It creeps along the ground and will provide good ground cover to sloping sites. This plant should be planted on 3 foot centers so they have room to expand without crowding. Plant in well-drained soil and apply two inches of mulch on bare soil between plants to reduce weeds while the plants are filling in. Only water until established, then stop automated irrigation and only water as needed. Read more at Establishing Shrubs Florida Landscapes.
by Mark Tancig | Feb 5, 2018
An important skill for the Florida gardener is to be able to identify and control invasive, exotic plant species. These plants invade and disrupt Florida’s unique natural ecosystems, often spreading from surrounding urban and suburban landscapes. Being proactive in reducing their spread helps protect the integrity of Florida’s natural areas. Cooler days, fewer bugs, dormant vegetation (including poison ivy!), and striking plant characteristics make this time of year perfect for identifying and controlling invasive, exotic plants in urban/suburban woodlands. For additional motivation, February 26 through March 2 has been proclaimed National Invasive Species Awareness Week.
National Invasive Species Awareness Week is February 26 to March 2 this year.
In north Florida, two easily recognizable invasive, exotic plants are coral Ardisia (Ardisia crenata) and heavenly bamboo (Nandina domestica). Both of these plants were introduced decades ago as ornamental plants due to their showy foliage and fruit and ease of cultivation. I picture an adventuring botanist or gardener returning from some exotic locale and sharing what a beautiful and easy growing plant they had found. These characteristics make them easy to notice.
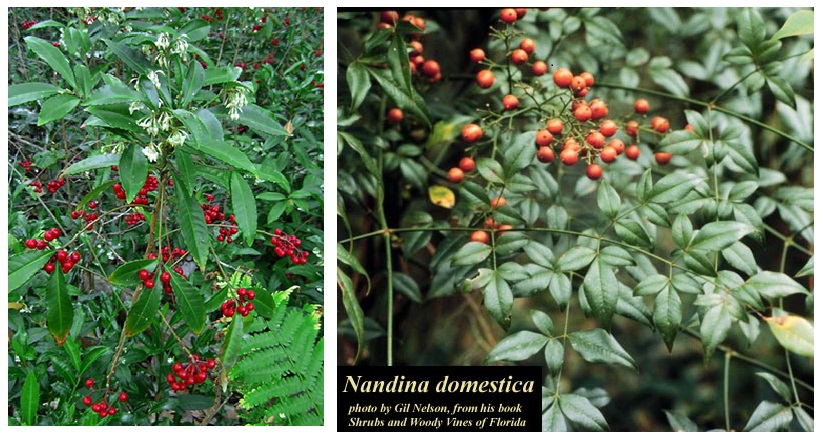
Coral Ardisia (left) and heavenly bamboo (right) are easy to recognize this time of year. Credit: UF/IFAS; Gil Nelson.
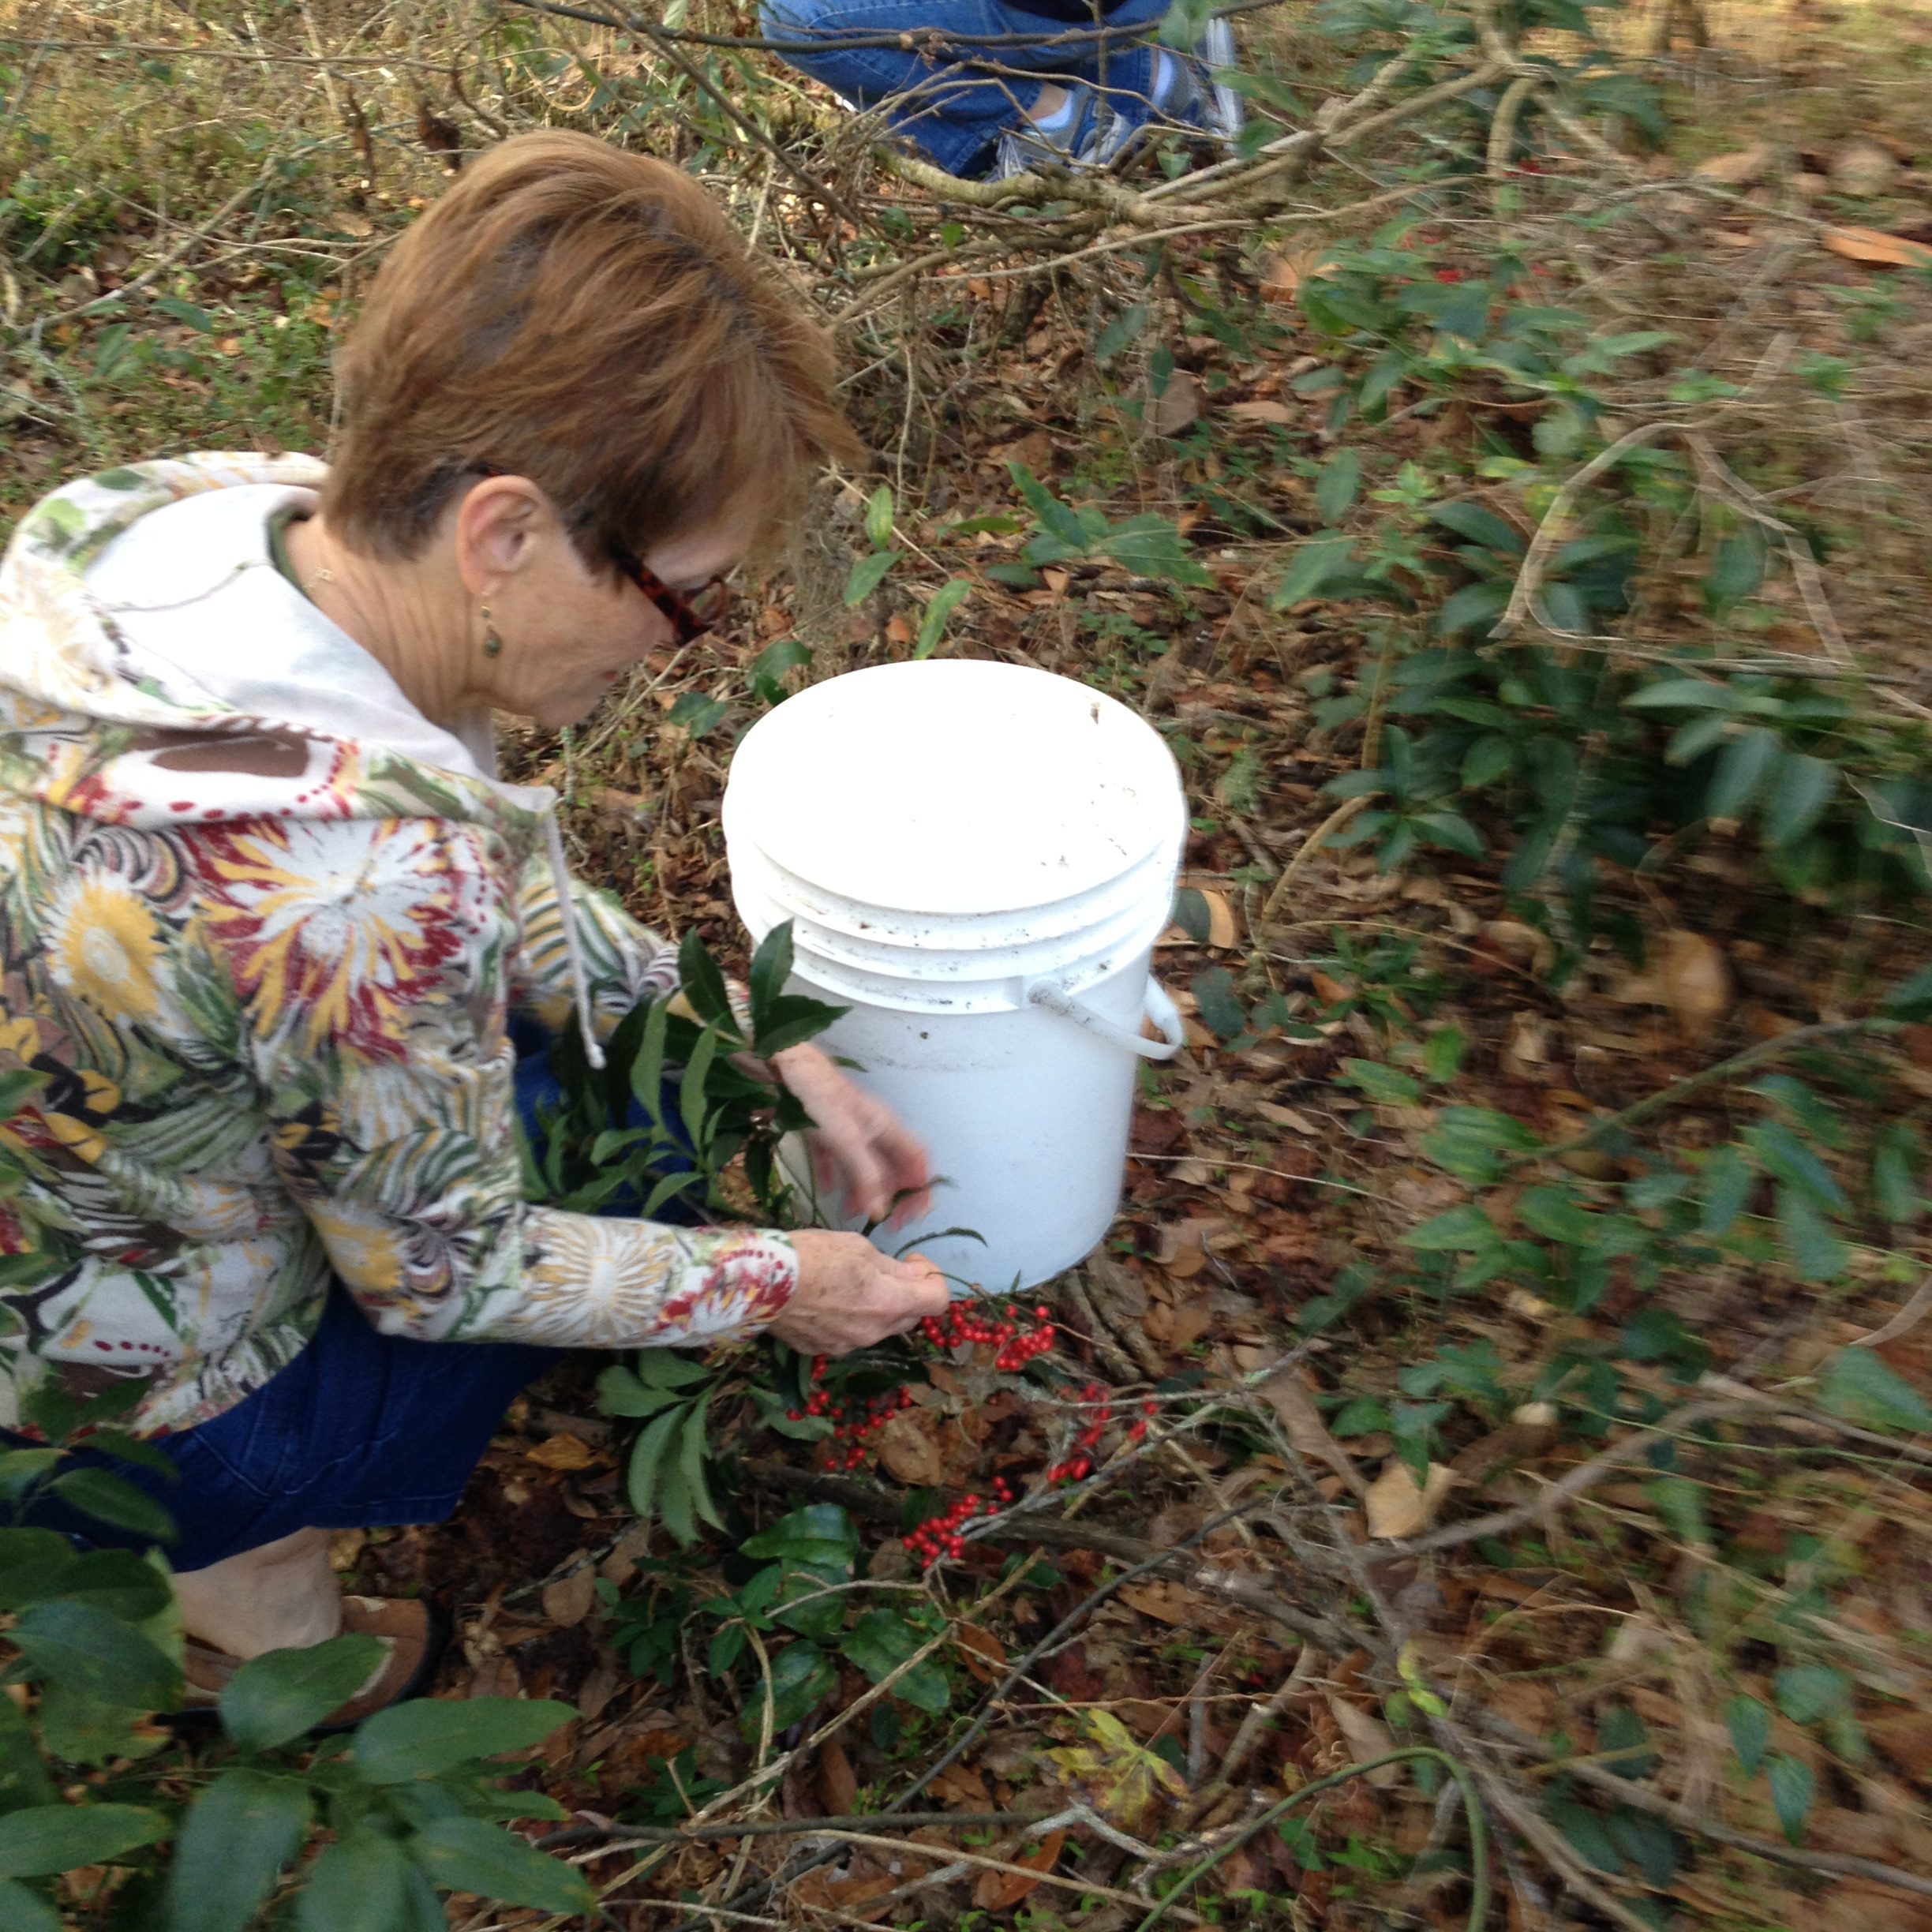
In small areas, manual control methods can be used to successfully rid an area of these common pest plants. Simply pick off the berries and place them in a small container – a 5-gallon bucket works great. Pull up the mature plant being sure to remove the roots. The seeds should be double-bagged and placed in the garbage for disposal in a landfill. The plants can be tossed to the side and allowed to dry out and breakdown. For larger plants, a shovel or root jack can be used to help ensure that the roots are removed from the soil. Follow up is often necessary for total control.
Chemical control methods are more efficient and practical for large areas. County Extension offices can help you select the right herbicide control program for your individual site and particular invasive, exotic species present.
During February and leading up to National Invasive Species Awareness Week, look for opportunities in your community to help rid natural areas of these pesky plants. For more information on invasive, exotic species, including photos, videos, and control recommendations, visit the UF/IFAS Center for Aquatic and Invasive Plants website – plants.ifas.ufl.edu.
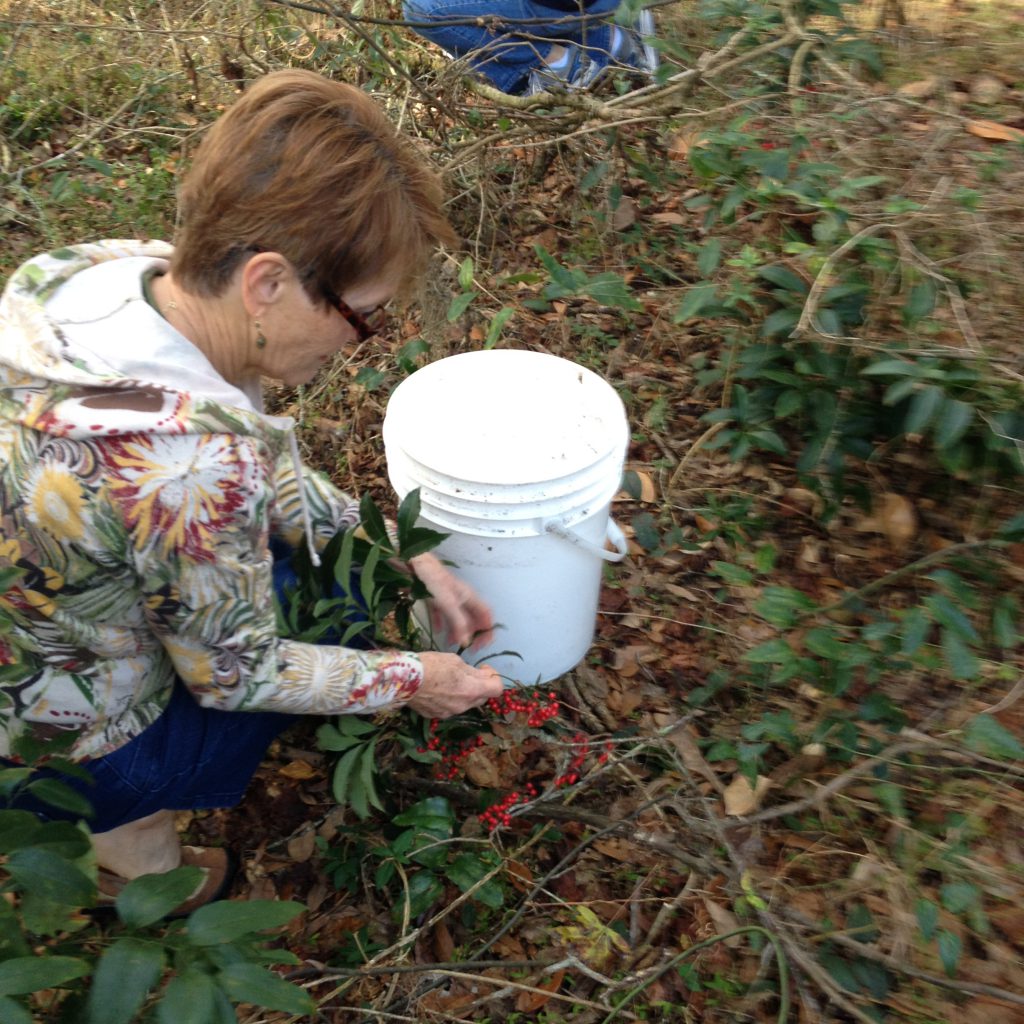
You can help rid local natural areas of invasive, exotic plants. Credit: Mark Tancig
by Matt Lollar | Jan 25, 2018
We’re having a cold winter this year and I’m sure the last thing on your mind is your spring garden, but it’s time to start ordering seeds! The spring gardening seed catalogs are now out on garden center magazine racks and it’s tempting to buy everything that looks good in pictures. However, there are a few things to think about when picking out what you want to grow.
Know Your Season
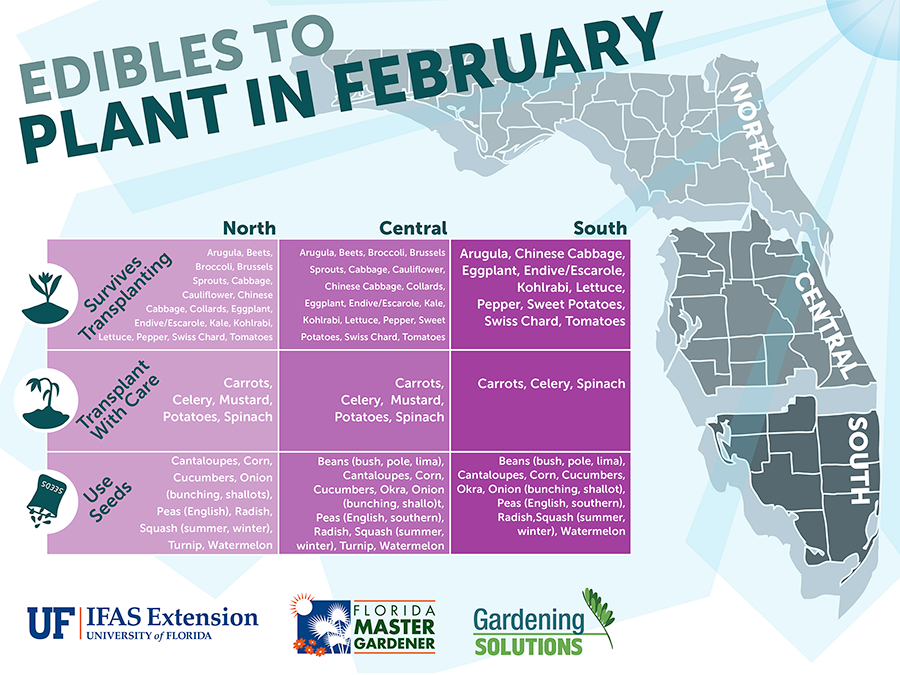
Vegetable crops are usually grown by season. We are lucky in Florida because we have both a warm season and a cool season. We are unlucky too because we have very hot summers! Usually our spring crops suffer from too much heat and humidity in July and August. Cool season crops are typically planted from September to March, while warm season crops are typically planted in February and March or August and September. Eggplant and okra are outliers because they can usually make it through the summer. It’s important that you follow tried and true planting dates for the crops you intend to grow. You can find a very helpful table embedded in the Florida Vegetable Gardening Guide that lists what to plant when.
Know Your State
As you may have noticed, North Florida has a very humid climate year-round. We not only have to give our crops extra care due to rain and humidity, but we also need to grow varieties adapted for our climate. Some recommended varieties are listed in Table 2 of the Florida Vegetable Gardening Guide. You can also find some recommended varieties in Seed Sources for Florida Homegrown Vegetables. (Please note that some of the seed sources listed in this publication are geared more toward commercial growers, so they may be unavailable unless you intend to plant quite a few acres in one crop.)
Know How Green Your Thumb Is
Probably the most important thing about gardening is your level of commitment and experience. Take a few minutes to assess your skills as a gardener and the amount of time you are willing to commit to your garden. Then use the following list to help you determine what to plant.
- Easy to Grow in Florida – Radish, Collard, Turnip, Kale, English Pea, Green Bean, Sweet Potatoes
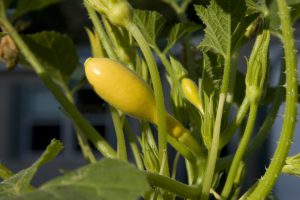
- Somewhat Easy to Grow in Florida – Okra, Yellow Squash, Zucchini, Eggplant, Watermelon, Sweet Corn
- Hard to Grow in Florida – Tomato, Cantaloupe, Muskmelon, Pumpkin
This is only a short list, but I hope it gives you a starting point to help you determine your skill set.
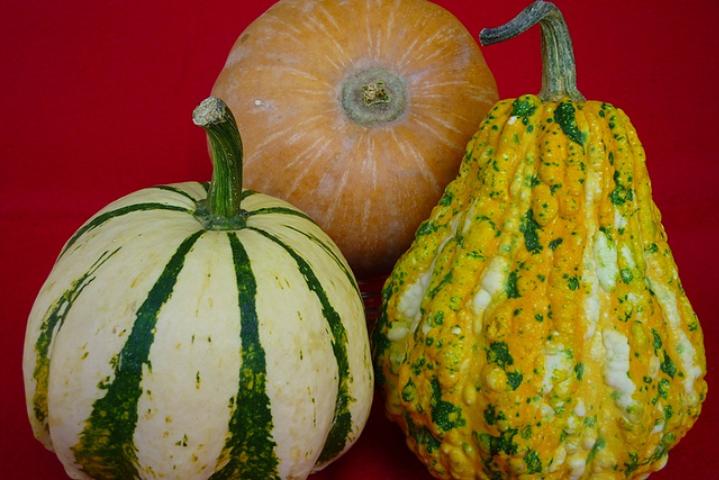
A variety of calabaza squash. Photo Credit: University of Florida/IFAS
Know the Difference Between Open Pollinated, Heirloom, and Hybrid Varieties
- Open-pollination of crops occurs when insects, birds, wind, or other natural mechanisms carry pollen from flower to flower. Seed can be saved from open-pollinated varieties which will produce crops with similar characteristics to their parents.
- Heirloom varieties have a history of being passed down within a family or community. As the name suggests, seed can be saved from heirloom varieties which will produce crops with similar characteristics to their parents.
- Hybridization is a controlled method of pollination in which the pollen of two different varieties or species is crossed by human or natural mechanisms. Seed saved from hybrids will most likely not produce as vigorously as their parents and may produce crops that are significantly different from their parents.
I would never want to discourage you from growing new crops, but I hope you now have a little better plan as to what to plant this year. If you want to try something new with minimal risk then I would recommend you try growing yard-long beans, calabaza squash, and malabar spinach. These vegetables serve as excellent substitutes for some of the more commonly grown varieties. You can read more about these crops and other minor vegetables by visiting the University of Florida/IFAS Minor Vegetable Webpage.

by Mary Salinas | Jan 25, 2018
Get a head start on your spring vegetable garden by planting seed now for some of your favorite spring crops. A great advantage to starting from seed is the seemingly endless number of varieties of your favorite vegetables that are available from online seed companies. You can experiment with new and heirloom varieties. Look to plant several different varieties that will mature at different times, thereby lengthening your harvest season.
Home grown squash. UF/IFAS Photo by Tom Wright.
Seed is also cheaper than purchasing transplants, especially if you save your seeds in optimal conditions. To save leftover seed, keep it tightly closed in the original packet and store in a closed jar or plastic storage bag along with a desiccant (one of the little packs that come in vitamin bottles or shoe boxes) to absorb any excess moisture. Place in a consistently cool place, like your refrigerator. Some seeds naturally keep longer than others.
No fancy pots are needed, just about anything several inches wide and deep with a drainage hole will work. The pots should sit in a shallow waterproof tray to catch the runoff. Be sure to sterilize any reused pots with a solution of 1 part chlorine bleach to 9 parts water to destroy any lingering pathogens from the previous plants.
A commercial seed-starting mix is your best choice. Compressed peat or coir pots are also a good choice. Some all-purpose potting mixes are okay, but others are heavy and can hold too much water and promote fungal disease.
Plant the seed according the packet instructions, water well and place in a nice sunny spot where you can check them every day. If you don’t have a convenient sunny spot, a shop light with florescent and/or grow lights mounted about 6 inches above the tops of the plants will work well. A timer for the light is a handy device to make sure your seedlings have a good 14-16 hours of light a day. If your pots are in a sunny window, rotate them 180° daily to insure uniform growth. If you find your seedlings skinny and stretched, they are not getting enough sun.
Make sure that the soil stays evenly moist from the time of planting until the young plants are ready for your garden. A clear cover over the pots or tray will help to keep moisture consistent while the seeds germinate.
When the time comes to transition your plants to the outdoors, do it gradually. Expose them to the sun for an hour or two the first day and gradually increase their ‘sunbathing’ time each day for about a week and then transplant them to their new home.
Happy Gardening!
For more information:
Florida Vegetable Gardening Guide
Organic Vegetable Gardening in Florida
Seeding the Garden
Starting the Garden with Transplants
by Sheila Dunning | Dec 14, 2017
 Photo by Sydney Park Brown UF/IFAS
Holly has been considered sacred in some cultures because it remained green and strong with brightly colored red berries no matter how harsh the winter, even when most other plants would wilt and die. According to Druid lore, hanging the plant in homes would bring good luck and protection.
Later, Christians adopted the holly tradition from Druid practices and developed symbolism to reflect Christian beliefs. Today, the red berries are said to represent the blood that Jesus shed on the cross when he was crucified. Additionally, the pointed leaves of the holly symbolize the crown of thorns Jesus wore on his head.
Several holly species are native to Florida. Many more are cultivated varieties commonly used as landscape plants. Hollies (Ilex spp.) are generally low maintenance plants that come in a diversity of sizes, forms and textures, ranging from large trees to dwarf shrubs.
The berries provide a valuable winter food source for migratory birds; however, the berries only form on female plants. Hollies are dioecious plants, with male and female flowers on separate plants. Both male and female hollies produce small white blooms in the spring. Bees are the primary pollinators, carrying pollen from the male hollies 1.5 to 2 miles, so it is not necessary to have a male plant in the same landscape.
Several male hollies are grown for their compact formal shape and interesting new foliage color. Dwarf Yaupon Hollies (Ilex vomitoria ‘Shillings’ and ‘Bordeaux’) form symmetrical spheres without extensive pruning. ‘Bordeaux’ Yaupon has maroon-colored new growth. Neither cultivar has berries.
Hollies prefer to grow in partial shade but will do well in full sun if provided adequate irrigation. Most species prefer well-drained, slightly acidic soils. However, Dahoon holly (Ilex cassine) and Gallberry (Ilex glabra) naturally occur in wetland areas and can be planted on wetter sites.
For a more comprehensive list of holly varieties and their individual growth habits refer to ENH42 Hollies at a Glance: http://edis.ifas.ufl.edu/mg021
by Beth Bolles | Dec 1, 2017
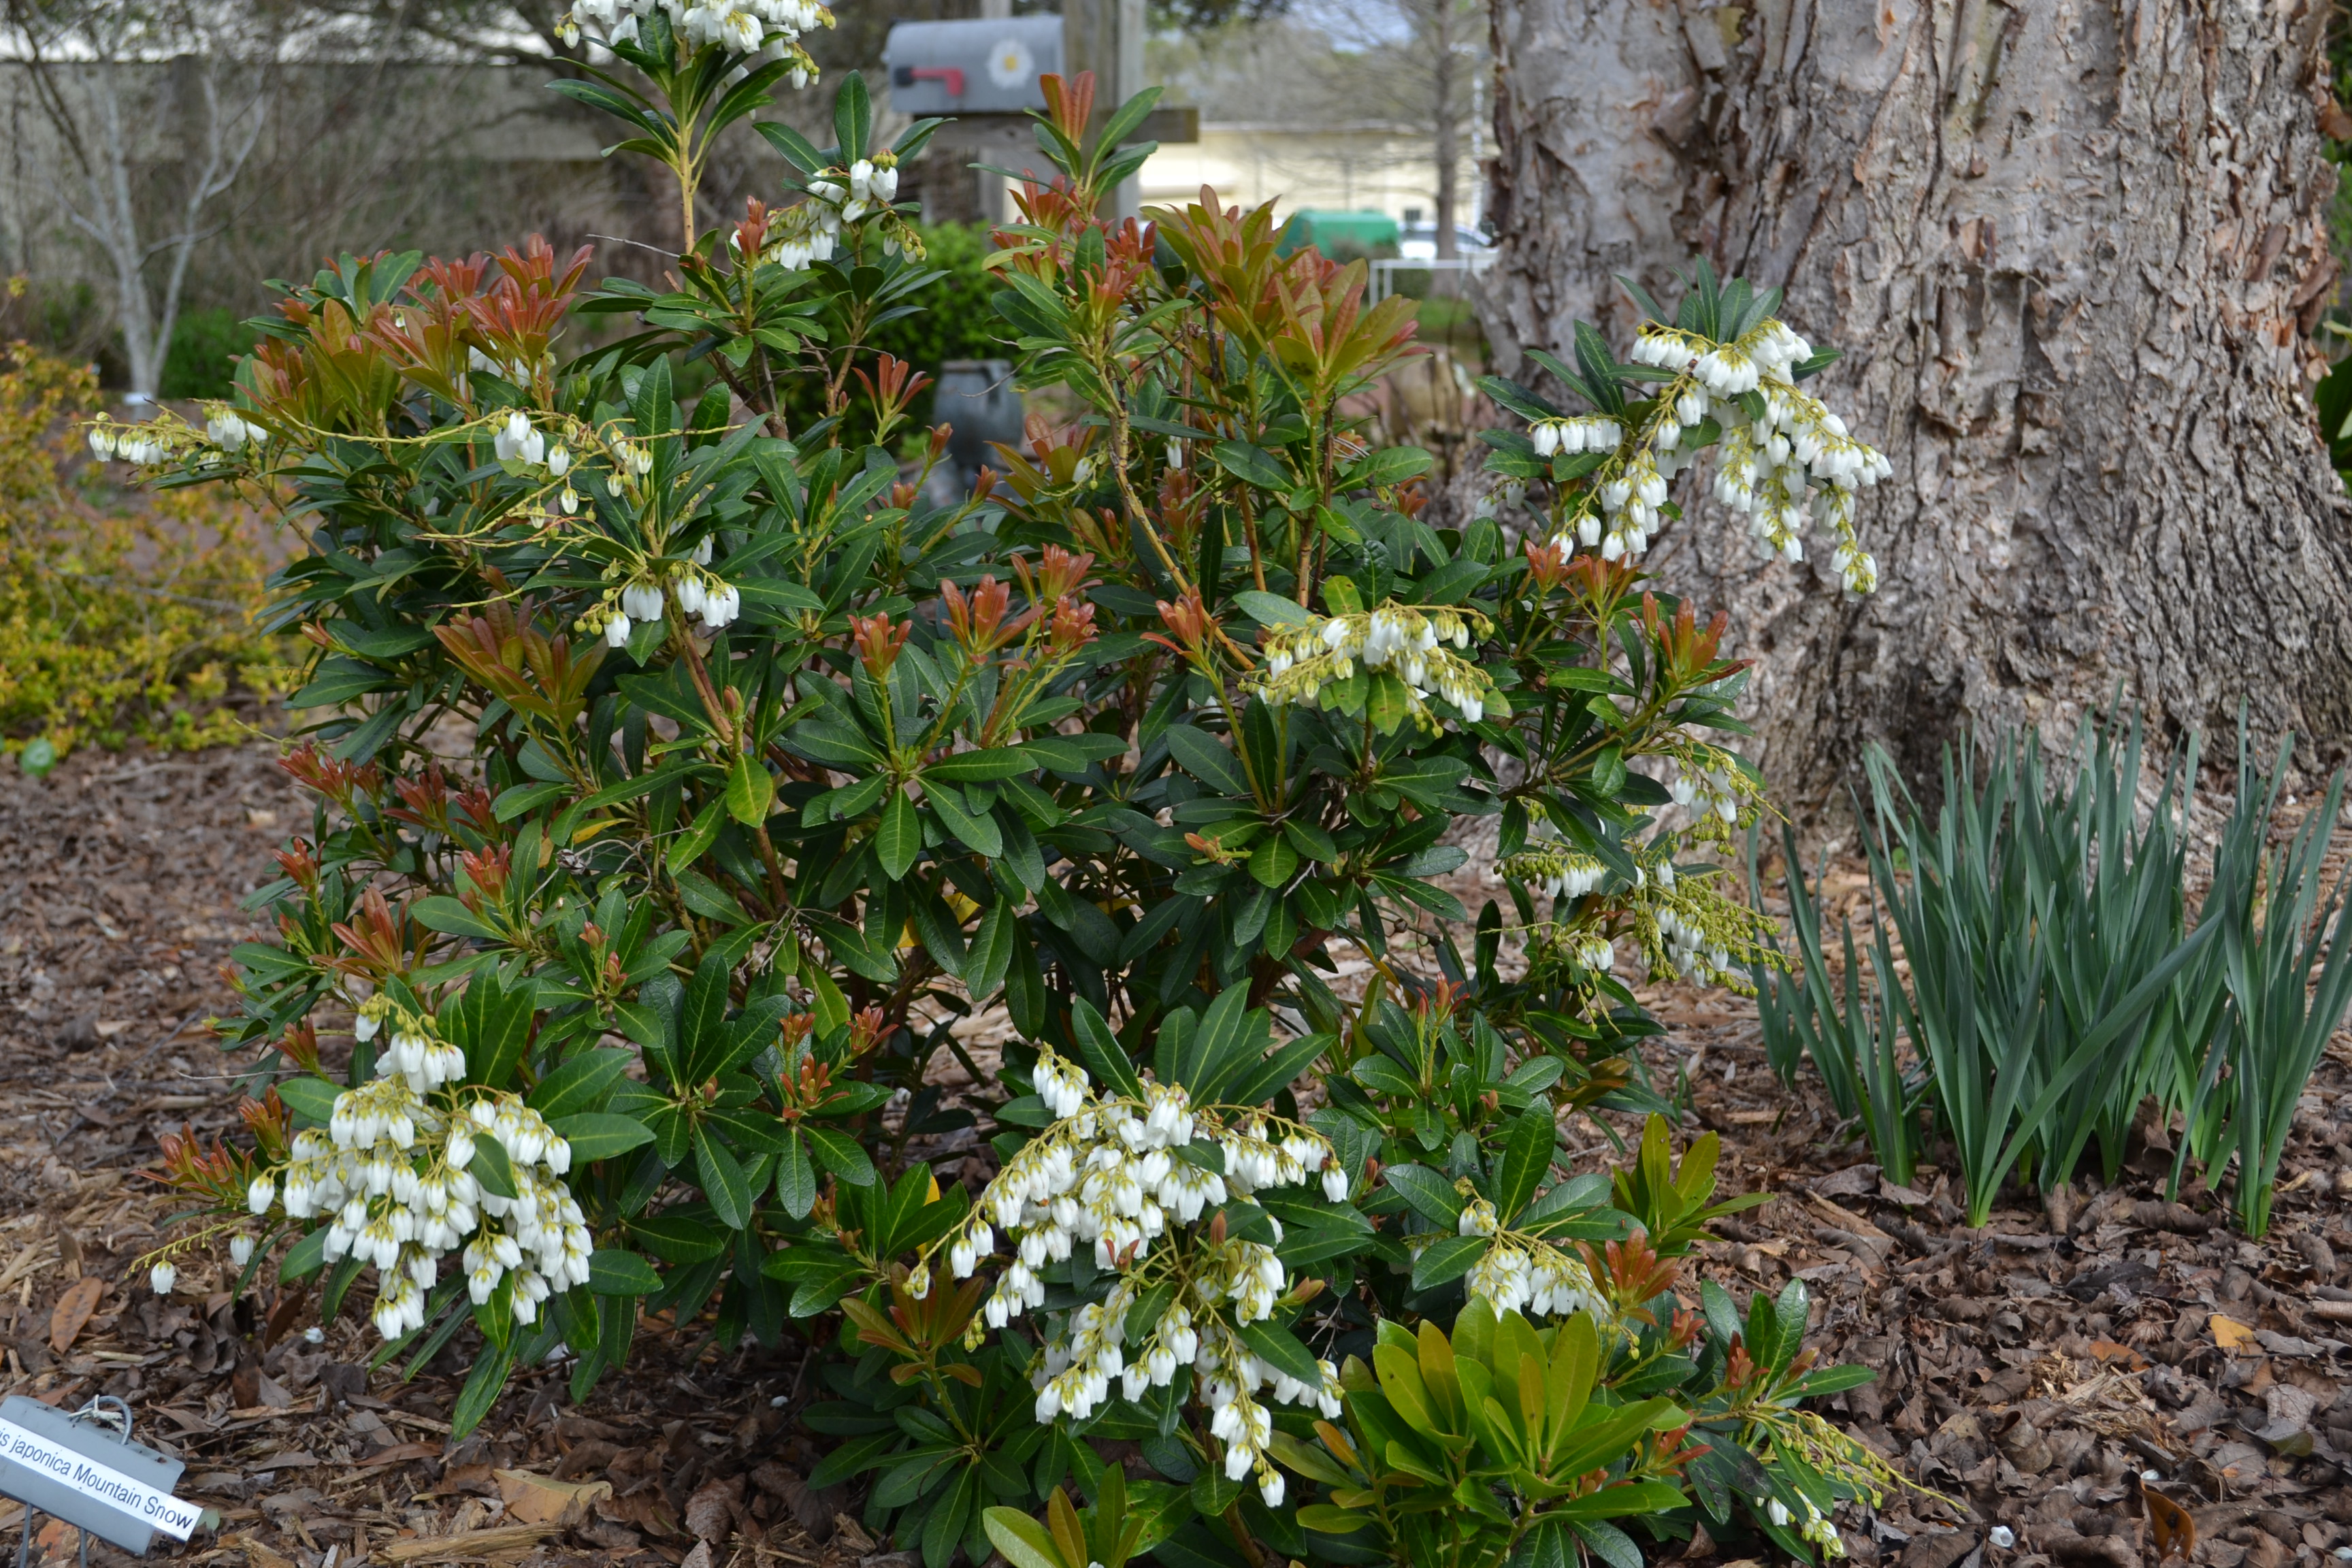
There are plants that gardeners may know and love from other regions that just do not perform well in the heat, humidity, and soils of our area. One example is the Japanese pieris, an attractive evergreen shrub with showy white blooms in spring. This shrub has a few specific environmental requirements that make it unsuitable for most gardens along the Panhandle, including the need for rich organic soil that holds some moisture but is well drained.
Late winter/early spring flowers on the Mountain Snow. New foliage also emerges reddish. Photo by Beth Bolles, UF IFAS Extension Escambia County.
For those of you who thought that a garden with Japanese pieris is only a dream, the nursery industry has now made your dream a reality. Part of the Southern Living plant collection is a more heat tolerant Japanese pieris called Mountain Snow™ that is showing promise. Site selection is still very important. Mountain Snow™ will grow best with summer shade and in beds that are amended with organic material. Water must be applied when rainfall is lacking and soil must be well drained.
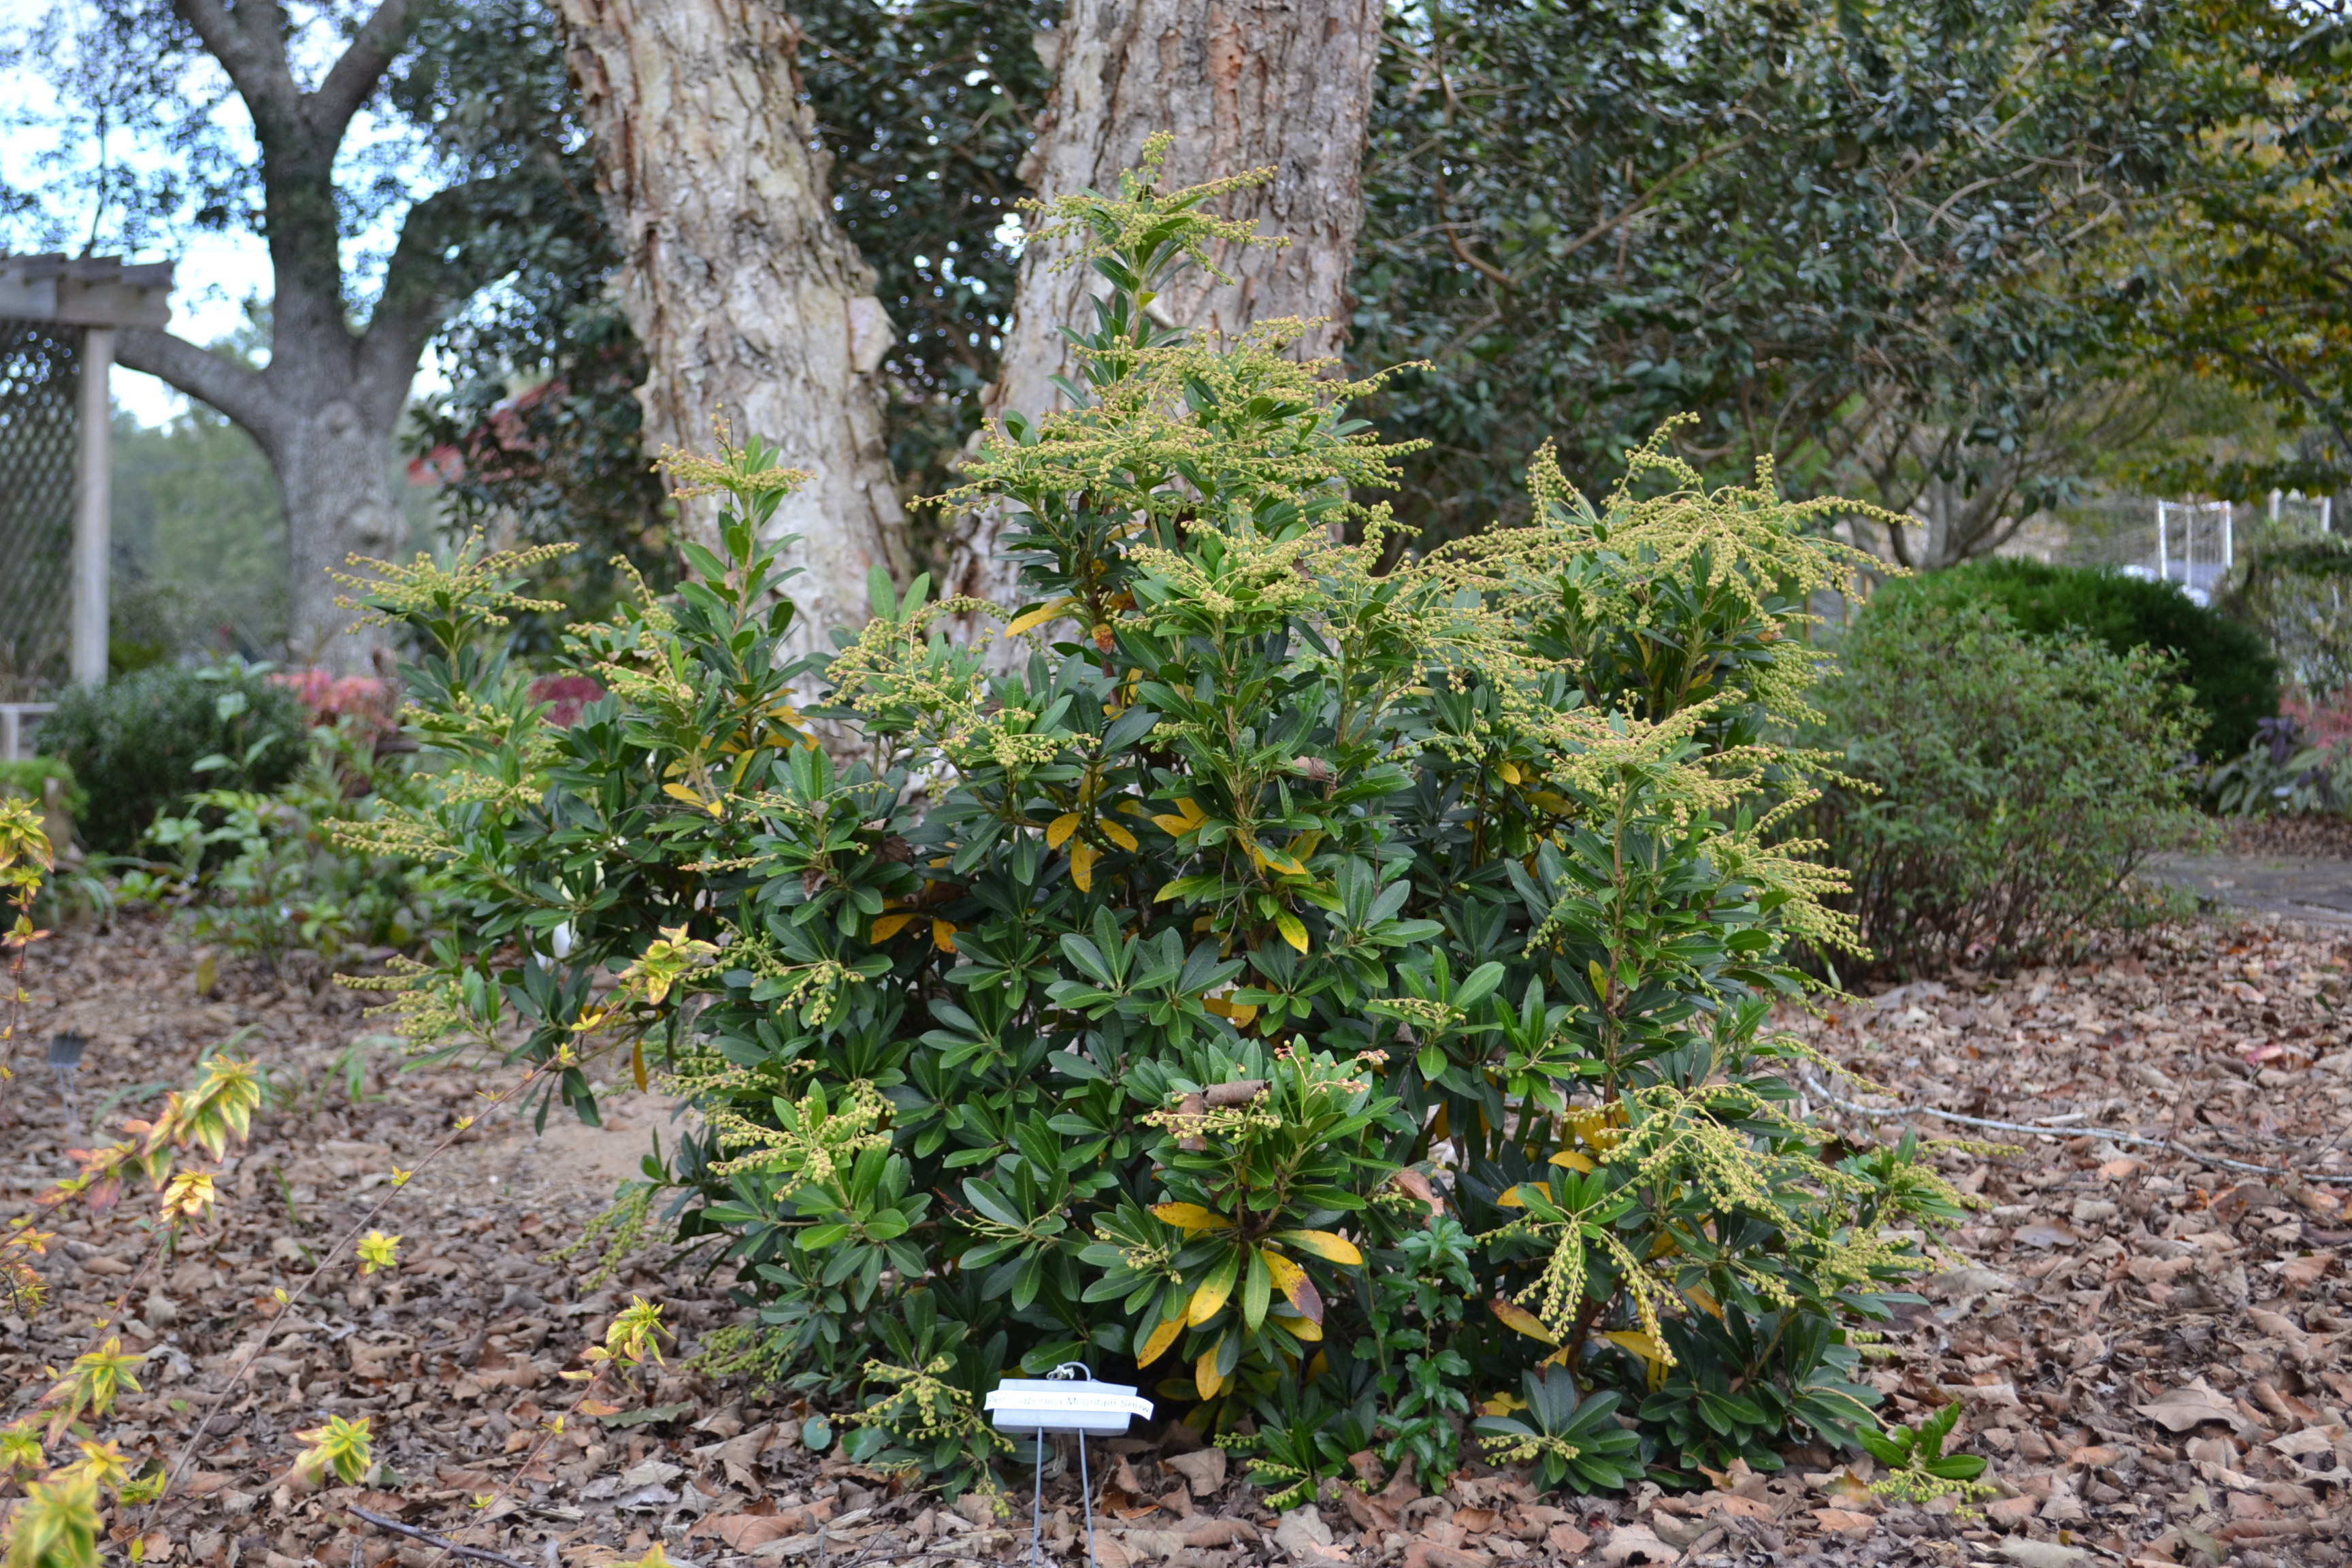
Shrubs will grow about 4 feet by 3 feet. Flower buds cover this established plant. Photo by Beth Bolles, UF IFAS Extension Escambia County.
Although those requirements can not be met in all landscapes, there are gardens like the Escambia County Demonstration Garden where a Mountain Snow™ plant will grow well. Our shrub is planted in an irrigated ornamental bed with organic mulch on top and receives summer shade from a deciduous tree. At two years old, it appears to be doing well in our area. If you have a garden spot with the conditions appropriate, consider trying this shrub for early season interest.

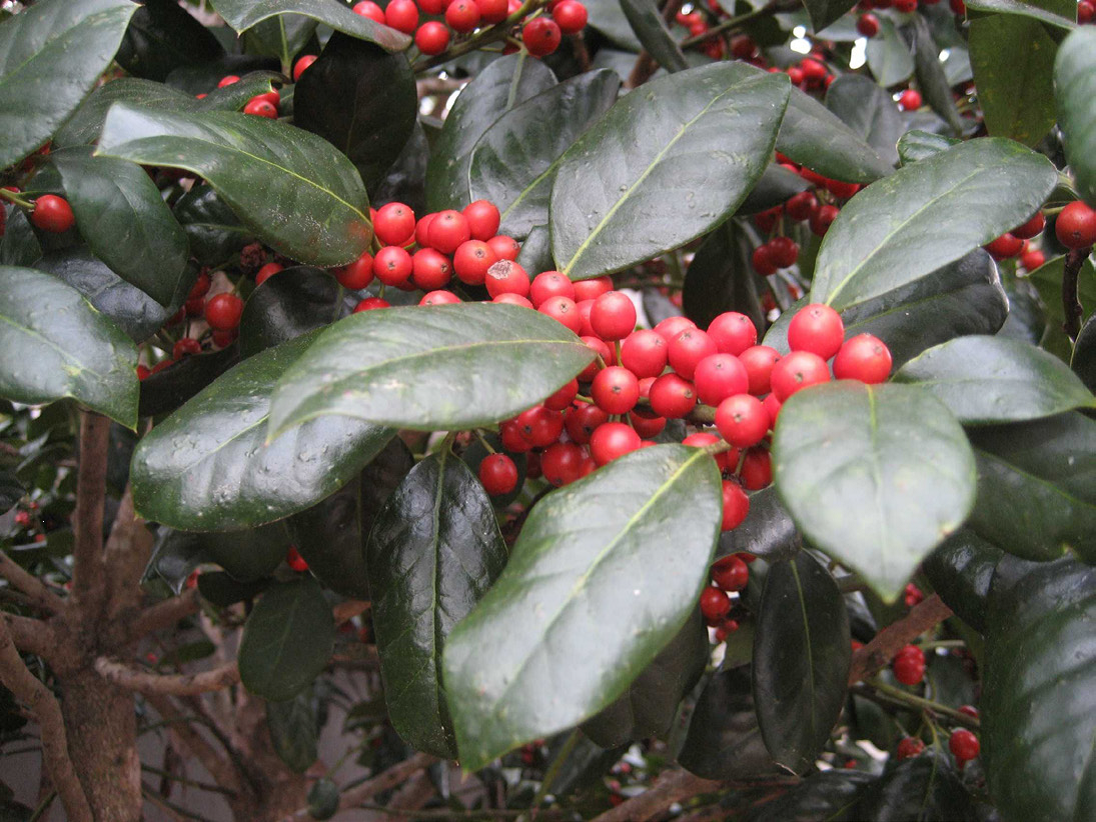 Photo by Sydney Park Brown UF/IFAS