With cold temperatures having arrived in the Panhandle last week, we’re finally getting close to prime landscape planting season. But why is winter the best time to install landscape trees and shrubs? Shouldn’t we plant when things are leafed out and growing? While it’s counterintuitive to think bitter cold, dreary days are significantly better to plant landscape plants in than the warm, sunny days of summer, it’s usually true! Let’s explore why winter is the time to plant woody trees and shrubs and then look at some of the best woody plants no Panhandle landscape should be without.
Most people from elsewhere think that Florida is always lush, green, and tropical. Those people have clearly never been to the Panhandle – heck it snowed last year! Our region of Florida has more in common, climate wise, with the rest of the south – subtropical with long hot, humid summers and wet, mild winters (though rain has been hard to come by recently), occasionally wracked by intense cold fronts. Because of those cold fronts, tropical plants cannot survive, and woody plants enter a dormant stage where above ground growth ceases. This cold-forced dormant season is the perfect time to plant woody plants because the planting process is stressful (the root system is purposefully damaged to remove circling and J-shaped roots and encourage outward growth) and regular rainfall and cool temps means conditions are right for plants to get a solid root system re-established before growth and transpiration begins in the heat of spring/summer.
Now that you know why we plant woody landscape plants when we do, let’s select a few quintessential, versatile Florida-Friendly trees and shrubs (2 each, one native and one non-native) to install in our landscapes this planting season.
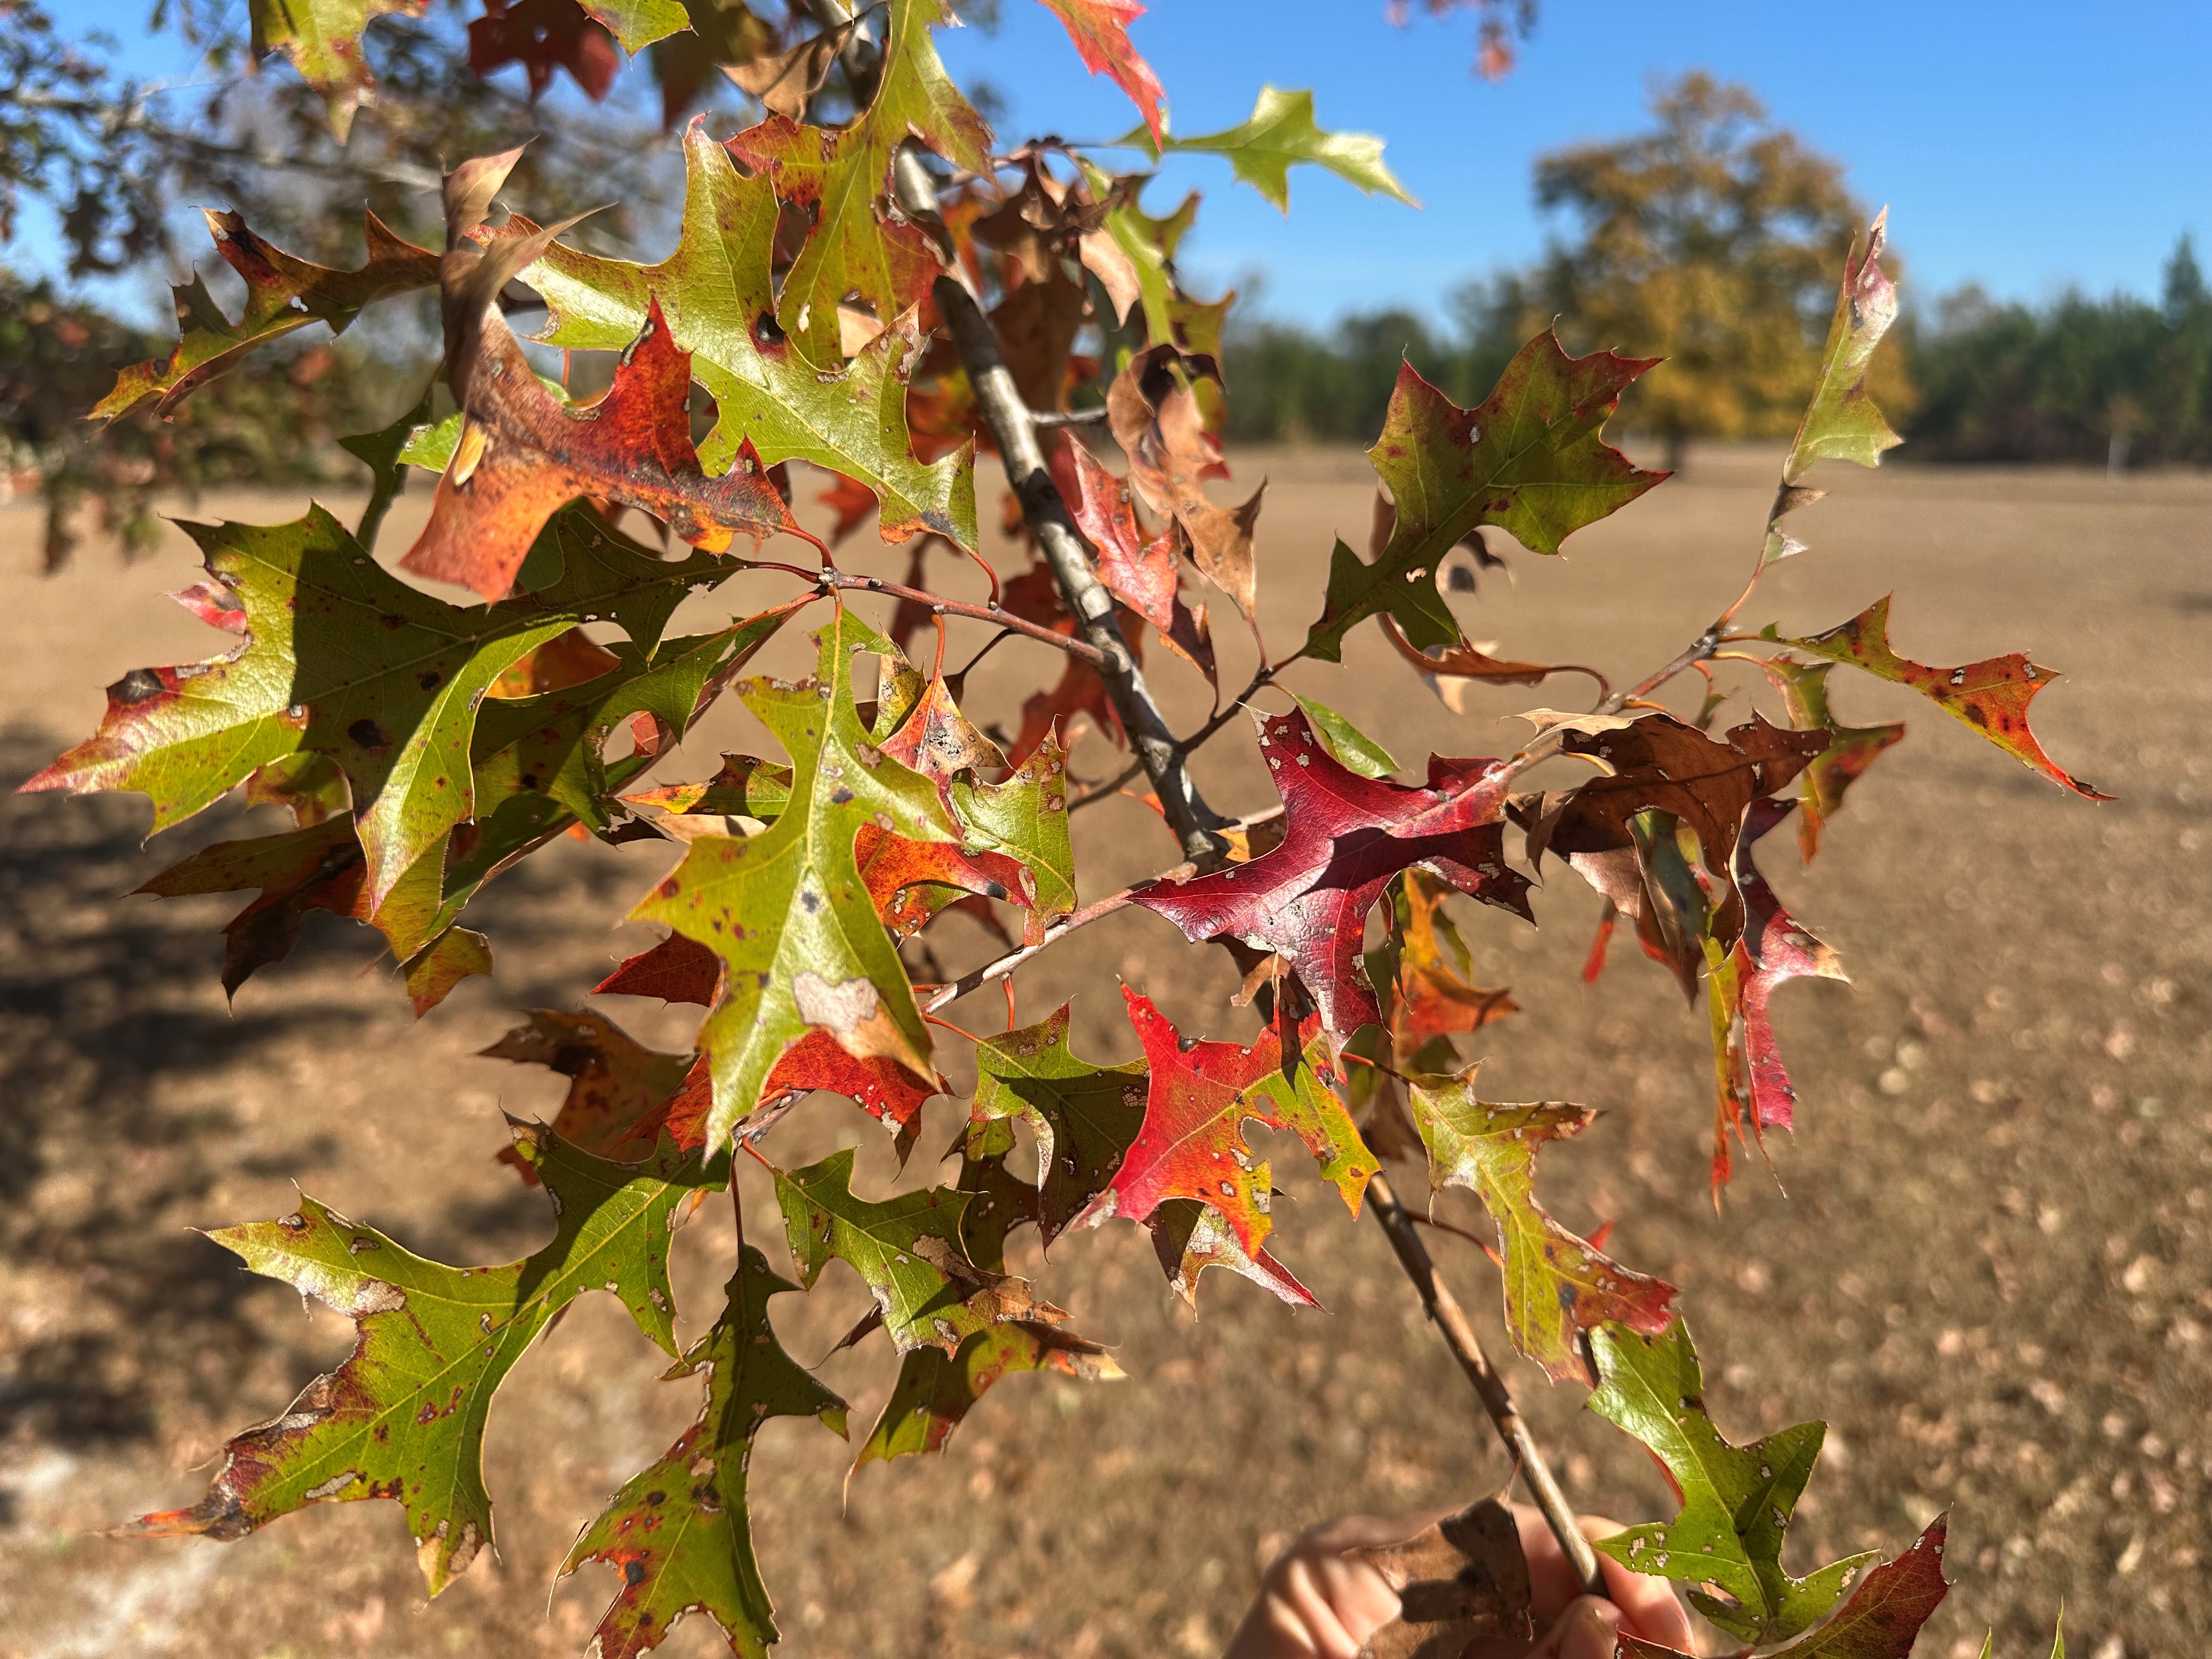
Nuttall Oak (Quercus texana) is one of the most adaptable landscape trees around. The species is tolerant of many soil types, native to moist bottomland areas but tolerating drier spots well once established. While it’s a large tree – up to 70-80’ tall, I find its rounded upright habit to often be more in scale with landscapes than the wide spreading Live Oak (Quercus virginiana). Nuttall Oak certainly has many positive attributes (tough, wind-resistant, pollinator friendly, etc), but its fall color is probably my favorite. For the Panhandle it is quite good, delivering autumnal hues of red and orange.
It’s not North Carolina Sugar Maple color but Nuttall Oak possesses attractive foliage. Photo courtesy of Daniel Leonard.
Crape Myrtle (Lagerstroemia indica) is the most widely grown landscape tree in the South for good reason! They’re tough, widely adapted, offer excellent summertime flower displays, and possess interesting architecture and unique bark. The primary consideration with Crape Myrtle is simply picking the right one. Do you need an upright, compact tree? Choose ‘Sioux’ or ‘Apalachee’. Do you want a big crape that can double as a small shade tree? Choose ‘Natchez’ or ‘Muskogee’. Do you want a new dwarf variety or one with black foliage? There’s now plenty of those to choose from as well. There’s truly a Crape Myrtle for every yard.
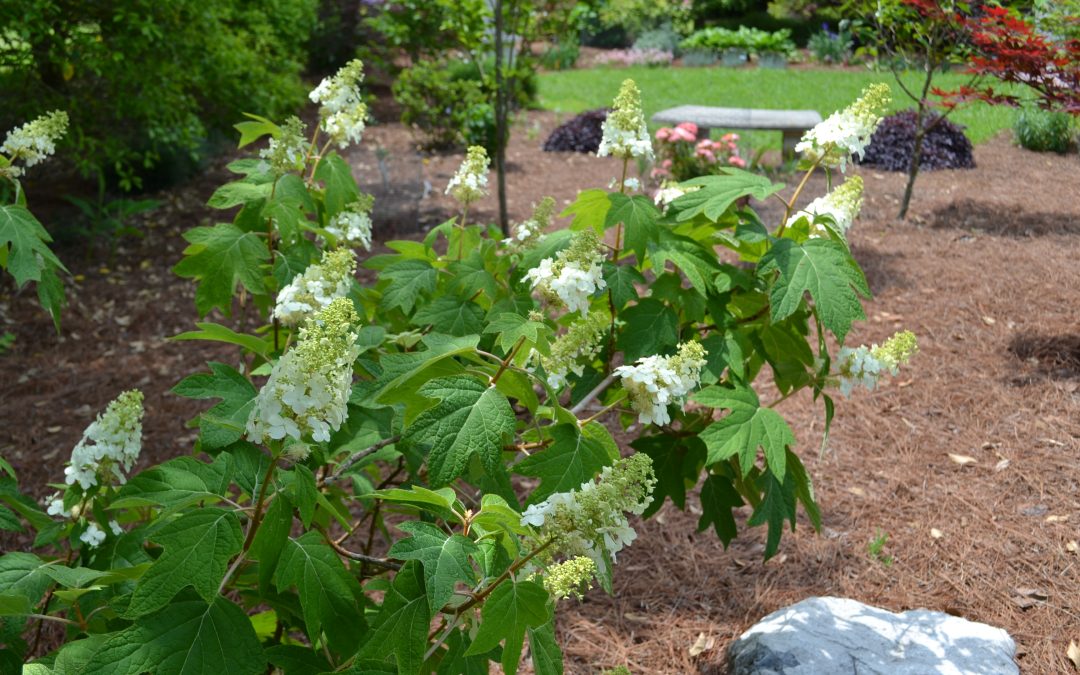
Oakleaf Hydrangea (Hydrangea quercifolia) is a wonderful native flowering deciduous shrub that’s at home in all Panhandle landscapes. It prefers moist soil with a little afternoon shade but can tolerate most conditions thrown at it. Growing 5-7’ in height, sporting footlong white flower panicles each summer, and beautiful foliage each fall, Oakleaf Hydrangea is a must. You can find unnamed seedlings of the species or look for named varieties such as ‘Snow Queen’, ‘Semmes Beauty’, and ‘Alice’. In my experience, you can’t go wrong with any of them.
Camellia Sasanqua is without a doubt my favorite fall flowering shrub. Impossibly durable (it’s common to find specimens over 100 years old), incredibly beautiful in flower and form, and coming in all shapes, sizes, and flower color, a Sasanqua of some kind belongs in ever yard. A few of my favorites are ‘Leslie Ann’ (upright form, white/pink bicolored flowers), ‘Shi Shi Gashira’ (dwarf that makes an excellent informal hedge), and ‘Yuletide’ (compact plant with red flowers & showy gold stamens).
So, as the weather continues to be mild with those cold front swings occasionally and rain begins to be more regular, think about getting some woody trees and shrubs planted into your landscape this winter. Keep in mind the excellent above selections and be sure to check out the Florida-Friendly Landscaping Plant Guide for more possibilities! Happy Gardening!
Shade is a wonderful feature in the landscape as we move into our summer months. It can also offer an opportunity to include a different palette of beautiful plants the bring color and brighteness to some filtered shade or full shade locations.
Here are a few plants to consider for those low light areas of the yard.
The native oakleaf hydrangea, Hydrangea quercifolia will do well in dappled shade spots. The leaves are attractive on their own but the addition of large flowers make it very showy. This native hydrangea will like a little moisture but soils should be well drained. A little morning sun is fine but afternoon shade is very helpful as the summer months progress.
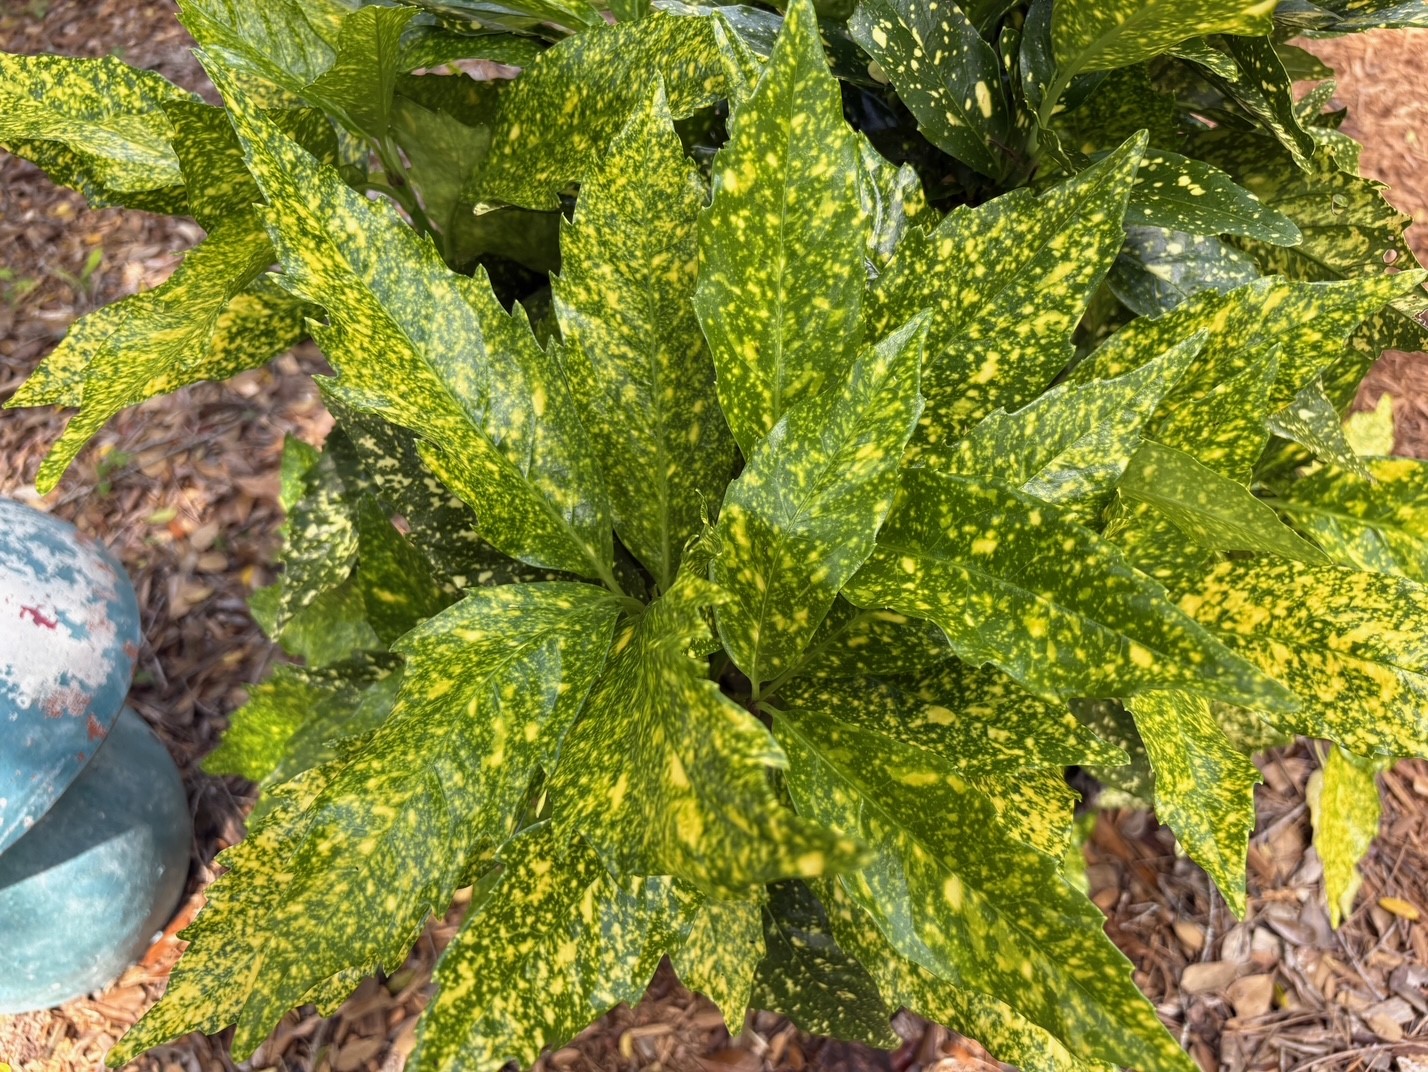
The old standard Japanese aucuba, Acuba japonica, is a favorite with it’s green leaves speckled with yellow. New growth is damaged by sun so this evergreen shrub is best with a good amount of shade. Be sure to place in a spot with good air circulation to make the environment less conducive to some plant pests.
Each Aucuba leaf has a unique pattern. Photo by Beth Bolles, UF IFAS Extension Escambia County.
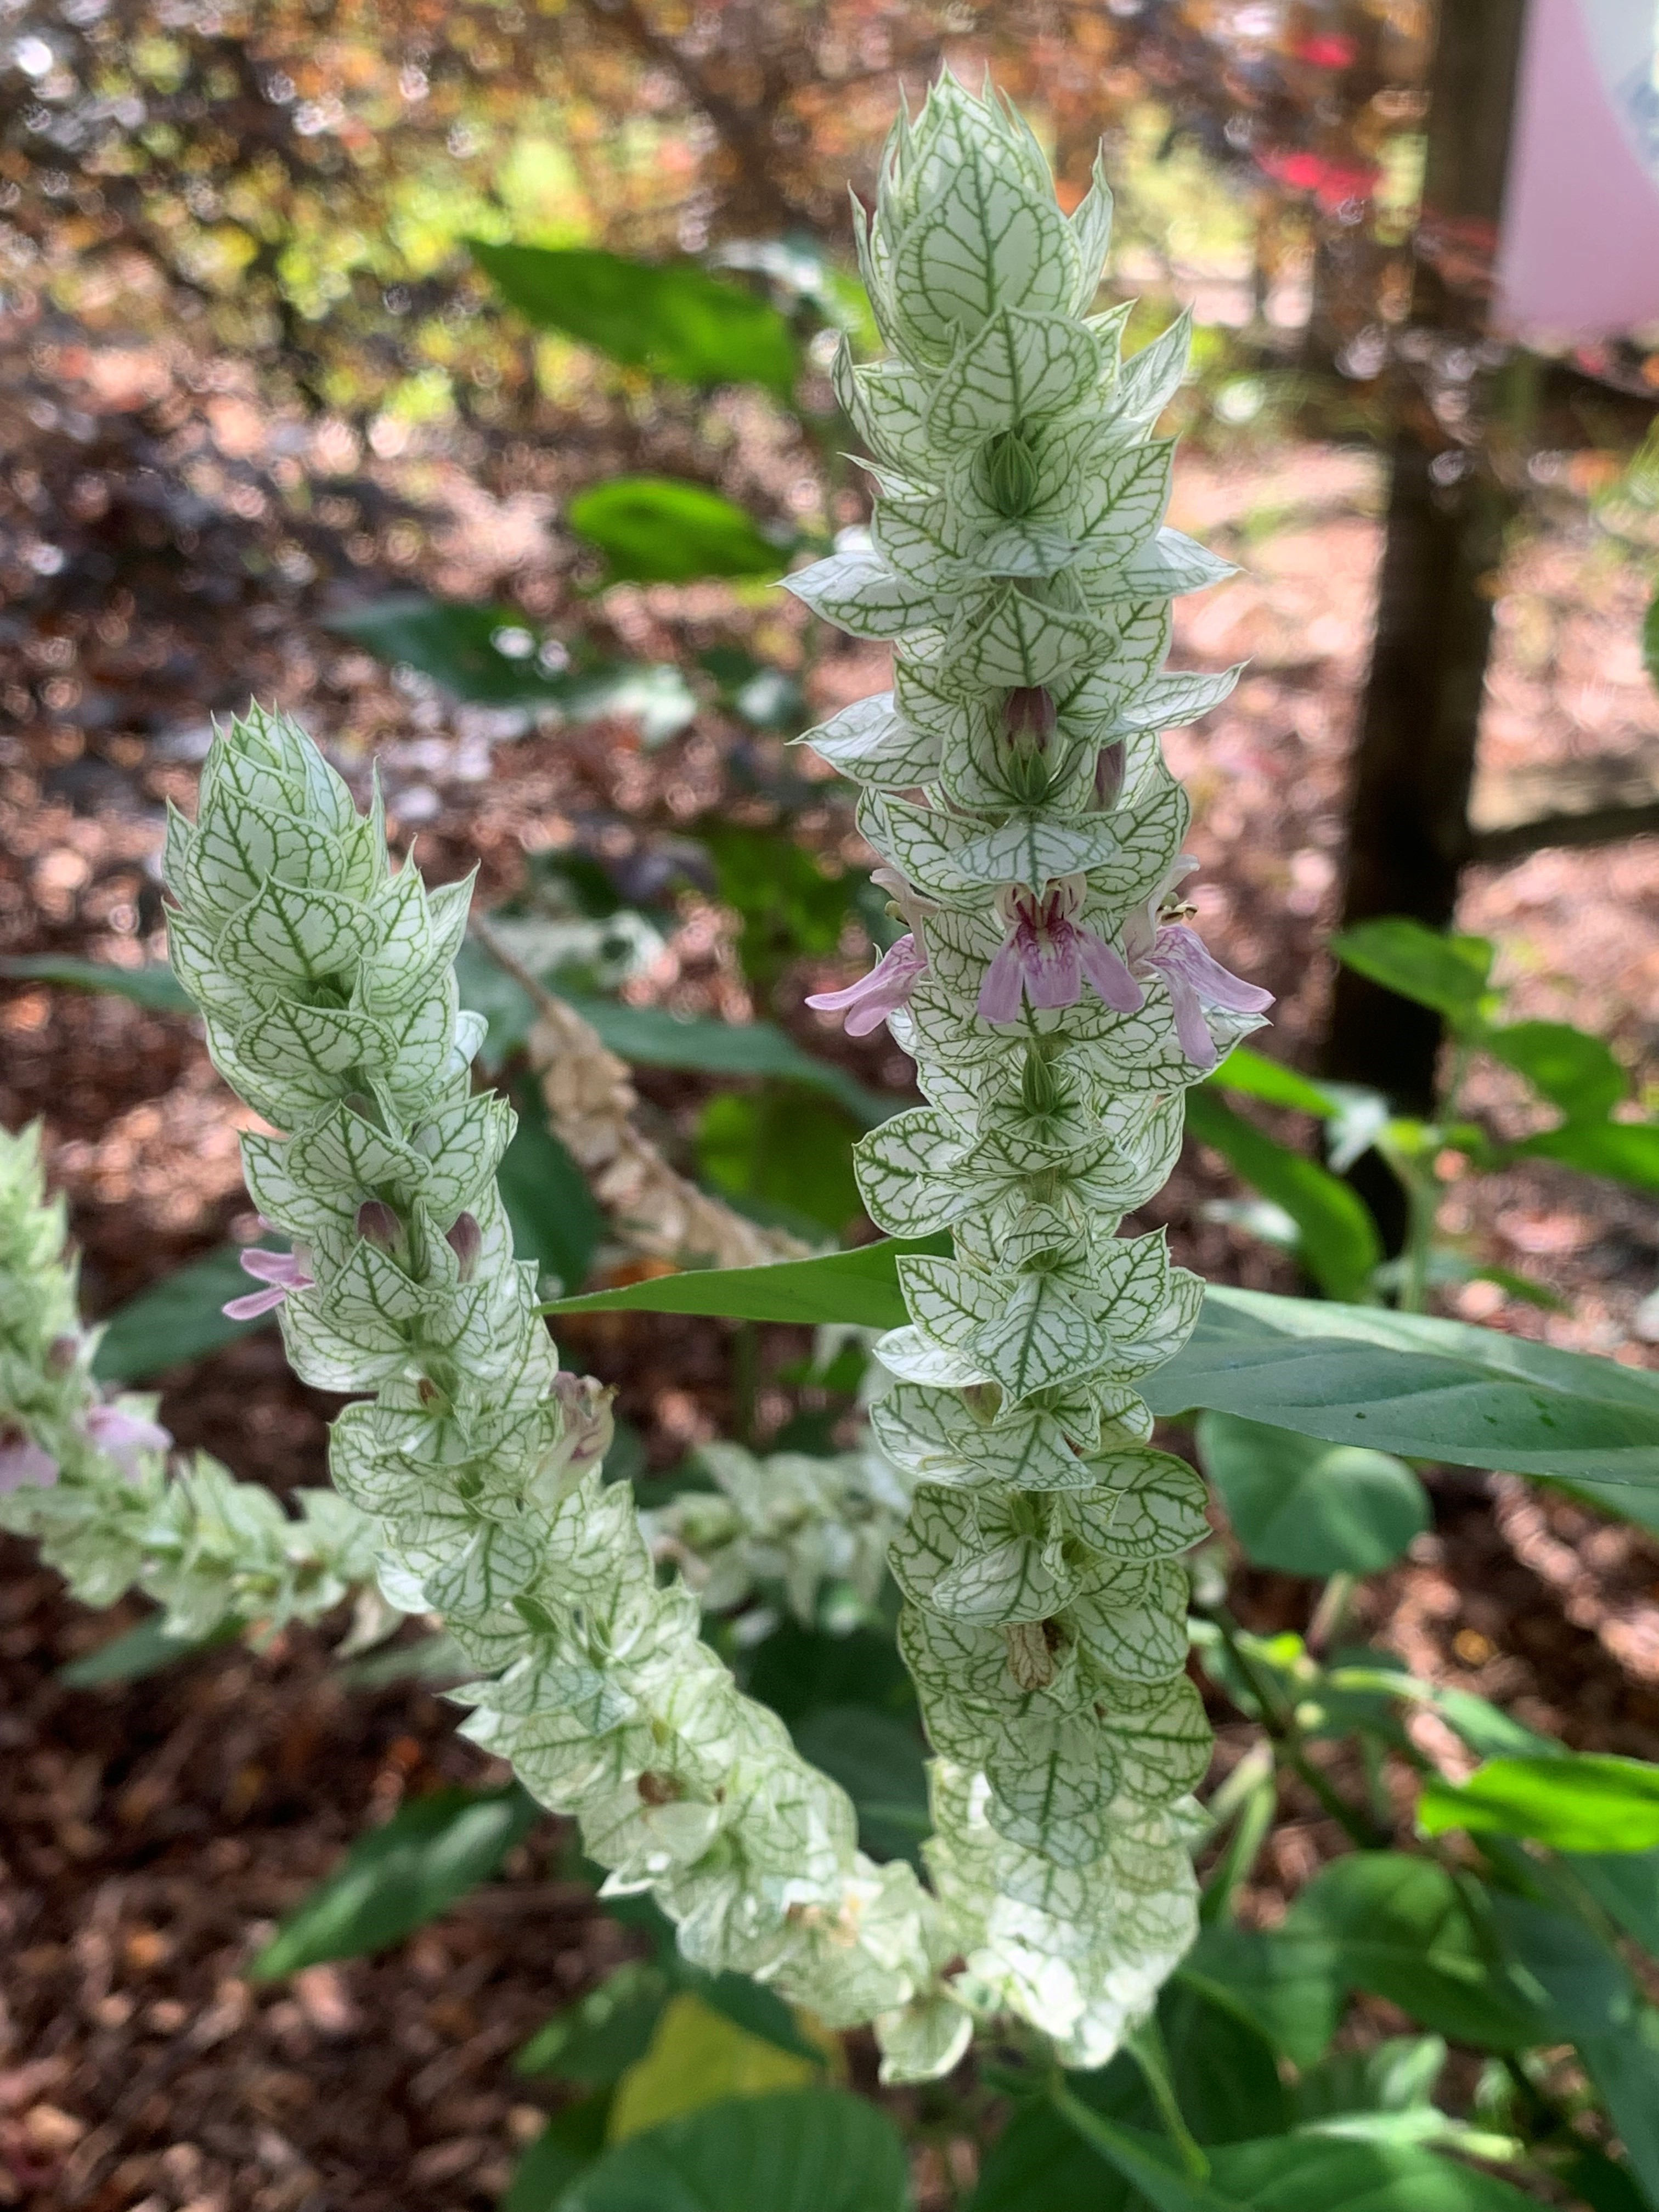
One of the shrimp plants that really needs shade is the White shrimp plant, Justicia betonica. Although this can be damaged in freezing weather, it is worth replanting every spring in a small grouping. Plants are easily started from cuttings and sometimes they will return from roots in the protected shade areas.
White bracts with pink flowers of White shrimp plant. Photo by Beth Bolles, UF IFAS Extension Escambia County.
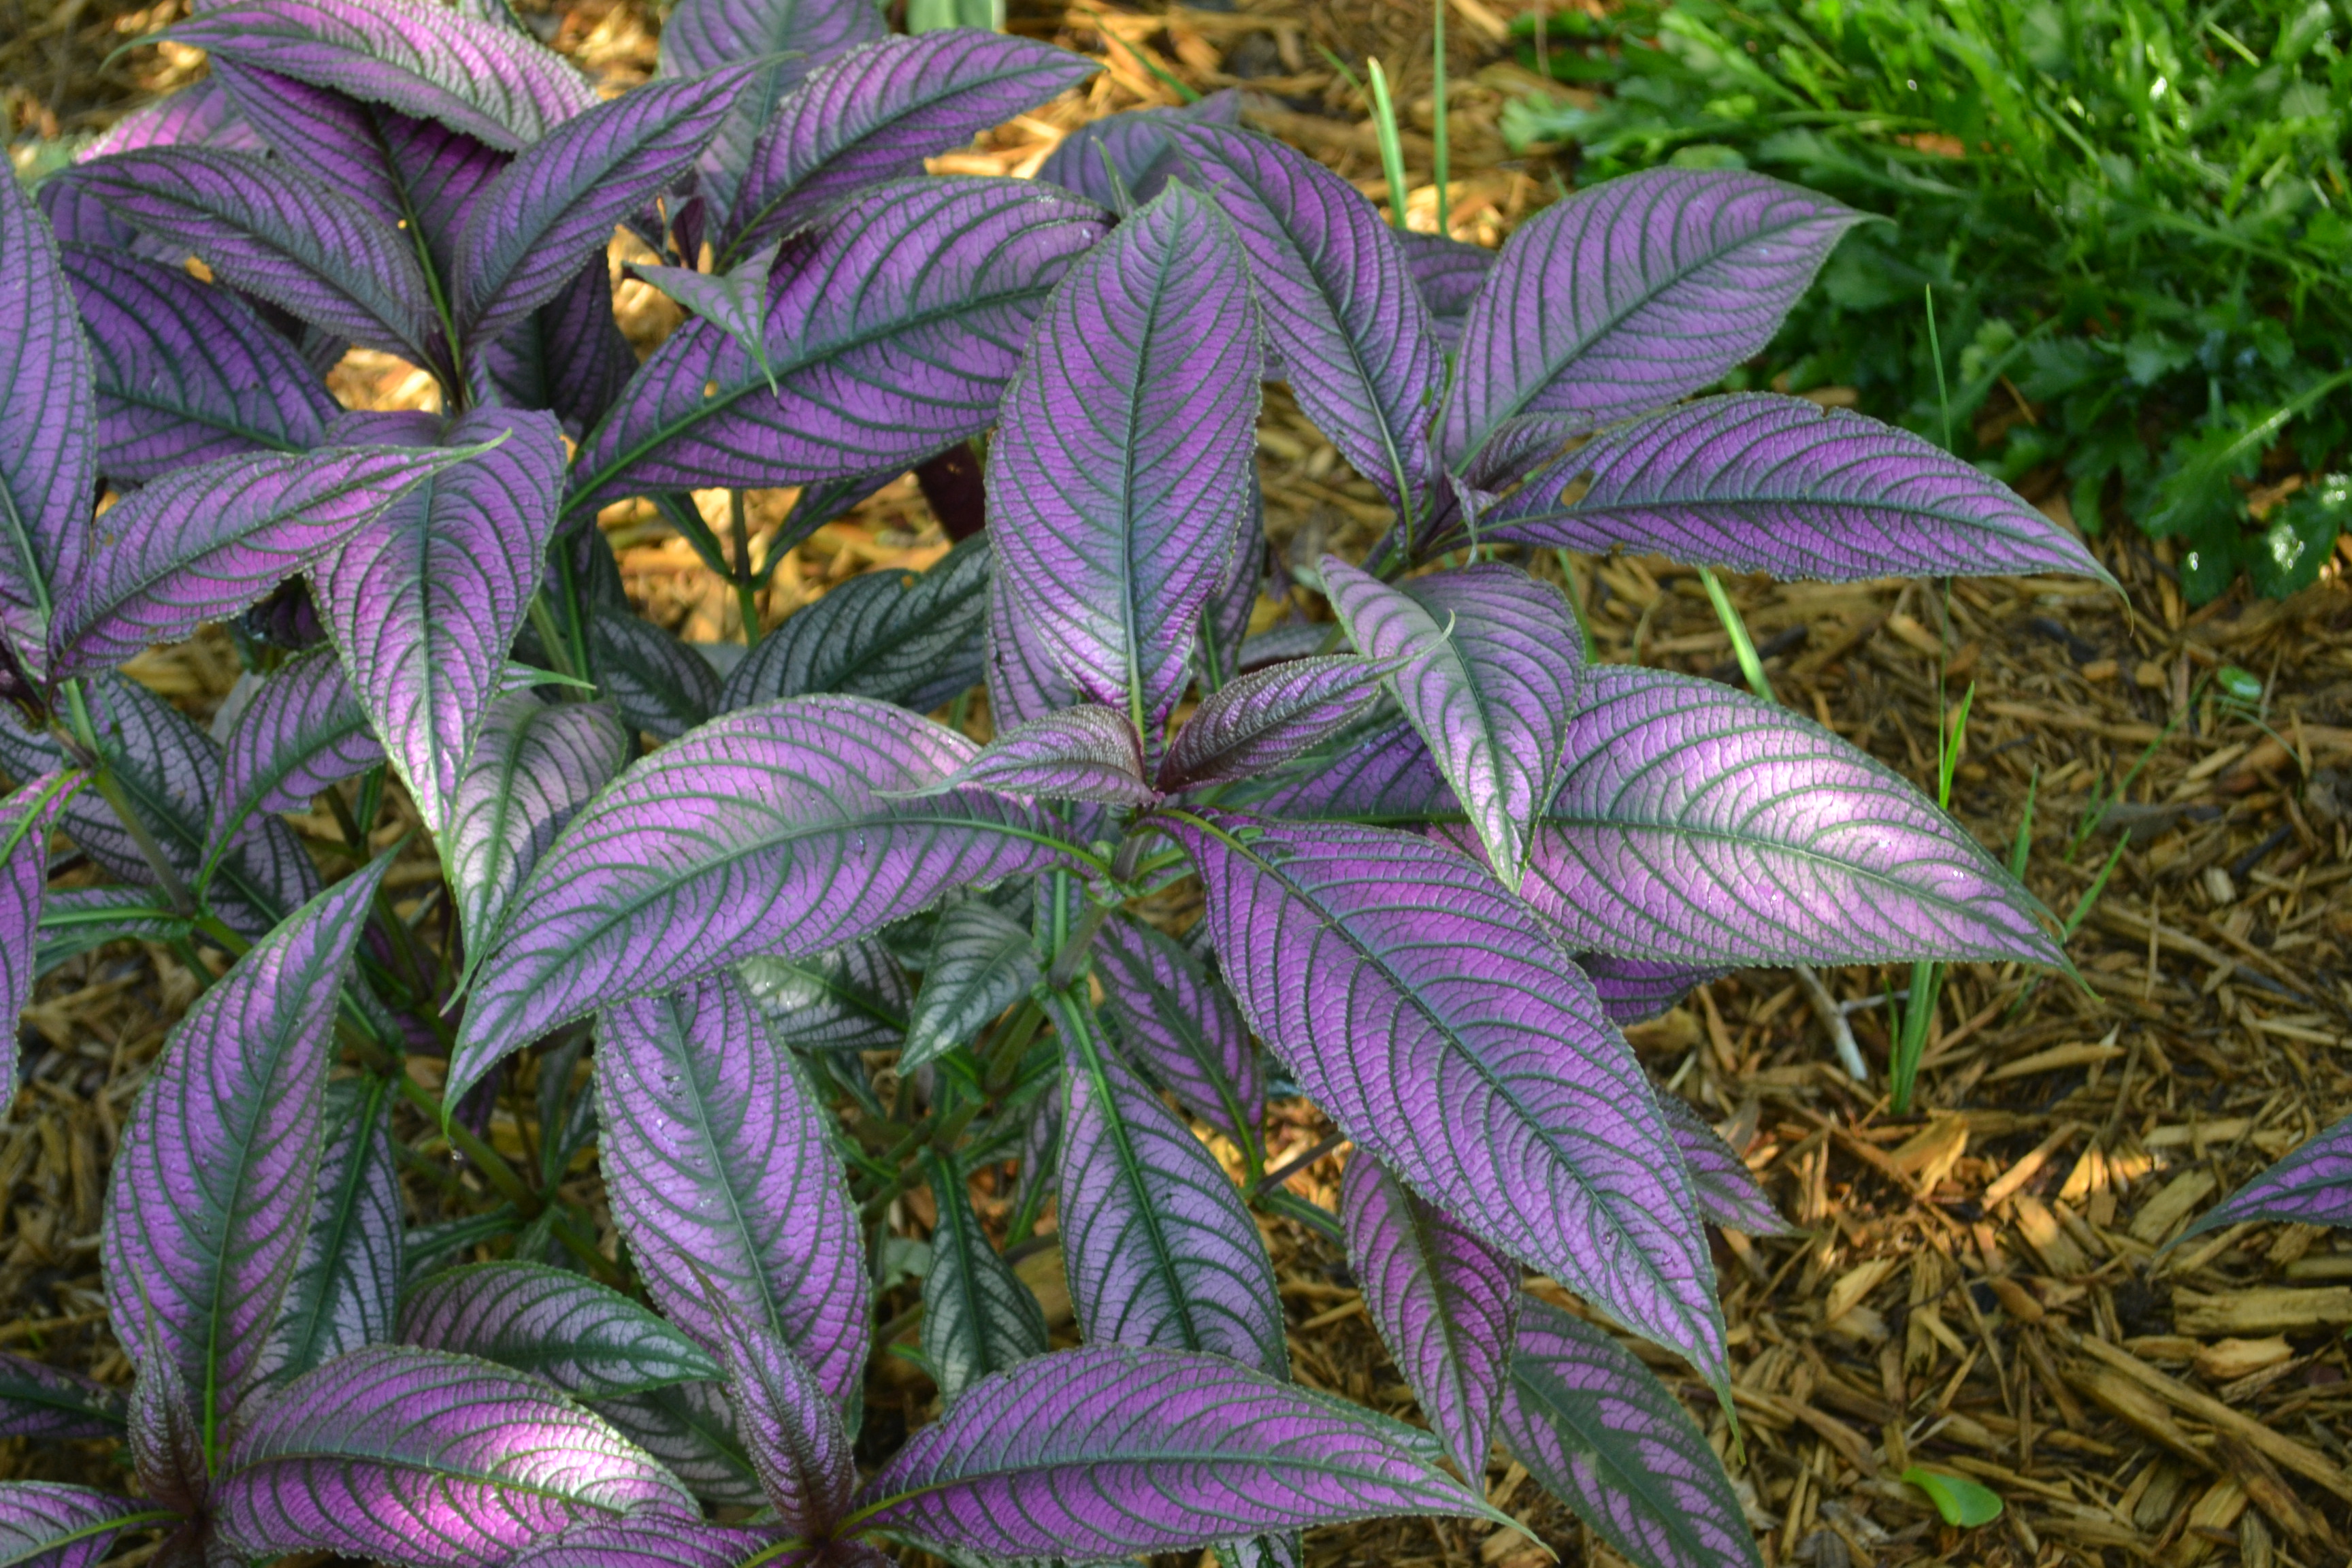
An annual that is very showy for shade is related to the shrimp plant. Persian shield, Strobilanthes dyerianus is grown for it’s iridescent purple and silver foliage. It thrives in our heat with a little water when rainfall is lacking. It grows well either planted in the ground or in a container to provide bright color amongst the green foliage plants of your shady spot.
A bit of dappled morning sunlight on the Persian shield leaves. Photo by Beth Bolles, UF IFAS Extension Escambia County.
Most people know the Cast iron plant, Aspidistra elatior, which is a full shade plant. Plants that receive too much sunlight with have scalding spots. Although green foliage is attractive in summer, consider one of the cultivars with various types of variegation. You may choose a selection with white or yellow stripes through leaves or a plant with lots of white spots throughout green leaves.
Vegetative plant propagation is a way for one plant to create another plant without the need for pollination to occur. This process is often much faster in achieving a new plant than growing from seed. The genetics of the parent plant can be carried on through this vegetative propagation method. There are many methods to propagate plants and the one covered in this article was taught to me by my grandmother many years ago – layering. Layering is a science and an art and has been performed by humans for over four thousand years.
Propagating plants by layering can be accomplished in several ways, including simple, tip, air, mound, compound, and runner production layering methods. Many plants in nature propagate by layering accidentally when long, low-lying limbs contact the soil around the plant and are eventually covered by leaves from other surrounding trees and shrubs. This creates an organic cover over a part of the limb and keeps the area moist. This creates the situation for adventitious roots to develop at the soil contact area. This occurrence is called simple layering and is often mimicked by gardeners in the landscape. Not all plants respond to this type of propagation, but several common species that do are azaleas, jasmine, viburnum, climbing rose, and grapevines.
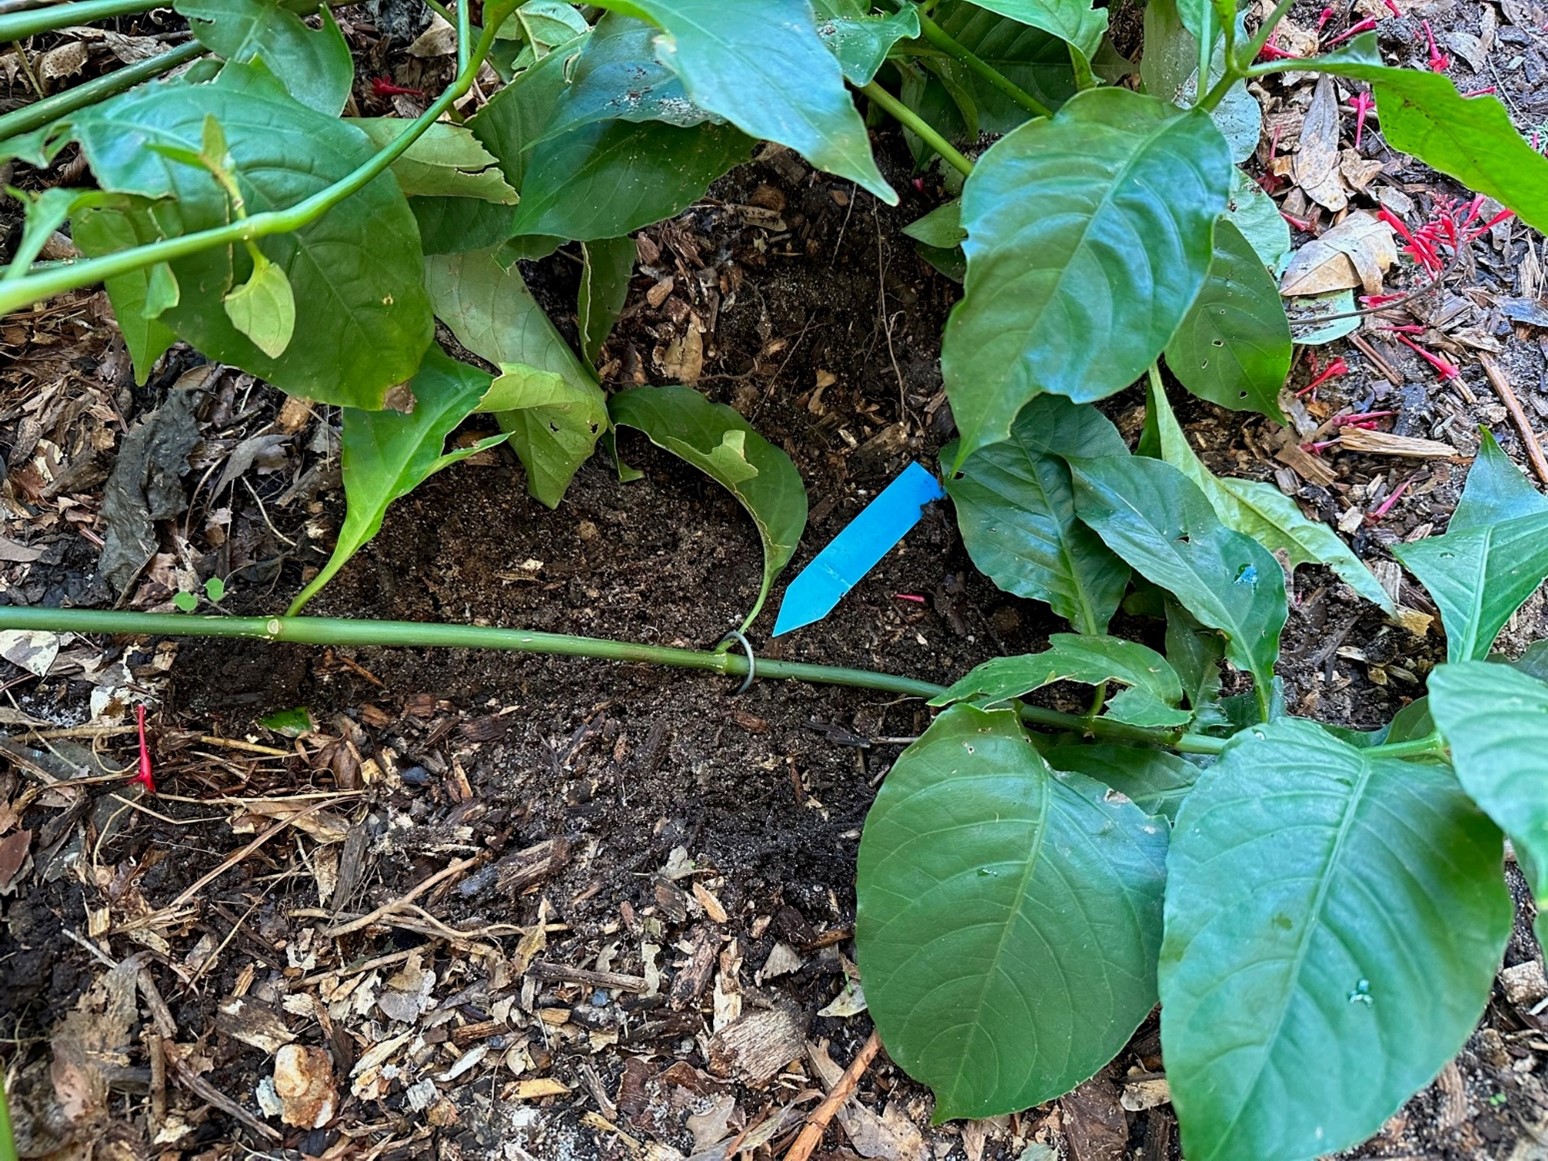
Unlike simple layering, tip layering involves digging out a shallow 3–4″ hole, which will allow space to bend the end of the branch down into the hole with the tip out the other side. Then, simply cover the hole to keep the branch in the ground. It may take something with a little weight placed over the covered hole to keep the branch from popping out. A brick or rock may be all that is needed. Both methods will take months for enough roots to develop before clipping the branch with a new plant ready to be dug and set somewhere new. For best results with both simple and tip layering, begin either in early spring with last seasons growth or late summer, utilizing that current year’s growth.
Simple layering. Photo Credit: Stephen Greer, University of Florida/IFAS – Santa Rosa County
Air layering is a fun adventure to rooting a new plant and can be used with both outdoor and indoor plants. It can be used on outdoor plants like camellia, azalea, maples, and magnolia, or indoor plants including weeping fig, rubber tree, and dieffenbachia. This type of layering requires a bit more planning and preparation than simple or tip layering. If the plant has a bark layer surrounding the cambium layer (this is the growing part of the limb and trunk and appears green) this area will need to be removed with a sharp clean knife. Choose a 1- ½ inch long area of the limb and scrape this area to remove the cambium layer located just beneath the bark. This is done to prevent the outside limb area from reconnecting back to the limb portion connected to the plant. Sphagnum moss will be needed to wrap around the wound site to create a rooting zone. Be sure to soak the moss with water by immersing it in a bucket of water, then squeeze it out. Wrap the moss with plastic wrap, making sure the moss is fully covered and tucked inside of the plastic. Both ends of the plastic wrap need to be secured tightly with twist ties or string. Make sure it remains tight throughout the 2 – 4 months needed for rooting to occur. If this process takes place in a sunny location, cover the plastic wrap with tin foil to block out the light.
Air layering a camelia. Photo Credit: Stephen Greer, University of Florida/IFAS – Santa Rosa County
There are other methods to layering plants and if you are interested, search online through the University of Florida IFAS EDIS site or contact your local UF IFAS Extension office in your local county. Enjoy growing your new plants.
We grow many types of hydrangeas in North Florida. In order to prune your hydrangeas at the correct time of year, you need to identify which types you have in your garden.
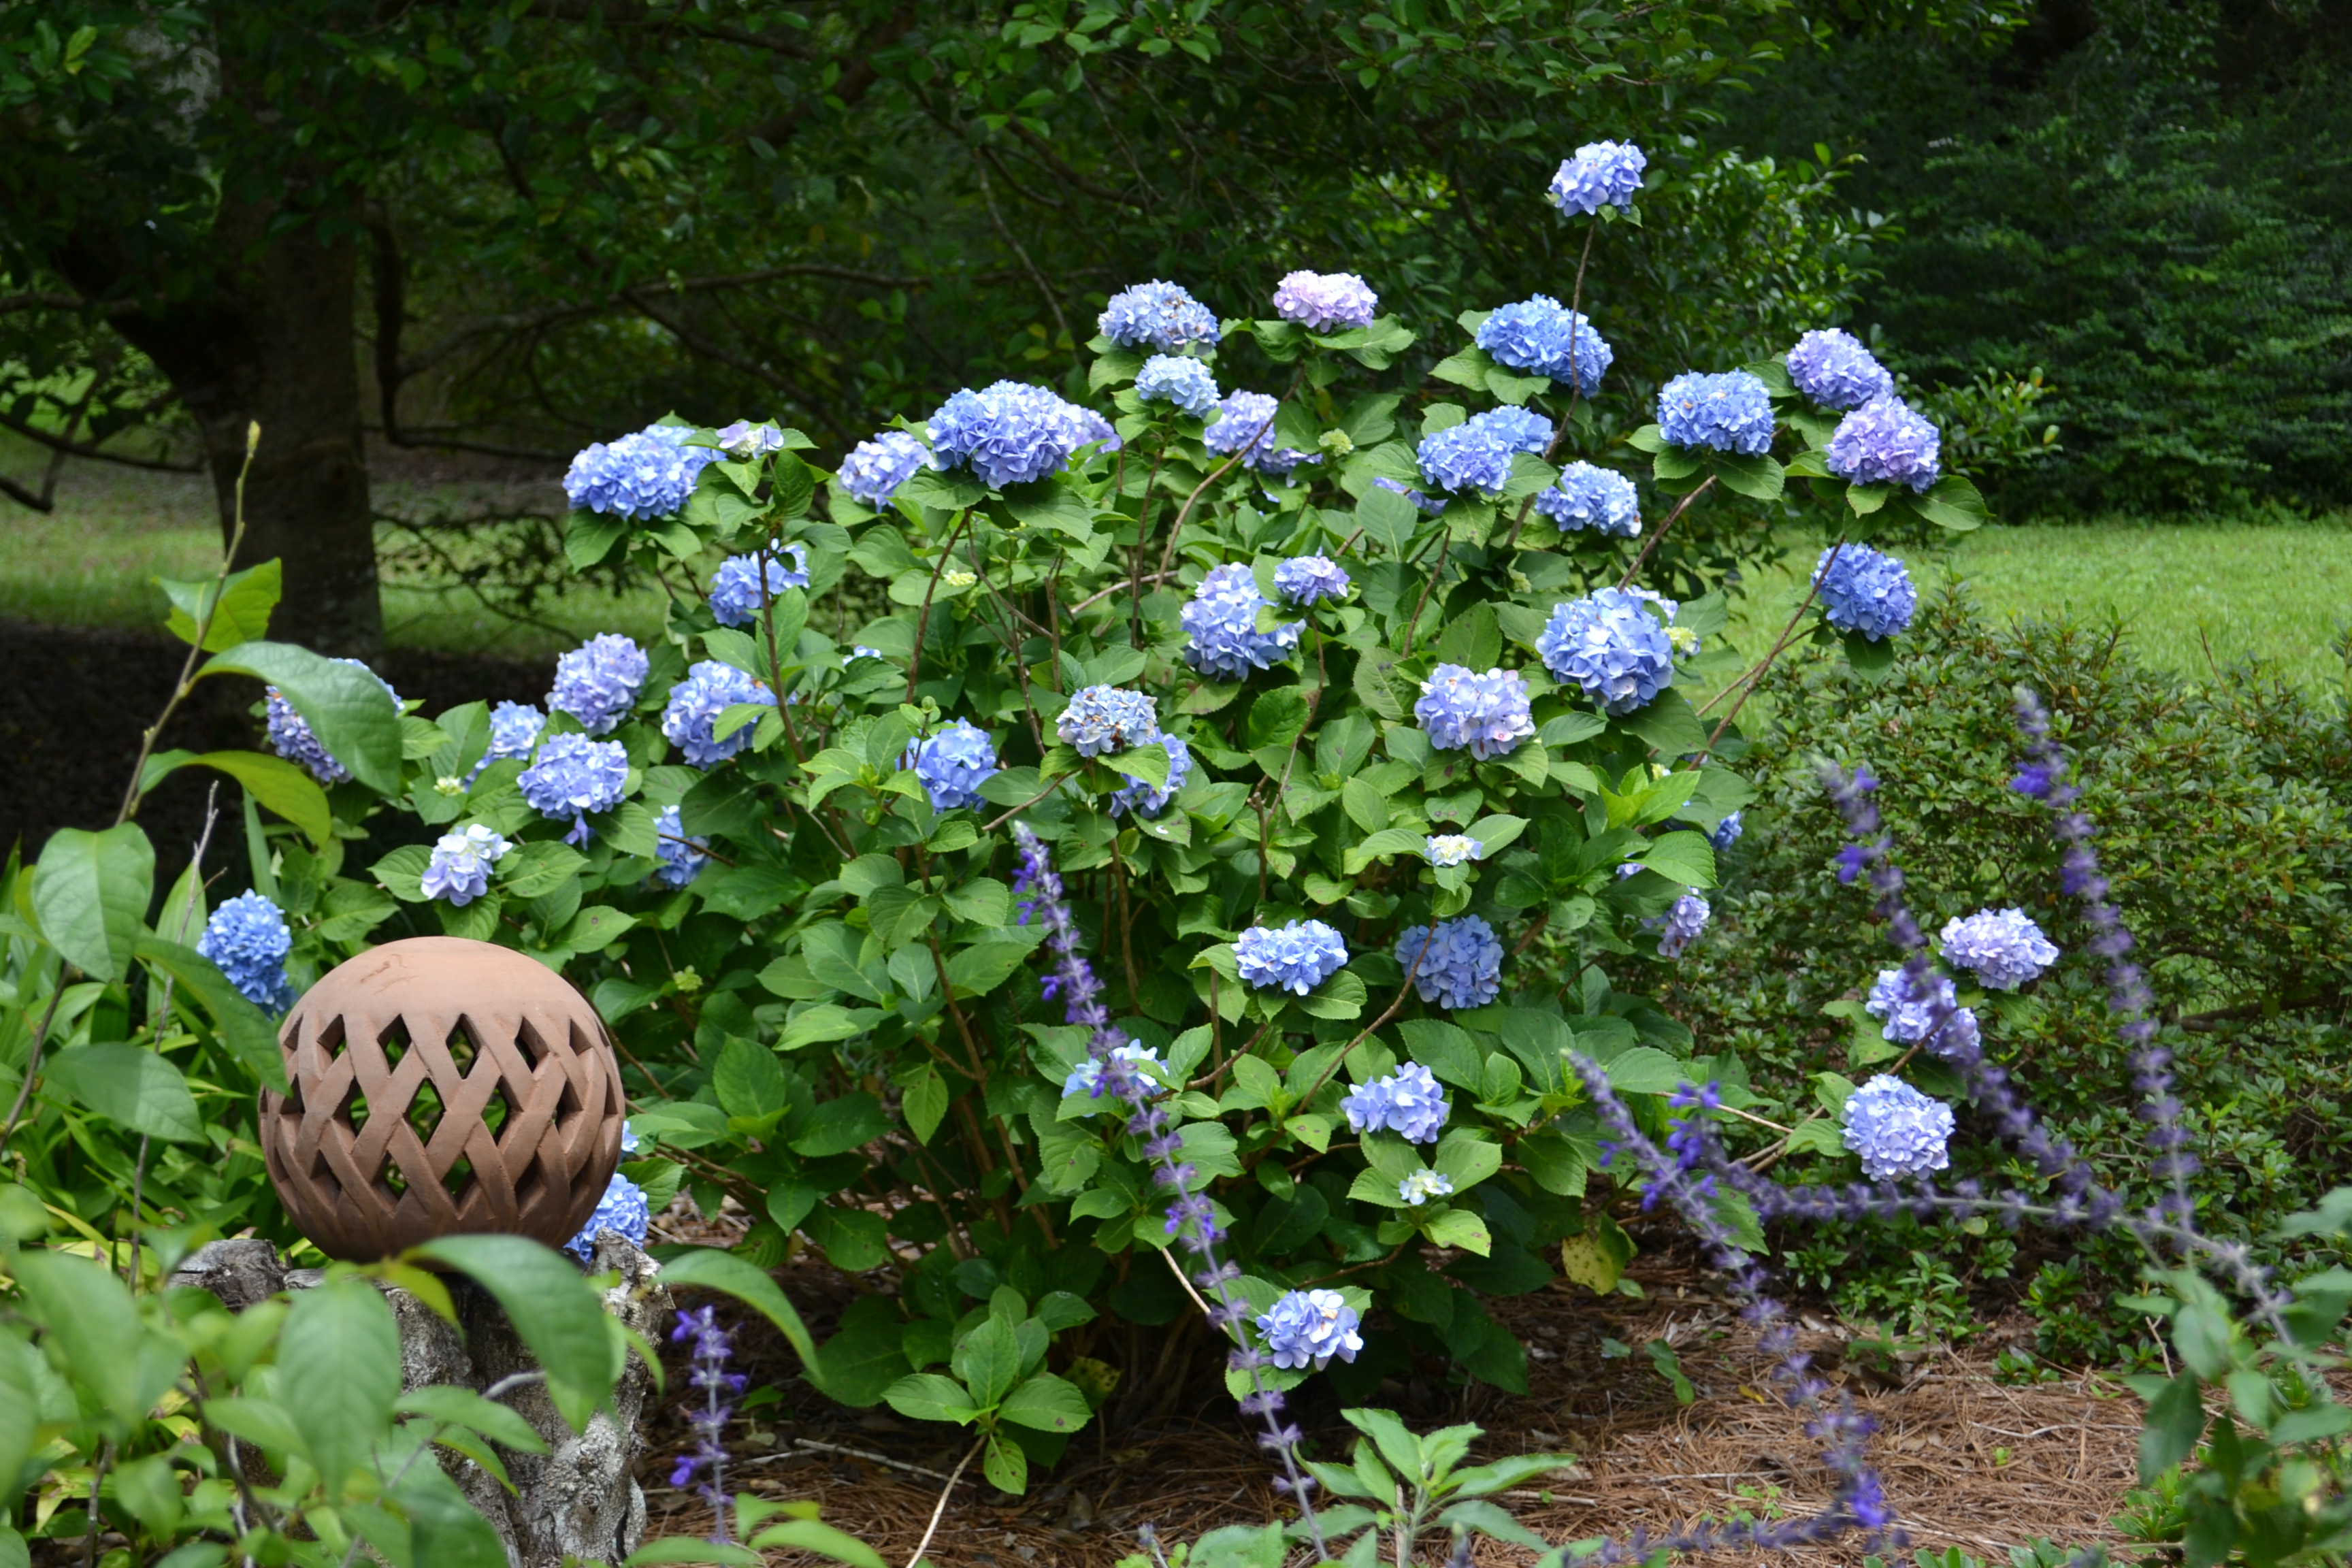
Bigleaf hydrangea (Hydrangea macrophylla) Bigleaf hydrangea (Hydrangea macrophylla) comes in mophead and lacecap flower forms. They bloom on old wood, so prune in summer after blooming is finished. Repeat bloomers, such as ‘Endless Summer’ bloom on both old wood from the previous year and on the current season’s wood. You can prune after the first bloom and still get a bloom later in the season.
Hydrangea macrophylla. Photo by Beth Bolles, UF IFAS Extension Escambia County
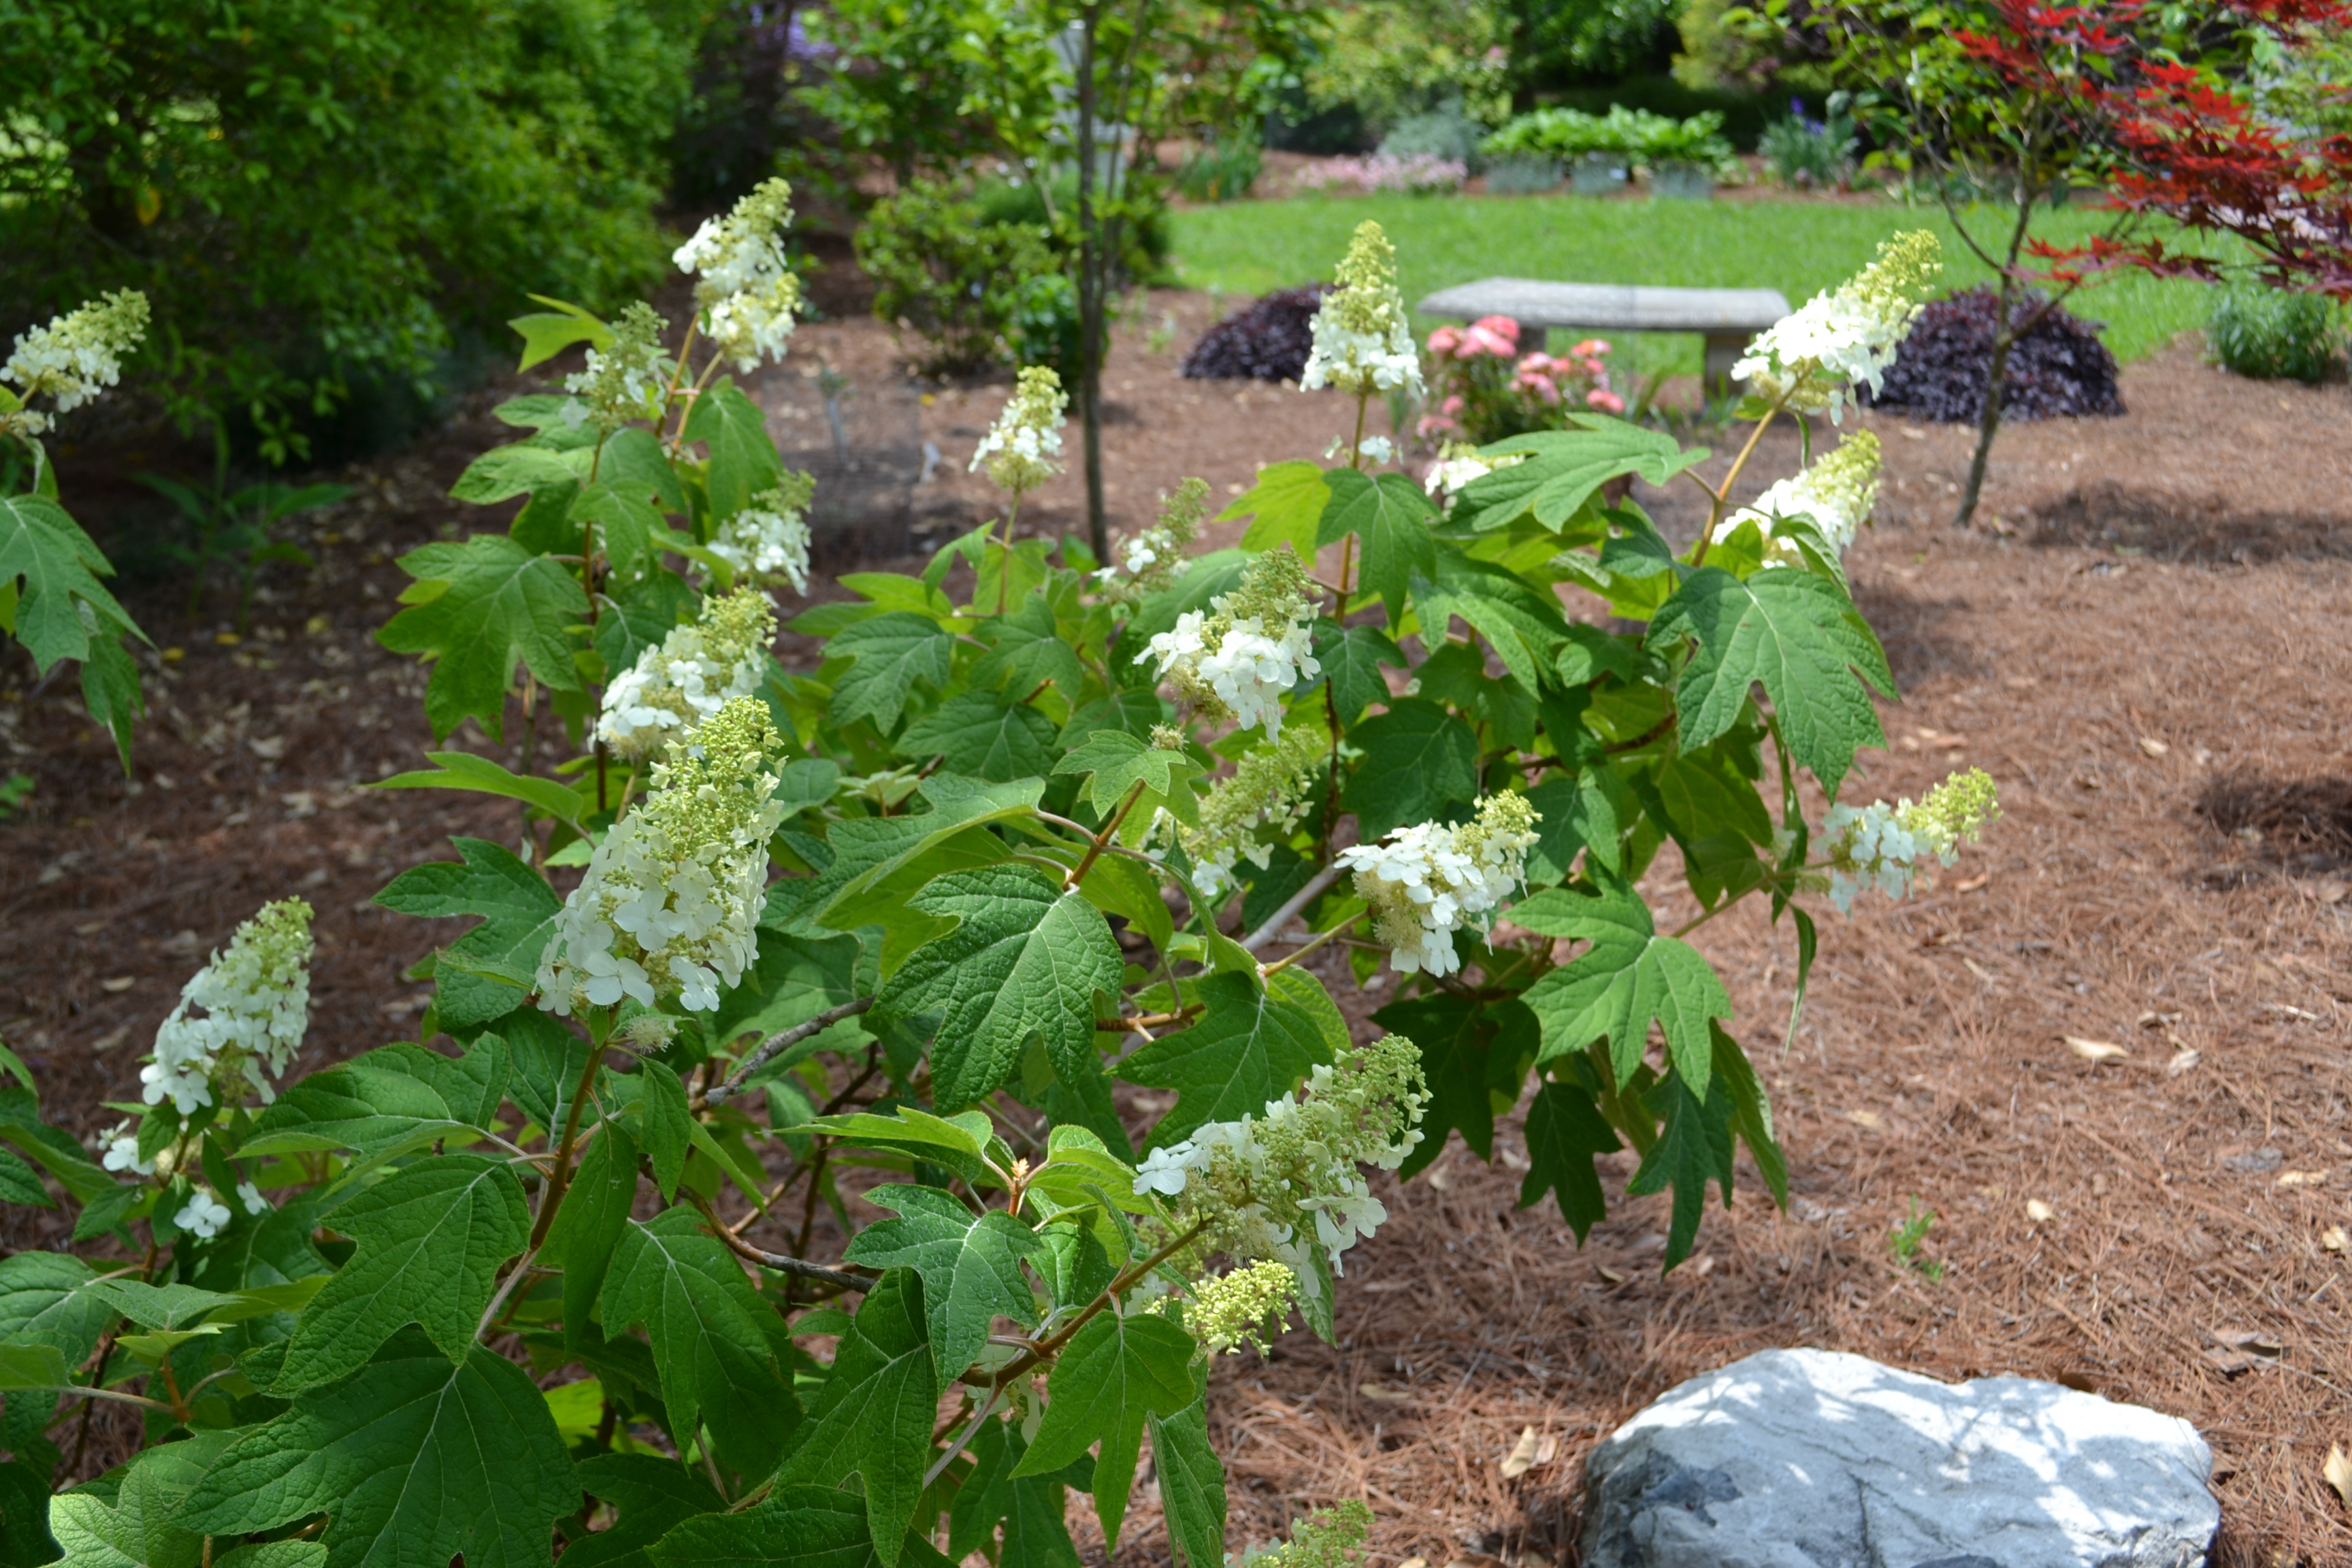
Oakleaf hydrangea (Hydrangea quercifolia) A native hydrangea that blooms on old wood, so prune after flowering. This type requires little pruning, only to maintain size and shape.
Oakleaf hydrangea. Photo by Beth Bolles, UF IFAS Extension Escambia County
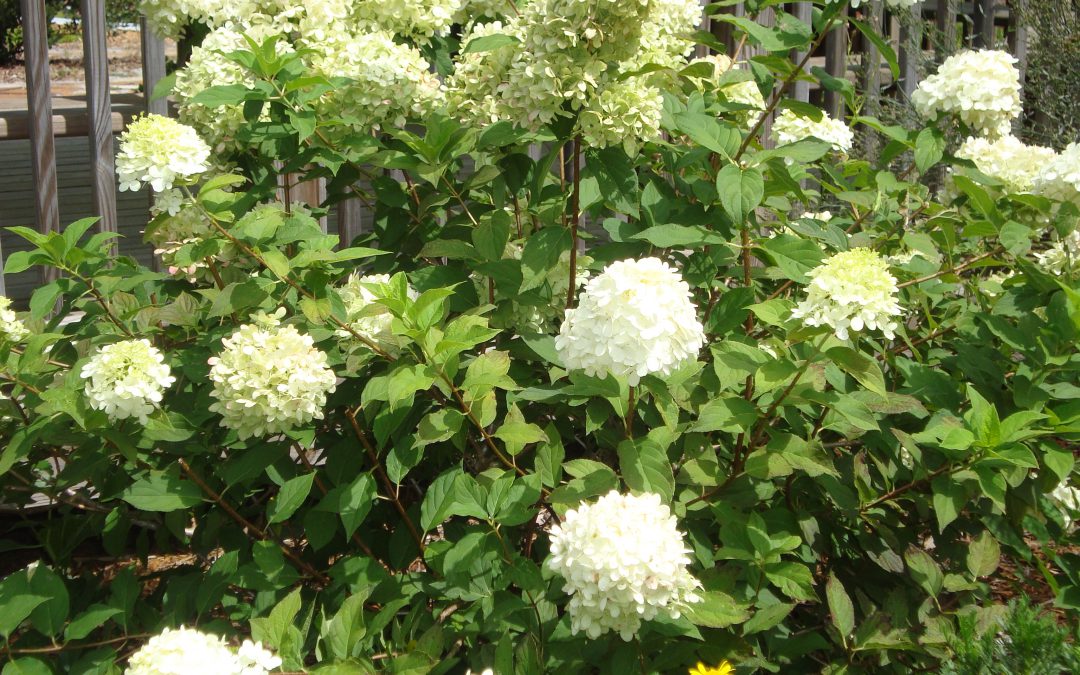
Panicle hydrangea (Hydrangea paniculata) These shrubs bloom on new wood, so prune in winter or early spring before new growth emerges. ‘Limelight’ and ‘Pee Gee’, are examples of this type. Plants only require pruning to shape or thin out the shrub.
Limelight hydrangea. Photo by Beth Bolles, UF IFAS Extension Escambia County
Here are some additional pruning tips for your hydrangeas.
For all types, check for winter-damaged wood in early spring. Remove all dead branches before buds start to open. Some plants need rejuvenation pruning. Old wood may die back or be less productive, so in early spring remove very old stems at the base. This stimulates new growth. Deadheading flowers (cutting off spent blooms at a set of leaves) can happen as needed.
It’s always fun to add new plant to the landscape. And it’s even more fun to propagate your own plant material. The question is, what plant propagation method is best? The answer depends on a number of factors such as:
How much time and money is available?
Is a uniform crop desired or is trait variation preferred?
What is the plant species being propagated?
Plants can be propagated either by seed (sexual propagation) or by segments of vegetative material (asexual propagation). Sexual propagation takes far less time and effort because new plants are being started from the seeds (offspring) of parent plants. This type of propagation promotes genetic diversity because offspring may not have the exact characteristics of the parent plants. Sexual propagation increases the possibility of hybrid vigor, which is the improved quality of plant material to that of parent plants. Asexual propagation usually takes more time, but generally ensures that propagated plants will maintain the same characteristics as the parent plant. For some species it may be the only way to pass on desired traits to subsequent generations and it may be the only way to propagate certain species. A plant produced vegetatively can become larger than a plant produced by see in the same amount of time.
Tips for Successful Sexual Propagation
Seed Collection – Seeds should be collected when fruit is ripe, just before they fall to the ground. In general, seeds should be cleaned, dried, and stored at 40 degrees Fahrenheit (in a refrigerator). However, palm seeds should be planted immediately after harvesting and cleaning.
Seed Dormancy – Some seeds have thick seed coats the inhibit germination. Some seeds need to be scarified (breaking of the seed coat) and/or stratified (stored in a specific environment) in order to germinate.
Seed Sowing – Seeds can be germinated in flats or other suitable containers in a seed starting media. Seeds should be planted at a depth of two to three times their diameter, but no deeper than 3 inches. Cycad seeds should be planted just below the medium surface.
Seeds stored in an envelope. Photo Credit: University of Florida/IFAS
Tips for Successful Asexual Propagation – In general, asexual propagation is the propagation of plant material from cuttings of stems, leaves, and/or roots.
Rooting Hormones – Increase rooting percentage, hasten root initiation, increase the number of roots per cutting, and increase root uniformity. Auxin based rooting hormones (Indolebutyric acid (IBA) and Naphthalenacetic acid (NAA)) are available in dry or liquid forms. It is important to use the correct concentration for the particular plant species because over application can cause damage to cutting base.
Sticking Cuttings – Cuttings should be stuck in the medium only deep enough to support the cuttings and hold them upright (1/2″ to 1″ deep).
Post-Rooting Care – Fertilization should be applied as soon as roots emerge from the cuttings. However, overfetilization can increase soluble salts and burn roots.
Examples of Asexual Propagation
Softwood Cuttings – Taken from woody plants usually three to four weeks after a new flush of growth. Commonly propagated species using this method include: crape myrtle; magnolia; oleander; azalea; jasmine; and boxwood.
Semihardwood Cuttings – Similar to softwood cuttings, but the lower portion of the cutting has become lignified (woody). Usually taken from new shoots six to nine weeks after a flush of growth. Commonly propagated species using this method include: camellia; pittosporum; junipers; and some hollies.
Hardwood Cuttings – Taken from the previous season’s growth, just before or during the dormant period. Commonly propagated species using this method include narrow-leaved evergreens and deciduous species during the dormant season after leaves have dropped.
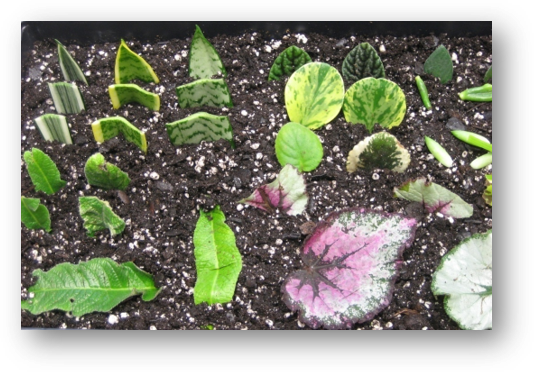
Leaf Cuttings – Comprised of only the leaf blade or the leaf blade and petiole (leaf stalk). Cuttings are stuck upright in the propagation medium with the basal end (petiole end) of the leaf inserted into the propagation medium. Commonly propagated species using this method include begonias and peperomias.
Root Cuttings – Taken in late winter or early spring from two to three-year-old plant material. Plants propagated by root cuttings may not reproduce true to type if they are budded or grafted. Commonly propagated species using this method include: plumbago; bayberry; oakleaf hydrangea; and yucca.
Plants being propagated by leaf cuttings. Photo Credit: University of Florida/IFAS
This article provides only a brief overview of propagation methods and techniques. For more information on plant propagation please visit University of Florida Plant Propagation Glossary or Plant Propagation Techniques for the Florida Gardener. Please be advised that some plant material is patented and it is illegal to propagate patented material without written authorization or licensing of the patent holder. If it is patented, a notation of patent number will be on the tag.
My obsession with plants started with the purchase of my first house in Waverly, Alabama in the late 90s. I bought a house with seven acres and of that about 1.5 acres was a fenced yard. The landscape was not very appealing, so I was on a mission to make it beautiful yet functional for my dogs. The only problem was, as a new homeowner, I had very little expendable income for my burgeoning plant habit. This dilemma forced me to be a resourceful gardener.
Shop the discount rack at garden centers
Many retail garden centers (especially mixed use stores with limited plant space) will discount plants simply because they are no longer flowering. Plants look perfectly healthy but are just not considered “retail ready” anymore, so rather than hold them over until they bloom again and appeal to most shoppers the stores tend to mark them down.
Plants are either growing or they are dead, so it is common to find some outgrowing their container and are getting “potbound” which means the root system is outgrowing the pot. Potbound plants are hard to keep watered without wilting and the solutions are to transition to a larger pot or plant in the ground. Most garden centers are not equipped to pot up overgrown plants to larger containers, so the easier solution is to sell them quickly. If you purchase a plant with circling roots be sure to trim the bottom and score (slice) the root ball to encourage roots to spread laterally.
Avoid plants that appear diseased (leaf spots, brown stems, mushy parts, rotting odor) or have active feeding insect activity.
Compliment other gardeners’ plants
When you get gardeners together, they inevitably start swapping plants. I really don’t have an explanation for this other that good old southern hospitality, but I’ve noticed over the years that when you express appreciation of plants to other people they tend to end up in your own yard. Ask if you can take a pinch (for cuttings) or offer to divide a clump of crowded perennials and you are on your way to a trunk full of plant babies.
I can’t recommend this for multiple safety reasons, but I have been known to photographs plants in my travels then strike up a conversation with a homeowner who insisted I take one home.
Experiment with basic propagation techniques
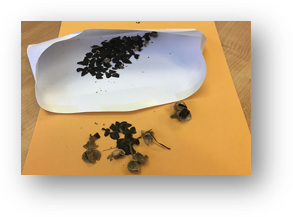
Grow flowers from seed. Either purchase seeds (usually under $2/pack) or collect seed heads from spent flowers in your own garden. After flowers fade, allow them to set seed then either crush and distribute in other parts of your garden or store in a cool, dry place until you can swap with friends.
Division – clumping perennials such as daylilies, cast iron plant, iris or liriope can be dug up and cut into smaller pieces with a shovel or machete. You only need to be sure to have buds on top and roots on the bottom to make a new plant. Other plants create offshoots that can be removed from the parent plant. Examples of these are agave, cycads, and yucca.
Cuttings – the list of plants that can be propagated from stem cuttings is endless but a few that are very easy are crape myrtle, hydrangea, and coleus.