by Daniel J. Leonard | Sep 11, 2025
Many turfgrass yards, including mine, are feeling the effects of an extended droughty period this month. While one of the benefits of the primary turf species grown in the area (Centipedegrass, Zoysiagrass, Bermudagrass, and Bahiagrass), is their drought tolerant nature, they aren’t impervious to drought. Even with these tough grass species the difference between a yard coming out of a drought in decent shape versus dead is as simple as remembering the answers to the following four maintenance questions.
How much should I water to keep my grass alive?
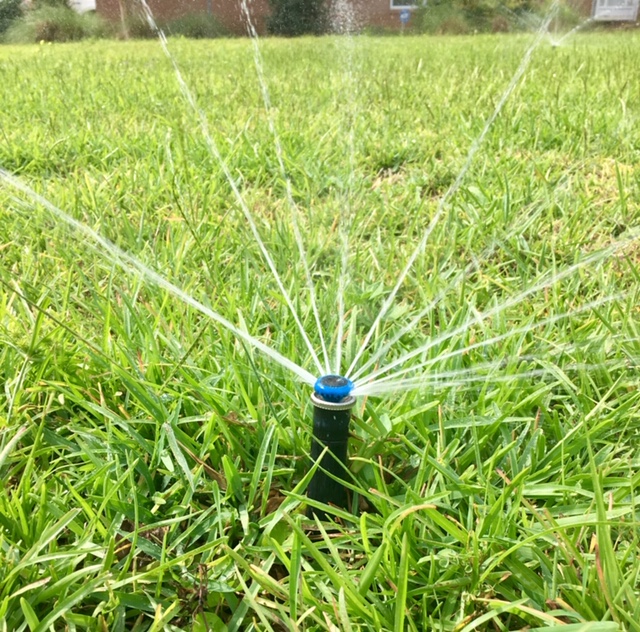
Lawngrass needs about ¾-1” of water per week to remain looking its best and growing vigorously. Obviously, unless you have an irrigation system, keeping a large yard of turfgrass in that ideal water range is going to be hard or impossible. So, what to do? I encourage homeowners to focus their efforts on keeping grass around highly visible and often used areas of the yard well-watered, letting outlying areas fend for themselves until rain resumes. To ensure you’re putting out the optimal ¾-1” of irrigation per watering event, spread a few straight sided cans (tuna or cat food cans work great) under the sprinkler’s range, allow it to run until you reach the 1” mark, and note how long it took to apply that amount of water. This will help you dial in your watering and ensure water isn’t wasted.
Should I mow during a drought?
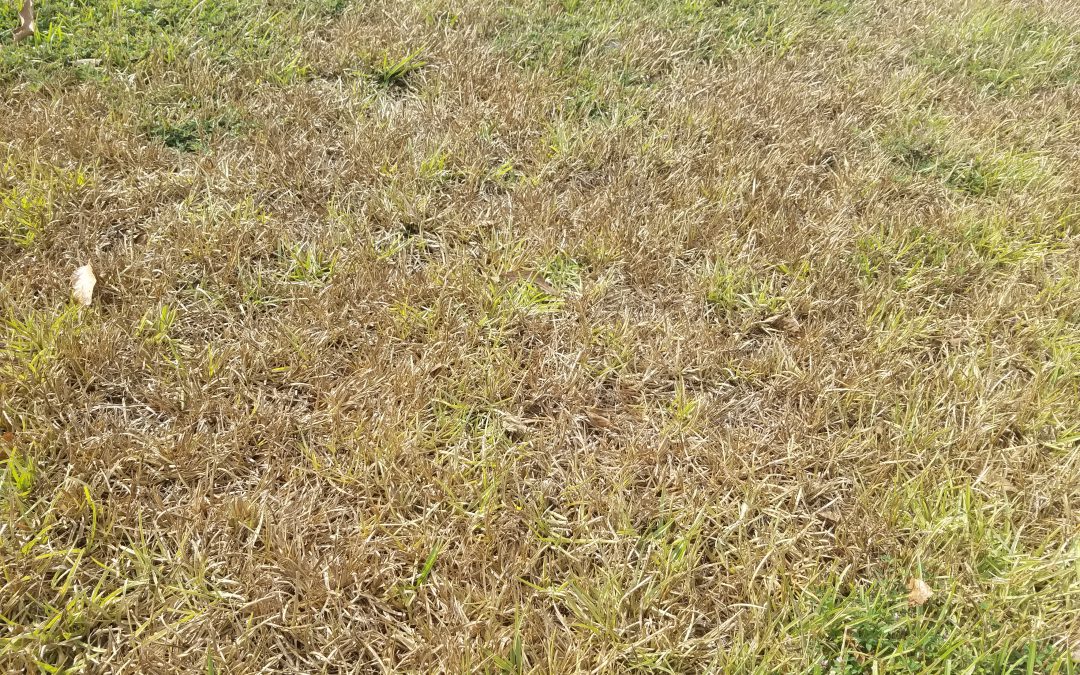
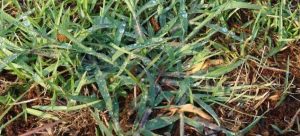
We all know that an unmown yard looks unkempt. However, given that mowing is a major stress on turfgrass, mowing during a drought can weaken your yard’s ability to recover when the drought ends. If you must mow to keep things looking neat, try to mow only areas that you keep watered and raise your mower’s deck to reduce the amount of leaf tissue you cut from the grass. Mowing in this manner will reduce stress on your turf and keep the yard from appearing weedy and unkempt. My unirrigated Centipedegrass yard has been flowering and setting seed over the last few weeks. My last mowing event (during the current dry period) was designed to only remove seedheads and minimize removal of leaf tissue.
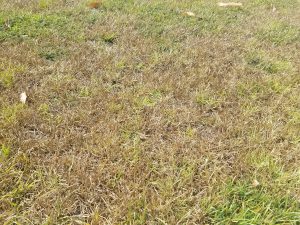
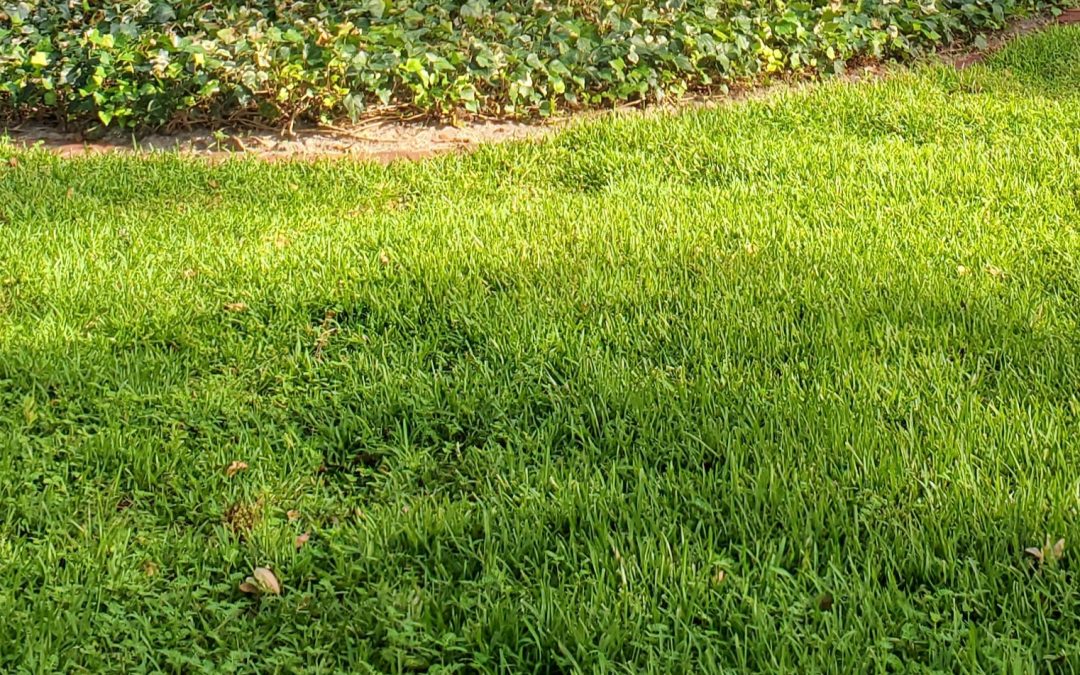
Unirrigated Centipedegrass turf showing drought stress – photo courtesy of Daniel Leonard.
Should I fertilize?
This one is easy! Don’t fertilize grass during a drought! For one, fertilizer promotes growth, and grass isn’t trying to grow during a drought, simply survive. Fertilizing in these times is another unnecessary stress. Additionally, fertilizer requires water to transport nutrients down to the plant roots. If there is no water to do so, it will simply sit there and wait on rain. Also, some or all the nitrogen in the fertilizer applied will volatize and return to the atmosphere, wasting your time, money, and effort and stressing your turfgrass in the process. Hold the fertilizer until rain begins again.
What do I do about weeds?
Turfgrass isn’t the only thing stressed during droughts; weeds are as well. During stressful events like droughts, all plants (weeds included) stop growing and enter survival mode. This has major implications for weed control, as herbicides are not particularly effective on weeds with drought defenses up. In addition to being ineffective, herbicides can injure stressed turfgrass, preventing a healthy recovery post-drought. So, keep the herbicide off the yard until the weeds, and your turf, are happy and growing again.
Maintaining an unirrigated lawn during drought is more about what you don’t do – less mowing and no fertilizer or herbicide applications – than what you do. Mowing too low, applying fertilizer, and trying to control weeds with herbicide are all potential stressors of turf and can inhibit its recovery when the rain returns. The best you can do to keep your lawn healthy in dry times is to apply ¾-1” of water per week and pray for rain! For more information about lawn management or any other horticultural topic, contact your local UF/IFAS County Extension office.
by Larry Williams | Aug 23, 2025
Hot, summer months are not the time to be using most lawn herbicides.
One issue is the heat of summer. Most lawn herbicide labels include statements such as the following. “Do not apply when temperature exceeds 90°F.” “Do not broadcast apply this product when air temperatures are above 90°F (85°F for St. Augustinegrass) unless temporary turf injury can be tolerated.”
Every year lawns are injured or killed because of lawn herbicides being applied when temperatures are too hot.
Summer is usually a rainy and windy time of the year. Many lawn herbicide labels include statements such as the following. “Allow 12 hours after application before watering lawn for maximum effectives on listed weeds.” “Apply only when wind is no more than 10 mph.” “Applying this product in calm weather when rain is not predicted for the next 24 hours will help to ensure that wind or rain does not blow or wash pesticide off the treatment area.”
It is critical to read and follow the label directions and precautions for any pesticide you use. Pesticide labels, including herbicides, include the following statements. “To the extent consistent with applicable law, the buyer assumes all risks of use, storage or handling of this product not in accordance with label directions.” “It is a violation of Federal law to use this product in a manner inconsistent with its labeling.”
Crabgrass growing in centipedegrass lawn. Photo credit: UF/IFAS Extension
By the time summer arrives, many of the lawn weeds are mature, which means they are well established with extensive root systems. These mature, well-established weeds are more difficult to control. The same weeds are more susceptible to herbicides when they are small, young and not well established. Also, these mature weeds have produced countless numbers of seeds by summer. Most weeds are prolific seed producers.
A single crabgrass plant (a common summer lawn weed) can produce 150,000 seeds!
Applying a preemergence lawn herbicide in February to help prevent summer annual weeds such as crabgrass or applying a postemergence lawn herbicide during spring while the temperature is mild and before the weeds are out of control simply makes more sense than waiting until summer.
The best options now with lawn weed control involve continuing to follow good mowing practices, maybe hand removal of some weeds and just simply waiting for next February and spring to use lawn herbicides.
In the meantime, you may want to read the following UF/IFAS Extension publication on lawn weed control. https://edis.ifas.ufl.edu/pdf/EP/EP14100.pdf
by Abbey Smith | Jun 5, 2025
The Florida Panhandle’s warm, humid, and sunny climate makes it ideal for lawns to stay lush and green for most of the year—but it’s also perfect for turfgrass diseases to develop. The summer weather has already been ramping up with temperatures reaching a little above 90 degrees Fahrenheit already this year which also means the signs of disease will be showing sooner rather than later. If you’ve been noticing large brown patches, thinning grass, or strange spots growing on you grass leaves, a disease may already be present. Here’s what you need to know to stay ahead of a total lawn takeover.
Large patch or rhizoctonia blight is one of the most common fungal turfgrass diseases to affect lawns, specifically if you have centipede turfgrass. This disease is most prevalent between the months of November and May, and if not controlled, will continue to spread in the fall. Symptoms are easy to spot, as large, brown circular discolorations that will grow larger in size over time. The best way to treat large patch is through preventative lawn maintenance over time. Water only when necessary to avoid excess moisture, apply slow-release appropriate lawn fertilizers, and clean your mower blades after each time you mow.
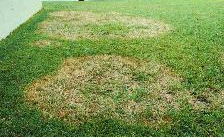
Large patch disease present in turfgrass. Photo Credit: Shelia Dunning, UF/IFAS Extension
Another common lawn disease to see during the warmer months is dollar spot. Dollar spot will affect all warm season turfgrasses but will be more commonly found in Bahia and Bermuda grass. Dollar spot disease creates small patches that are circular and will grow into larger areas. Individual grass leaves will have small lesions starting on the leaf margin that will have a light brown to tan coloration. It is important to know that grasses that are drought stressed, over irrigated, or mowed too low are more prone to contracting this disease. Proper cultivation practices are important to prevent dollar spot and other turfgrass diseases. For more sever cases, the use of chlorothalonil fungicide can be used during the treatment process.
There are various other lawn diseases that can be recognized over time. If you are trying to identify a potential disease in your lawn grass, consider using the UF Turfgrass Disease Identification Flowchart. It will walk you through the symptoms that are present to make a correct diagnosis. If you would like a more expert opinion, contact your local county Extension office for additional help. For additional information on turfgrass diseases, please visit:
https://sfyl.ifas.ufl.edu/media/sfylifasufledu/baker/docs/pdf/horticulture/TurfgrassDiseaseIdentificationGuide.pdf
https://gardeningsolutions.ifas.ufl.edu/lawns/problems-and-solutions/large-patch/
https://gardeningsolutions.ifas.ufl.edu/lawns/problems-and-solutions/lawn-diseases/
by Daniel J. Leonard | Jun 5, 2025
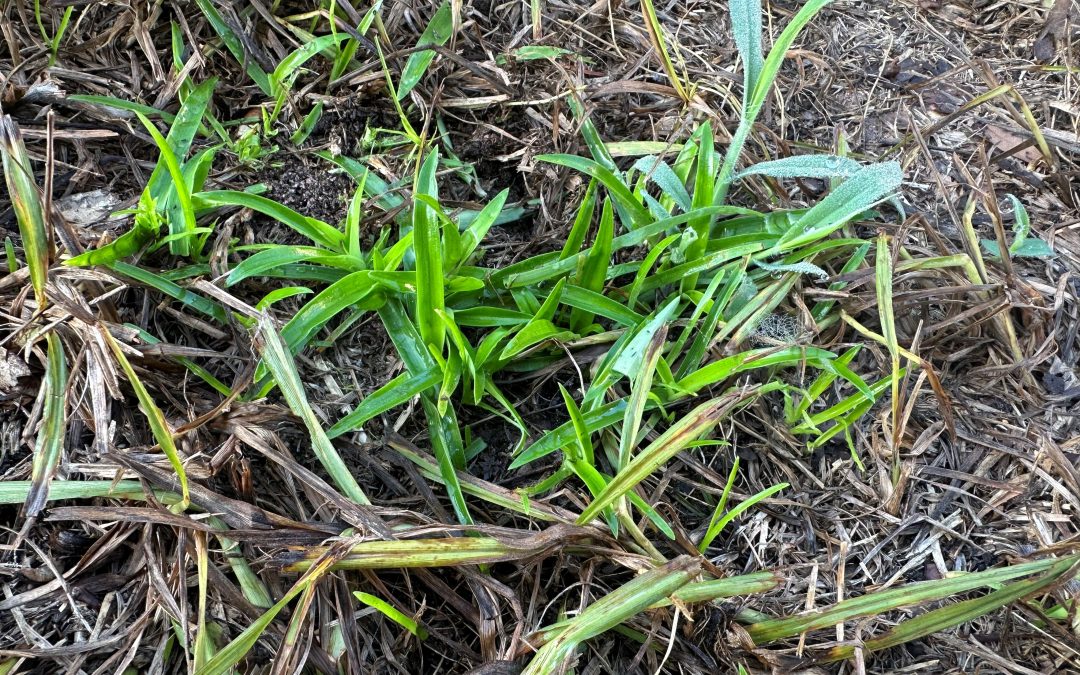
The Panhandle’s dreaded summer heat has finally arrived in force and has brought with it one of the most difficult to control lawn/landscape weeds, our annual enemy Doveweed (Murdannia nudiflora). Doveweed is characterized as one of the world’s worst weeds due to its broad range of growing conditions, ability to root along its stems, forming mats as it grows, massive seed production (each plant can produce up to 2,000 seeds per year), and inconspicuous nature – it looks like a grass to the untrained eye. So, what can gardeners do to control Doveweed that’s already up this year and prevent it next summer? Let’s find out.
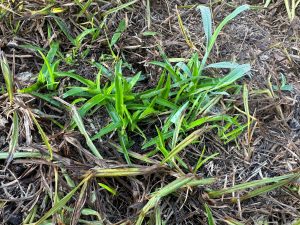
Doveweed emerging in a bare patch of a Centipedegrass lawn in late May 2025. Photo courtesy of Daniel Leonard.
First, the best prevention for all weeds, Doveweed included, is a healthy lawn/landscape. Ensuring healthy, thick Centipedegrass turf and landscaped beds that don’t allow light to hit bare soil goes a long way towards reducing the overall weed load lawns and landscapes can experience. For lawns, this can be achieved through mowing regularly at the proper height for your turfgrass (2.5” or so for Centipedegrass), irrigating no more than 0.75”-1” per week in the absence of rain, limiting stress from overfertilization, and removing excess thatch. In landscapes, preventative weed control focuses on limiting overwatering/fertilization and maintaining a 2-3” organic mulch layer of pinestraw, pine bark, leaves, wood chips, etc. Adopting these practices can greatly reduce the occurrence of weeds in your yard, however they will not eliminate weeds altogether and supplemental chemical weed control is often necessary.
Unlike Crabgrass, Florida Pusley, and other commonly encountered Panhandle annual weeds that emerge when the soil begins to warm in early spring (usually late February-March), Doveweed waits until mid-April-May (soil temperatures of 70-80 degrees F). All these annual weeds are best controlled by preemergent herbicides, like Indaziflam (Specticle G), before seeds germinate. For Doveweed, that means the first preemergent application should occur mid-April with a follow-up application 6-8 weeks later. However, for this year that opportunity is behind us and our only option is post emergent herbicides.
Which postemergent herbicide you choose depends on if your Doveweed issue is in turfgrass or in landscaped beds. In landscaped beds, the primary control option is either hand pulling or spot treating Doveweed with a 41% glyphosate product (Roundup and other generic products) at a rate of 3% (3-4oz glyphosate/gal). As glyphosate is a non-selective herbicide, be sure to not get any overspray on any ornamental plant foliage. In turfgrass, Doveweed control becomes a little more difficult. You essentially have three options – atrazine, a generic 3-way broadleaf product, or a commercial grade broadleaf product. Though it provides very good control of Doveweed and has pre-emergent properties to help discourage future weeds, I don’t prefer atrazine because it has a high potential to leach into groundwater following heavy rains in sandy soils, which describes much of the Panhandle. The generic 3-way products (usually a mix of Dicamba, Mecoprop, and 2,4-D) are fairly effective on Doveweed, however follow-up applications are usually required and the 2-4D component can be harsh on Centipedegrass at the higher label rates required for Doveweed control. Though somewhat expensive, the best post emergent option for most people is probably a commercial grade product like Celsius WG. Celsius WG is a very strong post emergent broadleaf herbicide that is very effective on Doveweed and is also very safe on Centipedegrass, even in hot weather. If the cost of the product (>$100) is off-putting, it is helpful to remember that even at the highest labelled rate, a 10 oz Celsius WG bottle goes a long way, enough to cover several acres of lawn.
* Regardless of what method you choose, be sure to get after emerged Doveweed seedlings early, before they mature and begin flowering – even the strongest post emergent herbicides work better on young weeds.
While Doveweed is a nasty little plant that is perfectly capable of taking over a lawn or landscaped bed, there are a variety of preventative and control options available. Using a combination of the above techniques should help achieve lasting Doveweed controls in future seasons! For more information about Doveweed and other summer annual weed control in lawns and landscapes, contact your local UF/IFAS Extension County office.
by Larry Williams | May 15, 2025
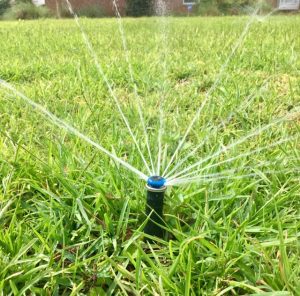
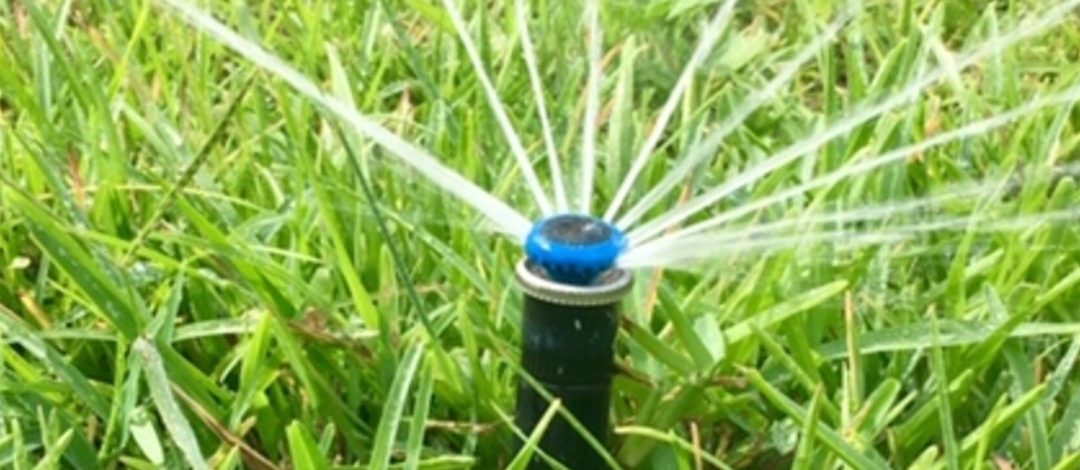
Lawn irrigation spray head running. Credit: Larry Williams
When watering to establish a new lawn or when renovating areas within an older lawn, 2-3 “mists” throughout the day for the first 7-10 days until roots get established is recommended. These are 10-minute bursts. Then back off to once a day for about ½ hour for 7-10 days. Then go to 2-3 times a week for about 7 days. By then your lawn should be established.
Irrigation is not needed when we are getting adequate rainfall. Rain counts. In the absence of sufficient rain, you’ll need to provide enough water at the correct time to allow your new sod to root, hence the above directions.
A well designed and correctly installed irrigation system with a controller, operated correctly, helps to achieve uniform establishment. It can be difficult or impossible and inconvenient and time consuming to uniformly provide sufficient water to establish a lawn with hose-end sprinklers, especially with a sizeable lawn and during dry weather. Most people are not going to do the necessary job of pulling hoses around on a regular basis to result in a well-established lawn.
Too much water will result in rot, diseased roots and failure. Too little water will result in the sod, seedlings, sprigs or plugs drying excessively and failure to establish. The end result, will be a poorly established, sparse lawn with weeds, or complete failure.
There is no substitute or remedy for incorrect irrigation when establishing a new lawn or when renovating an older lawn.
It is risky to invest the required time and money if the new lawn cannot be irrigated correctly. Taking the gamble that adequate (not too much, not too little) rainfall will occur when needed to result in a beautiful, healthy, lush lawn is exactly that, a gamble.
An irrigation system is a good tool to supplement rainfall. As much as possible, learn to operate the irrigation controller using the “Manual” setting. It also is wise and is State law to have a rain shutoff device installed and operating correctly. The rain shutoff device overrides the controller when it is raining or when sufficient rainfall has occurred. A rain shutoff device is inexpensive and easily installed. Also, a rain gauge can be an inexpensive tool to help monitor how much rain you’ve received. Rain counts.
The above schedule should help when planting a lawn from seed, sprigs, plugs or sod.
Once the lawn is rooted, your goal change from establishing a root system to developing a deep, strong rooted lawn. To do this, irrigate to provide ½ to ¾ inch of water on an as needed basis. Here are links to a UF/IFAS video and publication with more info on how to do this: https://www.youtube.com/watch?v=W_wn-hwLNtg, https://edis.ifas.ufl.edu/publication/LH025.
by Evan Anderson | Apr 30, 2025
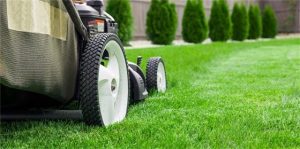
Mowing a lawn. Photo Credit: University of Florida/IFAS
Mowing a lawn isn’t always as simple as making sure there’s gas in the mower. Lawns are alive, and treating turfgrass without care can cause problems in the long run. To make sure your lawn is healthy, follow these guidelines.
- Know your turfgrass! Different grasses need to be mowed at different heights. Even the specific variety or cultivar can make a difference, but in general, bahiagrass should be cut to 3-4 inches, bermudagrass to ½ – 1½ inches, centipedegrass to 1½ – 2 inches, zoysiagrass to 2 – 2 ½ inches, and St. Augustinegrass to 2 ½ – 4 inches. Dwarf or finer-leaved varieties are usually cut lower and more often than taller grasses.
- Mow regularly enough to avoid removing more than 1/3 of grass blade height at one time. This makes sure the plant is not overly stressed and can recover from mowing quickly and efficiently, as well as promoting deeper root systems.
- Sharpen mower blades when they start to become dull. Freshly cut grass that has a ragged or torn appearance is a good sign that it’s time to sharpen the blade.
- Pick up debris such as twigs before mowing to avoid damage to the mower blade.
- Avoid mowing if grass is wet. Dew in the early morning or water from irrigation or rainfall will cause grass to clump and stick.
- In uneven lawns, take care to avoid scalping grass when pushing a mower over inclined areas.
- For a truly professional looking lawn, mow in different directions each time you mow. This can help to avoid forming wear patterns.
- Leave clippings on the lawn rather than bagging them. Clippings break down over time, recycling nutrients and adding organic matter. Grass clippings typically do not contribute to thatch buildup. If clumps form, they can be broken up with a rake to evenly distribute the cut grass over the lawn.
- Sweep clippings from hard, impervious surfaces to limit nutrient runoff.
Follow these guidelines and take care with other lawn management such as watering and irrigation, fertilization, and pest and disease control. You’ll have a great looking lawn before you know it!