by Julie McConnell | Feb 23, 2017
Regardless of what the tag says one size does not fit all. As with clothing, a piece will undoubtedly be too large for some and too small for others. Trying to go with a “one size fits all” approach to lawn care will lead to the same kind of frustration and disappointment as an ill-fitting garment.
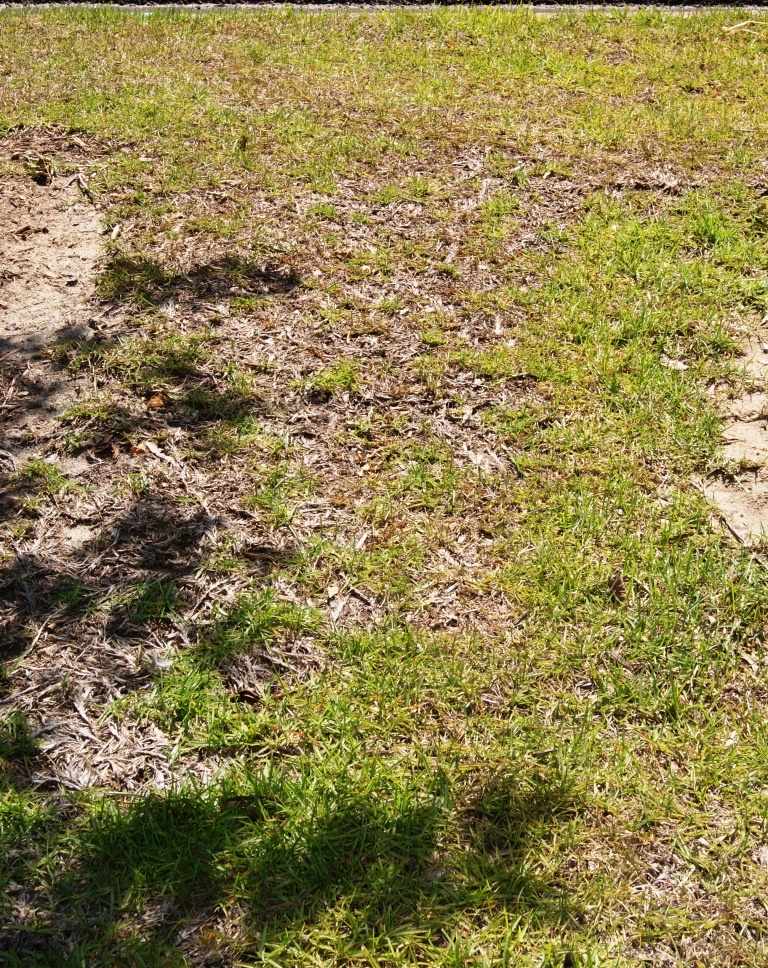
All turfgrass is not created equal. Thus management of our various turf species requires different methods. It is common for a homeowner to be unaware of what type of turfgrass they have – it’s all grass after all – what difference does it make? Misidentification leads to problems because proper management for one type may be counterproductive to another type. In order to create a practical turf management plan, it is critical that the species of grass is properly identified.

Although many grasses look similar it is important to know exactly what kind you have to maintain it properly. This photo shows Empire Zoysia. Photo credit: Julie McConnell, UF/IFAS
Why is it important to know the species of turf in a lawn?
Two of the most common mistakes extension agents observe is excessively low mowing height of St. Augustinegrass and over-fertilizing Centipedegrass. Both of these errors can reduce turfgrass vigor and decrease its tolerance to pest issues. Another potential maintenance pitfall is using a herbicide that is not labeled for use on a given type of turfgrass. Several popular herbicides available on the market can cause damage to St. Augustinegrass and/or Centipedegrass. Thus turf can be inadvertently killed by herbicides when they are applied to the wrong species.
Before a lawn maintenance plan is developed, be sure to know what type of grass is present and then follow UF/IFAS recommendations for proper care. If assistance is needed with identification, contact your local extension office.
To learn more about lawn care, visit this site or plan to attend “Caring for Your Florida Lawn” at the UF/IFAS Extension Bay County office on April 8th. For more details call 850-784-6105.
by Sheila Dunning | Feb 3, 2017
 Remember last summer? The hot, dry days. Grass drying up and turning brown. Yet, the weeds are green and doing fine. However, every herbicide label warns against applying when the temperatures are above 85 degrees and especially under drought conditions. Those weeds flourished and dispersed seed everywhere. Now, they are just sitting there ready to sprout again.
It’s time to start thinking about weed prevention. Pre-emergent herbicides need to be applied prior to seed germination. Late winter is the time to focus on summer annual weeds. The narrow window of application is challenging. Homeowners often wait too late into spring to put out preventative products. A general rule of thumb for pre-emergent herbicide timing is February 15 – March 1 in North Florida.
However, weed seeds germinate in response to soil temperature, not calendar dates. By monitoring day time temperatures, one can determine a more effective application date. When there are 4-5 consecutive days that reach 65 to 70 degrees weeds will germinate. This generally coincides with the first blooms appearing on azaleas and dogwood. With a warm winter it may occur as early as mid-January.
Some of the active ingredients in pre-emergent herbicides include dithiopyr, isoxaben, oryzalin, pendimethalin, prodiamine and simazine. Always read the label for specific weed controlled and observe all directions, restrictions and precautions.
Weed and feed products that contain nitrogen are not suitable as pre-emergent herbicides. Irrigation before and after application is necessary to activate these products. The chemical binds to soil particles, creating a barrier that remains effective for 6-12 weeks. Reapplication will be necessary for season long control, especially with constantly fluctuating winter temperatures. Now is the time to purchase pre-emergent herbicides and prepare to apply them. For more information on weed control in lawns go to: http://edis.ifas.ufl.edu/ep141
by Julie McConnell | Jan 17, 2017
Winter flowers and small leaves with serrated edges lead to identification as Camellia sasanqua. Photo: J_McConnell, UF/IFAS
A common diagnostic service offered at your local UF/IFAS Extension office is plant identification. Whether you need a persistent weed identified so you can implement a management program or you need to identify an ornamental plant and get care recommendations, we can help!
In the past, we were reliant on people to bring a sample to the office or schedule a site visit, neither of which is very practical in today’s busy world. With the recent widespread availability of digital photography, even the least technology savvy person can usually email photos themselves or they have a friend or family member who can assist.
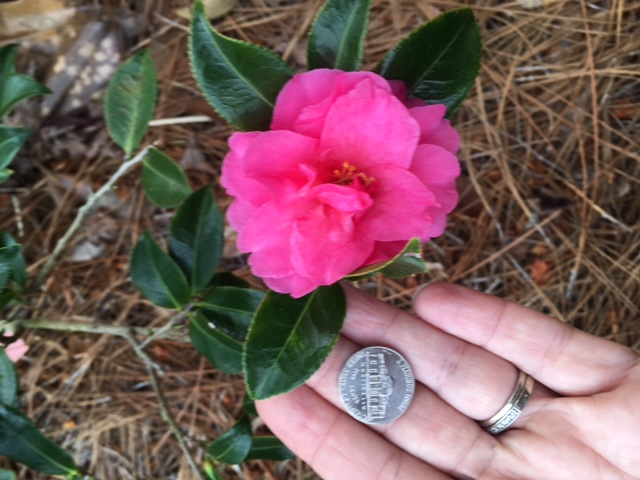
If you need to send pictures to a volunteer or extension agent it’s important that you are able to capture the features that are key to proper identification. Here are some guidelines you can use to ensure you gather the information we need to help you.
Entire plant – seeing the size, shape, and growth habit (upright, trailing, vining, etc.) is a great place to begin. This will help us eliminate whole categories of plants and know where to start.
Stems/trunks – to many observers stems all look the same, but to someone familiar with plant anatomy telltale features such as raised lenticels, thorns, wings, or exfoliating bark can be very useful. Even if it doesn’t look unique to you, please be sure to send a picture of stems and the trunk.
Leaves – leaf color, size and shape is important, but also how the leaves are attached to the stem is a critical identification feature. There are many plants that have ½ inch long dark green leaves, but the way they are arranged, leaf margin (edges), and vein patterns are all used to confirm identification. Take several leaf photos including at least one with some type of item for scale such as a small ruler or a common object like a coin or ballpoint pen; this helps us determine size. Take a picture that shows how leaves are attached to stems – being able to see if leaves are in pairs, staggered, or whorled around a stem is also important. Flip the leaf over and take a picture of the underside, some plants have distinctive veins or hairs on the bottom surface that may not be visible in a picture taken from above.
Flowers – if flowers are present, include overall picture so the viewer can see where it is located within the plant canopy along with a picture close enough to show structure.
Fruit – fruit are also good identification pictures and these should accompany something for scale to help estimate size.
Any additional information you are able to provide can help – if the plant is not flowering but you remember that it has white, fragrant flowers in June, make sure to include that in your description.
Learning what plants you have in your landscape will help you use your time and resources more efficiently in caring for you yard. Contact your local UF/IFAS Extension office to find out who to send requests for plant id.
by Beth Bolles | Nov 22, 2016
Leaf wilt may indicate more than just dry soil. Photo by Beth Bolles
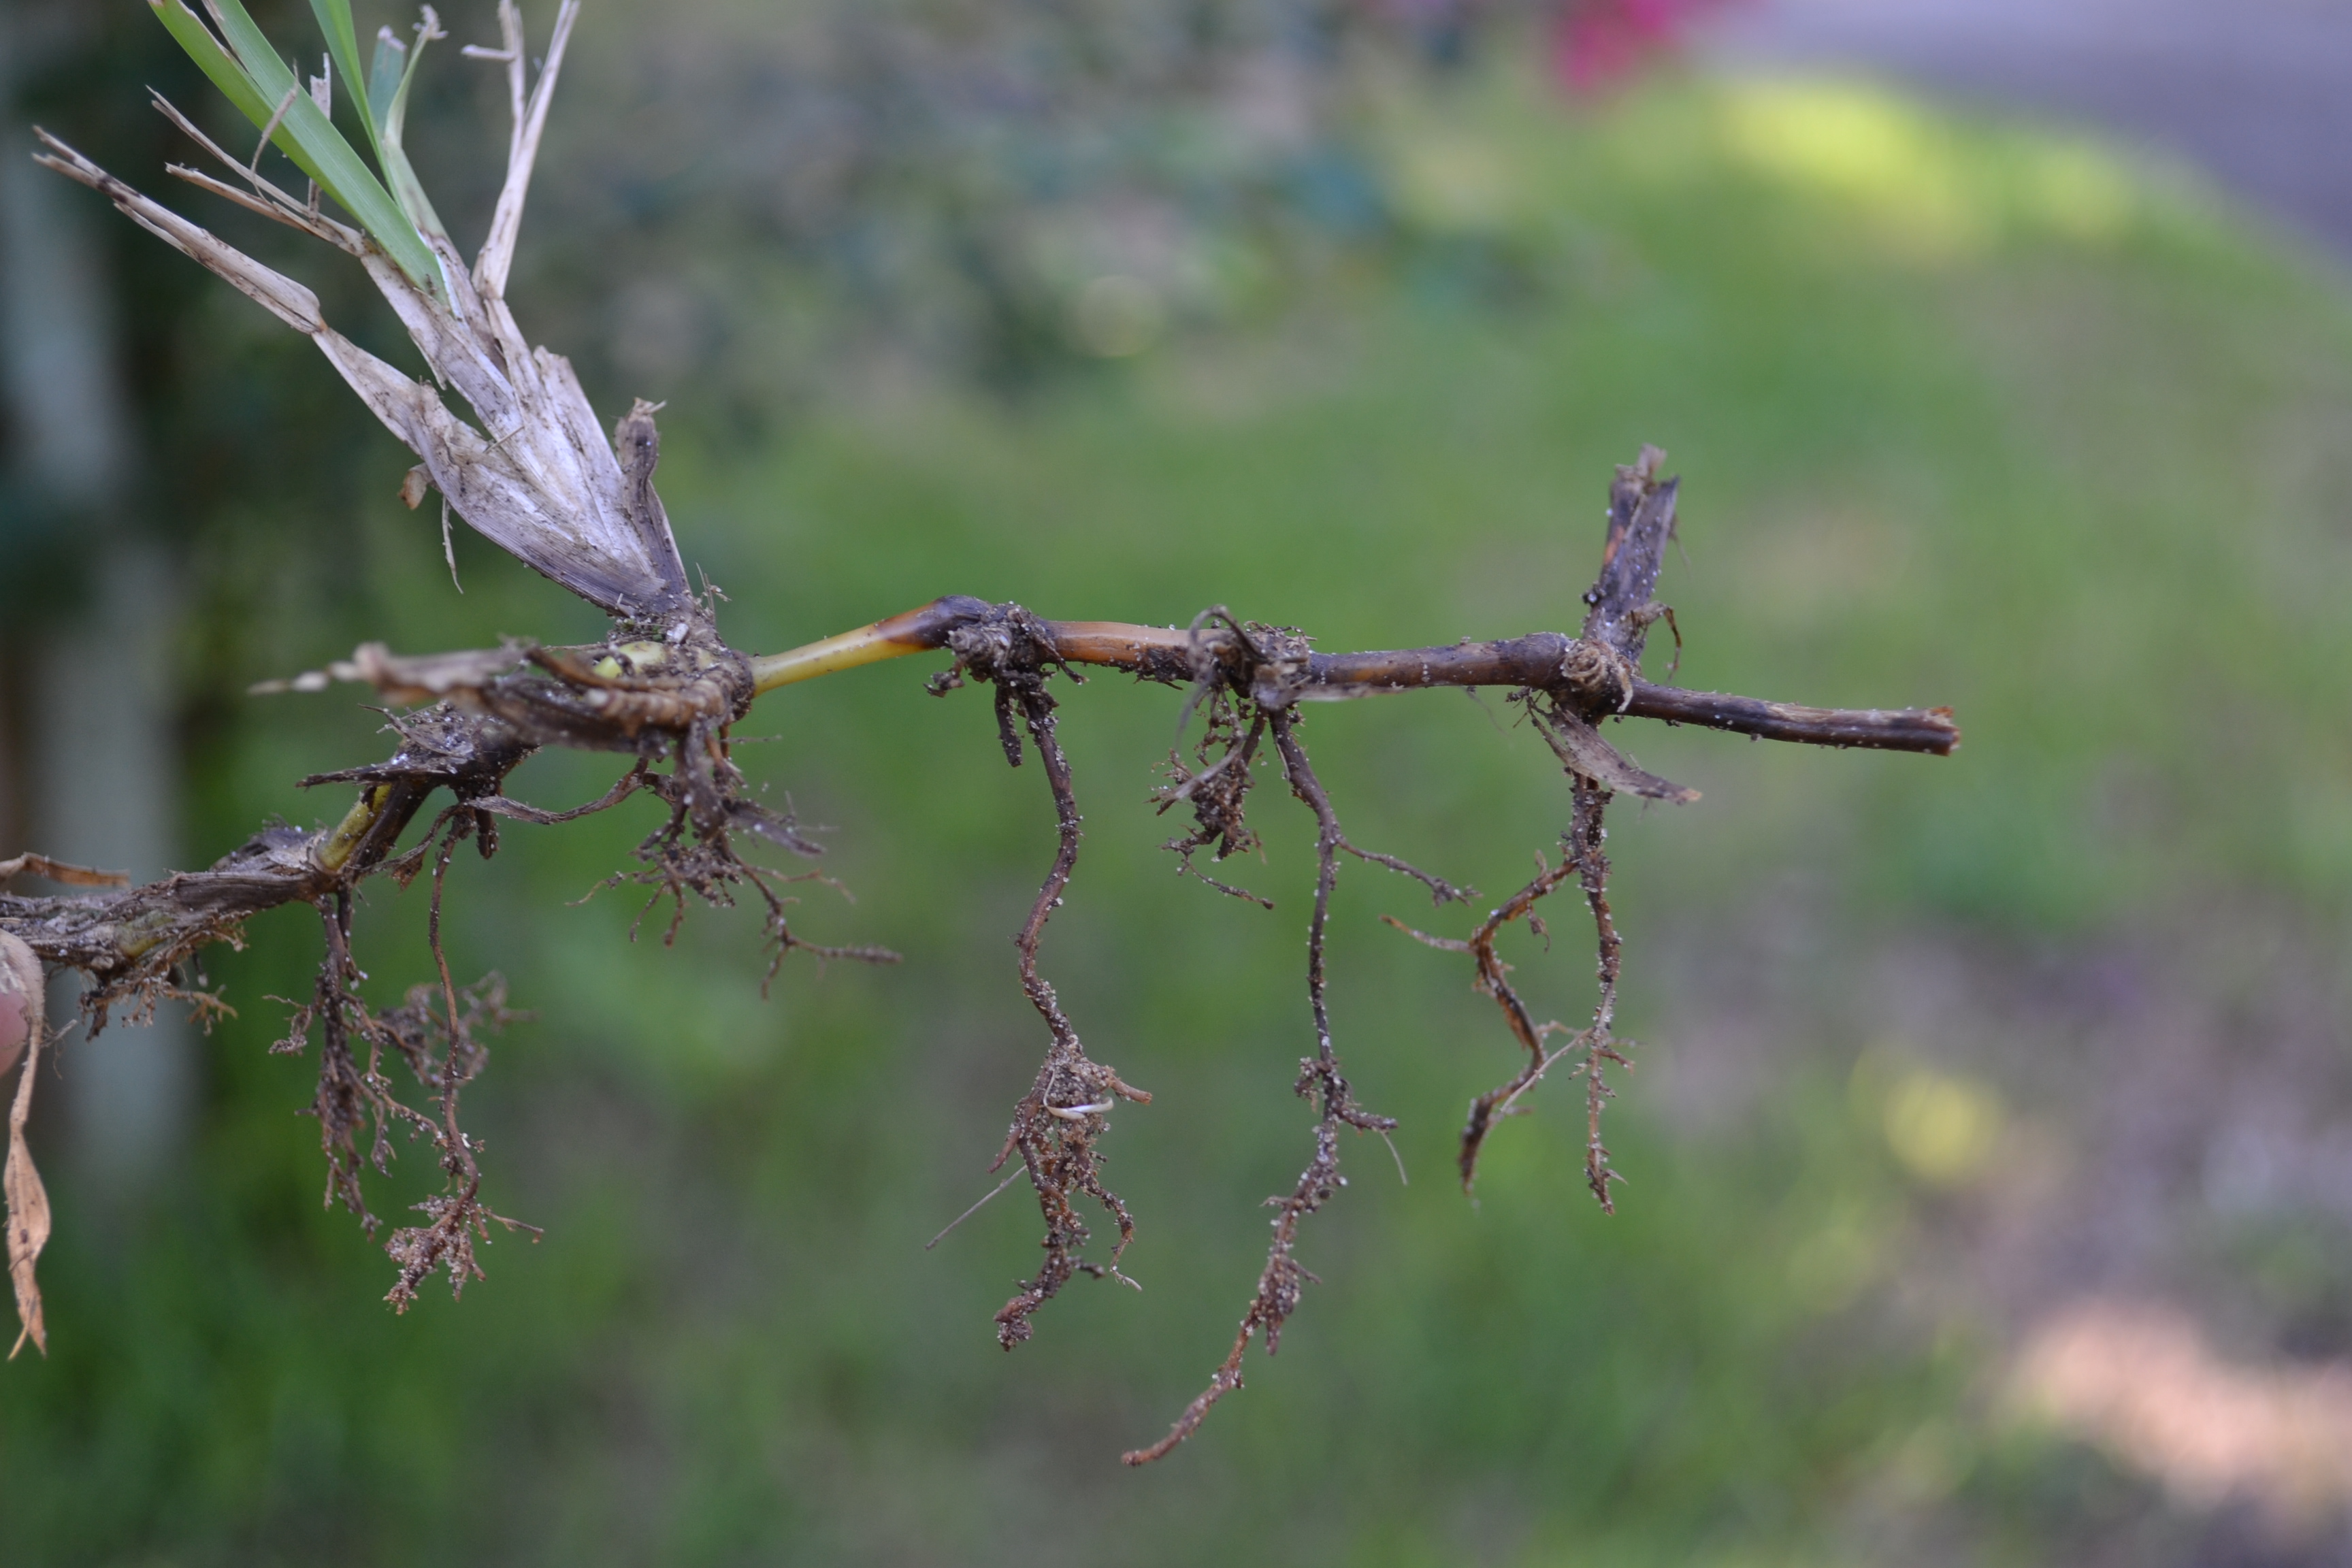
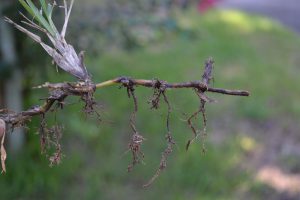
Plants have specific ways of telling gardeners that there is a problem, but not all plant symptoms lead us directly to the cause. During drier conditions, we often use wilting leaves as an indicator that water is needed. This can be a reliable symptom that the soil is lacking moisture but it is not always the case. Wilting leaves and herbaceous branches actually tell us that there is not adequate water in the plant. It does not necessarily indicate lack of moisture in the soil.
There can be many reasons why water is not being absorbed by roots and moved to tissues in the plant. The obvious place to start is by checking soil moisture. If soil is powdery several inches deep around the plant, water is likely needed. However, if you ball the soil up in your hand and it holds together, there may be another reason for lack of water reaching the upper plant parts. The harder part is determining why the root system is not taking up water. Causes can be a rotted root system from too much water, a poorly developed root ball that has circling or kinked roots, and even problems in the soil such as compaction. Insects, diseases, and other pathogens can also injure root systems preventing the uptake of water.
Too much water can cause roots to decay, preventing the uptake of water. Photo by Beth Bolles
So before automatically grabbing the hose or turning on the sprinkler, do a little soil investigation to make sure that the plant wilt is really indicating lack of water in the soil. If you need help in your diagnosis, always contact your local Extension office.
by Matthew Orwat | Oct 21, 2016
Wednesday November 9th, 8am-4pm. Green Industries Best Management Practices
Okaloosa County Extension 3098 Airport Rd. Crestview, FL. Click Here for flyer.
by Ray Bodrey | Sep 8, 2016
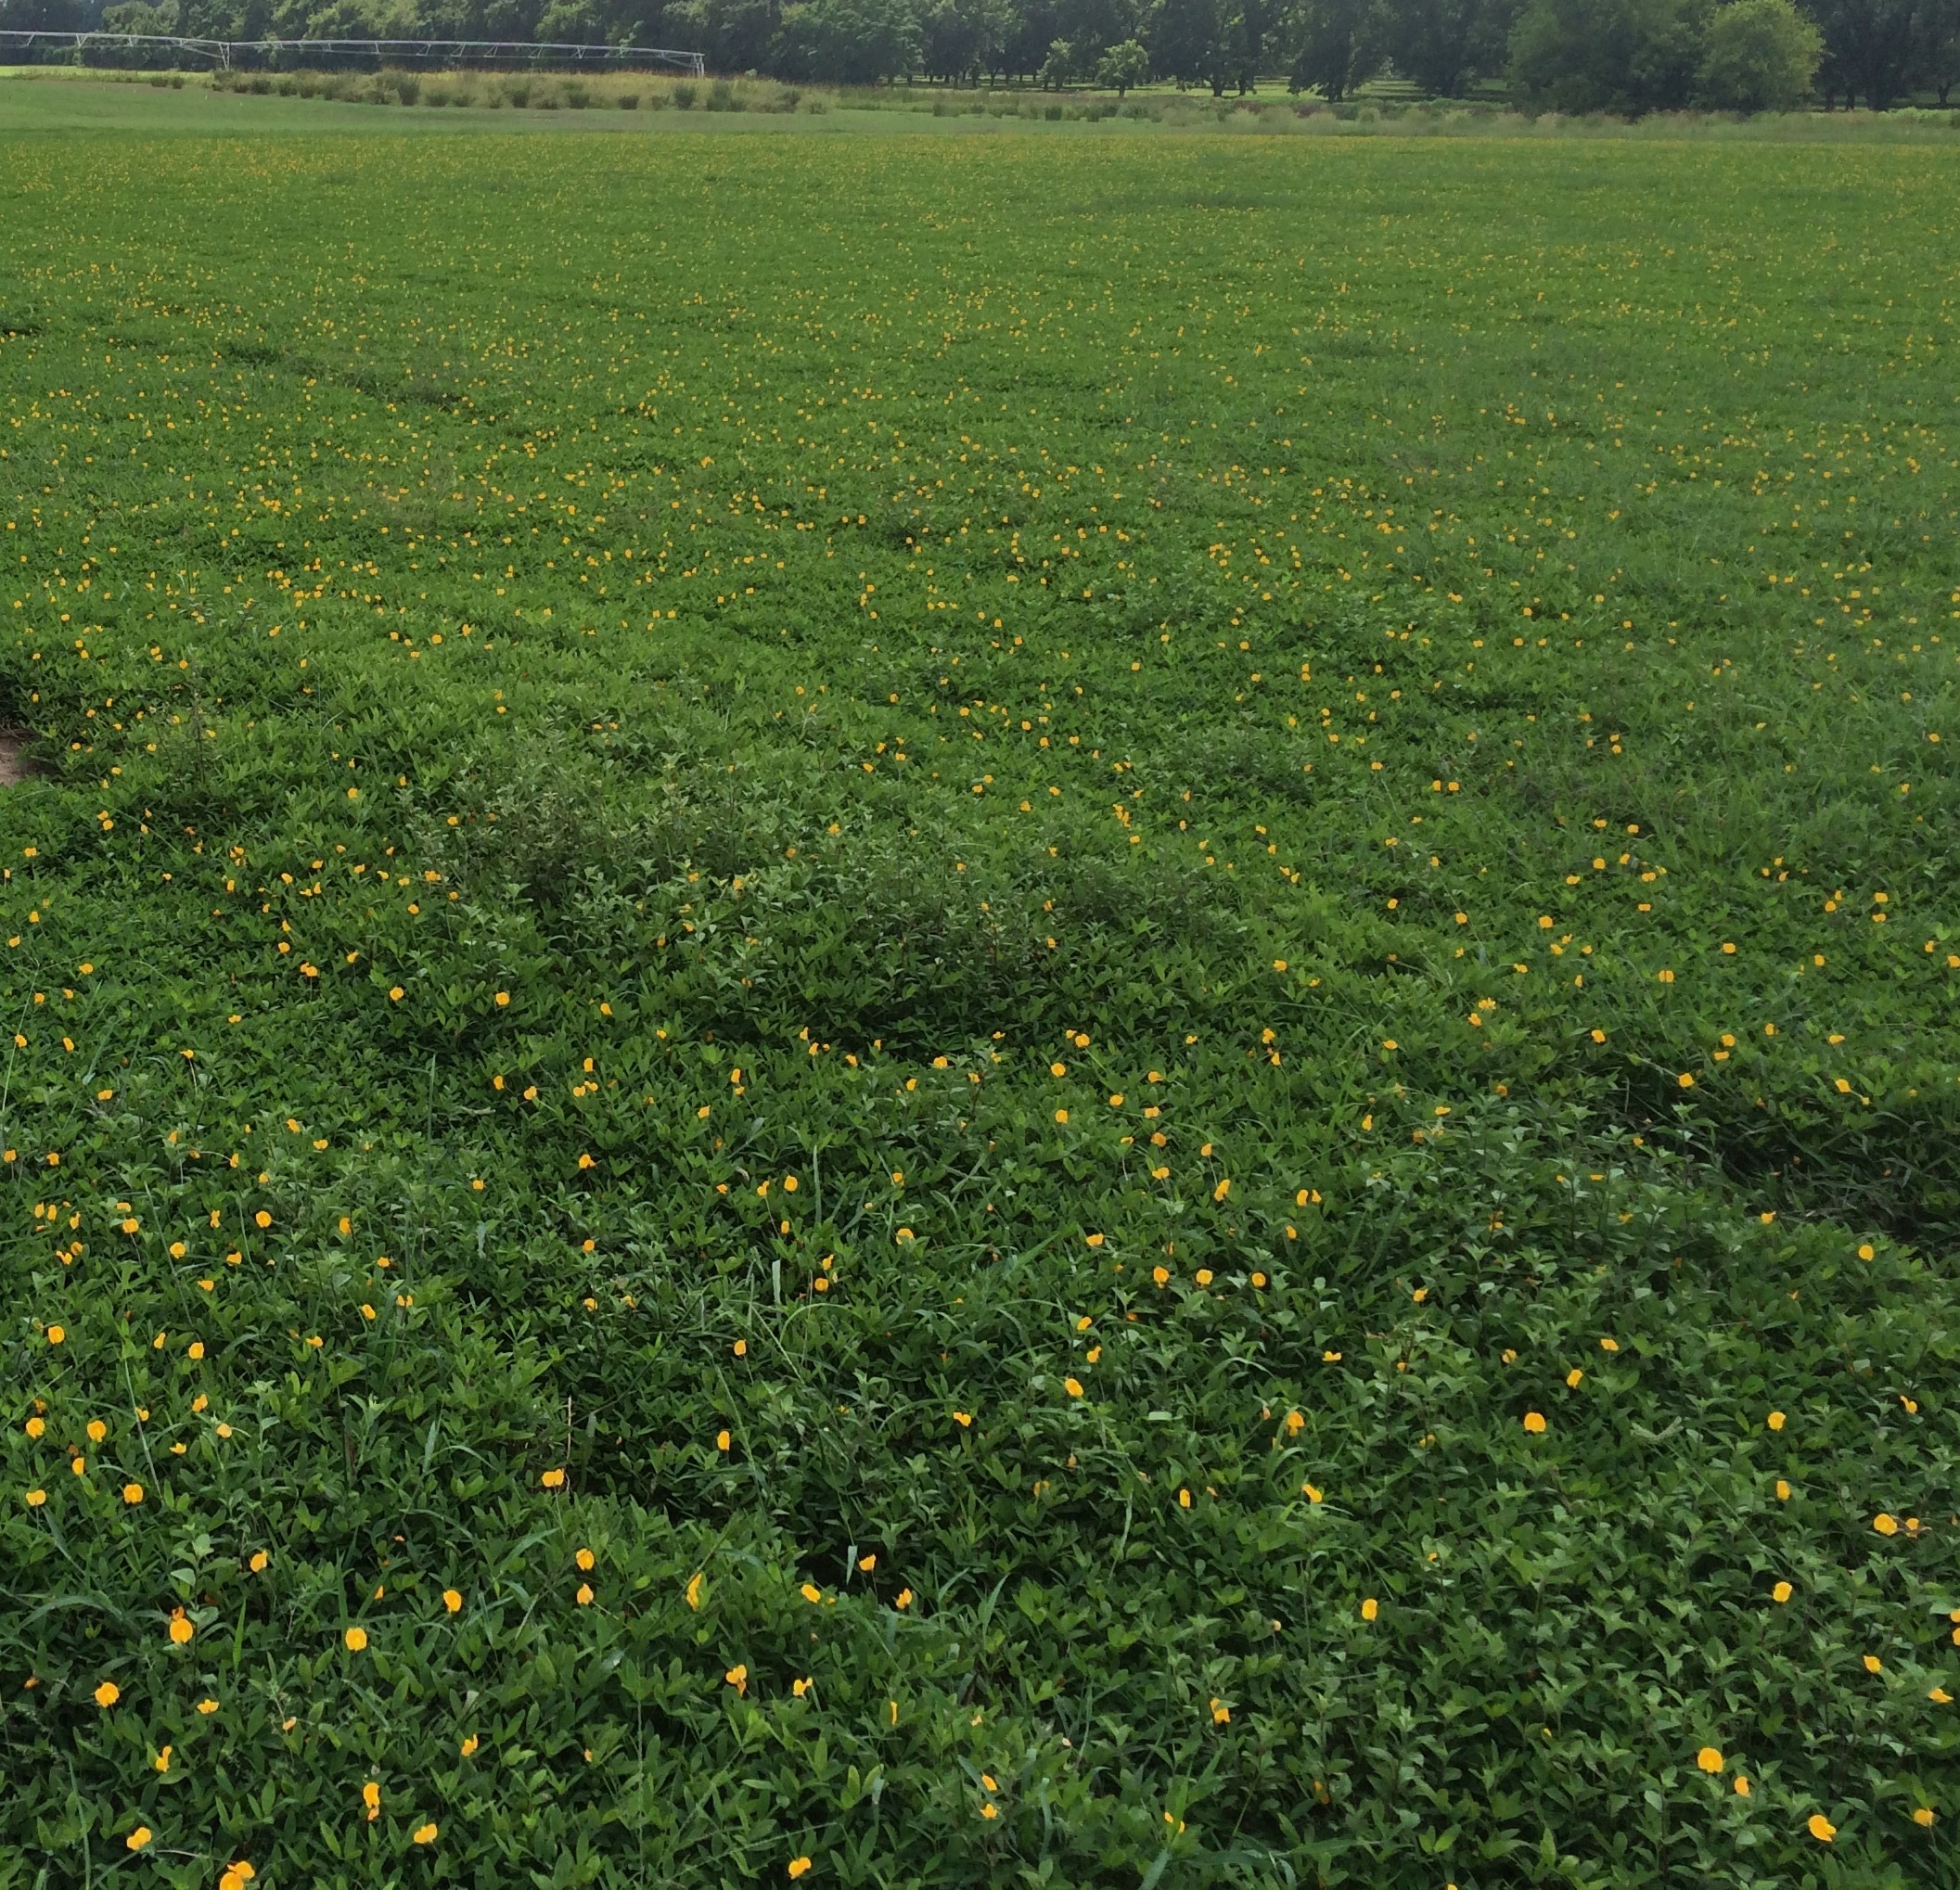
Driving through rural panhandle counties this time of year, one finds pastures with thick green canopies, exploding with yellow-gold flowers. Perennial peanut is in bloom. This is a highly nutritional forage option for livestock and also makes for a beautiful urban groundcover alternative to turfgrass.

Perennial Peanut Field. Photo credit: Ray Bodrey, UF/IFAS.
Perennial peanut was introduced from Brazil in the mid 1930’s. Though a non-native, the perennial peanut has not been shown to be a nuisance nor an invasive. The plant is in the same genus as the peanut that humans consume. However, this plant is a true perennial, living year to year. Perennial peanut does produce a small seed pod. But rhizoma perennial peanut, Arachis glabrata, does not reproduce by seed. Therefore, wildlife, specifically birds, are unable to disburse the plant into unintended areas.
As a side note, few perennial peanut cultivars, such as Arachis pintoi or “pinto peanut”, can be planted by seed. This species has stolons or “runners” and will produce adventitious roots at the nodes. The pinto peanut has become confused in nursery trade with the Florida-developed perennial peanut. Limited research to date has shown how well pinto peanuts perform as groundcover. The pinto peanut is more susceptible to winter kill, insect damage and nematodes than the cultivar Arachis glabrata.
The Florida developed perennial peanut is used mostly for hay or grazing by livestock such as horses, beef & dairy cattle, sheep and goats, as well as wildlife such as deer, rabbits and turkeys. The most common cultivars for pastures are “Florigrazed” and “Arbook”. These cultivars were released by UF IFAS and USDA in 1978 and in 1985. Since the release, these cultivars have also has been used in citrus groves as a cover crop as well as a ground cover in roadway medians. In Florida, it has been planted on approximately 30,000 acres.
Perennial peanut is high in nutritional value and is easily digestible by forage animals. It’s also a nitrogen fixer. Like all legumes, perennial peanut obtains its nitrogen from a bacteria associated with the plant’s root system. Therefore, it naturally adds nitrogen to the soil, reducing the amount of fertilizer needed if used with other crops or plants in a landscape.
Perennial peanut will reach ½ – 1 ½ feet in height. The plant is propagated using rhizomes and can be purchased as mats of sod or in containers. With its extensive root system, rhizoma perennial peanut spreads across the ground as a sod grass would perform. Perennial peanut grows best in sandy to sandy loam soils with a target soil pH of 6.0 although a soil range of 5.8 – 7.0 is adequate. It requires high moisture, with at least 30 inches of rain per year.
In home landscapes, several cultivars are available and have limited maintenance issues. “Ecoturf” and “Arblick” are the most popular cultivars used due to their lower height and profuse flowering. These cultivars thrive in coastal areas as they are considered salt tolerant. Salt spray, drift and short term salt water flooding have little effect. Mowing is not required but edging may be needed as the plant spreads. Weed control is the most concerning, especially during establishment. For pest management, peanut stunt virus cases have been reported. The symptoms are leaf mottling and yield depressions, but are rarely a problem unless the plant is under drought or nutrient stress.
All information considered, perennial peanut is a great option for panhandle livestock producers or the home landscape enthusiast.
Supporting information for this article can be found in the UF/IFAS EDIS publications:
“Guide to Using Rhizomal Perennial Peanut in the Urban Landscape”, by Robert E. Rouse, Elan M. Miavitz and Fritz M. Roka.
“Rhizoma Perennial Peanut”, by M.J. Williams, Y.C. Newman and Ann Blount.
“Perennial Peanut: A Quick Reference”, by Yoana C. Newman, Cheryl L. Mackowiak, Ann R. Blount and Jason Ferrell.
“Plant Materials Fact Sheet: Rhizoma Perennial Peanut (Arachis glabrata) – The Perennial Peanut for Urban Conservation in Florida”, by USDA NRCS.


