by Evan Anderson | Oct 21, 2021
While most people are familiar with the European honey bee, the domesticated insect that pollinates our crops and provides us with honey, there are plenty of other species of bees and their relatives out there. Most of them are harmless, spending their time quietly pollinating plants, including our crops. Their presence in the landscape, however, may cause some alarm, as it can be difficult for the untrained eye to distinguish between aggressive species and those that are innocuous.
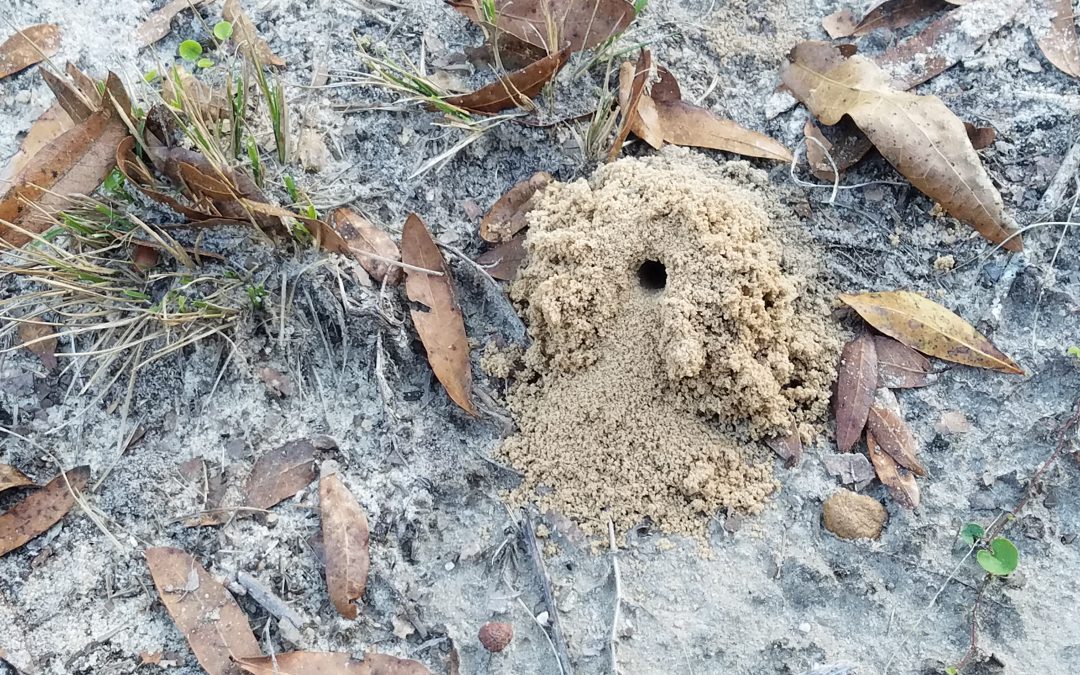
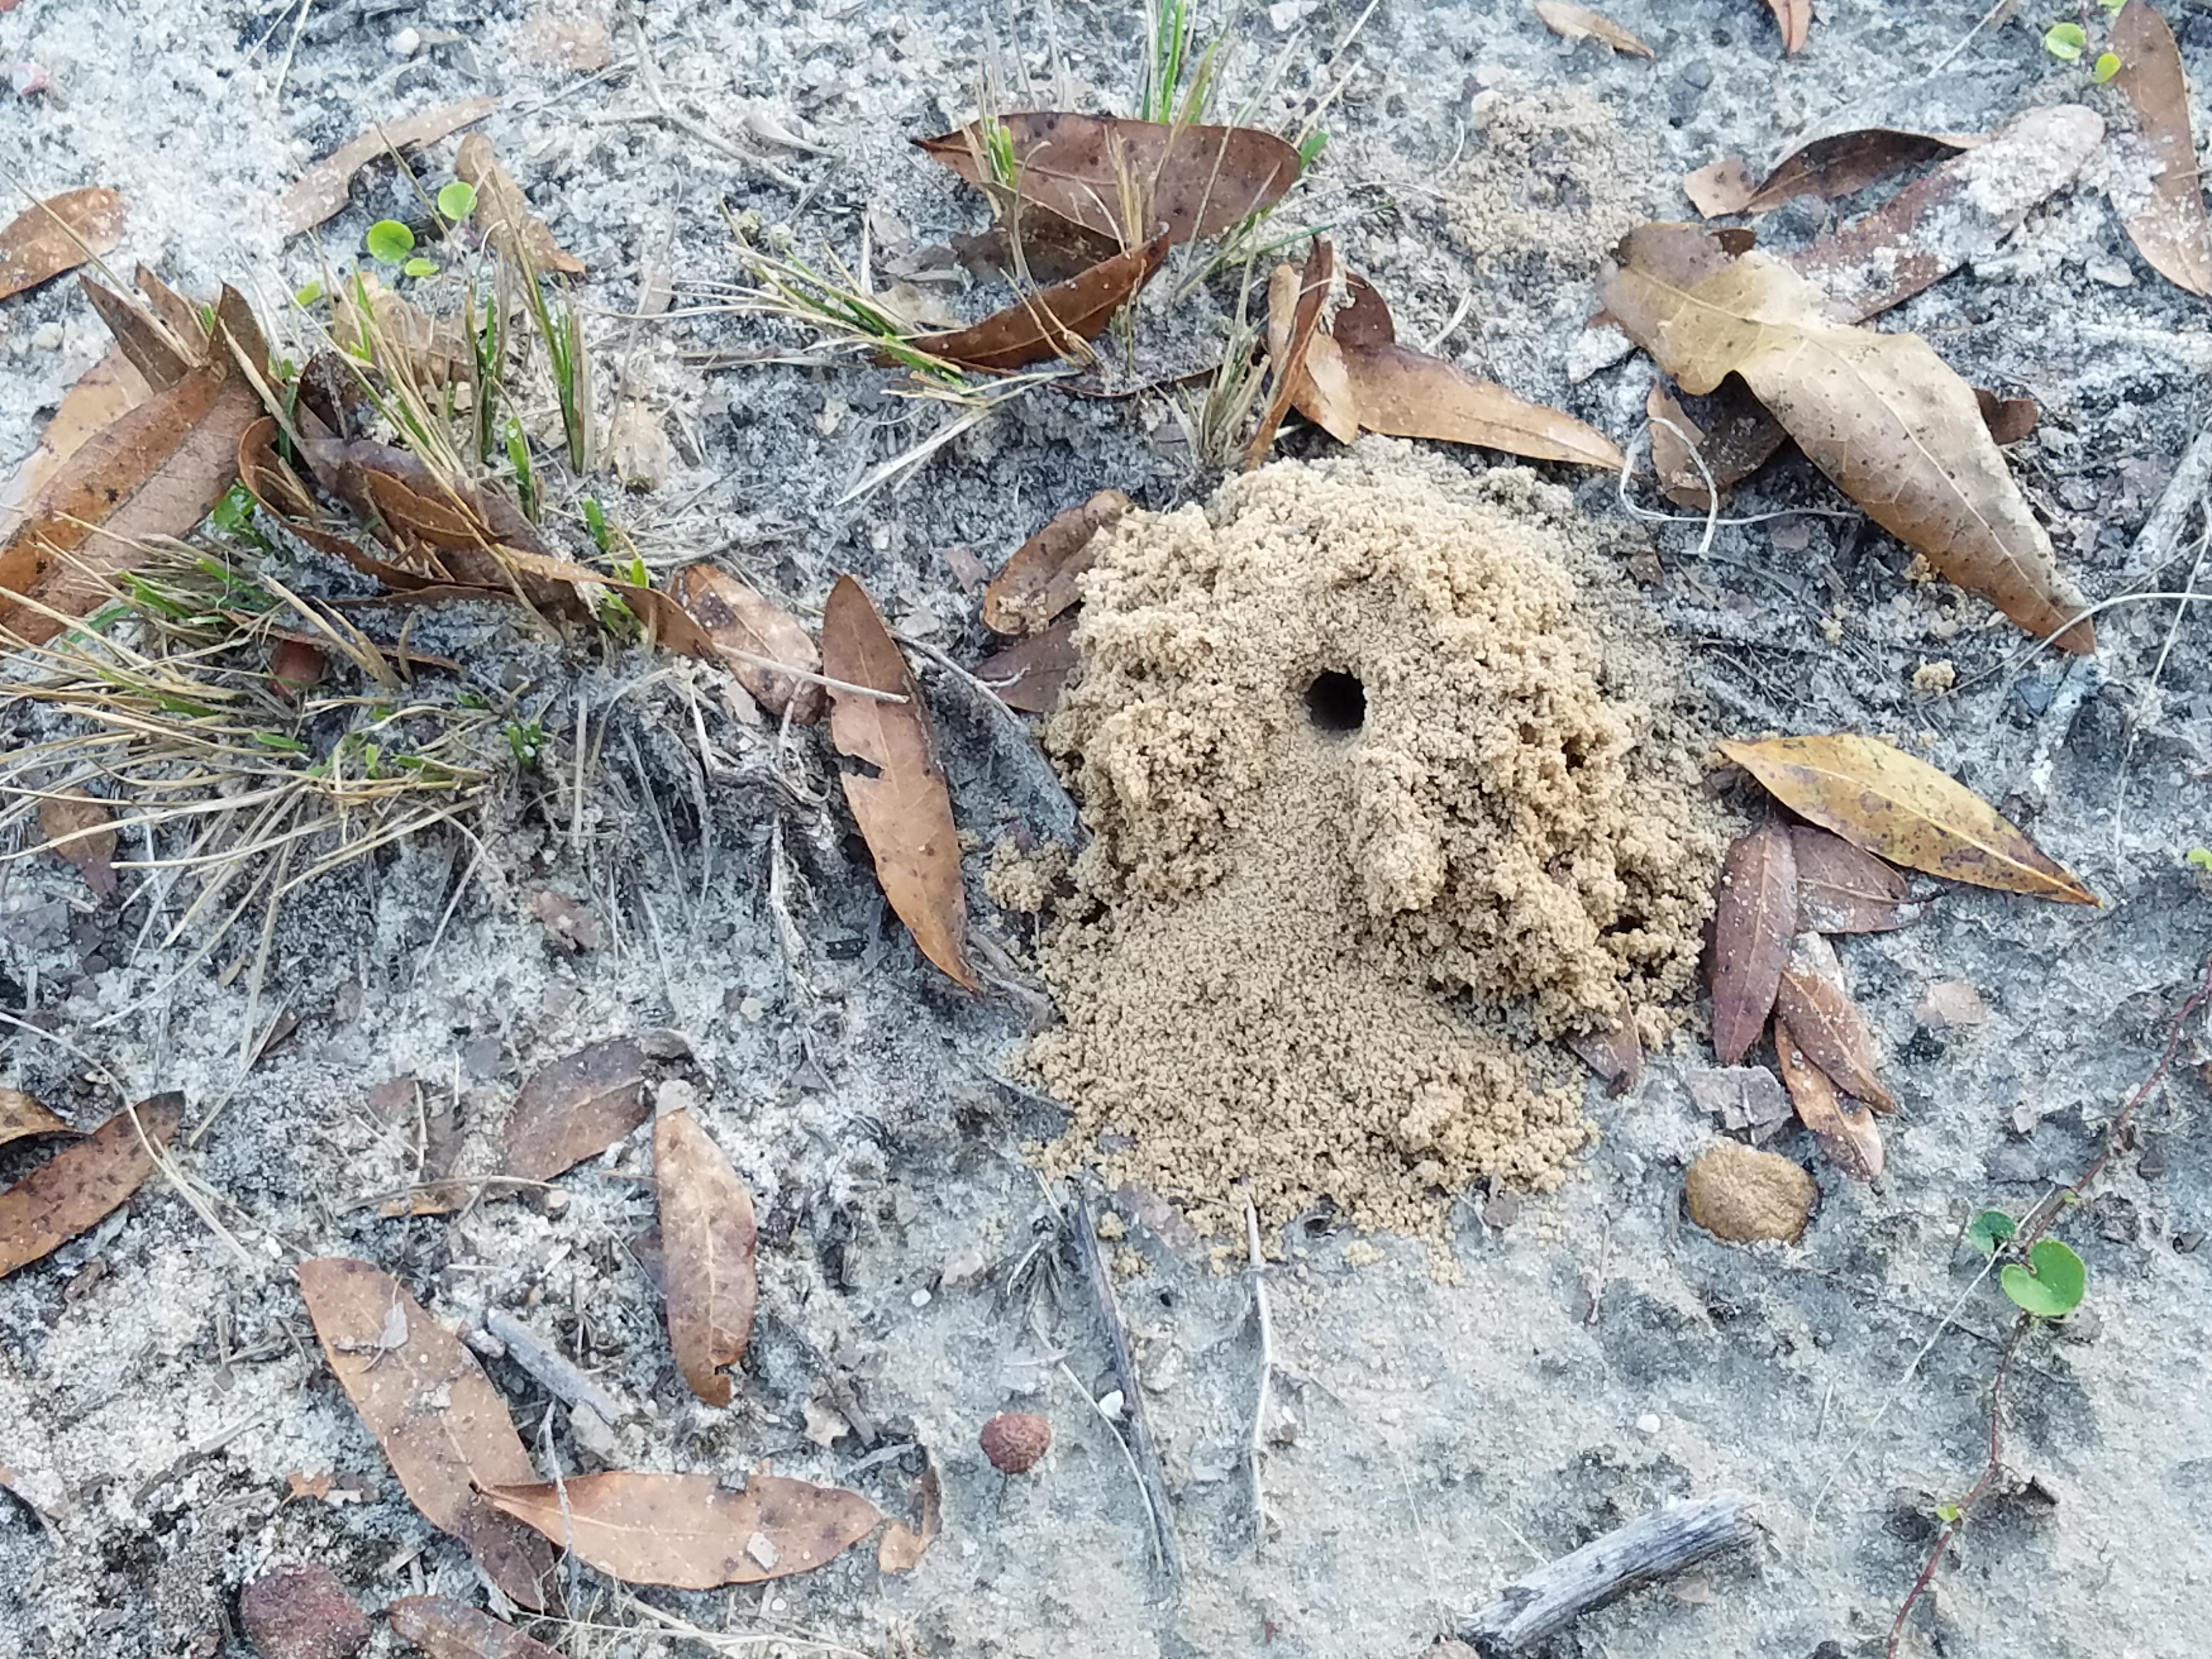
The entrance to a miner bee burrow.
Homeowners may occasionally note small mounds of soil in sandy areas of their lawns. Sometimes sporting a small hole in the center, these are the nesting sites of solitary, ground-nesting bees or hornets. Miner bees or digger bees build underground chambers, usually in well-drained, otherwise bare areas of sandy soil. Multiple bees may choose to dig their nests in the same location, though each bee makes its own tunnel and they do not live communally. Each bee lays her eggs in the nest she has excavated. She gathers pollen to feed the young when they hatch, stocks the larder, and leaves. When the young emerge from the nest, they fly away and do not remain; they will dig their own nests when they are ready to reproduce. While there is no need to control these insects (they serve as fantastic pollinators), the mounds of soil they make may be aesthetically displeasing to some people. Keeping a healthy lawn with no bare patches can deter miner bees from nesting in an area. Irrigation sprinklers can also help to keep the ground moist; these bees prefer dry soil, so it may keep them away. Care must be taken not to over-water a lawn, however!

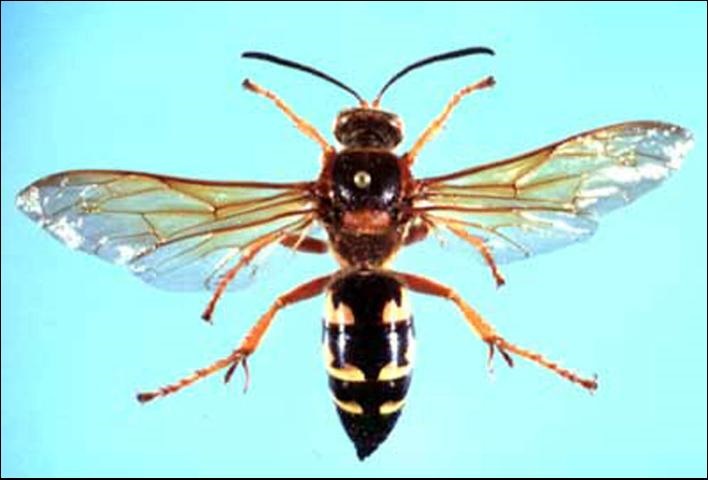
A cicada killer wasp. Photo credit: Division of Plant Industry
Another species of note is the cicada killer hornet. Also known as the giant ground hornet, these insects grow to a size of about an inch and a half in length. Instead of pollen, they capture cicadas to feed their young. Like the miner bee, though, they are not harmful. Females do possess a stinger which they use to hunt their prey. Males may try to warn people or animals away from their burrows by acting aggressive, but they have no stingers. Some may see the large size of the cicada killer and wonder if the so-called “murder hornet” has made its way from Washington state to Florida, but as of this writing it has not. Unless you are a cicada, you have nothing to fear.
One ground-dwelling hornet that does warrant some concern is the yellowjacket. These are communal hornets, living in hives that are often build underground. Yellowjackets are known for their bad attitudes, attacking anyone who disturbs the entrance to their nest. They can be beneficial, being predators of many other insects including plant pests. A colony located too close to human dwellings or areas of activity is most often a nuisance, however. Any attempts to control yellowjacket nests should be done at night when they are less active. Protective clothing is recommended even then. Large or difficult to reach nests may require the attention of a certified pest control company.
For more information on these topics, see our EDIS publications:
Miner Bees: https://edis.ifas.ufl.edu/publication/in912
Cicada Killers: https://edis.ifas.ufl.edu/publication/in573
Yellowjackets: https://edis.ifas.ufl.edu/publication/IN238
by Daniel J. Leonard | Sep 30, 2021

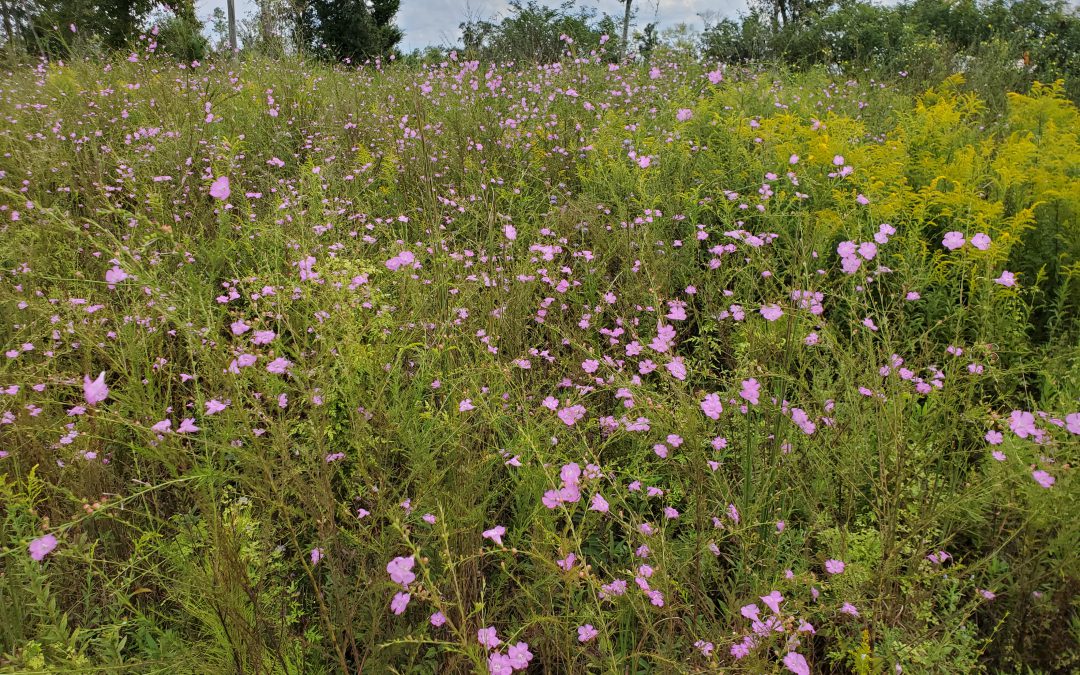
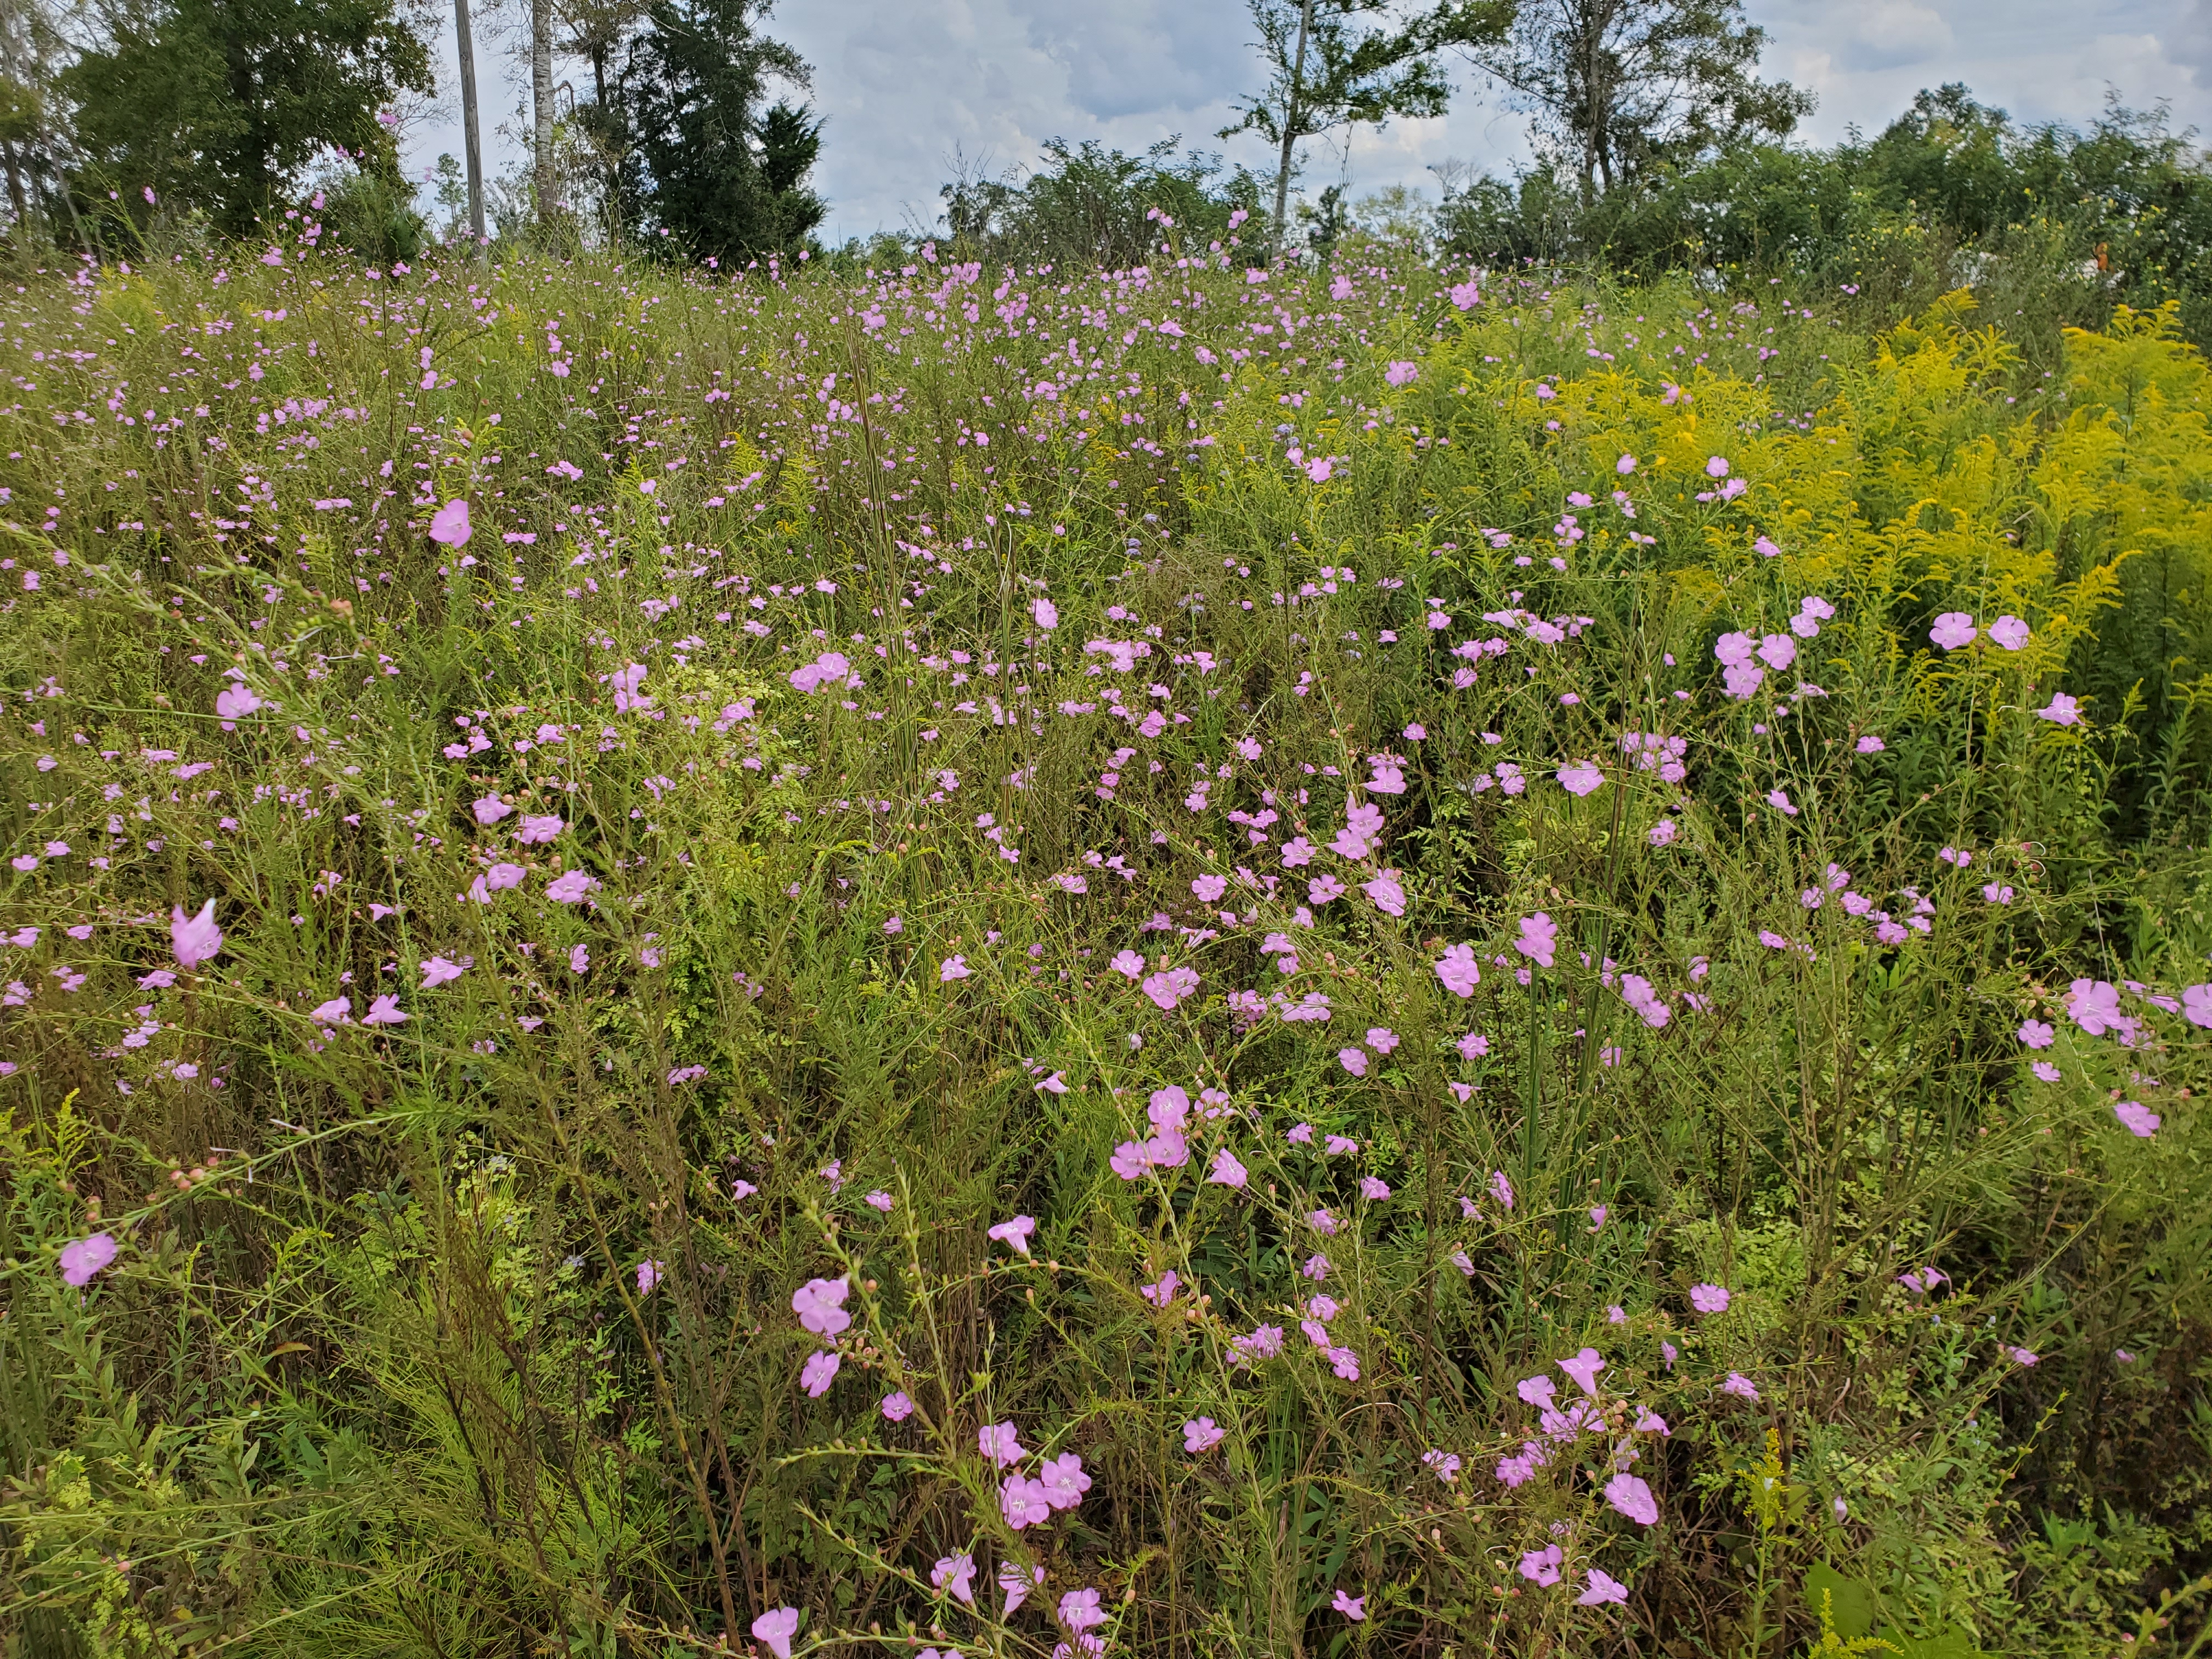
False Foxglove in a Calhoun County natural area. Photo courtesy of Daniel Leonard.
Fall is the absolute best season for wildflower watching in the Panhandle! When mid-September rolls around and the long days of summer finally shorten, giving way to drier air and cooler nights, northwest Florida experiences a wildflower color explosion. From the brilliant yellow of Swamp Sunflower and Goldenrod, to the soothing blue of Mistflower, and the white-on-gold of Spanish Needles, there is no shortage of sights to see from now until frost. But, in my opinion, the star of the fall show is the currently flowering False Foxglove (Agalinus spp.).
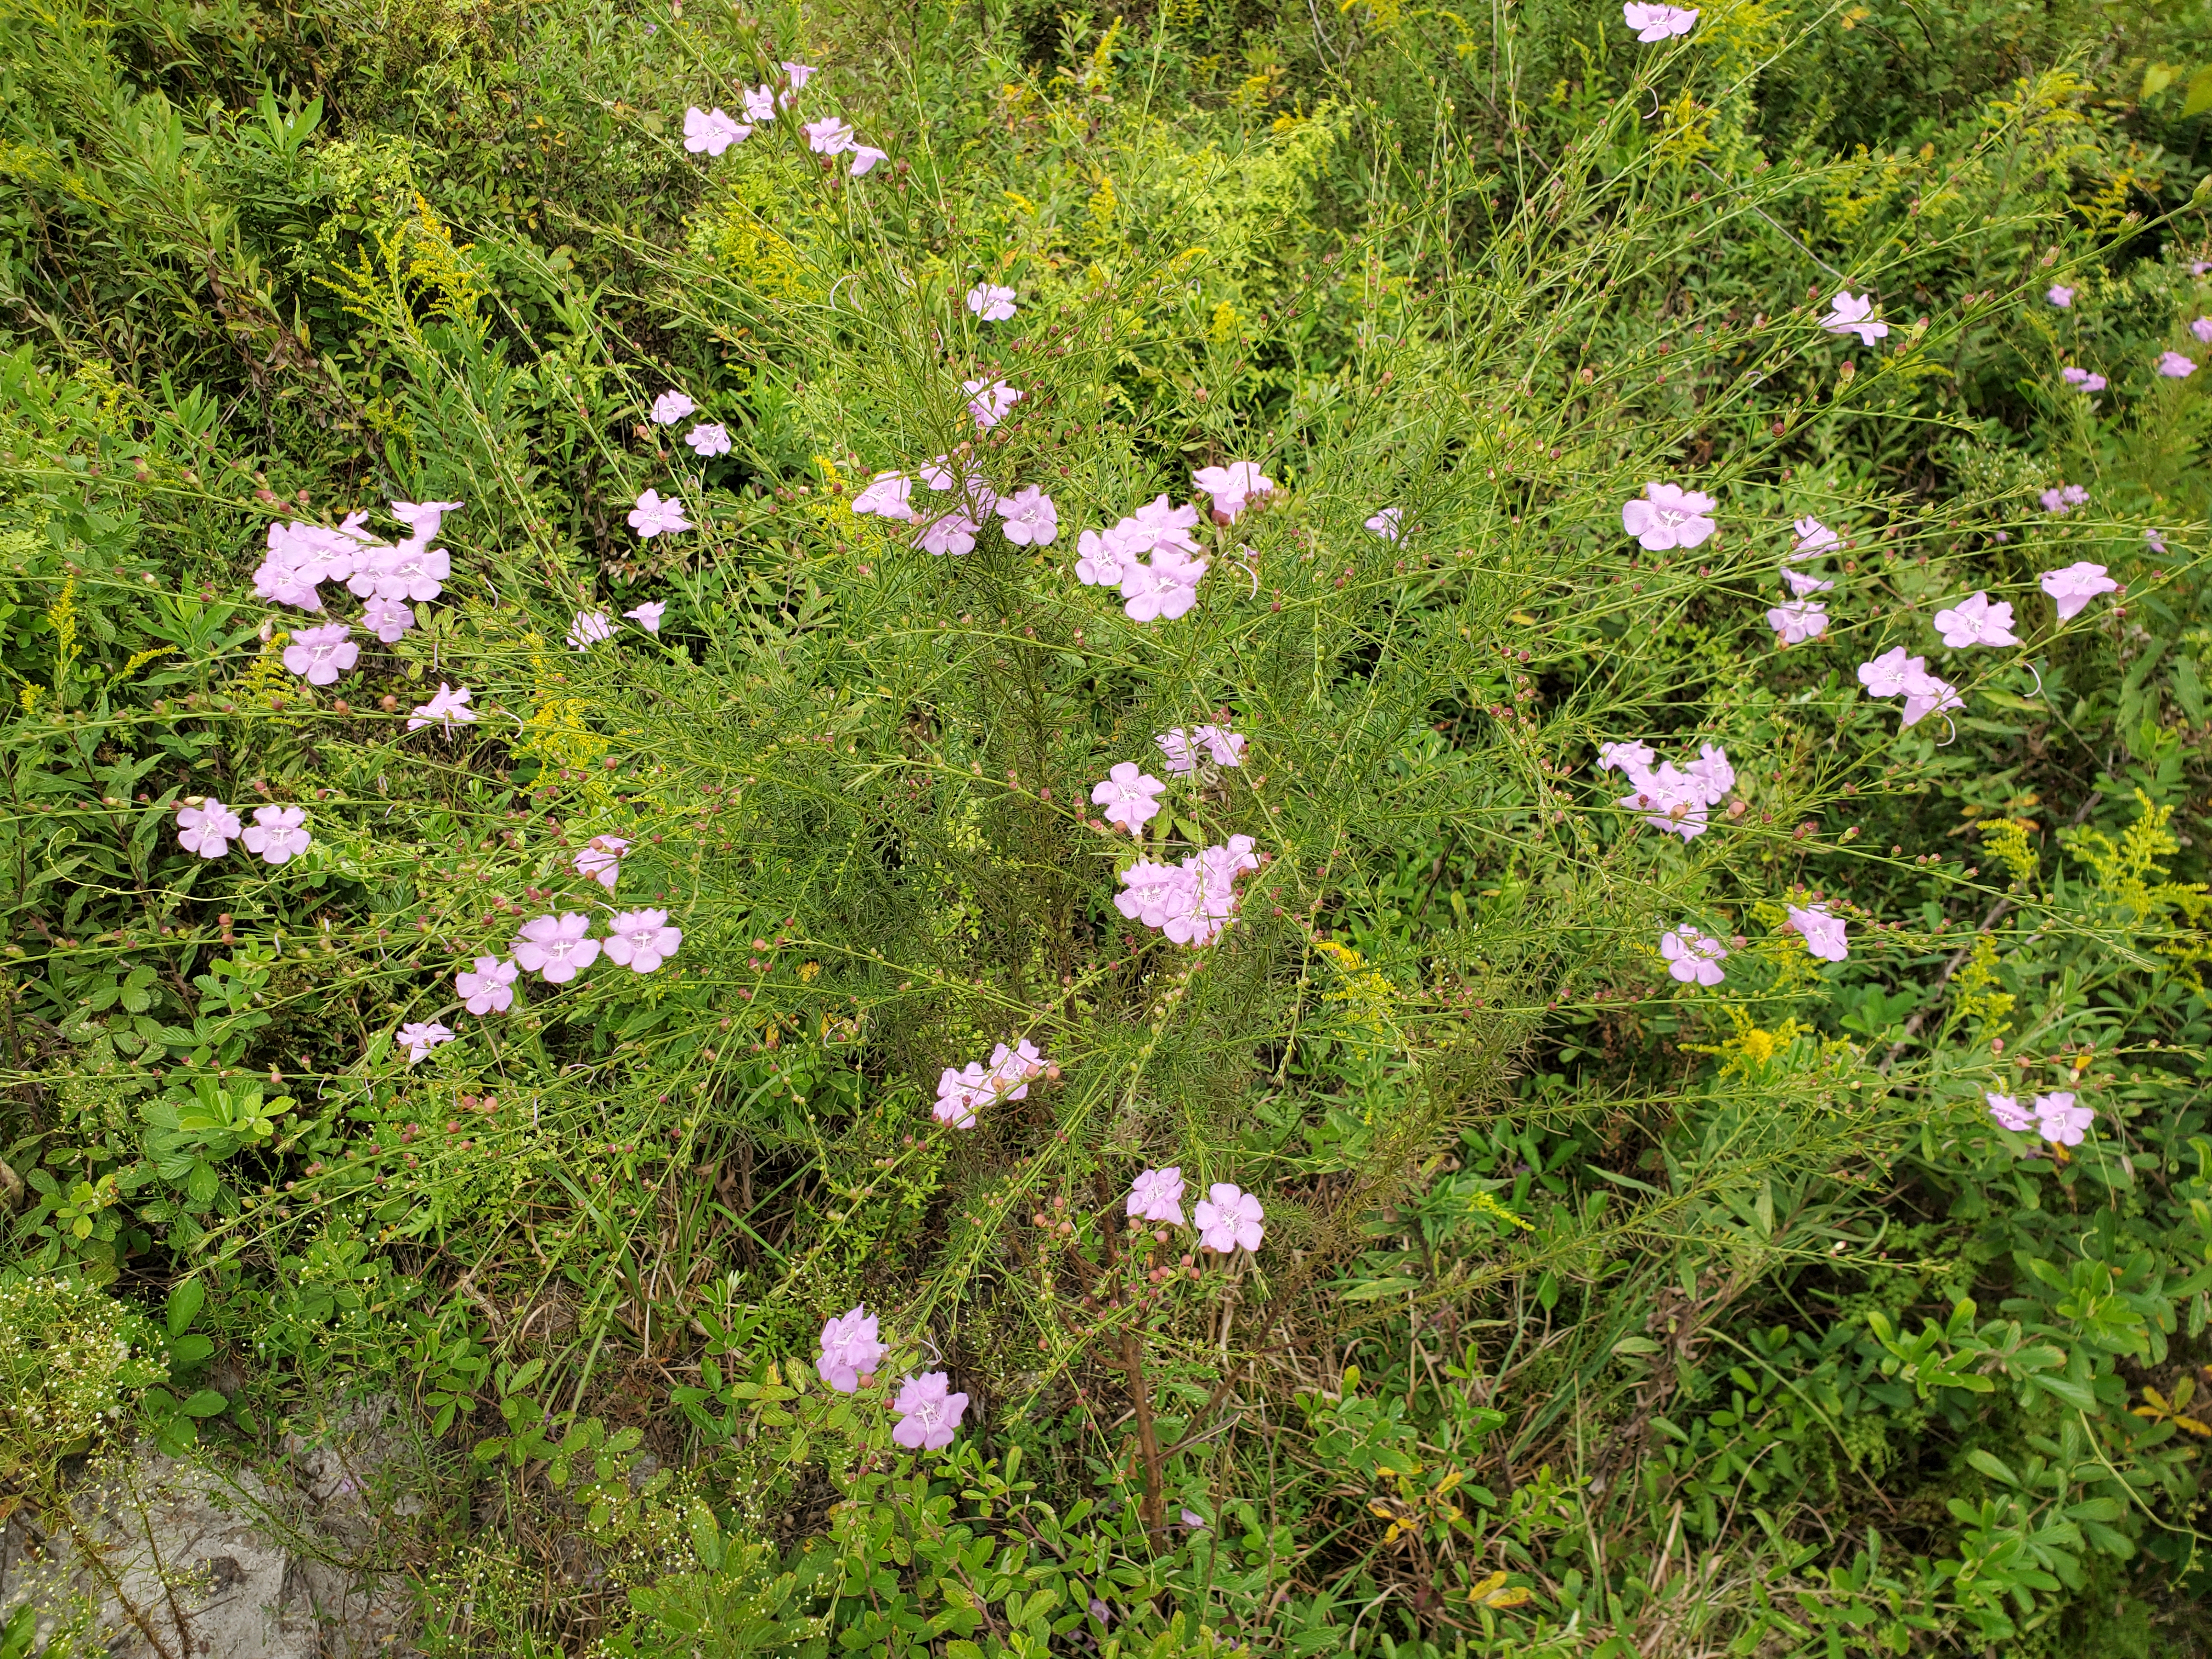
Named for the appearance of their brilliant pink flowers, which bear a resemblance to the northern favorite Foxglove (Digitalis spp.), “False Foxglove” is actually the common name of several closely related species of parasitic plants in the genus Agalinus that are difficult to distinguish by all but the keenest of botanists. Regardless of which species you may see, False Foxglove is an unusual and important Florida native plant. Emerging from seed each spring in the Panhandle, plants grow quickly through the summer to a mature height of 3-5’. During this time, False Foxglove is about as inconspicuous a plant as grows. Consisting of a wispy thin woody stem with very small, narrow leaves, plants remain hidden in the flatwoods and sand hill landscapes that they inhabit. However, when those aforementioned shorter September days arrive, False Foxglove explodes into flower sporting sprays of dozens of light purple to pink tubular-shaped flowers that remain until frost ends the season.
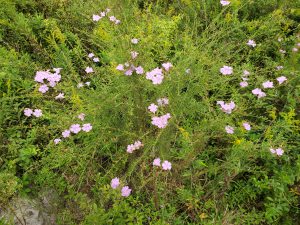
False Foxglove flowering in a Calhoun County natural area. Photo courtesy of Daniel Leonard.
In addition to being unmatched in flower, False Foxglove also plays several important ecological roles in Florida’s natural areas. First, False Foxglove’s relatively large, tubular-shaped flowers are the preferred nectar sources for the larger-sized native solitary and bumble bees present in the Panhandle, though all manner of generalist bees and butterflies will also visit for a quick sip. Second, False Foxglove is the primary host plant for the unique Common Buckeye butterfly. One of the most easily recognizable butterflies due to the large “eye” spots on their wings, Common Buckeye larvae (caterpillars), feed on False Foxglove foliage during the summer before emerging as adults and adding to the fall spectacle. Finally, False Foxglove is an important indicator of a healthy native ecosystem. As a parasitic plant, False Foxglove obtains nutrients and energy by photosynthesis AND by using specialized roots to tap into the roots of nearby suitable hosts (native grasses and other plants). As both False Foxglove and its parasitic host plants prefer to grow in the sunny, fire-exposed pine flatwoods and sand ridges that characterized pre-settlement Florida, you can be fairly confident that if you see a natural area with an abundance of False Foxglove in flower, that spot is in good ecological shape!
The Florida Panhandle is nearly unmatched in its fall wildflower diversity and False Foxglove plays a critical part in the show. From its stunning flowers to its important ecological roles, one would be hard-pressed to find a more unique native wildflower! For more information about False Foxglove and other Florida native wildflowers, contact your local UF/IFAS County Extension office.
by Beth Bolles | Aug 18, 2021
In a garden with a variety of flowers, pollinators will be abundant. Sometimes we don’t always recognize the specific pollinator when we see it, but there are some native pollinators that leave other signs of their activity. One of our medium-sized native bees will leave a distinctive calling card of recent activity in our landscape.
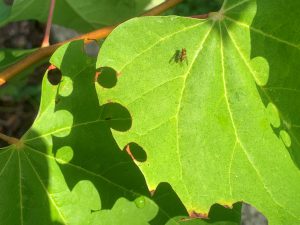
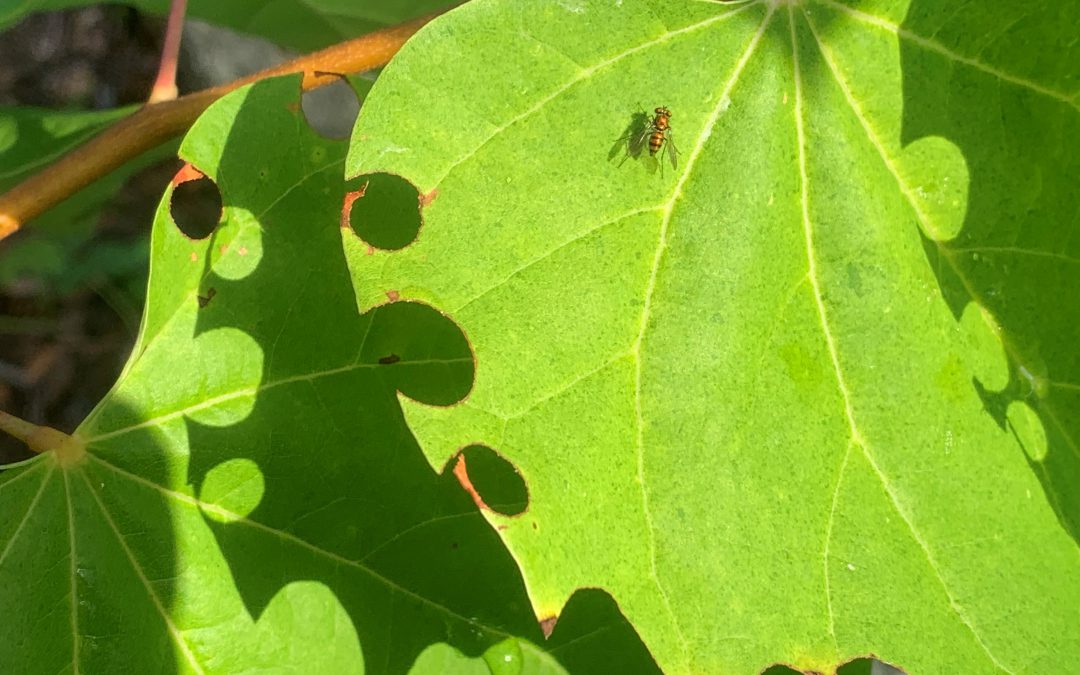
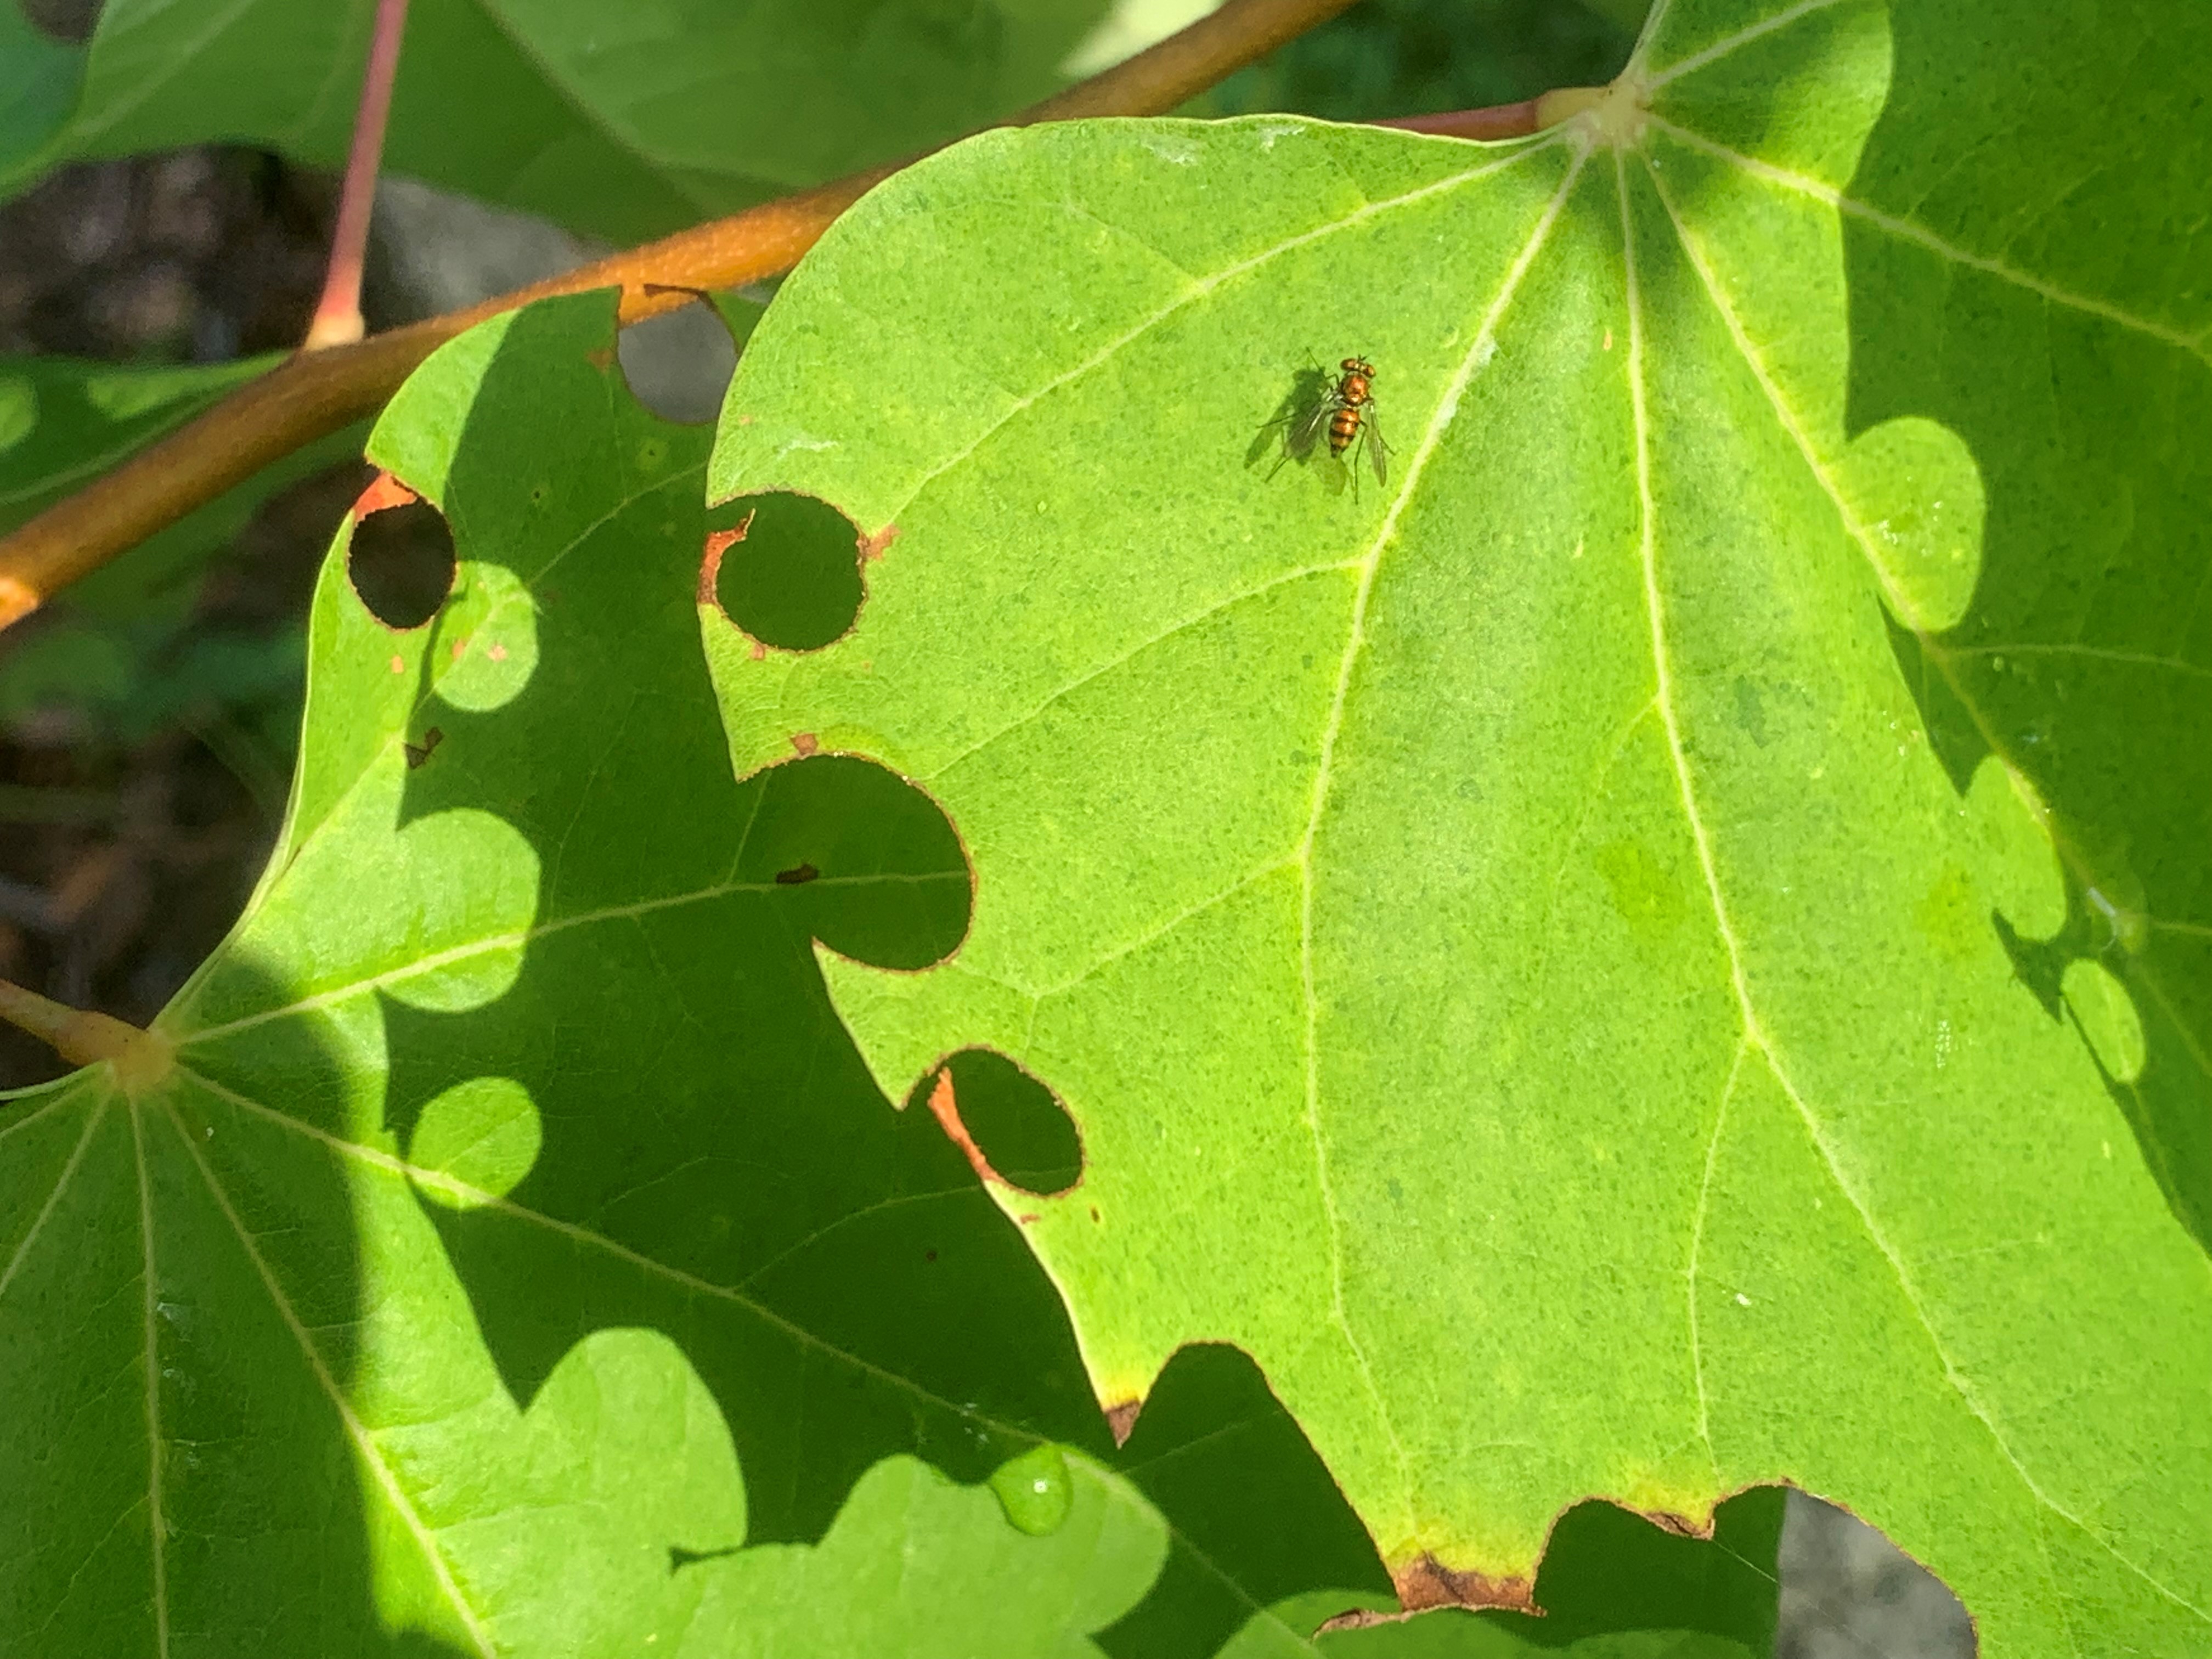
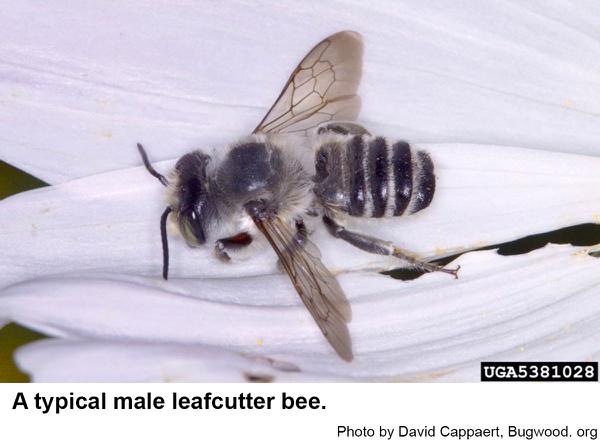
Leafcutter bees have collected circular notches from the edges of a redbud tree. Photo by Beth Bolles, UF IFAS Extension Escambia County.
If you see some of the leaves of trees and shrubs with distinct circular notches on the edges of the leaves, you can be sure the Leafcutter bee is present. The females collect the leaf pieces to make a small, cigar-shaped nest that may be found in natural cavities, such as rooting wood, soil, or in plant stems. Each nest will have several sections in which the female places a ball of pollen and an egg. The emerging larvae then have a plentiful food source in order to develop into an adult bee.
When identifying a leafcutter bee in your landscape, look for a more robust bee with dark and light stripes on the abdomen. These bees also have a hairy underside to their abdomen where they carry the pollen. When loaded with pollen their underside will look yellow.
 Leafcutter bees are solitary bees that are not considered aggressive. A sting would only be likely if the bee is handled. Your landscape will have many plants that a leafcutter may use for nesting material. The pollinating benefits of these bees far outweigh any cosmetic injury to the plant leaf margins.
Visit Featured Creatures to see a photo of the leaf pieces made into a nest.
by Mary Salinas | Aug 18, 2021
For those of you who tuned into the July 29 edition of Gardening in the Panhandle LIVE, beneficial insects was the topic of the day. Here are links to the publications our panelists talked about.

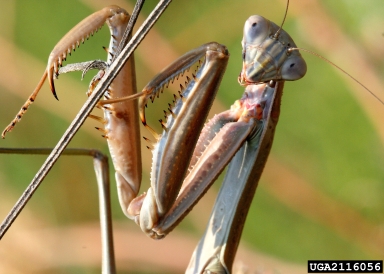
Mantid. Photo credit: David Cappaert, Bugwood.org.
How do I identify the kind of insect I have?
Recognizing beneficial bugs: Natural Enemies Gallery from UC Davis http://ipm.ucanr.edu/natural-enemies/
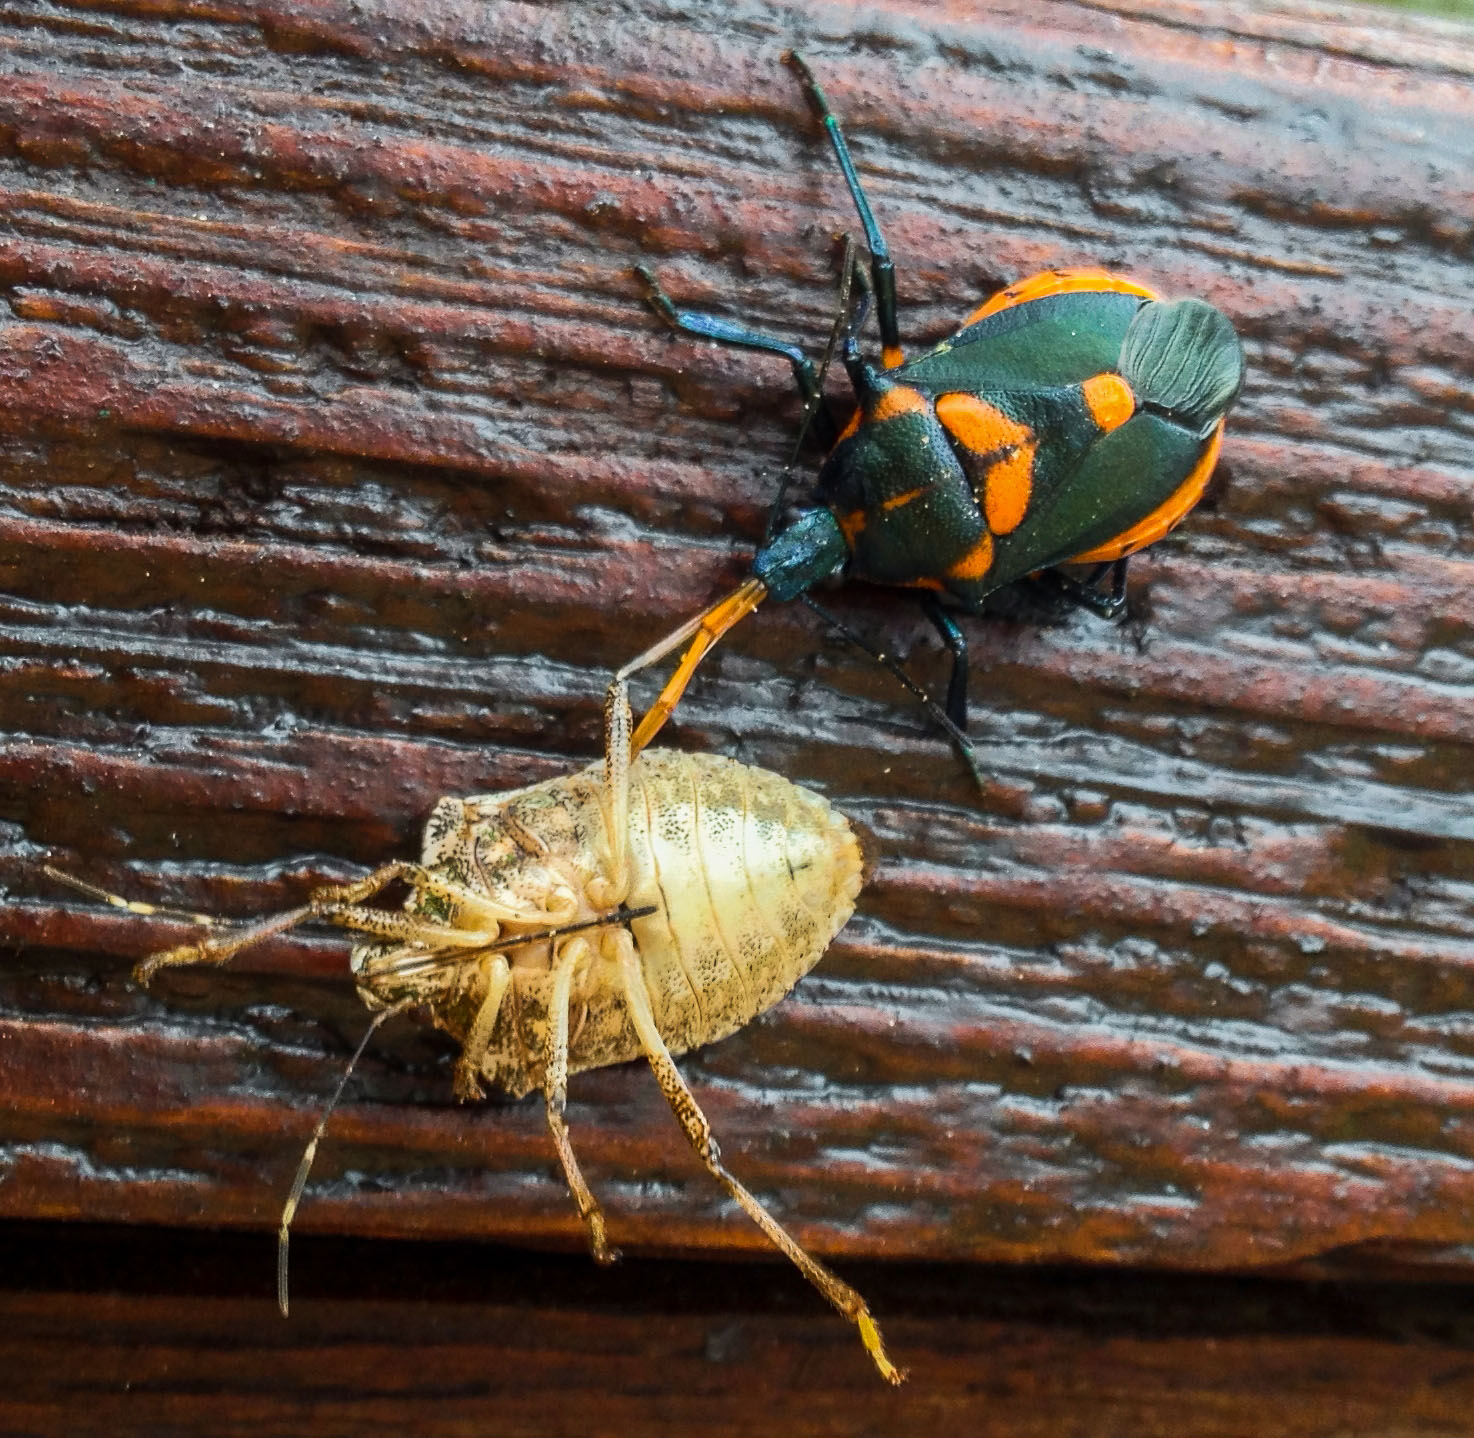
How to distinguish the predatory stink bug from the ones that harm our crops: https://entomology.ces.ncsu.edu/wp-content/uploads/2014/01/FL-pred.jpg
How to tell difference in stink bugs and leaf footed insects. Are both harmful? UF/IFAS Featured Creatures: leaffooted bug – Leptoglossus phyllopus (Linnaeus) (ufl.edu)
How can I tell bad beetles from good ones? Helpful, Harmful, Harmless Identification Guide is one resource available: http://ifasbooks.ifas.ufl.edu/p-153-helpful-harmful-harmless.aspx
How can we encourage beneficial insects?
How can we encourage the beneficial insect species?
- Plant more flowers attract pollinators that also feed on insects.
- Diversity of plants in the landscape.
- Use softer or more selective pesticides to minimize damage to beneficials.
Is it helpful to order beneficial insects such as lady bugs? Encouraging Beneficial Insects in Your Garden OSU: https://catalog.extension.oregonstate.edu/sites/catalog/files/project/pdf/pnw550.pdf
How effective is buying predatory insects to release in your greenhouse? Natural Enemies and Biological Control: https://edis.ifas.ufl.edu/publication/IN120
Can I buy beneficial insects to start breeding in my garden? Natural Enemy Releases for Biological Control of Crop Pests: https://www2.ipm.ucanr.edu/agriculture/natural-enemy-releases-for-biological-control-of-crop-pests/
What benefit would result by planting city right-of-ways with native wild flowers? https://edis.ifas.ufl.edu/publication/in1316; https://adamgdale.files.wordpress.com/2020/03/gcm_feb2020.pdf
Can an individual gardener sustain an ecosystem for beneficial insects? Penn State Article on beneficial insects that mentions some flowering plants that help support predators and parasitoids: https://extension.psu.edu/attracting-beneficial-insects
Specific Insects
How do I get rid of mole crickets? UF/IFAS Mole Crickets: https://edis.ifas.ufl.edu/entity/topic/mole_crickets
Are wasps really beneficial? Beneficial Insects: Predators!: https://sfyl.ifas.ufl.edu/sarasota/gardening-and-landscaping/horticulture-commercial/integrated-pest-management/beneficial-insects/
Is a dish soap solution effective against wasps? Soaps, Detergents, and Pest Management: https://gardeningsolutions.ifas.ufl.edu/care/pests-and-diseases/pests/management/soaps-detergents-and-pest-management.html
How to control leaf footed bugs? Handpick them, attract beneficials, create diverse plantings in landscape, accept some damage, and control them when in the juvenile stage.
Can you tell me about praying mantids? Praying Mantids: https://entomology.ca.uky.edu/files/efpdf2/ef418.pdf
Are there any beneficial insects that keep mosquito populations down? Dragonfly larvae in water, mosquitofish
What are the little insects that hop out of centipede grass? Are they beneficial?
Spittlebugs and your lawn: https://nwdistrict.ifas.ufl.edu/hort/2020/05/27/spittlebugs-and-your-lawn/
How to stop Eastern Black Swallowtail Butterflies laying eggs on parsley – the hatched caterpillars eat it all. Plant extra or put a screen over plant.
Extra fun video!
Take a look at this video of parasitic wasp attacking aphids: Parasitic Wasps | National Geographic – YouTube
by Larry Williams | Jul 15, 2021
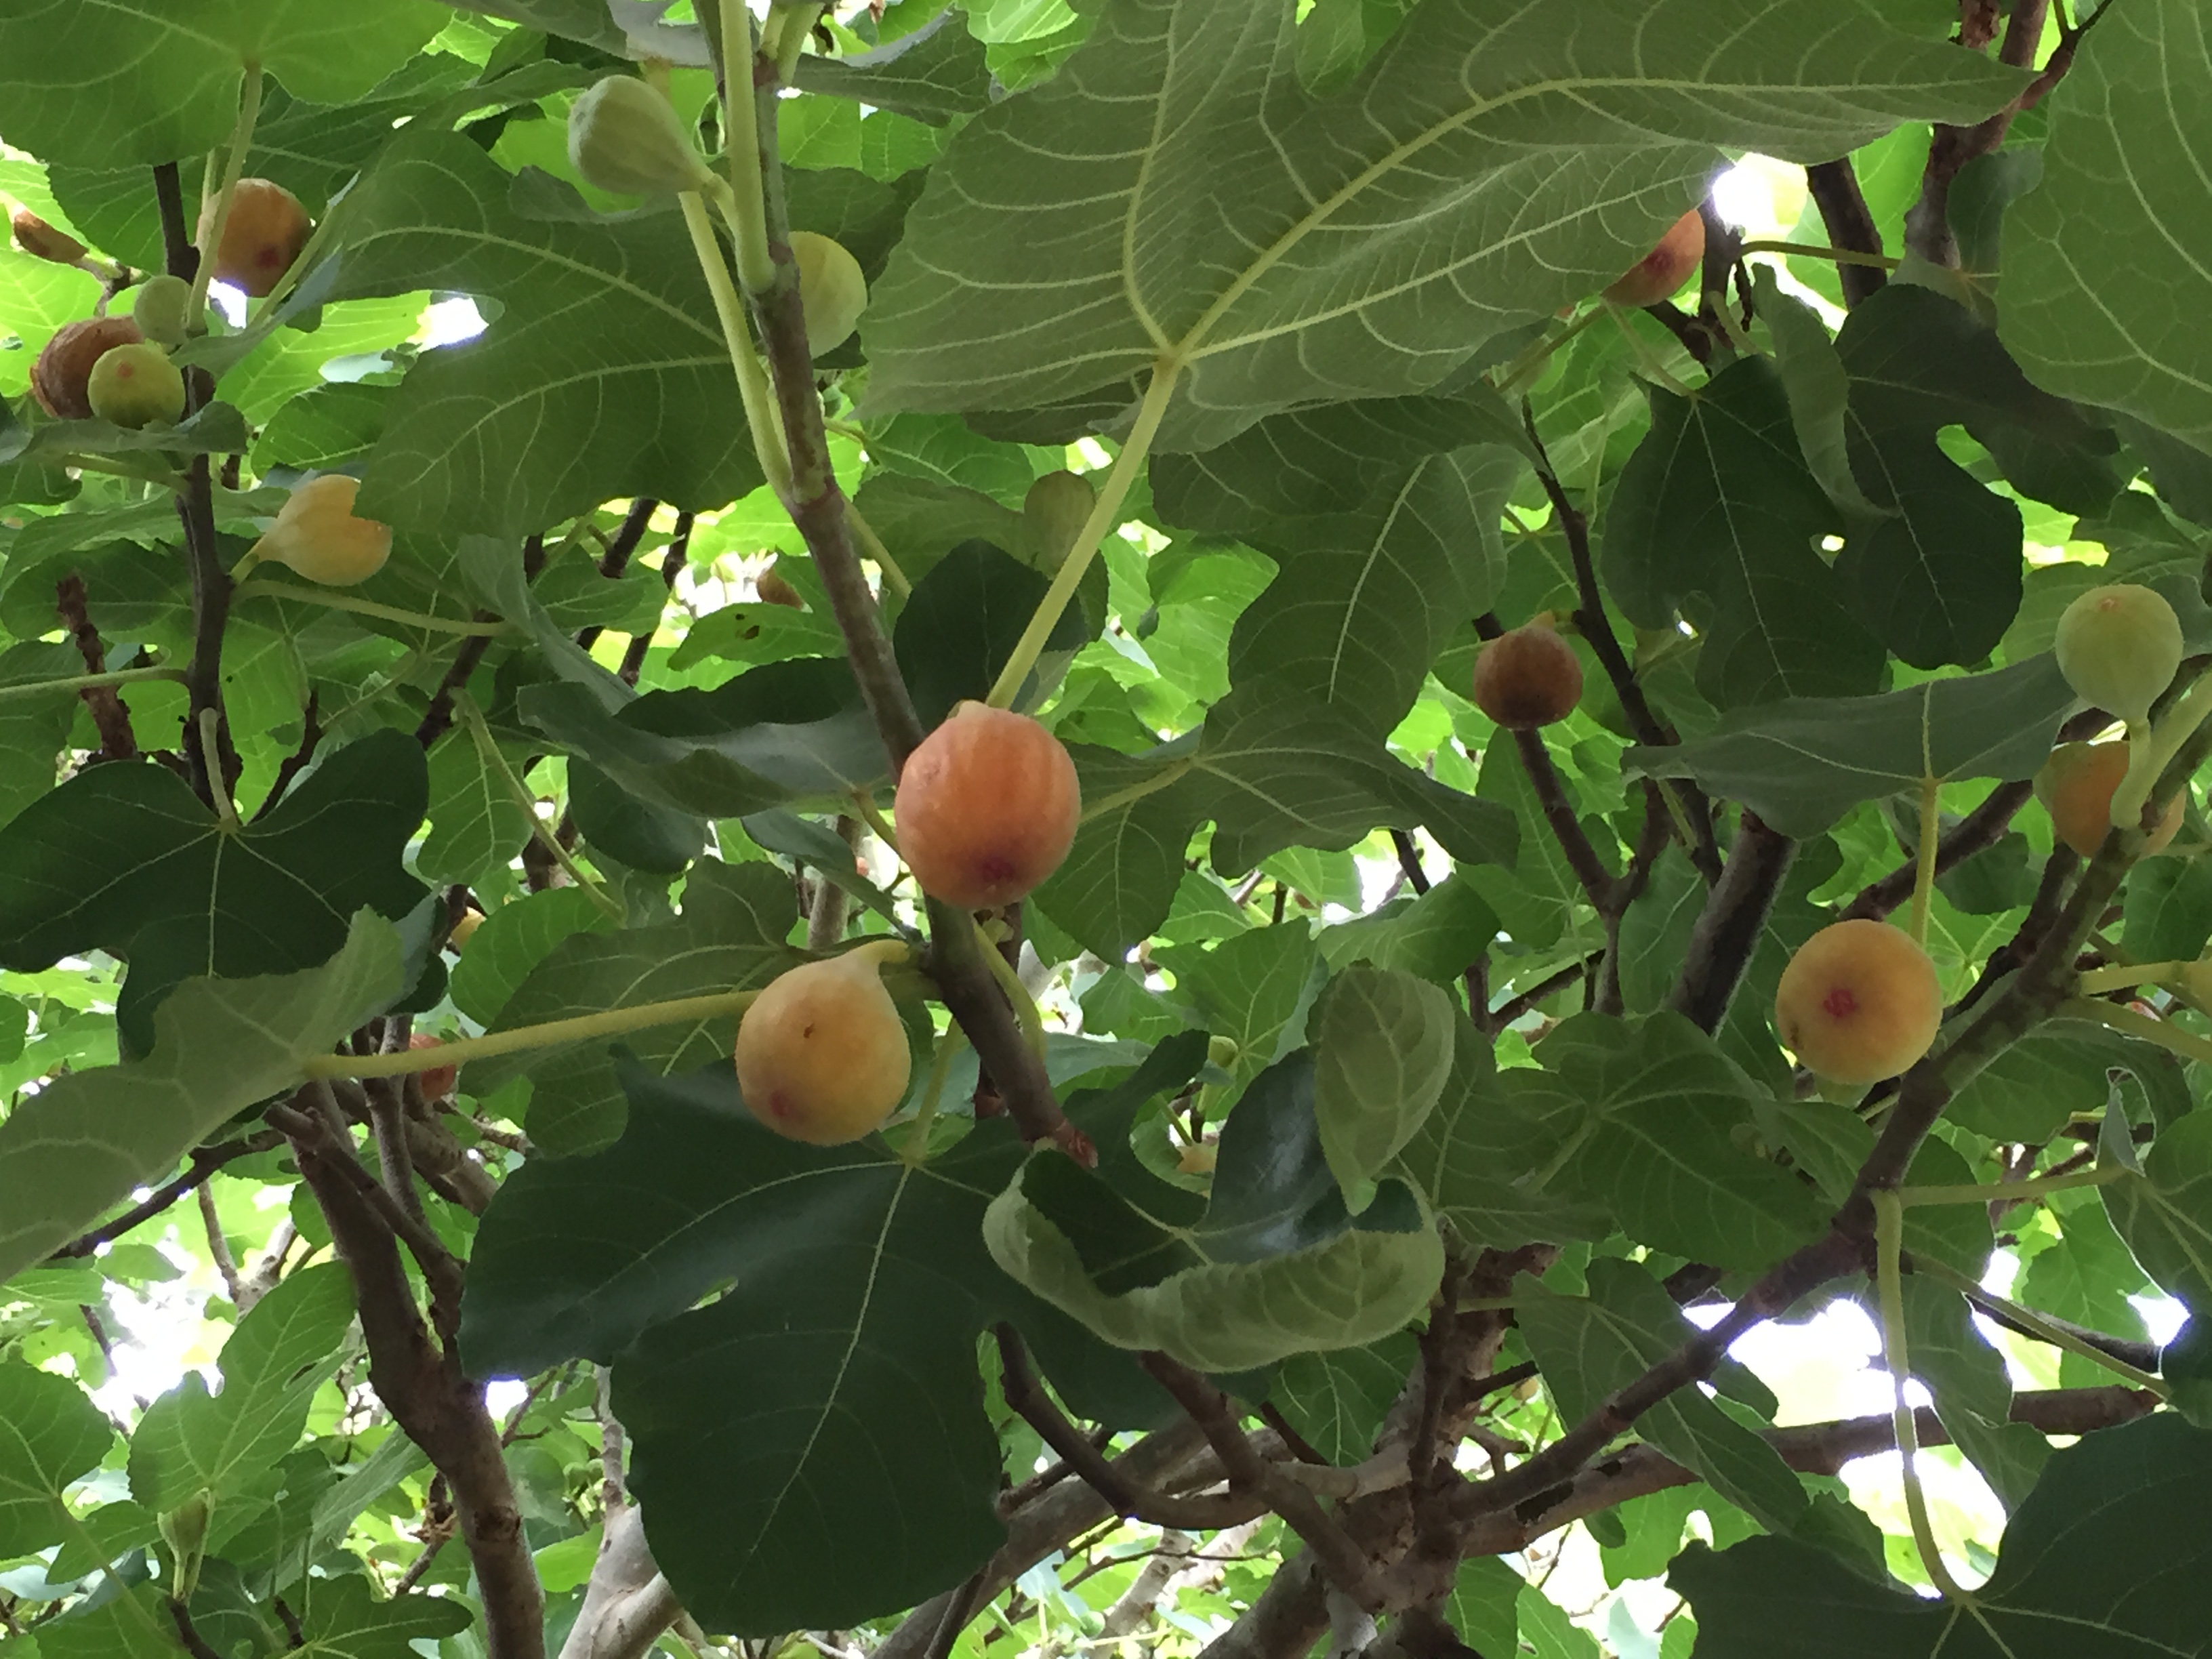
Q. One of my two fig trees has produced a few figs. The other one, which is the largest and healthiest tree, has never had a fig on it. Both where planted six years ago. Why is it not producing?
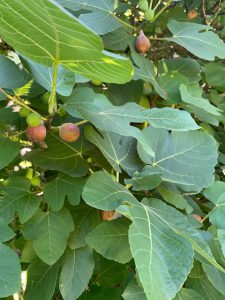
Mature fig tree with fruit. Photo credit: Larry Williams
A. It may be a matter of age and being overly vigorous. When a fruit tree is younger, it puts most of its energy into producing leaves and shoots. Until the plant becomes mature and slows down in the production of leaves and shoots, it will produce few to no fruit. It may take a year or two more for your tree to slowly and gradually switch from producing mostly leaves and shoots to producing and maturing some fruit. Patience is needed.
Be careful to not overdo it in fertilizing and/or pruning your fig tree. Too much fertilizer, especially nitrogen, or severely pruning the tree will result in the tree becoming overly vigorous at the expense of setting and maturing fruit. This includes fertilizer that the tree may pull up from a nearby lawn area. A tree’s roots will grow outward two to three times beyond its branch spread into adjacent lawn areas.
The end result of being heavy handed with fertilizing and/or overdoing it in pruning is the same – it forces the plant to become overly vigorous in producing leaves and shoots at the expense of producing and maturing fruit.
In addition, the following is taken from an Extension publication on figs and includes the most common reasons for lack of fruiting, in order of importance.
- Young, vigorous plants and over-fertilized plants will often produce fruit that drops off before maturing. If plants are excessively vigorous, stop fertilizing them. Quite often, three of four years may pass before the plant matures a crop because figs have a long juvenile period before producing edible quality fruit.
- Dry, hot periods that occur before ripening can cause poor fruit quality. If this is the case, mulching and supplemental watering during dry spells will reduce the problem.
- The variety Celeste will often drop fruit prematurely in hot weather regardless of the quality of plant care. However, it is still a good variety to grow.
- An infestation of root-knot nematodes can intensify the problem when conditions are as described in item 2.
- You could have a fig tree that requires cross-pollination by a special wasp. This is a rare problem. If this is the case, then it will never set a good crop. The best way to resolve this is to replace the plant with a rooted shoot of a neighbor’s plant you know produces a good crop each year.
by Mary Salinas | Jul 15, 2021

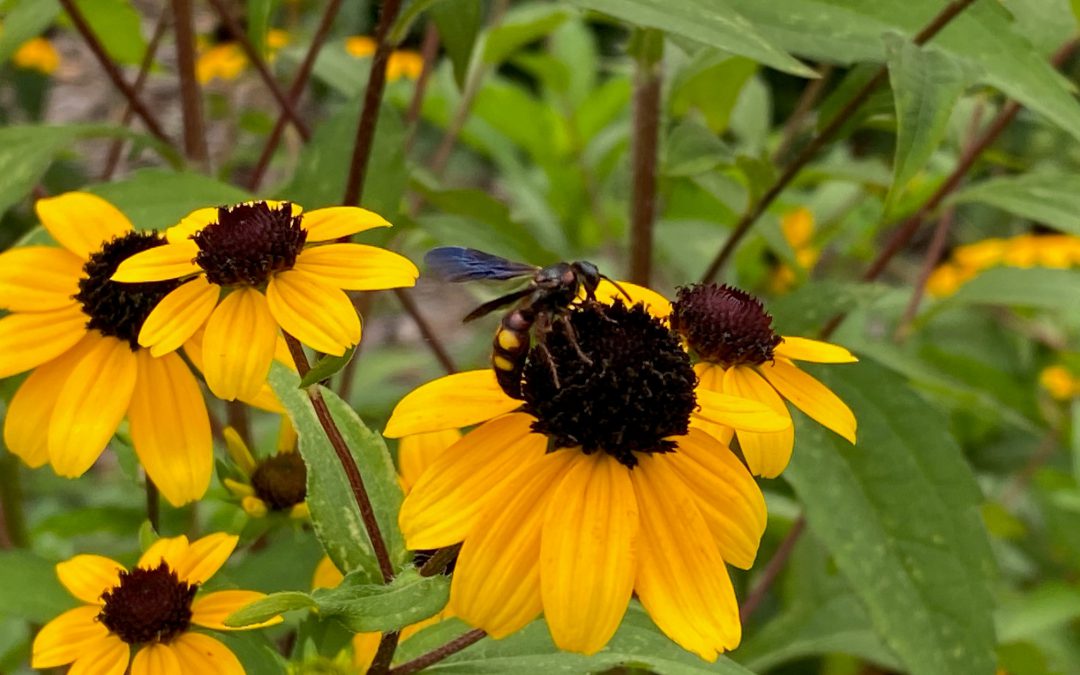
Brown-eyed Susan makes a nice addition to a pollinator garden. This one is visited by a scoliid wasp, a parasitoid of soil-inhabiting scarab beetle larvae. Photo credit: Mary Salinas, UF/IFAS Extension.
Black-eyed Susan, Rudbeckia hirta, has been a very popular garden perennial for generations. Fewer gardeners have experience with, or even heard of its’ close relative, brown-eyed Susan, Rudbeckia triloba. So, what is the difference between them?
- Brown-eyed Susan has more numerous flowers and generally flowers for a longer period in spring, summer, and fall.
- Black-eyed Susan has bigger flowers and bigger leaves.
- Both species are perennial, but the brown-eyed Susan tends to die out sooner after a few years. The good news is that both readily spread through seed to replace older plants.
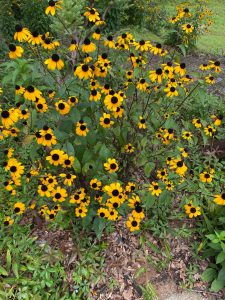
Brown-eyed Susan. Photo credit: Mary Salinas, UF/IFAS Extension.
Brown-eyed Susan is native to the eastern and central United States and, although native to Florida, it has only been vouchered in the wild in 5 counties in Florida. Gardeners can find seed and plants readily online and at a few native plant nurseries. It is best to try to source wildflower seed from plants grown in the same region. Brown-eyed Susan seed from plants grown in Nebraska or Michigan may not be as well adapted to the Florida environment as locally grown seed.
If you want to add this pollinator attracting perennial to your garden, choose a spot that is sunny or partly sunny. Although it prefers moist soil, brown eyed Susan adapts to most soil types and is drought tolerant after establishment.


