by Daniel J. Leonard | May 7, 2020
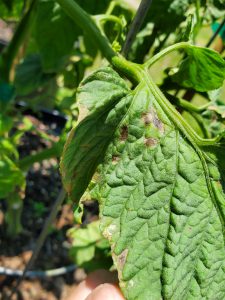
Early BLS symptoms appear on lower leaves. Photo courtesy of the author.
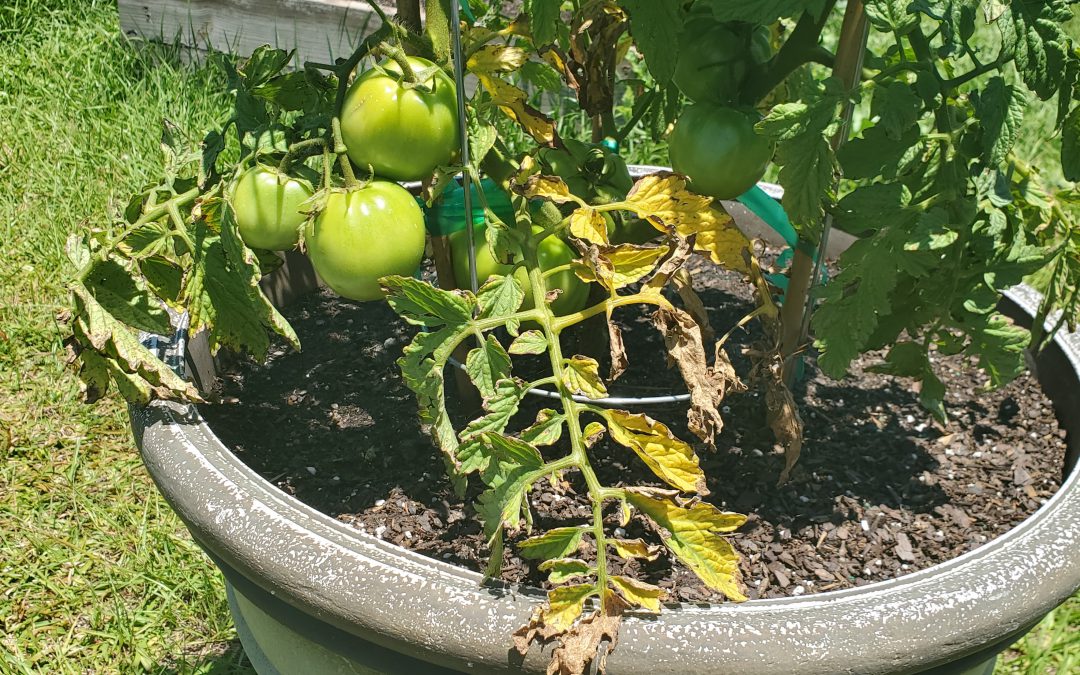
Tomatoes are among the most notoriously difficult vegetable species to grow in Florida. Even when you do everything right (choose disease resistant varieties, buy clean seed/healthy transplants, plant early, rotate crops, scout for insects, prune and support vines, etc), things can go wrong in a hurry. Bacterial Leaf Spot (BLS) caused by the pathogen Xanthomomas perforans, is one of those things. BLS often hitches a ride into gardens undetected on seed and transplants and presents itself as warm and humid weather arrives in late April/early May. Outbreaks typically happen in concurrence with the frequent heavy rainstorms that accompany these months and quickly wreak havoc on tomato plants.
BLS occurrence, much worse in some springs than others, has exploded this year in home gardens. First noticed on the plant’s lower leaves, BLS pathogens enter through natural openings in leaves called stomata, manifest as small, “water-soaked” leaf lesions and then develop within days into dark circular spots, sometimes surrounded by a yellow halo. As conditions worsen, all these individual infections cause a general yellowing or “blighting” of entire leaves. Though the issue begins on tomato leaves, BLS can affect all parts of the plant, including stems, flowers and fruit too! It’s at this point, when blighted leaves become obvious and lesion developing on flower stalks cause both flowers and small fruit to drop, that most home gardeners notice that something is up.
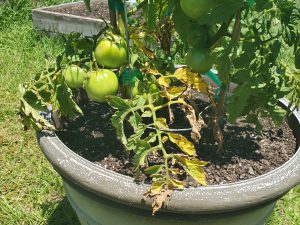
Advancing progression of BLS with “blighted” leaves. Photo courtesy of the author.
Unlike with many other pathogens, gardeners don’t have an abundance of options to control BLS. However, taking the following preventative measures can reduce the pathogen’s impact and stave off disease progression until ripe fruit can be harvested.
- Don’t irrigate overhead. Utilize drip/microirrigation or hand water beds and containers at soil level. This prevents the leaves from becoming wet; wet leaves become a perfect host for BLS.
- Never work tomato plants when leaves are wet. No staking, pruning, tying, or anything else until plant tissue is dry. Working wet tomato plants is an excellent way to spread bacteria!
- Sanitize pruning tools often and wash hands after working infected plants.
- Maintain airflow in plants by planting at correct spacing and thinning interior leaves as necessary to facilitate quicker drying of the plant.
- Prune lower leaves to at least 12” from the soil’s surface to prevent disease transmission from soil to leaves through splashing water.
- Remove infected leaves (when plants are dry!) to slow disease progression.
- Rotate crops and destroy infected plants to prevent buildup of BLS organisms in soil.
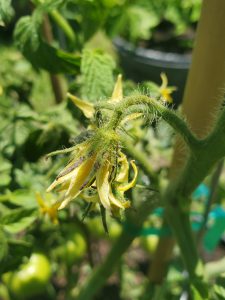
BLS lesions on tomato flowers. Photo courtesy of the author.
- Preventative measures are best, but if your garden has a history of BLS and local weather forecasts call for warm/wet/humid weather, it is best to spray fungicides proactively to protect your crop. A weekly spray with a tank mixture of copper and mancozeb is effective at keeping BLS at bay. This is the only chemical spray combination proven to be effective in controlling BLS.
- Unlike many common tomato pathogens that can be reliably avoided through planting resistant cultivars like ‘Big Beef’, ‘Celebrity’ and others, no varieties are resistant to BLS.
While BLS is an extremely destructive pathogen of both home and commercially grown tomatoes, growers can lessen the disease’s effects by following the preventative measures outlined above and spraying with a copper/mancozeb mix if necessary. Growing tomatoes this year hasn’t been easy, but it’s worth it to fight back and realize a harvest despite difficulties like BLS!
If bacteria have given you the blues or other garden issues are bringing you down, give your local UF/IFAS County Extension Agent a call! We’re here to help you be successful in all your horticultural endeavors. Happy gardening!

by Larry Williams | Apr 23, 2020
One of the things to do while stuck at home due to COVID-19 restrictions, is to look for caterpillars and butterflies in your landscape. I’ve noticed giant swallowtail butterflies (Papilio cresphontes) a little early this year. The giant swallowtail is one of the largest and most beautiful butterflies in our area. Its larval stage is known as the orangedog caterpillar. This unusual name comes from the fact that it feeds on young foliage of citrus trees.
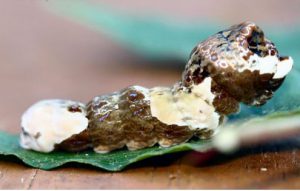
Orangedog caterpillar. Photo credit: Donald Hall, University of Florida
The orangedog caterpillar is mostly brown with some white blotches, resembling bird droppings more than a caterpillar. When disturbed, it may try to scare you off by extruding two orange horns that produce a pungent odor hard to wash off.
I’ve had some minor feeding on citrus trees in my landscape from orangedog caterpillars. But I tolerate them. I’m not growing the citrus to sell. Sure the caterpillars eat a few leaves but my citrus trees have thousands of leaves. New leaves eventually replace the eaten ones. I leave the caterpillars alone. They eat a few leaves, develop into chrysalises and then emerge as beautiful giant swallowtail butterflies. The whole experience is a great life lesson for my two teenagers. And, we get to enjoy beautiful giant swallowtail butterflies flying around in our landscape and still get plenty of fruit from the citrus trees. It is a win, win, win.
In some cases, the caterpillars can cause widespread defoliation of citrus. A few orangedog caterpillars can defoliate small, potted citrus trees. Where you cannot tolerate their feeding habits, remove them from the plant. But consider relocating the caterpillars to another area. In addition to citrus, the orangedog caterpillars will use the herb fennel (Foeniculum vulgare) and rue (Ruta graveolens) as a food source. Some butterfly gardens plant citrus trees to provide food for orangedog caterpillars so that they will have giant swallowtail butterflies. So you could plan ahead and grow some fennel, rue or find a butterfly garden in your area for the purpose of relocating the larvae.
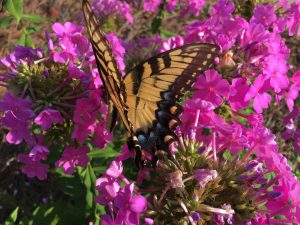
Yellow giant swallowtail butterfly on pink garden phlox flowers. Photo credit: Larry Williams
The adult butterflies feed on nectar from many flowers, including azalea, bougainvillea, Japanese honeysuckle, goldenrod, dame’s rocket, bouncing Bet and swamp milkweed. Some plants in this list might be invasive.
Keep in mind that mature citrus trees can easily withstand the loss of a few leaves. If you find and allow a few orangedog caterpillars to feed on a few leaves of a mature citrus tree in your landscape, you and your neighbors might get to enjoy the spectacular giant swallowtail butterfly.
More information on the giant swallowtail butterfly is available online at http://edis.ifas.ufl.edu/in134.
by Daniel J. Leonard | Apr 1, 2020
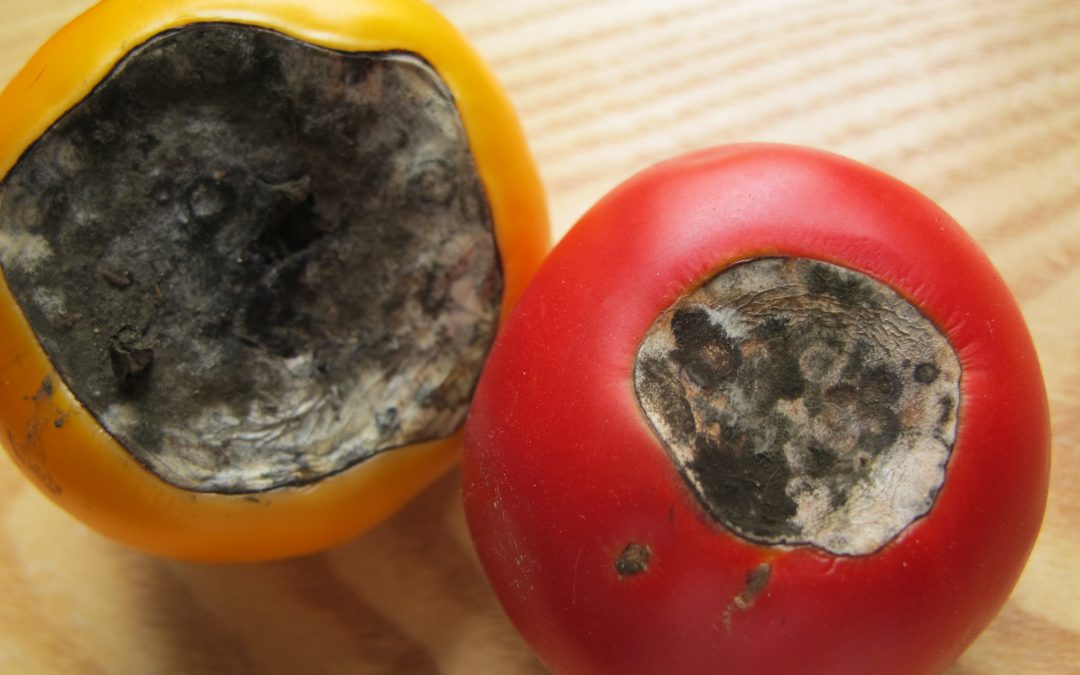
There aren’t many more frustrating things than growing seemingly healthy tomatoes, those plants setting an abundance of flower and fruit, and then, once your tomatoes get about the size of a golf ball, having the fruit rot away from the base. This very common condition, called Blossom End Rot (BER), is caused one of two ways: by either a soil calcium deficiency or disruption of soil calcium uptake by the plant. Fortunately, preventing BER from occurring and then realizing an awesome crop of tasty tomato fruit is relatively simple and home gardeners have a couple of possible preventative solution!
Blossom End Rot damage. Photo Courtesy Larry Williams, Okaloosa County Extension.
- Soil Test & Lime if Needed. The only way to really know if your soil calcium level is sufficient is through a soil test. A complete soil test through the UF Soil Lab or other lab measures both raw nutrient levels and pH. Testing for pH is especially critical. For calcium, either already in the soil or in a supplement you apply, to be available to tomato plants, soil pH needs to be between 6.0-7. In more “acidic” soil pH below 6, nutrients like iron and aluminum become more available to your tomato plants, outcompeting calcium for uptake into the roots. We don’t want that. If your soil test indicates a pH below 6, it will give a lime recommendation somewhere between 3-5 lbs/100 ft sq of garden area to raise the pH to the sweet spot between 6.0-7.0 where your tomatoes will thrive.
- Use a Non-Lime Calcium Supplement. If you’ve had your soil tested and your pH is fine, adding more lime as a calcium supplement isn’t helpful. Using lime as an additional calcium source can actually lift pH above that 6.0-7.0 zone and cause other problems. At this point, once pH is where we want it, I like to add a non-lime calcium supplement. There are lots of options here. Traditional fertilizers labeled for tomatoes and veggies tend to have a good calcium content in the 6-10% range and work great. However, if you’re into organic gardening or just don’t need the extra nutrient value of a complete fertilizer, Gypsum is a good calcium supplement and is widely available. Regardless of which non-lime source you choose, apply at planting or shortly after and follow label rates for best results.
- Water Properly. Consistent watering is key in helping ward off BER. Though we know BER is generally
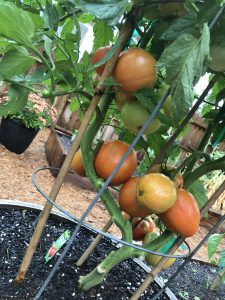
Healthy ‘Big Beef’ tomatoes grown in 2019 with a pH of 6.5, amended with Gypsum at planting, and watered regularly each day! Notice no BER. Photo courtesy the author.
caused by calcium deficiency, it can be induced by creation of distinct wet and dry periods from non-regular watering, interfering with calcium uptake and availability to the plant. So, while you may have adequate soil calcium, if you don’t water correctly, the condition will happen anyway! It’s also good to keep in mind that mature tomato plants use large quantities of water daily, so during the heat of summer, plants in containers may need to be watered multiple times daily to maintain consistently moist soil. Think about it, you don’t drink 8 glasses of water when you wake up and then never drink again throughout a hot day. A tomato is no different. Allowing your plants to wilt down before providing additional water ruins productivity and can induce BER.
Blossom End Rot, while one of the more destructive fates of tomatoes, is totally preventable by a little legwork early in the growing game from you! Soil test and change pH with lime if needed, add a shot of calcium through a tomato blend fertilizer or non-lime supplement like gypsum, and water regularly! Do these three things and you’ll be well on your way to a great crop of early summer tomatoes. If you have any questions about tomato blossom end rot or any other horticulture or agricultural topic, please don’t hesitate to reach out to us at the UF/IFAS Calhoun County Extension Office. Take advantage of this beautiful spring weather and get in the garden today! Happy gardening.

by Larry Williams | Dec 4, 2019
Fire ant control options in some situations include doing nothing.
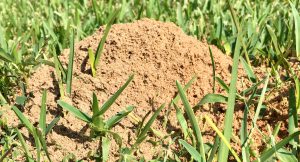 Fire ant colonies consist of the brood (eggs, larvae and pupae) and adult ants. The adults include winged males, winged females, one or more egg producing queen and workers. The winged males and females mate in spring or early summer after a rainy period. Males die shortly after mating. Newly mated females can fly as far as twelve miles from the nest (or farther carried by wind). After landing, mated females shed their wings and begin digging chambers in which they lay eggs to start a new colony.
A single queen can lay over 2,000 eggs per day! She can live an average of six to seven years. A mature fire ant colony may contain 100,000 to 500,000 workers. Fire ant mounds/colonies can reach densities of 200 to 800 per acre.
You should now begin to understand why fire ants are difficult to control. Where they don’t present a direct threat to human health, the best management practice may be to leave them alone.
Homeowners may have to find a tolerable level. Waging war on this insect can be expensive and requires a long-term commitment. There is no single, universal solution to controlling fire ants. A one-time treatment may make the problem worse. In areas where native ants and fire ants have been reduced or eliminated with insecticides, reinfestation by fire ants into these treated areas is rapid.
A balanced approach to fire ant management is recommended. Those mounds that pose no threat to humans should be left alone. Instead target specific mounds such as those close to buildings and walkways.
When treating single mounds with contact insecticides, it’s critical to treat when the queen and brood are close to the surface, which is between 70ºF to 85ºF. When using fire ant baits, it’s important to apply the bait when the ants are foraging for food. They are most actively doing that between 70ºF to 85ºF. Actively foraging ants will pick up the bait and carry it into the nest within minutes. That’s important because baits tend to quickly go rancid and then are no longer attractive to ants. When using season-long control products, it’s a must to achieve uniform coverage of the area. Always read and follow the label precautions and directions when using any insecticide.
Where fire ants create no threat in out-of-the-way areas on your property, consider the option of leaving them alone.
The following link to a UF/IFAS Extension publication provides options for fire ant control in lawns, gardens and landscapes. http://edis.ifas.ufl.edu/lh059
by Daniel J. Leonard | Nov 8, 2019
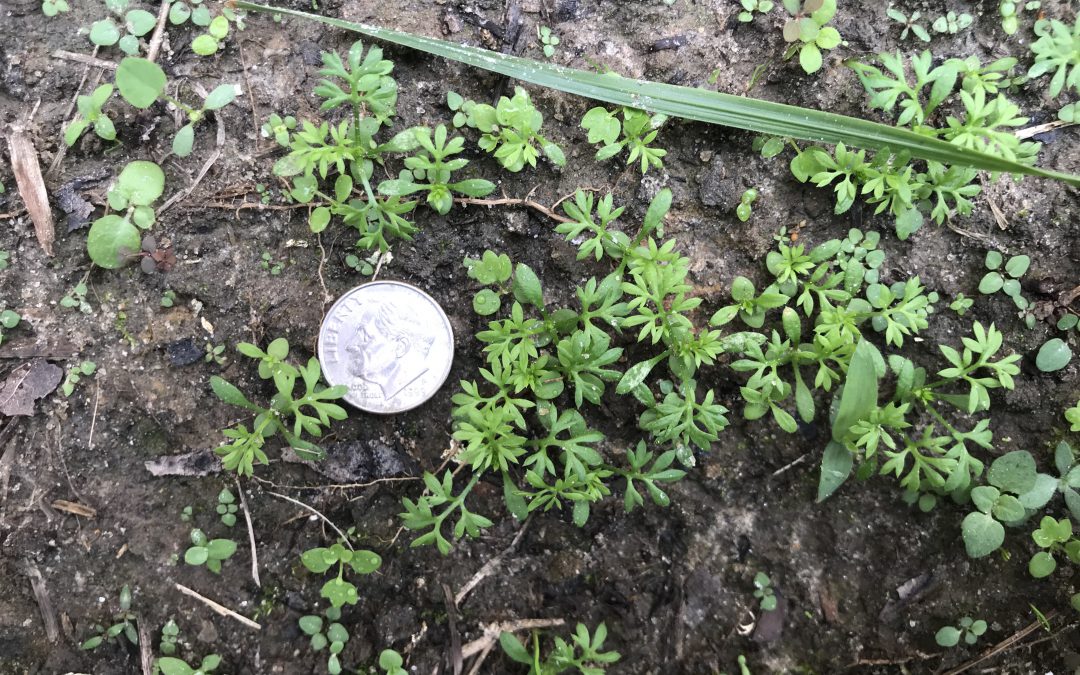
Most lawn weeds are annoying, appearing in unwanted places and numbers, but few actually cause physical harm like the pest plant Lawn Burweed (Soliva sessilis)! This infamous small, spreading winter weed’s seeds generally germinate when temperatures begin to cool in the fall (late October-November). Burweed then grows mostly unnoticed through the winter until spring, when it then produces the hard, spiny burs that contain the plant’s seeds and the plants finally die. Once the burs have formed, Burweed’s presence makes walking on newly greened-up spring turf extremely painful for pets and people (barefoot of course, the burs aren’t large enough to puncture shoe soles). At this point of the plant’s life, once it has made its unwanted presence known, control is not feasible as the Burweed plants have set seed, ensuring a new crop next year, and killing the remaining foliage doesn’t remove the burs. What is a homeowner to do?
Newly germinated Lawn Burweed. Photo courtesy of the author.
Fortunately, Lawn Burweed is relatively easy to control chemically if one pays close attention to seasonal changes and uses herbicides (either pre-emergent or post-emergent herbicides) effectively.
Pre-emergent Herbicide Options: The first chemical control option for Lawn Burweed is a timely application of the pre-emergent herbicide Isoxaben (sold under various brand names at most farm or garden stores) to prevent Burweed seeds from germinating, greatly reducing plant populations. However, pre-emergent Isoxaben applications must be made before the plants sprout and begin to grow to be effective. For Burweed, this generally means application in October, once nighttime temperatures dip into the 55-60 degrees F range for several nights in a row, as consistent temperatures in this range give Burweed seeds the signal to germinate. Though we’re already past the point of pre-emergent herbicides being an option for control this year, homeowners should plan to include this method in their Lawn Burweed control plan for fall 2020!
Post-Emergent Herbicide Options: If you haven’t already used a pre-emergent herbicide this fall for Burweed control, you must turn to post-emergent options. Like pre-emergent herbicides, timing is critical if you want your post-emergent applications to work! These herbicides are most effective when Burweed plants are young, small, vigorously growing, and haven’t set burs yet. Successful post-emergent applications may be made from December-early February before burs harden. Unlike pre-emergents, where there is only one strong option for Burweed control, many post-emergent herbicides exist that are extremely effective! When shopping, look for products containing the following active ingredients:
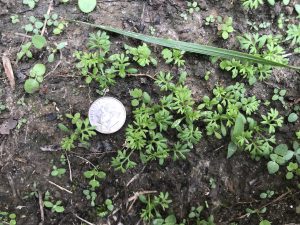
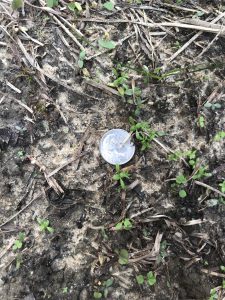
Lawn Burweed around 10 days after emergence. Photo courtesy of author.
- Atrazine – sold under many brand names and safe in Centipede, St. Augustine, & Bermudagrass. Do not use in Zoysia or Bahiagrass lawns.
- Dicamba, Mecoprop, 2,4-D – commonly sold in three-way formulations through many brand names. Generally safe in Centipede, St. Augustine, Bermuda, Zoysia, & Bahiagrass lawns.
- Metsulfuron – sold under several brand names and safe in Centipede, St. Augustine, Zoysia & Bermudagrass. Do not use in Bahiagrass. Be careful if used around ornamentals.
- Thiencarbazone, iodosulfuron, dicamba – sold as Celsius WG from Bayer. Safe in Centipedegrass, Zoysiagrass, Bermudagrass, and St. Augustinegrass. Do not use in Bahiagrass.
Lawn Burweed control with of all the above-listed herbicides will be most effective with a follow-up application 10-14 days later.
Note: With the exception of the Thiencarbazone, iodosulfuron & dicamba mixture (Celsius), do not apply any of these post-emergent herbicides during spring turf green up.
As always, if you have questions about Lawn Burweed control or any other horticulture or agriculture related questions, please contact your local UF/IFAS County Extension office or consult any of the following related articles: https://nwdistrict.ifas.ufl.edu/hort/2015/10/06/lawn-burweed-prevention-is-easier-than-cure/ and http://blogs.ifas.ufl.edu/washingtonco/2017/10/11/prepare-now-to-avoid-lawn-burweed-infestation-later/
Happy gardening!
by Molly Jameson | Aug 28, 2019

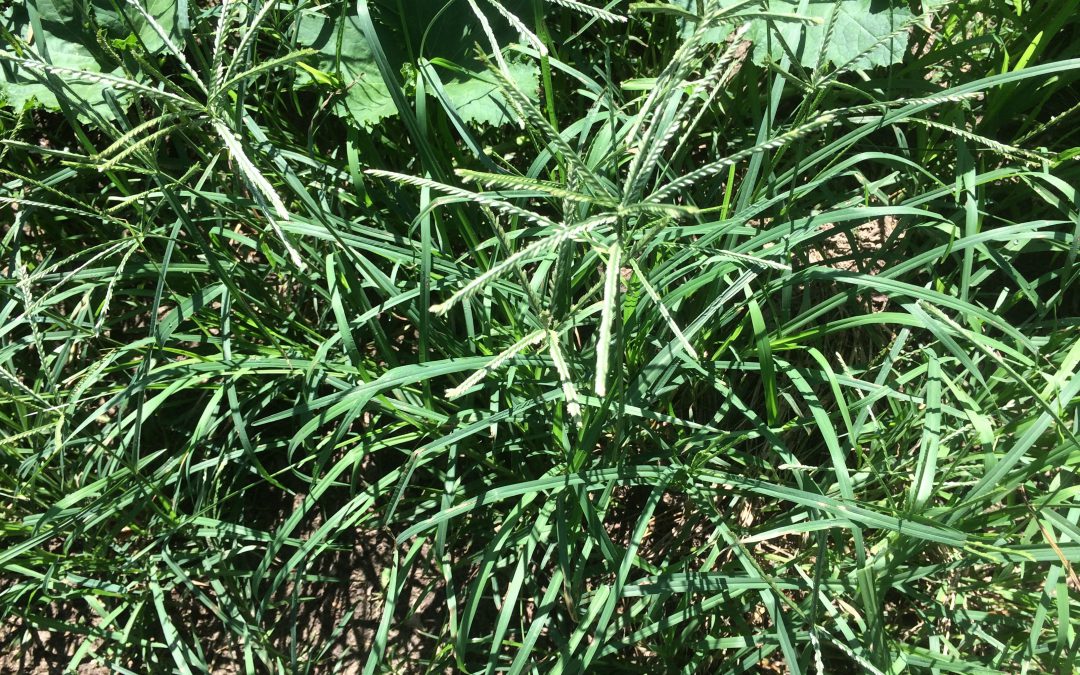
Vaseygrass produces prolific seed heads, and once introduced, can be spread easily by farming equipment. Photo by Herman Holley.
Beware Vaseygrass, an Aggressive Exotic Weed
A couple months ago I got a concerning call from a local small farmer. Rich Pouncey, of Bumpy Road Farm in northern Leon County, was very troubled by an unwelcome visitor he found growing on his farm.
Rich, who grows multiple crops, including heirloom corn varieties to create his delicious cornmeal and grits, noticed something amok in a portion of his rows. With closer inspection – and a visit from Extension Agent Les Harrison – it was identified as vaseygrass (Paspalum urvillei). Vaseygrass, an aggressive exotic species from South America, was starting to take complete control of a large section of Rich’s small growing space he had reserved for upcoming collard production.
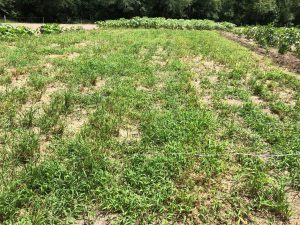
With its abundant seed heads and our consistent summer rainstorms, vaseygrass quickly took over a section of Rich’s field. Photo by Molly Jameson.
Rich, who prides himself on supporting biological diversity, soil health, and native pollinators, uses strictly organic growing methods in raising his crops. Therefore, the presence of such an aggressive exotic was truly of grave concern.
Rich is not sure exactly how this weed was introduced to his fields. He suspects it may have been hidden in a soil amendment he purchased, but he cannot be certain of the source. It is certainly a reminder to be careful when bringing in outside equipment, mulch, and any new agricultural products.
When mature, vaseygrass can grow to six-feet tall with plentiful seed heads, and it flourishes in warm, wet conditions. It spreads by seeds and has very high rates of germination during times of abundant rainfall. The grass is low in nutrition – making it a poor choice for grazing cattle – but in a hay field, it will spread like wildfire if not controlled.
Vaseygrass is a true perennial bunch grass, with a small root system and, fortunately, few rhizomes. Rich began pulling and black bagging as much of the grass as he could each day, but struggled to keep up, and it quickly spread through more than a tenth of an acre of his field.
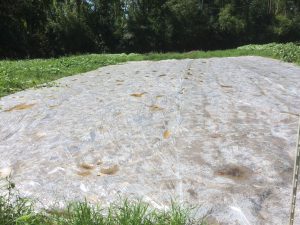
When hand pulling wasn’t enough, Rich switched to solarization, hoping to kill emerged vaseygrass seedlings and seeds with heat. Photo by Herman Holley.
About six weeks ago, Rich changed strategies and began solarizing the area with clear plastic sheeting. Tightly covering soil with clear plastic sheeting in the warmest summer months can trap heat and increase temperatures, potentially killing weeds, pests, and diseases within the top foot of the soil surface. He will find out soon if this control strategy has been successful, as he’ll be pulling up the plastic in September. He knows that if the solarization is not successful, he may have no choice but to use chemical control methods, which will mean he will have to wait years to grow any crops in this area he wishes to market as organically grown.
If hand pulling isn’t enough, small infestations of vaseygrass can be controlled by spot spraying a one percent glyphosate solution at 1.2 ounces/gallon. Be aware, mowing and tilling can make the problem worse, as the scattering and burying of seeds can exacerbate the infestation.
For more details about identifying and controlling vaseygrass, read the UF/IFAS EDIS publication, Identification and Control of Johnsongrass, Vaseygrass, and Guinea Grass in Pastures (https://edis.ifas.ufl.edu/ag372).
If you suspect vaseygrass is growing on your property, contact your local county extension agent to get the grass properly identified and help spread the word about its presence.


