by Matt Lollar | Dec 10, 2019
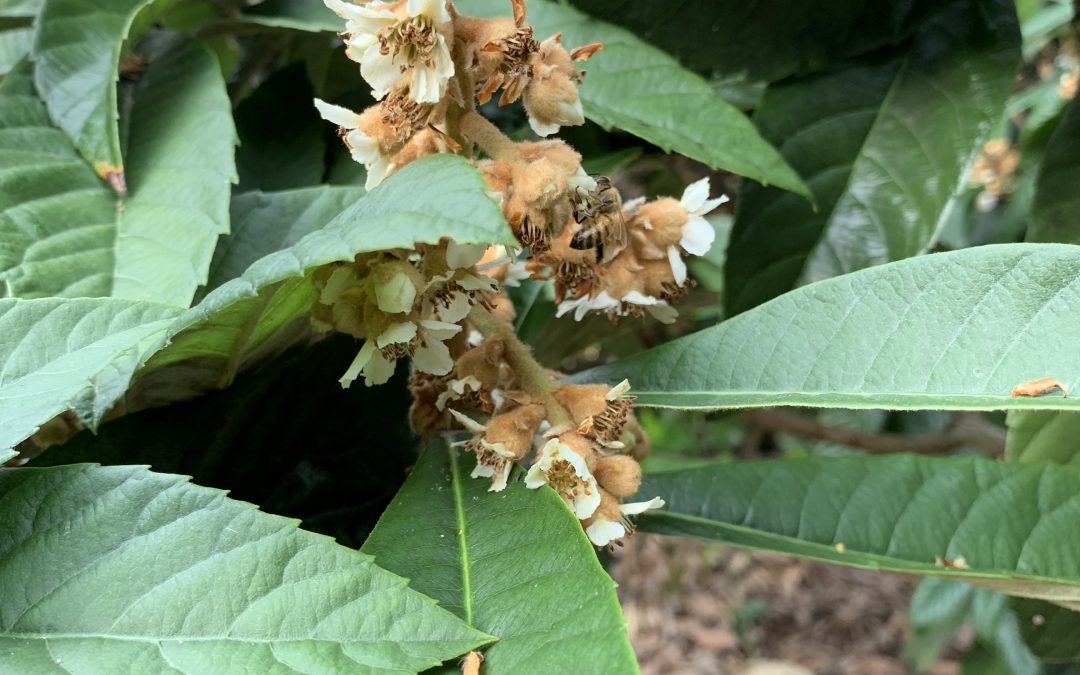
Loquat trees provide nice fall color with creamy yellow buds and white flowers on their long terminal panicles. These small (20 to 35 ft. tall) evergreen trees are native to China and first appeared in Southern landscapes in the late 19th Century. They are grown commercially in subtropical and Mediterranean areas of the world and small production acreage can be found in California. They are cold tolerant down to temperatures of 8 degrees Fahrenheit, but they will drop their flowers or fruit if temperatures dip below 27 degrees Fahrenheit.
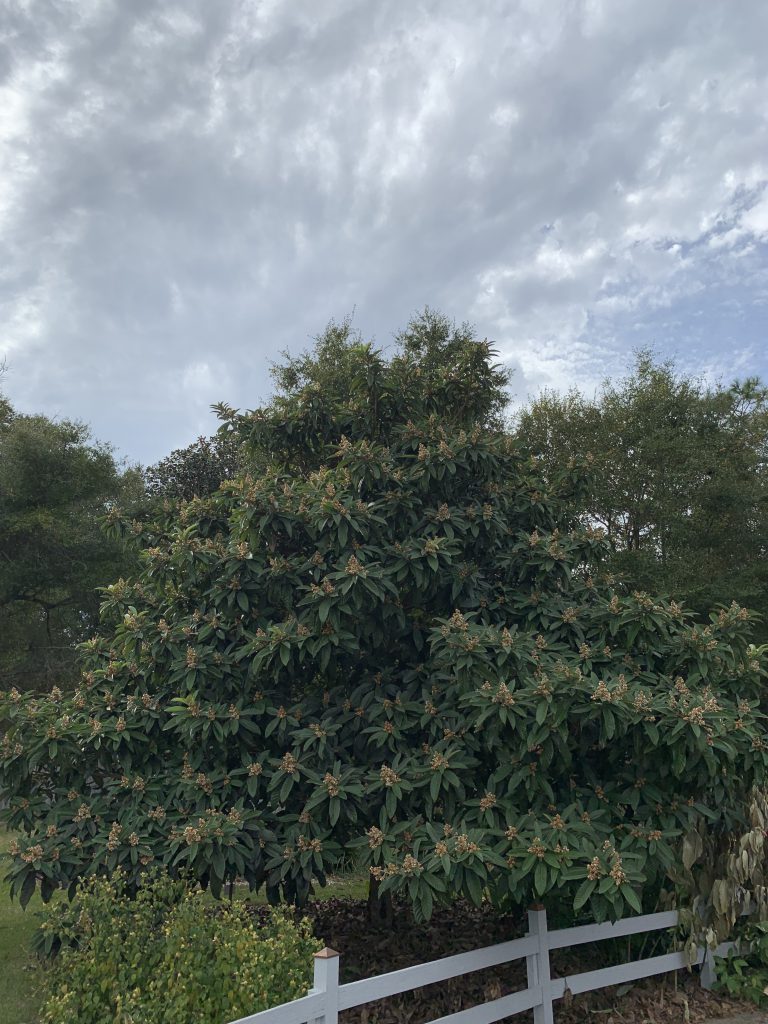
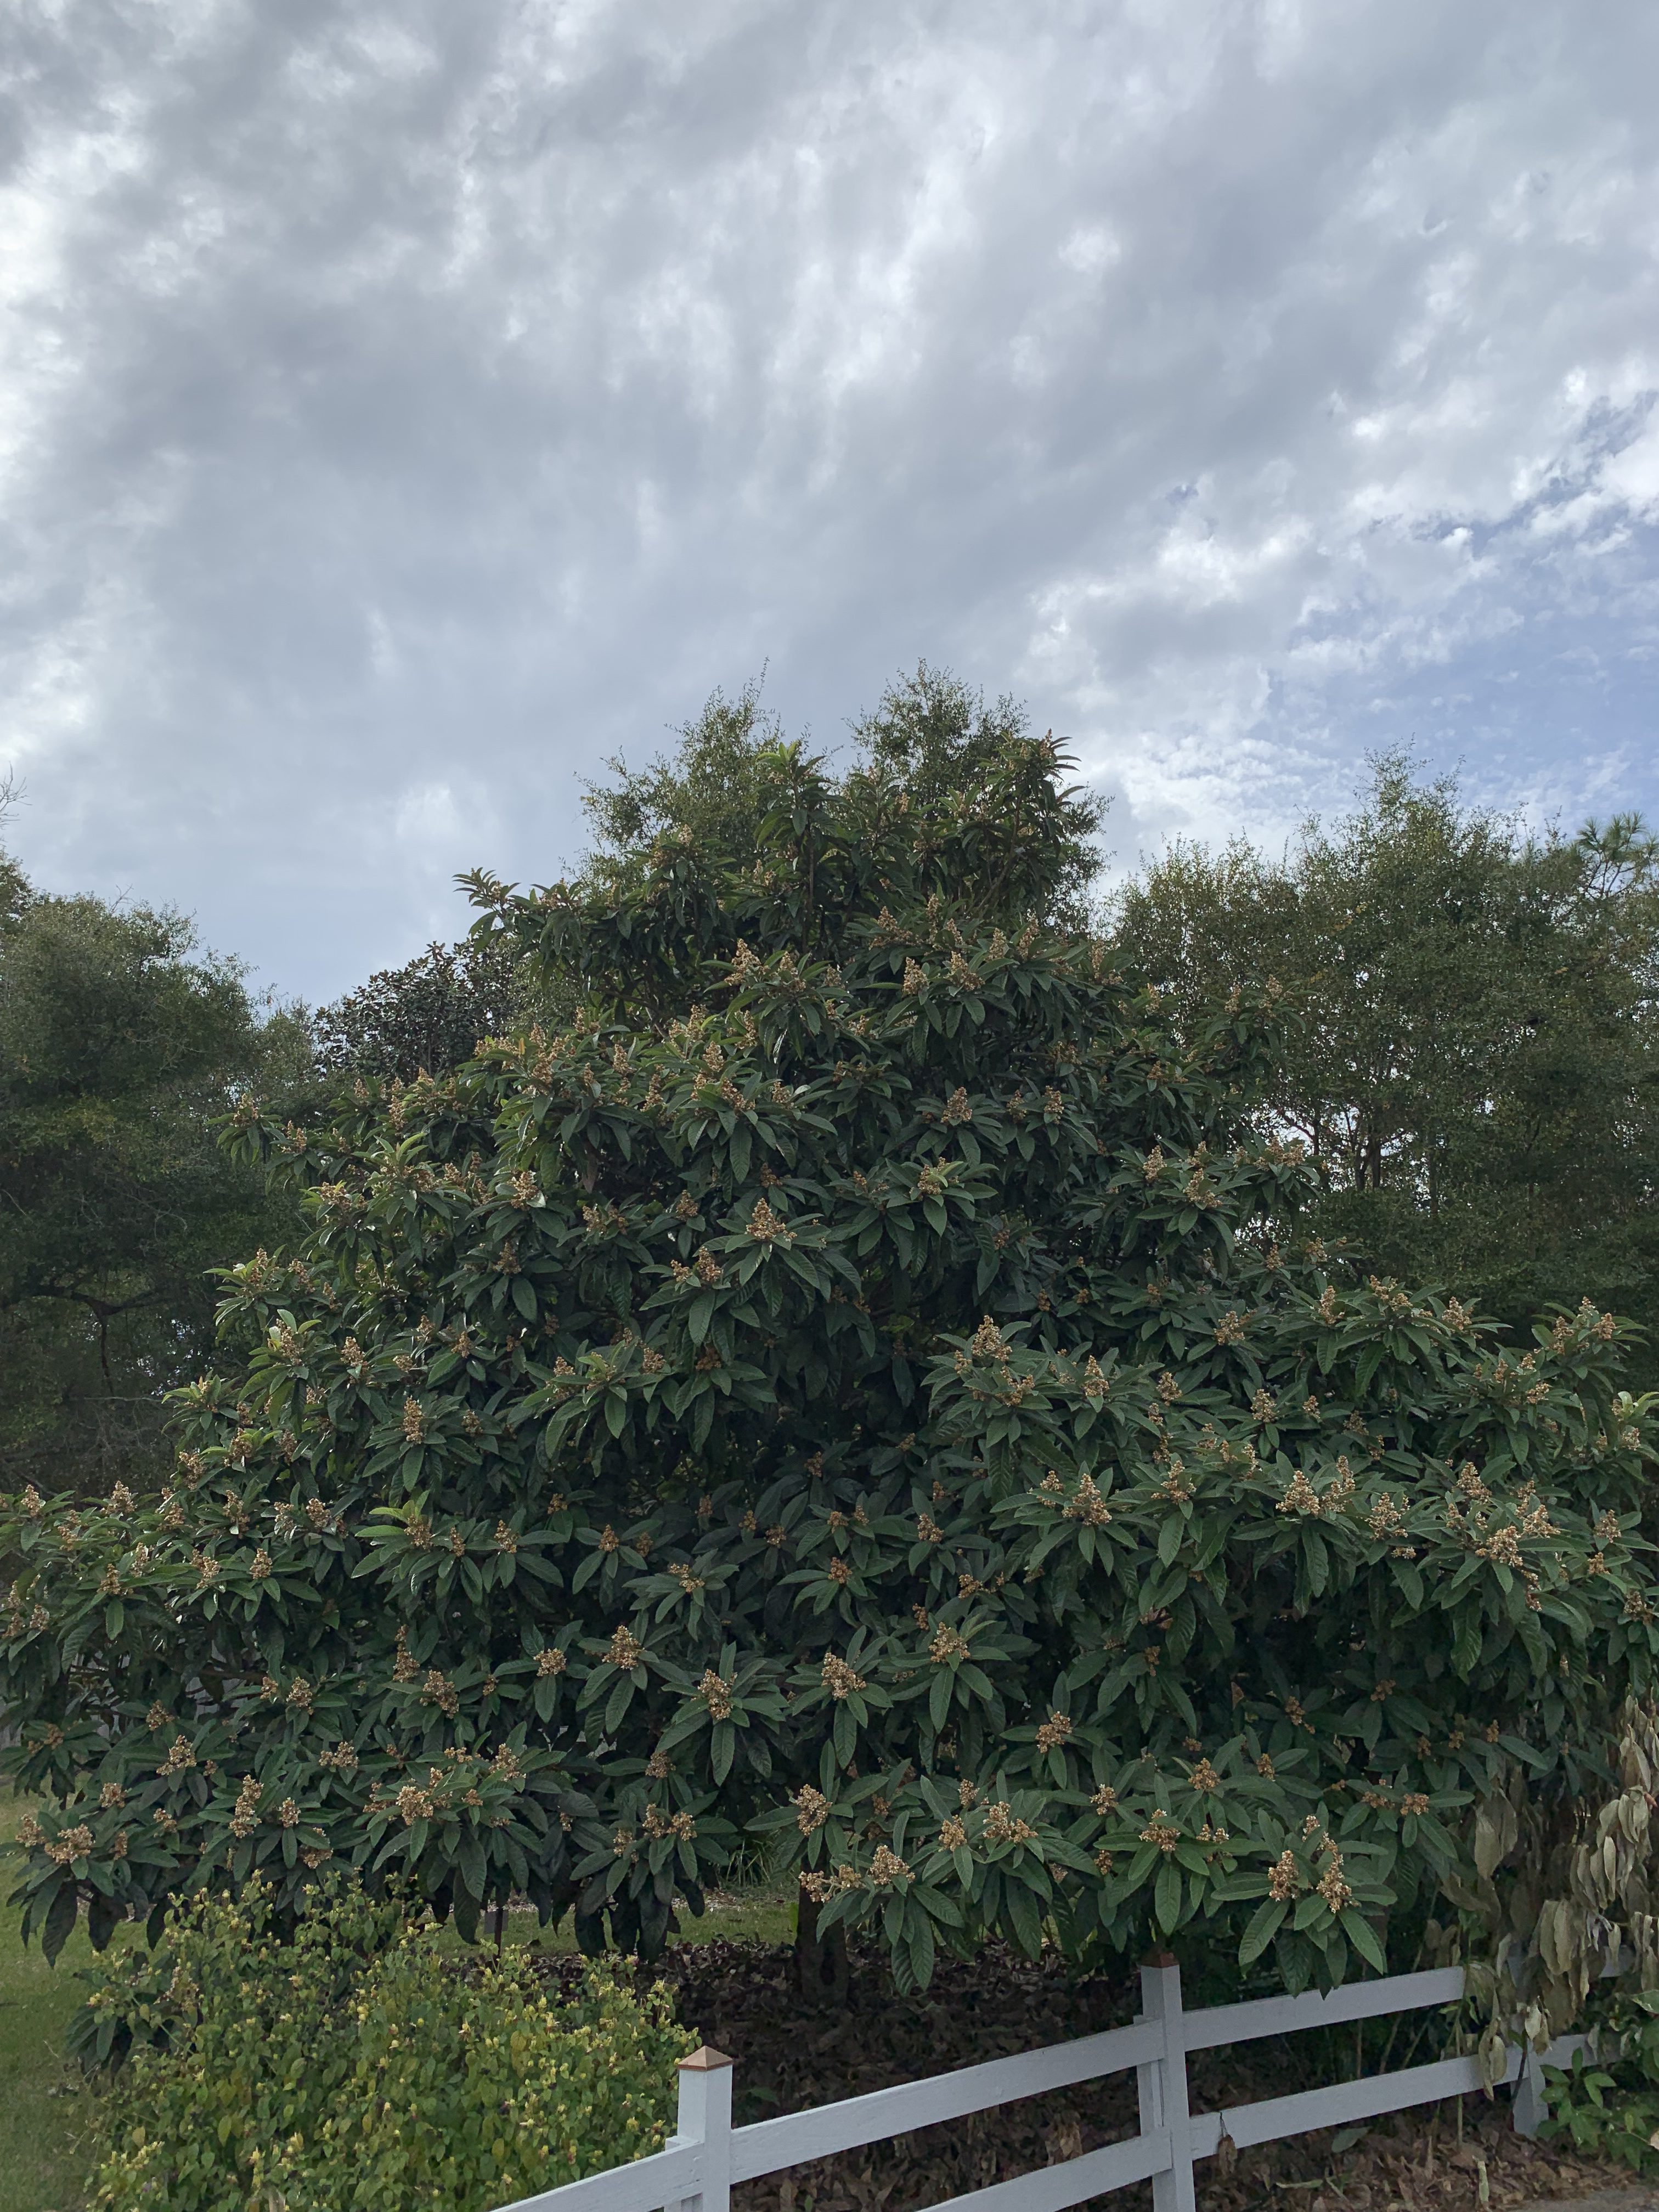
A beautiful loquat specimen at the UF/IFAS Extension at Santa Rosa County. Photo Credit: Matt Lollar, University of Florida/IFAS – Santa Rosa County
Leaves – The leaf configuration on loquat trees is classified as whorled. The leaf shape is lanceolate and the color is dark green with a nice soft brown surface underneath. These features help give the trees their tropical appearance.
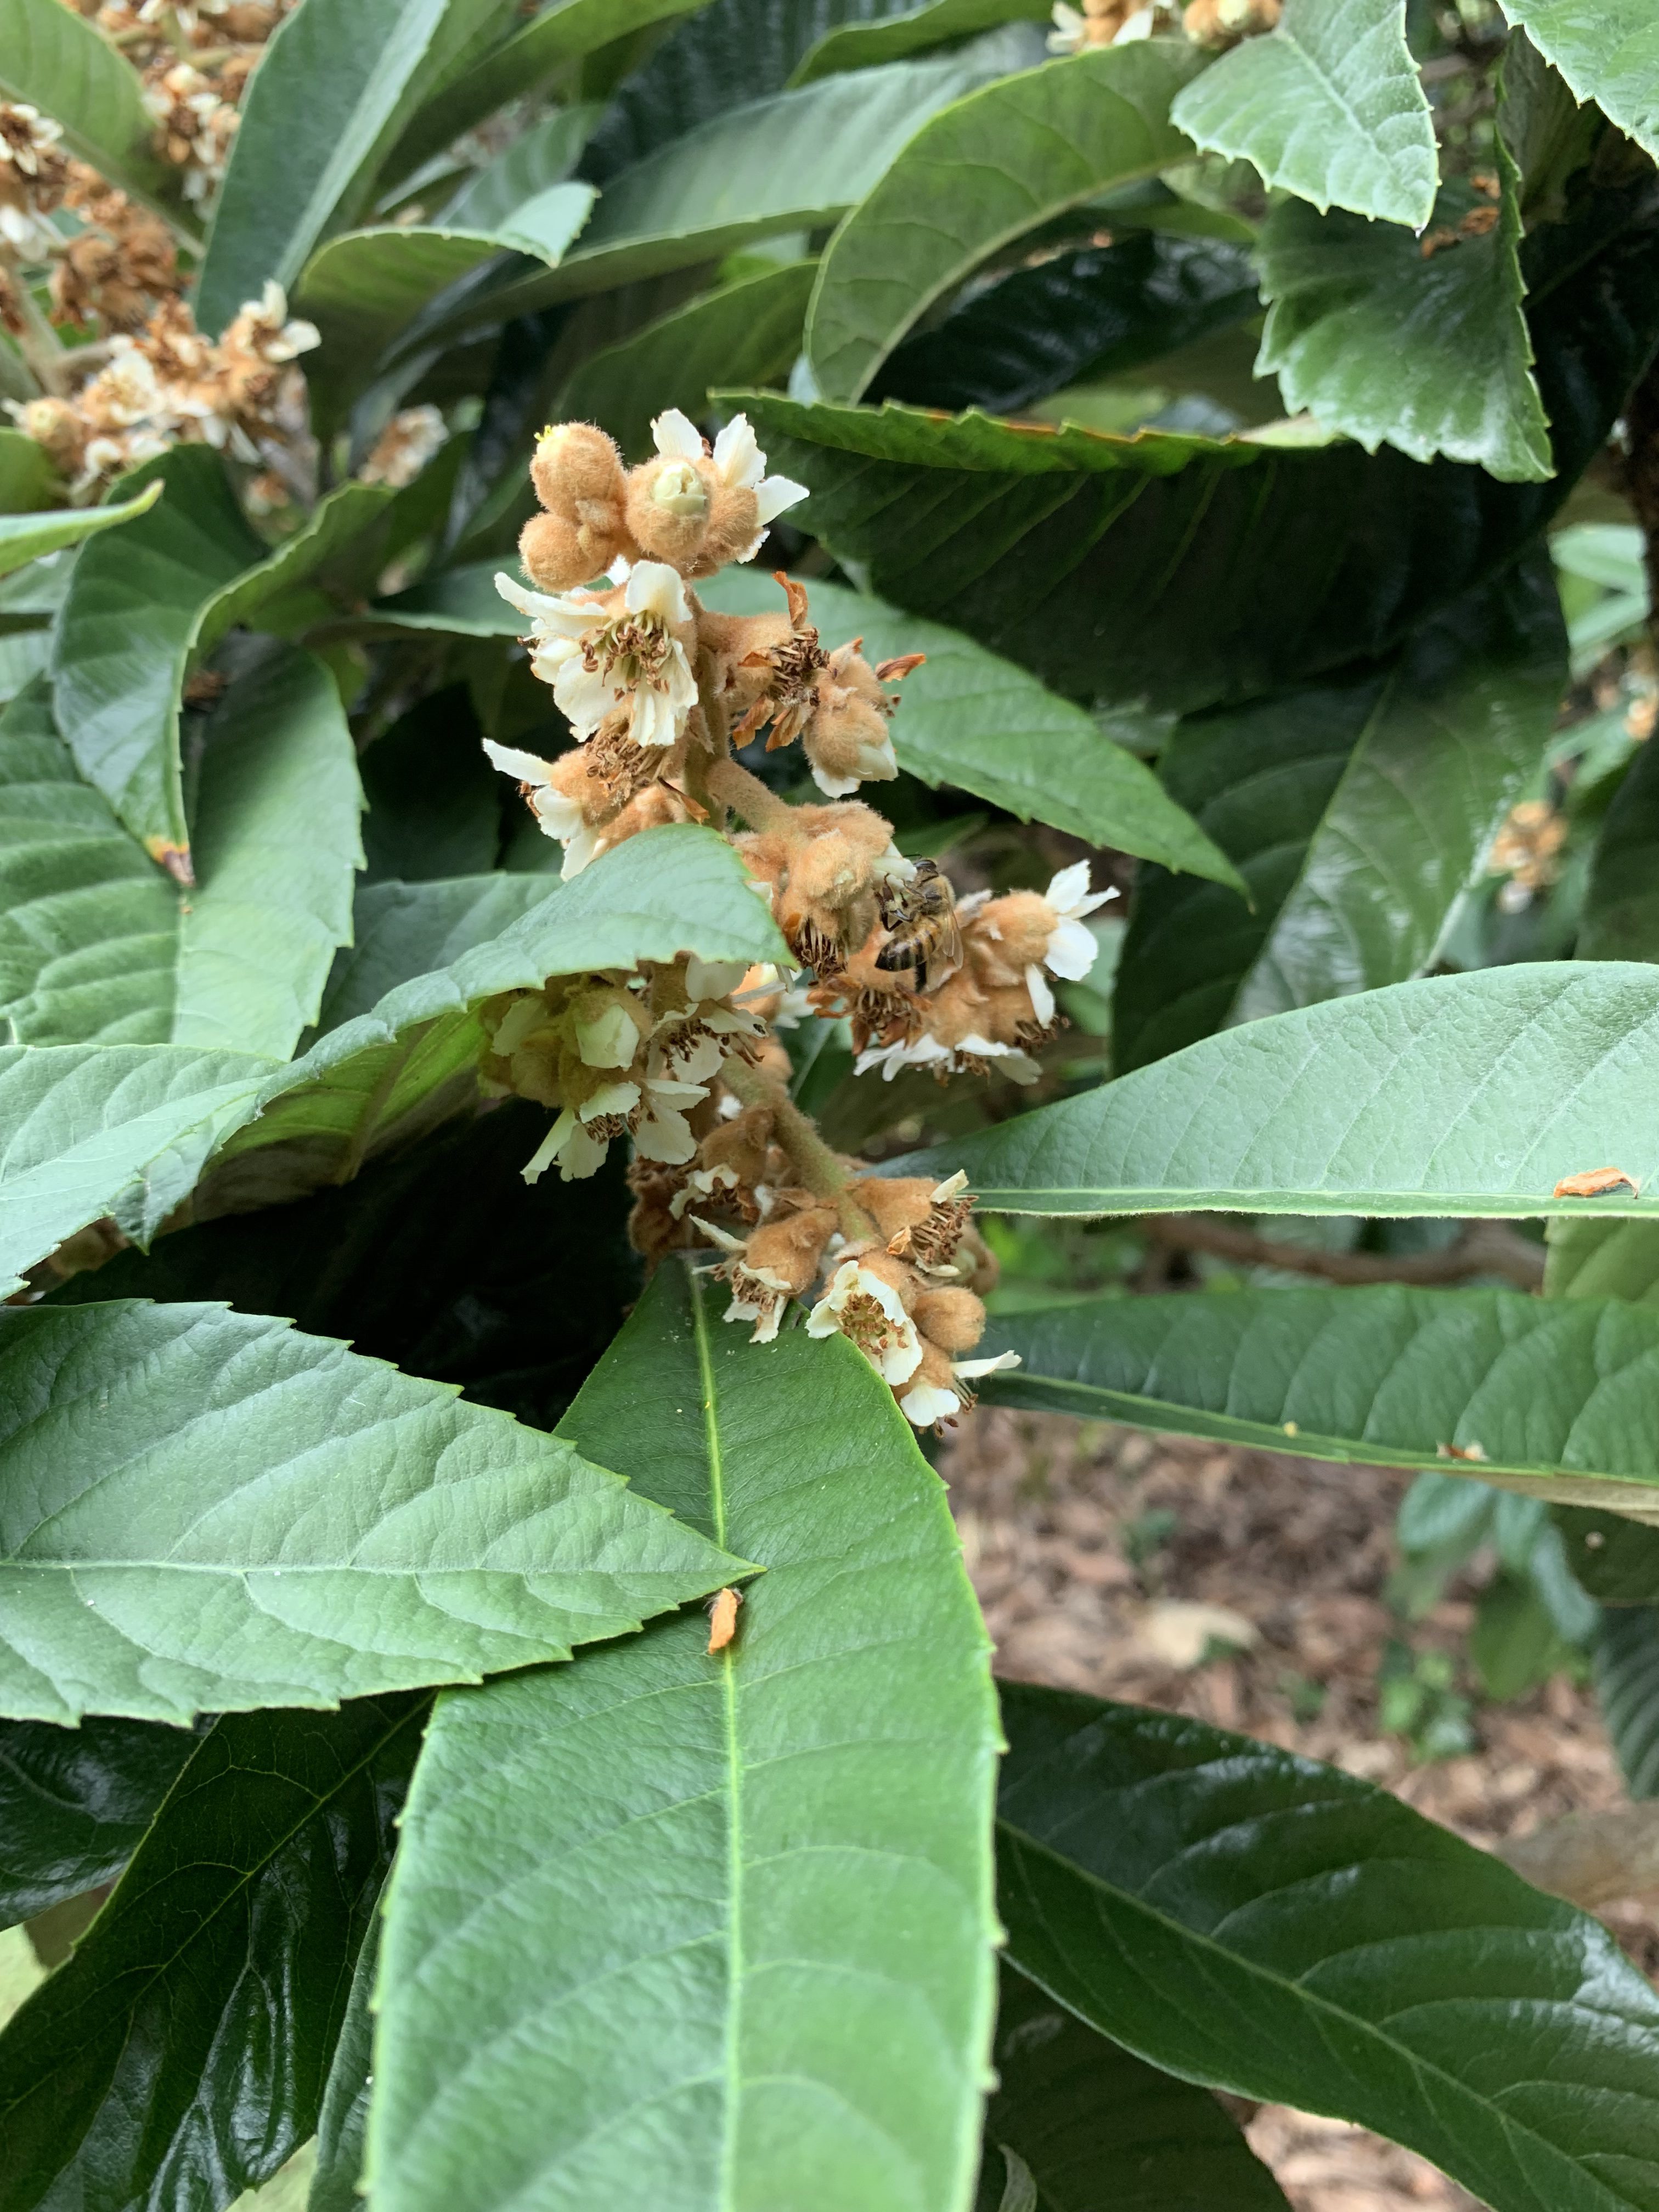
Flowers – 30 to 100 flowers can be present on each terminal panicle. Individual flowers are roughly half an inch in diameter and have white petals.
Fruit – What surprises most people is that loquats are more closely related to apples and peaches than any tropical fruit. Fruit are classified as pomes and appear in clusters ranging from 4 to 30 depending on variety and fruit size. They are rounded to ovate in shape and are usually between 1.5 and 3 inches in length. Fruit are light yellow to orange in color and contain one to many seeds.

A cluster of loquat flowers/buds being pollinated by a honey bee. Photo Credit: Matt Lollar, University of Florida/IFAS – Santa Rosa County
Propagation – Loquat trees are easily propagated by seed, as you will notice as soon as your tree first bears fruit. Seedlings pop up throughout yards containing even just one loquat tree. It is important to note that the trees do not come true from seed and they go through a 6- to 8-year juvenile period before flowering and fruiting. Propagation by cuttings or air layering is more difficult but rewarding, because vegitatively-propagated trees bear fruit within two years of planting. Sometimes mature trees are top-worked (grafted at the terminal ends of branches) to produce a more desirable fruit cultivar.
Loquat trees are hardy, provide an aesthetic focal point to the landscape, and produce a tasty fruit. For more information on growing loquats and a comprehensive list of cultivars, please visit the UF EDIS Publication: Loquat Growing in the Florida Home Landscape.
by Mary Salinas | Jul 11, 2019
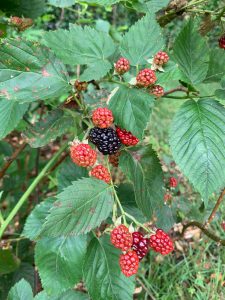
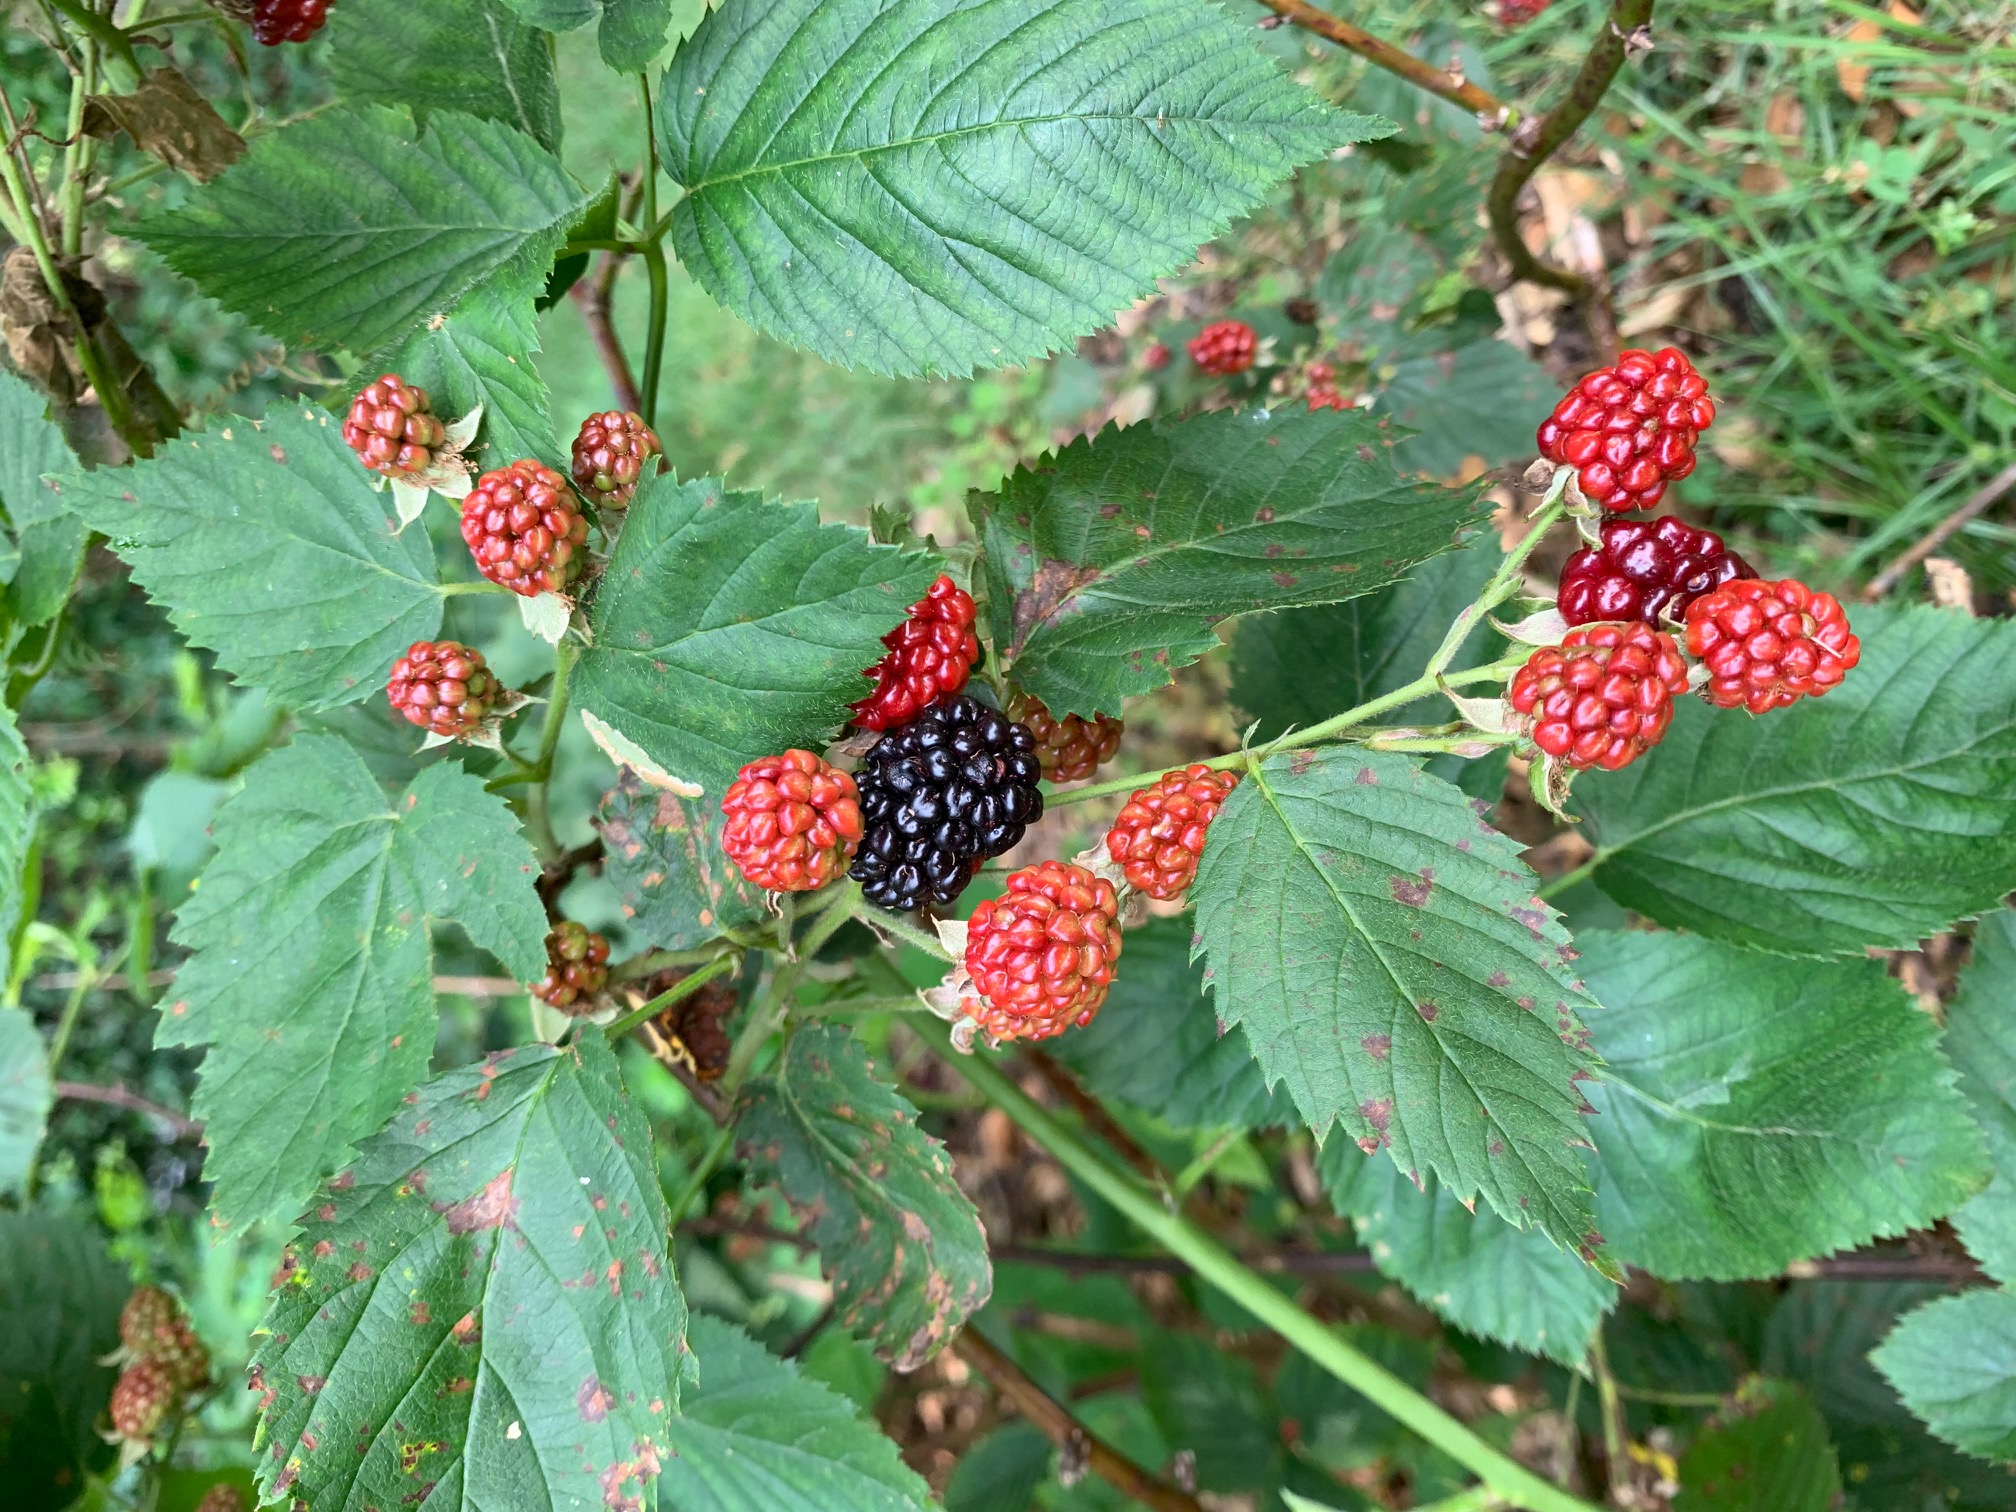
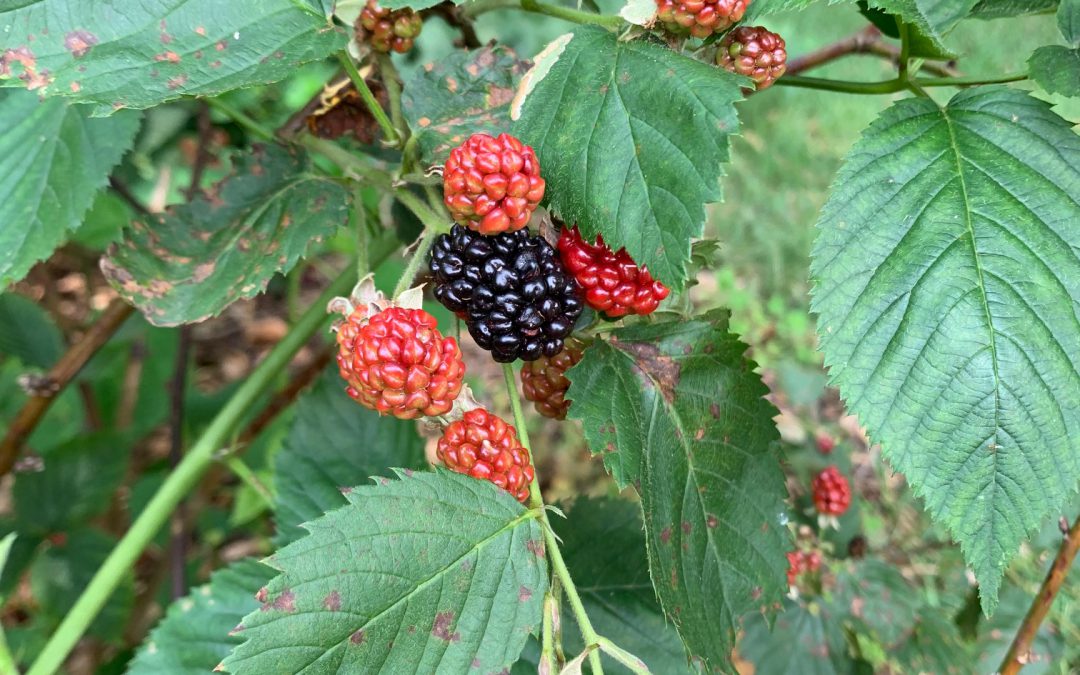
Ripening thornless blackberries. Photo credit: Mary Salinas, UF/IFAS Extension.
To everyone’s delight, the blackberries are ripening in the Santa Rosa County Extension demonstration garden. The blackberry patch is a reliable perennial that continues to provide fresh berries year after year. Before you decide against them because you don’t want a thorny and painful hazard in your landscape, remember that there are thornless blackberry cultivars with fruit just as tasty as the old-fashioned thorny blackberry varieties. However, it is important to take care and make sure that the variety or cultivar you choose is adapted to our Florida climate and chill hours.

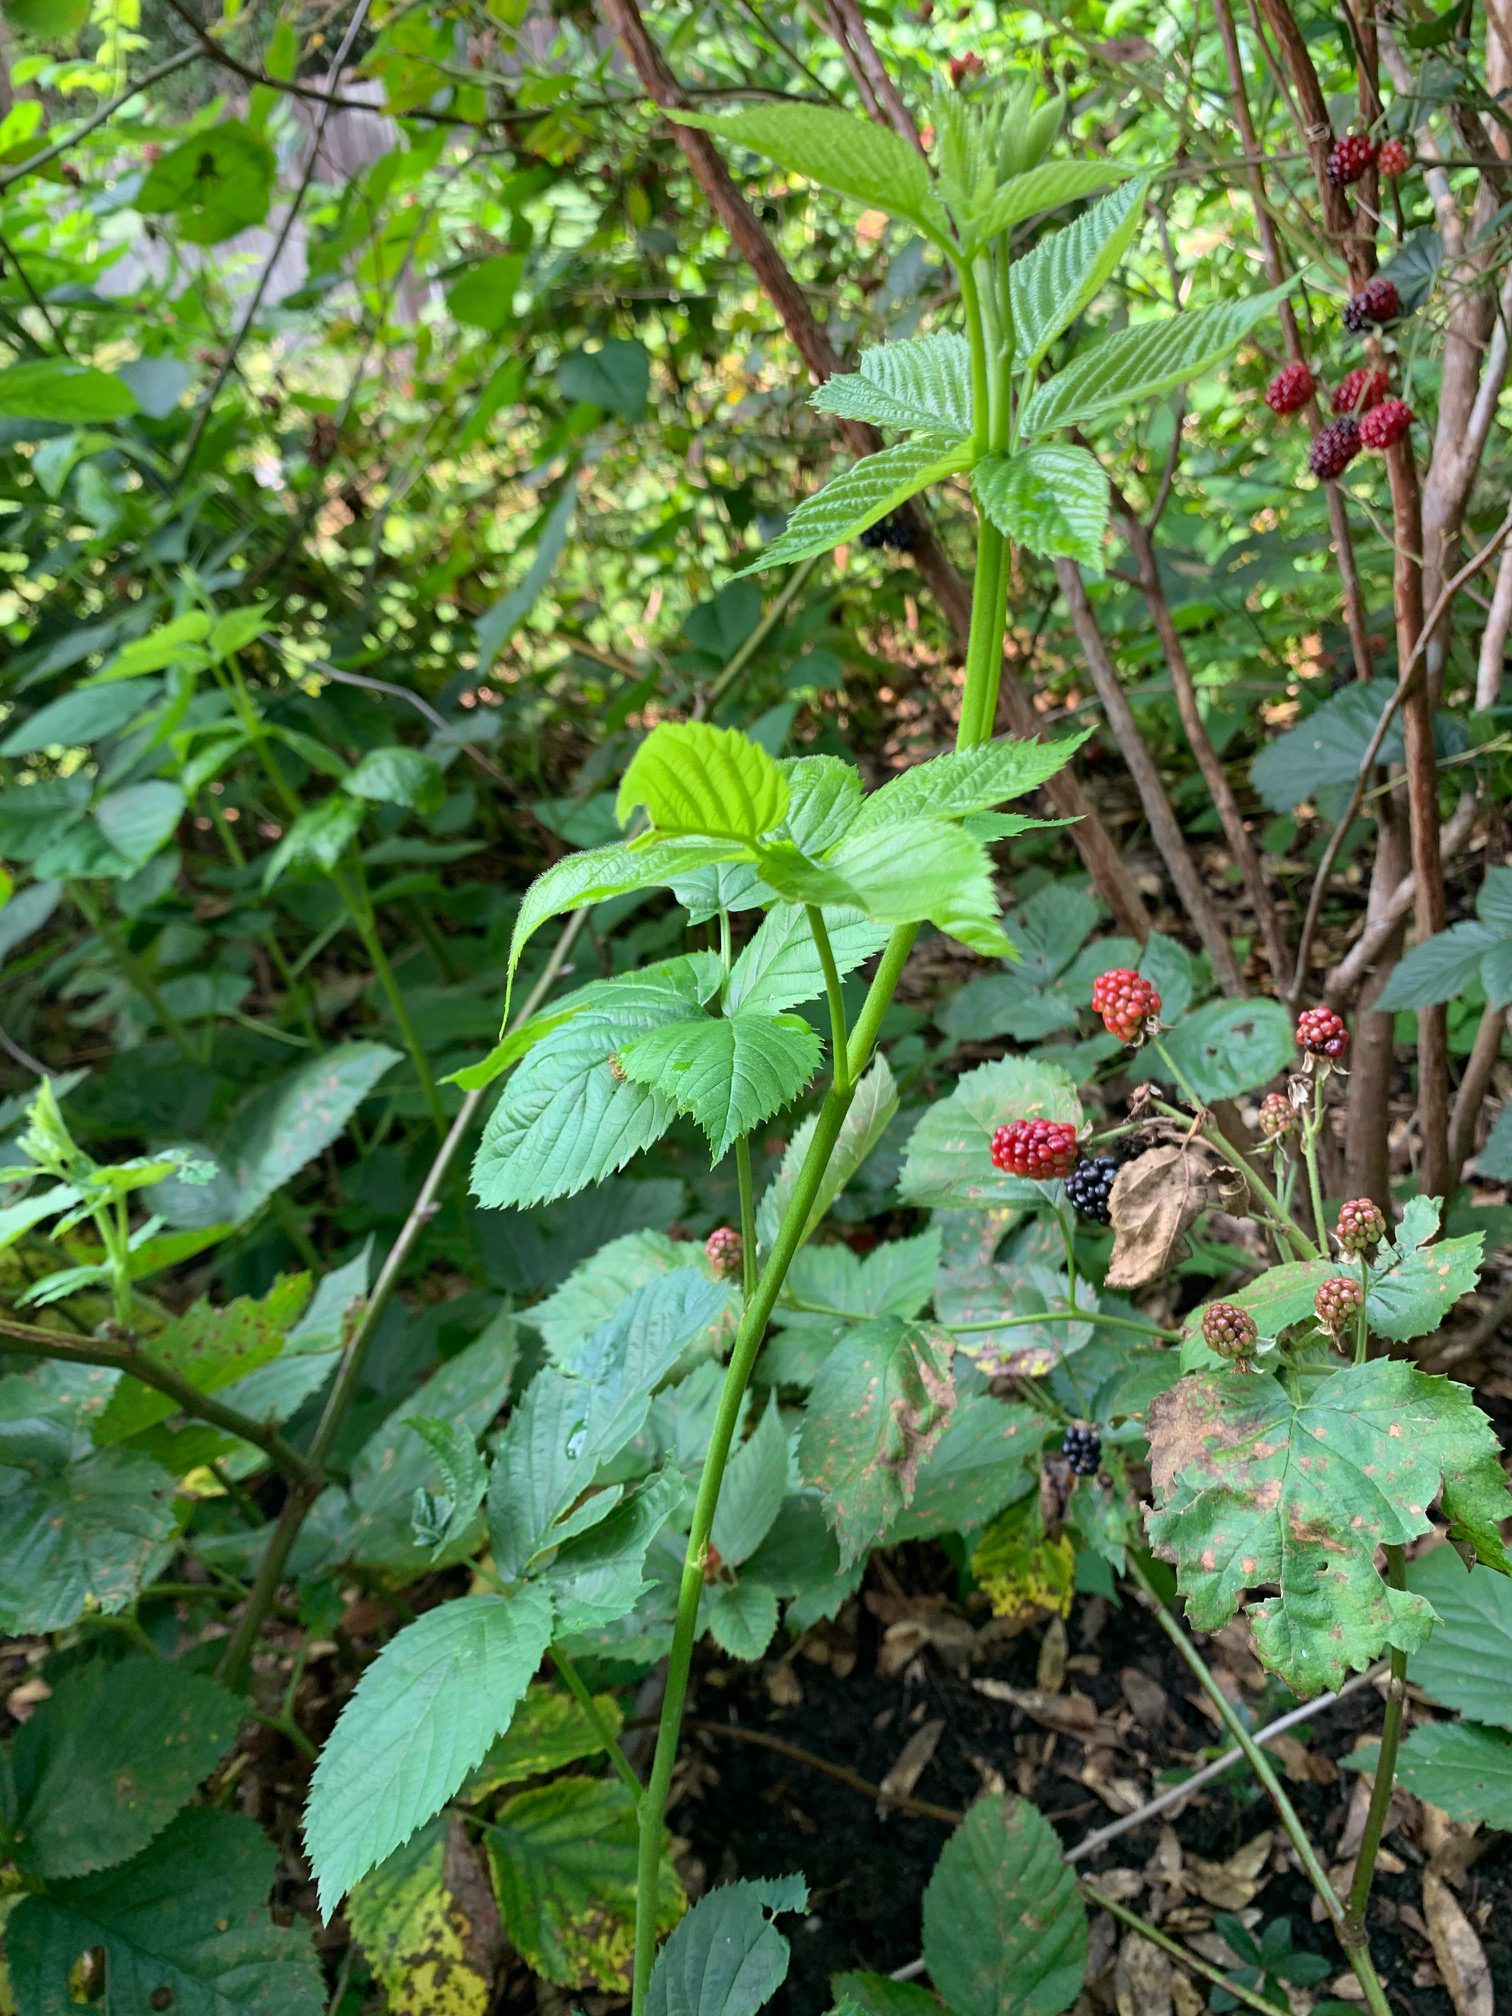
Blackberries bloom and produce fruit on last year’s canes. This year’s growth (the bright green shoot in the front center) will produce next year. Photo credit: Mary Salinas, UF/IFAS Extension.
You can choose a blackberry variety from your local nursery or propagate some plants from a favorite blackberry grown by a friend or neighbor (with permission, of course). Methods of propagation include stem cuttings, root cuttings, tip layering and removing the suckers that arise from the roots.
Plant when the weather is cooler in winter and choose a sunny spot with good soil. Frequent irrigation is crucial during the establishment period and when the fruit is produced. Weed control with organic or plastic mulches is also important to the success of your blackberry patch.
For more information on blackberry cultivars, propagation and growing success please see the University of Florida publication The Blackberry.
by Julie McConnell | Jun 21, 2019
My obsession with plants started with the purchase of my first house in Waverly, Alabama in the late 90s. I bought a house with seven acres and of that about 1.5 acres was a fenced yard. The landscape was not very appealing, so I was on a mission to make it beautiful yet functional for my dogs. The only problem was, as a new homeowner, I had very little expendable income for my burgeoning plant habit. This dilemma forced me to be a resourceful gardener.
Shop the discount rack at garden centers
- Many retail garden centers (especially mixed use stores with limited plant space) will discount plants simply because they are no longer flowering. Plants look perfectly healthy but are just not considered “retail ready” anymore, so rather than hold them over until they bloom again and appeal to most shoppers the stores tend to mark them down.
- Plants are either growing or they are dead, so it is common to find some outgrowing their container and are getting “potbound” which means the root system is outgrowing the pot. Potbound plants are hard to keep watered without wilting and the solutions are to transition to a larger pot or plant in the ground. Most garden centers are not equipped to pot up overgrown plants to larger containers, so the easier solution is to sell them quickly. If you purchase a plant with circling roots be sure to trim the bottom and score (slice) the root ball to encourage roots to spread laterally.
- Avoid plants that appear diseased (leaf spots, brown stems, mushy parts, rotting odor) or have active feeding insect activity.
Compliment other gardeners’ plants
- When you get gardeners together, they inevitably start swapping plants. I really don’t have an explanation for this other that good old southern hospitality, but I’ve noticed over the years that when you express appreciation of plants to other people they tend to end up in your own yard. Ask if you can take a pinch (for cuttings) or offer to divide a clump of crowded perennials and you are on your way to a trunk full of plant babies.
- I can’t recommend this for multiple safety reasons, but I have been known to photographs plants in my travels then strike up a conversation with a homeowner who insisted I take one home.
Experiment with basic propagation techniques
- Grow flowers from seed. Either purchase seeds (usually under $2/pack) or collect seed heads from spent flowers in your own garden. After flowers fade, allow them to set seed then either crush and distribute in other parts of your garden or store in a cool, dry place until you can swap with friends.
- Division – clumping perennials such as daylilies, cast iron plant, iris or liriope can be dug up and cut into smaller pieces with a shovel or machete. You only need to be sure to have buds on top and roots on the bottom to make a new plant. Other plants create offshoots that can be removed from the parent plant. Examples of these are agave, cycads, and yucca.
- Cuttings – the list of plants that can be propagated from stem cuttings is endless but a few that are very easy are crape myrtle, hydrangea, and coleus.
- Patented plants can not be propagated.
For more information read Plant Propagation Techniques for the Florida Gardener or contact your local UF/IFAS Extension Office.
by Matt Lollar | Feb 5, 2019
Winter is in full swing and home grown produce is probably not the first thing that comes to mind. But it should be! It’s time again to start thinking about spring vegetable gardening. While a number of crops can be started by direct seeding in the soil, success rates are higher when plants are started indoors or in a covered structure. In order to be successful, it’s important that you follow some simple steps.
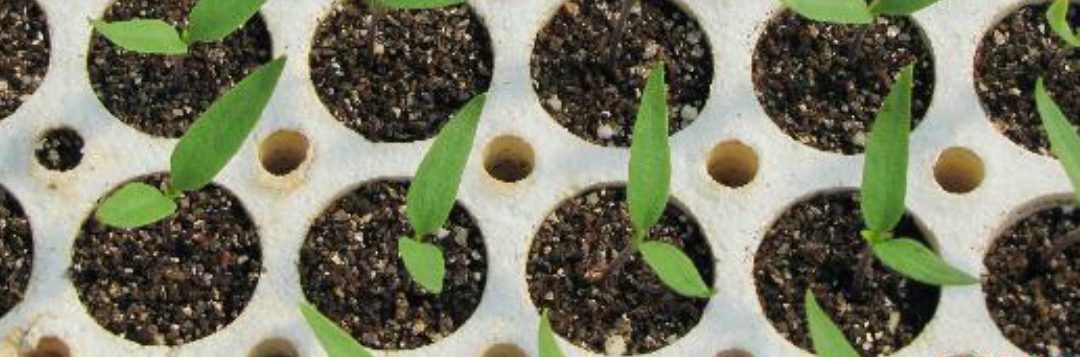
Seedless watermelons planted in a 128-cell flat. Photo Credit: Gene McAvoy, University of Florida/IFAS Extension – Hendry County
- Transplant Trays/Flats – Trays are made from different materials such as plastic, polystyrene, and compostable materials. Different cell sizes are also available. Generally, smaller cells are used for smaller seeds and larger cells are used for larger seeds. It’s important to think of the life cycle of the crop. For example, lettuce and other leafy greens have much shorter life cycles compared to tomatoes. Because of this, they have smaller root systems at transplant time and may not develop a good rootball in a large cell. Therefore, lettuce would perform better in a smaller cell.
- Media – It’s important that you choose a germination mix instead of a potting mix. Definitely don’t use garden soil! Germination mixes are typically a combination of finely ground peat, perlite, and other soiless substrates.
- Seed – Purchase seed from a reputable source with a germination guarantee. If you save seeds for future gardening, then store them in a cool, dry place. Seed can be stored in the refrigerator. However, do expect the germination rate of stored seeds to diminish over time. Coated seed is recommended for smaller seeds to make seeding easier and more efficient. Seeds should be planted in media at a depth of approximately 3 times the diameter of the seed. Check the seed package for additional planting recommendations. For more germination and storage information please see this publication from the University of Nebraska.
- Fertilizer – Too much fertilizer can result in leggy and possibly burned plants. A 20-10-10 (or similar ratio N-P-K) water-soluble product is generally used in commercial production. Rates are dependent on crop, sunlight, and temperature. The media should be kept moist, but not continually wet.

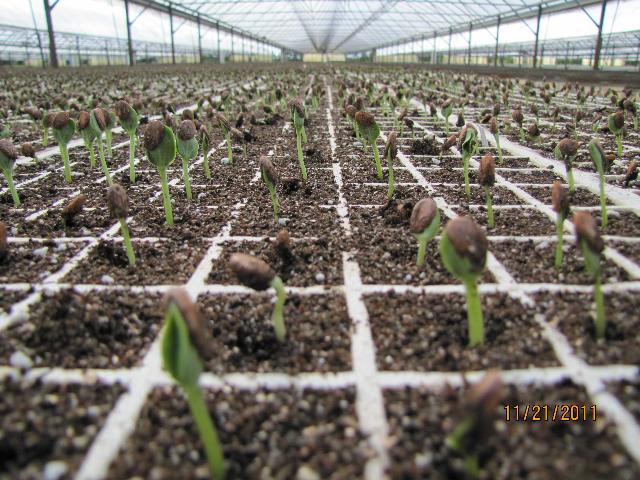
Well-grown kale transplants ready for field planting. Photo Credit: Gene McAvoy, University of Florida/IFAS Extension – Hendry County
Seeds can take up to 14 days to germinate depending on species and conditions. Most transplants are ready for the garden by 6 to 8 weeks. To improve success rate and accelerate production time, most farmers harden off their transplants before planting. Hardening off is the process of stressing the transplants for about a week. Generally, transplant trays are taken out of the greenhouse (or other transplant area such as a window sill) and set outside. Watering frequency is reduced and fertilization is halted. It’s important that the plants aren’t completely neglected, but just stressed enough to prepare them for the elements. A good place to put the trays is under a tree in partial shade. After this hardening off period, the transplants are ready for your garden. Hopefully these tips will make you a more successful gardener!
by Matt Lollar | Mar 13, 2018
This late winter has been alternating between warm and cool extremes. One thing is for certain and that’s that it’s time to start planning your sweet potato crop.
Sweet potatoes are generally planted March through June in the Florida Panhandle. The most common method of planting is with sweet potato slips. Sweet potato slips are simply six to eight inch cuttings of a sweet potato vine with the majority of the leaves pulled off. You can purchase sweet potato slips from a local garden center or a seed catalog. Make sure you only purchase certified, disease free slips. You can also easily start your own sweet potato slips from a store-bought sweet potato.
Sweet Potato Slip Production
- Pre-sprout Your Tubers – Place sweet potato tubers in a warm place (75 to 85 degrees) with high humidity (90%), such as in your garage, for two to four weeks. It is important that you put the tubers in a well-ventilated container. Allow the tubers to stay in the pre-sprout area until sprouts are roughly 1/4-inch in length.
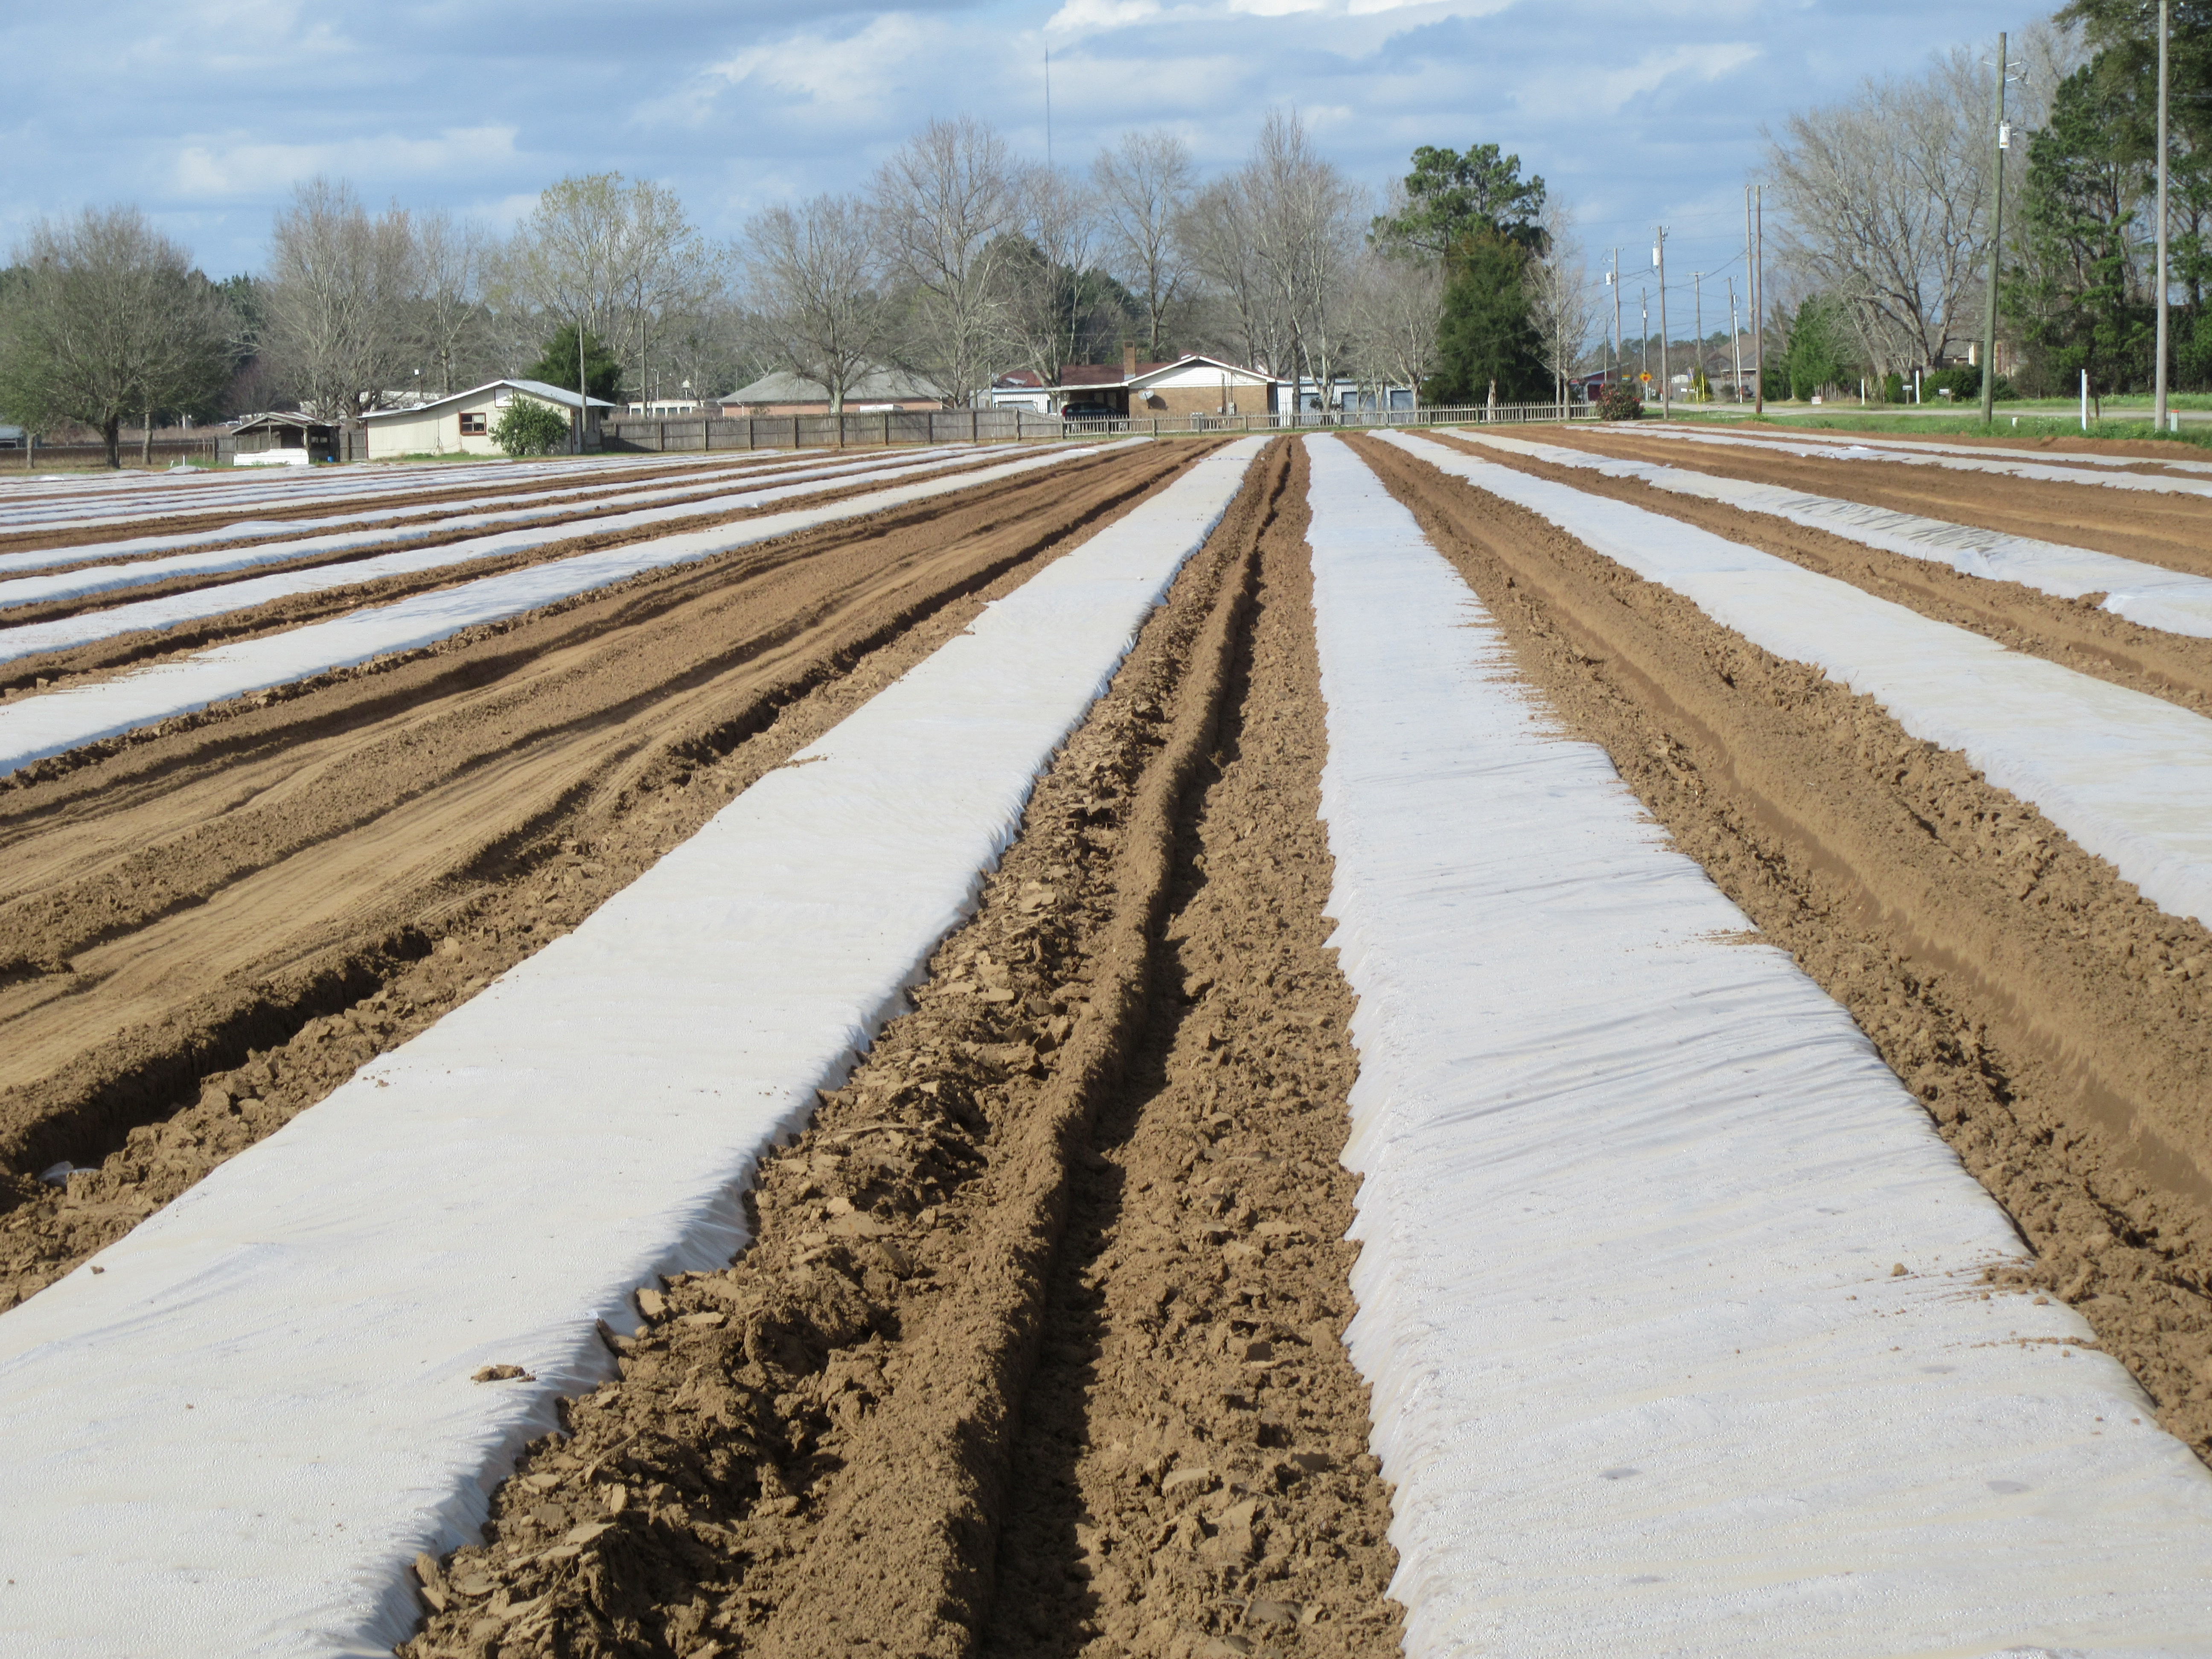
- Bedding – Sweet potatoes are placed in “beds” to produce slips. A sweet potato bed can be made out of the same materials as you’d use for a raised bed garden. You can simply build a frame out of 2″x12″ lumber. Plastic is placed in the bottom of the beds before a layer of bedding material is put down. The bedding media can be a peat-based potting mix or a more economical substrate would be wood chips or sawdust. Sprouted sweet potatoes should then be placed in a single layer 8″ to 12″ inches apart and covered with two additional inches of bedding material. Then top dress the bed with a general purpose, granular fertilizer, water the bed, and cover with clear or black plastic. Poke holes in the cover plastic to aerate the soil and prevent carbon dioxide and temperature buildup. You may need to water the bed periodically, but do not completely saturate. Sweet potato slips can also be produced in the garden if you have a sandy, well-drained soil such as the field pictured below.
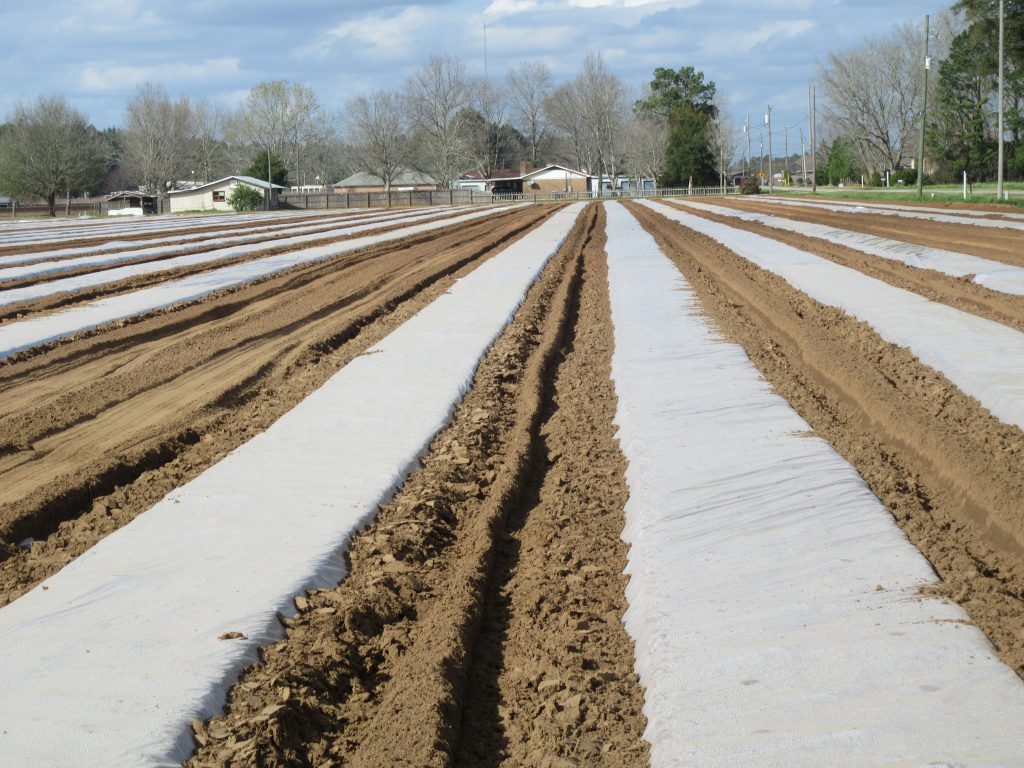
Sweet potato slip production in the field. Photo Credit: Evan Anderson, University of Florida/IFAS Extension.
- Cut Slips – Slips will be ready to cut in seven to ten weeks. Cut slips 1″ above the bed surface and trim to 10″ to 12″ in length. Strip all but the top one or two leaves from each slip. If you are unable to plant your slips at the time of cutting, then store them in a cool, dry area to prevent them from rotting.
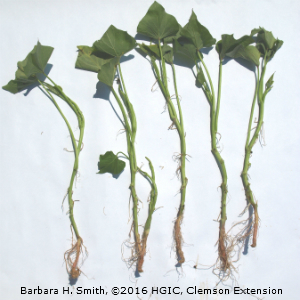
Rooted sweet potato slips that are ready to transplant into the garden when the soil becomes warm.
Barbara H. Smith, ©2016 HGIC, Clemson Extension
Sweet Potato Production
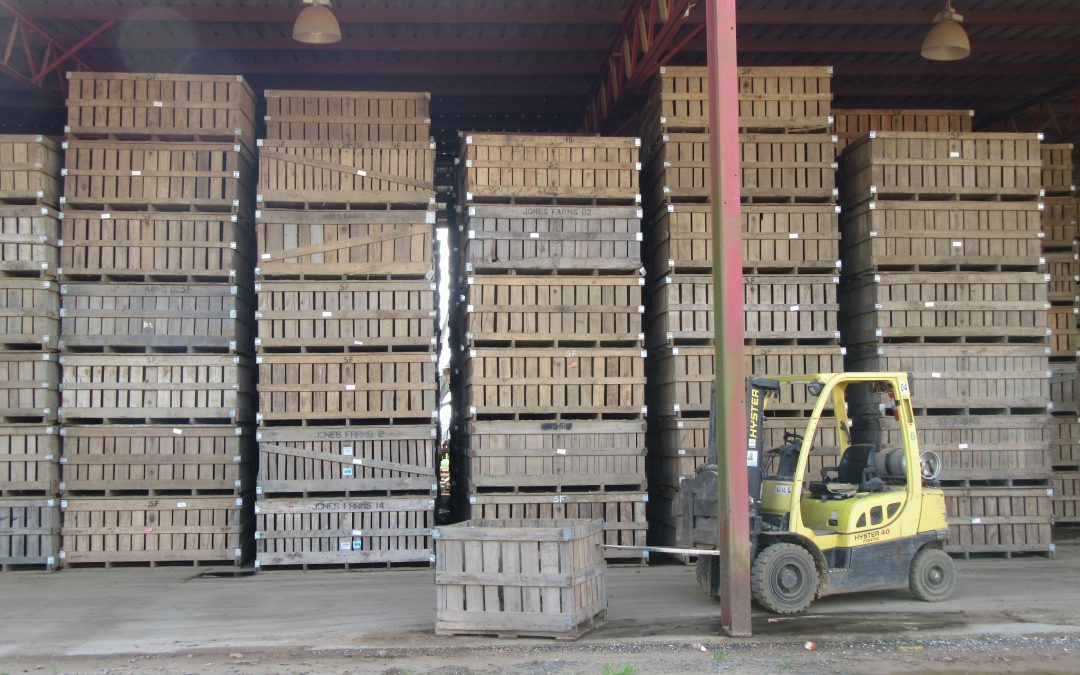
Sweet potato slips can be planted March through June in the Florida Panhandle. Plant the slips at least three nodes (leaf stubs) deep at 12″ by 36″ spacing. Fertilize based on soil test recommendations. Sweet potatoes are ready to harvest generally between 100 to 120 days after planting slips. After harvest, you will need store your sweet potatoes in a warm (80 to 85 degrees), humid (80 to 90%) place for one to two weeks to allow them to “cure”. After the curing period, you can store your sweet potatoes in a cool area (55 to 60 degrees) until you are ready to eat them.

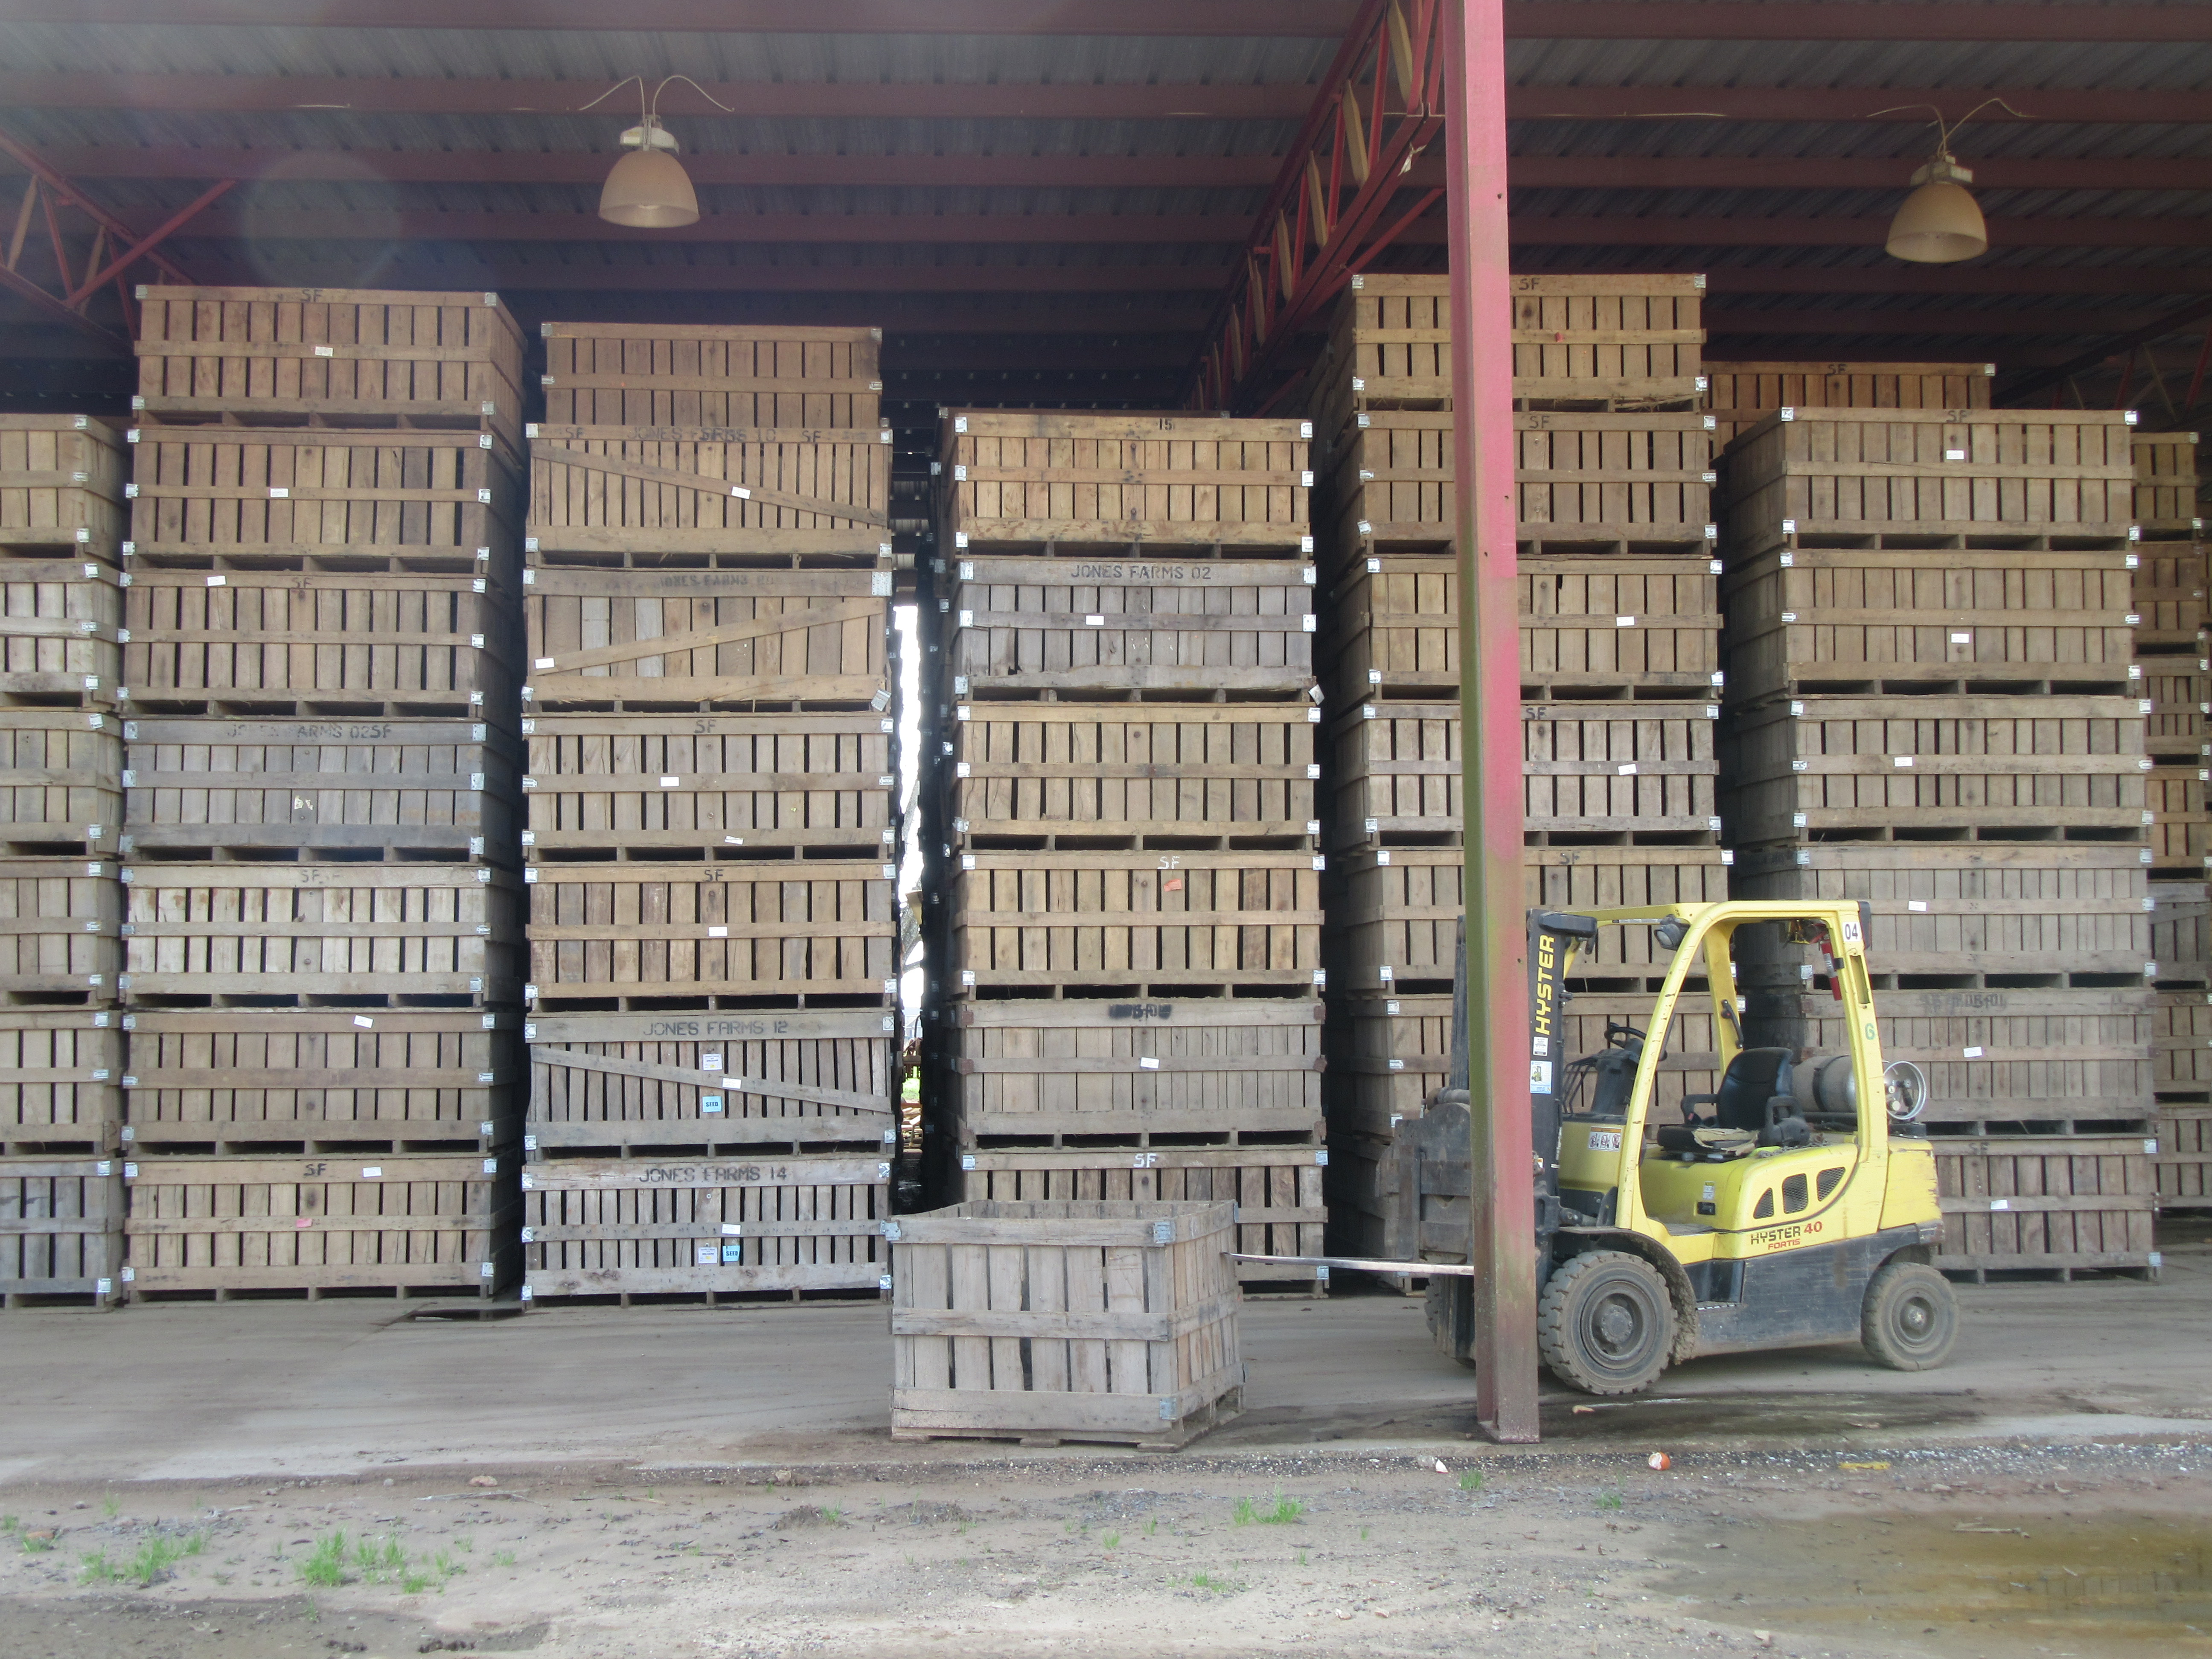
Sweet potato storage on a commercial farm. Photo Credit: Evan Anderson, University of Florida/IFAS Extension.
by Mary Salinas | Sep 9, 2015
You’ve grown some wonderful vegetables, annuals or perennials and you would like to save some of the seed from those plants to have for planting in the future. This is a great way to get more of the plants you know and love while saving on the expense of new plants. One exception are plants that are F1 hybrids; seeds from these plants will produce crops quite dissimilar to the parent.
First, you need to collect ripe seed from the desired plants. How do you know when the seeds are ripe and ready to harvest? The strategies for annuals/perennials and vegetable plants differ.

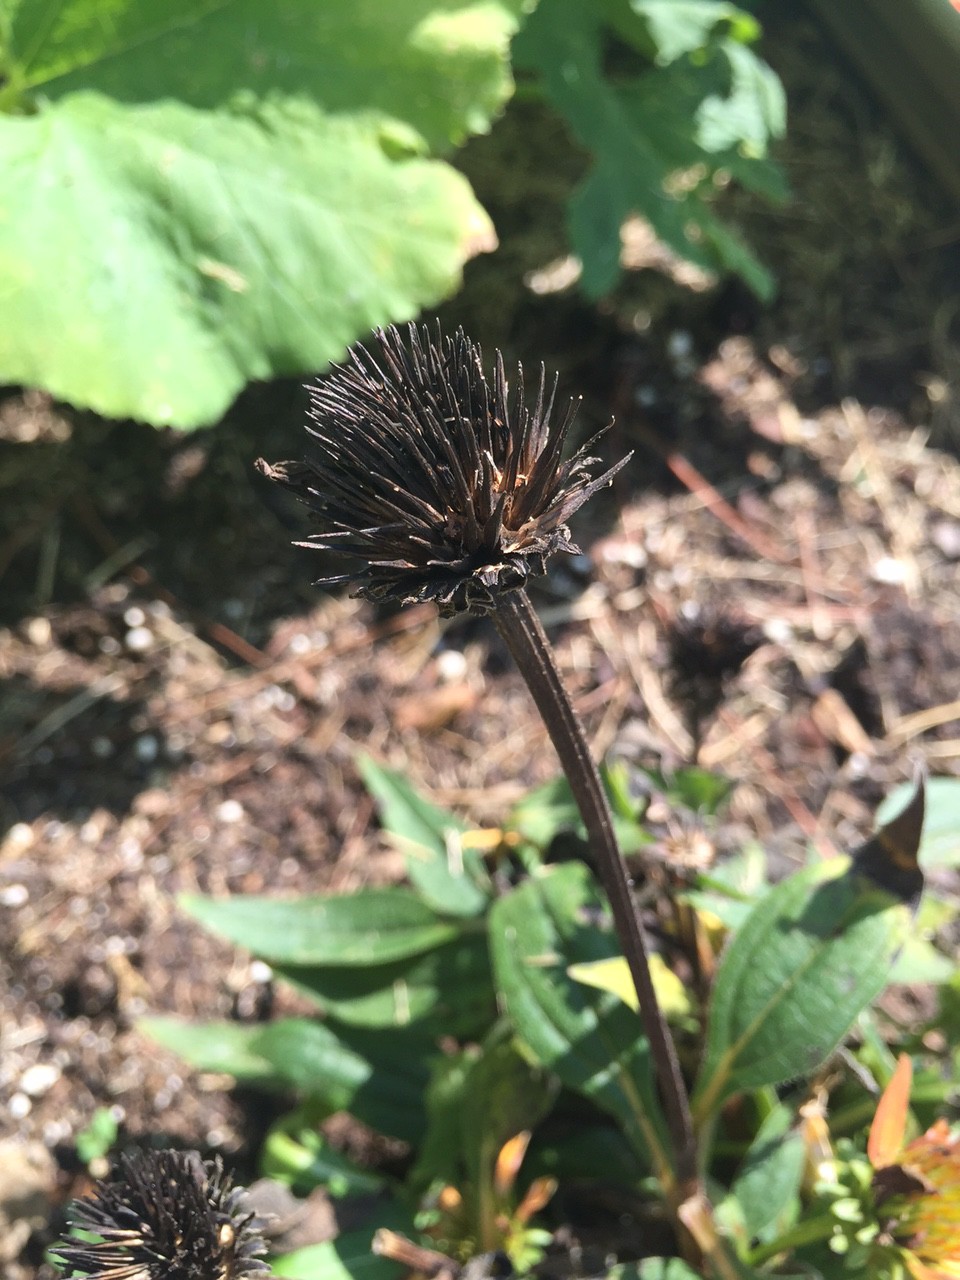
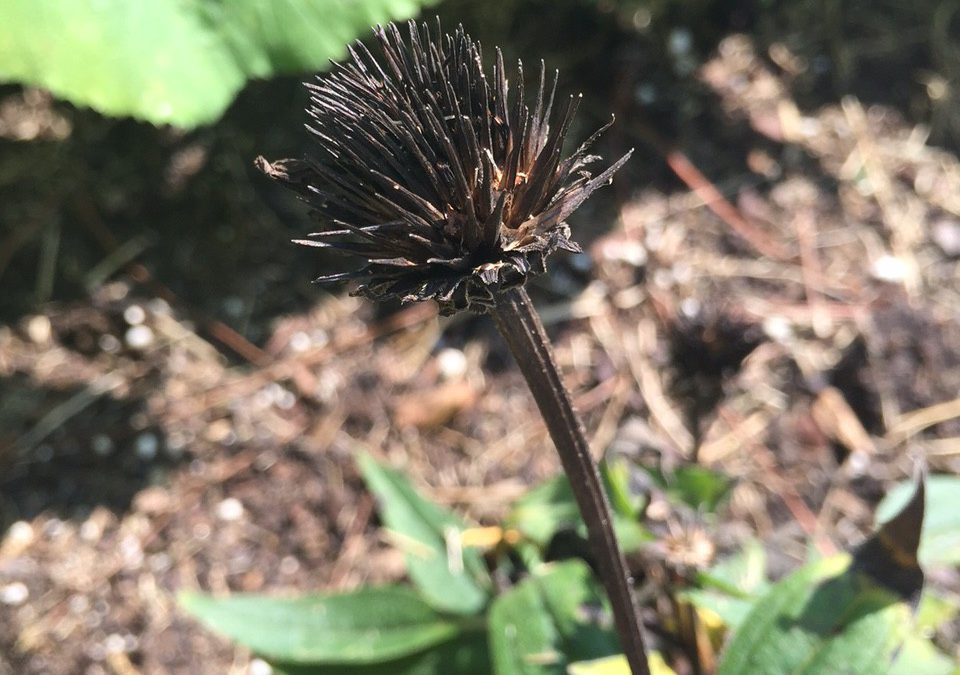
The ripe seedhead of a coneflower. Photo credit: Mary Derrick, UF/IFAS Extension.
For annuals and perennials that flower without making a fruit, wait until the flower has dried up and the seed head is brown and dead-looking. The seeds are then mature and ready to harvest. Take a look at the photo of the coneflower seedhead for reference. These seeds are already dry and can be put into an envelope and then into a sealed jar or plastic stage bag that contains a desiccant to absorb any excess moisture. There are a few options for desiccants: the little packets that come in vitamin bottles and purses to keep them dry, cornmeal or dried milk in bottom of the bag. Be sure to label your envelope with the date and name of your plant seeds. Store in the refrigerator.
When you are saving seed from a vegetable that has seeds inside it such as a tomato, pepper or squash, harvest the vegetable when it is ripe and ready to eat and scoop out the seeds and wash away all other plant parts from the seed. These seeds are very moist and if stored in this state, they will rot into a mess. You want to get the moisture content below about 8% for long term storage. There are several methods:
- If the humidity is low and the temperature high, (I know, those can be rare conditions for Florida) you can put the seeds in a single layer on a baking sheet in the shade to let them dry all day.
- Another option is to take that baking sheet with a single layer of seeds and put it in a 100° oven for 6 hours with the door open. It’s crucial to monitor your oven temperatures as those above 100° will kill the seeds.
Once the seeds are dried sufficiently, store them as described above for flower seeds. Your seeds can then last for several years.
For more information:
Seed Saving from Colorado State Extension
Saving Vegetable Seeds from University of Minnesota Extension