by Matt Lollar | Feb 5, 2019
Winter is in full swing and home grown produce is probably not the first thing that comes to mind. But it should be! It’s time again to start thinking about spring vegetable gardening. While a number of crops can be started by direct seeding in the soil, success rates are higher when plants are started indoors or in a covered structure. In order to be successful, it’s important that you follow some simple steps.
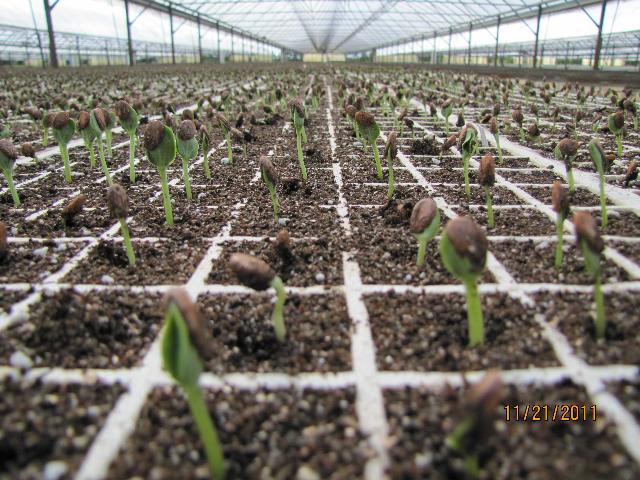
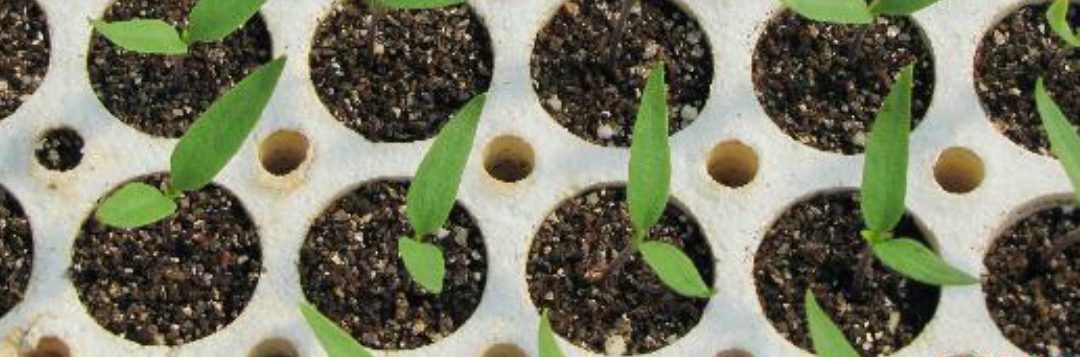
Seedless watermelons planted in a 128-cell flat. Photo Credit: Gene McAvoy, University of Florida/IFAS Extension – Hendry County
- Transplant Trays/Flats – Trays are made from different materials such as plastic, polystyrene, and compostable materials. Different cell sizes are also available. Generally, smaller cells are used for smaller seeds and larger cells are used for larger seeds. It’s important to think of the life cycle of the crop. For example, lettuce and other leafy greens have much shorter life cycles compared to tomatoes. Because of this, they have smaller root systems at transplant time and may not develop a good rootball in a large cell. Therefore, lettuce would perform better in a smaller cell.
- Media – It’s important that you choose a germination mix instead of a potting mix. Definitely don’t use garden soil! Germination mixes are typically a combination of finely ground peat, perlite, and other soiless substrates.
- Seed – Purchase seed from a reputable source with a germination guarantee. If you save seeds for future gardening, then store them in a cool, dry place. Seed can be stored in the refrigerator. However, do expect the germination rate of stored seeds to diminish over time. Coated seed is recommended for smaller seeds to make seeding easier and more efficient. Seeds should be planted in media at a depth of approximately 3 times the diameter of the seed. Check the seed package for additional planting recommendations. For more germination and storage information please see this publication from the University of Nebraska.
- Fertilizer – Too much fertilizer can result in leggy and possibly burned plants. A 20-10-10 (or similar ratio N-P-K) water-soluble product is generally used in commercial production. Rates are dependent on crop, sunlight, and temperature. The media should be kept moist, but not continually wet.

Well-grown kale transplants ready for field planting. Photo Credit: Gene McAvoy, University of Florida/IFAS Extension – Hendry County
Seeds can take up to 14 days to germinate depending on species and conditions. Most transplants are ready for the garden by 6 to 8 weeks. To improve success rate and accelerate production time, most farmers harden off their transplants before planting. Hardening off is the process of stressing the transplants for about a week. Generally, transplant trays are taken out of the greenhouse (or other transplant area such as a window sill) and set outside. Watering frequency is reduced and fertilization is halted. It’s important that the plants aren’t completely neglected, but just stressed enough to prepare them for the elements. A good place to put the trays is under a tree in partial shade. After this hardening off period, the transplants are ready for your garden. Hopefully these tips will make you a more successful gardener!
by Matt Lollar | Mar 13, 2018
This late winter has been alternating between warm and cool extremes. One thing is for certain and that’s that it’s time to start planning your sweet potato crop.
Sweet potatoes are generally planted March through June in the Florida Panhandle. The most common method of planting is with sweet potato slips. Sweet potato slips are simply six to eight inch cuttings of a sweet potato vine with the majority of the leaves pulled off. You can purchase sweet potato slips from a local garden center or a seed catalog. Make sure you only purchase certified, disease free slips. You can also easily start your own sweet potato slips from a store-bought sweet potato.
Sweet Potato Slip Production
- Pre-sprout Your Tubers – Place sweet potato tubers in a warm place (75 to 85 degrees) with high humidity (90%), such as in your garage, for two to four weeks. It is important that you put the tubers in a well-ventilated container. Allow the tubers to stay in the pre-sprout area until sprouts are roughly 1/4-inch in length.
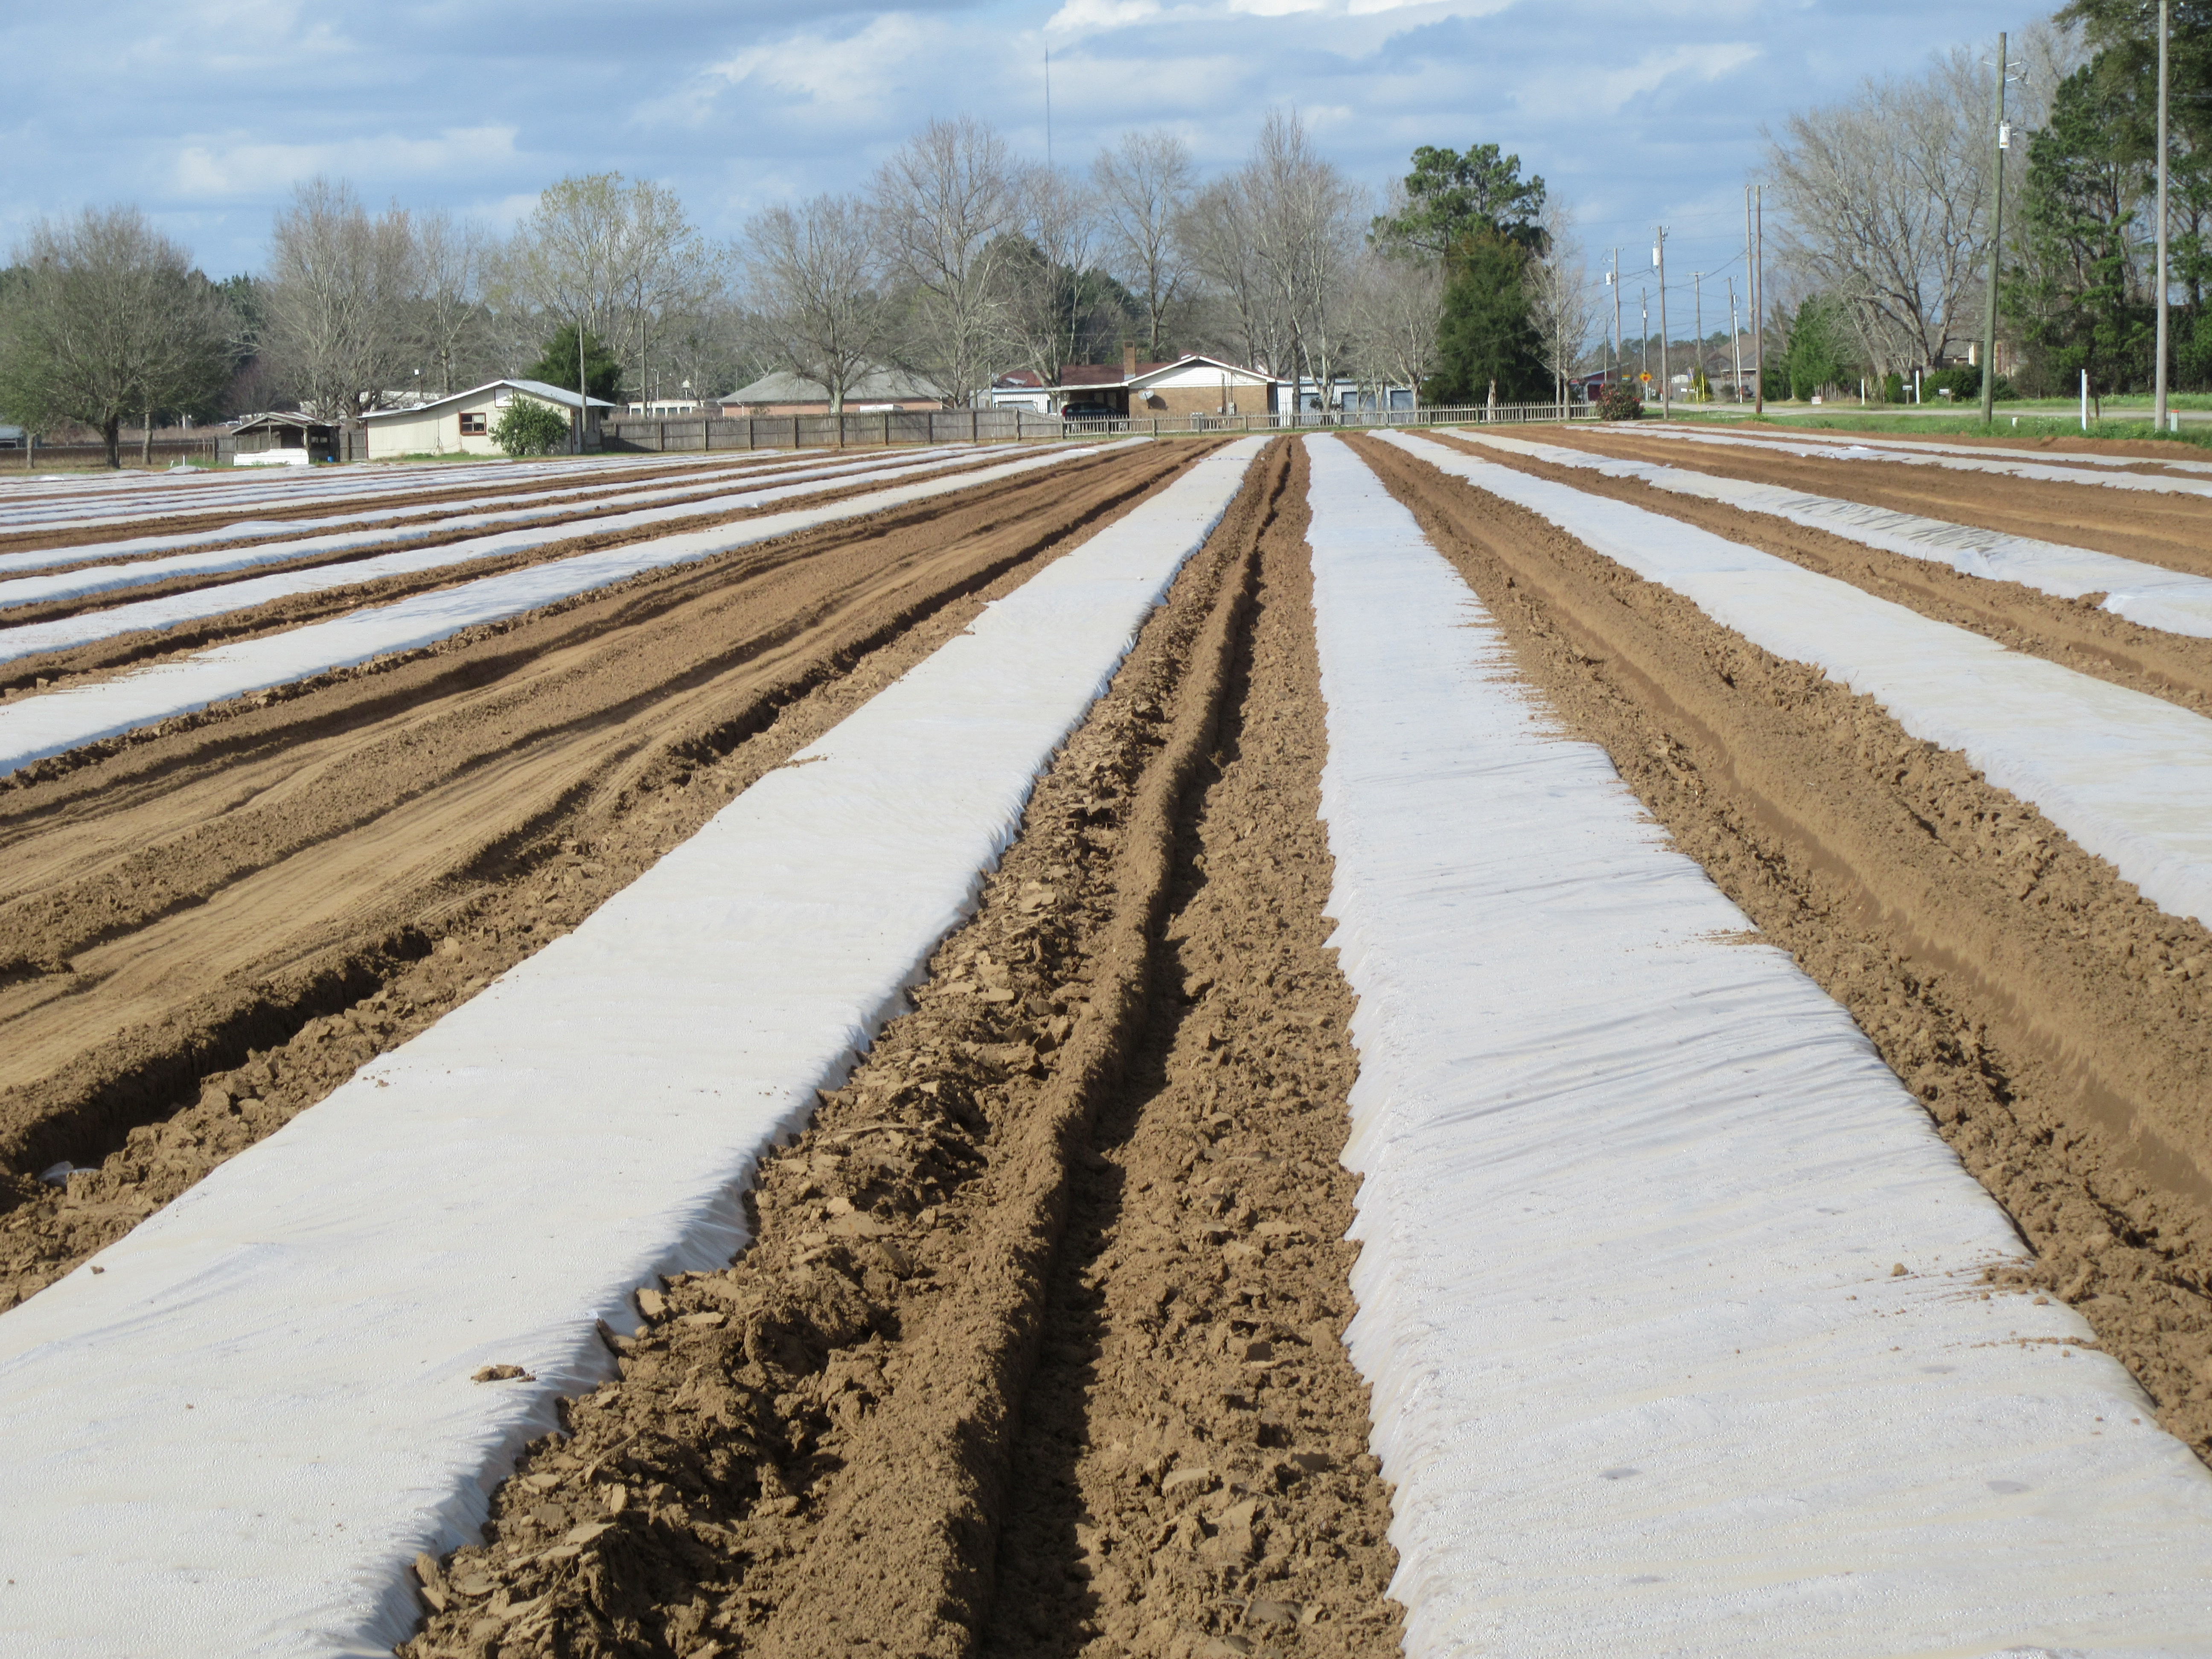
- Bedding – Sweet potatoes are placed in “beds” to produce slips. A sweet potato bed can be made out of the same materials as you’d use for a raised bed garden. You can simply build a frame out of 2″x12″ lumber. Plastic is placed in the bottom of the beds before a layer of bedding material is put down. The bedding media can be a peat-based potting mix or a more economical substrate would be wood chips or sawdust. Sprouted sweet potatoes should then be placed in a single layer 8″ to 12″ inches apart and covered with two additional inches of bedding material. Then top dress the bed with a general purpose, granular fertilizer, water the bed, and cover with clear or black plastic. Poke holes in the cover plastic to aerate the soil and prevent carbon dioxide and temperature buildup. You may need to water the bed periodically, but do not completely saturate. Sweet potato slips can also be produced in the garden if you have a sandy, well-drained soil such as the field pictured below.
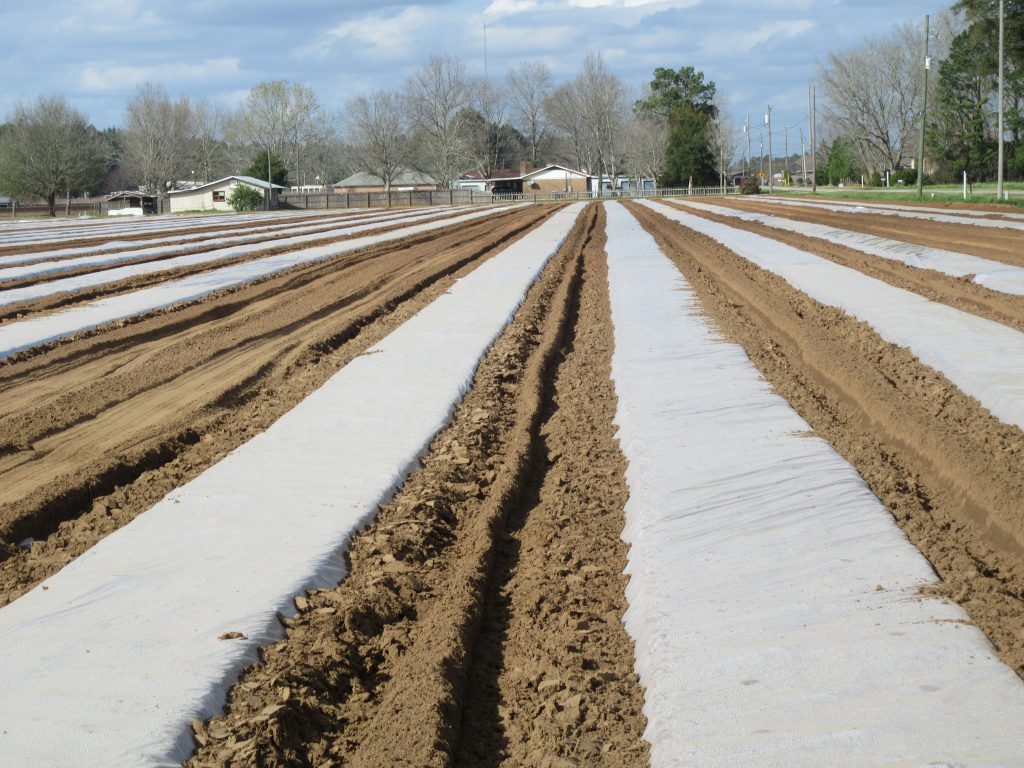
Sweet potato slip production in the field. Photo Credit: Evan Anderson, University of Florida/IFAS Extension.
- Cut Slips – Slips will be ready to cut in seven to ten weeks. Cut slips 1″ above the bed surface and trim to 10″ to 12″ in length. Strip all but the top one or two leaves from each slip. If you are unable to plant your slips at the time of cutting, then store them in a cool, dry area to prevent them from rotting.
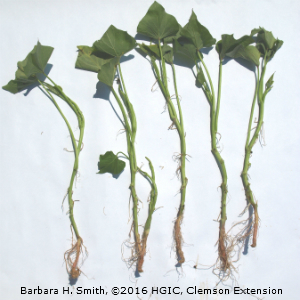
Rooted sweet potato slips that are ready to transplant into the garden when the soil becomes warm.
Barbara H. Smith, ©2016 HGIC, Clemson Extension
Sweet Potato Production
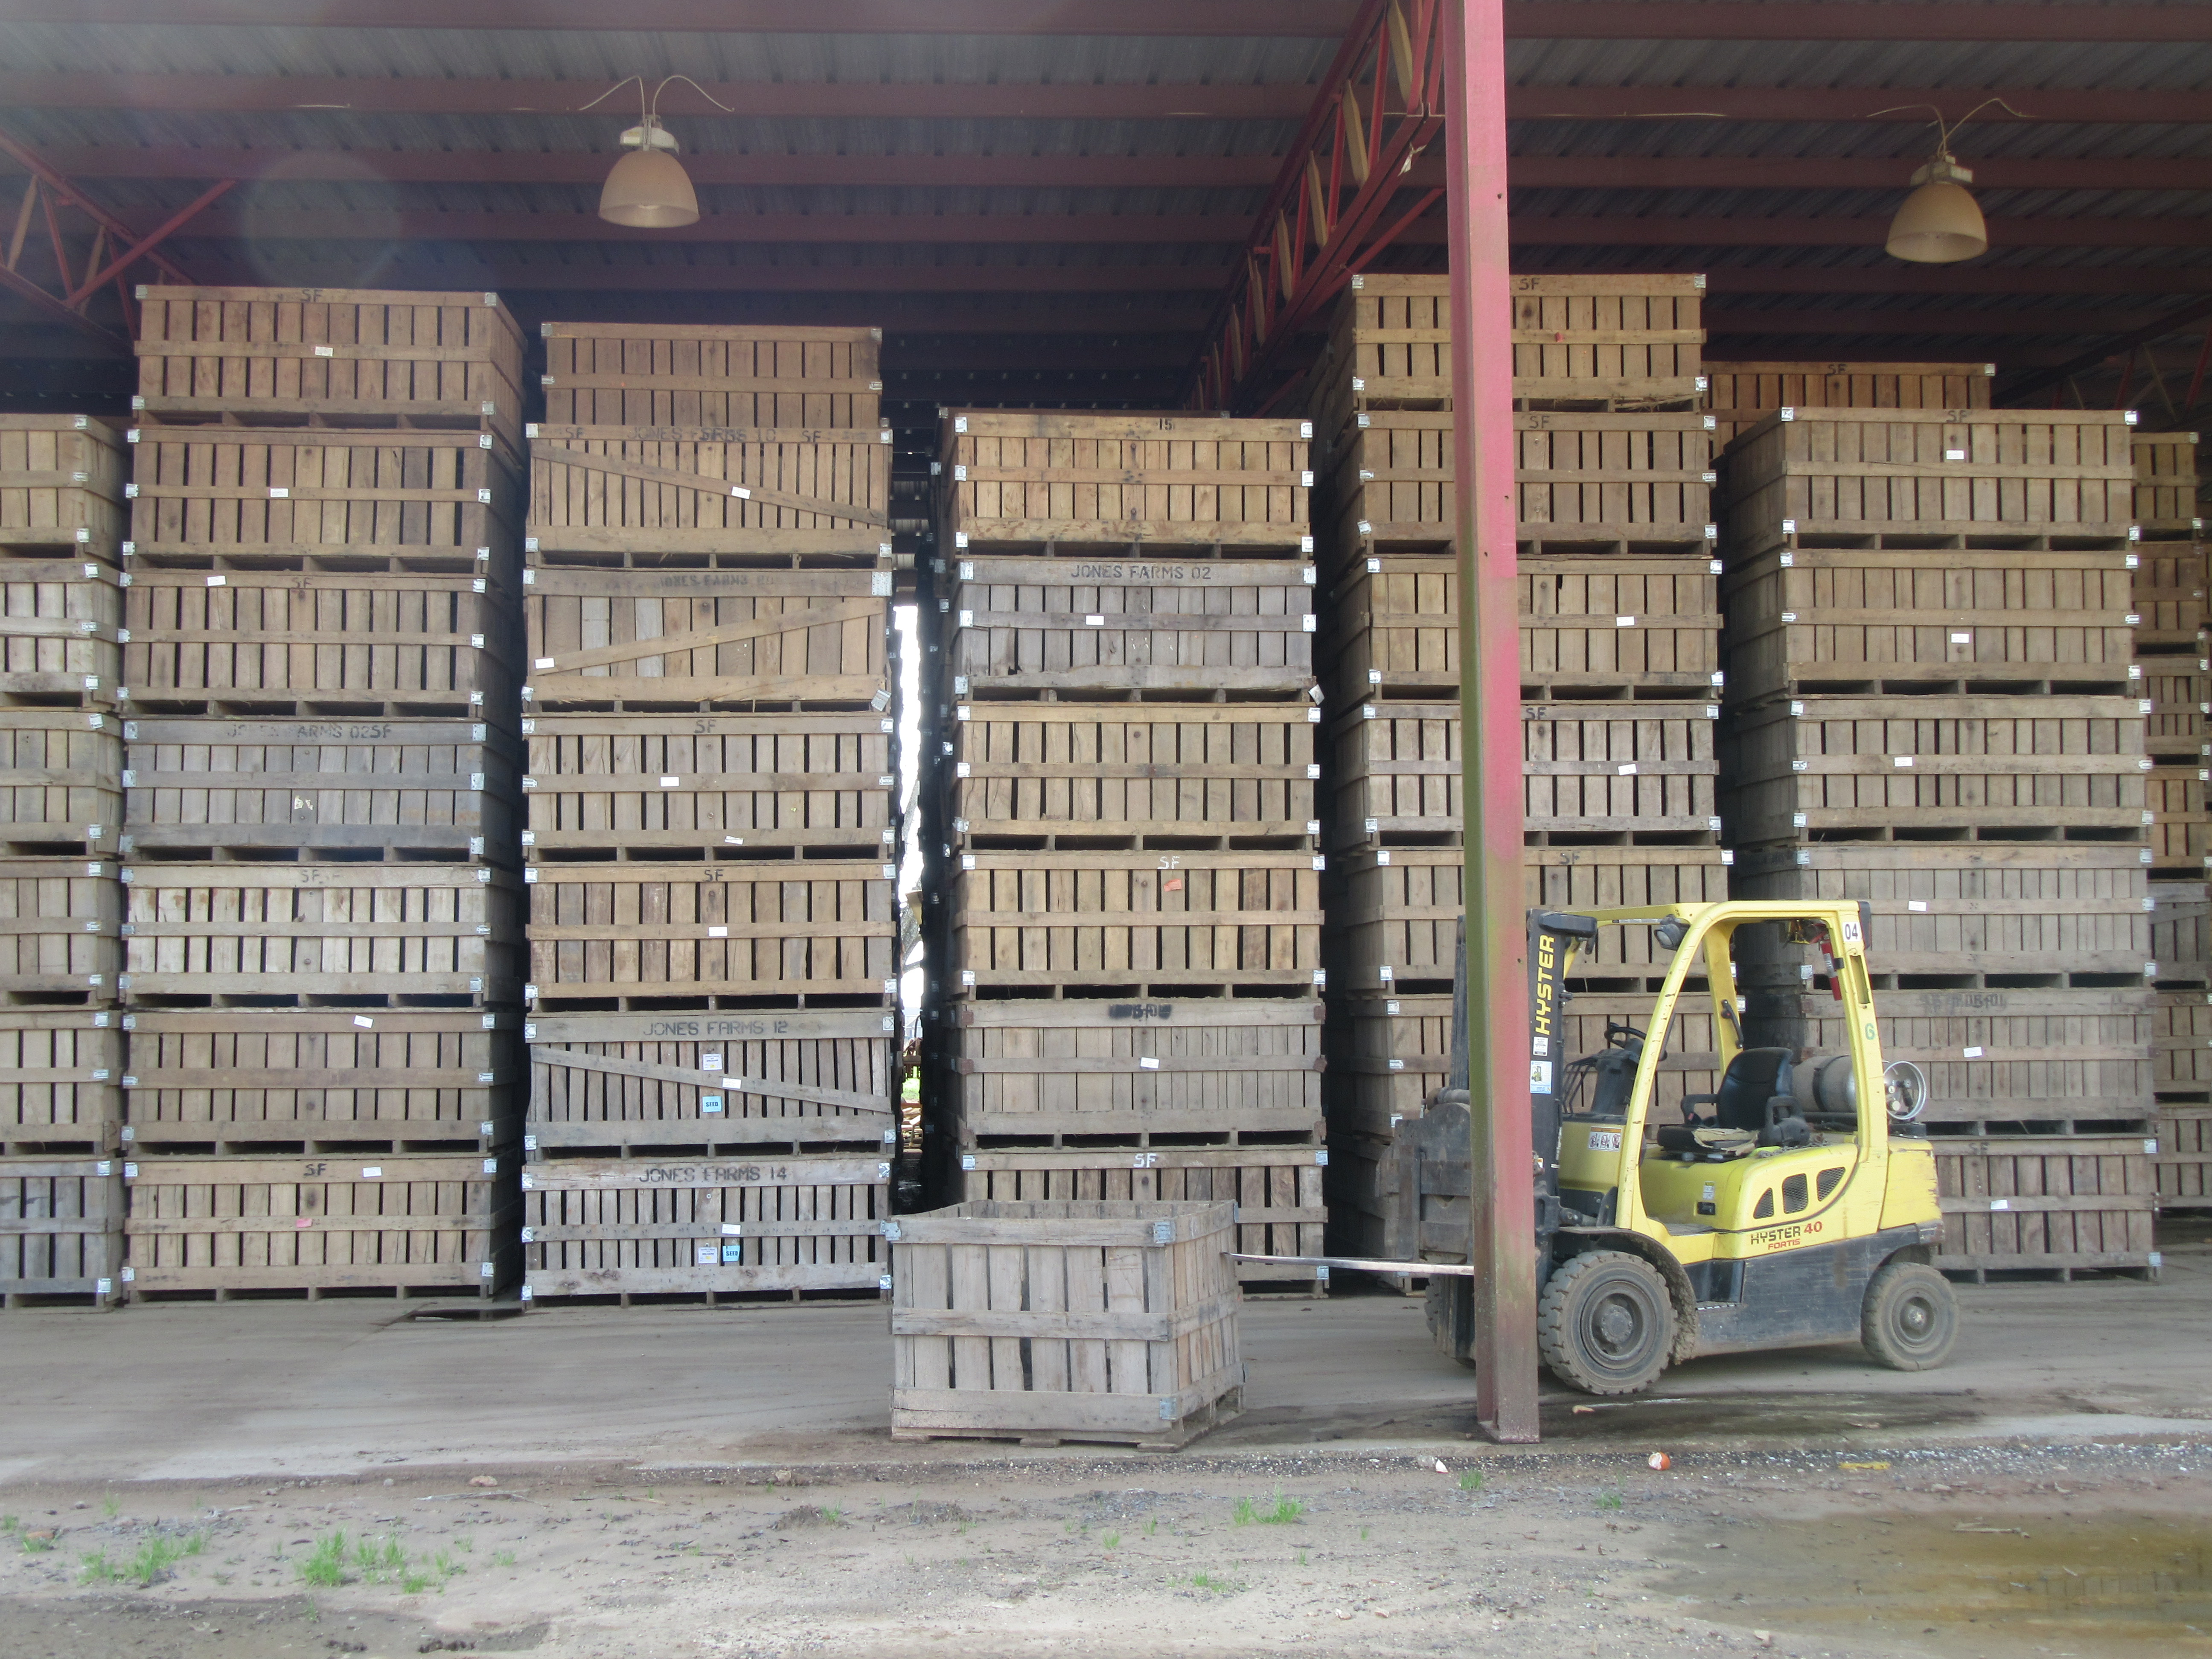
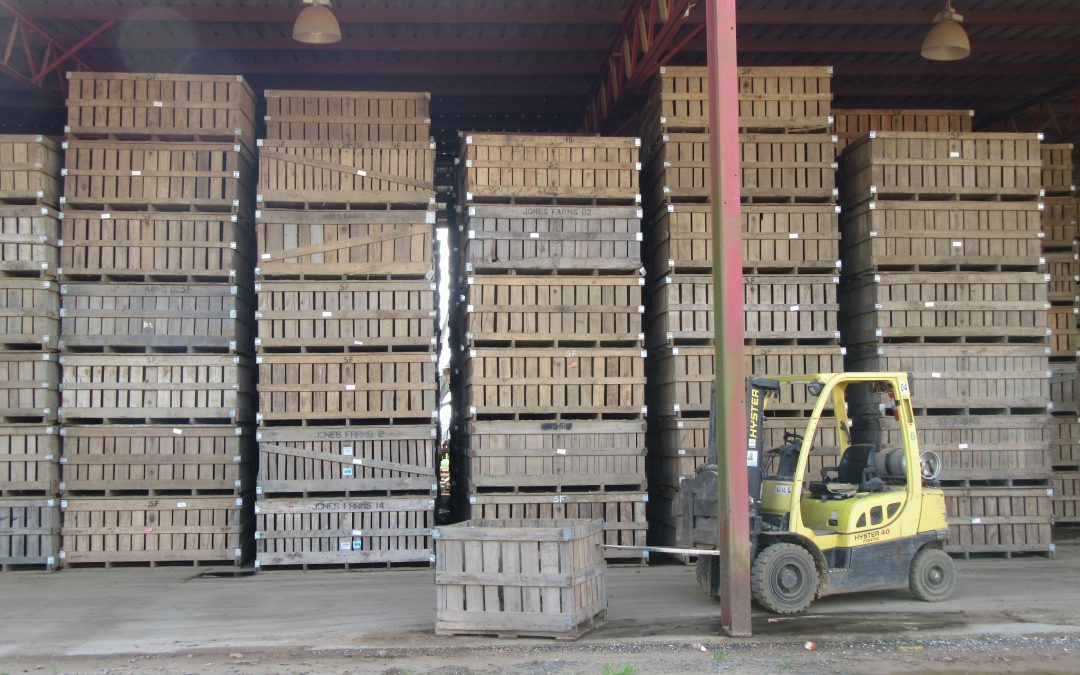
Sweet potato slips can be planted March through June in the Florida Panhandle. Plant the slips at least three nodes (leaf stubs) deep at 12″ by 36″ spacing. Fertilize based on soil test recommendations. Sweet potatoes are ready to harvest generally between 100 to 120 days after planting slips. After harvest, you will need store your sweet potatoes in a warm (80 to 85 degrees), humid (80 to 90%) place for one to two weeks to allow them to “cure”. After the curing period, you can store your sweet potatoes in a cool area (55 to 60 degrees) until you are ready to eat them.

Sweet potato storage on a commercial farm. Photo Credit: Evan Anderson, University of Florida/IFAS Extension.
by Mary Salinas | Sep 9, 2015
You’ve grown some wonderful vegetables, annuals or perennials and you would like to save some of the seed from those plants to have for planting in the future. This is a great way to get more of the plants you know and love while saving on the expense of new plants. One exception are plants that are F1 hybrids; seeds from these plants will produce crops quite dissimilar to the parent.
First, you need to collect ripe seed from the desired plants. How do you know when the seeds are ripe and ready to harvest? The strategies for annuals/perennials and vegetable plants differ.

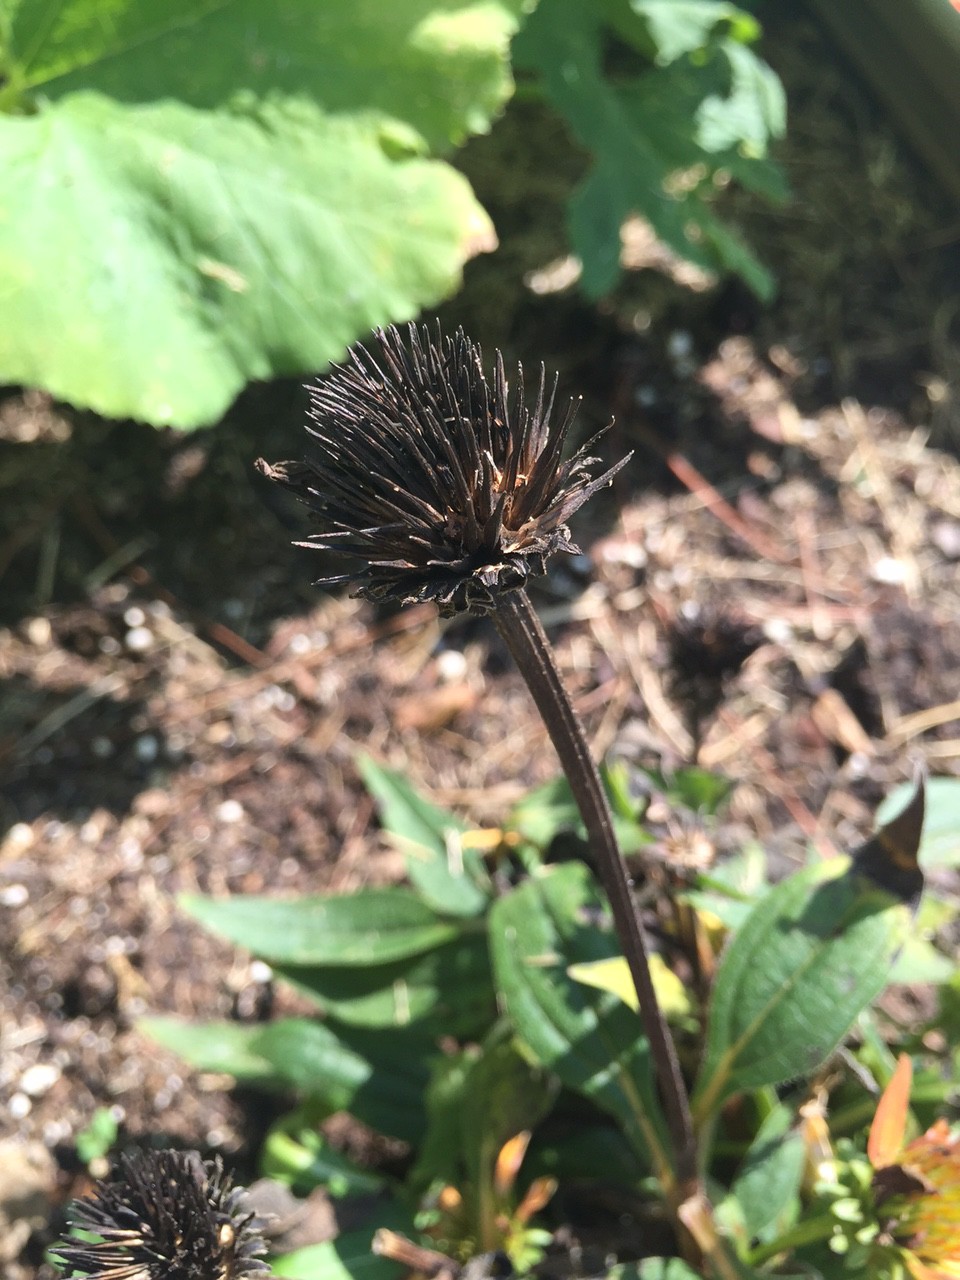
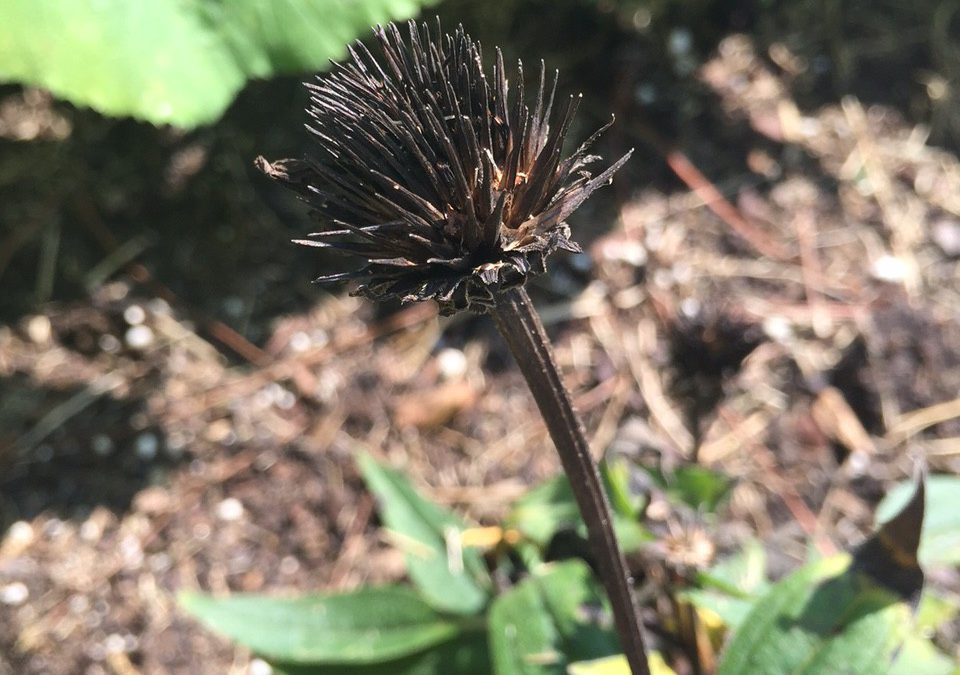
The ripe seedhead of a coneflower. Photo credit: Mary Derrick, UF/IFAS Extension.
For annuals and perennials that flower without making a fruit, wait until the flower has dried up and the seed head is brown and dead-looking. The seeds are then mature and ready to harvest. Take a look at the photo of the coneflower seedhead for reference. These seeds are already dry and can be put into an envelope and then into a sealed jar or plastic stage bag that contains a desiccant to absorb any excess moisture. There are a few options for desiccants: the little packets that come in vitamin bottles and purses to keep them dry, cornmeal or dried milk in bottom of the bag. Be sure to label your envelope with the date and name of your plant seeds. Store in the refrigerator.
When you are saving seed from a vegetable that has seeds inside it such as a tomato, pepper or squash, harvest the vegetable when it is ripe and ready to eat and scoop out the seeds and wash away all other plant parts from the seed. These seeds are very moist and if stored in this state, they will rot into a mess. You want to get the moisture content below about 8% for long term storage. There are several methods:
- If the humidity is low and the temperature high, (I know, those can be rare conditions for Florida) you can put the seeds in a single layer on a baking sheet in the shade to let them dry all day.
- Another option is to take that baking sheet with a single layer of seeds and put it in a 100° oven for 6 hours with the door open. It’s crucial to monitor your oven temperatures as those above 100° will kill the seeds.
Once the seeds are dried sufficiently, store them as described above for flower seeds. Your seeds can then last for several years.
For more information:
Seed Saving from Colorado State Extension
Saving Vegetable Seeds from University of Minnesota Extension
by Mary Salinas | Sep 9, 2015
After a few years, many perennial plants have grown so large that they need to be divided in order to be revived. Overcrowding causes them to bear fewer flowers and, sometimes, to die in the center. Fall is a good time to divide perennials that bloom in spring and summer and are now done blooming for the year. This is a great way also to expand your perennial beds or share some of your perennial favorites with friends and neighbors.

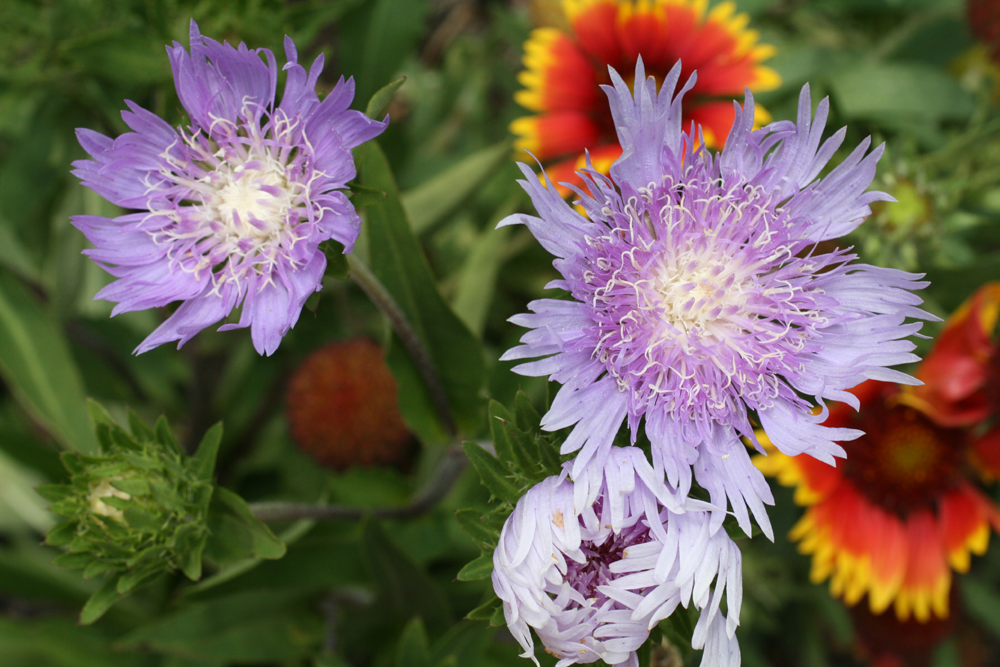
Vibrant blue Stokes’ aster. Photo credit: UF/IFAS.
Some examples of perennials to divide in the fall are:
- Stokes’ aster, Stokesia laevis
- Daylily, Hemerocallis spp.
- Black-eyed Susan, Rudbeckia hirta
- Yarrow, Achillea millefolium
- Crocosmia, Crocosmia spp.
- Flax lily, Dianella tasmanica ‘Variegata’
- Liriope, Liriope muscari
- Cast iron plant, Aspidistra elatior
The first step is to dig out the entire clump. If there is enough clearance in the garden bed, start digging about six inches out from the plant and dig straight down beyond the root zone. It’s best to get as much of the roots as possible to lessen the shock of transplanting. If the clump is too heavy to remove, make your divisions right there with a sharp blade, trowel or shovel. Often, you can just pull them apart with your hands.
Before replanting the divisions, consider adding some nutritious compost to those areas of your garden bed to ensure healthy plants. Be sure to replant as soon as feasible to protect the roots from drying out. After replanting, water the transplanted divisions well and mulch appropriately.
To explore further please see:
Gardening with Perennials in Florida
Propagation of Landscape Plants
by Larry Williams | Jul 7, 2015
There are a number of plants in my landscape that bring back fond memories – plants that I propagated.

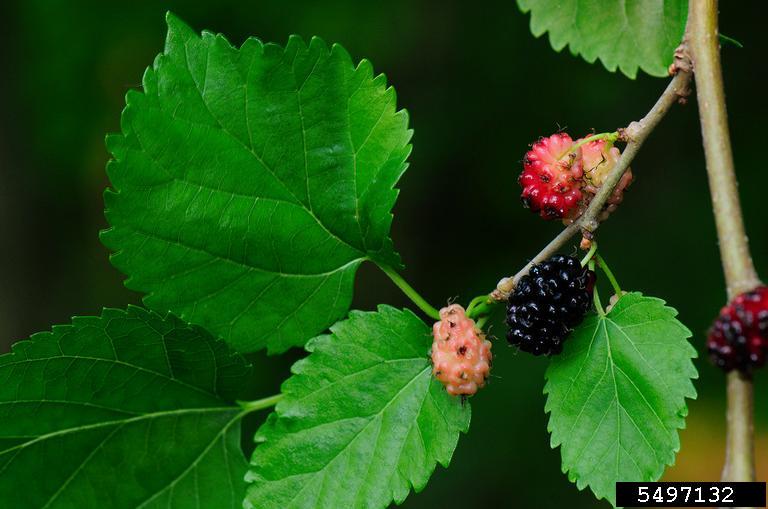
Red Mulberry. Photo credit: Vern Williams, Indiana University, bugwood.org.
There’s a mulberry tree in my backyard that I rooted years ago. I took the cuttings from an old mulberry tree in my hometown. As a boy, I climbed the tree, got in trouble once for coming home with mulberry stains on my clothes. I liked the berries and still do. I have good childhood memories about the tree.
About twenty years ago I visited the property adjacent to my childhood home. The tree was still there. It was during mulberry season. I enjoyed a few mulberries. I took about eight or ten cuttings from the tree. About a year after my visit, the property sold. The new owner bulldozed the tree.
But because of the cuttings that I rooted, the tree still lives and not just in my memory. The trees produced by those cuttings are genetically the same as the parent tree. Essentially, they are clones. The one in my backyard produces mulberries each year.
You too can propagate memories. Not all plants can be propagated from cuttings but many can be. Sometimes trial and error is necessary to learn proper timing in taking cuttings. But most reliable references will provide the time of year to take cuttings based on the plant species.
Stem cuttings should be removed from the parent plant with a clean, sharp knife or pruner. Ideally your cutting should be 4-6 inches in length and not much thicker than a pencil in diameter.
Take the bottom two-thirds of leaves off on each cutting. The cuttings should be stuck upright in a propagation medium. I usually use a good quality potting mix and mix in a little course sand or perlite for better drainage. The cuttings should be inserted deep enough to hold them upright, usually ½ to 1 inch.
To help promote rooting of moderate to difficult to root plants, wound the cuttings by scraping the lower ½ to 1 inch of the stem with a clean, sharp knife. The scrape should remove the bark or “skin.” Then dip the cutting in a rooting hormone covering the scrape with the rooting powder prior to inserting the cutting into the rooting medium.
I usually use a four inch pot, gallon size pot or bedding plant flat with drainage holes as a rooting container. I may stick as many as ten stem cuttings in a gallon size pot. I place the container of cuttings in a shady location outdoors and keep it moist. The cuttings should produce roots in two to sixteen weeks, depending upon plant species and the environment.
After the cuttings have rooted, carefully remove them and individually plant each rooted cutting in its own four inch to one gallon size pot. Keep the potting medium moist but not soggy. After the roots adequately fill the pot, the plant should be strong enough to be planted in the ground.
As your rooted cuttings grow, hopefully they will provide fond memories.

by Mary Salinas | May 12, 2015
An easy to care for perennial to add to your flower garden is the coneflower, Echinacea purpurea. The daisy-like flowers stand tall above the foliage on sturdy 2 to 4 foot stems. Blooms appear about the last part of April or the first of May in the Florida panhandle and last throughout the warm season until late fall. This Florida native reliably comes back year after year. Plant coneflower in part to full sun in rich but well-drained soil for best results.
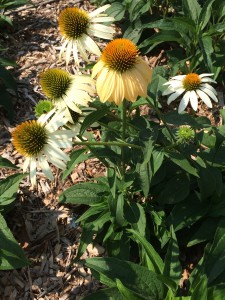
White coneflower. Photo credit: Mary Derrick, UF/IFAS Extension.
Coneflowers are traditionally purple but many new colors and variations of their form have become available from the horticultural industry. You can find them in white, yellows, pinks, oranges, and greens as well as all shades of lavender and purple. No matter what color you choose, the blooms will attract a host of butterflies and other pollinating insects. In order to protect these delicate creatures, avoid the use of pesticides when they are present.
Once you have a few coneflowers, you will notice that the clumps will grow in time and new plants will sprout from seeds left behind by the spent blooms. In our demonstration garden, this has created a stunning display that has been allowed to take over one of the garden beds. When any one clump gets too big, the number of blooms can decrease and it may be time to dig up the clump and divide it. This is a great opportunity to expand your coneflower bed or share them with some friends or neighbors!
For more information:
Ornamentals for your landscape
Butterfly Gardening