by Carrie Stevenson | Jun 23, 2014
Since the heavy flooding in late April of this year, many property owners have expressed concern to me and their local government officials about their neighborhood’s vulnerability to flooding. Homes and landscapes are most people’s largest investment, and the damage caused by a major storm can be financially and emotionally devastating.

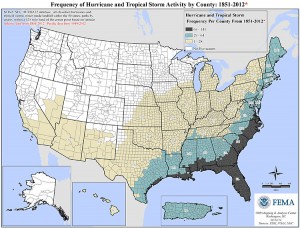
This map shows Florida’s extreme vulnerability to hurricanes and tropical storms, compared with the rest of the country. Graphics courtesy FEMA
To say that Florida is prone to flood is an understatement, at best. Between 1851 and 2012, every county in our state endured between 65 and 141 tropical storms and hurricanes. Many counties average one named storm every 1.1 years. While other states have coastal regions vulnerable to hurricanes, the entire state of Florida lies within FEMA’s highest designation of storm frequency. With hurricane season just beginning and record-breaking flood events in April, it is wise to consider flood insurance. Regular homeowners’ insurance policies do not cover damage related to flooding. Many homeowners go without flood insurance because their home is “high and dry” or “not in a flood zone.” It can be argued, however, that as a Floridian, particularly one in a region of the state with the highest annual average rainfall, you’re in a flood zone—it’s just a matter of whether you’re high or low risk. And, as we’ve seen recently, even those who thought they were low risk could be vulnerable.
Flood insurance is often very inexpensive for those outside of officially designated Special Flood Hazard Areas (think waterfront homes, low-lying property, creek floodplains, and barrier islands). Rates can be as low as $130/year for basic coverage in a low-risk area. It’s simple to get a ballpark figure for potential flood insurance costs by entering your address into a one-step “risk profile” online. According to the National Flood Insurance Program’s (NFIP) website, a quarter of NFIP flood insurance claims and third of Federal Disaster Assistance each year goes to residents outside a mapped high-risk flood zone . When the expenses related to flooding, including removal of flooring, walls, furniture, and damage to plumbing and wiring, are taken into consideration, flood insurance can be a smart investment.

Intense flooding can strike in unexpected locations during heavy rainstorms and tropical storms. This Pensacola street had never experienced serious flood damage prior to April 2014, so most residents did not have flood insurance. Photo credit: Carrie Stevenson
Timing is important, too, because a 30-day waiting period is often required before flood insurance coverage kicks in. If you are also looking at additional windstorm insurance, be aware that policies will not be sold if a storm is in the Gulf. It is important to act sooner than later, but if you start now you can have flood and windstorm coverage in place before August and September. Our most severe storms historically occur during these months, after the Gulf has had all summer to warm up.
To purchase flood insurance, contact your local agent, find an agent online at www.floodsmart.gov, or call 1-888-379-9531. Be sure to ask exactly what is covered and under what circumstances, as there are many particularities to flood insurance. For up-to-date information on recent changes to the NFIP, please visit Coastal Planning Specialist Thomas Ruppert’s webpage.
Disclosure: The University of Florida/IFAS Extension program cannot make specific recommendations on insurance agents or providers. Please make the best decision for your home and family to prepare for storms and flooding.

by Taylor Vandiver | Jun 3, 2014
In a world of limited time and space, container gardens seem to make more and more sense. Poor soil and no place to put plants in the ground are no longer good excuses for not being able to enjoy the simple pleasures of gardening. Container gardening allows the individual to create gardens to fit any situation. Gardening in containers can be just as rewarding as having a full-size garden.
There are a few items to consider when you are planning your container garden. The first is the plants you intend to use. If you are planting more than one plant in the same pot be sure that all your plants meet the same requirements. The requirements you should consider are amount of light, amount of water, climate and fertilizing needs. Some other things you might want to think about when planning your container garden are height, color, and texture. A nice variation of these elements will make your container gardens more attractive and increasingly more interesting to look at.
The next step in container gardening is choosing your container. A good rule of thumb is: “Anything that holds soil and has drainage holes in the bottom may be transformed into a container garden.” It can be a pot you purchased from the local gardening center or an old bathtub you picked up off the side of the road. However, be sure that the size of the container matches the current and potential size of your plant. For vibrant plant growth, the containers must provide adequate space for roots and soil media, allowing the plant to thrive.
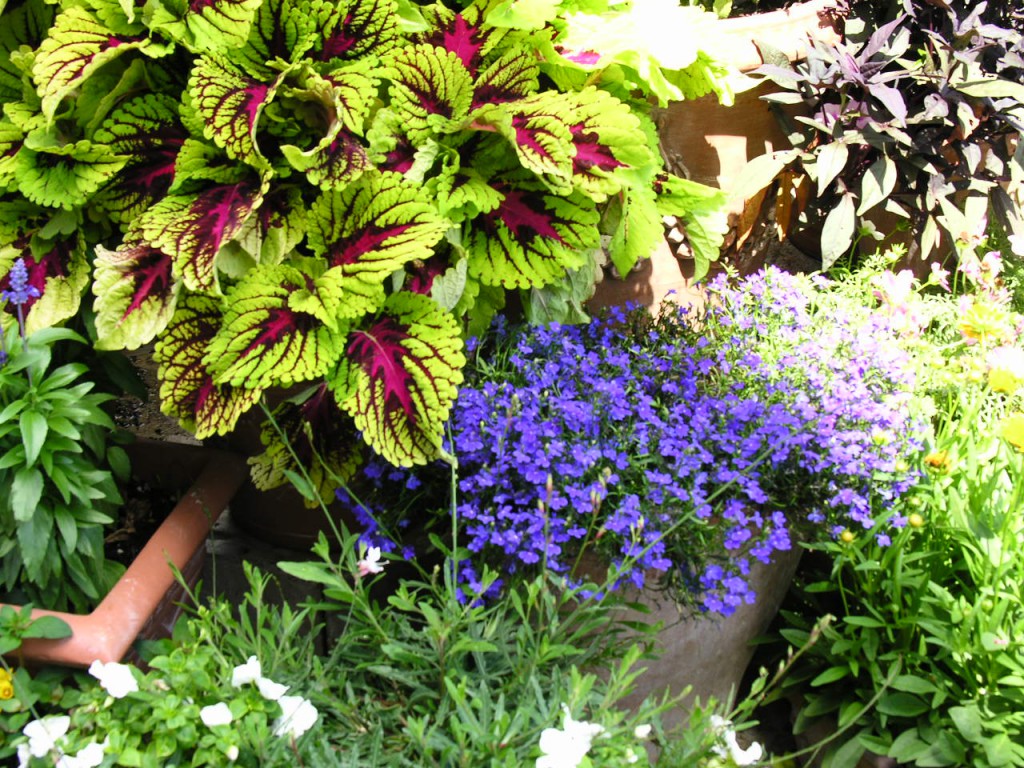
Colorful containers bring life to your small spaces.
Next on your list is choosing a soil for your container. Container soils need have good aeration and decent drainage, while still being able to retain enough moisture and nutrients for plant growth. When choosing what to use in containers, never use garden soil by itself. When garden soil is added to a container, both drainage and aeration are severely impeded, and the results are plants that grow poorly or not at all.
Container soils are often referred to as soilless or artificial media, because they literally contain no soil. They are commonly composed of various media such as peat moss, perlite, vermiculite, bark and coir fiber (ground coconut hulls) in a variety of mixes. When using soilless media remember t0 moisten it slightly before planting. Fill a tub with the media, add water and lightly fluff the media to dampen it. This will keep the mixture from becoming hydrophobic (unable to take up water) throughout its life in the container. When adding media to your containers, never fill the pot to the top. You should leave about a one-inch space between the top of the soil and rim of the pot. This will make watering the pot easier as it provides a place to “put water” and not have it run over the edge.
When watering your container gardens, the best time to do so is in the morning. Watering in the morning allows the leaves of your plants and soil to dry out, preventing diseases and viruses. Remember that overwatering is the most common reason for fatalities in container gardens. Check your soil by pushing your finger into the media; if the media is moist don’t water it. When it comes to fertilizing your container gardens, fertilize only as needed. Over-fertilization will result in a buildup of salts and may burn the roots of your plants. Try to fertilize your plants during the growing season, and only if needed during the dormant seasons.
The most important objective when container gardening is to be creative. Maybe, try a variety of plants in one container garden. While an nicely put together individual container can be quite impressive, think what might happen if you put several containers together in a group. Also, don’t limit your container gardens to flowers–many vegetables can be grown in a container and actually do quite well. There really is no limit to what can be done in a container!
by Carrie Stevenson | May 27, 2014
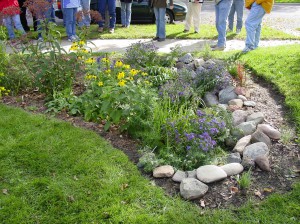
Rain gardens can make a beautiful addition to a home landscape. Photo courtesy UF IFAS
Northwest Florida experienced record-setting floods this spring, and many landscapes, roads, and buildings suffered serious damage due to the sheer force of water moving downhill. That being said, we are just entering our summer “rainy season,” so it may be wise to spend extra time thinking about how you want to landscape based on our typically heavy annual rainfall. For example, if you have an area in your yard where water always runs after a storm (even a mild one) and washes out your property, you may want to consider a rain garden for that spot.
Rain gardens work similarly to swales and stormwater retention ponds in that they are designed to temporarily hold rainwater and allow it to soak into the ground. However, they are quite different aesthetically, because they are planted with water-tolerant trees, shrubs, groundcovers and flowers to provide an attractive alternative to the eroding gully that once inhabited the area! Rain gardens are not “created wetlands,” but landscaped beds that can handle both wet and drier soil. Many of the plants best suited for rain gardens are also attractive to wildlife, adding another element of beauty to the landscape.
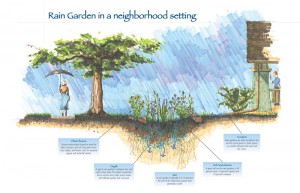
This diagram shows how a rain garden works in a home landscape. Photo courtesy NRCS
A perfect spot for a rain garden might be downhill from a rain gutter, areas notorious for excess water and erosion. To build a rain garden, the rainwater leaving a particular part of the property (or rooftop), is directed into a gently sloping, 4”-8” deep depression in the ground, the back and sides of which are supported by a berm of earth. The rain garden serves as a catch basin for the water and is usually shaped like a semi-circle. The width of the rain garden depends on the slope and particular site conditions in each yard. Within the area, native plants are placed into loose, sandy soil and mulched. Care should be taken to prevent the garden from having a very deep end where water pools, rather allowing water to spread evenly throughout the basin.
Besides reducing a problematic area of the lawn, a rain garden can play an important role in improving water quality. With increasing populations come more pavement, roads, and rooftops, which do almost nothing to absorb or treat stormwater, contributing to the problem. Vegetation and soil do a much better job at handling that water. Excess sediment, which can fill in streams and bays, and chemicals from fertilizers and pesticides are just some of the pollutants treated within a rain garden via the natural growth processes of the plants. Many commercial properties are considering rain gardens, also known as “bioretention” as more attractive alternatives to stormwater retention ponds.

The North Carolina Arboretum used a planted bioretention area to manage stormwater in their parking lot. Photo courtesy Carrie Stevenson
A handful of well-known perennial plants that work great in rain gardens include: Louisiana iris, cinnamon fern, buttonbush, Virginia willow, black-eyed Susan, swamp lily, tulip poplar, oakleaf hydrangea, wax myrtle, Florida azalea, river birch, holly, and Southern magnolia. For a complete list of rain garden plants appropriate for our area, visit the “Rain Garden” section of Tallahassee’s “Think about Personal Pollution” website, tappwater.org or contact your local Extension Office.
by Taylor Vandiver | Apr 29, 2014
Now that spring has finally sprung and summer is well on its way, you may find yourself taking a stroll through your landscape and assessing damage done by late cold spells. However, it may not be a frost problem that has your plants looking worse for the wear. They could be experiencing nutritional imbalances which affect overall plant health. Most cases involving nutrition issues in plants can be linked back to the soil. Therefore, if you suspect a problem I suggest testing your soil to ascertain pH and nutrient levels. You can obtain a soil test kit at your local UF IFAS Extension office. Another way to diagnose your plant damage is to visually catalog its symptoms. Symptoms of mobile nutrients, such as nitrogen and phosphorus, tend to reveal themselves on older leaves first. Whereas, immobile nutrient symptoms (i.e. boron and calcium) will show up on newer leaves. These flow charts can help to narrow down which essential element may be lacking in your plant’s diet.
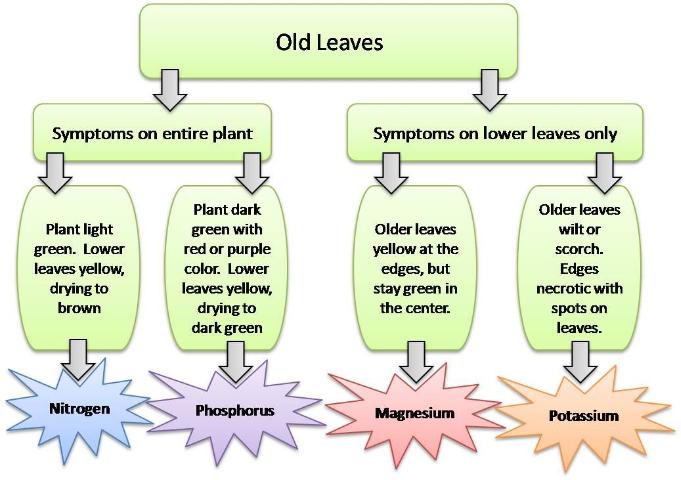
Mobile Nutrient Symptoms.
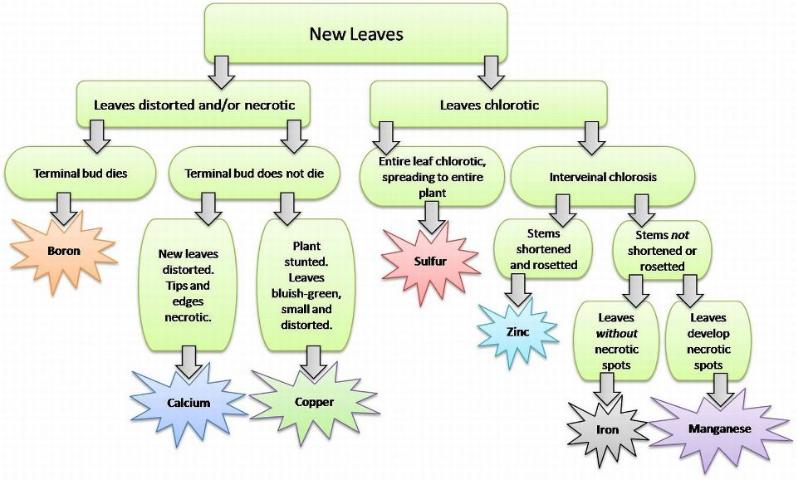
Immobile Nutrient Symptoms.
by Carrie Stevenson | Apr 21, 2014
As spring commences and young wildlife of all species are born, everyone’s favorite flying, furry mammal also begins roosting season. Ideally, bats will find shelter in trees, caves, abandoned buildings, and bat houses, but sometimes they end up in a home. I receive calls often about how to best remove or exclude a group of bats living in an attic or garage. While there are countless benefits (most notably, efficient insect control) to having bats in one’s landscape or neighborhood, most people prefer they not share their own home with them. However, due to their slow reproductive cycle and declining populations in the United States, it is illegal in Florida to prevent bats from returning to any roosting location from April 16 to August 14. Female bats typically give birth during maternity season to one pup (or rarely, two), which will cling to the mother’s fur to nurse for their first few weeks and months of life. Being nocturnal, this means mothers and babies will be inside a dwelling during the day. Typically, if a homeowner is trying to exclude bats from a home, they will put up netting or seal up a hole in an attic entry in the evening after bats have flown off to feed on insects at night. However, if this is done during roosting season, young bats left back in the roost while mothers are hunting can get trapped inside a building and will not survive.

A rare set of twin Seminole bat pups with their mother. Photo credit: Carrie Stevenson
This obviously has the potential to cause conflict between homeowners and the bat population. The Florida Fish & Wildlife Conservation Commission has regulatory oversight for bat-related issues, and they will work with citizens to arrange a positive outcome for both the property owner and the animals involved.
Bat populations are declining in North America due to a devastating disease called white-nose syndrome and loss of habitat. However, you can help these fascinating animals by installing a bat house in your yard. Keep in mind that bats attracted to bat houses prefer to be in open areas away from trees (where their predators hide), and the house should be installed at least 12 feet in the air. Bat houses can be purchased or built rather simply—keep an eye out for Extension workshops near you, or visit this UF Wildlife Ecology publication or Bat Conservation International’s website for simple instructions.
To learn more about bats and how to help them, visit this website or contact me or your local County Extension office!
by Beth Bolles | Apr 15, 2014
How can an animal that does such much to help rid your lawn of pests be so hated by most homeowners? Such is the life of the mole.
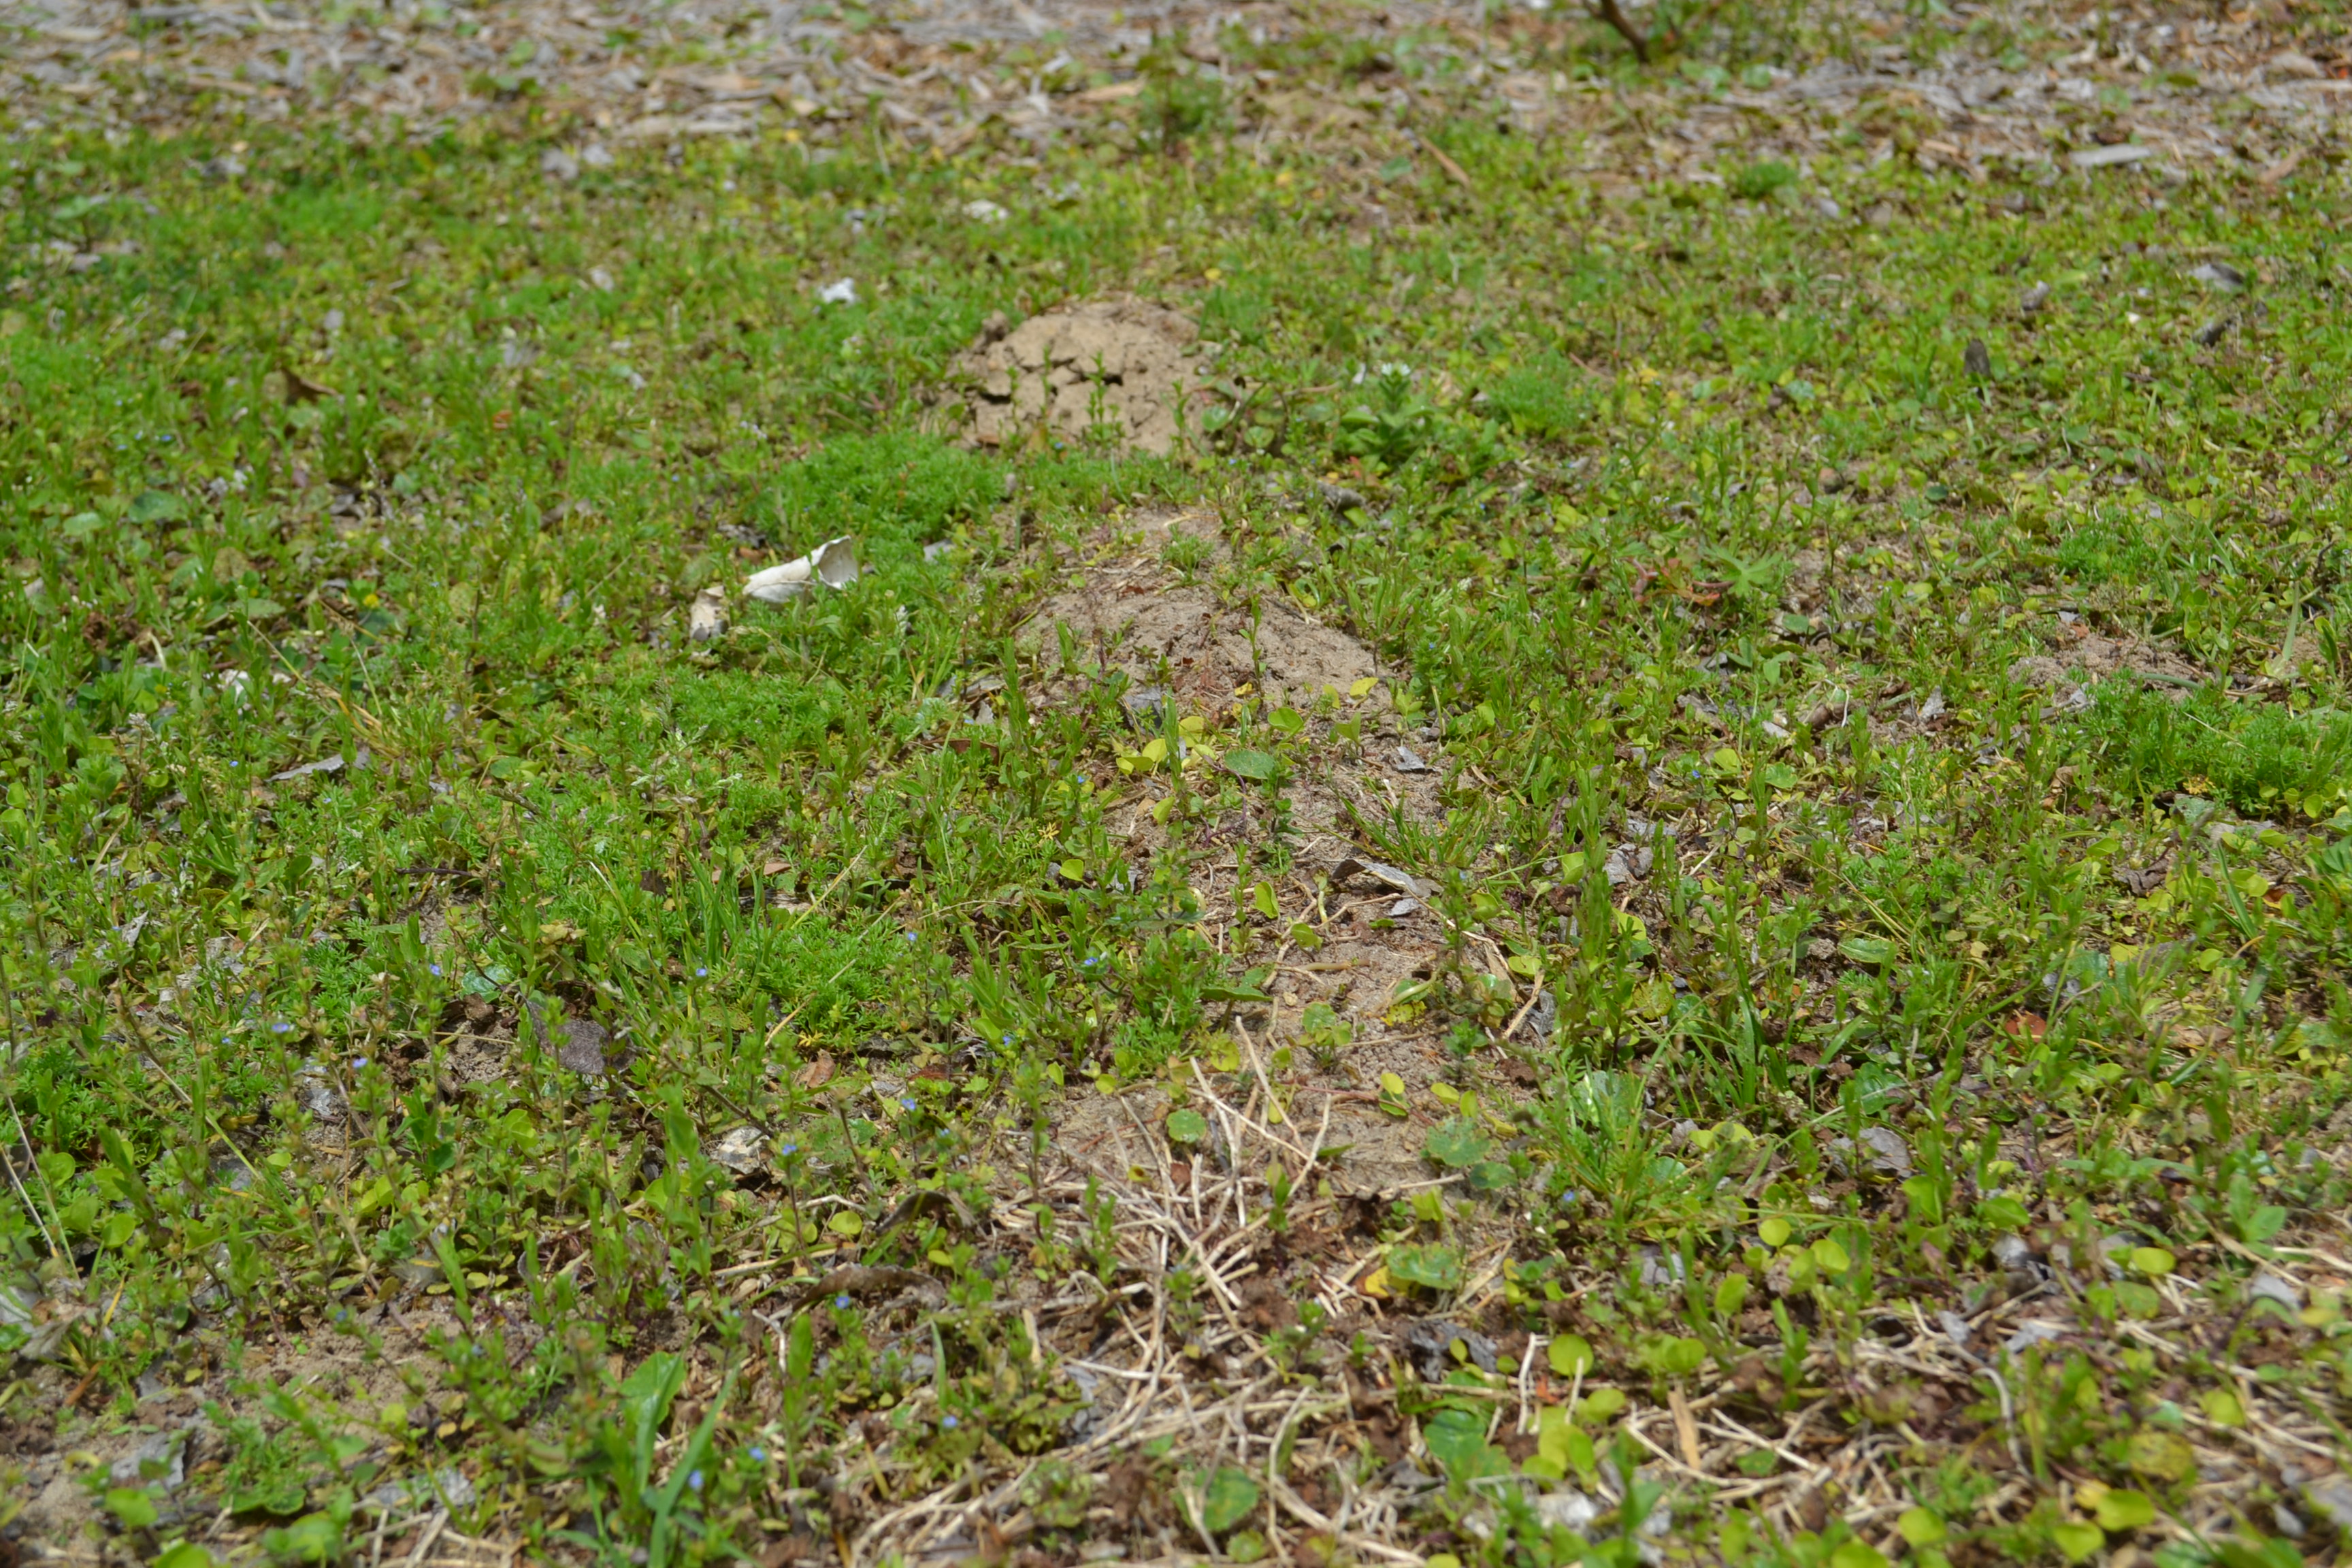
The beneficial mammal is a soil dweller that tunnels through the soil, increasing aeration as it searches out a meal of beetle grubs, mole crickets, and slugs. Moles prefer loose soil and can tunnel more than 15 feet an hour. Moist soil brings the food source closer to the surface which in turn bring moles up to expose raised tunnels to homeowners. These tunnels are mostly cosmetic and show up easily in mulched areas and lawns with heavier weed populations. Most homeowners with a healthy, thicker lawn will rarely notice mole activity unless they encounter loose areas as they walk over the turf. These can easily be pressed back down with your foot.
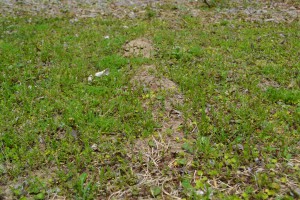
Mole tunnel in weedy area. Photo: Beth Bolles, UF IFAS Extension Escambia County
There are management techniques for moles which include traps and ridding the lawn of the food source. The best practices are to manage the turf through proper mowing, watering, and fertilizing to create a uniform, healthy cover. For the most part, mole management is not even required. Consider the benefits of the moles as predators and allow them to be a natural part of the landscape environment. For more information on moles read the University of Florida IFAS Extension publication.


