
by Larry Williams | Sep 3, 2015
Tropical storm season officially ends November 30. I’m not predicting a storm but even with our average winds during a typical thunderstorm, you’d be wise to prepare.
Falling trees and flying landscape debris during a storm can cause damage. Evaluate your landscape for potential tree hazards. Pruning or removing trees once a hurricane watch has been announced is risky and tree trimming debris left along the street is hazardous.
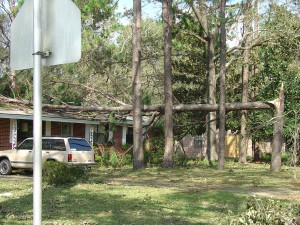
Photo credit: Larry Williams, UF/IFAS.
Now is a good time to remove dead or dying trees and to prune decayed or dead branches Also inspect trees for signs of disease or insect infestation that may further weaken them.
Professional help sometimes is your best option when dealing with larger jobs. Property damage could be reduced by having a professional arborist evaluate unhealthy, injured or questionable trees to assess risk and treat problems. Hiring a certified arborist can be a worthwhile investment. To find a certified arborist in your area contact the International Society of Arboriculture (ISA) at 217-355-9411 or at www.isa-arbor.com. You also may contact the Florida Chapter of ISA at 941-342-0153 or at www.floridaisa.org.
Consider removing trees that have low wind resistance, are at the end of their life span or that have potential to endanger lives or property. For example, laurel oaks are relatively short-lived, usually showing considerable dieback as they reach 50 years. They tend to lose their strength and stability faster than most other oaks and have low wind resistance. Consider removing a big, old laurel oak within falling distance of your home before the next storm.
Tree species with the lowest wind resistance include pecan, tulip poplar, cherry laurel, Bradford pear, southern red oak, laurel oak, water oak, Chinese tallow, Chinese elm, southern red cedar, Leyland cypress, sand pine and spruce pine.
Pine species vary in their wind resistance, usually with longleaf and slash pines showing better survival rates than loblolly and sand pine. However, when pines become large, they may cause damage if located close to homes or other valuable structures.
by Blake Thaxton | Aug 19, 2015
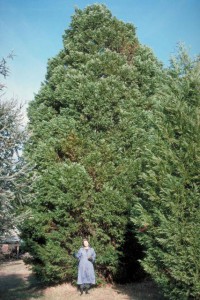
Photo Credit: Ed Gilman, UF/IFAS
Leyland cypress, x Cupressocyparis leylandii, has been hugely popular over the past 20 years as an ornamental landscape tree. It has the reputation of being a beautiful evergreen that can grow at a rate of up to 3 to 4 feet per year. Sounds like the perfect option for someone looking to make their back yard more secluded and private. Because of these traits, it has been planted widely throughout the southeastern US, including the Florida panhandle, only to succumb to intense environmental conditions and disease pressure.
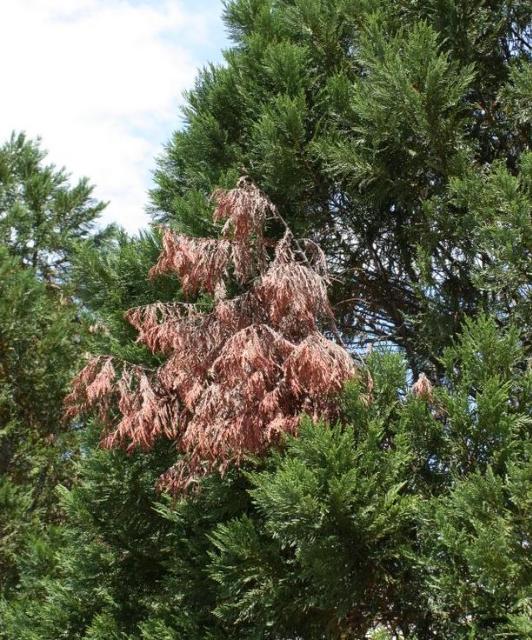
UF/IFAS suggests that other species be used in place of Leyland cypress because of the damaging effects of Seiridium canker. The disease is a fungal organism that attacks the tree after periods of drought while the tree is under stress. Once the stress has occurred and rain does arrive the fungus attacks the vulnerable trees in the wetter periods. The major symptom is “flagging” or branches that have turned brown that can be scattered throughout the tree. This is caused by a canker further up the brown branch that has been girdled,cut of from the flow of water and nutrients to the branch by diseased tissue.
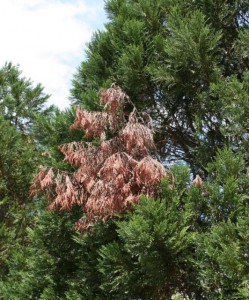
Flag branch on Leyland Cypress. Photo Credit: UF/IFAS
What are the options for Florida panhandle landscapers and homeowners? If you have a tree exhibiting symptoms of Seiridium canker, pruning the “flag” branches out several inches below the canker can prolong the life of the tree but is very unlikely to save it. The only long term sustainable option is to replace Leyland cypress with species that are resistant to the disease. The following are good examples of species that could be considered:
|
Common Name
|
Scientific Name
|
|
Atlantic white cedar
|
Chamaecyparis thyoides
|
|
Southern red cedar
|
Juniperus silicicola
|
|
Arizona cypress
|
Cupressus arizonica var. glabra
|
|
Mexican cypress
|
Cupressus lusitanica
|
|
Oriental arborvitae
|
Platycladus orientalis
|
|
“Green Giant” arborvitae
|
Thuja x ‘Green Giant’
|
|
Kashmir cypress
|
Cupressus cashmeriana
|
|
Chinese funeral cypress
|
Cupressus funebris
|
|
Chinese cypress
|
Cupressus chengiana
|
|
Hinoki cypress
|
Chamaecyparis obtusa
|
|
For more information read the University of Florida publication, Seiridium Canker of Leyland Cypress.
by Taylor Vandiver | Aug 3, 2015
As our world and our lives become more centered on technology it seems that all the information we need is just a touch screen away. After all, you are most likely reading this article from a laptop, smart phone, or tablet. While convenient and portable, there are some places you might not wish to take your electronics and one of those places is in the garden. You may say, “Well Taylor, that’s what they make waterproof, shatterproof, dirt proof, etc. cases for!” and I would say that you’re right. However, technology has many limiting factors such as battery life and screen glare. Now believe me, I am by no means disparaging technology! I come from a generation that considers Wi-Fi as necessary as water and an outlet comparable to oxygen. But there is something to be said for having a book in hand when out in the garden. For one thing your neighbors won’t worry about you as they see you march around the garden with your phone in the air doing the “No Signal Dance”. Also, a book is great to have in order for you to jot down any notes or reflections. I would like to list for you a few books that I often reference when I receive calls from homeowners. These books will cover various topics and all of them can be found on the UF/IFAS Bookstore website, the links for each can be found below. If you have any questions contact your local Extension Office and, as always, feel free to contact me and I can give you a rundown on my collection of favorite reference books!
- New to the UF/IFAS bookstore: “Trees: North & Central Florida” a field guide to 140 common tree species. This sturdy, pocket-sized field guide–the only one of its kind for north and central Florida–is designed for landscape professionals, arborists, naturalists, gardeners, and anyone seeking to know the trees around them. Full color photographs of leaves, bark, flowers and full trees, together with clear descriptions and other information make identifying trees easier than ever. This book also features a handy diagnostic key, an introduction to plant parts, a glossary and a ruler to guide you, whether you’re a trained botanist or a complete beginner.
- “Poisonous Plants of the Southern United States” John W. Everest, Thomas A. Powe, Jr., and John D. Freeman (of Auburn University). Identification of common poisonous plants found along fence lines and in pastures in the Southern United States.
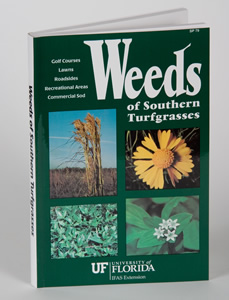
- “Weeds of Southern Turfgrasses” This practical weed identification guide contains 427 color photographs of 193 weed species, their geographical range, and life cycle descriptions. Includes a glossary of taxonomic terms and index of common and scientific names.
- “Disorders and Diseases of Ornamental Palms” Recently revised and updated, this ID deck is a diagnostic tool for landscape professionals and backyard hobbyists. The color photographs and explanatory text helps users identify and distinguish between the nutritional deficiencies, physiological disorders and common diseases of ornamental palms. All palms in the U.S. suffer from disorders and diseases, and identifying the differences can be tricky. These cards feature photographs and descriptions and are cross-referenced for easy comparison between different symptoms and the potential problems causing them. Includes a table of contents and 55 laminated, ring-bound cards.
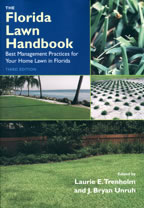
- “Florida Lawn Handbook: Best Management Practices for Your Home Lawn in Florida” Written in practical language by turfgrass experts, this highly-anticipated new edition offers the most current lawn management information. Color plates identify various grass types, weeds, diseases, and insects—including those that are good for your lawn! Chapters cover selection, establishment, and maintenance for each type of lawn; soil analysis and fertilization; yearly calendars for lawn care and culture; mowing, watering, and calibrating sprinkler systems and fertilizer spreaders; overseeding for winter color; preparing a lawn for drought and low temperatures; safe pesticide application and use; the latest integrated pest management strategies; organic lawn care; and complete, illustrated diagnostic information for weeds, diseases, insect problems, nematodes, and other pests.
- “Sustainable Gardening for Florida” Gardeners today face a unique challenge: how do you create a beautiful, thriving landscape without over-use of fertilizers, pesticides, and water? Sustainable Gardening for Florida might be the first place to look for answers. This book provides interesting, money-saving ideas to reduce your ecological footprint. It includes chapters on composting and mulching, integrated pest management, water-wise irrigation and rainwater harvesting, preparing your garden for disasters, and all aspects of managing meadows, lawns, trees and shrubs, edible gardens, rain gardens and waterfront gardening.
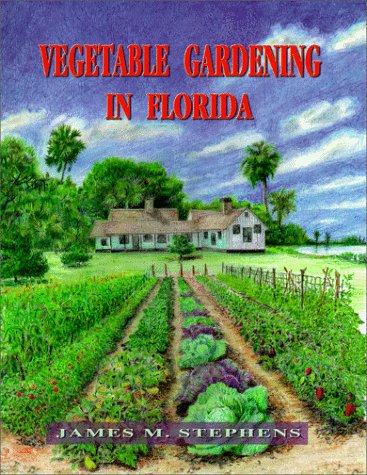
- “Vegetable Gardening in Florida” From James Stephens, the founder of the Florida Master Gardener Program, this is the one resource you need to successfully grow vegetables in Florida. Whether you’re growing beans, tomatoes, herbs, or any other Florida crop, this guide will take you from site selection and insect management through the harvest and storage of your produce. Useful planting guides, gardening measurement conversions, and organic gardening information are accented with full-color throughout.

by Carrie Stevenson | Jul 27, 2015
Late summer brings hot, humid temperatures, and many Floridians are retreating from the heat into their air-conditioned homes. Unfortunately, those comforts of home also come with a price tag. When people think about energy efficiency, practices like turning off lights, purchasing energy-efficient appliances, good insulation and windows, and managing A/C temperature settings are the first things that come to mind. These are very important steps to take, not only to save money but also to conserve energy. The US Department of Energy has an excellent publication that can take you step-by-step through a home evaluation, and many energy companies offer a similar walk-through energy audit for free.
However, there are many best management practices that can be done outdoors to offset expensive home power bills. Planting trees is one example. Department of Energy studies have shown that when compared to a home in full sun, a shaded home may experience up to a 25% decrease in energy for cooling.
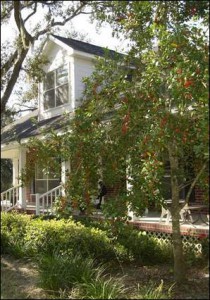
This home uses passive cooling from a front porch and numerous shade trees. Photo credit: Carrie Stevenson
Trees planted to shade eastern and western facing walls of your home can be the most effective, as these areas receive direct sun in the morning and afternoon. By preventing heat from entering your home, you prevent straining an air conditioning system that would otherwise have to counteract that heat. It is also helpful to provide shade over an air conditioning unit. Deciduous trees are ideal, as they have leaves to provide shade in the summer but drop them by winter, when you might want sunlight to passively heat your home.
In addition to shade, transpiration—the process of plants emitting moisture as they release water from leaf pores—creates cool spaces around vegetation. Grasses and shrubs along the edges of a home, or vines on nearby trellises, can cool walls and windows in this manner.
Finally, consider sprinkler systems. A home irrigation system can use a significant amount of energy to pump water throughout your yard. Calibrating your system and even reducing run time or frequency can also conserve water and reduce water bills.
For more information on energy-efficient landscaping, please visit www.myfloridahomeenergy.com or contact your local Extension office.

by Mary Salinas | Jul 20, 2015
July always brings the blessing of abundant figs on my trees. A new crop waits to be picked and enjoyed every day for nearly a month. The tender sweet fruit can be enjoyed fresh, prepared into jams or used in a myriad of recipes.
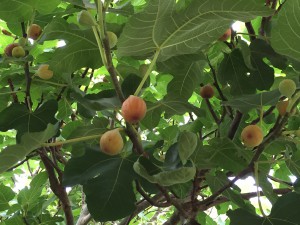
Ripe figs ready to pick. Photo credit: Mary Derrick, UF/IFAS Extension.
The fig (Ficus carica) is native to Asia Minor and the Mediterranean regions of the world and has been cultivated for an estimated 7,000 years. Spanish explorers brought the fig with them to Florida in 1575 and it has had a presence here ever since. Since the fig is adapted to a dry climate in its native regions, the humidity it encountered in Florida can cause fruit to split; but new cultivars have been developed to minimize this problem.
Fig trees usually grow to a maximum of 25 feet and have large bright green leaves that fall in the autumn. Fruit develops from June to August, depending on the chosen cultivar.
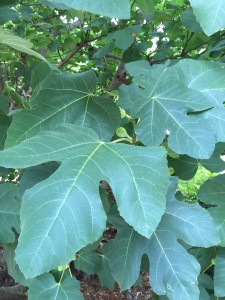
The large fig leaves are quite ornamental. Photo credit: Mary Derrick, UF/IFAS Extension.
Choose a spot for planting a fig tree that receives full sun and good drainage. Once established, figs are drought tolerant and only need supplemental irrigation if we have an extended drought. No structural pruning is required but you can prune to keep the tree from growing so tall that you cannot pick the delicious fruit. Be sure to do your pruning just after the fruit is gone as the fruit develops on the terminal ends of the branches from last year’s growth.
Many figs grow and fruit sufficiently without applied fertilizer, however, a light fertilization with a 10-10-10 with micronutrients can be helpful for small trees getting established and those with reduced fruiting. Young trees can benefit from a ½ pound three to five times from February to August while large trees could use up to 4 pounds per application on the same schedule.
There are a few pests that do damage figs; the most common, though, are the birds and squirrels that get the fruit before you do. Seldom do figs need to be sprayed when grown in the home garden.
For more information:
The Fig
Fig nutrition facts and recipes
by Larry Williams | Jul 7, 2015
There are a number of plants in my landscape that bring back fond memories – plants that I propagated.

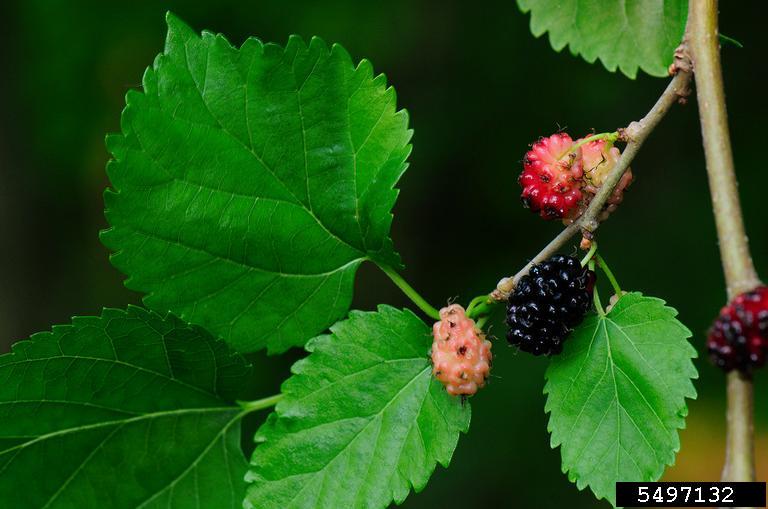
Red Mulberry. Photo credit: Vern Williams, Indiana University, bugwood.org.
There’s a mulberry tree in my backyard that I rooted years ago. I took the cuttings from an old mulberry tree in my hometown. As a boy, I climbed the tree, got in trouble once for coming home with mulberry stains on my clothes. I liked the berries and still do. I have good childhood memories about the tree.
About twenty years ago I visited the property adjacent to my childhood home. The tree was still there. It was during mulberry season. I enjoyed a few mulberries. I took about eight or ten cuttings from the tree. About a year after my visit, the property sold. The new owner bulldozed the tree.
But because of the cuttings that I rooted, the tree still lives and not just in my memory. The trees produced by those cuttings are genetically the same as the parent tree. Essentially, they are clones. The one in my backyard produces mulberries each year.
You too can propagate memories. Not all plants can be propagated from cuttings but many can be. Sometimes trial and error is necessary to learn proper timing in taking cuttings. But most reliable references will provide the time of year to take cuttings based on the plant species.
Stem cuttings should be removed from the parent plant with a clean, sharp knife or pruner. Ideally your cutting should be 4-6 inches in length and not much thicker than a pencil in diameter.
Take the bottom two-thirds of leaves off on each cutting. The cuttings should be stuck upright in a propagation medium. I usually use a good quality potting mix and mix in a little course sand or perlite for better drainage. The cuttings should be inserted deep enough to hold them upright, usually ½ to 1 inch.
To help promote rooting of moderate to difficult to root plants, wound the cuttings by scraping the lower ½ to 1 inch of the stem with a clean, sharp knife. The scrape should remove the bark or “skin.” Then dip the cutting in a rooting hormone covering the scrape with the rooting powder prior to inserting the cutting into the rooting medium.
I usually use a four inch pot, gallon size pot or bedding plant flat with drainage holes as a rooting container. I may stick as many as ten stem cuttings in a gallon size pot. I place the container of cuttings in a shady location outdoors and keep it moist. The cuttings should produce roots in two to sixteen weeks, depending upon plant species and the environment.
After the cuttings have rooted, carefully remove them and individually plant each rooted cutting in its own four inch to one gallon size pot. Keep the potting medium moist but not soggy. After the roots adequately fill the pot, the plant should be strong enough to be planted in the ground.
As your rooted cuttings grow, hopefully they will provide fond memories.


