by Beth Bolles | Oct 7, 2013
It is now too late for homeowners to apply nitrogen fertilzers to warm season lawns for the year.
Many fertilizers are available in the stores and promotions are everywhere that state that now is the time for lawns to be winterized. Applications of nitrogen after mid September can lead to turf problems next spring. Nitrogen encourages growth of the grass which uses up stored food. As the weather frequently changes throughout the winter months, grasses may use up their food reserves and not have enough carbohydrates to regrow when weather consistently warms next year.
Besides creating unnessary new growth as grasses enter winter dormancy, lawns receive additional stresses when gardeners add nitrogen this late in the season One such issue with a late season application of nitrogen is that it can make the grass more susceptible to large patch fungus. This fungus is active when soil temperatures range between 75 and 65 degrees F. Nitrogen applications encourage lush growth which can increase the incidence of the disease.
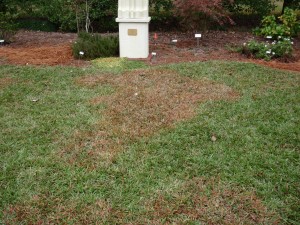
Large patch fungus can be more of a problem on turf following late season nitrogen applications.
For those that feel it necessary to apply some type of fertilizer now, potassium may be applied for the next couple of weeks. Potassium is often sold as a 0-0-60 and the rate is about 1.5 lbs. of the fertilizer per 1,000 square feet of lawn.
Learn much more about lawn fertilization from the University of Florida IFAS Extension.
by Carrie Stevenson | Oct 7, 2013
After severe weather of any kind, homeowners must often spend a considerable amount of time dealing with impacts to their landscapes. Below are a few lessons we have learned from hurricanes and tropical storms in the past. Many thanks to fellow agent Beth Bolles for her contributions to this article.
Dealing with Toppled Trees
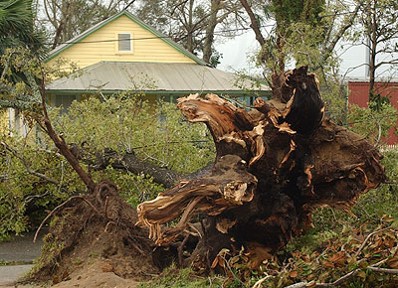
It may be difficult to turn an uprooted favorite tree into firewood, but this is probably the best choice. A small or young tree may be replanted successfully if done immediately. These trees will require bracing for up to two years until the root systems regrow and are able to support themselves. If the roots have been exposed for an extended period of time, don’t try and save the tree. Exposed roots should be covered with soil or moist burlap for protection from drying out. Large or older trees will typically not survive this ordeal even with the best of care. Because the root system is compromised, attempting to keep the tree may create a hazard down the road with the next storm.
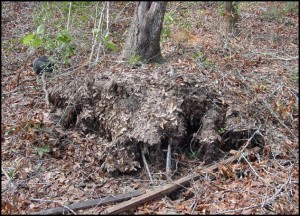
If a tree is completely uprooted, its odds of recovery are severely limited and it is best to remove the tree. Photo courtesy Beth Bolles, UF IFAS Extension
When removing fallen trees, think ahead about whether you plan to remove stumps. It’s a lot easier to pull instead of dig stumps out of the ground, so leave a four-foot stump to make your life easier. Be careful using power equipment like chain saws. It may be better to hire a professional to deal with removing large trees, especially around power lines.
Exposed Roots or Leaning Trees
Any exposed roots should be covered immediately. Cover roots with nearby soil at the same level roots were originally growing. Do not bank the soil higher because this will cut off oxygen supplies to roots in an already oxygen deprived, saturated soil.
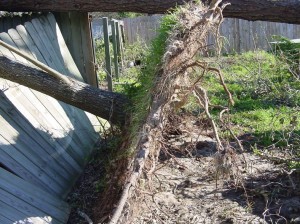
If small trees are leaning and need straightening, they can be staked and treated like a newly planted tree. Larger trees with trunks greater than six inches in diameter can be saved but should be removed if they are a hazard to structures, power lines, or roadways. Reset the trees with stakes or guy wires for support. Trees with trunks measuring less than two inches in diameter can be supported with two or three forty-eight inch, two inch by two inch wood stakes placed one foot outside of the root ball inserted eighteen inches into the ground. Larger trees should be anchored with three or four guy wires or cables. Cover guy wires that are in contact with the trunk with rubber hoses to prevent damage.
A leaning, partially uprooted tree may recover if it is righted and its roots are covered back with soil. Photo courtesty Beth Bolles, UF IFAS Extension
Replace the soil around the area and firm to assure there are no air pockets around the roots. Make sure the top root coming off the trunk is level with the existing soil. If many trees were swaying back and forth during the wind, there may be air pockets underneath the trees. If this is obvious, add soil and water to eliminate any air pockets. If root damage is obvious, do not fertilize at this time because salts in the fertilizer may damage new feeder roots.
Broken Branches
Broken branches should be removed from trees and shrubs as soon as possible to prevent tearing into trunk wood. Make clean cuts just outside of the branch collar to avoid damaging the trunk. If these are large branches, make three separate cuts to prevent tearing. Make the first cut on the underside of the branch about fifteen inches from the trunk and one-third through the branch. The second cut is made from the top, a few inches out from the first cut. This cut should remove the weight of the branch so the next one will not rip the trunk. The remaining stub can be held while the last cut is made. Make the last cut just outside the branch bark ridge and end outside the trunk collar (swollen area on lower side of branch). This is not a flush cut with the trunk and should leave a small protrusion on the trunk. Do not use wound dressing on the cut surface, as this practice is no longer recommended.
If trees lost all of their branches, it is advisable to remove the tree. The natural shape is gone and trees like pines will typically not recover. Some trees may lose the majority of their leaves, but these will flush back out so they should be okay.
Repairing Lawns
Keep a close eye on lawns for disease problems due to all the rain. Brown patch and take-all root rot would be the major concerns. Rake and remove all debris to give lawns a chance to dry out. If lawn areas are damaged, now is the time to replace with plugs or sod so they can establish before winter. Sod webworms are bad now so don’t mistake this damage for diseases. If adult moths are obvious and grass blades are closely cropped, this is due to caterpillar damage…not disease.
Watering
Most soils are saturated and irrigation systems should be in the off-mode. If there is standing water around trees or in other low areas, use a hose to siphon water to a retention pond or a better-drained area. Once soils dry out and the sun comes out, keep a close eye on plants as they may require more frequent irrigation because of root damage. Coastal areas flooded with saltwater may experience damage from extended exposure to high salinity; it is recommended to run a sprinkler system to flush out a lawn after the water retreats.
If you have questions, contact your local UF IFAS Extension Office!
by Julie McConnell | Sep 9, 2013
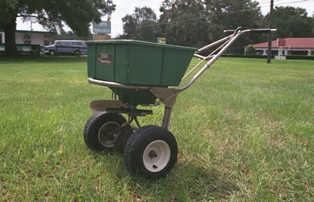
Fertilizer Spreader: Image Courtesy UF / IFAS Extension FYN Program
Although temperatures are still hovering around 90° F, the last fall fertilization date is approaching quickly. Mid-September is the
deadline for applying fertilizer to warm season turf-grasses and landscape ornamental plants for the year. Why is September 15 the cutoff date? In North Florida, our estimated first frost date is November 15. When fertilizer is applied the nutrients encourage new growth that typically takes about 6-8 weeks to become “hardened off” and able to tolerate low or freezing temperatures. So, simply backtracking on the calendar gives you an idea of when to make the last application of fertilizer (if needed).
If September 15 is at the end of our warm season feeding schedule, the next question should be “when should I fertilize in the spring?” Although Northwest Florida’s average last frost date is listed as March 15, UF/IFAS Turf Specialist Dr. Bryan Unruh does not recommend fertilizing before April 15 in the panhandle. There are two main reasons for this later date. One is that the March 15 last frost date is an estimate, many times cold weather follows a warming trend in late winter/early spring. During April of this year warm weather was followed by cool temperatures with cold winds that caused landscape plant damage. If fertilizer was applied before this weather arrived, some cold damage may have been evident this spring in affected landscapes. The second reason is that if fertilizer is applied to turf or plants that are not actively growing and using those nutrients, it may leach out of our sandy soils. Nutrients do not wait for plants to use them; they can be washed out and become a source of nonpoint source pollution.
To read more tips on fertilizing visit EDIS ENH1174 “The Lawn Fertilizer Toolbox”
by Larry Williams | Sep 2, 2013
Despite the fact that winter annual weeds are not currently growing, we are approaching the best time to prevent them from being seen in our North Florida lawns.
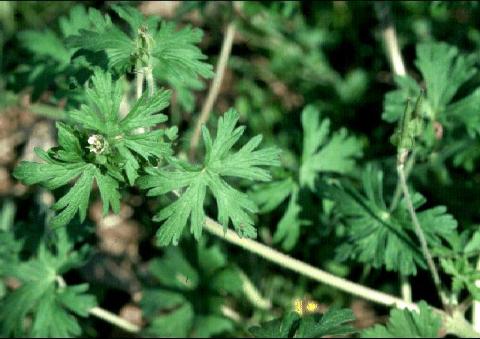
Carolina Geranium
Common winter annual weeds include annual bluegrass (Poa annua), chickweed, henbit, hop clover, lawn burweed and Carolina or wild geranium.
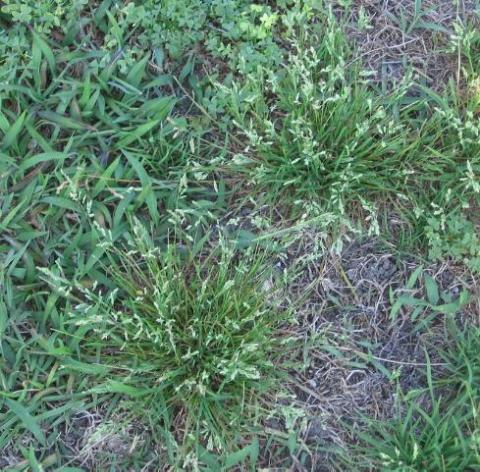
Annual Bluegrass Photo Credits: UF/IFAS
These and other winter annual weeds germinate from seeds in late fall and early winter. The little seedlings go unnoticed but continue to slowly grow through the colder winter months. Approaching spring, as day length becomes longer and soil temperatures warm, these previously inconspicuous weeds put on a growth spurt.
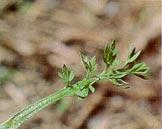
Lawn Burweed:
Close up of parsley-like leaves. Note sharp spines in leaf axils.
Photo Credits: Weeds of Southern Turfgrasses
During spring, the winter weeds may outgrow the lawn grass in our North Florida yards. They begin producing numerous flowers followed by thousands of seeds. For example, one chickweed plant can produce over 15,000 seeds.
In late spring or early summer with the onset of higher temperatures, the parent plants that started their lives from seeds the previous fall will die. But they leave behind a multitude of seed. These seed last the hot summer months dormant in your lawn. Then, in late fall and early winter, they germinate, beginning the entire cycle again.
Late September to early October, when nighttime temperatures drop to 55° to 60°F for several consecutive nights, is the time to apply a pre-emergence herbicide to interrupt the cycle of life for these winter annual weeds. This is just before seedlings emerge.
For season-long control, a second application may be needed about nine weeks after initial application. Not every lawn needs an application of pre-emergence herbicide. If your lawn has had no problem with winter annual weeds, there’s probably no need to apply a pre-emergence herbicide. Use pre-emergence herbicides only on lawns that have been established for at least a year. Many preemergence products interfere with grass seed germination. So, delay reseeding 6 to 16 weeks after application. This also applies to over-seeding a lawn with rye grass seed. Always follow label directions and precautions when using any pesticide, including herbicides.For specific pre-emergence herbicide recommendations, please consult this Weed Management Guide.
by | Aug 19, 2013
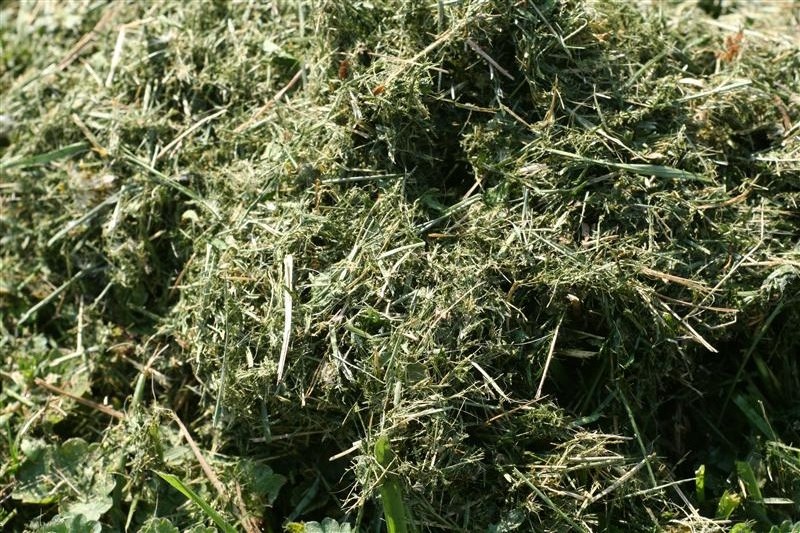
 As if mowing the lawn wasn’t trouble enough, dealing with and disposing of grass clippings is a major pain.
Clumps of grass clippings left on the lawn are unsightly and cause the grass beneath them to turn yellow due to a lack of sunlight as well as oxygen.
That problem is somewhat eliminated if you have a bag attachment on your mower, but handling the grass clippings extends the chore of mowing by taking extra time and effort to repeatedly empty the bag. Then, once clippings are put in garbage bags and placed on the curb, our municipal waste handlers must deal with them.
What to Do?
On the other hand, if we manage our lawns correctly and use proper cutting practices, we can have nice lawns without bagging clippings.
Properly managed, grass clippings will not contribute to thatch buildup or other problems. As they decompose, grass clippings also can supply much of the nutrients needed by your lawn.
Since you’ve already got it, why throw it away?
Bag-free Lawn Care Plan
 You can follow this bag-free lawn care plan using a traditional lawn mower:
- For an established lawn, cut at the lower recommended cutting heights for your grass and use the lowest recommended amount of fertilizer. Mowing grass at a lower height will discourage thatch build-up.
- The rule of thumb for when to mow is to remove no more than about one-third of the leaf area at a time. If this practice is followed, the clippings will be small enough to sift into the turf and naturally decompose near the soil surface.
- To be successful, you will need to mow frequently enough so that the clippings are not too large. This may mean that the lawn can’t necessarily wait until Saturday morning. You must also mow at the recommended height. To ensure that your blade is set at the recommended height, set the mower wheel height on a concrete surface.
Here are some recommendations on various grasses and the heights at which to mow the grass:
- Common Bermuda: mow at approximately 1½ inches.
- Hybrid Bermuda: mow at approximately 1¼ inches.
- Zoysia: mow at approximately 2 inches.
- St. Augustine: mow at approximately 3 inches.
- Centipede: mow at approximately 2 inches.
Under the bag-free plan, you may apply a second application of fertilizer to your lawn this month (The first application should have been done in late April.). But remember that fertilizing grass increases its rate of growth. Reducing the amount of fertilizer you apply to the lawn will reduce the amount of clippings you will have to deal with. However, the one turf I would completely eliminate from a second fertilizer application annually is centipede. Too much fertilization in centipede can cause many more problems than any benefits that may arise from it.
A complete turf fertilizer is recommended for the average lawn. The best is a blend with more nitrogen, little phosphorus and some potash. Fertilizers with nitrogen, phosphorus and potassium ratios of 3:1:2 or 4:1:2 are good for turf. Choose a blend that contains some controlled-release nitrogen for longer feeding.
Don’t forget that recycled clippings also add nutrients, so fertilize at one-half the recommended rates – or not at all – if the grass color, growth and general appearance are acceptable.
Other practices will add to your success. First, don’t over water your lawn. During the hottest summer period lawns don’t need more than about an inch of water a week. Water as needed for weather conditions, and wait until the grass actually shows some stress before watering. Drought-stressed lawns often appear slightly faded, and the grass blades may be folded or rolled up.
Cut your grass when the leaf blades are dry (wait for the dew to dry). The clippings will sift down to the soil better. Make sure your mower blades are sharp, and keep the mower housing clean for best cutting and movement of clippings. You may need to have your mower blade sharpened once or twice in the growing season to properly cut your grass rather than having a dull blade ear your grass.
If you own or are thinking of buying a mulching mower, you’ll find they do an excellent job of chopping grass clippings and fit very well into this kind of program. Because these mowers are designed specially to chop grass clippings finely and return them to the lawn, they are a bit more forgiving if you wait slightly longer than recommended before mowing. Always avoid letting the grass get excessively tall before you mow.
For more in depth lawn care information, consult “Your Florida Lawn” or contact your County Extension Agent.
by Julie McConnell | Aug 5, 2013
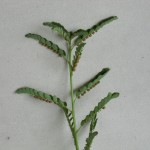
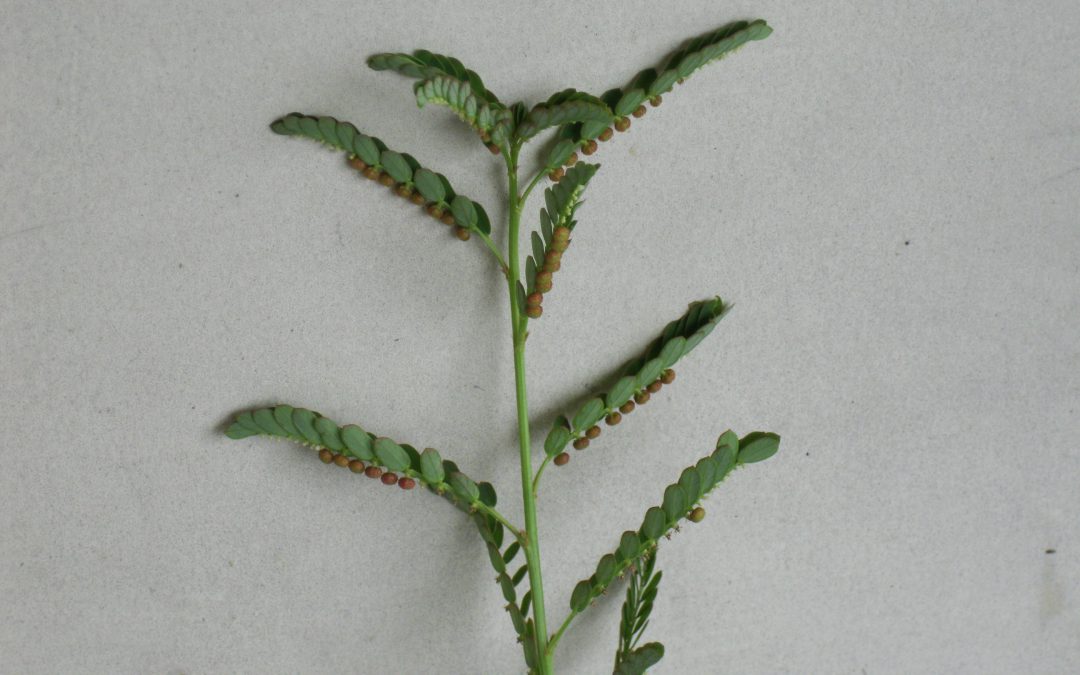
Chamberbitter
Above average rainfall this summer has supplied water to more than just our landscapes, weeds are benefiting and flourishing as well.
Just as with any other landscape pest, proper weed control starts with accurate identification and knowledge about the life cycle of the weed.
When weeds are low in number, mechanical control (pulling, mowing) is a good start. If weed population continues to increase and herbicide options are considered, several questions need to be answered before product application.
Questions you need to ask yourself about your weed and site:
- What weed(s) are you trying to control?
o Be sure you know what the name of the weed is so that you can find it on your product label “weeds controlled” list; if you need help with identification contact your local county extension office
- What is your site?
o Lawn – specific turfgrass is important, what is safe to use on one type may kill another
o Ornamental beds – again note specific plants near your treatment area in case of sensitivity
o Water bodies – some herbicides are not labeled for use within a given distance of water; if the weed is in or around the water only use herbicides listed for aquatic weed control
- What is the life cycle of your weed?
o Annual – one season life cycle, summer annuals complete their life cycle between spring and fall; winter annuals are active between fall and spring
o Biennial – two growing season life cycle
o Perennial – plant lives for three or more years
- What category does your weed fall into?
o Grasses – one seed leaf as it emerges from the soil; hollow, rounded, stems with nodes, parallel veins in true leaves; examples are crabgrass, dallisgrass, cogongrass, torpedograss
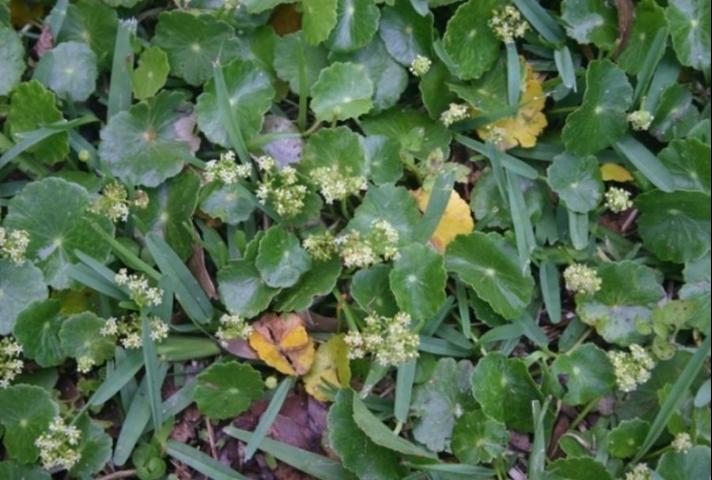
o Broadleaves – have two seed leaves and true leaves have net-like veins and usually have showy flowers; examples are lespedeza, dollarweed, clover, chickweed, henbit, florida betony
o Sedges/Rushes – sedges have solid triangular stems; rushes have round stems; both like moist or wet habitat; examples are purple nutsedge, yellow nutsedge, beak rush

Dollarweed: Image Credit Edis ENH1128
Basic information about herbicide categories:
For more information read EDIS Publication “Weed Management in Home Lawns”