by Eddie Powell | Nov 18, 2013
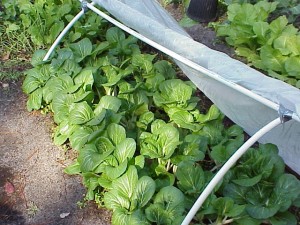
Image Credit : Eddie Powell
Northwest Florida homeowners enjoy growing their own vegetables every fall, but are faced with cold weather issues, especially during the first few days of December. For example, most cole crops can be planted until November, but they must be protected from the cold weather or they will need to be replaced. A good variety of cold tolerant plants should be used in order to prevent total devastation of the garden by extremely cold weather.
Below are a few tips to assist the home gardener in growing a successful winter vegetable crop.
- For tender plants, site selection should the top priority when preparing for a freeze. Vegetable plants need a site with good air drainage; not in a low area where cold air settles. Arranging tender plants along a barrier to protect them from cold winds improves the plants cold protection, especially from very hard freezes.
- Poorly drained soils result in weak and shallow roots which are more susceptible to cold injury.
- Plants grown with the correctly applied rate of nutrients will tolerate colder temperatures better and recover from cold injury faster than plants grown with little to no nutrients.
- Watering vegetable garden plants before a freeze can help protect plants. A well watered soil will absorb more solar radiation than dry soil and will radiate heat during the night. This may increase cold tolerance by as much as 2°F.
- Saturated soil conditions can damage the root systems of most plants over a few days, so make sure the ground is well-drained.
- Healthy vegetable plants are more resistant to cold than vegetable plants weakened by disease, insect damage, or nematode damage. Routine inspection for pests and implementation of necessary control measures are essential.
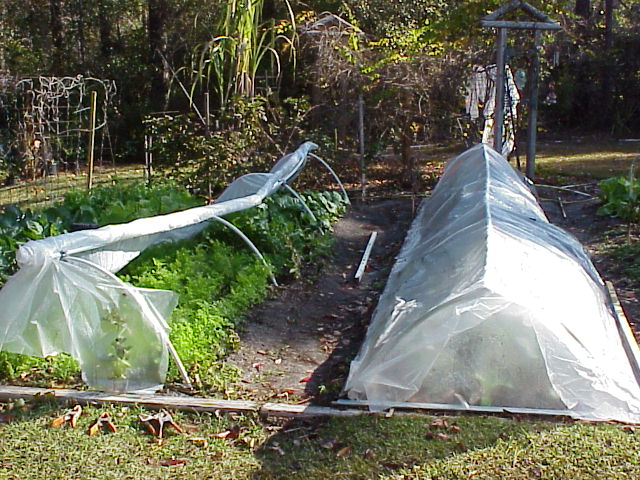
- Plastic or cloth coverings can help protect vegetable plants more from frost than from extreme cold. Covers that extend to the ground and are not in contact with the vegetable plants foliage will reduce cold injury. If the vegetable plant foliage is in contact with the cover it is often cold burned or injured because of heat transfer from the foliage to the colder cover. Some examples of excellent plant covers are cloth sheets, quilts or black plastic. If plastic covering is used, it is extremely important to remove the covering during the day to provide for ventilation of trapped heat.
- Feel free to contact your local county extension office for information on cold protection, pest identification and recommended control measures.
by Roy Carter | Nov 4, 2013
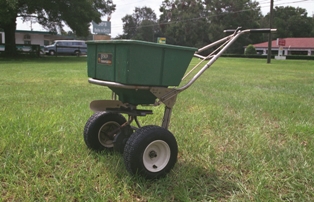
Fertilizer Spreader on lawn. Image Credit UF IFAS Extension FYN Program
Fertilizers are manufactured from a wide variety of materials to supply plant nutrients. Once these materials are mixed, it becomes difficult to distinguish the materials present. In the past, a few unscrupulous manufacturers have taken advantage of this to increase their profit. To protect consumers and legitimate manufacturers from such practices, The Florida legislature enacted the first fertilizer law in 1889 and has amended it many times since enactment. These laws regulate the manufacture and sale of fertilizer in the state.
The law requires that the manufacturer purchase and affix a label to each bag, package, container, or lot of fertilizer offered for sale in the state. The law requires that each label show specific information about the analysis and composition of the mixture or material.
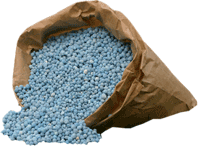
Image Credit UF IFAS
The key information comes in the guaranteed analysis section of the label. It tells the home gardener the ratio by percentage of the primary plant nutrients. The number s are in the order of these primary nutrients; Nitrogen, Phosphorus and Potassium. For example an 8-8-8 fertilizer would be eight percent nitrogen compound, eight percent phosphorus compound and eight percent potassium compound.
There’s some other information in this section of the label that may seem even more complicated but it’s also important. The label explains how much chlorine the fertilizer can contain. Chlorine can reduce the quality of some vegetable and flowers.
It informs the buyer what materials the primary plant nutrients are derived from. This can assist in determining the quality of the fertilizer.
Probably the most difficult part of the label to read, certainly the hardest part to describe, is the information listed right after the total nitrogen figure in the guaranteed analysis section. In addition the total amount of nitrogen, the label gives the amount of each of several types of nitrogen present in the fertilizer. This information will seem confusing, but it also offers a glimpse into how the fertilizer will work in specific types of soil.
Terms such as nitrate nitrogen ammoniacal nitrogen, water-soluble organic nitrogen and/or urea nitrogen can be used by plants fairly quickly. These nitrogen forms in fertilizer are great for a vegetable garden. But nitrate and water-soluble organic nitrogen are rapidly leached out of the soil so they don’t last very long. Ammoniacal and water insoluble nitrogen will stay longer in sandy soils.
Fertilizer with a high percentage of natural organic nitrogen is used by the plants slowly over a fairly long period of time. This kind of slow release fertilizer would be good for lawns helping them stay green without causing spurts of extra fast growth.
This is a complicated subject, hard to fully explain in one article. This is the take home message: almost any fertilizer purchased in Florida is a good one if it has the ingredients required for plant health and if the price is fair in terms of the total amount of plant nutrients it contains.
For more information on Florida fertilizer label contact your local UF IFAS Extension office or read this publication on the Florida Fertilizer Label.
by Matthew Orwat | Oct 23, 2013
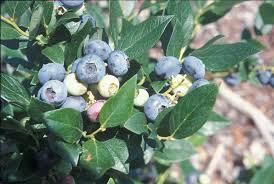
Image Credit: UF IFAS EDIS
From Dr. John P. Hayes”
“Florida Crossroads made a 28 minute video entitled “Seeds of Change” featuring the IFAS breeding efforts to create new varieties of blueberries, strawberries, tomatoes, and other crops, and the ways that these programs have influenced Florida industry.
For those of you who are familiar with our breeding programs, you’ll enjoy seeing some of our scientists on the screen. For those who aren’t familiar with IFAS development of new varieties, it is well worth the watch and I’d encourage you to do so. Our breeding program and the scientists engaged in breeding at UF are world class.”

by Les Harrison | Oct 21, 2013
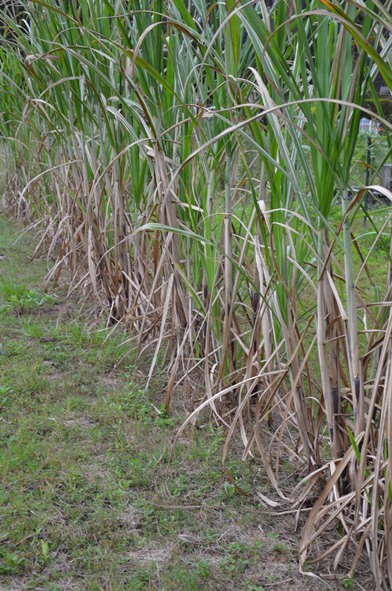
Row of sugar cane. Image Credit: Les Harrison
By Les Harrison, UF/IFAS Wakulla County Extension Director
October has ushered in the fall gardening season. Turnips, mustard, radishes, carrots and a variety of other cool season crops have emerged and are growing.
Another once common crop ready to be planted in October is sugar cane. Cane for processing is harvested, and select stalks with the most desirable traits are planted in October and November.
Planting is accomplished by digging a shallow furrow and laying the canes end-to-end. The cane is then covered with the soil removed from the furrows. Sugar cane may also be planted in north Florida during March.
In the days before mass market sweeteners, almost every farm had a patch of sugar cane. Some varieties were planted for processing into cane syrup, molasses and raw sugar, and some for chewing by the young and those with a sweet tooth.
When not pulling a plow or wagon, mules spent their days walking in a circle to drive a cane mill. Enterprising growers frequently sold their excess production as a means of generating another revenue stream to support the family farm.
Roadside sales of homemade cane syrup were a common sight in the rural south for many years. Sampling was a quality assurance courtesy offered to the potential buyer confirming the syrup had not been scorched while cooking.
The sugar cane plant is a form of grass with high sucrose content. It originated in south Asia where it has been cultivated for several millennia.
Over the centuries, sugar cane production followed the trade routes west. Christopher Columbus brought it to the New World on his second voyage west.
South Florida has long had a large commercial cane sugar industry with thousands of acres committed to growing and processing the sweetener on the outskirts of the Everglades. Louisiana is the other big sugar cane state, but Brazil is the global production champion.
The perennial nature of sugar cane allows growers to harvest the cane, and then grow the following years’ crop off the existing roots. Ratooning, as it is termed, is a widely used practice which has application for growing in panhandle Florida.
From a nutritional standpoint, sugar cane based products are a source of carbohydrates in the diet. Generally speaking, the reason for addition of sugar to a recipe is an issue of taste and flavor.
The sugar cane currently growing in the UF/IFAS Wakulla County demonstration garden was planted in November 2012. Tours of the garden are available during normal business hours.
To learn more about growing sugar cane in Wakulla County, visit the UF/IFAS Wakulla County website or call 850-926-3931 . And “Like” us on Facebook.
by Eddie Powell | Oct 21, 2013

Image Credit: Eddie Powell

Image Credit: Eddie Powell
Every fall gardening season, Florida homeowners enjoy growing their own vegetables but are faced with cold weather issues. As early as November 1, a chance of frost is possible in Northwest Florida.
Most Cole Crops can be planted until November, but they must be protected from the cold weather or they will need to be replaced. A good variety of hardy plants should be planted in order to prevent total devastation of the garden by extremely cold weather. If tender plants are used, the following considerations must be observed.
Site selection for tender plants is the number one factor to be considered when preparing for a freeze. Vegetable plants need a site with good air drainage, and somewhat high in elevation relative to the area; not in a low area where cold air settles. Arranging tender plants along a barrier to protect them from cold winds improves the plants cold protection, especially from very hard freezes. Another factor to consider is that poorly drained soils result in weak shallow roots which are more susceptible to cold injury.
Plants grown with the correctly applied rate of nutrients will tolerate colder temperatures better and recover from cold injury faster than plants grown with little to no nutrients. Watering vegetable garden plants before a freeze can help protect plants. A well-watered soil will absorb more solar radiation than dry soil and will re-radiate heat during the night. This can improve hardiness by as much as 2°F. However, saturated soil conditions can damage the root systems of most plants over a few days, so make sure the ground is well-drained.
Healthy vegetable plants are more resistant to cold than vegetable plants weakened by disease, insect damage, or nematode damage. Routine inspection for pests and implementation of necessary control measures are essential. Feel free to contact your local county extension office for information on pest identification and recommended controls.
Plastic or cloth coverings can help protect vegetable plants more from frost than from extreme cold. Covers that extend to the ground and are not in contact with the vegetable plants’ foliage may reduce cold injury to the plant. If the vegetable plant foliage is in contact with the cover it is often cold burned or injured because of heat transfer from the foliage to the colder cover. Some examples of excellent plant covers are cloth sheets, quilts, commercial row cover such as “remay”, or black plastic. If plastic covering is used, it is extremely important to remove the covering during the day to provide ventilation of trapped heat. Failure to do so will result in certain death to the vegetables. To learn more on cold protection of vegetable plants please visit this EDIS article on frost protection.

by Larry Williams | Oct 21, 2013
I tried growing Brussels sprouts for the first time a few years ago. I enjoy vegetable gardening and thought I’d try something a little different. To be honest, I wasn’t too happy with the results – nothing like starting an article on a positive note.
Actually, I don’t think I did too badly but overall I couldn’t decide if the results were worth the effort. Before I completely discourage you from trying this vegetable in your garden, I better give you some of the positives.
They are considered fairly easy to grow. They require about the same growing conditions and care as cabbage. Technically they are a type of cabbage. But instead of forming one large head, as cabbages do, they form many tiny heads along their tall stems. The round vegetable sprouts are about the size of walnuts. Each sprout resembles a miniature head of cabbage, with its layers of tightly packed leaves and central core.
Brussels sprouts are considered a cool season crop. They require cool weather for best growth. They should be grown in the winter garden in Florida. Now is a good time to plant this crop. If they are grown when temperatures are warm, the sprouts tend to be soft and open rather than solid and tightly packed.
Brussels sprouts can be started from seeds or small plants. But it may be hard to find plants for starting. Seeds can be planted directly in the garden or germinated in flats. If you start seeds in flats, plant about 25 seeds to a foot of bed and cover them with about half an inch of soil. When seedlings emerge, thin them to about an inch apart. They’re ready to plant in the garden when they’re about three or four weeks old. Plant them 30 inches apart in rows that are three feet wide.
Follow good gardening practices in watering, fertilizing and monitoring for pests.
Your sprouts are ready to harvest when they reach walnut size and feel firm. Usually, the first sprouts, near the bottom of each plant, are ready within three months. Don’t leave them on the plant too long or they’ll become yellow and tough.
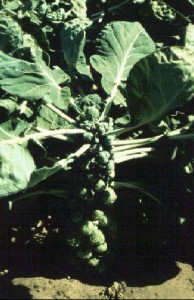
Brussels Sprout Plant
Photo Credit: UF/IFAS Extension
If you have space in your garden to devote to one crop for a minimum of three months (I left mine in the garden for five months), you might do okay with Brussels sprouts. Keep in mind they will still be producing in spring when it’s time to start planting your spring garden. The length of time it took to get a decent amount of Brussels sprouts was probably what I disliked the most about this crop.