Gifts from your garden are an easy and thoughtful way to share something special with a friend or neighbor. They can be low- or no-cost gestures that tells someone you are thinking of them.
Many of us have annuals and perennials that reseed in the garden. If you have already saved seed, just package those up and make a label with planting details. Your label can be printed or homemade.
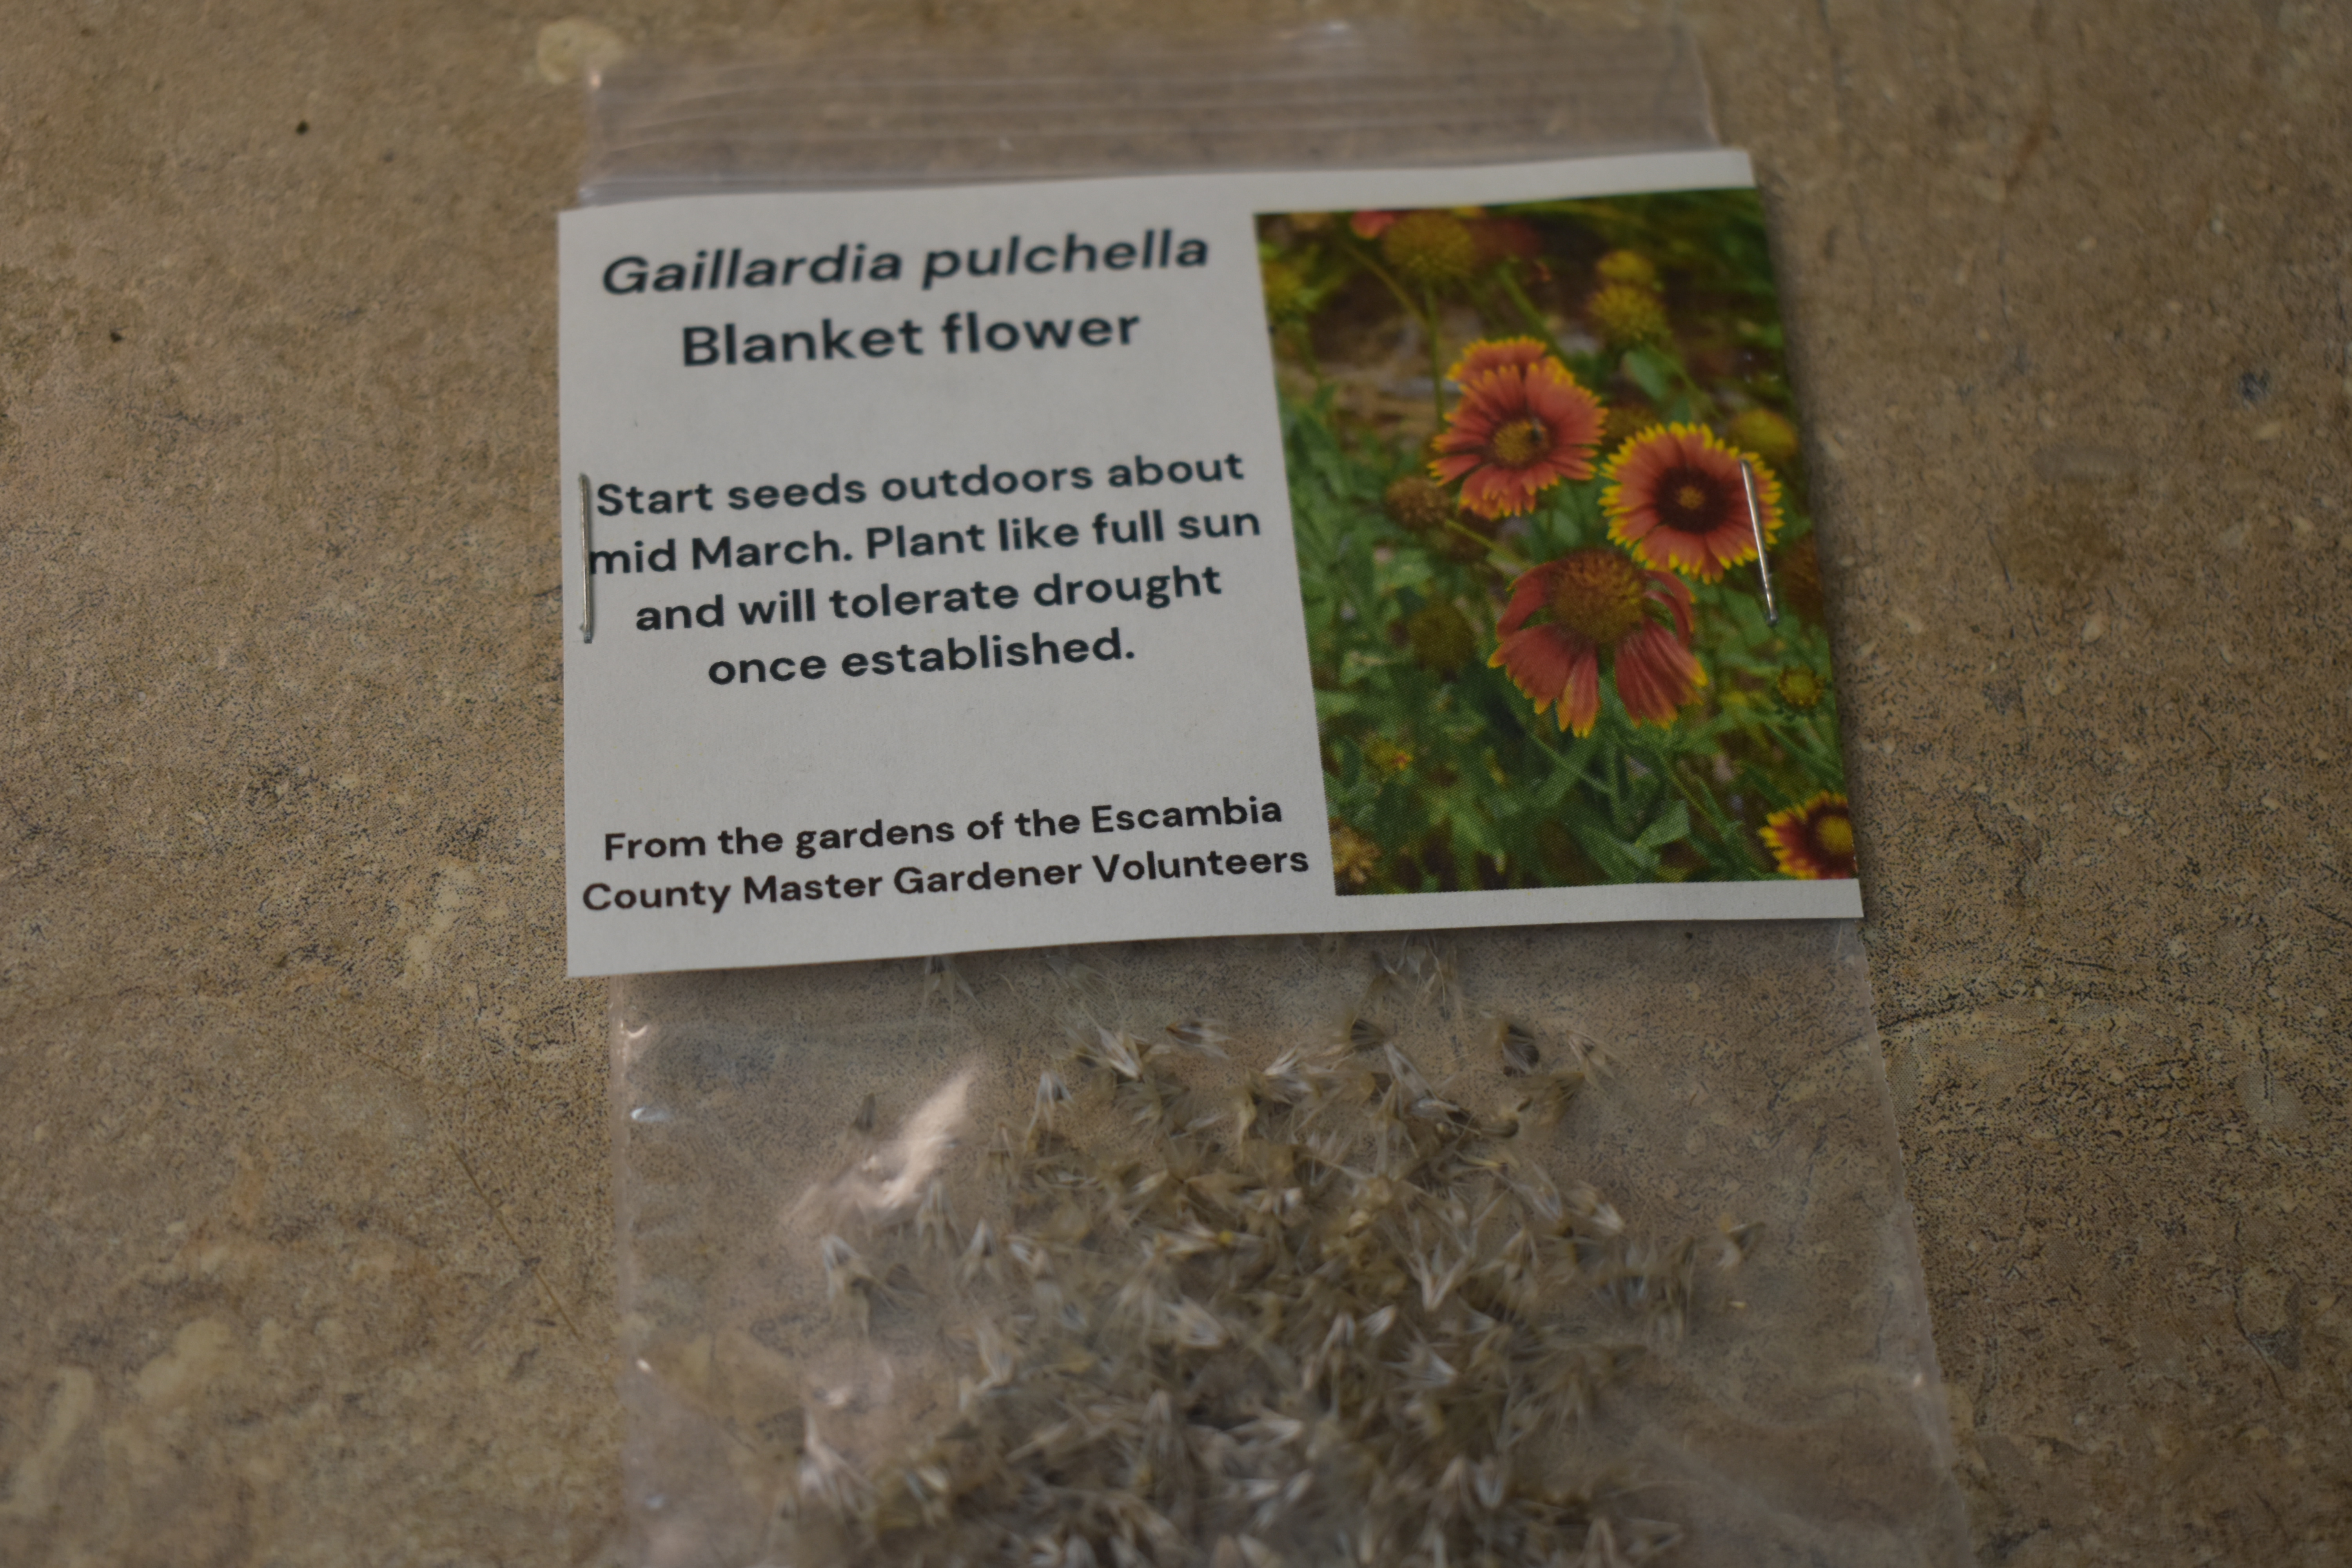
There are many native and Florida Friendly plants that offer seeds for you to share with friends. Photo by Beth Bolles, UF IFAS Extension Escambia County
A few common plants that offer plenty of seeds include Rudbeckia, Zinnia, Blanket flower, Native milkweeds, and sunflowers. Just collect a few mature flower heads, separate the seeds from the debris and let the seeds dry out on a towel for a couple of days. Remember there are numerous sources of seeds locally and online that offer a large variety of flowers and edibles when you need a prepackaged gift. Just add in a recycled tray or homemade cups for starting seeds.
If you don’t have seeds available now, consider plants that can be divided from your garden. Stoke’s aster, daylilies, gingers, and Toadlily are just a few. Find a recycled pot for plants that have leaves or add ‘bulbs’ to a small decorative bag with a label.
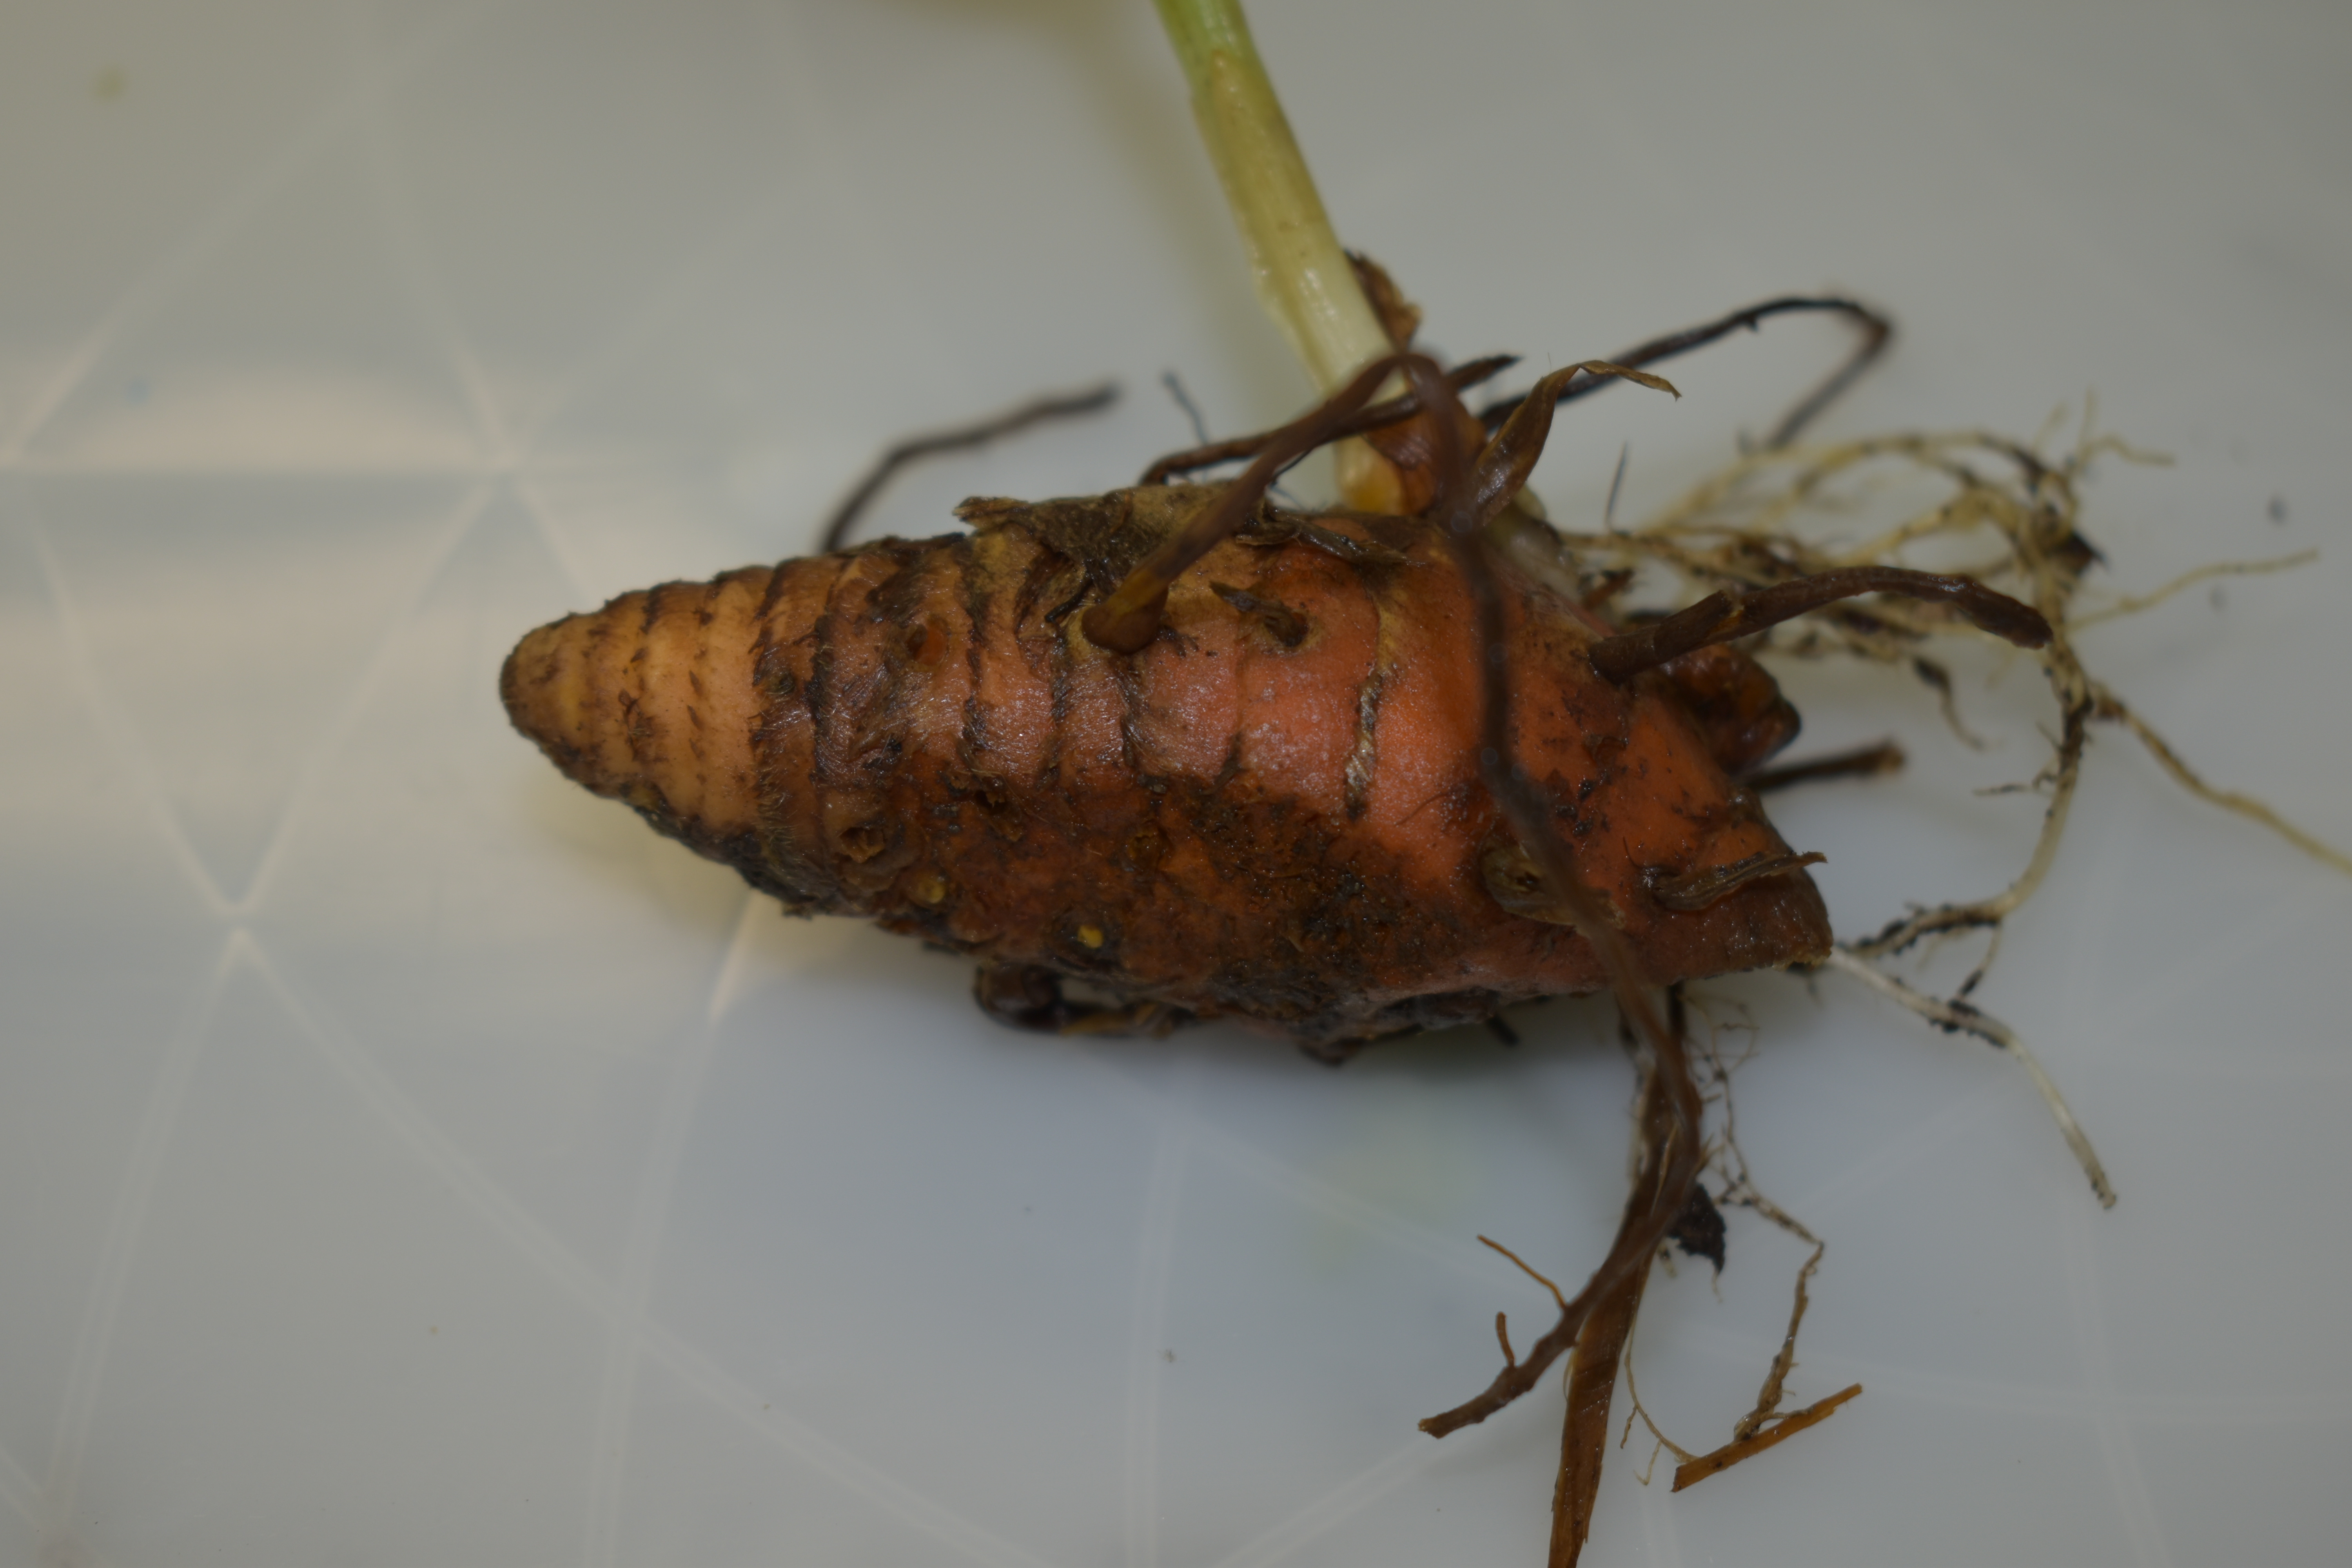
For those with a green thumb, consider taking a few cuttings of easy to root herbs or annuals. These plants will be ready for a small 4 inch pot in a short time. If you are not able to easily root plantings, consider sharing a piece of a turmeric or edible ginger stems. These can also be purchased from the store for starting new plants.
A plant is often a lasting gift, offering positive memories and beauty in the garden.
Many herbs, like rosemary, are easy to start from cuttings. Photo by Beth Bolles, UF IFAS Extension Escambia County.
Fresh turmeric from the garden or store is easy to grow in a container. Photo by Beth Bolles, UF IFAS Extension Escambia County
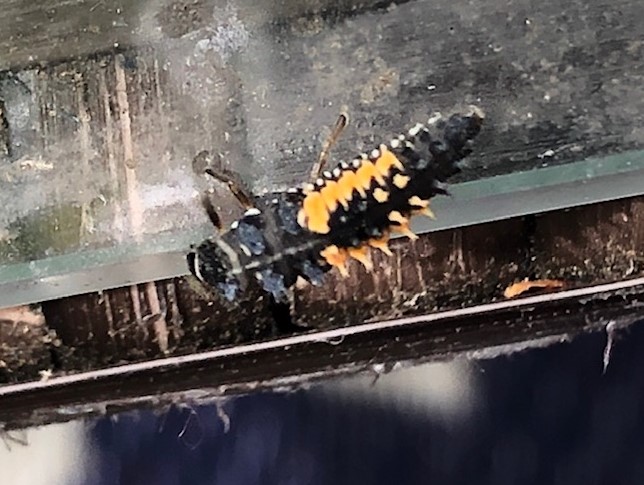
Beneficial juvenile ladybugs bear almost no resemblance to their adult form. Photo credit: Carrie Stevenson, UF IFAS Extension
When maintaining a garden, knowing the difference between your enemies and the “good guys” is half the battle. Once, I was teaching a group of landscape maintenance folks about beneficial insects, and quizzed them on their bug identification skills. I flashed up an image of a larval ladybug and asked if they knew what it was. No one in the class could identify it. I followed up with, “If you saw this in a client’s landscape, would you use a pesticide?” All but one responded that they would.
Thankfully, I was able to teach them something useful that day and avoid the unnecessary slaughter of baby ladybugs. But the larger issue to address was this “shoot first, ask questions later,” attitude. In reality, the beneficial—often predatory—insects are larger and fewer in number. It’s analogous to the smaller numbers of any apex predator in comparison to its prey; think about the dozens of lions vs thousands of antelope in the savanna, or hundreds of sharks vs hundreds of thousands of fish in swaths of ocean. The proportions are similar in the insect world. When predator insects are indiscriminately killed off, prey insects that harm plants can multiply in rapid numbers. The reproductive cycles of beneficial insects are often slower than smaller prey insects, so it becomes nearly impossible to restore a healthy balance.
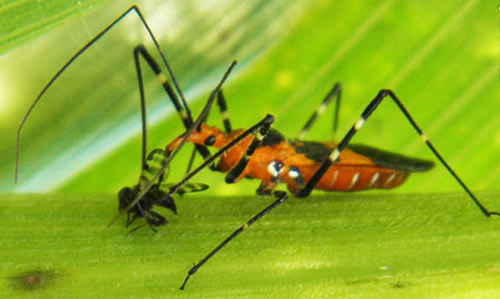
Adult assassin bug feeding on a cornsilk fly. Photo credit: Megha Kalsi, UF
One such beneficial common to northwest Florida gardens is the milkweed assassin bug. Leggy and intimidating with black highlights and bright orange warning coloration, it is a daunting figure to prey insects and humans alike. The milkweed assassin bug, (Zelus longipes) is named for its similarity in appearance to the (unrelated) milkweed bug.
Nearly everything eats a juicy tomato, pepper, or leafy green vegetable, but the assassin bug leaves the plants alone. As suggested by its name, the assassin bug is a killer—a top predator among insects. An assassin bug does not go easy on its prey, which typically consists of beetles, flies, tomato hornworms, and even roaches and mosquitoes. Once the prey is ambushed, the bug uses its rostrum to “impale them, inject venom, and suck the body contents.”
While considered a beneficial species that protects the food we’ve worked so hard to grow, don’t assume the assassin bug is particularly friendly. It does not deliberately attack humans, but will defend itself if threatened. The bite of an assassin bug is said to be quite painful, and will result in a small itchy lump. There are no toxins present, though, and the bite will resolve itself fairly quickly.
So, if you see one of these fascinating little creatures crawling in your garden, leave it be. It is no doubt doing its job, hunting down pest insects one by one and slurping their guts out.
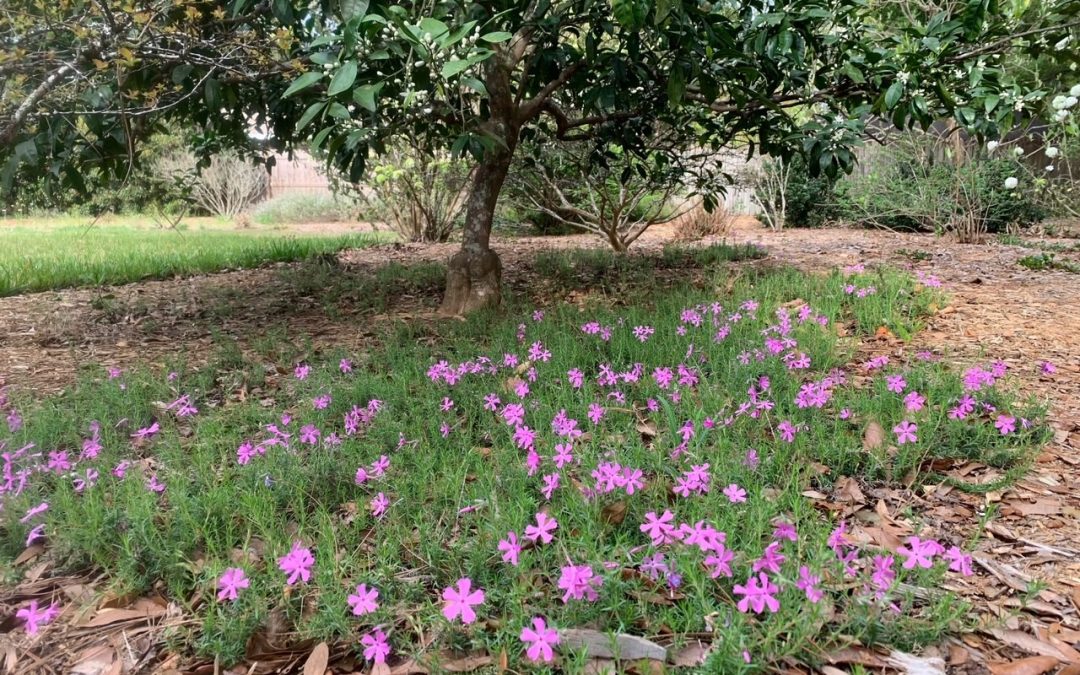
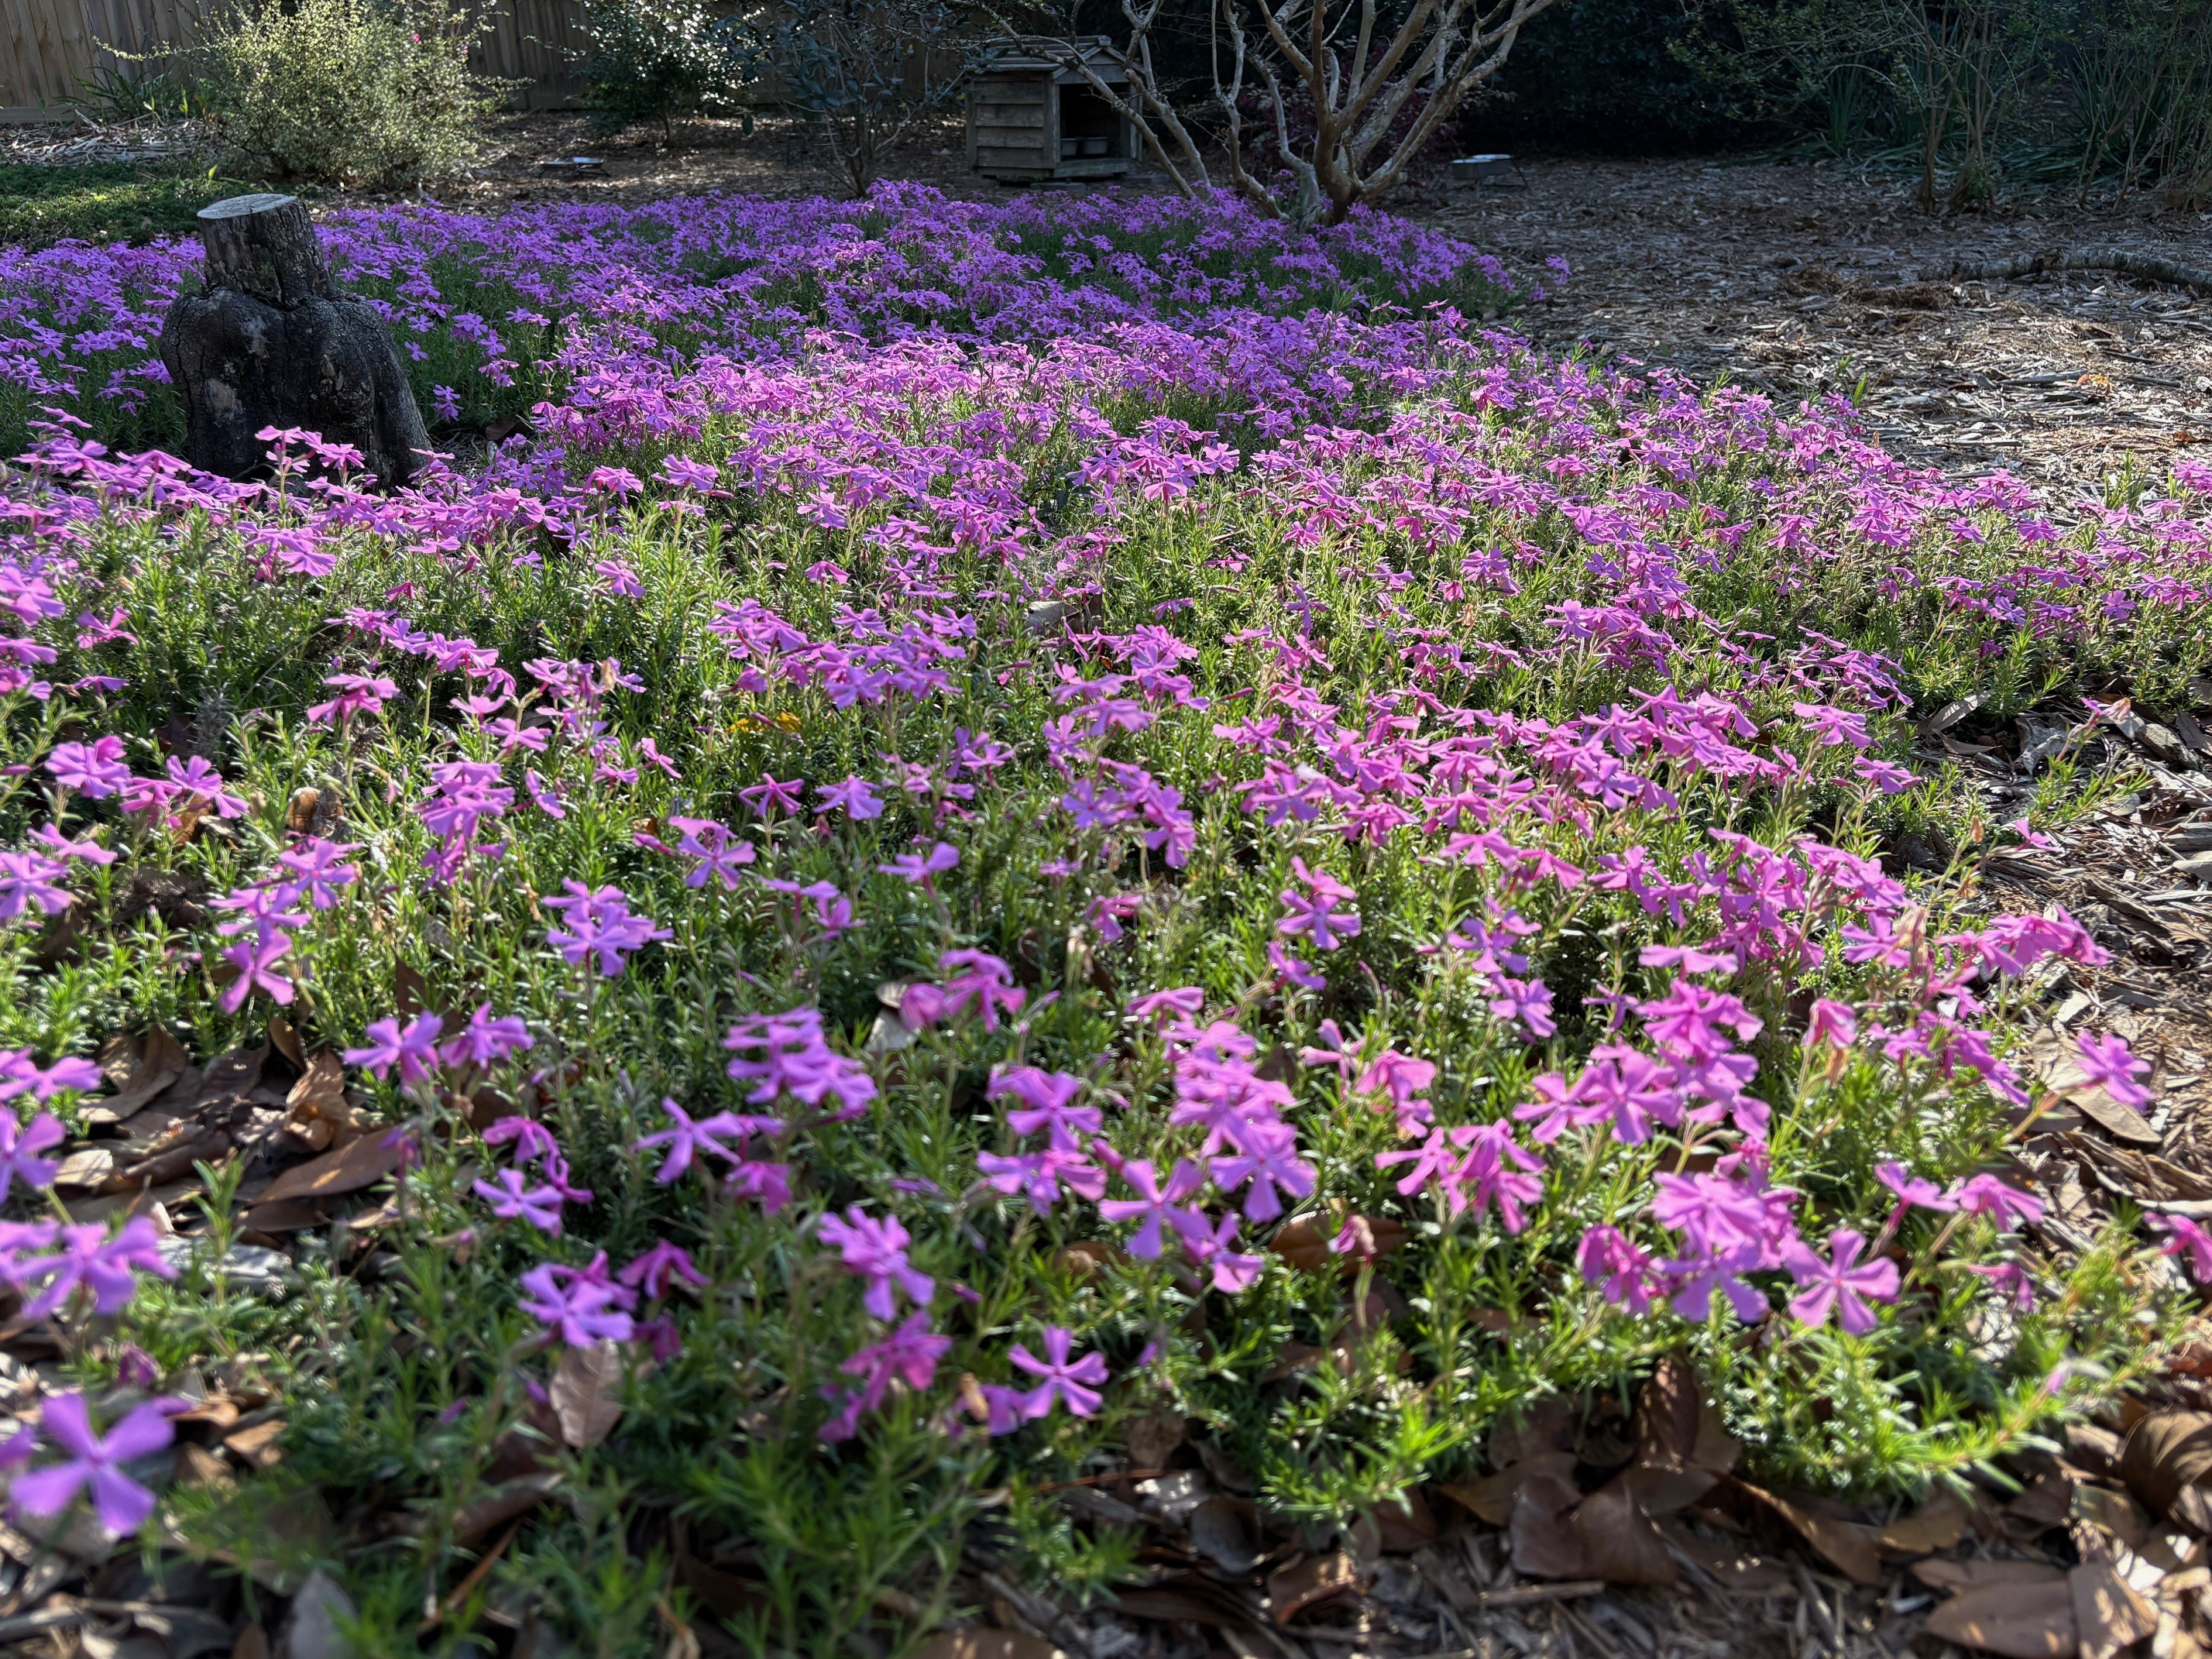
Growing up in Tennessee, my backyard was a large expanse of woods right off a concrete patio. In areas that received sunshine, one of my favorite plants was a groundcover called thrift, Phlox subulata. Each spring, pink flowers brightened the slope as the groundcover spread amongst the rocks. Luckily, I was able to bring a piece to Florida to add to my landscape over 24 years ago.
Creeping phlox in a home landscape. Photo by Beth Bolles, UF IFAS Extension Escambia County.
Thrift or creeping phlox is a low maintenance groundcover that only grows about 6 inches tall. Plants grow well in moist, rich soil, but also in poorer soils or sand. Planting sites should not hold water to prevent rotting roots. Phlox does need sunlight for best spring blooms but the Florida summer sun can be too intense. Consider using in areas where sunlight is plentiful in the spring but tree canopies may offer shade in the summer heat.
This is usually not a groundcover for traffic areas so use stepping stones if you need to move through planted areas. There are cultivars with flowers that are red, white, or lavender but the original pink is very appropriate for the spring season.
If you choose Creeping phlox for your landscape, some neglect is good once plant’s are established. Pick a spot that has good air circulation and water as needed after root’s take hold. Routine overhead watering may lead to some disease in your plants.
Flowers are a beautiful addition to any landscape, but have you ever wondered why some plants bloom in the spring while others show off in the summer?
Let’s start with why plants produce flowers. Simply put, flowers are the sexual reproductive structures a plant uses to increase genetic diversity by incorporating DNA from male and female flower parts into seed produced as a result of pollination and successful fertilization. For a plant to produce flowers it must be sexually mature which might be determined by triggers such as how many leaves and nodes the plant has produced or the amount of time that has passed.
Maturity A plant grown from seed must reach the markers required for that species to become mature, however, a plant that is propagated vegetatively (cuttings, division, grafting, etc.) is the same stage of maturity as the parent plant so if the parent plant is mature then the vegetative “offspring” will also be mature and able to bloom.
But if we only went by plant maturity then a mature plant would flower continuously, but even the novice gardener knows that is not accurate. So, what else needs to happen to induce flowering? There are two other important factors that play a role: photoperiods and temperature.
Mona Lavender Plectranthus bloomed sporadically through the summer but as the days got shorter it burst into bloom. Photo: J_McConnell, UF/IFAS
Photoperiod Photoperiod is the number of hours of daylight in a 24-hour period. Flowering plants are separated into three main groups: short-day plants (SDP), long-day plants (LDP), and day-neutral plants (DNP. But wait, it gets a touch more complicated – the plants are not technically sensitive to the hours of daylight rather it is the hours of uninterrupted darkness. Think of short-day plants as long-night plants, long-day plants as short-night, and day neutral plants do not have a preference.
Have you ever seen the recommendation to put a Christmas cactus in a dark cabinet for a few weeks to induce flowering? It works because Christmas cactus requires short days (long nights) to initiate flower bud development. If the plant is exposed to lights in normal household settings or you keep opening the cabinet and allowing light in this can delay flower bud development.
Temperature The last factor that affects flower production is temperature. Plants have ideal temperatures where they thrive, for example tomatoes grow well when temperatures are warm and are damaged by freezes. But did you know that even a heat-loving tomato also has a heat limit? When day temperatures are above 90 degrees and nights are above 70 degrees tomatoes stop producing flowers and fruit. Along these same lines, perennial plants may require a designated number of hours below approximately 50 degrees to initiate flower buds. If you have grown fruiting trees and shrubs, you may be familiar with the concept of chill hours which is the number of accumulated hours between 32-45 degrees needed by a plant to flower.
Practical Application
Why does any of this matter? If you are planning a flower garden and want to maximize your seed/plant budget, understanding the bloom requirements of the plant will help you make better choices. It also may help explain why plants seem to behave differently depending on the time of year, such as when you are successive planting flowers.
Example 1: A long-day plant seeded in May has time to reach full vegetative size before the days are long enough to trigger flowering. The same seed planted in late July flowers on a shorter vegetative plant because the daylength hours have been met triggering earlier flowering (fewer days from seed to bloom).
Example 2: A bedding plant you purchased in March that looked great in the spring, stopped blooming in summer, then started blooming heavily in the fall was triggered by photoperiod and/or temperature.
Plant breeding can affect bloom triggers even within the same species, so it is difficult to compile a list of true short-day, long-day, and day-neutral plant lists, but now you know this is a feature to look for during your garden planning!
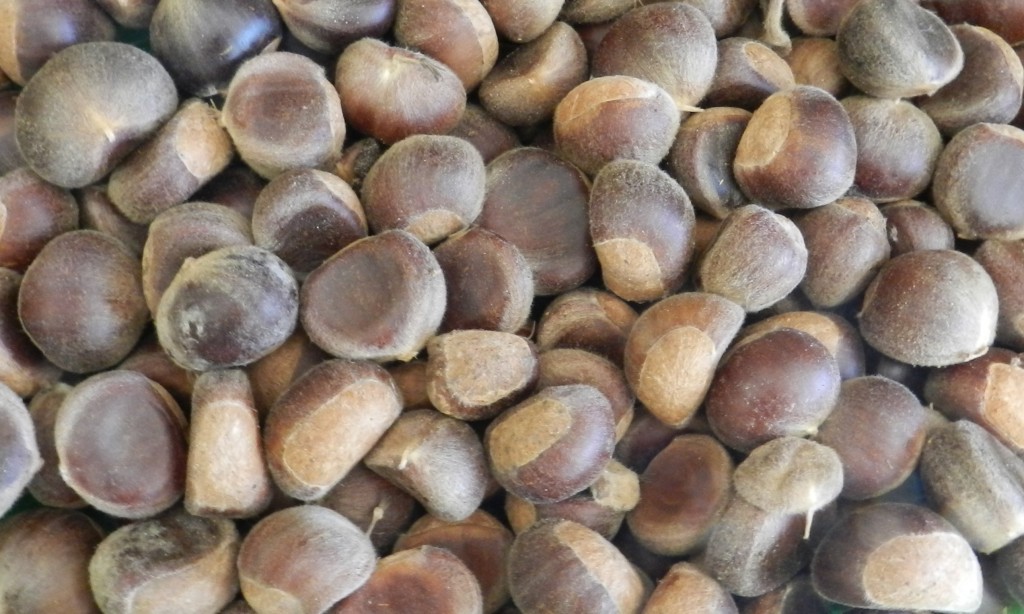
Christmas is a season rife with horticultural significance. Extracts from the Boswellia and Commiphora myrrah trees were presented at the nativity as frankincense and myrrh. Holly (Ilex spp.) and Ivy (Hedera spp.) are common in decorations, and a huge number of spices are used to flavor our favorite dishes of the season. Without plants, Christmas just would not be quite the same. One plant made famous thorough “The Christmas Song” sung by Nat King Cole is the humble Chestnut tree (Castanea spp.).
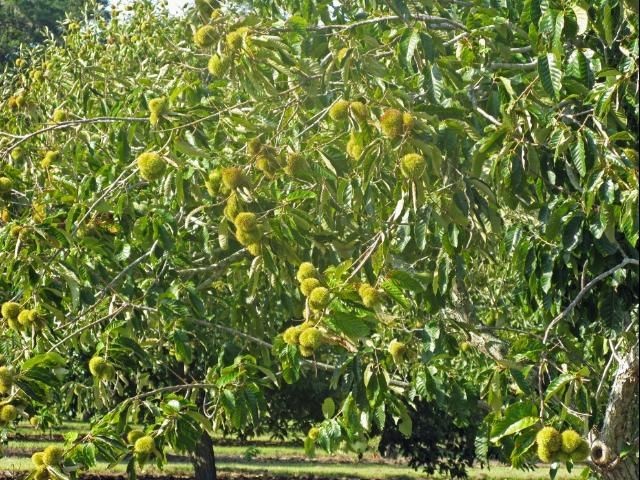
UF/IFAS Photo
A Brief History
Chestnuts once grew prolifically throughout the United States. They were prized rot resistant lumber produced alongside their staple nut crop. Further they were a critical resource for wildlife providing a food and shelter resource. This all came to crashing halt in the early 1900’s when a fungal blight took hold all but eliminating them from America’s forests.
Hybridization has brought this tree back into relevance. American Chestnut (C. dentata) and Chinese Chestnut (C. mollissima) has provided reinvigoration this tree’s once known potential. The reason is that the mixed genetics of this hybrid provide resistance to the blight while providing the products for which this tree is known.
Growing These Trees
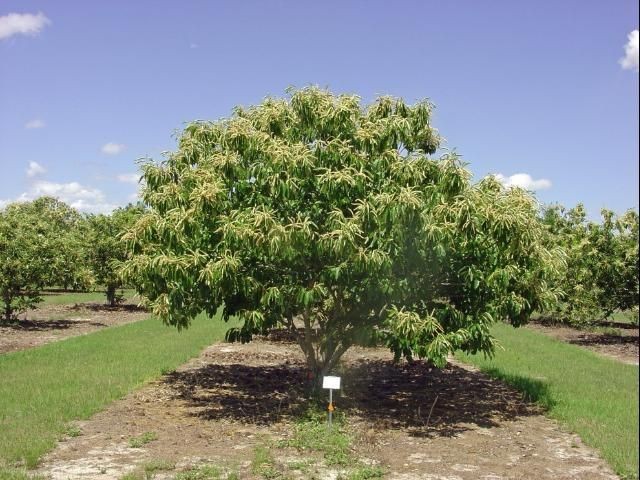
Chestnut trees are known to grow upwards of 40 feet tall and wide. Keep in mind that these plants are monoecious, meaning you’ll need two if you would like a harvest. For this reason, you’ll really want to implement the concept of right plant, right place as they will take up a lot of real estate.
Though they prefer acidity, a wide array of well-draining soils will suffice. That said, these trees will appreciate some active irrigation beyond that required to establish the tree.
As all Extension professionals will tell you, fertilization should be planned and executed based on soil testing. It is common though to apply one pound of a 10-10-10 fertilizer per year of tree age up to 15 years.
Growing this way, you can expect these trees to bear in roughly five years. Nuts will be produced on the new wood where branches maximize sunlight interception. Therefore, pruning for this will produce the highest yield.
UF/IFAS Photo
Pest Concerns
There are minimal pest concerns with chestnut trees. The main concern is Chestnut blight, which has been largely mitigated through hybridization. There are some other concerns, but these again can be mitigated through cultural practices. Keeping the areas under these trees clean will deny overwintering habitat to any insects while appropriate irrigation will greatly reduce the risk of any fungal infections. If managed appropriately, the biggest pest you’ll find near these trees is squirrels and deer seeking to deny you a harvest. As always, the only real way around this is physical barriers.
Chestnut trees are certainly worth a second look in your landscape. New hybridization has brought these back into the spotlight. With both wood and edible nuts they are certainly one that you should consider for your property. Done properly, you’ll soon be roasting chestnuts on an open fire as Nat King Cole suggested many years ago. As always, for more information on this or any gardening topic, call your local extension office.