by Ray Bodrey | Nov 14, 2016
Want to try something different in your winter garden this year? Well, when it comes to Brussels sprouts, you either love them or hate them. They’re not commonly grown in the Panhandle, but if you’re looking for something different, try growing this tiny cabbage. Predicted weather conditions for this season should lend a great crop.
 Brussels sprouts are very popular in Europe, especially Great Britain, but not so much here in the U.S. However, they are grown commercially in California and New York. But, most states have a limited market and these crops are mostly seen in backyard vegetable gardens. The two varieties, Jade Cross and Long Island Improved, are the most commonly grown in the Panhandle.
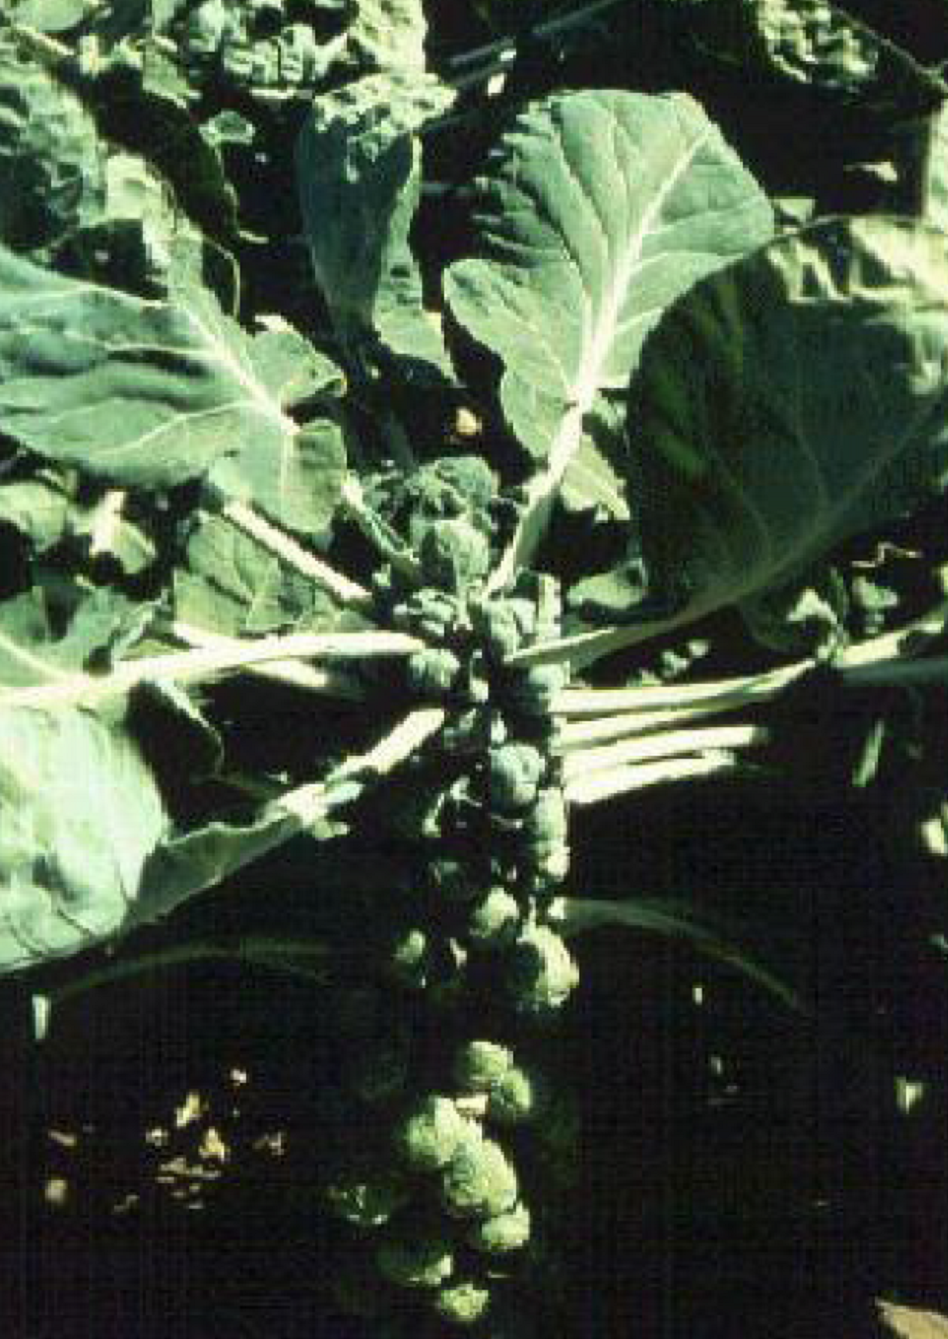
Brussels sprouts are actually a type of cabbage. However, the plant does not form one large head in the center, but rather many small heads on lengthy branches. Each golf ball size sprout resembles a cabbage head. Brussels sprouts require extended cold, dry weather, just as many sources have predicted for this year in the Panhandle. Brussels Sprouts can also survive a heavy frost. They’ll need a temperature at least in the lower 60’s in order to maintain a solid sprout and not open up. If sprouts open, structural integrity is lost, and the sprout will turn to mush.
Finding Brussels sprout transplants for your garden may be a challenge. They’re just not that popular. The good news is, seed is readily available and germination is quick once planted in garden soil. Seeds should be planted between October-December in the Panhandle. When planting, space approximately 2 ½’ apart within the row at a seeding depth of a ½”. Rows should be 2’ apart. It’s a good idea to fertilize before you plant with a general all-purpose fertilizer like 10-10-10 or 8-8-8. A good rule of thumb is to disperse 4 pounds of fertilizer per 100’ row. Once plants have grown a few inches, broadcast another application and apply a water afterwards. After a month, another application should be done. Plants should reach maturity at three months. First sprouts will develop on lower branches. Once sprouts are golf ball size, they’re ready to pick.
As far as pest management, the most common issues with Brussels sprouts are the same with any cabbage. Aphids, nematodes and cabbage worms pose the greatest threats. If these pests appear, it’s usually later in the season when the plant is closer to maturity. At that point, you should apply a common vegetable garden pesticide, one that can be used with any variety of produce. As always, be sure to follow the manufacture’s label directions when using chemicals.
Brussels sprouts are high in nutritional value. According to the USDA, a sprout has approximately 10 calories, and is high in both dietary fiber and vitamin C. Here is a challenge for readers who are not fans of the tiny cabbage. Fair warning, this challenge is under the premise that additional calories are acceptable. Start by sauteing a dozen or so Brussels sprouts in equal parts olive oil & butter. Once the sprouts have become a bit tender, add a generous amount of Parmesan cheese and bacon bits. Plate and dig in. I’m confident that this will change some minds.
For more information, contact your local IFAS Extension office
Supporting information can be found in the UF/IFAS EDIS publications, “Brussels Sprouts-Brassica oleracea L. (Gemmifera group)” by James M. Stephens, & “Florida Vegetable Gardening Guide” by Sydney Park Brown, Danielle Treadwell, J.M. Stephens and Susan Webb.
by Blake Thaxton | Nov 3, 2016
It was a hot summer that has continued into Fall. We hope cooler temperatures are on their way to the panhandle of Florida. Fall can be a great time to spruce up your landscape with some new shrubs.
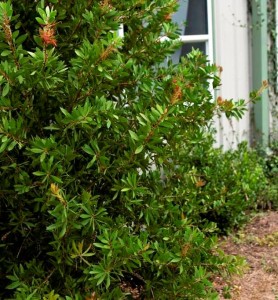
Image Credit UF / IFAS
It may be time for your landscape to receive a mini-makeover and to get a new look. Perhaps some strategically placed shrubs will be what makes an outdoor living space pop. Proper selection and installation is key to future health of new shrubs.
Selection
There are several factors that need to be considered before installing new shrubs to the landscape. Selecting plants carefully, based on the following points, will help with long-term success of the plant:
- Climate – Be sure that the species are climate appropriate.
- Environment – Study the light level, acidity, and drainage of the planting site.
- Space – Account for the mature size of the plant before planting. This will eliminate the possible need for plant removal if space is not adequate.
- Inspect the plant – Check for mechanical injury (scars and open wounds), cold injury, condition and shape of the canopy, and examine the root system.
Installation
Now that essential considerations have been made, it is time to give the shrub the best chance for survival with proper installation techniques. Fall and winter is an ideal time for planting shrubs. The roots can develop before the tops begin to grow in spring. The following are keys to proper establishment of container shrubs.
- Root ball preparation – Remove the container from the root ball and inspect for circling roots. If there are circling roots than make three or four cuts vertically to cut the roots. Pull some of the roots away so they will take on a new growth direction (massage the roots). Also find the top most roots, as sometimes they are covered by extra potting media. Remove the extra potting media so the top most roots are exposed and become the top of the root ball.
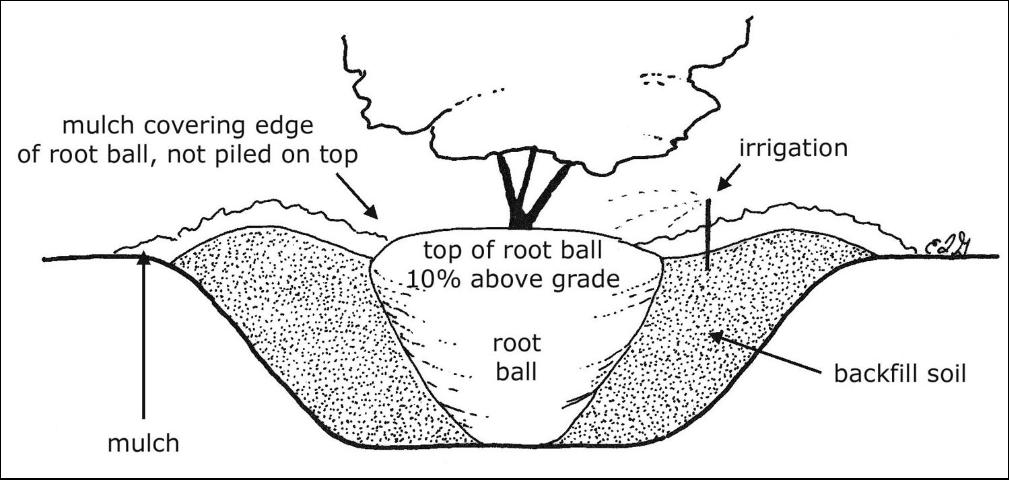
Image Credits: UF/IFAS, Edward F. Gilman
- Wider is better – Dig the hole two or three times the diameter of the root ball.
- Proper depth – Make sure to dig the hole 10% less than the height of the root ball. In poorly drained soils dig the hole 25% less than the height of the root ball. The top most roots should be slightly above the native soils.
- Backfill – Fill the hole with existing soil half way and tamp the soil to settle. Again fill the rest of the hole with the existing soil and tamp again to settle the soil. Do not place any backfill soil or mulch over the root ball as it is crucial that water and air are able to be in contact with the roots.
- Aftercare – Irrigate daily for the first two weeks, followed by every other day for the next two months, and weekly until the shrub is established (For <2 inch caliper shrubs).
If these key points are followed regarding selection and installation, the shrubs will be well on their way to becoming established in the landscape. If you would like read more in detail about installation please read the following:
Specifications for Planting Trees and Shrubs in the Southeastern U.S.
Literature:
Gilman, E.F., (2011, August) Specifications for Planting Trees and Shrubs in the Southeastern U.S.. Retrieved from: http://edis.ifas.ufl.edu/ep112
Black, R.J. and Ruppert, K.C., (1998) Your Florida Landscape, A complete guide to planting & maintenance. Gainesville, FL: University Press of Florida.
by Julie McConnell | Nov 2, 2016

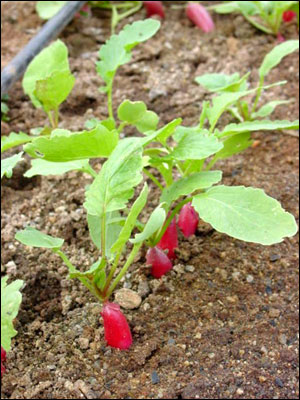
Radish. Photo credit: UF/IFAS Gardening Solutions
If you’ve considered starting a vegetable garden but are intimidated by the idea, this time of year is a great time to give radishes a try. Radishes are a cool season crop and will grow well in the mild winter climate of North Florida. The ease of growing this cool season vegetable also make them an ideal starter plant to get kids interested in gardening.
Radishes germinate with soil temperatures of 45-85⁰F and grow well when temperatures average 50-65⁰F, so October to November is a good time to plant in the fall. They develop quickly and are ready to harvest in as little as 3-4 weeks, so the quick results keep children interested.
Don’t have a garden area setup yet? No problem, grow radishes in a container! They take up very little space both in width and depth and can be easily grown in a modest sized pot. Radish seeds are small so should be planted very shallow, only cover with about ¼” of soil. Space plants about 6 inches apart and stagger planting dates through the fall and winter so that you can harvest as needed and still have a new crop coming on. For best flavor and texture, harvest when radish roots are ¾ inch diameter or less.
by Molly Jameson | Sep 16, 2016
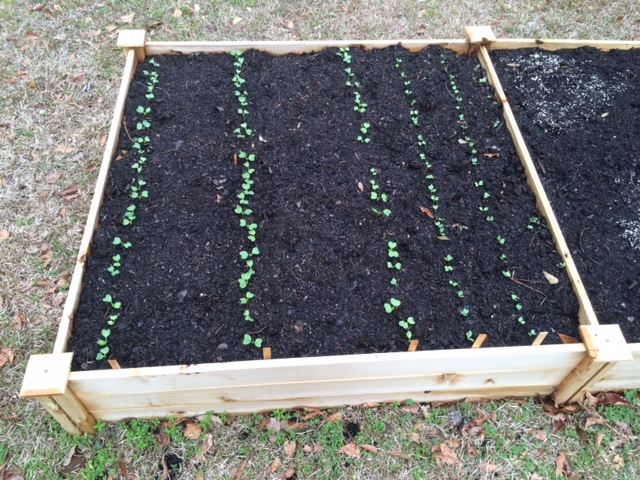
Direct seed root crops and many leafy greens, such as arugula and spinach. Photo by Molly Jameson.
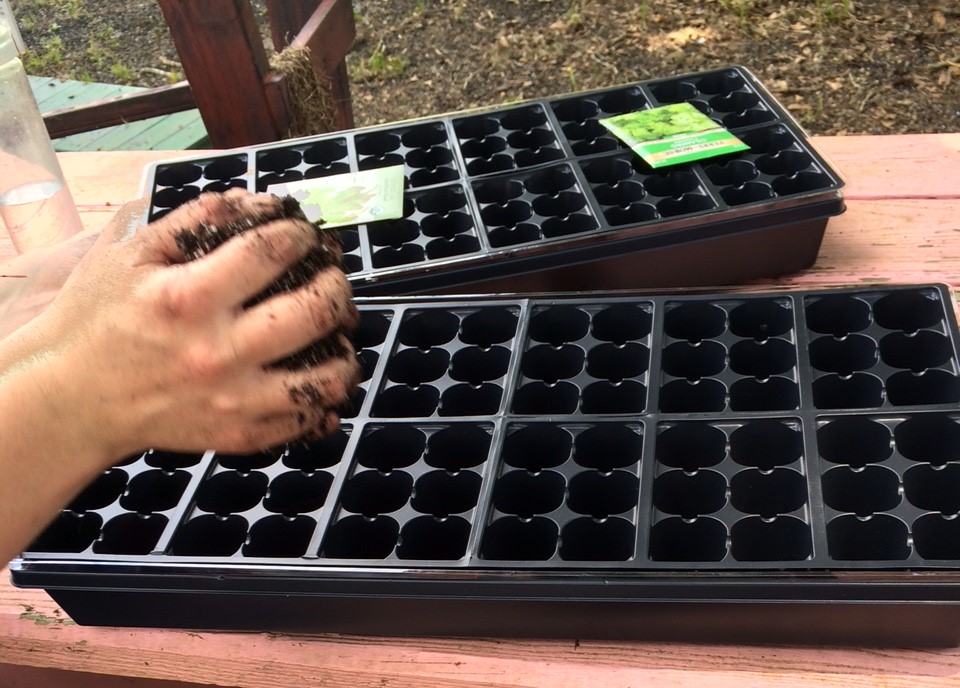
Fall is fast approaching, and that means my favorite season for gardening has arrived! September is the month we get to start all of our fall favorites. For me, this means starting lettuce, kale, broccoli, and collards by seed in flats indoors. I use full-spectrum fluorescent bulbs, which mimics natural sunlight. In a couple of weeks, I will direct seed arugula, carrots, mustards, spinach, Swiss chard, and turnips into my raised beds.
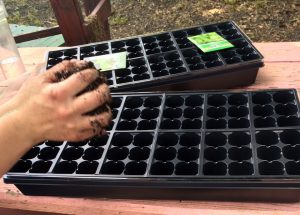
Seed brassicas and lettuce into flats. Photo by Molly Jameson.
But before I get started direct seeding, I will first need to do some garden cleanup. Sadly, this means I will need to say goodbye to my basil and okra, which are still hanging on despite the heat (and despite the hurricane!). Then it will be time to add a fresh layer of compost. Additionally, I will be adding worm castings, which I have been creating for my fall garden in my home worm bin all summer. There is no better feeling then growing brassicas and lettuce from seed, digging small holes, adding homemade fresh worm castings to each, and planting the eager seedlings.
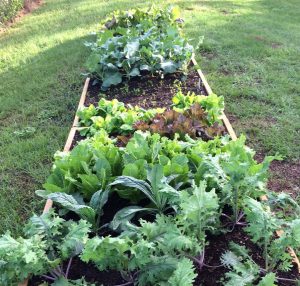
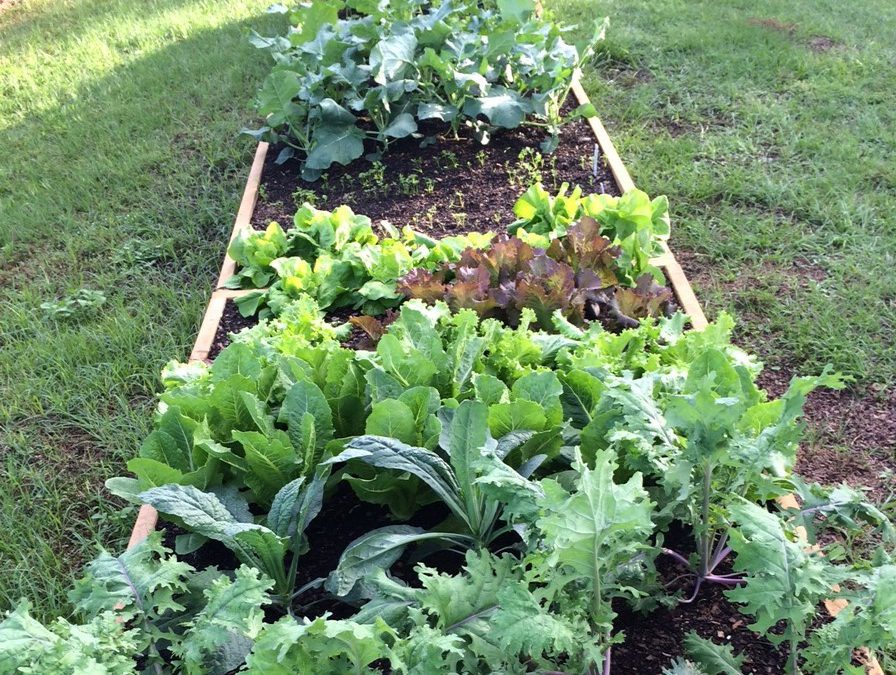
Grow a variety of greens for the fall season. Photo by Molly Jameson.
Fall is a wonderful time to garden in zone 8b – generally less pest pressure and a chance to plant hardy leafy greens that can be harvested all the way into spring. Of course, I always keep frost cloth around, in case temperatures dip below freezing for extended periods of time. In which case I will be sure to carefully cover my lettuce and Swiss chard, making sure the cloth is well secured.
I love my tomatoes, peppers, beans, and squash, but they usually involve staking and the ever imminent threat of caterpillars and intense heat. In the fall, most crops hold themselves off the ground, and I certainly cannot wait to pull on a jacket in the crisp early morning, come out to harvest kale and spinach leaves, and add them to my breakfast smoothie and veggie omelet.
For more information:
Florida Vegetable Gardening Guide

by Julie McConnell | Sep 3, 2015
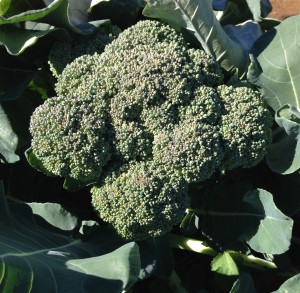
Broccoli, a popular winter vegetable. Photo by Mary Derrick, UF IFAS
As the days get shorter and temperatures decrease, it is time install your cool season vegetable garden. Many vegetables can be grown in Florida, but it is important to understand what the climatic requirements are for each crop to have the most success.
To get the most of your garden space know the recommended months for planting and the turnaround time for harvest so that you can stagger plantings or change out crops as needed.
September is the ideal time to plant cabbage, beets, kale, lettuce, mustard greens, onions, and radishes. After the New Year some options include eggplant, potatoes, English peas, and turnips.
Many gardeners start their tomatoes and peppers as early as February, but they are frost sensitive and early planting carries some risk of cold damage.
If you are interested in learning more about fall vegetable gardening, join the UF/IFAS Bay County Master Gardeners on Friday, September 18th for a free vegetable gardening workshop. This class will be held at the Bay County Extension Office at 2728 E. 14th Street in Panama City. To register please call 850-784-6105 or email bay@ifas.ufl.edu. Fall-VegMG2015
For more information and a full chart of what to plant when see Florida Vegetable Gardening Guide.