by Matt Lollar | May 13, 2021
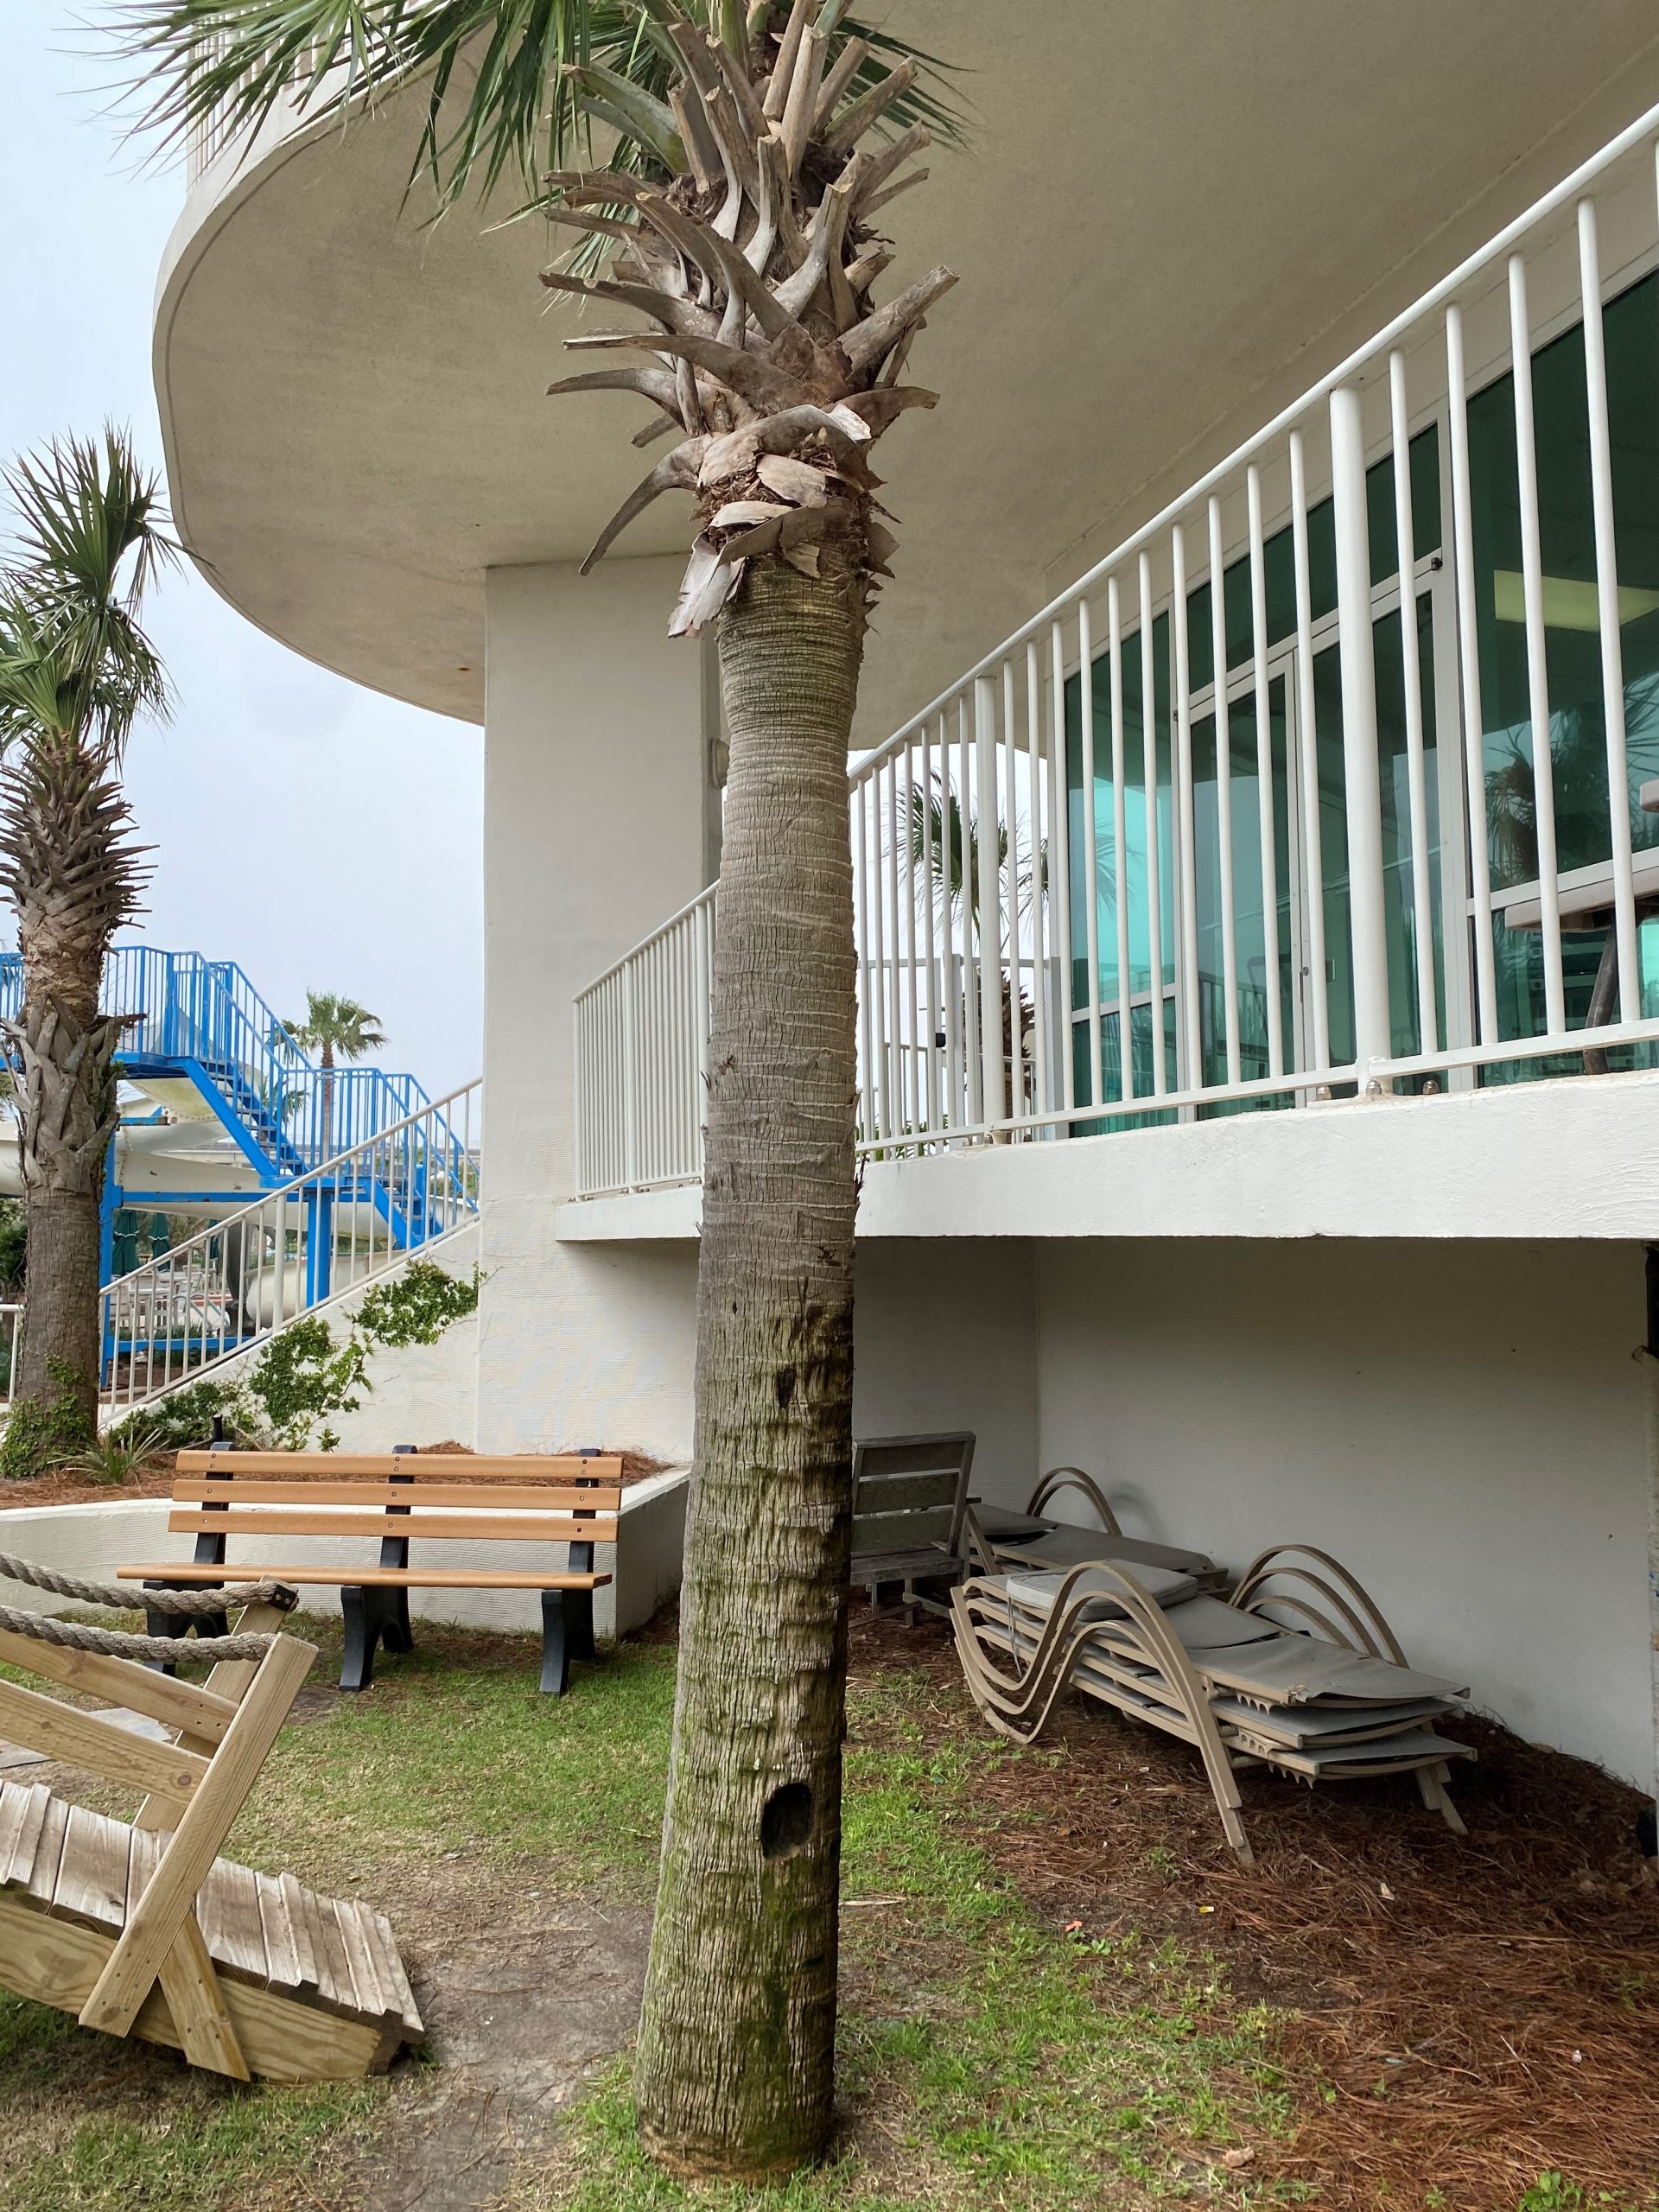
Palm trees are great for adding a tropical feel to your landscape. For the most part, they are easy to care for, however there are a number of environmental and nutritional factors that can affect palm tree growth. Extended drought conditions can cause palm trunk to contract or shrivel and extended periods of moisture can cause trunks to swell and crack.
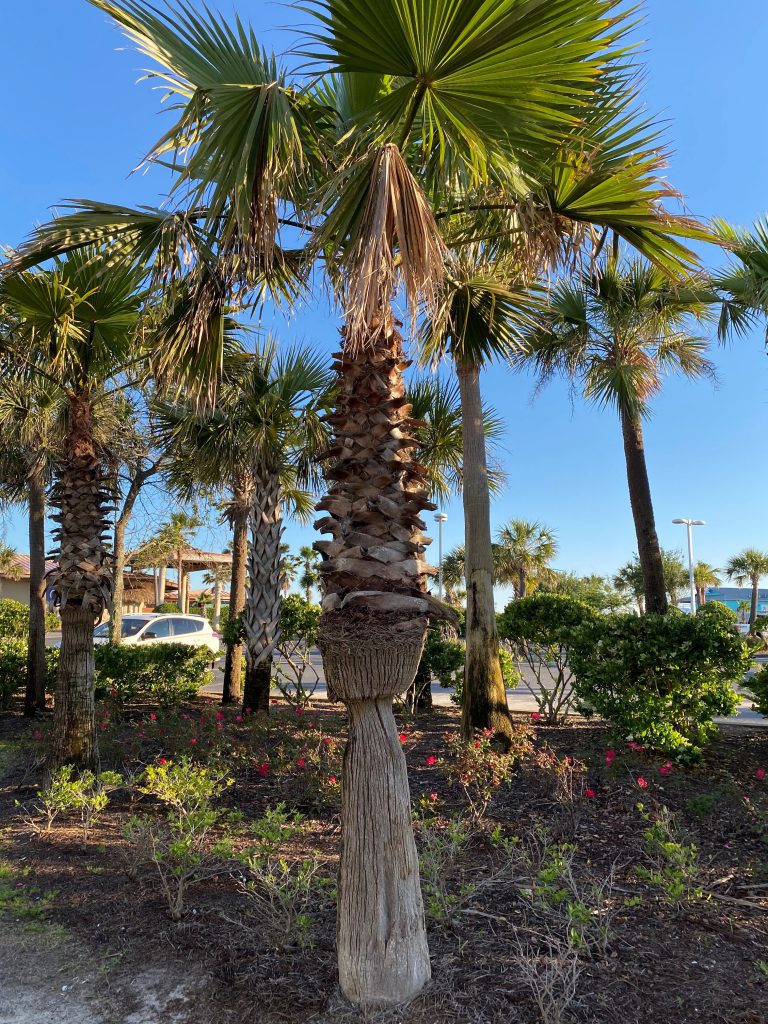
A palm tree with an irregularly shaped trunk due to water stress. Photo Credit: Matt Lollar, University of Florida/IFAS Extension – Santa Rosa County
Palm trees are monocots and do not have lateral meristems or vascular cambium. In dicot and coniferous trees these structures produce additional xylem (water transport structures) internally and phloem (nutrient transport structures) and bark externally. This means that once the apical meristem (frond producing portion of the palm) dies, the tree dies. It also means that wounds to the trunks of palms are visible for life instead of healing over like in dicots. If you were to cut the top out of a red maple, a number of it’s branches would fight to take over as the main trunk. If you were to cut the top out of a palm tree , you would be left with a dead snag for a tree. Palms certainly have unique structures and growing habits. Visit this publication from Dr. Timothy Broschat for more information on palm tree anatomy and morphology.

A palm tree with a wound near the base of its trunk. Photo Credit: Matt Lollar, University of Florida/IFAS Extension – Santa Rosa County
Palm trees display nutritional disorders differently from other trees. Their nutritional balance gets disrupted if too much nitrogen is applied. This often happens when high nitrogen turfgrass fertilizers are applied near palm plantings. The recommended palm fertilizer is 8-2-12 (nitrogen-phosphorus-potassium) plus 4 magnesium all available in 100% slow release form. A soil test is recommended to determine if other micronutrients are needed in addition to magnesium.
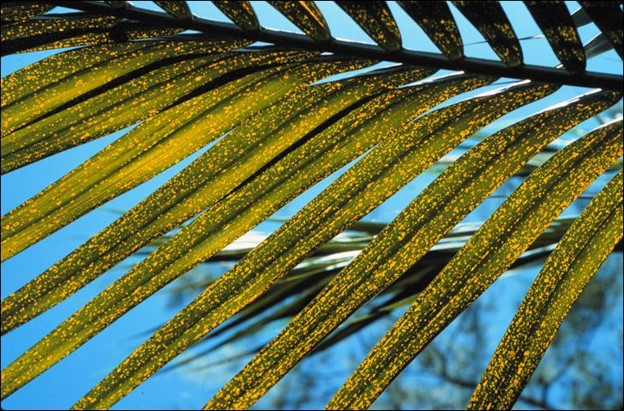
Potassium-deficient older leaf of Dictyosperma album (hurricane palm) showing translucent yellow-orange spotting. Photo Credit: Timothy K. Broschat, University of Florida/IFAS
Potassium is one of the most common nutrient deficiencies observed in palm trees. For more detailed information on palm tree nutrient deficiencies please visit the publication: Nutrient Deficiencies of Landscape and Field-Grown Palms in Florida.
This article provides just a glimpse of some of the common issues that affect palms. For more information on what could be going on with your palm trees and general palm tree care please visit Ask IFAS: Palm Care.

by Sheila Dunning | May 6, 2021
Some very exciting things have come from all the computer time that COVID-19 forced upon the University of Florida technology specialists – new updated websites. If you haven’t searched for UF publications or Florida-Friendly Landscaping advice in a while, you will be pleasantly surprised at what is available.
UF/IFAS has had a long history of providing electronic access to publications, beginning in the early 1990s when it began producing handbooks of documents on CD-ROMS. By the mid-90s the Florida Agricultural Information Retrieval System (FAIRS) website went online. In 1998, the name was changed to Extension Data Information Source (EDIS) to reflect changes in its scope and function. EDIS became the single source for all Extension publications and was also adapted to permit Extension units to print documents on an as-needed basis. More recently in 2006, the UF/IFAS Solutions for Your Life web initiative has brought EDIS publications together with other valuable web resources. Now, after 25 years as a valuable online resource from UF/IFAS, the EDIS website has been rebranded as Ask IFAS. The new site is modern, mobile-friendly and will make Extension publications even easier to find. There are many new features including videos and two Ask IFAS specific indexes: Experts and Topics. The new indexes enable users to find contact information for specific agents and specialists by their name or department. Information by individual topics is easier to search also. Ask IFAS carries on EDIS’ role as a comprehensive, single-source repository of all current UF/IFAS numbered peer-reviewed publications. Each year, visitors to the EDIS website access one of over 6,500 publication titles more than 17.5 million times.
The deactivated_site website will soon be taken down. But, the nine principles, plant database and recorded useful information has been updated and posted on the Florida-Friendly Landscaping site.  https://ffl.ifas.ufl.edu/. Information is organized by specific user groups, such as Home Landscapes, Community Landscape and Landscape Professionals. By utilizing the appropriate category, individuals can submit questions, join webinars and locate Florida-Friendly Certified Professionals. Okaloosa and Bay counties have individuals that have completed the required training. The criteria for earning Florida-Friendly status for residential or commercial landscapes is outlined on the website as well. All nine principles provide tips on ways to apply practical techniques in any landscape. Florida-Friendly Landscaping™ in a Minute is a one-minute radio show that shares practical tips on Florida-Friendly Landscaping™ based on University of Florida horticultural research. The show airs twice every weekday and all shows are supported with helpful online links for more information. Shows are recorded for any time viewing at a later date. Finally, the Florida-Friendly Plant Guide can be tailored by zip code and the app for your phone is free to download. https://ffl.ifas.ufl.edu/resources/apps/. There is even a toxic plant and butterfly garden app.
by Mary Salinas | May 6, 2021
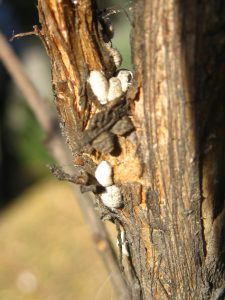
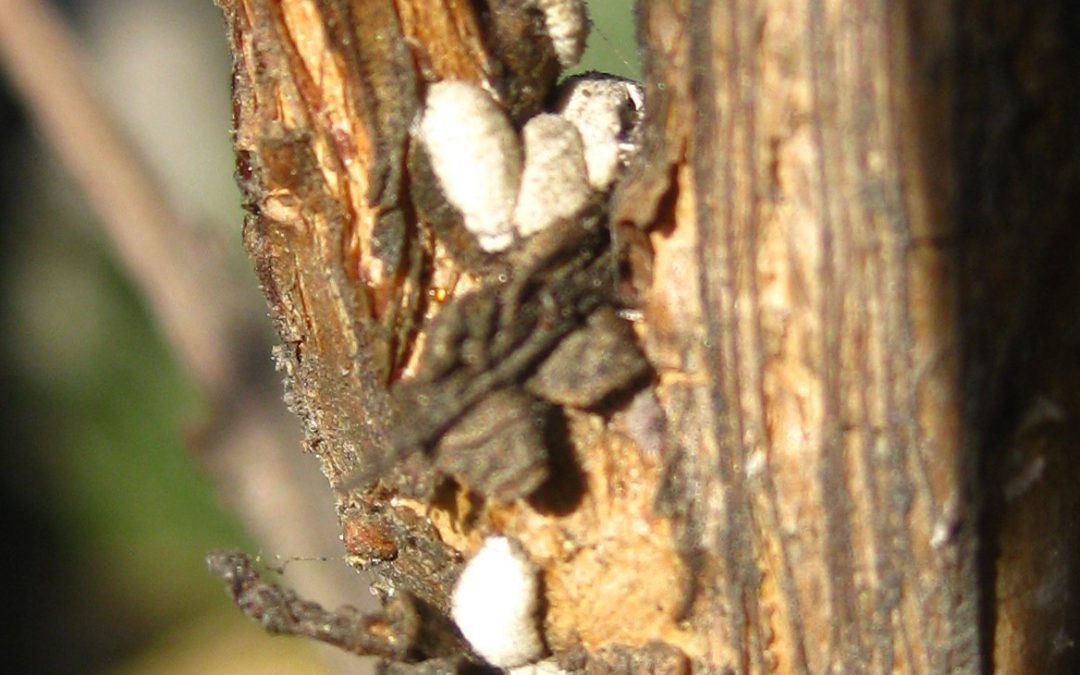
Crapemyrtle bark scale are often found in branch crotches and wounds to the bark. Photo credit: Gary Knox, UF/IFAS.
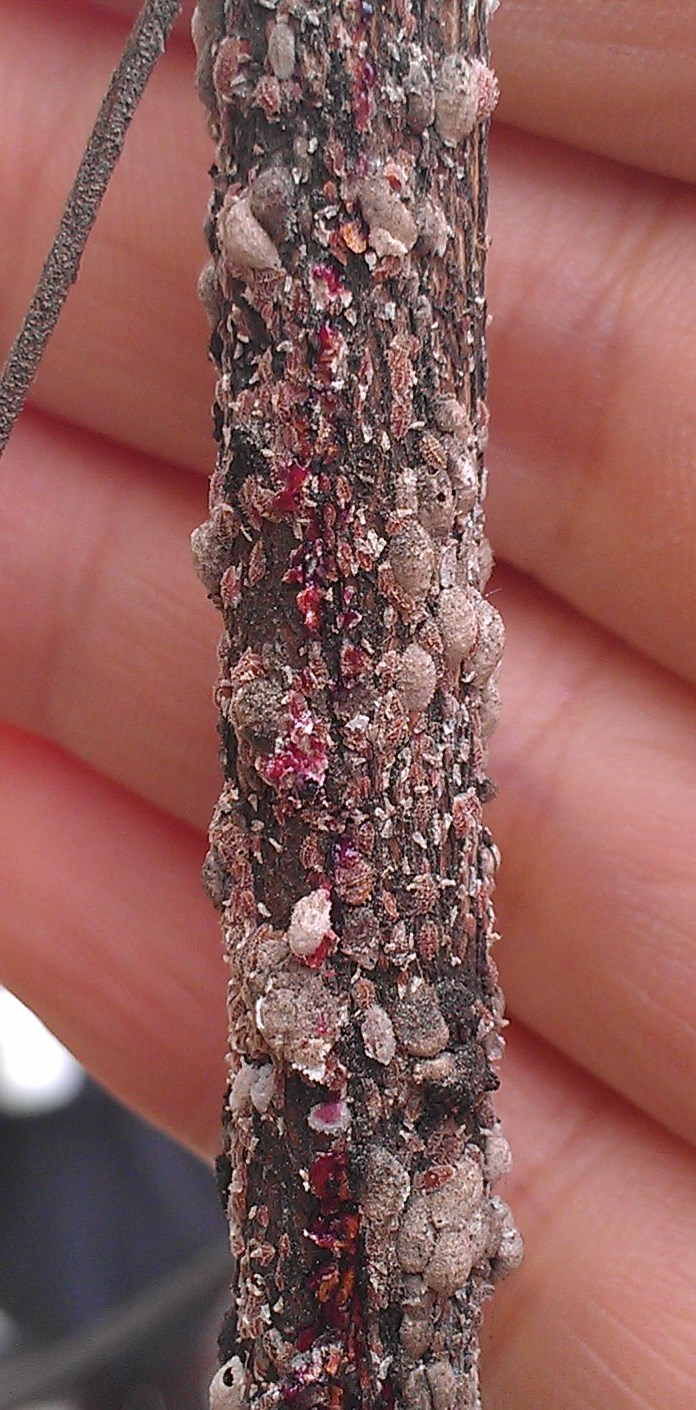
There is a new pest in the western panhandle of Florida. Crapemyrtle bark scale (CMBS) is a scale that is found on the trunks, branches, and twigs of crapemyrtle. It is the only known scale insect found on the bark of crapemyrtle. There are other scales that occur on the leaves.
When scouting for this pest, look for very small (2 mm or 0.08 inch) white or light gray spots on the bark of crapemyrtle. The adult females do not ever move once they have found a place to feed and reproduce. Under her protective covering, she lays eggs that hatch into ‘crawlers’ that then crawl away to find their own spot to settle down. When squished, they exude a pink goo (the eggs or newly hatched crawlers). Males are winged and travel to find their mates. See this comprehensive information on their interesting biology.
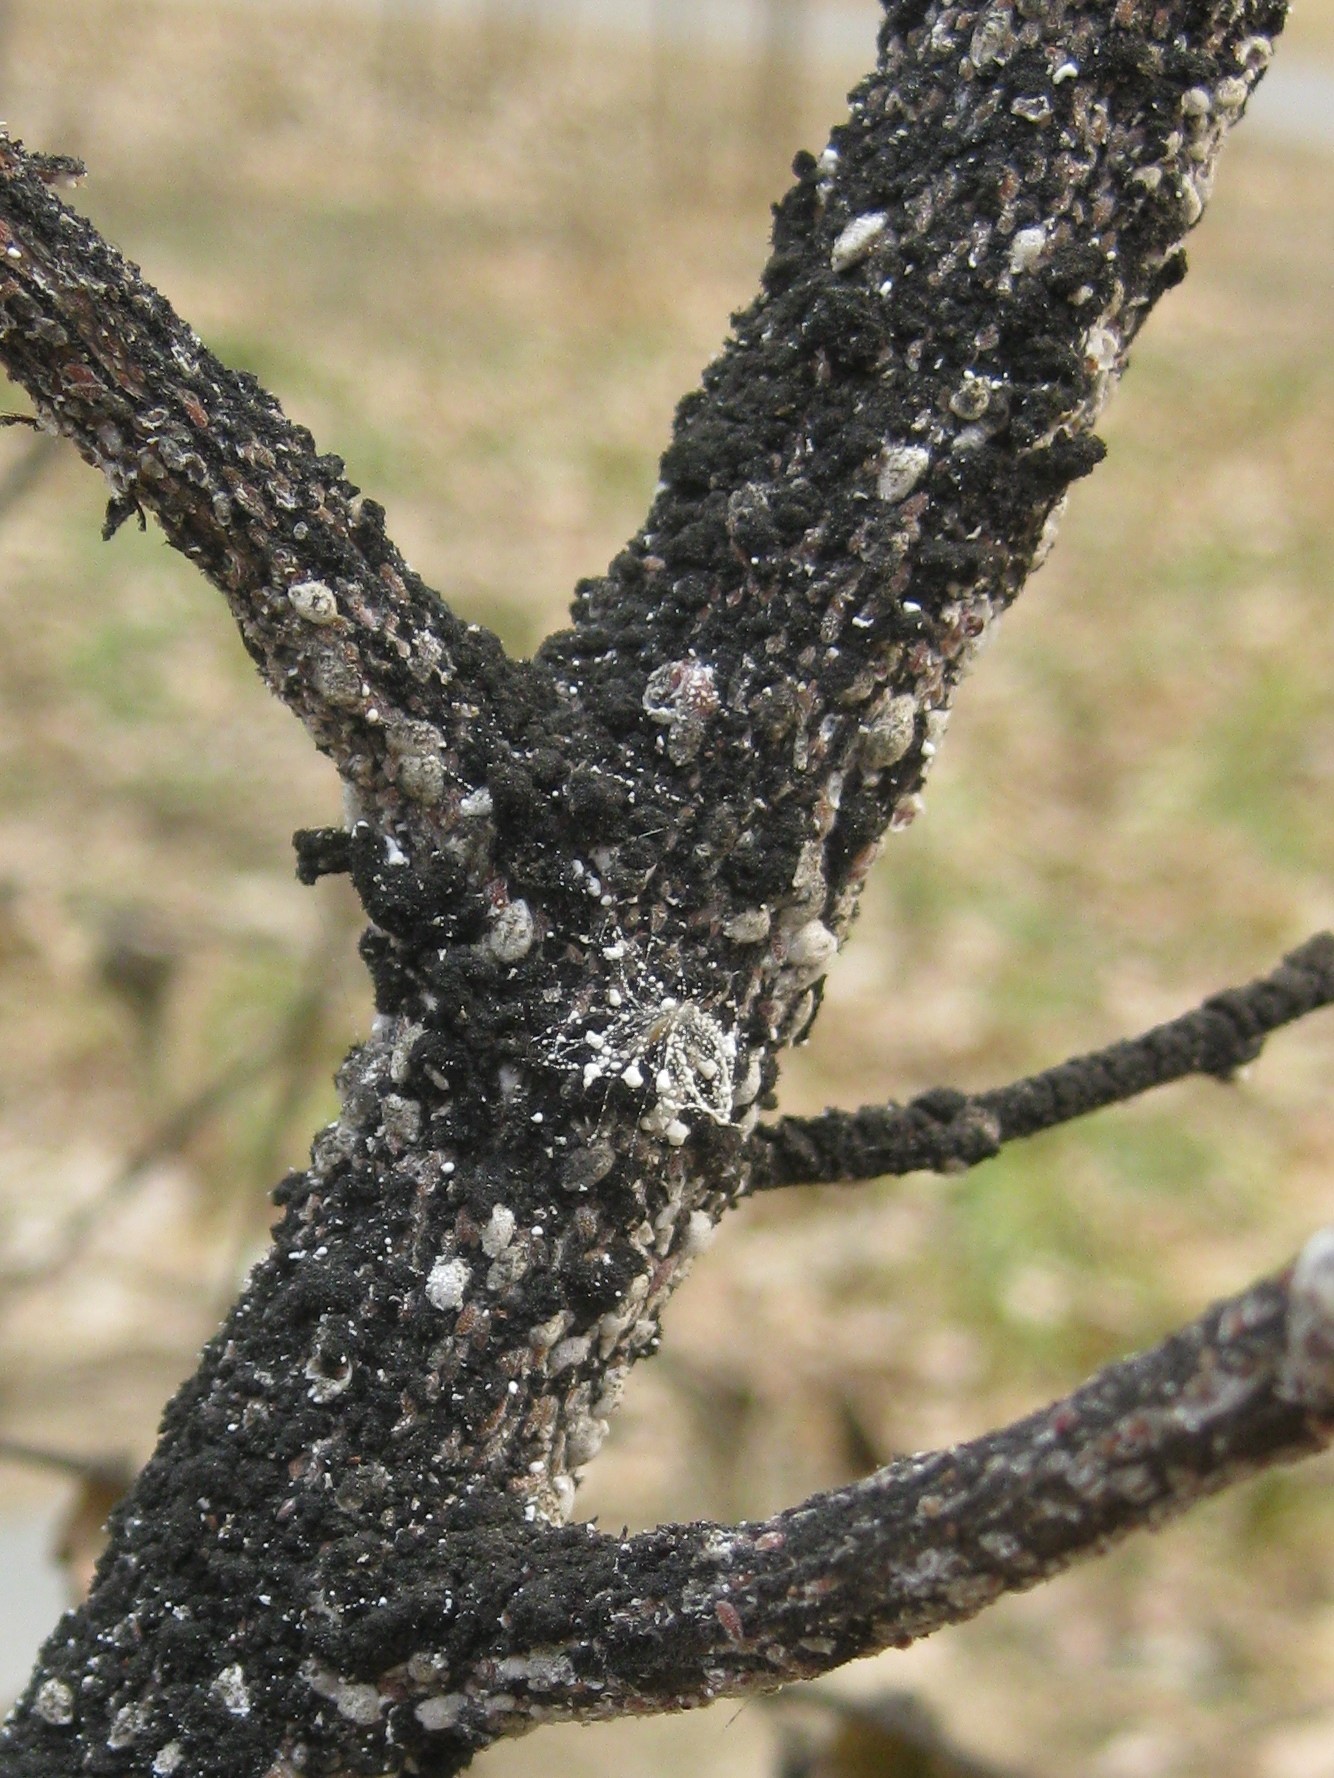
While the scale does not outright kill the trees, it lessens their landscape value and can reduce flowering. And like other scale, CMBS secretes lots of honeydew; black sooty mold then feeds and grows on the honeydew. The black sooty mold does not harm the plants directly, but it is unsightly and can interfere with photosynthesis if present on the leaves.
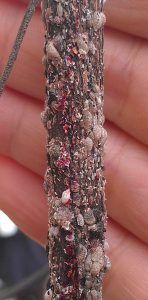
Crapemyrtle bark scale are white to gray and ooze pink when squished. Photo credit: Gary Knox, UF/IFAS. ,
Unfortunately, CMBS has also been found on a very popular native bush, American beautyberry, Callicarpa americana, and it is yet unknown whether CMBS will expand its host range to other plant species in our country. In Asia, this pest has been found on some economically important crops like pomegranate and persimmon.
CMBS is a tough insect to control. And it is best left to the professionals. Dr. Adam Dale, an entomologist at the University of Florida, recommends using pyriproxyfen (in the product Distance) or buprofezin (in the product Talus). These are insect growth regulators that have shown to provide great control of CMBS and other similar scale insects on trees and other woody plants. Although these products are not systemic, they are translaminar, which helps increase their control and reduce any non-target effects on beneficial insects like bees. Two applications 7–14 days apart are suggested. However, these products can only be applied by licensed pest control applicators.
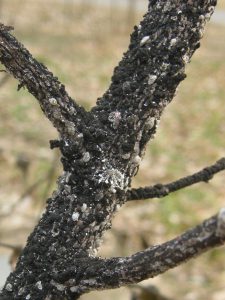
Severe infestation of crapemyrtle bark scale and sooty black mold. Photo credit: Gary Knox, UF/IFAS.
Systemic insecticide drenches are effective but pose a dangerous hazard to bees and other pollinators as the poison also gets into the flower nectar. The product labels prohibit application of these type of products to flowering plants for that very reason.
Routine close inspection of your crapemyrtle trees is critical for CMBS control. Early treatment will help prevent heavy infestations as seen in some of the photographs. When pruning your crapemyrtles, thoroughly clean your tools between plants to prevent any accidental spread.
Prevent this scale from coming into your landscape in the first place. Inspect all new plants you are considering adding to your landscape for any sign of CMBS or other insect or disease presence.
If you have any questions on making the correct identification of CMBS, or any other insect, contact your county extension office.
Lastly, consider reporting the presence of this new scale to enable researchers to track its spread.
For more information:
Stop CMBS Website
UF/IFAS Featured Creatures: crapemyrtle bark scale
by Ray Bodrey | May 6, 2021
The Annual Tupelo Honey Festival will be held Saturday, May 15th from 9 am – 4 pm central time at Lake Alice Park in Wewahitchka. This is your chance to take part in a local treat. Area honey producers will be on hand to sell their honey in a variety of sizes. There will also be food, art and crafts, and live music.
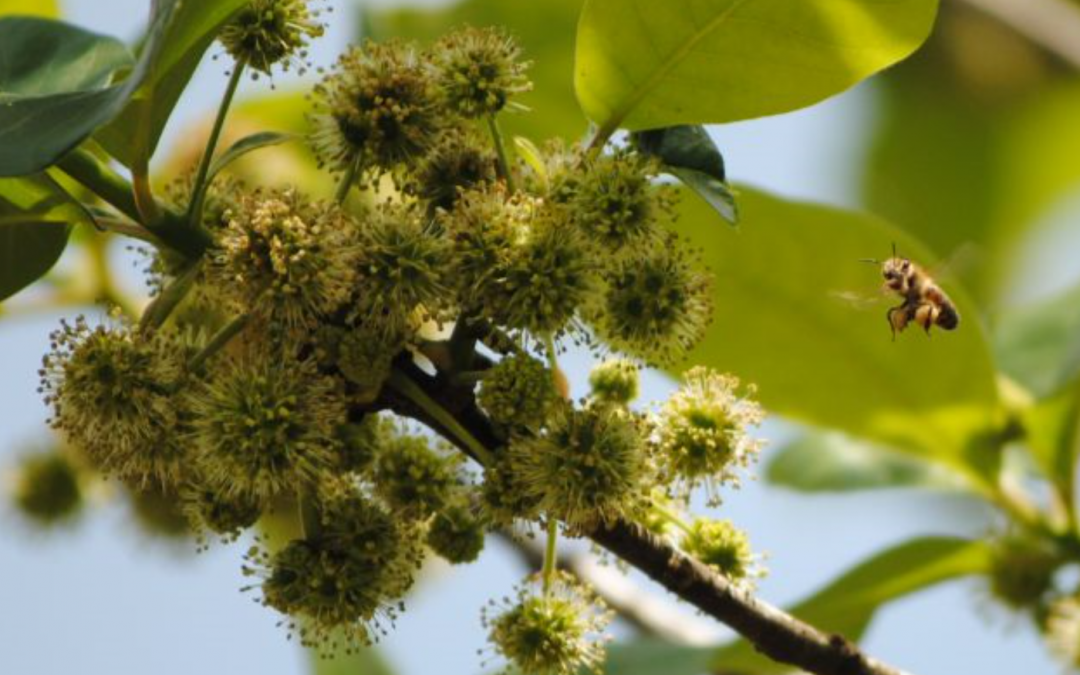
For decades, tupelo honey has been synonymous with Gulf county. The nectar from the tupelo gum tree (Nyssa ogeche), produces some of the finest honey in the world. The common name “tupelo” is derived from language of the Muscogee Nation, also known as the Creek Indian Nation. The meaning of the word is “swamp tree”, as this tree flourishes in areas of wet soils and seasonal flooding. Gulf County is home to one of the largest tupelo forests on earth.
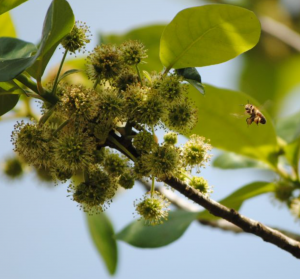
A honeybee visiting tupelo blossoms. Photo Credit: Gulf County Tourist Development Council.
The tupelo bloom season lasts from approximately mid-April to the end of May. This is an anxious time for beekeepers. Tupelo blooms are very temperamental and delicate in nature. For this short period, beekeepers hope for little wind or rain and no cold temperatures, as any of these factors can make or break tupelo honey production. Regardless of seasonal impacts, the demand for Gulf County’s tupelo honey never subsides.
Please visit http://www.tupelohoneyfestival.com/ for more information on the festival. For more information on beekeeping, contact your local county extension office.
UF/IFAS Extension is an Equal Opportunity Institution.
by Julie McConnell | Apr 29, 2021
National Arbor Day is April 30 and although we celebrate Florida Arbor Day in January you may find yourself planting trees right now as Spring Fever sets in. It is a little easier on the tree and the gardener caring for it to plant in the winter, but you can plant year-round if you implement proper care to ensure good establishment.
The most common problems with trees we see at our help desk are related to incorrect installation and establishment. Number one is incorrect planting depth and number two is incorrect watering during establishment. This article will cover a few pitfalls to avoid so that whenever you plant your tree you will increase your likelihood of success!
Planting Depth
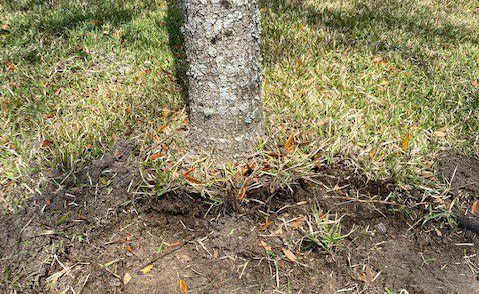
It is important that tree roots are not too deep so that they can adequately access both water and oxygen needed for survival and root generation. A good rule of thumb is to plant new trees with 10% of the root ball above the natural grade. Also check to be sure the root flare is exposed in trees that have this feature. This may require removing some soil from the top of the root ball as it came from the nursery.
A few common mistakes that lead to incorrect planting depth are listed below:
- Leaving burlap and straps on the top of root balls of balled-and-burlap (B&B) trees
- Piling soil on top of the root ball
- Adding mulch to the root ball
- Laying sod on top of root ball
- Planting on a slope where soil can erode onto the root ball
- Planting level with grade – trees settle and bark mixtures decompose which cause the tree to become deeper than originally planting
- Creating a bed with added soil around trees (this is more common on mature trees and should be avoided)
When planting a tree, measure height and width of the corrected root ball. Dig the hole 90% as deep as the height and 125-150% as wide as the root ball. There is no need to add fertilizer or amendments to the hole, simply plant into the native soil and water appropriately.
Watering Until Tree is Established
The establishment period is the time it takes for a plant to create enough functional roots to adequately uptake water and nutrients needed to survive with little to no supplemental irrigation. In general, smaller/younger plants establish more quickly than larger ones so there are benefits to starting small when choosing trees.
Soil texture, rainfall, time of year, and tree species will factor into how long it takes for a tree to become established but there are a few guidelines to help you plan. Irrigate 2-5 gallons of water per inch trunk caliper during establishment period. Hint- your turfgrass irrigation output is not sufficient for optimum tree root growth. The chart below offers a range of irrigation frequency based on size of tree at installation and whether your goal is for fast growth or just enough to survive.
| Size of Nursery Stock |
Irrigation Schedule for Vigor |
Irrigation Schedule for Survival |
| Less than 2” trunk caliper |
Daily: 2 weeks
Every other day: 2 months
Weekly: Until established |
Twice weekly for 2-3 months |
| 2-4-inch trunk caliper |
Daily: 1 month
Every other day: 3 months
Weekly: Until established |
Twice weekly for 3-4 months |
Gilman and Sadowski. “Planting and Establishing Trees.” This document is ENG 1061, one of the Urban Forest Hurricane Recovery Program series of the School of Forest Resources and Conservation and the Environmental Horticulture Department, UF/IFAS Extension. Original publication date September 2007. Reviewed February https://edis.ifas.ufl.edu/pdffiles/EP/EP31400.pdf