by Daniel J. Leonard | Jul 3, 2024
While the Florida Panhandle isn’t considered a true tropical climate, now that the summer rains have started, it sure feels tropical outside. To create high performing colorful containers in these conditions, it’s wise to pick plants that hail from tropical climes – one of my favorites is Crossandra (Crossandra infundibuliformis).
Native to tropical Sri Lanka and India, Crossandra is built for hot, humid conditions. An evergreen subshrub growing about 3’ tall in its native range, Crossandra sports glowing orange flower clusters held high on stems that rise above deep green, glossy foliage – a very striking combination. These showy orange flowers arrive once temperatures heat up in the early summer and continue emerging en masse until cool nights stop the show in fall. While deadheading spent flowers can enhance Crossandra’s free-flowering nature, I haven’t found it totally necessary to ensure consistent flowering. In addition to being beautiful, Crossandra’s flower clusters are also attractive to a wide variety of pollinators, including butterflies and dragonflies.
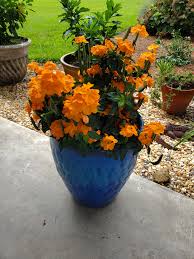
Crossandra growing in partial shade on a patio. Photo courtesy of Daniel Leonard.
Adding to Crossandra’s appeal, the species couldn’t be easier to grow if you give it the right conditions. Crossandra prefers to be sited in areas that receive ample sunlight but also get a reprieve from the hottest afternoon rays. This year, I grew one on a deck that receives sun from about 10 am – 2 pm and is then provided filtered shade from a large tree the rest of the afternoon; these conditions seem to be ideal. Crossandra performs best in moist, well-drained soil, making potting mix an excellent option. Daily watering in the summer combined with our (hopefully) frequent rainfall in July and August keeps it wilt-free. I also apply slow-release fertilizer at planting and then supplement with liquid fertilizer periodically throughout the summer. This, combined with regular irrigation, promotes healthy, vigorous growth, and allows the flower show to continue uninterrupted until cool weather finally draws the curtains.
Crossandra is a versatile plant in container gardens, shining in either the role of filler in larger containers or as a solo specimen plant in its own container. In mixed containers, play off of Crossandra’s orange flowers with partial sun foliage plants like Coleus, Elephant Ears, or Hawaiian Ti, or flowering annuals like Browallia ‘Endless Illumination’, Torenia (Wishbone Flower), Blue Daze, or Purple Heart Plant. While Crossandra does well in mixed containers, as a UF graduate, I prefer to stick it in my favorite blue pot for an orange and blue Gator themed solo container!
Regardless of how you choose to incorporate Crossandra into your garden’s design, it will reward you with summer-long orange flowers in a low-maintenance package. Simply place it in morning to early afternoon sun, give it ample water and adequate fertilizer, and enjoy this Florida Friendly Landscaping approved species. Plant one today!
For more information about Crossandra or any other horticultural topic, contact your local UF/IFAS County Extension office.
by Joshua Criss | Jun 13, 2024
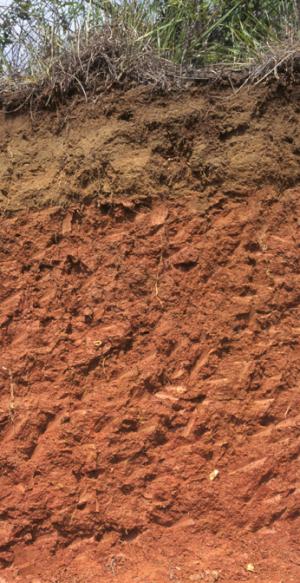
Understanding soil composition is crucial for successful gardening. Soil is the slow interaction of parent material with regional climates, topography, and soil biota over millennia. The breakdown of parent materials results in layers of material called horizons. A subset of soil science is dedicated naming soils with similar horizon development. In North Florida, three of these soil types predominate. Near the northern border, we find ultisols, these sandy soils have a higher clay content and are suitable for row crops with proper management. Through the center of the Panhandle counties, you’ll find entisols. These are sandy and undeveloped, thus requiring close attention to irrigation and fertilization. Finally, by the coast are spodisols rife with mineral pockets and known for being waterlogged. All are usable for plant growth, and with little knowledge of cultural practices can make your landscape thrive.
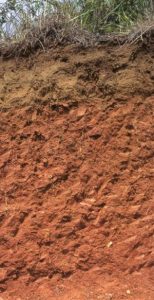
Soil horizons of ultisols
Photo: USDA/NRCS
The Panhandle Parent Material
In Florida’s panhandle, the parent material stems from the Citronelle formation transitioning into the Miccosukee formation around Gadsden County. The Citronelle formation consists of unconsolidated quartz (sand), gravel, clay, and mineral deposits from rock formations in the Appalachian Mountains. Clay associated with this formation is the basis for the ultisol concentrations in the northern portion of the state. Alluvial flow or deposits left by rivers washes the sandier particles down into the center portions of the panhandle, and siltier particles flowing to the coast depositing minerals as they settle. The Miccosukee formation is similar but has different textures and particle sizes in the quartz deposits. Knowing where your soils originate will help you understand two major aspects with regard to soil’s physical properties. Those being texture and aggregation.
Soil Texture
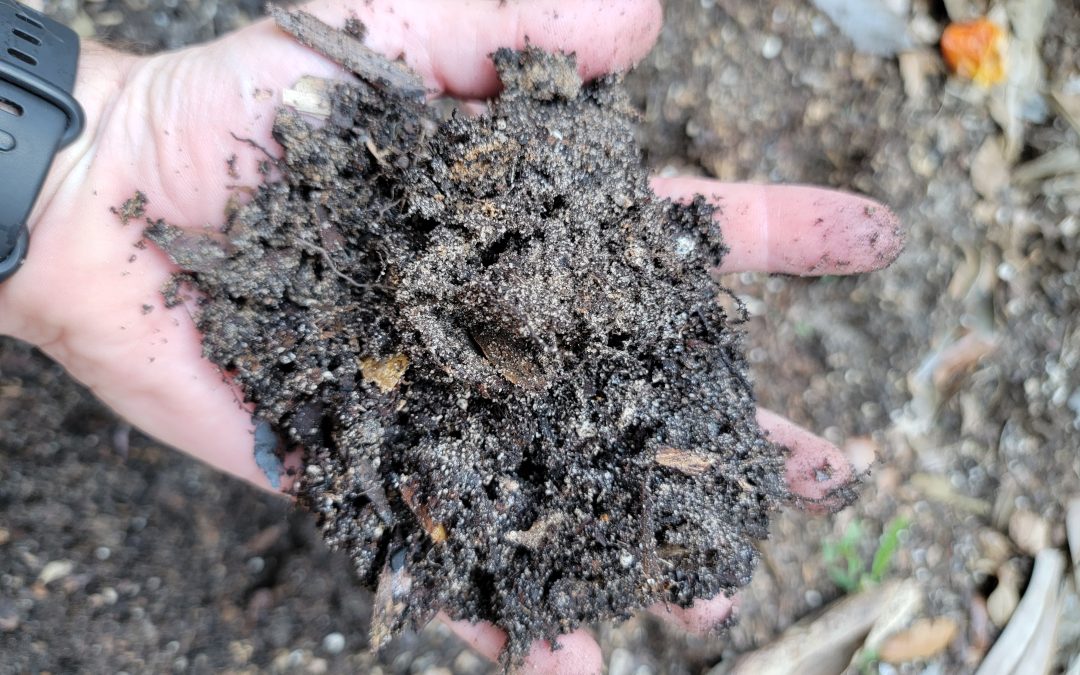
Soil, a blend of sand, silt, and clay, is not just the ground you walk on but the very foundation of your garden. These components, deposited in your location through natural processes (as outlined above), have been blended to create a soil unique to your garden. Sand is the largest of these particles, with silt considerably smaller and clay smaller still. This size difference, means there will be air spaces known as pore space within what appears to be a consistent material. These spaces comprise approximately 45% minerals, 25% air, 25% water, and 5% organic matter. Higher sand soils have larger pore spaces which facilitates water flow through that soil profile. What that means for your soil is less water holding capacity and higher losses of nutrients. In contrast, higher clay percentages have smaller pore spaces which coupled with charges at the atomic level are better at holding onto water and nutrients. Understanding your soil texture is key to determining the right timing for irrigation and fertilization while providing insight as to potential aggregation of your soils.
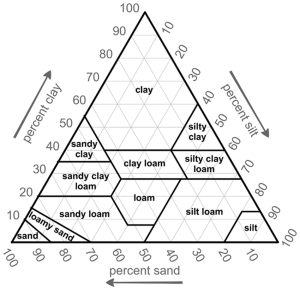
Soil Texture Triangle
Photo: USDA
Aggregation
Soil structure is an often overlooked aspect of garden management. Well structured soils resist compaction, hold on to water, and retain plant nutrients. They also provide growth space for roots which have access to the resources they need to fuel healthy plants. Conversely, poor soil structure makes your garden more susceptible to ponding and inhibited plant growth. Soil aggregation is what provides this structure. Aggregation is the conglomeration of soil particles bound through chemical bonds and physical forces bolstered by soil biota. Aggregates form through a few mechanisms both inherent and dynamic. Inherent factors include clay content which form and break with changing moisture levels. Other inherent factors include those minerals inherently present in the soil such as calcium. Dynamic factors include levels of organic matter, and those fauna present in that soil.
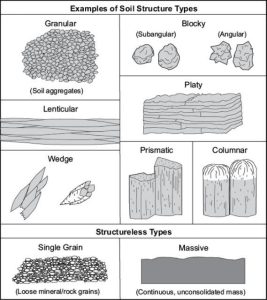
Types of soil structures
credit: USDA/NRCS
Maintaining Healthy Physical Structures
Many Florida soils are poorly structured which is why they need to be properly managed for homeowners to have successful gardens. Before you can begin to improve your soil, you must understand your soil’s story. Start with testing for compaction by pressing a screwdriver into the ground. If this is difficult, you need to take action to relieve the situation and increase the availability of air in your root zone. Tillage is a good way to do so, but be wary as excessive tilling can lead to higher compaction problems long term. Look into conservation tillage as a methodology to avoid this problem. Perform a jar test to understand the texture of your soil and thus its propensity to develop aggregates. For high sand soils, add organic matter to improve structure. Be careful to add smaller amounts at a time as organic matter has an inherent nutrition load and too much may begin to limit nutrients. Cover crop strategies are a great way to add organic matter while keeping soil covered during non-active growth periods.
Soil improvement and management will take multiple growing seasons. Stick to it and monitor your soil to keep your gardens healthy and thriving. For more information on soil, see these Ask IFAS documents, or contact your local extension agent for additional information on this and any topic regarding your gardens and more.
by Daniel J. Leonard | May 9, 2024
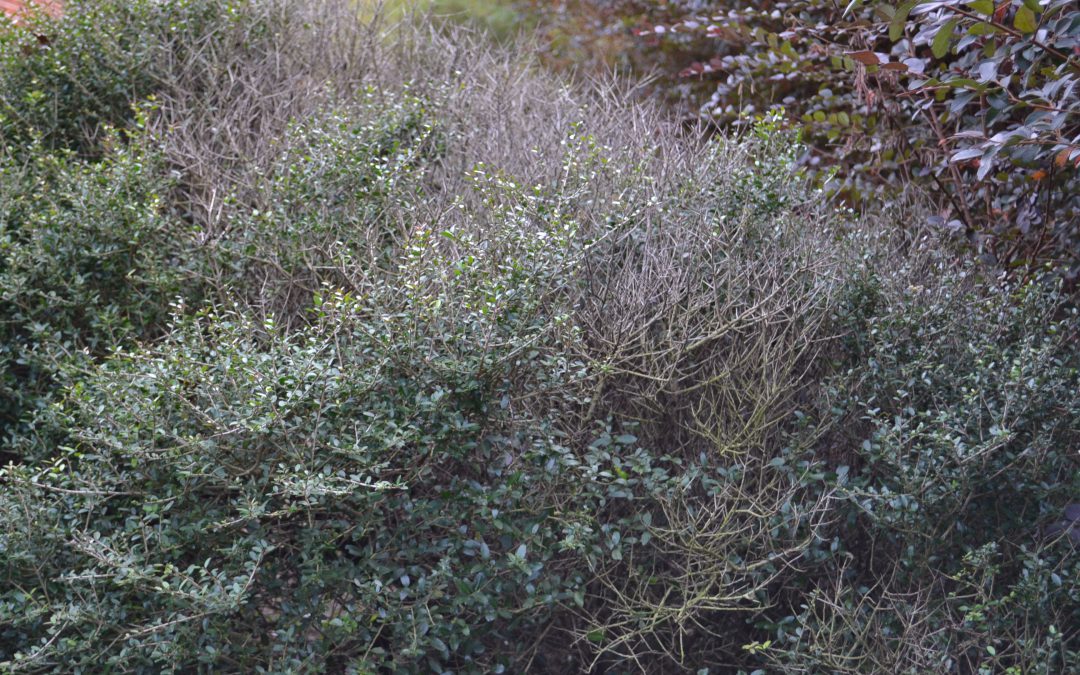
In the last couple of weeks, I’ve had multiple questions regarding trees and shrubs that aren’t looking too hot. These types of calls are common this time of year – it has gotten hot and dry, and plants have fully emerged from winter, causing issues that have been hiding under the surface during the dormant season to manifest as crown or branch dieback. While there are a wide variety of things that can cause dieback, in most cases a little detective work can help pinpoint the issue. Let’s look at a few of the most common causes of dieback and some corrective measures that may help restore the plants to health.
The first thing to do when you notice a plant in decline is nothing. Don’t try and oversaturate it with water. Don’t run out and dump a bunch of fertilizer around it. Many times, these panic measures exacerbate the stress the plant is already under. Instead, I encourage you to give us a call at your local UF/IFAS County Extension Office. We can likely help identify the cause of the problem through a site visit to your property or by you sending us diagnostic photos of the plant with a description of what’s been going on with it – the more information you can provide about the plant and the management practices it has experienced, the better (you can email diagnostic images/information to d.leonard@ufl.edu).
The most common cause of tree/shrub dieback that I see arises from improper planting practices. Most landscape plants should be planted at or just above the surrounding soil level, preferably where the topmost root arises from the trunk. To accomplish this, planting holes should be dug slightly shallower than the rootball’s height and about twice as wide. Planting any deeper than that is probably too deep and can cause problems like trunk and root decay, which lead to crown dieback. Unfortunately, once a plant is planted too deep, it cannot be corrected other than digging up and replanting at the proper depth, which may or may not be possible depending on the size of the tree. Another common issue that can arise after planting is girdling roots. This occurs when plants are grown in plastic containers and develop a root system that circles the inner wall of the pot. If not trimmed, the plant’s root system will continue to grow in this manner, eventually encircling the plant’s trunk, cutting off water and nutrient flow, and leading to crown dieback. Fortunately, this condition can be prevented by cutting, removing, or redirecting these roots at planting.
The next most common cause of plant dieback occurs due to soil disturbance by people. It’s easy to forget but the root zone of trees and shrubs can reach out several times farther than the plant is tall and is easily damaged. Disturbances to the root zone from digging or trenching near trees or compaction from prolonged vehicle travel over the area cause damage that might be slow to appear but can lead to plant decline. If you are doing construction or building near a shrub or tree, try to keep digging machinery as far out of the root zone as possible and avoid repeatedly parking or driving vehicles over the root zone area. Like below ground root damage, trunk damage that occurs from injury by string trimmers, mowers, or animal feeding activity can all disrupt the flow of water and nutrients in plants and prove deadly. There is no cure for this type of damage, so employing physical barriers to prevent damage is key.
The last major stress is environmental in nature and is caused by a water imbalance – either too much or not enough. Dry soil conditions during the planting and establishment phases (first several years after planting) should obviously be avoided if possible – keeping the developing rootzone moist and allowing plant roots to establish in their native soil is critical. Too much water can also cause problems for trees planted in poorly drained soil. Excessive moisture leads to root diseases, which ultimately presents as dieback in the canopy. If planting in an area that tends to stay wet, select a species of plant adapted for that sort of site – some species are more tolerant of “wet feet” than others. While many people expect disease and insect damage to be the cause of an unhealthy plant, they’re often not the biggest culprit and, if they occur at all, are generally secondary to one of the above issues.
For more information about crown dieback or declining landscape plants, contact your local UF/IFAS County Extension office. Happy gardening!
by Joshua Criss | May 2, 2024
Overview of Daylilies
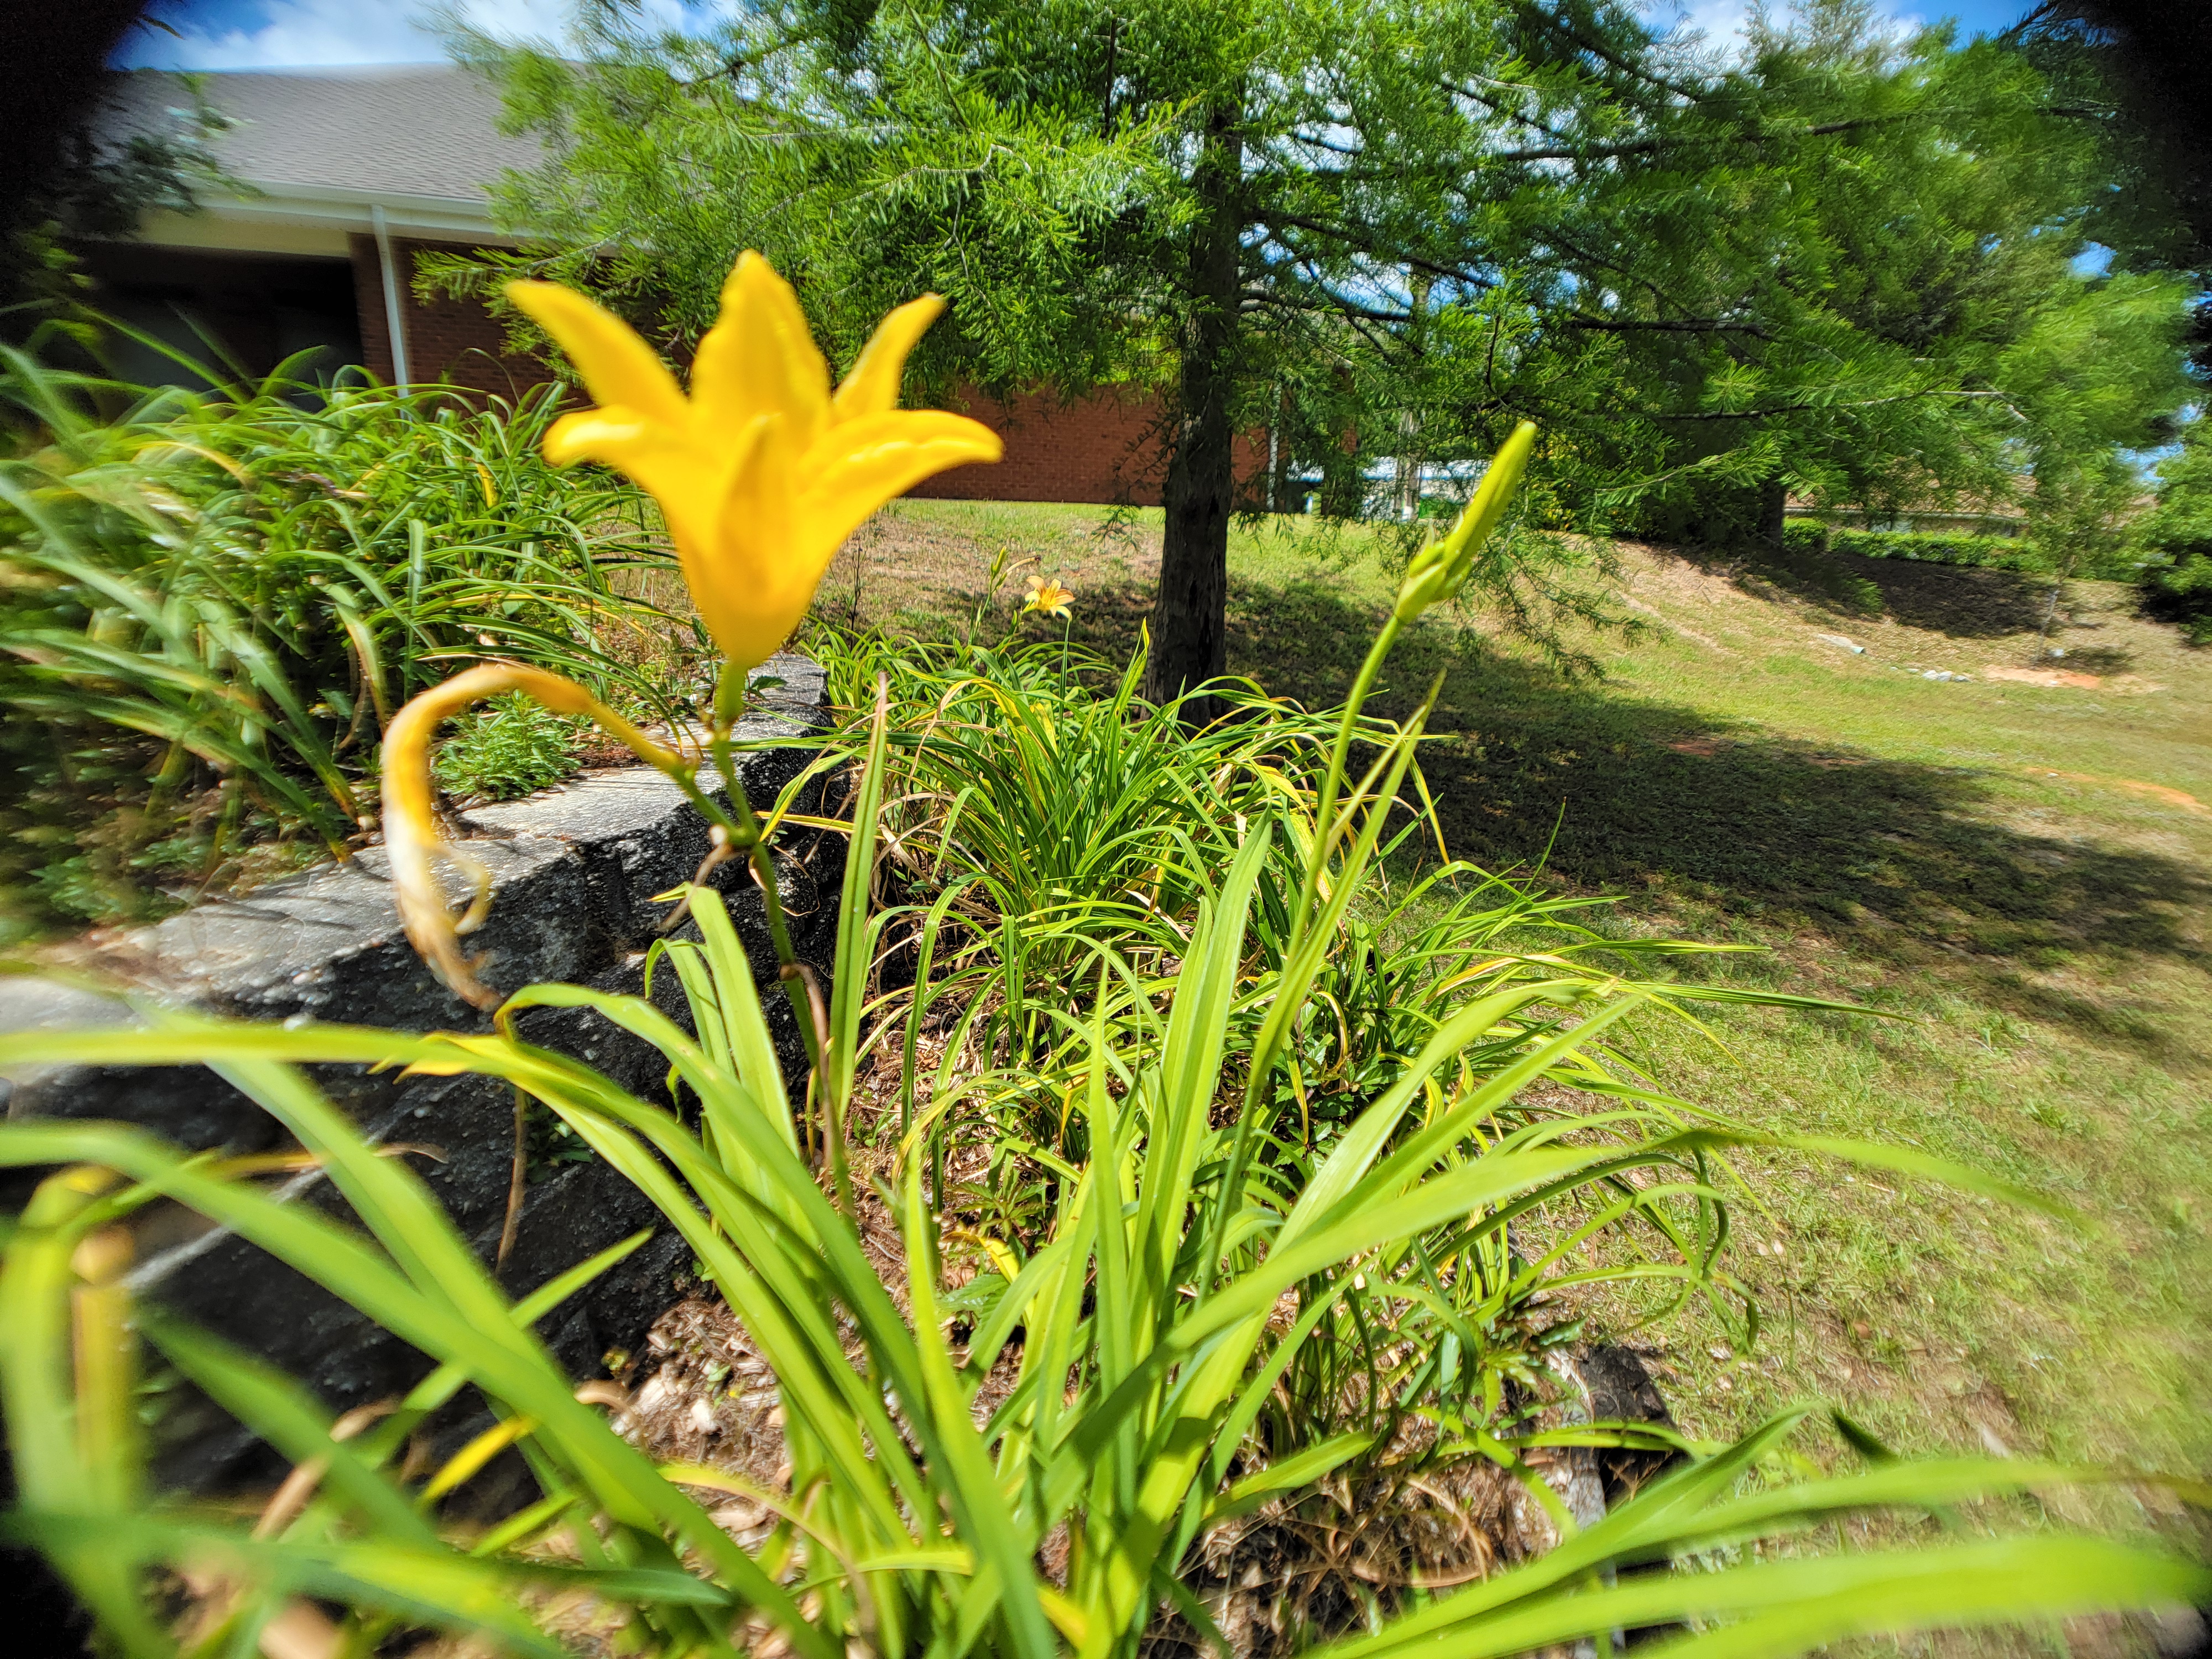
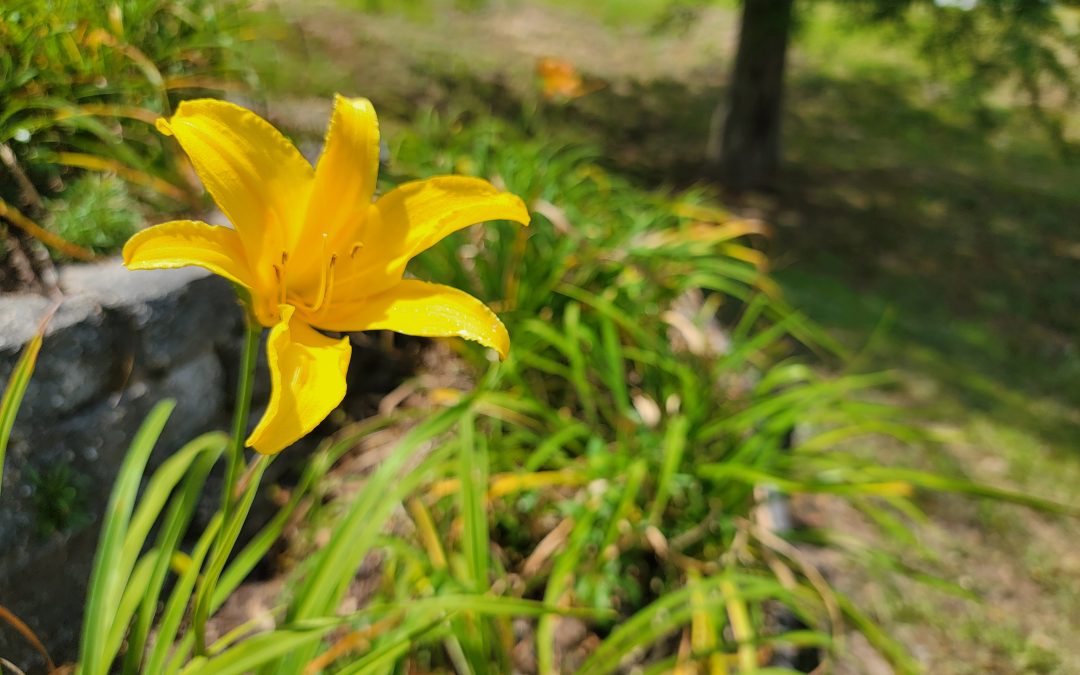
Spring has begun, and the flowers are making their debut en masse. The daylily is an exceptionally versatile plant that grows in various colors, shapes, and habitats (Hemerocallis spp.). This plant garners its name from a combination of Greek terms meaning “beauty for a day,” given the tapestry a mass planting provides, they live up to that name. These plants tend to bloom repeatedly for 4-7 weeks, though each individual flower only lasts one day. The time of year flowering begins varies by cultivar, but typically, they may be seen beginning in March, with later bloomers starting around mid-May. Add to their beauty that they are also edible, and you have a plant that can’t be beaten.
UF/IFAS Photo: J. Criss
These perennials are widely available as bare-root or potted plants. Both may be planted in Florida year-round, but planning in spring or autumn will increase success. Inspect roots before you plant them, removing any that are circling or damaged. Plant with the crown at ground level, much like a tree, and keep the soil moist until the plant is established. Though drought tolerant with deep roots, you’ll still want to apply mulch to retain moisture. Fertilizers may be added in spring, summer, and fall based on soil testing. Scouting this planting is important, but insects rarely cause lasting damage. They may be propagated vegetatively or via seed. Vegetative propagation will become important as these plants fill in spaces over the years and will need to be thinned.
Uses in the Landscape
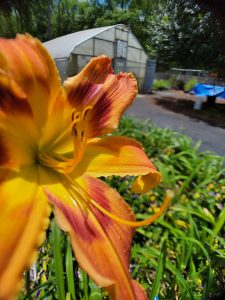
Thanks to the hybridization efforts of growers worldwide, daylilies are available in every spectrum of color and a variety of flower shapes. Daylilies are clumping plants with grasslike foliage and flowers on a scape that may reach up to 36 inches tall. They can be striking when planted in groups of 10, included in a mixed border, or used to highlight a specific area of your gardens. Because they are so varied, it is important to carefully consider the design elements of your landscape and the growing conditions of your landscape when selecting varieties. All cultivars will require some sun, so avoid heavily shaded areas.

UF/IFAS Photo: J. Criss
A Note on Color
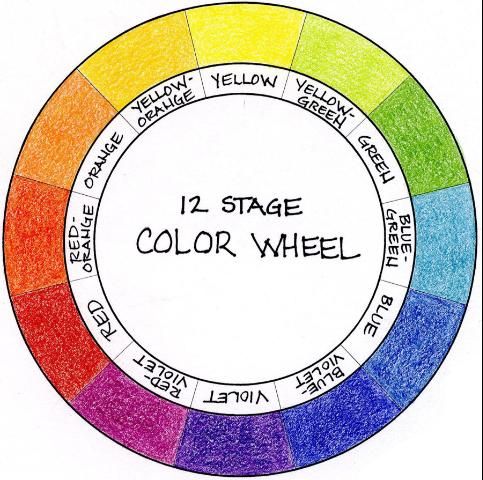
Your biggest concern when considering daylilies in the garden will be color. When it comes to landscape design, color integration has three main theories. The first revolves around monochromatic flowering. Simply put, except for the green foliage, all flowers in this type of garden will be one color. Certainly, daylilies fall into this category, which are often yellow and may be quite striking. The second theory on color in your garden spaces is an analogous scheme in which 3-5 colors on the color wheel are utilized to create continual flow. In this case, find daylilies with red flowers and pair them with violet or yellow flowers. The final theory on color use in gardens is a complementary scheme. In this instance, colors on opposite sides of the color wheel are utilized. The contrast created by this method can create a striking difference that draws the eye to a specific point. Keep in mind that these are all theories. Ultimately, it is your landscape, and you should use those flower colors which satisfy your sensibilities.

UF/IFAS: Gail Hansen
Daylilies are a wonderful plant for your landscape. Easy to grow with great variety, few others can compete with them. For more information, see this Ask IFAS document. As always, please contact your local extension agent for additional information on this and any topic regarding your gardens and more.
by Abbey Smith | Apr 5, 2024
Here in North Florida, it is not uncommon to see a few citrus trees in a residential landscape. With Florida being the second highest producing state of citrus, it is not out of the normal to see them when you are out and about. They are a great option to keep a lush green aesthetic in your yard. But, what other options are there for the homeowner that wants to add some edible diversity to their landscape? In this article we will be discussing a few of the many edible landscape choices that can add both diversity and a sweet treat to your yard.
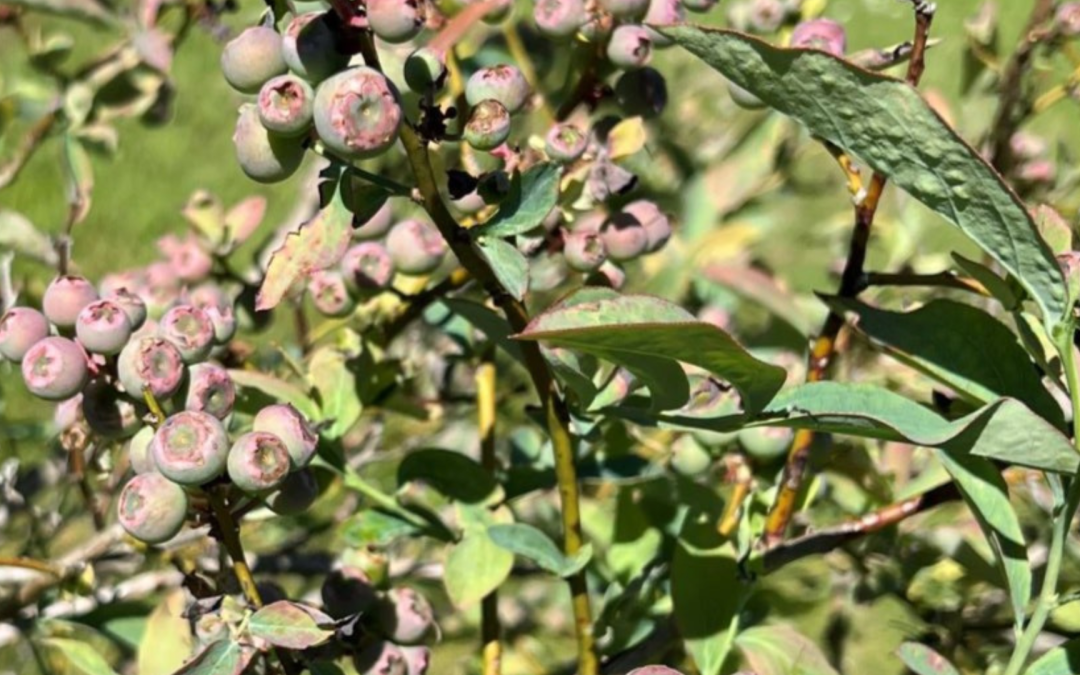
A popular edible landscape option is the rabbiteye cultivar of blueberry. The rabbiteye blueberry plant is considered easier to grow for the first time blueberry grower in comparison to the southern high bush cultivar. This cultivar thrives in acidic soils and requires a soil pH of 4.0 to 5.5. When planting, the use of pine bark mulch is a great organic method to satisfy the soil pH requirement. Mixing composted pine bark mulch in the soil and adding additional mulch after the bush is planted will add to the soil’s organic matter over time. Mulching also aids the establishment of young plants and moderates soil temperatures and weed control. For variety selection, mid-to-late season rabbiteye cultivars are best for Northwest Florida, as they are more cold tolerant and less susceptible to lose their flowers and young set fruit in late winter/early spring frosts. Common mid-to-late season rabbiteye’s are ‘Vernon’, ‘Brightwell’, ‘Powderblue’, ‘Tifblue’, and ‘Georgia Giant’. Because blueberry plants are not “self-unfruitful”, they will require more than one variety to cross-pollinate with in order to produce fruit. Two is great, but three plants will also encourage larger fruit set for you and your family to enjoy!
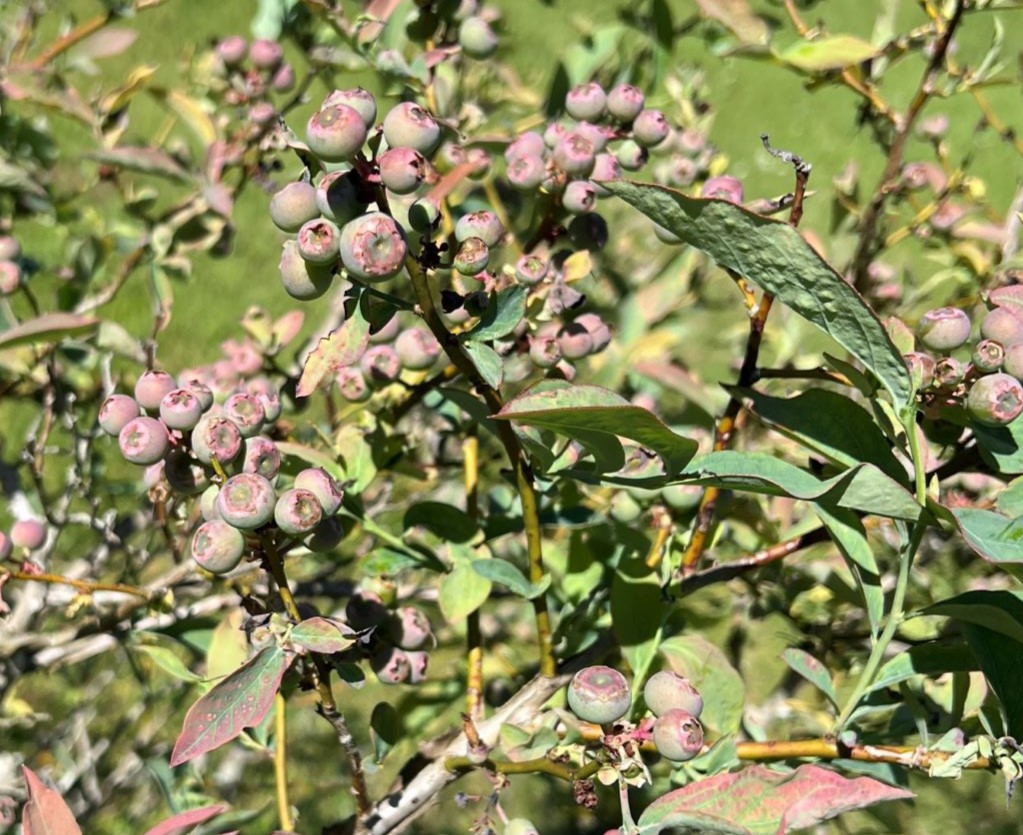
Blueberry Set Fruit, Jackson County Master Gardener Demo Garden
Another option that has steadily grown interest in the Florida Panhandle is the apple tree. There are two known cultivars of apple that are acclimated to the North Florida region due to their low chill hour requirement cold tolerance. This is the ‘Anna’ Apple and the ‘Dorsett Golden’ Apple. Apple trees will perform best in full sun locations of the yard and prefer a well-drained soil. The chilling hour requirement for these cultivars of apple are between 400-600 hours. You will begin to see the fruit ripen in the months of May to June. The ‘Anna” Apple has been compared to the well known ‘Red Delicious” that is best known in northern region of the United States. Planting should occur in early spring and planting holes should be big enough that the root system does not become over crowded from limited expansion space. There is no UF/IFAS fertilizer recommendation for the apple tree because it is not commercially produced in Florida, but generally a fertilizer such as 10-10-10 can be used.
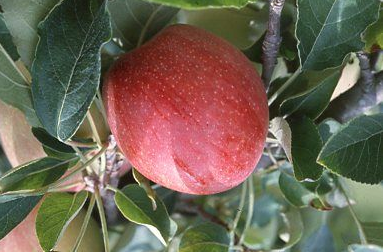
‘Anna’ Apple, Photo Credit: UF/IFAS NFREC
The blackberry is a great choice as well for an edible landscape. There are several blackberry species that are native to Florida. Most blackberries produce thorns on their shoots, but many new cultivars have been developed as thornless. When selecting your planting location, low-lying areas should be avoided to deter from over-flooding of your plants. Blackberries thrive best in well-drained soils and high air flow and should be planted between December to February. Pollination of the plant is very important to ensure the quality and quantity of the fruit produced; blackberries range from self-fruitful to self-unfruitful depending on the cultivar. ‘Apache’, ‘Flordagrand’, and ‘Choctaw’ are a few examples of many blackberry cultivars available. The first year after the blackberry has been established, it will only produce new shoots with no berries. These shoots are called primocanes. The second year, berries will produce on these shoots and then be called floricanes. It is important to cut the tip off the primocanes after they have reached about 3 ft in height to encourage the shoot to create lateral branches. Floricanes will die off after they have produced fruit. Trellises can be used as well to encourage the plant to grow upright and off the ground.
For more information, please use the following links:
https://edis.ifas.ufl.edu/publication/MG359
https://edis.ifas.ufl.edu/publication/MG368
https://edis.ifas.ufl.edu/publication/HS104