Some years it can be hard to tell that the season has shifted from winter to spring in Northwest Florida, but this year we are seeing ideal temperatures for summer vegetable gardens as we shift into April. Soil temperature is affected by ambient temperature and the last few weeks of warm weather has helped to make the ground more conducive to germination of warm season seeds and support growth of transplants. If you have not started your garden yet, do not despair, you still have time to get things growing!
Below is a short list of ideas for your vegetable garden, and you can find more detailed information in the Florida Vegetable Gardening Guide.
Direct seed (plant seeds directly into the garden instead of transplant) recommendations:
The Northwest District Agents discussed foodscaping by answering questions submitted by program participants. Included are the panelist’s answers along with supporting publications for the questions. You may view the session on YouTube at https://www.youtube.com/watch?v=wEMXmaZqRTU
When do I start spring vegetable garden? Still follow the guidelines for warm season edibles. Many seeds are started earlier (inside in January/February) and outside (now through April). For established landscapes with large trees, direct sowing is not the best amongst all the roots. Publication: What to Plant Month by Month https://gardeningsolutions.ifas.ufl.edu/plants/edibles/text-version-of-what-to-plant-by-month/
Suggestions for only 4-6 hours of sunlight in an oak tree hammock. Bell peppers can grow in some shade in containers or in the ground. Leafy lettuces for the cooler months. Publication: Peppers in the Shade, https://edis.ifas.ufl.edu/publication/HS368
What herbs work well mixed into the landscape? Many will work but look for those with essential oils such as thyme and rosemary. Mint is good in a container. Add a bay laurel tree for a evergreen selection.
Publication: Herbs, https://gardeningsolutions.ifas.ufl.edu/plants/edibles/vegetables/herbs/
What is the best citrus for North Florida? Satsuma would be a cold hardy selection with delicious fruit. Owari and Brown Select grow well in Panhandle. Tangerine and Meyer lemon is intermediate in cold hardiness. Start fruit in about a year but remove those early to but energy into the tree. Look for harvesting fruit in about 3-5 years. Look at our citrus publication for citrus fertilization with a fertilizer that contains zinc and iron.
Soil test to match plants with the right locations. Publication: The Satsuma Mandarin, https://edis.ifas.ufl.edu/publication/CH116
What fruit trees can I grow? Choose a variety adapted to our area. Peaches, pears, plums, some citrus, Pineapple guava, Loquat. Choose ones with chill hours for our area. Look at Auburn and Georgia selections rather than Florida selections which are more adapted to central and south Florida. Publication: Dooryard Fruit Varieties, https://edis.ifas.ufl.edu/publication/MG248
What about companion planting? One plant will benefit another – attracts beneficials, provides chemicals for a purpose. Use a trap crop that attracts insects to catch them before they move to your desirable fruit.
Marigolds is an example of use around some edibles to reduce nematodes. Publication: Companion Planting, What is It?https://nwdistrict.ifas.ufl.edu/hort/2023/02/21/companion-planting-what-is-it/
What vegetables can I grow on a trellis? Cucumbers, squash, passionflower, pole beans, indeterminate tomatoes benefit for a trellis. Provides shade for ground plants in heat of summer.
Publication: Trellises and Cages for Vegetable Gardens, https://extension.umn.edu/planting-and-growing-guides/trellises-and-cages
I need to add soil to my native/food garden. What are considerations? Sandy soils may need some amendments. Compost should be mixed in and not grow straight in compost. Maybe add ½ inch.
Soil test first so you don’t add too much nitrogen through amendments. Publication: Soils and Fertilizers, https://sfyl.ifas.ufl.edu/lawn-and-garden/soil-and-fertilizer/
What vegetables grows among pine trees and cherry laurel trees? This environment may have a lower pH. Sweet potatoes may work well if you can bank up hills for planting the potatoes.
Make a pine straw bed too to plant sweet potatoes.
Publication: Sweet Potatoes, https://aggie-horticulture.tamu.edu/vegetable/wp-content/uploads/sites/10/2010/10/EHT-026-Easy-Gardening-Sweet-Potatoes.pdfGrowing Miss Figgy and how to fertilize a kumquat tree growing in a large pot?Fruit tree selections that are dwarf may work better and be prepared to up pot. Watering and fertilizer will have to be managed carefully in the container environment. Video: Small Edibles for Small Spaces,https://www.youtube.com/watch?v=3oVTBqs3I44
I have 3-4 blueberry bushes and they are 2-4 years old and haven’t fruited. What is wrong? Know the cultivar so you are sure they have a cross pollinator. Need the right conditions too. Blueberries set in the fall so if fall pruning, you may have cut off flowering structures. Soil pH is critical. Blueberries like acidic soil and they will struggle in higher pH soils. Publication: Blueberry Gardener’s Guide,https://edis.ifas.ufl.edu/publication/MG359
How do I grow lavender in the landscape? Lavender likes low humidity and drier conditions. Soil should be well drained and plants need good air circulation. Maybe try Phenomenal lavender. Grow in a pot that is very well drained and don’t amend soil when planting in the ground. Prune as needed to open up plant. Publication: Lavender, https://edis.ifas.ufl.edu/publication/FP337
Which apple trees grow best in North Florida? You can grow a tree but it does not produce well due to lack of proper chill hours. Try the Shell apple which is more adapted to north parts of the counties.
Our area may get 500-600 hours of chill generally. Publication: Dooryard Fruit, https://edis.ifas.ufl.edu/publication/MG248
How to protect plant from insects without pesticides, including squirrels? Reduce stressed by planting in the right spot and providing care. You will also have many diverse plantings in a foodscape to allow beneficial to help manage pest. Monitoring the garden is very important to catch problems early and physically remove. Consider safer options when pesticides are needed that are labeled for food crops.
Might use some screening for small mammals and fencing for large animals. Motion activated sprinklers and scare devices such as ribbon, foils. Chemical repellents that contain capsaicin. Publication: Natural Products for Pest Control,https://edis.ifas.ufl.edu/publication/IN197
What are the most common vegetables for small spaces?
Some plants will need at least 12 inches of depth such as tomatoes. Lots for winter edibles do well in small spaces and containers. Consider a patio version of the plant. There are small selections of Pineapple guava and Pomegranate although they may produce smaller fruit.
How easy is it to grow in containers?
You can grow in the ground with good soil and if you can work with plants on the ground.
Containers allow you to create the right soil environment easy. You do have to manage water carefully as the heat builds up. Publication: Growing Vegetables in Containers,https://gardeningsolutions.ifas.ufl.edu/plants/edibles/vegetables/growing-vegetables-in-containers/
What are the best tomatoes for the area? Determinate and cherry will perform a little better. Choose early or mid producing plants to get fruit
Panelist’s favorites are:
Everglades and Sungold, Early Girl, Cherokee Purple is an heirloom
What edibles can handle full sun? Most fruit plants like sun since they are needing lots of energy. Water must be available when rainfall is lacking.
Three fruit trees have not produced in 3 years. What do we need to do? We really need to know what they are first. Do they need a plant for cross pollination? Are they flowering but not fruiting? How are they planted? Deep planting will cause a plant to struggle. Contact your Agent for more help.
Will glyphosate residues from a fall application carry over to spring? Chemicals are regulated extensively so follow the label directions for safety. There should not be residue issues with this pesticide.
Try to manage weeds with other techniques like mulches, handpulling, directed watering, soil solarization, etc. Publication: Use of Glyphosate and Herbicide Alternatives for Weed Control in Florida Landscape Planting Beds, https://edis.ifas.ufl.edu/publication/ep580
What are some native plants for foodscaping?
Blueberries, blackberries, Chickasaw plum, pecans, persimmons, Maypop, Mulberry.
Use native plants to attract animals such as beautyberry.
Where can we find compost? Cotton gin to get cotton gin trash will need to be composted first. Manure from equestrian centers or zoos. Make sure it is composted too.
Peanut processing facility.
Escambia County has bloom compost from ECUA.
Note: Amended soil with compost can be flammable. Ash can benefit garden if needed. Test soil pH first so you don’t add too much.
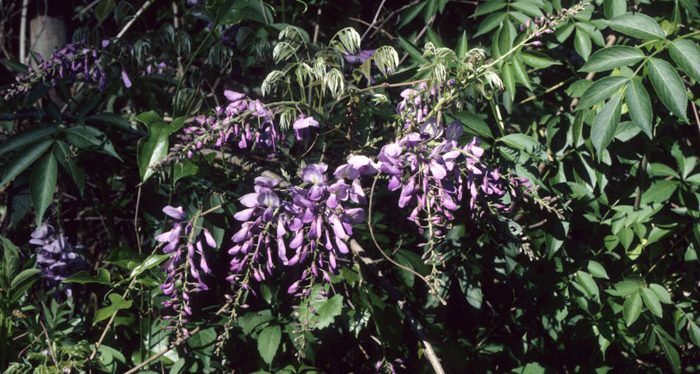
It’s hard to miss the clusters of lavender colored flowers that seem to be growing everywhere right now. That’s because they are an invasive wisteria, doing what invasive plants do best: growing everywhere.
Wisteria vine wrapped around tree trunk Photo: Tristan Hansford; Budwood.org
We often notice the invasive Chinese wisteria (Wisteria sinensis) and Japanese wisteria (Wisteria Floribunda) in the early spring because of their fragrant and showy flowers. Look closely, and you’ll see thick vines wrapped around trees, decks, and other structures. This dense growth outcompetes native plants by taking up available light, nutrients, and space. Eventually the vines can even kill the trees and damage structures they grow on.
Look-Alike Alternatives
If you love the look of the invasive wisteria, consider planting the native American wisteria (Wisteria frutescens) to achieve a similar look, without damaging structures or ecosystems. American wisteria is a native plant and a larval host plant for butterflies and moths, including the long-tailed skipper. It grows well in USDA zones 5 to 9.
American Wisteria Photo courtesy of Robert H. Mohlenbrock, hosted by the USDA-NRCS PLANTS Database / USDA SCS. 1991.
Invasive wisteria has larger and less dense flower clusters. Photo: UF/IFAS Lauren Goldsby
Invasive Wisteria Removal
Use the lavender colored flowers in the spring to locate invasive wisteria in your landscape. Invasive wisteria has long flower clusters (up to 50cm) and seed pods that are covered in dense hairs. American wisteria has shorter (5-10cm), denser flower clusters and seed pods that are hairless. If the vine you see is growing aggressively in natural areas, it is likely an invasive wisteria. You can always reach out to your local Extension office for help with identification.
Cut the vine as close to the root as possible and apply glyphosate to the cut stem with a sponge or paintbrush. Invasive wisteria can spread from seeds and stems so be careful to remove all plant material and dispose of it in your garbage not your compost bin. If you do not want to apply herbicide you can still cut the main stem but will need to come back to remove sprouts or dig up and remove the root system.
For more recommendations on vining plants that won’t take over, check out this article: Versatile Vines
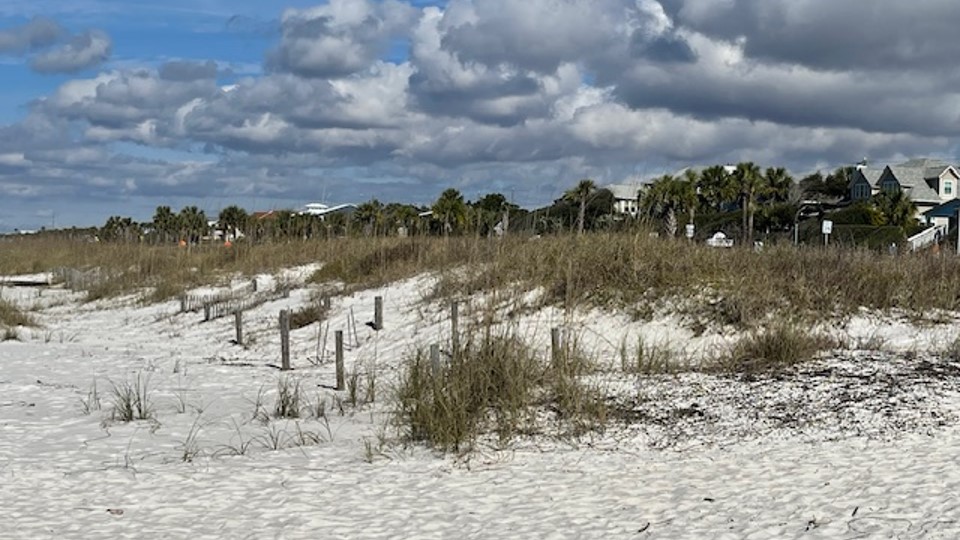
Florida is synonymous with sand dunes and sea oats and evidence can be seen across the state’s vast shoreline landscape. Sand dunes are an important part of both the ecosystem and as a storm protection measure for coastal communities. Sea oats play an integral role in maintaining this healthy coastal ecosystem.
Sand dune in St. Joe Beach. Credit: Ray Bodrey UF/IFAS Extension
The raw power of ocean waves and seemingly constant weather conditions keep sand in motion on Florida’s beaches. Fortunately, there is a natural mechanism that holds sand in place to stabilize the shoreline. Sand dunes are simply formed though three basic principles: sand, wind and space. The process of dune formation occurs when the ocean pushes sand on shore, wind blows sand further onto the beach and sand gets trapped and accumulates. This creates a frontal and back dune area. Dunes are categorized by many factors, such as size, shape, biodiversity and vegetation. Back dune areas are home to a diverse host of plants and animals. Wildflowers, shrubs, grasses and even trees can be found in the network of hills in the back dune area. Shore birds such as the snowy plover and ruddy turnstone find solace in these areas. The endangered dune mice also live in the back dune areas, as a place of refuge and protection.
With vegetation as a cover, frontal dunes are anchored and tend to stay in place. Storm surges can easily erode dunes without vegetation. This can affect coastal communities in combatting storm surge and flooding. One of the most viable plants that secure dunes is sea oats (Uniola paniculata). This clumping grass is found on both beaches and dunes. The plant gets its common name from the seed head, which looks similar to field oats. Sea oats are extremely drought and salt tolerant. These plants need limited soil fertility to grow, making them the perfect plants for sand dunes. Sea oats also reproduce vegetatively through complex root system call rhizomes. The vast root system caused by rhizomes is a big reason why these plants are excellent at securing sand on dunes. The plant structure is very flexible, so the plant can endure strong coastal winds. Sea oats are native species that help provide habitat for coastal animals, as well.
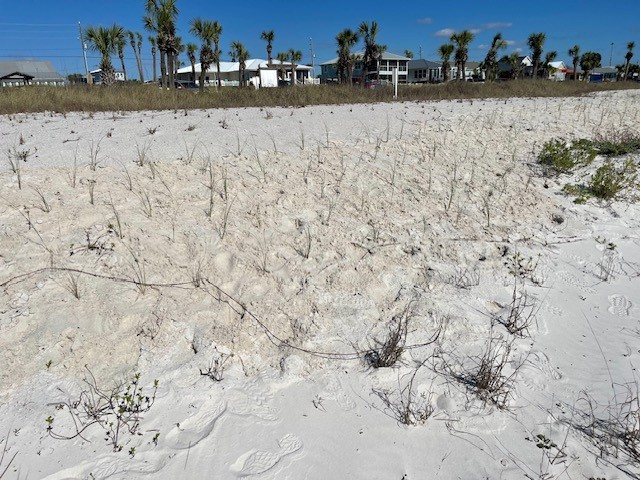
Recently restored sand dune in St. Joe Beach. Credit: Ray Bodrey, UF/IFAS Extension
Sea oats are protected by law. It is illegal to collect sea oats for any reason in the wild without proper permitting. There are native plant nurseries that propagate sea oat seedlings for dune restoration. For more information on volunteer opportunities to assist in dune restoration, please contact your local county extension office.
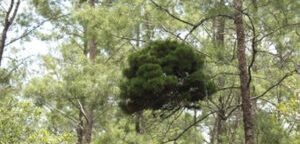
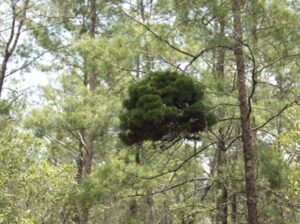
The telltale intense growth of a witches’ broom in a pine tree. Photo credit: Keith LeFevre
Our topic today might seem better suited to late October, but it can be observed in the woods year-round. During a recent Master Naturalist class, we discussed the various species of pines that grow in northwest Florida. All seven Florida native species—longleaf, loblolly, pond, slash, shortleaf, sand, and spruce—grow in our area of the state. While they can be differentiated based on growing location, needle length, and growth pattern, one of our class members had seen something really bizarre in the local pines.
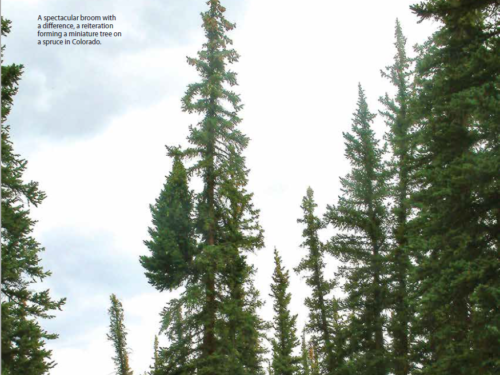
A witches’ broom in this spruce tree has resulted in a miniature version growing along its primary trunk. Photo credit: American Conifer Society
What he described was essentially an intense burst of pine needle growth at the tip of a branch. It stands out as deep green, dense, and unusual among the regular growth pattern of needles. The end result is essentially the production of a “mini-me,” a miniature copy of the normally growing tree, hanging off one of the branches. That afternoon while touring Blackwater River State Forest with a professional forester, we asked him about the strange phenomenon. He’d seen it many times and referred to it as a “witches’ broom.”
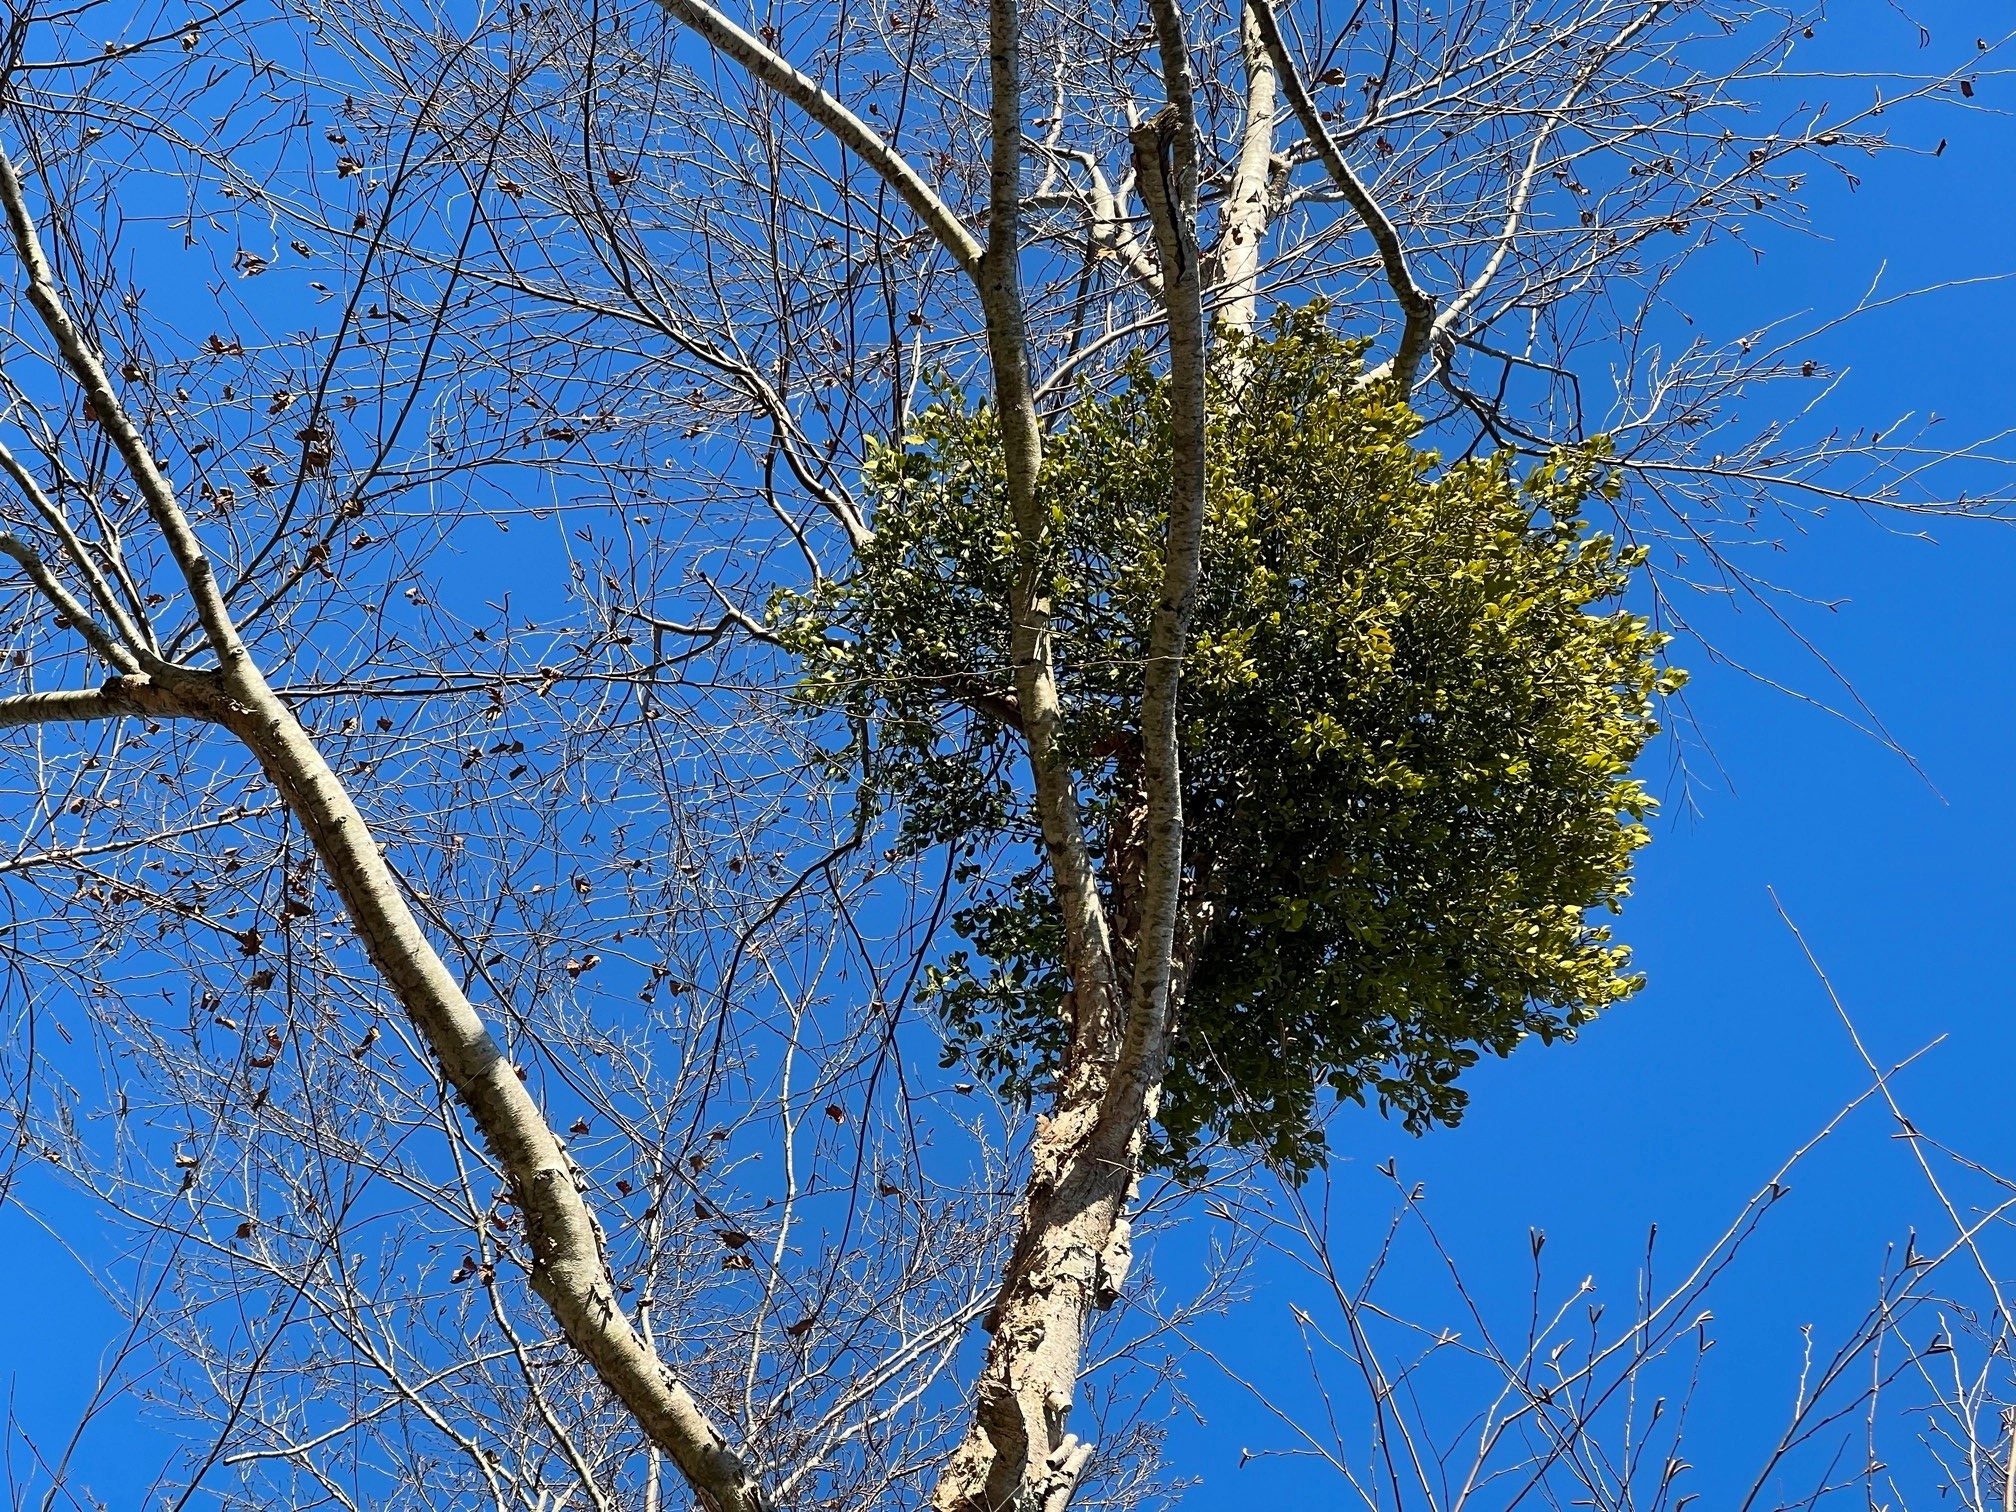
Mistletoe growing in a tree results from the same type of auxin disturbance as witches’ brooms. Photo credit: Carrie Stevenson, UF IFAS Extension
In normal tree growth, the trunk produces hormones called auxins, which control the division, expansion, and differentiation of cells. The hormones are concentrated in the growing tips of roots and shoots, and auxins maintain normal growth and keep smaller branches from overtaking the “leader.” Unusual growth occurs when the presence and concentration level of auxin is interfered with by an outside factor. The intense growth seen in these affected trees may be triggered in several ways, including pest, fungus, or mistletoe infestation, or death of terminal buds by environmental conditions. Phytoplasmas—bacteria that infect the phloem tissues—transferred by insect vectors (usually leafhoppers) are also blamed for the odd growth in some plants. Pines aren’t the only species affected; witches’ brooms can be found in other conifers like firs and junipers, nut species like hickory, pecan, and walnut, or in ashes, peaches, and elms.
The prolific growth of witches’ brooms is of great interest to horticulturists hoping to propagate dwarf varieties of the trees. This post by the American Conifer Society goes into great detail on how to “hunt”, cultivate, and encourage the growth of witches’ brooms into dwarf plants for the home landscape. Ecologically, witches’ brooms are not a huge problem for their host trees. Unless vulnerable to a massive outbreak of parasitic mistletoe, trees usually continue growing around them and live normal lifespans. The dense brush can even benefit wildlife, becoming a ready-made nest for birds or tree-dwelling mammals.