by Daniel J. Leonard | Sep 8, 2020
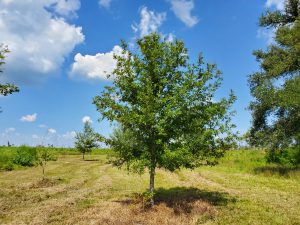
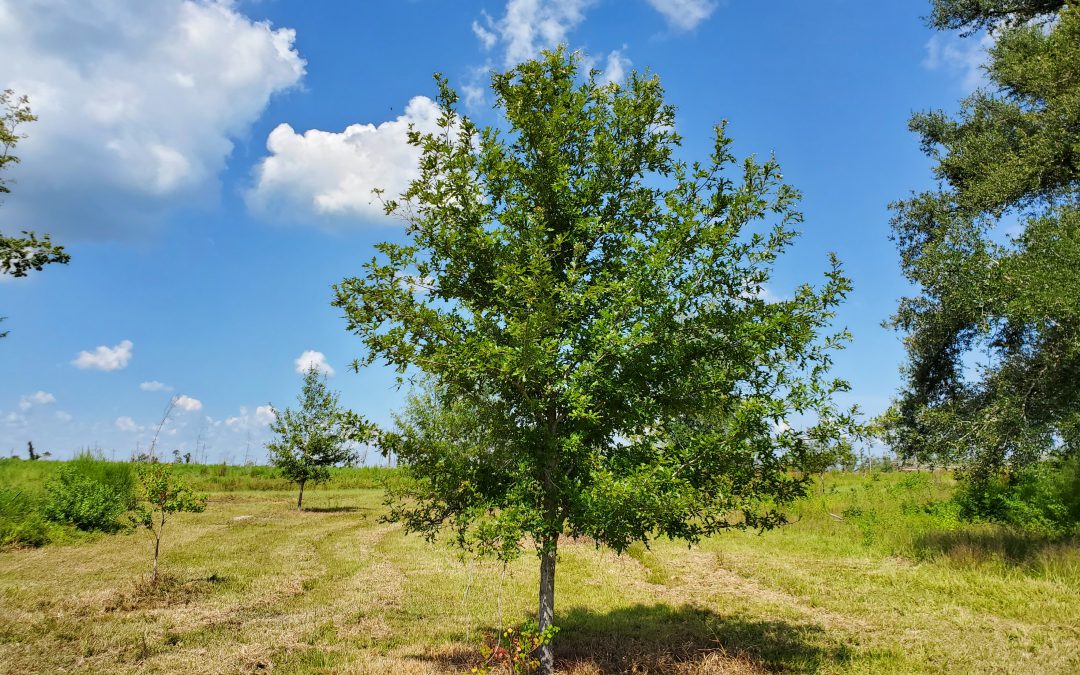
7 year old Overcup Oak (Quercus lyrata) on the edge of a wet weather pond in Calhoun County. Photo courtesy of Daniel Leonard.
Haunting alluvial river bottoms and creek beds across the Deep South, is a highly unusual oak species, Overcup Oak (Quercus lyrata). Unlike nearly any other Oak and most sane people, Overcups occur deep in alluvial swamps and spend most of their lives with their feet wet. Though the species hides out along water’s edge in secluded swamps, it has nevertheless been discovered by the horticultural industry and is becoming one of the favorite species of landscape designers and nurserymen around the South. The reasons for Overcup’s rise are numerous, let’s dive into them.
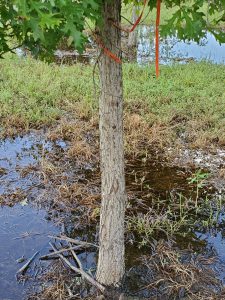
First, much of the deep South, especially in the Coastal Plain, is dominated by poorly drained flatwoods soils cut through by river systems and dotted with cypress and blackgum ponds. These conditions call for landscape plants that can handle hot, humid air, excess rainfall, and even periodic inundation (standing water). It stands to reason our best tree options for these areas, Sycamore, Bald Cypress, Red Maple, and others, occur naturally in swamps that mimic these conditions. Overcup Oak is one of these hardy species. Overcup goes above and beyond being able to handle a squishy lawn, it is often found inundated for weeks at a time by more than 20’ of water during the spring floods our river systems experience.
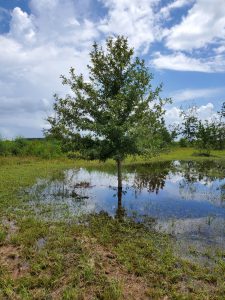
The same Overcup Oak thriving under inundation conditions 2 weeks after a heavy rain. Photo courtesy Daniel Leonard.
The species has even developed an interesting adaptation to allow populations to thrive in flooded seasons. Their acorns, preferred food of many waterfowl, are almost totally covered by a buoyant acorn cap, allowing seeds to float downstream until they hit dry land, thus ensuring the species survives and spreads. While it will not survive perpetual inundation like Cypress and Blackgum, if you have a periodically damp area in your lawn where other species struggle, Overcup will shine.
Overcup Oak is also an exceedingly attractive tree. In youth, the species is extremely uniform, with a straight, stout trunk and rounded “lollipop” canopy. This regular habit is maintained into adulthood, where it becomes a stately tree with a distinctly upturned branching habit, lending itself well to mowers and other traffic underneath without having to worry about hitting low-hanging branches. The large, lustrous green leaves are lyre-shaped if you use your imagination (hence the name, Quercus lyrata) and turn a not-unattractive yellowish brown in fall. Overcups especially shines in the winter, however, when the whitish gray, shaggy bark takes center stage. Overcup bark is very reminiscent of White Oak or Shagbark Hickory and is exceedingly pretty relative to other landscape trees that can be successfully grown here.
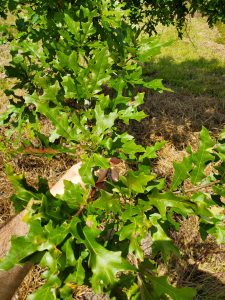
Overcup Oak leaves in August. Note the characteristic “lyre” shape. Photo courtesy Daniel Leonard.
Finally, Overcup Oak is among the easiest to grow landscape trees. We have already discussed its ability to tolerate wet soils and our blazing heat and humidity, but Overcups can also tolerate periodic drought, partial shade, and nearly any soil pH. They are long-lived trees and have no known serious pest or disease problems. They transplant easily from standard nursery containers or dug from a field (if it’s a larger specimen), making establishment in the landscape an easy task. In the establishment phase, defined as the first year or two after transplanting, young, transplanted Overcups require only a weekly rain or irrigation event of around 1” (wetter areas may not require any supplemental irrigation) and bi-annual applications of a general purpose fertilizer, 10-10-10 or similar. After that, they are generally on their own without any help!
Typical shaggy bark on 7 year old Overcup Oak. Photo courtesy Daniel Leonard.
If you’ve been looking for an attractive, low-maintenance tree for a pond bank or just generally wet area in your lawn or property, Overcup Oak might be your answer. For more information on Overcup Oak, other landscape trees and native plants, give your local UF/IFAS County Extension office a call!
by Matt Lollar | Aug 24, 2020
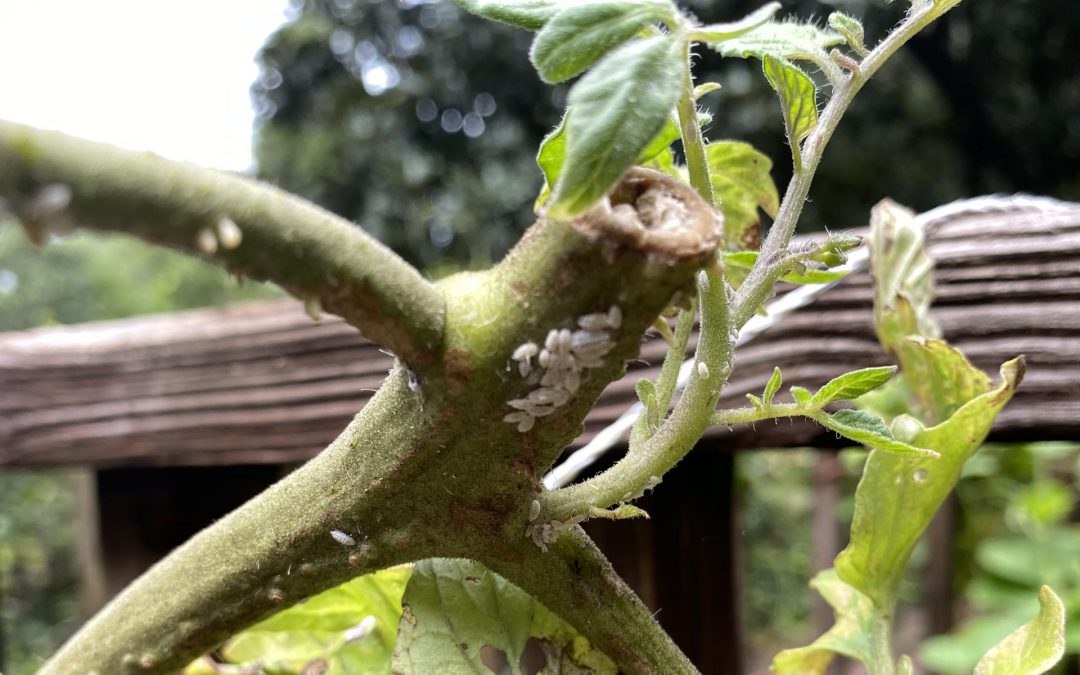
A common question for gardeners at the end of the season is if one should till the soil or use no till practices. Opinions vary regarding this question, even among Extension Agents. However old crops harbor insects, both good and bad. This phenomenon was noticed on some recently cut back tomato plants. The intention was to cut the leftover spring garden tomatoes back to encourage fall production. Instead, a host plant for mealybugs was provided.
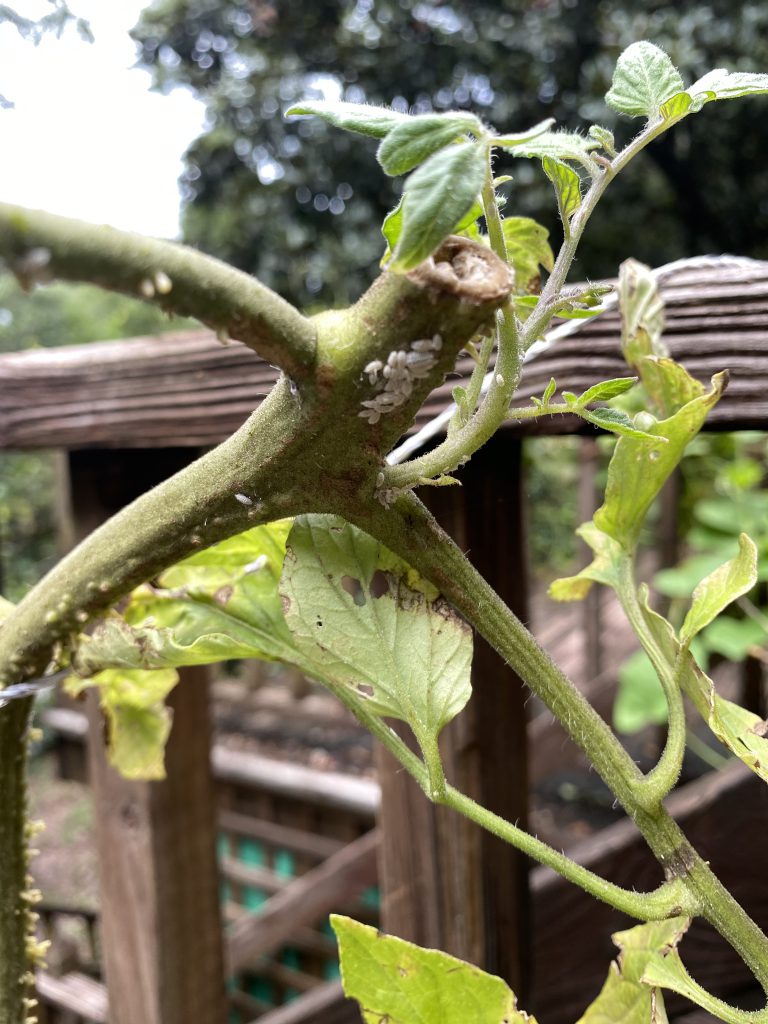
Mealybugs on a tomato plant. Photo Credit: Matt Lollar, University of Florida/IFAS Extension – Santa Rosa County
Mealybugs are soft-bodied insects that possess a covering of flocculent, white, waxy filaments. They are about 1/8 inch in length and usually pinkish or yellowish in color. Mealybugs have piercing-sucking mouthparts which they use to siphon fluids from the leaves, stems, and sometimes roots of many ornamental and vegetable plants. Mealybug damage produces discolored, wilted, and deformed leaves.
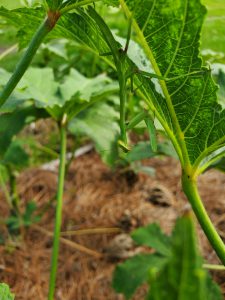
One very common example of an insect pest likely to claim residence in your garden’s crop residue, are squash bugs. They like to overwinter on squash, cucumber, and other cucurbit crop residue. If you choose to not till your garden and leave a portion of last seasons crop in your garden, then you should consider applying an insecticide to your spent crop at the end of the season. A product containing a pyrethrin or pyrethroid as an active ingredient would be a good broad spectrum insecticide to control any pest that may reside on plant residue. More information on pyrethrins and pyrehtroids can be found at the EPA webpage: Pyrethrins and Pyrethroids. If you choose to apply an insecticide, it is important that you follow the information on the label regarding pollinator protection. Another option is to plant a trap crop on the edge of your garden to help attract pest insects away from your desired crops. More information on trap crops can be found in the EDIS Publication: Intercropping, Pest Management and Crop Diversity.
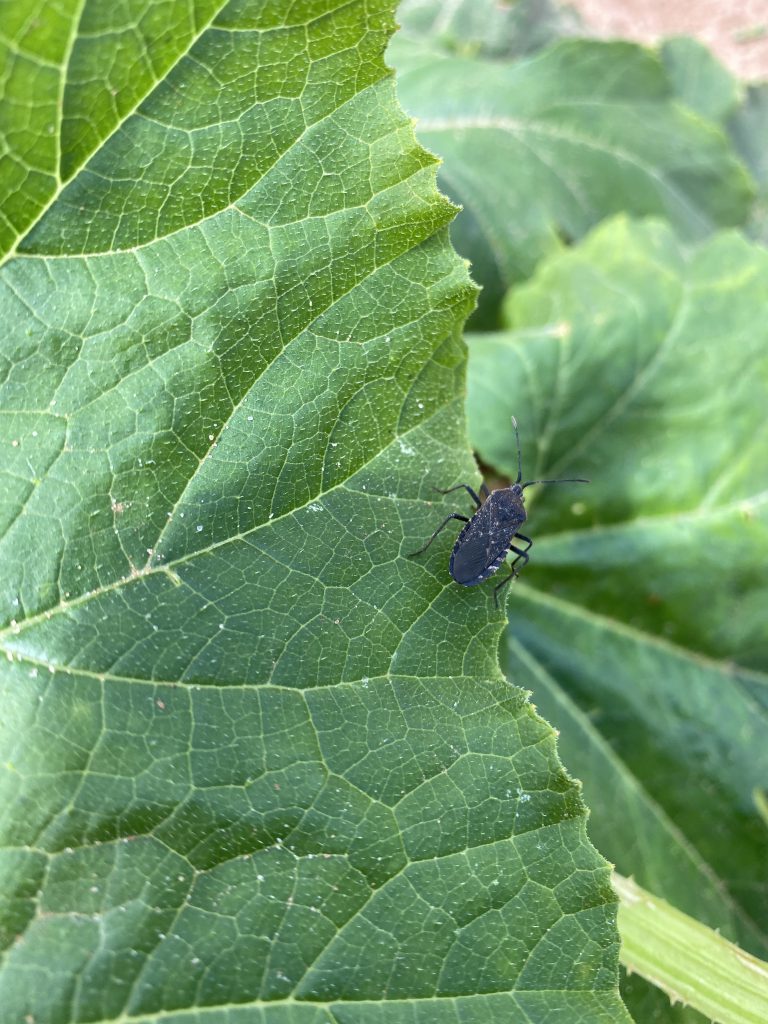
An adult squash bug on a zucchini leaf. Photo Credit: Matt Lollar, University of Florida/IFAS Extension – Santa Rosa County
So the answer to the till or no till question is…it depends. It is really up to the gardener. Yes, the residue from crops will add nutrients and organic matter to your soil, but it could also increase pest pressure in your garden. If you don’t plan to remove crop residue and don’t plan to till, then keep an eye out for what could be hiding in your garden.
by Daniel J. Leonard | Aug 6, 2020
I know this is going to come as a shock to some readers, but not all bugs are bad. In fact, while there are over 1 million species of insects worldwide, less than 1% are problem pests! This problem 1%, composed of common garden pests, including aphids, stinkbugs, nuisance caterpillars, and scales, get all the attention and for good reason; they can be extremely destructive to home and commercial crops. However, the good guys, beneficial predatory insects, are out there too, providing valuable pest control day and night and should be considered in part of a quality garden pest management strategy.
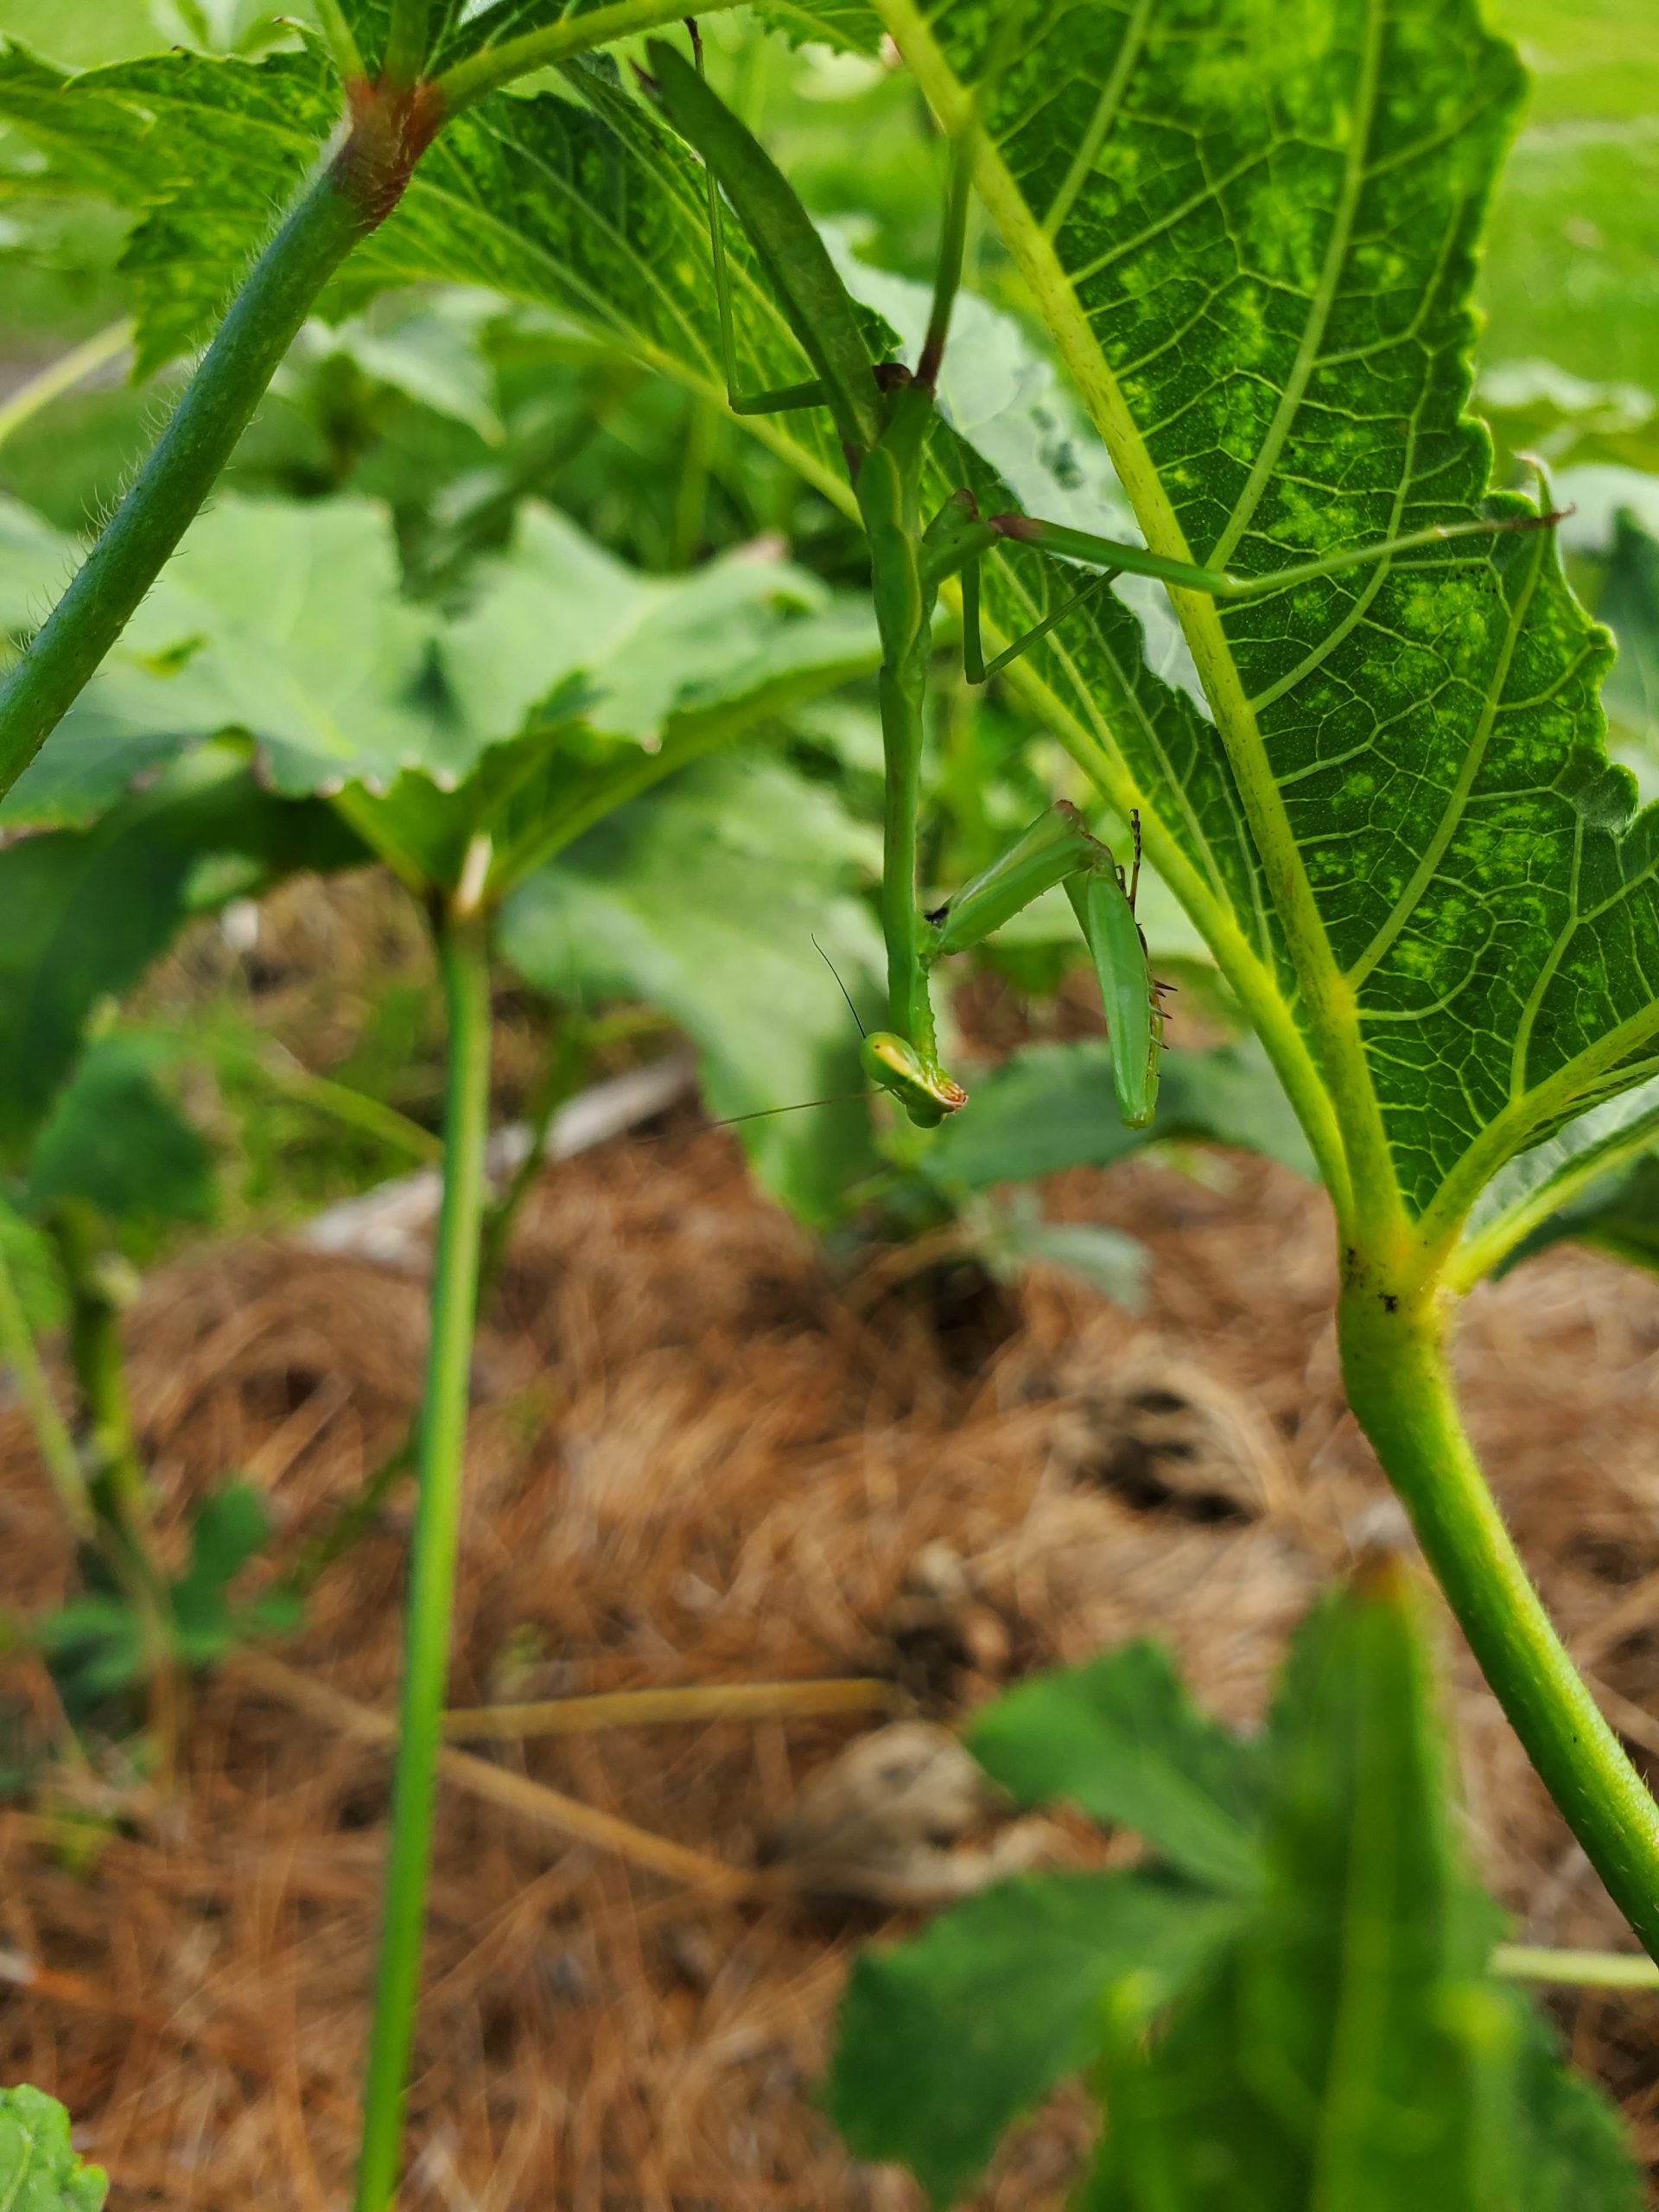
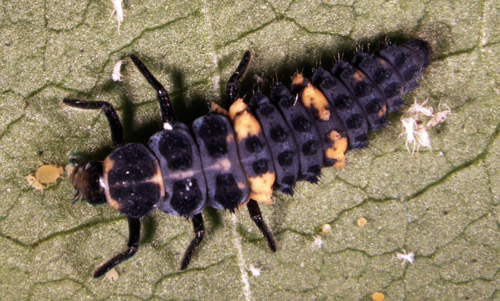
 Beneficials come in many shapes and sizes. Some are commonly known predators, such as spiders, Lady Beetles and Praying Mantids, while others are lesser known pest nemeses, like Paper Wasps, Pirate Bugs, and Lacewings. Regardless, gardeners should do their homework and be able to identify beneficials when they see them and allow them to do their jobs. The presence, or not, of a handful of Lady Beetles or Lacewings on the attack can be the difference between needing to treat with insecticides for an aphid outbreak or just letting nature take its course. Studies have shown that just one individual Lady Beetle in the larval stage can consume as many as 500 aphids; adult Lady Beetles are even hungrier aphid eaters! Paper Wasps, you know the ones who make the large “papery” nests around eaves of house and other structures, play an important beneficial role, frequently preying on caterpillars. If their nests aren’t near highly trafficked areas around your home and you don’t have family members allergic to wasp stings, your garden will thank you for leaving a few paper wasp colonies as caterpillar insurance!
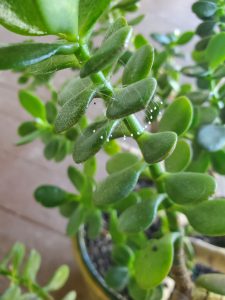
Lacewing eggs on a Jade plant in close proximity to the author’s vegetable garden.
In many instances, beneficial insects can keep pest insect infestations at bay, allowing gardeners to spot treat outbreaks when they get out of hand or even prevent the problem from needing chemical intervention altogether.
As helpful as they are, beneficial insects in the garden won’t totally negate the need for chemical treatment entirely. From time to time, garden pest populations outpace the beneficials’ abilities to kill them and intervention from humans is needed. In these times, it is advisable to use a couple of best practices to limit exposure to beneficial insects. First, try to use selective insecticides that only target specific pests and are nontoxic to other bugs, like the product Bt for caterpillar pests (sold under many brands like Dipel, Garden Safe Bt Worm and Caterpillar Killer, Thuricide, etc). However, if a nonselective, general insecticide, like the Pyrethroids (many common homeowner insecticide brands) and carbamates (Sevin and others), is needed, timing these broad spectrum sprays for early in the morning and late in the evening when many beneficials are not very active can help reduce friendly fire casualties. Care should also be taken to only spot treat infested plants and not the entire garden, this helps reduce beneficial exposure to these broadly toxic pesticides.
Every gardener should have a plan for pest control and beneficials can play an important role in this overall strategy. Gardeners can help ensure that nature pulls its weight in controlling problem pests by taking a little time to scout for beneficial insect populations, keeping a close eye on developing pest outbreaks, using selective insecticides when you can, and only spraying broad spectrum products as spot treatments when necessary and timing those applications for very early or late in the day. If you have a question about whether or not a garden insect is a good guy or a pest or want more information on garden pest control strategies, contact your local UF/IFAS County Extension Office! Happy Gardening!
The following resources were used in the development of this article:
https://gardeningsolutions.ifas.ufl.edu/care/florida-friendly-landscapes/beneficial-insects.html
https://sfyl.ifas.ufl.edu/sarasota/gardening-and-landscaping/horticulture-commercial/integrated-pest-management/beneficial-insects/
http://www.missouribotanicalgarden.org/gardens-gardening/your-garden/help-for-the-home-gardener/advice-tips-resources/pests-and-problems/other/beneficial-insects.aspx

by Daniel J. Leonard | Jul 23, 2020
I enjoy starting my garden from seeds. Ordering seed opens so many more options relative to the limited old-fashioned seed and transplant selections that line garden shelves. Picking newer, improved varieties has several other advantages as well, including increased disease resistance, earlier fruiting, unusually colored/shaped fruit, and generally more vigorous plants. One of the most exciting days of the year in my house is when the cardboard box full of the season’s seed packets comes in the mail! However, I garden exclusively in small, 4’x8’ raised beds and only need a couple of plants of each veggie variety to fill the fridge with fruit; meaning I always have leftover seeds in the packets! In the past, I’ve thrown the excess seed away and chalked it up to the cost of gardening in small spaces, but this spring, as seeds became somewhat hard to come by and several of the varieties I normally grow were out of stock, I started saving and storing my leftover seed packets for future seasons to ensure I have what I want! You can save and store seeds too, here’s how.
Cauliflower seed waiting for the fall garden in the author’s refrigerator.
Properly storing your leftover seeds is a relatively simple process. While seed longevity definitely varies somewhat according to species, regardless of how they are treated by you, remembering the following few tips can help improve the stored seeds’ viability and vigor for the next season.
- Store Cool. Seeds like to be stored in a refrigerator around 40 degrees F. Seeds stored warmer, near room temperature, or colder, as in a freezer, will decline much more rapidly than those in the fridge.
- Keep it Dry. Humidity or moisture in the seed storage area is a sure way to reduce the shelf life of seeds. Store dry in plastic bags or glass containers and add a dessicant. Dessicants help keep storage containers dry and can be found for around $1 each from various online purveyors, making them a cheap insurance policy for your home seed bank!
- Don’t Store Pelleted Seed. These days, you can buy pelleted seed for many of the smaller seeded vegetable varieties, like lettuce and carrots. The pelleting process and materials used, while making it easier for old eyes and those of us with fumbling fingers to plant, reduces seed longevity. Do your best to plant all the pelleted seed you purchase. If you store pelleted seed, don’t say you weren’t warned when next season’s germination is poor!
- Plant All Stored Seed the Next Season if Possible. Remember, that while most non-pelleted vegetable species’ seed can remain viable in storage for more than a year, it’s best to only store seeds until the next season and use them up. Regardless of how well you store them, seed germination percentage (how many in the lot will sprout when planted) and vigor (how strong the germinating seedlings are) decline in direct proportion to time spent in storage.
- Plant Old Seed Heavy. As germination rates in storage may have declined, it’s best to plant stored seed a little thicker than you normally might. If you need a squash plant in a certain spot, instead of just planting one seed, put three or four in the hole to ensure you get a plant. You can always thin extras later, but time lost replanting cannot be regained.
By following these few simple tips, you can waste a lot less seed and ensure that you have what you want to plant for the following year! As always, if you have any questions about saving and storing seed or any other agriculture or horticultural topic, please contact us at the UF/IFAS Calhoun County Extension Office. Happy Gardening!
The following resources were used as references when writing this piece and may prove helpful to you also, check them out:
- Johnny’s Selected Seeds Seed Storage Guide: https://www.johnnyseeds.com/growers-library/tools-supplies/seed-storage-guide.html
- Seeding the Garden EDIS Publication: https://edis.ifas.ufl.edu/vh026#:~:text=Storing%20Leftover%20Seeds,better%20than%20in%20the%20refrigerator.
by Evan Anderson | Jul 1, 2020
A lot can go wrong in a garden or landscape, but proper preparation can help to avoid many of these problems from popping up in the first place. For some of these problems, a good preventative measure is mulch.
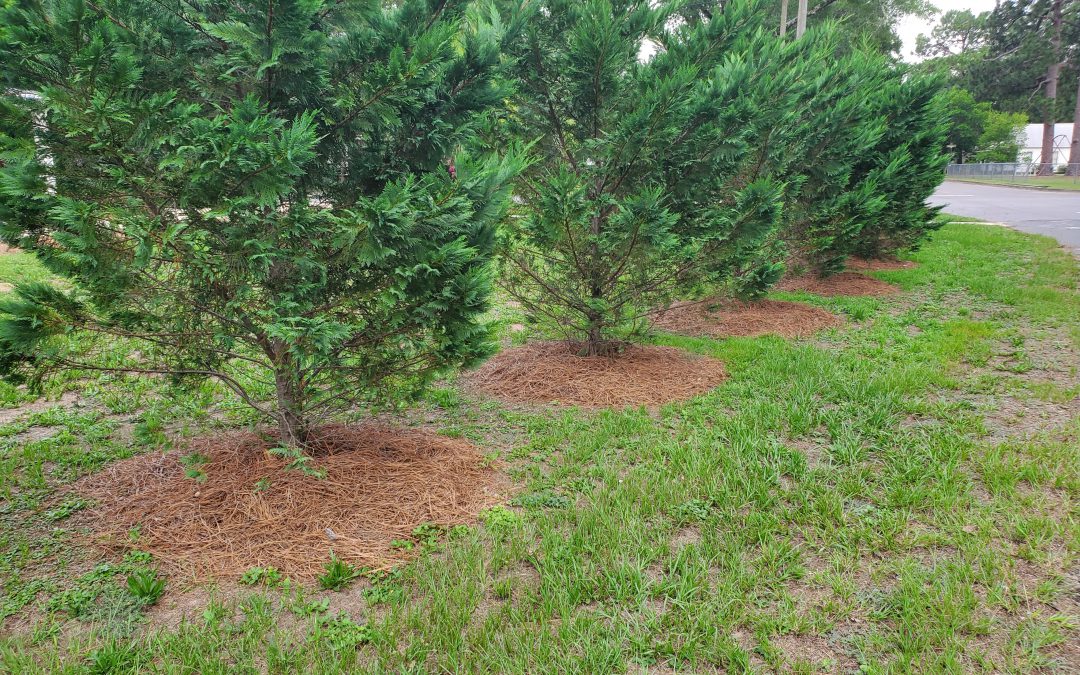
Pine straw is a common material used as mulch.
Mulch is any material that’s spread over the surface of the soil. One of the most common materials used in our area is pine straw, which is simply the needles of pine trees harvested from forested lands. Pine bark, another byproduct of the forestry industry, can be found easily as well. Both of these mulches will tend to have an acidifying effect on soils over time.
Other popular mulches include shredded or chipped wood. Melaleuca trees were originally planted in South Florida in an attempt to convert wetlands into farmable areas; to help remove this invasive species, the trees are now cut and ground into mulch. Eucalyptus mulch is also popular, as well as cypress, though it can be difficult to determine where cypress mulch originated from. Improperly harvested cypress can damage Florida’s natural wetlands. Hardwood mulch from other species may also be found.
Utility companies may sometimes give away mulch produced as they trim trees and bushes along their power lines, but this should be used only with the understanding that it may contain weed seeds or traces of herbicides or other chemicals. Homeowners may sometimes produce their own mulch in the form of raked leaves or grass clippings, but the same concerns about weed seeds and chemicals apply here as well.
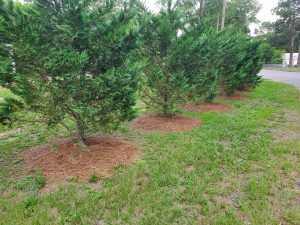
Mulch can be used to help avoid hitting plants with a mower or trimmer.
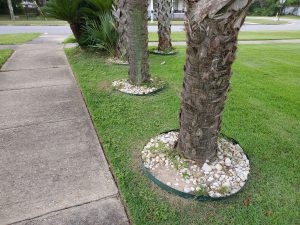
Gravel or pebbles may often be used, especially in wet areas, or close to houses where flammable materials may be ill advised. Lastly, garden mulches may include materials such as paper or plastic spread in sheets over the ground.
Choosing the proper mulch can depend on the reason for its use. There are a number of effects mulch can have on a garden or landscaping bed. Mulch can help to retain moisture in the soil, keep weed growth down, reduce erosion, and act as a temperature buffer for the soil and plant roots below. It may also add visual appeal and help to keep lawn mowers and trimmers from needing to get too close to plants which may be damaged by them.
Whatever the reasons for adding mulch, there are a few things to avoid. Do not mound mulch around the base of plants. Moisture held against the trunk or stem of a plant can lead to fungal problems. Try to maintain a layer two to four inches deep. Any less and weeds will grow through the material; more mulch will not allow water to filter properly to the ground. Finally, if mulch becomes clumped and matted over time, do not let these block air or moisture to areas below. Rake or stir the mulch to evenly spread it.
You can find more information on mulching at our EDIS site https://edis.ifas.ufl.edu/topic_mulch or in the Florida Friendly Landscaping site at https://ffl.ifas.ufl.edu/handbook/Mulch_vSept09.pdf.