by Julie McConnell | Mar 6, 2025

Are you an experienced beekeeper looking to expand your education?
Are you a new beekeeper or maybe just considering jumping into honey bees?
Do you want to see hands-on demonstrations with live honey bees?
If you can answer yes to of the questions above, you don’t want to miss the 2025 Beekeeping in the Panhandle Conference April 4-5, 2025, at the Washington County Agriculture Center (1424 Jackson Ave, Chipley, FL 32428)!
UF/IFAS Extension Washington County and the Central Panhandle Beekeepers Association have lined up some top-notch speakers and will ensure there are educational opportunities for all skill levels at this two-day event. Speakers will be joining us from the UF/IFAS Honey Bee Research and Extension Lab, Florida Department of Agriculture and Consumer Services, and beekeepers with experience managing honey bees in this region.
Sample Topics include:
- Honey Bee Biology
- Hive Components
- Top Tips for Beekeepers
- Making Splits
- Integrated Pest Management in a Honey Bee Colony
- Seasonal Efficacy of Varroa Treatments
- What you Need to Know About the Yellow-legged Hornet (Vespa velutina)
- Pesticide Risk Assessment in Honey Bees
- Pollinator Plants
- Product Making Demonstrations
- Apiary Demonstrations
Early bird registration is open through 4:59 p.m. on March 17, 2025, so get your tickets now for the best value!
The University of Florida is committed to providing universal access to all of our events. To arrange disability accommodations, please contact Julie McConnell (juliebmcconnell@ufl.edu ) or call 850-638-6180 at least 2 weeks in advance. We are proud to be an Equal Opportunity Institution.
by Beth Bolles | Mar 6, 2025
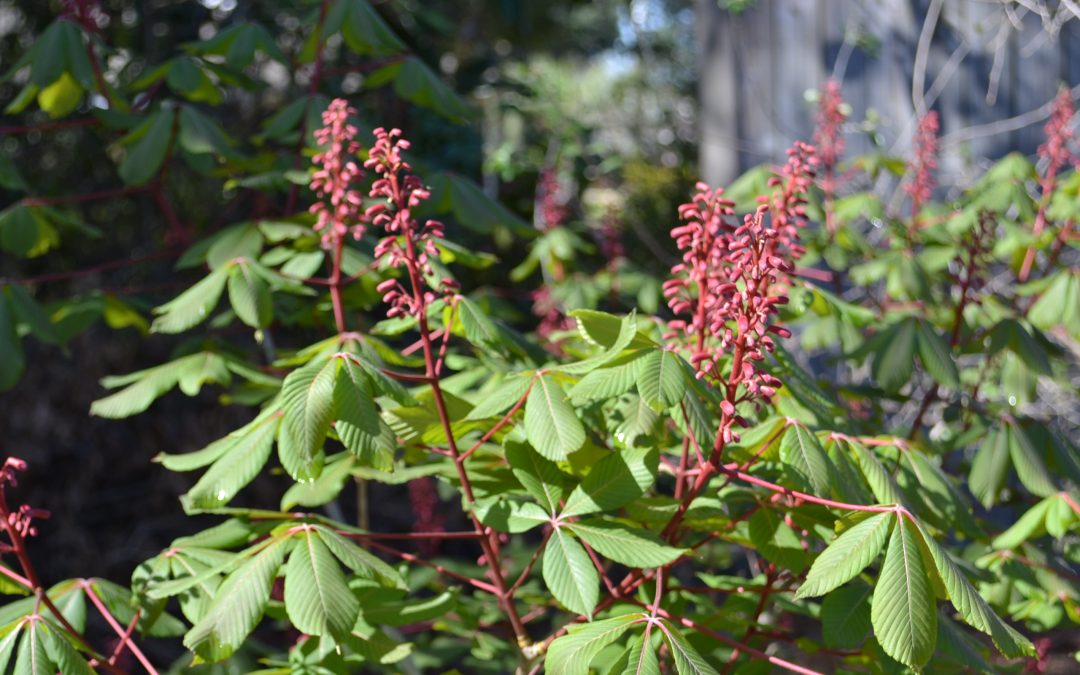
One plant that signals our change in season is beginning to bloom in natural areas and woodland gardens. The Red buckeye, Aesculus pavia, is forming large spikes of red flowers and the attractive palmate leaves are unfurling.
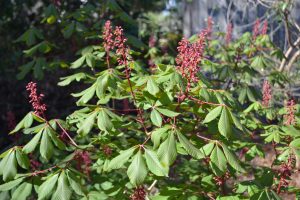
Red buckeye in the late winter sunshine. Photo by Beth Bolles UF IFAS Extension Escambia County.
If you enjoy a more natural landscape, Red buckeye is a perfect fit. It often has open growth with multiple branching stems which give it more of a shrub look in many landscapes. Plant size can vary from 8-15 feet. The blooms are beautiful and the tubular flowers can be visited by overwintering or returning hummingbirds.
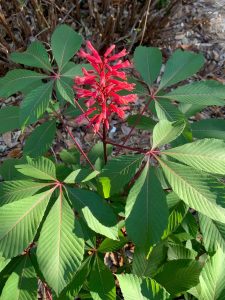
Single bloom with palmate leaves. Photo by Beth Bolles UF IFAS Extension Escambia County
Although plants can tolerate full sun, plants look their best with some afternoon shade as the summer progresses. A high canopy that allows filtered sun would be excellent throughout our summer weather. Choose a location with moist, well drained soils. In general, plants will drop leaves earlier than other deciduous plants in your landscape so make sure your location is a spot to show off the late winter/early spring blooms.
A precaution with the Red buckeye is that the fruit is toxic for people and pets. The large capsules will contain several seeds which can drop and grow new plants. Squirrels will also enjoy the seeds.
by Daniel J. Leonard | Mar 6, 2025
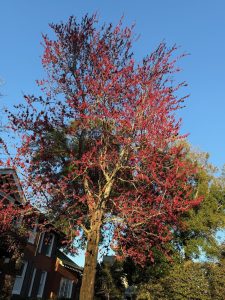
Red Maple in flower. Photo courtesy of Carrie Stevenson.
A month ago, when the Panhandle was covered in snow, it would have been hard to imagine that spring was just around the corner. But warm spring weather has arrived, and with it, the first of our native trees to bloom each year – the venerable Red Maple (Acer rubrum). Reliably heralding spring in Northwest Florida each February, Red Maples adorn our roadsides and low-lying natural areas with brilliant red blooms. Spotting a Red Maple blooming amongst the otherwise drab landscape means winter is on its way out and spring has sprung – or will shortly.
Beyond the blooms, Red Maple has much to offer as a landscape tree. For one, it is unbelievably adaptable. Across its native range – one of the most expansive of any species in the US, occurring naturally from Maine all the way down to the Everglades,* the tree can handle soils that range from periodically inundated along streams and other wet areas to more well-drained upland sites. Adding to its adaptability, in the Panhandle, Red Maple typically tops out around 40’ in height and around 20’ wide with a spreading vase shape, rarely growing out of scale with most landscapes.
*Since Red Maple occurs over a huge area of the US, it’s important to purchase seedlings or named varieties that hail from areas with like climate conditions to the Panhandle. Avoid varieties from northern states for best performance.
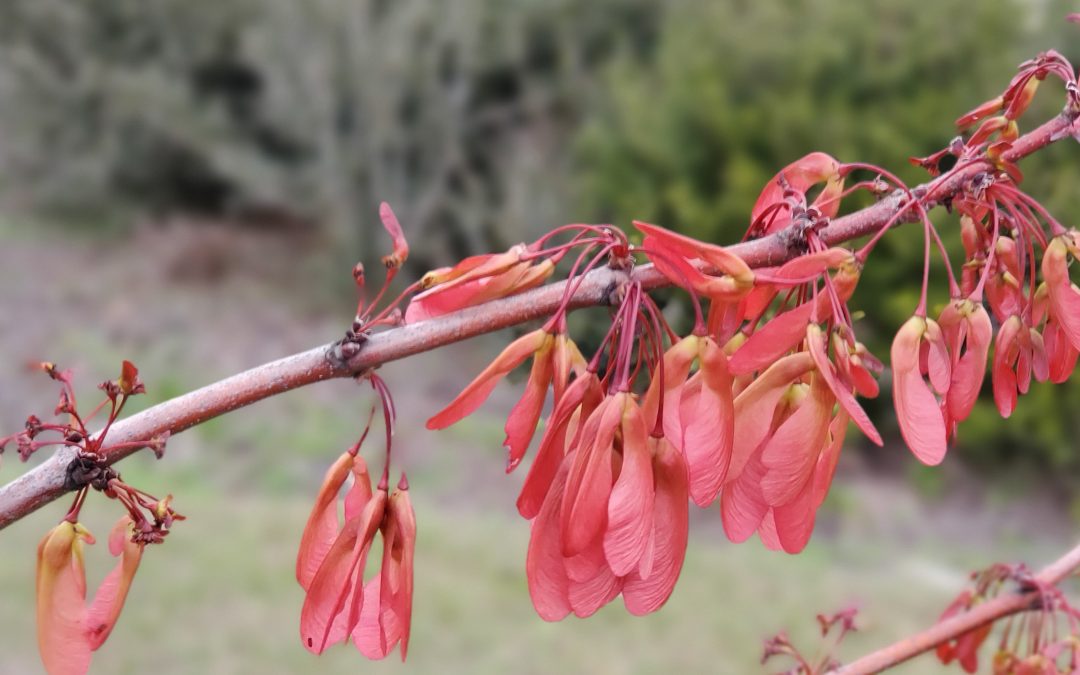
Red Maple is one of the few shade trees that has true four-season interest in our area. We’ve already talked about its spring flowers, but it also has attractive deep green foliage in the summer (some selections, like ‘Summer Red’ are even known for reddish purple new growth), famous fall color (though it is more muted in Florida than locales farther north), and unique ridged light gray bark in the winter. The seeds of Red Maple are even pretty. These two-winged seed structures, called a samara, follow the spring flower show, appear pinkish red, and are a favorite of squirrels and other critters.
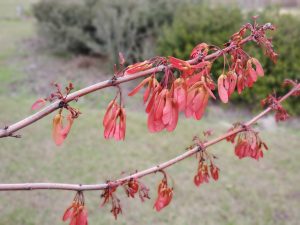
Red Maple samaras. Photo courtesy of Daniel Leonard.
Red Maple is a quick growing, low maintenance tree as well. If planted correctly and properly cared for, the species can grow several feet per year in its youth. Site the tree in a moist site that receives full sun, plant slightly higher than the soil level of the container the tree was purchased in to compensate for soil settling post-planting, and water regularly until established. After establishment, periodic fertilizing with a balanced fertilizer will help ensure Red Maple’s nutritional needs are met and maximum growth achieved.
If you’ve been looking for a medium-sized, native, flowering shade tree with four-season interest, Red Maple may be just the tree for your landscape. Plant one today! For more information on Red Maple, other recommended landscape plants, or any other horticultural topic, contact your local UF/IFAS Extension office.
by Joshua Criss | Mar 6, 2025
Ah, springtime is approaching quickly. You and I both know you’re getting anxious to get out into your gardens to grow your plants. I’m not faulting you, far from it. You’ll find that your local Extension agents want your garden to succeed as much as you do. Because we all want you to have a bountiful harvest, we need to have a conversation about fertility in your lawns and gardens.
Definitions
Before we get too deep into this topic, let’s define nutrition. You may hear some refer to fertilizers as “plant food.” While this is a common phrase concerning fertilizers, it is not factually accurate. Food is associated with energy creation within an organism. Plants are autotrophs, meaning they convert sunlight into energy. So, under this premise, sunlight is plant food, whereas plant nutrition is the building blocks of tissues or catalysts of metabolic processes.
The 17 elements designated as plant essential nutrients are categorized based on the quantity needed for healthy growth. All are important to have in your soil; as per the “Law of the Minimum,” your plant’s development will be limited based on the most deficient element.
UF/IFAS Photo
Macros
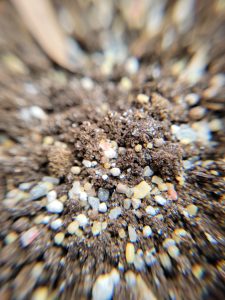
Those elements with the largest demand within the plant are known as macronutrients. The three most critical of these are very often absent in fertilizer conversations as they cannot be added to soil in granule form. These are carbon, hydrogen, and oxygen, and their presence in your garden results from your cultural practices. You get them from air and water in the pore spaces of your soil. Appropriate tillage and irrigation are the only ways to provide these elements to your plants. They are critical for proper photosynthesis and fluid balance in the plant.
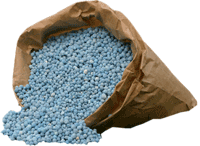
The most discussed elements are so vital that they make up the three numbers on every bag of fertilizer. These are nitrogen (N), phosphorous (P), and potassium (K), all of which may be added to soil to overcome deficiencies (N often being the limiting factor). These elements are crucial for protein creation, photosynthesis, and fluid movement.
Secondary Nutrition
UF/IFAS Photo: J. Criss
The next set of nutrients have less demand than NPK. They are sulfur (S), magnesium (Mg), and calcium (Ca). Ca is essential for cell structure but is often abundant in our soils. S is frequently rained out of the atmosphere (though you may still need to add some) and facilitates enzymatic processes in plant cells. Mg needs the most attention in this category as it has a lot of mythology among gardeners. You’ve likely heard you should add this element to “green up” your plants. While it is true that Mg is critical to chlorophyll, adding it without testing for deficiencies first is a recipe for poor plant growth.
Micros
Our final category of fertilizer is micronutrients. These are iron (Fe), manganese (Mn), boron (B), chlorine (Cl), zinc (Z), copper (Cu), molybdenum (Mo), and nickel (Ni). These serve various functions in the plant, mainly in metabolic processes.
To Sum Up
Plant fertilization is critical for lawns and gardens. It behooves gardeners to understand these elements and their role in plant growth. Once you do, you’ll understand the importance of applying the correct version of the element in the proper amount at a time and location to maximize use efficiency. You can learn more about what they do and how they react in the soil here. For more information, contact your local extension office.
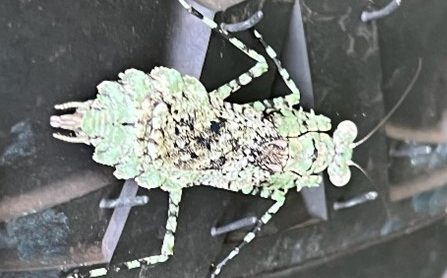
by Donna Arnold | Feb 27, 2025
Extension agents occasionally receive calls about “alien” bug sightings, sparking concern among residents. One such insect, Gonatista grisea, commonly known as the Grizzled Mantis, Florida bark Mantis or Lichen Mimic mantis, often raises alarm. But there’s no need to panic—this mantis is a fascinating and harmless part of our ecosystem.
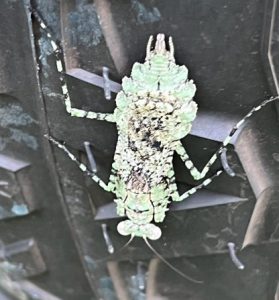
Photo Credit: Vincent Moore, Sweet Magnolia Ridge.
The Grizzled Mantis is native to the United States, ranging from southern Florida to Georgia and South Carolina, and is also found in Puerto Rico, Jamaica, and Cuba. Adults are relatively small, with males measuring 36–38 mm and females slightly larger at 37–40 mm. Their grayish-green coloration and mottled dark markings provide excellent camouflage, allowing them to blend seamlessly into their surroundings, such as lichen-covered bark. They are characterized by triangular heads and large eyes, perfect for their ambush hunting style.
Quick and agile, Grizzled Mantids scuttle rapidly away from perceived threats. They exclusively prey on arthropods, adopting a head-down ambush position while resting on tree bark. Their preferred plants include sea grape, gumbo limbo, water oak, and magnolia, though they are not limited to these species.
Interestingly, mantids are gaining popularity as low-maintenance pets. Some enthusiasts collect egg cases or purchase late-stage nymphs. However, keep in mind that newly hatched mantids require ample food or separation, as they can become cannibalistic if resources are scarce.
Whether in the wild or as pets, the Grizzled Mantis is a unique and beneficial insect, playing a role in controlling arthropod populations. So, the next time you spot one, there’s no need for fear—just appreciation for this remarkable creature!
For more information, contact your local Extension Office or click on the link Grizzled mantid – Gonatista grisea.


