by Daniel J. Leonard | May 7, 2020

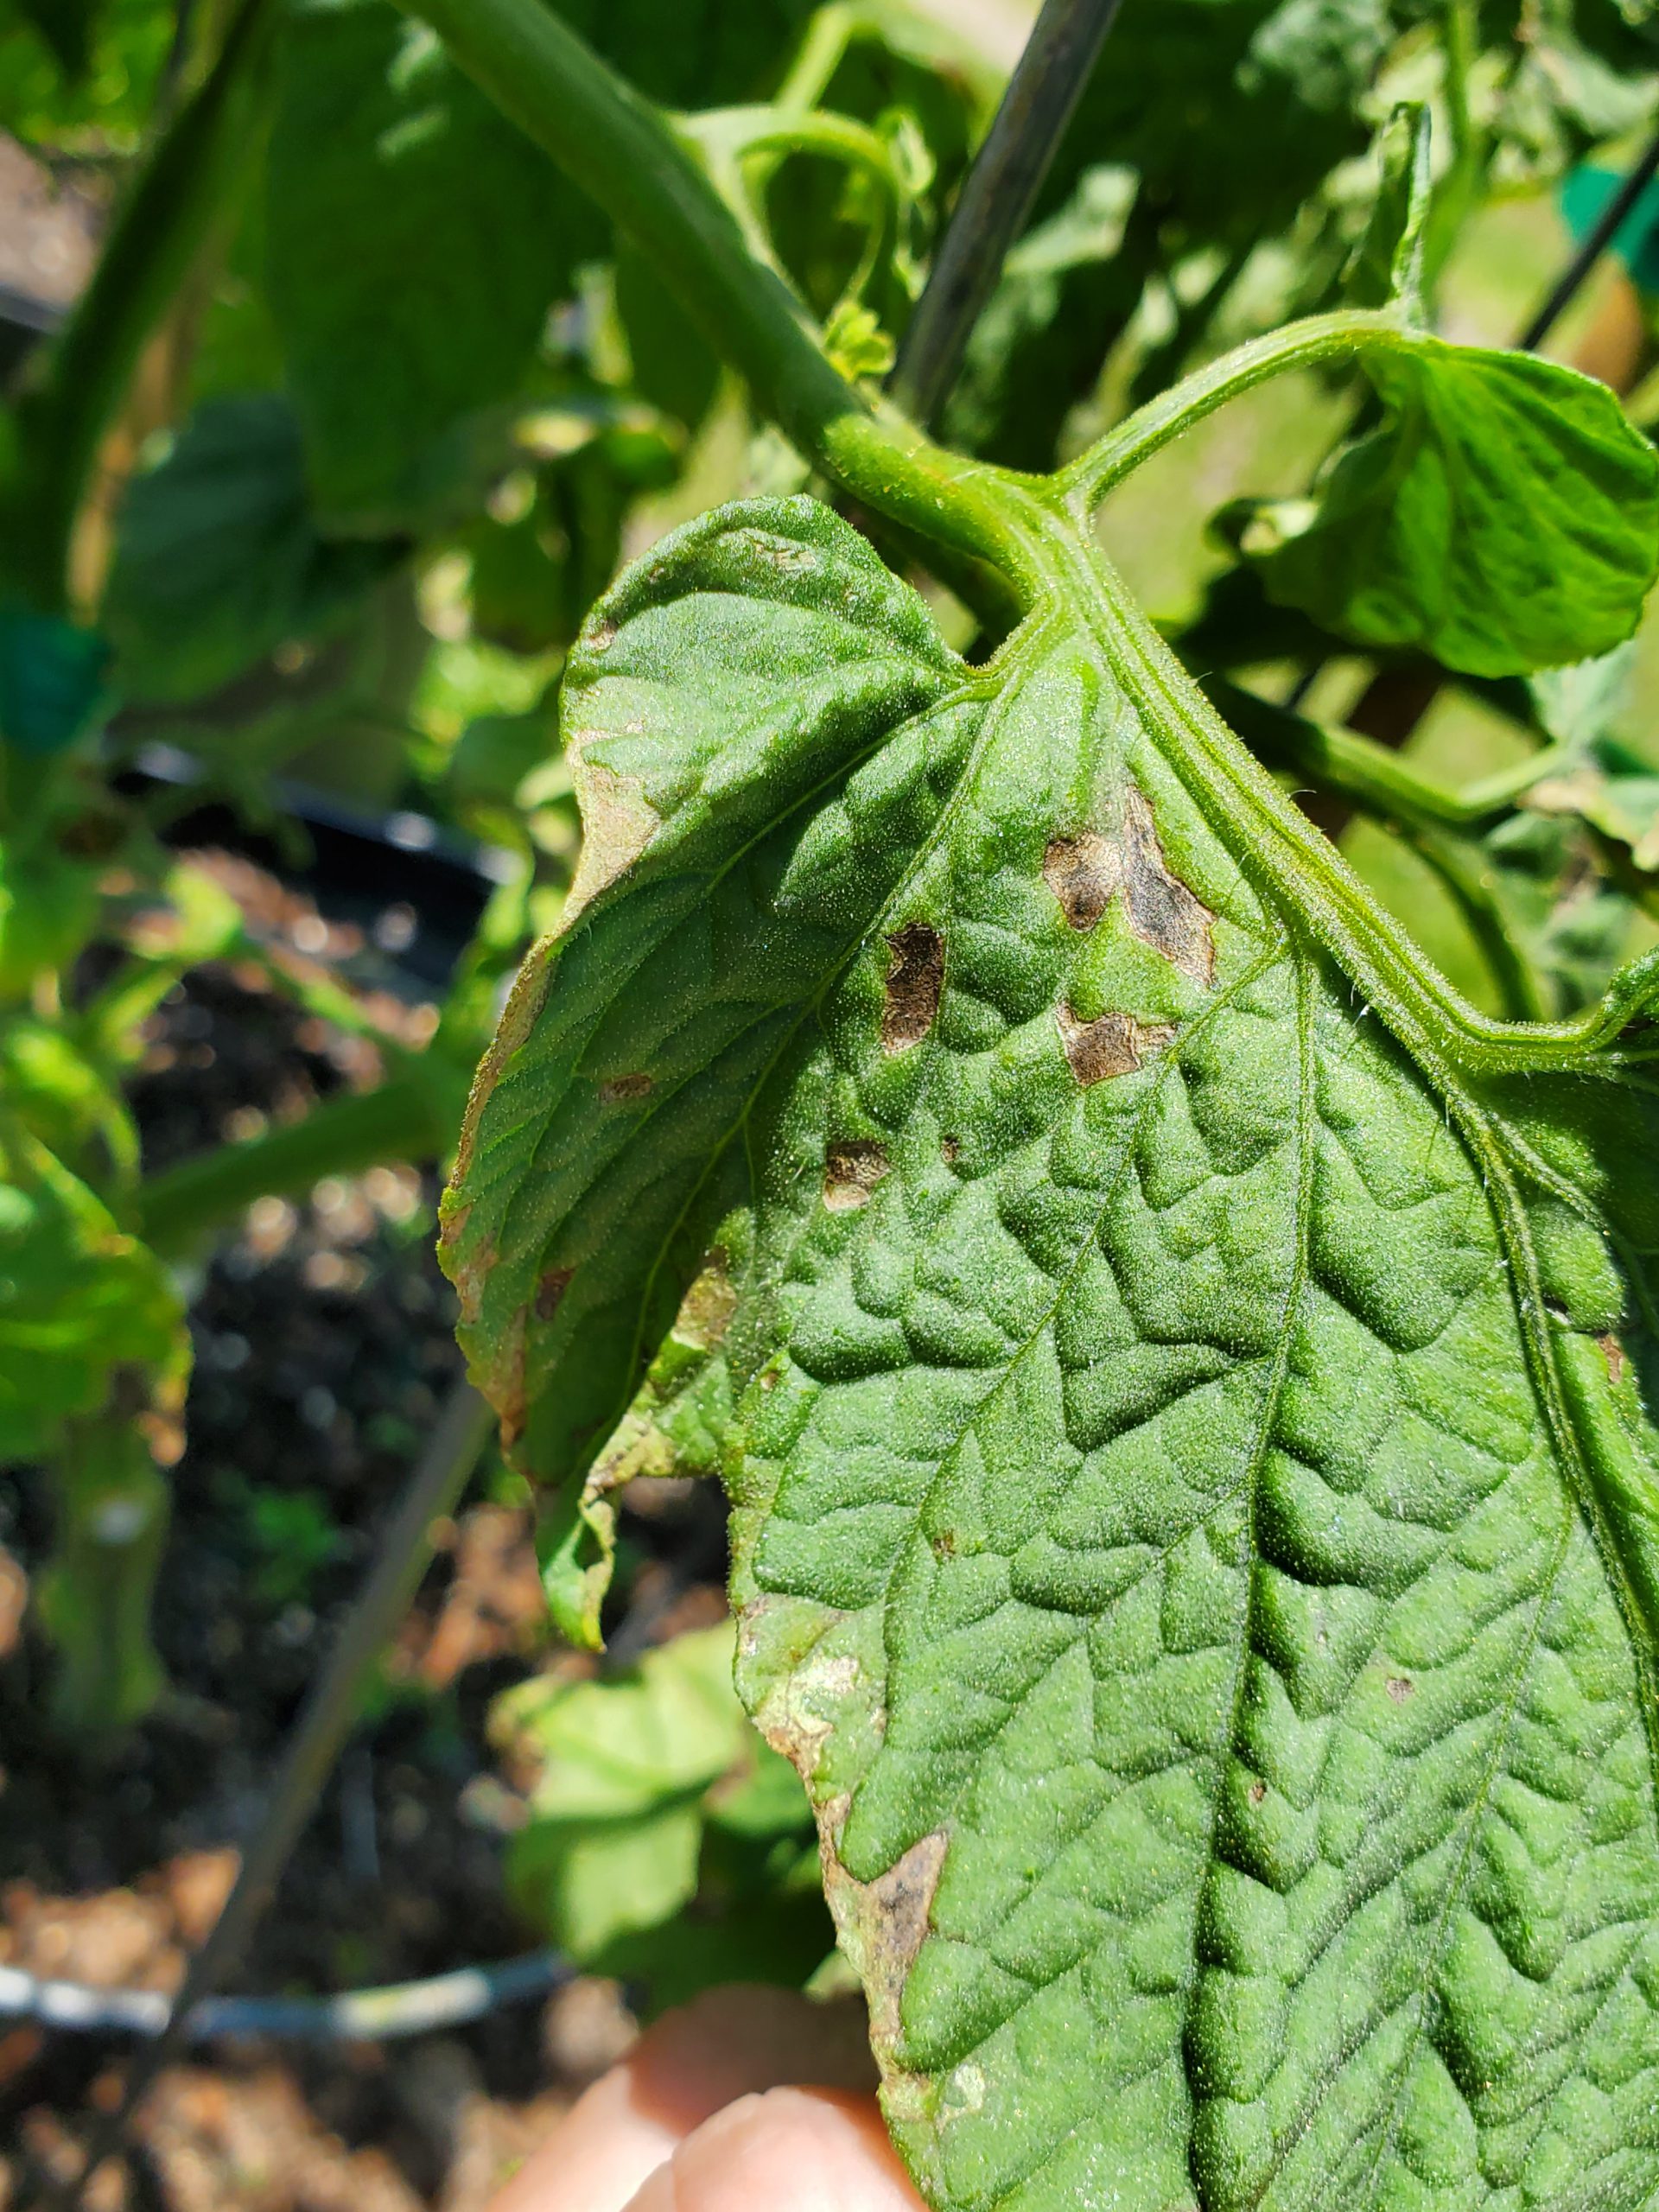
Early BLS symptoms appear on lower leaves. Photo courtesy of the author.
Tomatoes are among the most notoriously difficult vegetable species to grow in Florida. Even when you do everything right (choose disease resistant varieties, buy clean seed/healthy transplants, plant early, rotate crops, scout for insects, prune and support vines, etc), things can go wrong in a hurry. Bacterial Leaf Spot (BLS) caused by the pathogen Xanthomomas perforans, is one of those things. BLS often hitches a ride into gardens undetected on seed and transplants and presents itself as warm and humid weather arrives in late April/early May. Outbreaks typically happen in concurrence with the frequent heavy rainstorms that accompany these months and quickly wreak havoc on tomato plants.
BLS occurrence, much worse in some springs than others, has exploded this year in home gardens. First noticed on the plant’s lower leaves, BLS pathogens enter through natural openings in leaves called stomata, manifest as small, “water-soaked” leaf lesions and then develop within days into dark circular spots, sometimes surrounded by a yellow halo. As conditions worsen, all these individual infections cause a general yellowing or “blighting” of entire leaves. Though the issue begins on tomato leaves, BLS can affect all parts of the plant, including stems, flowers and fruit too! It’s at this point, when blighted leaves become obvious and lesion developing on flower stalks cause both flowers and small fruit to drop, that most home gardeners notice that something is up.

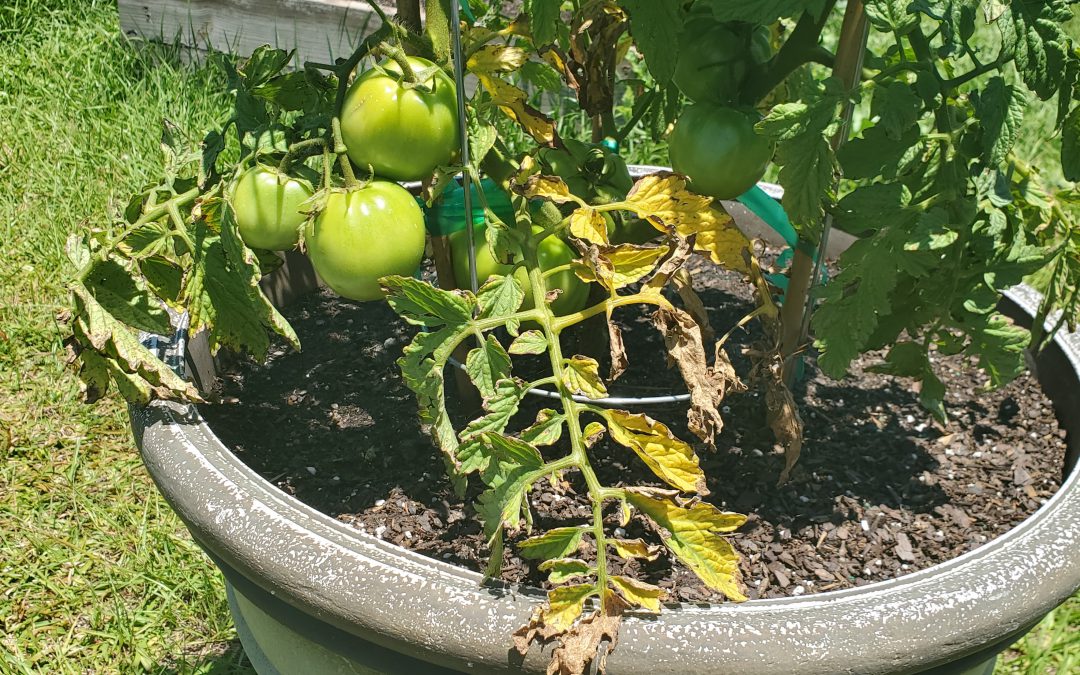
Advancing progression of BLS with “blighted” leaves. Photo courtesy of the author.
Unlike with many other pathogens, gardeners don’t have an abundance of options to control BLS. However, taking the following preventative measures can reduce the pathogen’s impact and stave off disease progression until ripe fruit can be harvested.
- Don’t irrigate overhead. Utilize drip/microirrigation or hand water beds and containers at soil level. This prevents the leaves from becoming wet; wet leaves become a perfect host for BLS.
- Never work tomato plants when leaves are wet. No staking, pruning, tying, or anything else until plant tissue is dry. Working wet tomato plants is an excellent way to spread bacteria!
- Sanitize pruning tools often and wash hands after working infected plants.
- Maintain airflow in plants by planting at correct spacing and thinning interior leaves as necessary to facilitate quicker drying of the plant.
- Prune lower leaves to at least 12” from the soil’s surface to prevent disease transmission from soil to leaves through splashing water.
- Remove infected leaves (when plants are dry!) to slow disease progression.
- Rotate crops and destroy infected plants to prevent buildup of BLS organisms in soil.
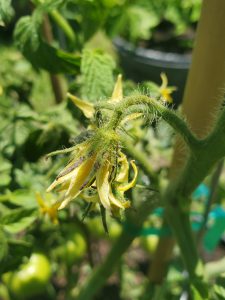
BLS lesions on tomato flowers. Photo courtesy of the author.
- Preventative measures are best, but if your garden has a history of BLS and local weather forecasts call for warm/wet/humid weather, it is best to spray fungicides proactively to protect your crop. A weekly spray with a tank mixture of copper and mancozeb is effective at keeping BLS at bay. This is the only chemical spray combination proven to be effective in controlling BLS.
- Unlike many common tomato pathogens that can be reliably avoided through planting resistant cultivars like ‘Big Beef’, ‘Celebrity’ and others, no varieties are resistant to BLS.
While BLS is an extremely destructive pathogen of both home and commercially grown tomatoes, growers can lessen the disease’s effects by following the preventative measures outlined above and spraying with a copper/mancozeb mix if necessary. Growing tomatoes this year hasn’t been easy, but it’s worth it to fight back and realize a harvest despite difficulties like BLS!
If bacteria have given you the blues or other garden issues are bringing you down, give your local UF/IFAS County Extension Agent a call! We’re here to help you be successful in all your horticultural endeavors. Happy gardening!
by Mark Tancig | Apr 30, 2020
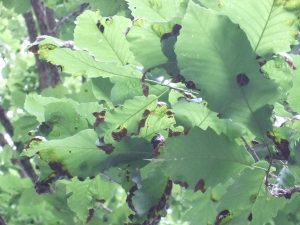
Symptoms of oak leaf blister on swamp chestnut oak. Credit: Gordon Magill.
Even during global pandemics, it’s a joy to be outside during the great north Florida spring we’ve been experiencing lately. As cold fronts come through with their rain bands, some packing a punch, they leave behind the most pleasant mornings, clear blue daytime skies, and crisp evenings. Unfortunately, we’re not the only organism that also enjoys those cool days. Many species of fungi are quite active this type of year as the rains, followed by warmer, yet not too hot temperatures, create the perfect conditions for fungal growth. Some of these fungi grow right on or in the plants we’d like to be enjoying for ourselves, stealing nutrients and causing plant decline or merely causing aesthetic damage. As this is an active time for certain species of fungi, local extension offices are getting more calls and questions regarding lawn and landscape damage due to fungal pathogens. A recent call was a new one for me and an example of a native fungi-plant interaction that looks bad but requires no intervention from us. It also highlights how correctly identifying a disease leads to the best action and can often save time and money and prevent unnecessary pesticides (in this case a fungicide) from entering the environment.
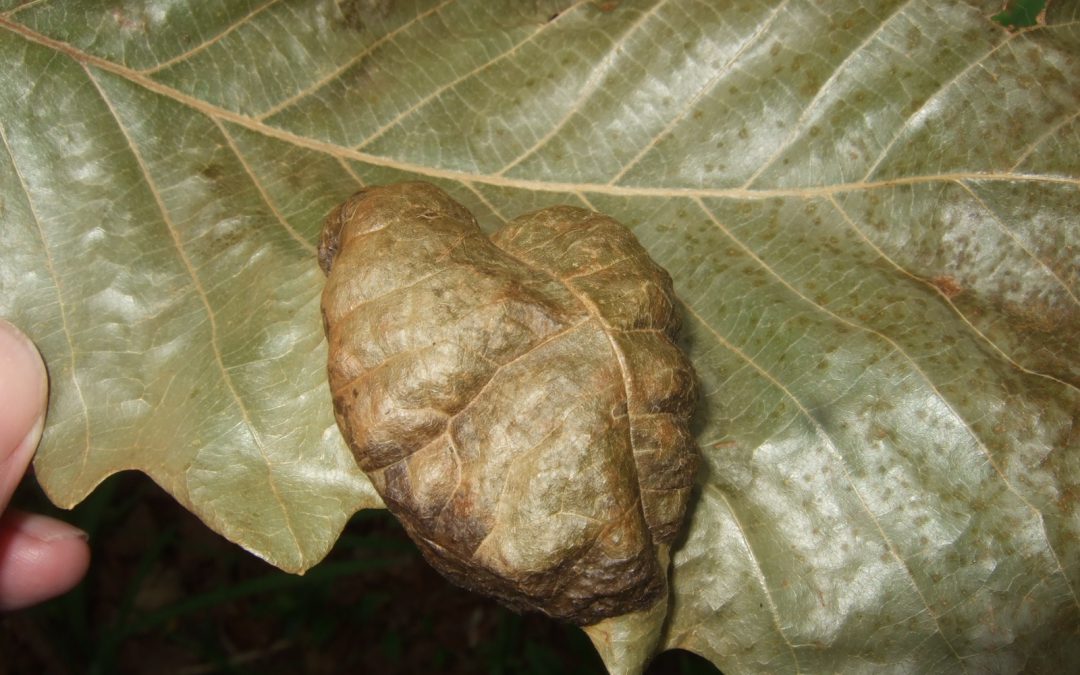
Close up of oak leaf blister on swamp chestnut oak. Credit: Gordon Magill.
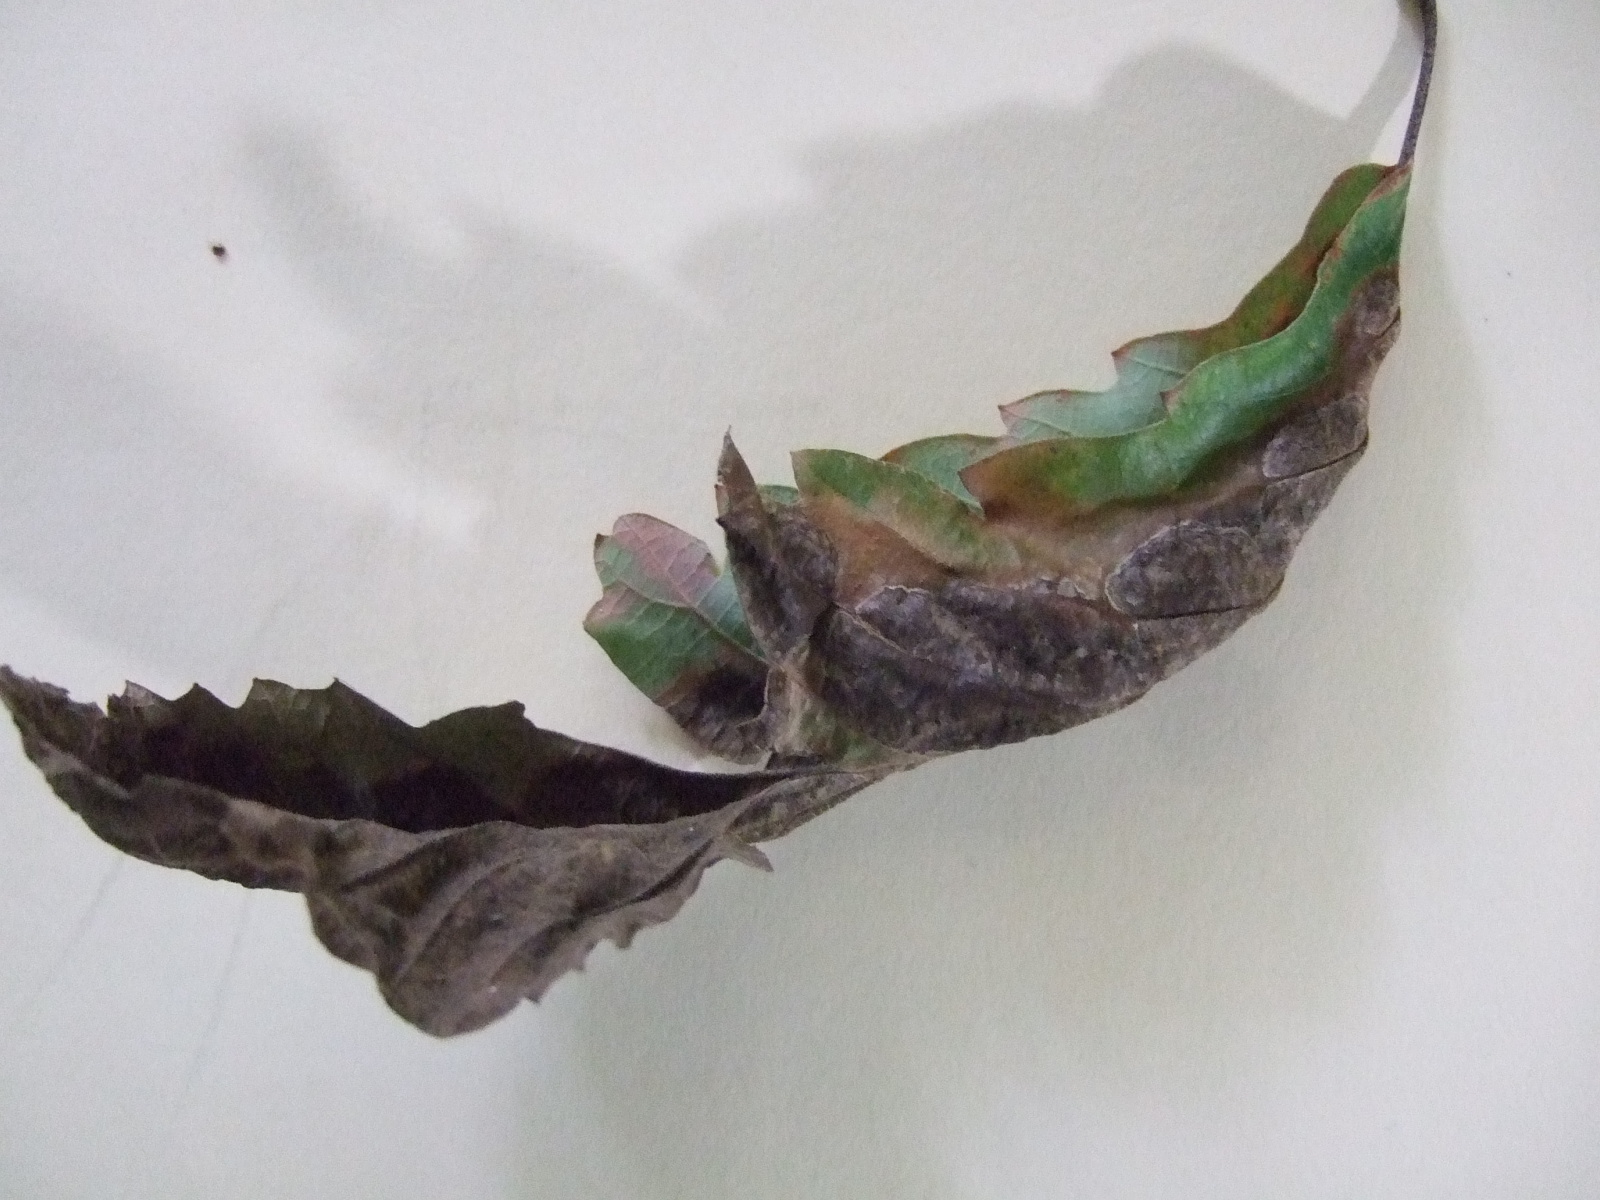
The fungi and plant involved here was the oak leaf blister (Taphrina caerulescens) on a swamp chestnut oak (Quercus michauxii). It forms, you guessed it, blisters on the leaves of any of the oaks, though live oak (Quercus virginiana), laurel oak (Quercus laurifolia), and water oak (Quercus nigra) seem to be preferred hosts. The spores of the fungi, dormant since the previous summer/fall and which happen to get lodged in bud scales through wind and rain, germinate in cool, wet weather. The fungus then infects young leaves as they flush and its growth causes a disruption in the leaves’ development. This leads to the blistered look of the leaf tissue and, during extended periods of cool, wet weather, the entire leaf sort of shrivels, browns, and eventually falls off. Spores are eventually released from the fallen leaves to start the process over the next spring.
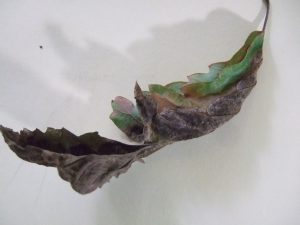
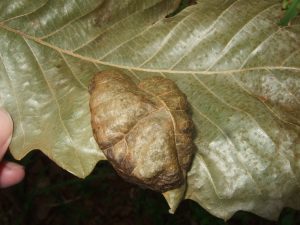
Severe oak leaf blister on swamp chestnut oak. Credit: Gordon Magill.
Though the leaves look pretty terrible, this fungal disease rarely causes plant health issues and the tree recovers just fine. Specimen trees that experience it year to year may be treated with a fungicide, but most homeowners can just let it go. Raking up and disposing of the leaves may help prevent further infections by reducing the number of spores released in the area.
As you enjoy another cool morning after an evening rainstorm, remember that the fungi all around you are also having a great day. You may want to look at your landscape plants and see if there’s anything abnormal going on. If so, take a photo and send it to your local extension office for help with identification and best methods of control, or, like in this case, just leaving it alone.
p.s. As I said this was a new one for me and I want to thank Stan Rosenthal, Extension Agent emeritus, for assisting with identification.
by Sheila Dunning | Apr 23, 2020
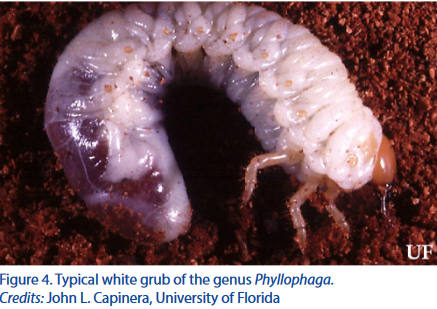
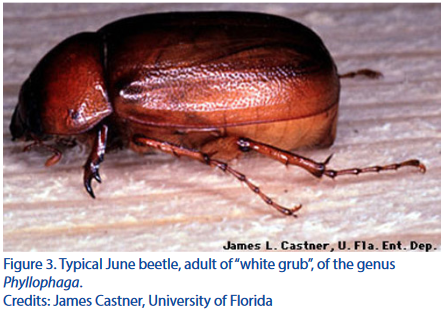
Members of the Phyllophaga genus are found throughout Florida and most of North America. One of them is the May/June beetle. Adults are most active during the rainy season. So in parts of the country where the wetter months are May or June, the common name of this insect makes common sense. But, when an area experiences extra rain earlier in the spring, the May/June beetle may emerge from the ground in March or April. That is what has happened in the western Panhandle this spring. May/June beetles have been leaving the soil and flying to the lights of people’s homes.
The life cycle of these beetles varies from one to four years. Eggs are laid in soil each spring by females. In 3 to 4 weeks, small grubs (larvae) hatch from eggs and develop through three stages (instars), with the first two stages lasting about 3 weeks. The larvae will move closer to the surface and back deeper in the soil as the soil temperature changes. While close to the surface, larvae feed on grass roots about one inch below the soil surface. Damaged grass turns brown and increases in size over time. Heavy infested turf feels spongy and moves when walked upon. The last larval stage remains in the soil from the fall through spring. The cool soil temperatures drive the larvae deeper in the soil where they remain relatively inactive. Typically, on the third year, white grubs pupate 3 to 6 inches deep in the soil and emerge as adults.
 Larvae, called grubs, vary in length from ¾ to 1 ¾ inches depending on the stages. Grubs are white with a C-shaped body with a brown head and three pairs of legs near the head. Adults have ½ to 1 inch long, shiny bodies that are dark yellow to brownish-red in color. Adults do feed on the foliage of several species of ornamental plants, but the damage is typically only aesthetic; not causing long-term harm.
Monitoring of and managing emerging adults can help with deciding on the need for insecticide control for the grubs. To catch and remove adult beetles, place white buckets containing soapy water near plants that have chew marks or areas with lights at night. Leave it overnight. The beetles can easily be disposed of the next day. If there are more than 12 in the bucket be prepared to monitor the lawn for grubs. Extra rain or frequent irrigation during the adult flight time may attract more egg-laying females.
To inspect for grubs, turn over sod to a depth of at least two-inches. If there are an average of three or more per square foot, an insecticide treatment may be needed. To confirm that they are May/June beetles inspect the darkened rear of the grub. Locate the anal slit. It should be Y-shaped with two rows of parallel bristles that point toward each other. This is referred to as the raster pattern. All grub species can be identified using their unique “butt” features.
The most effective time to control this pest is summer or early fall when the larvae are small. Remove as much thatch as possible before applying an insecticide. Spot treat the off-colored area plus the surrounding 10 feet with products containing imidacloprid or halofenozide in early summer. Follow up in the fall with insecticides such as trichlorfon, bifenthrin or carbaryl if grubs persist.
by Daniel J. Leonard | Apr 1, 2020
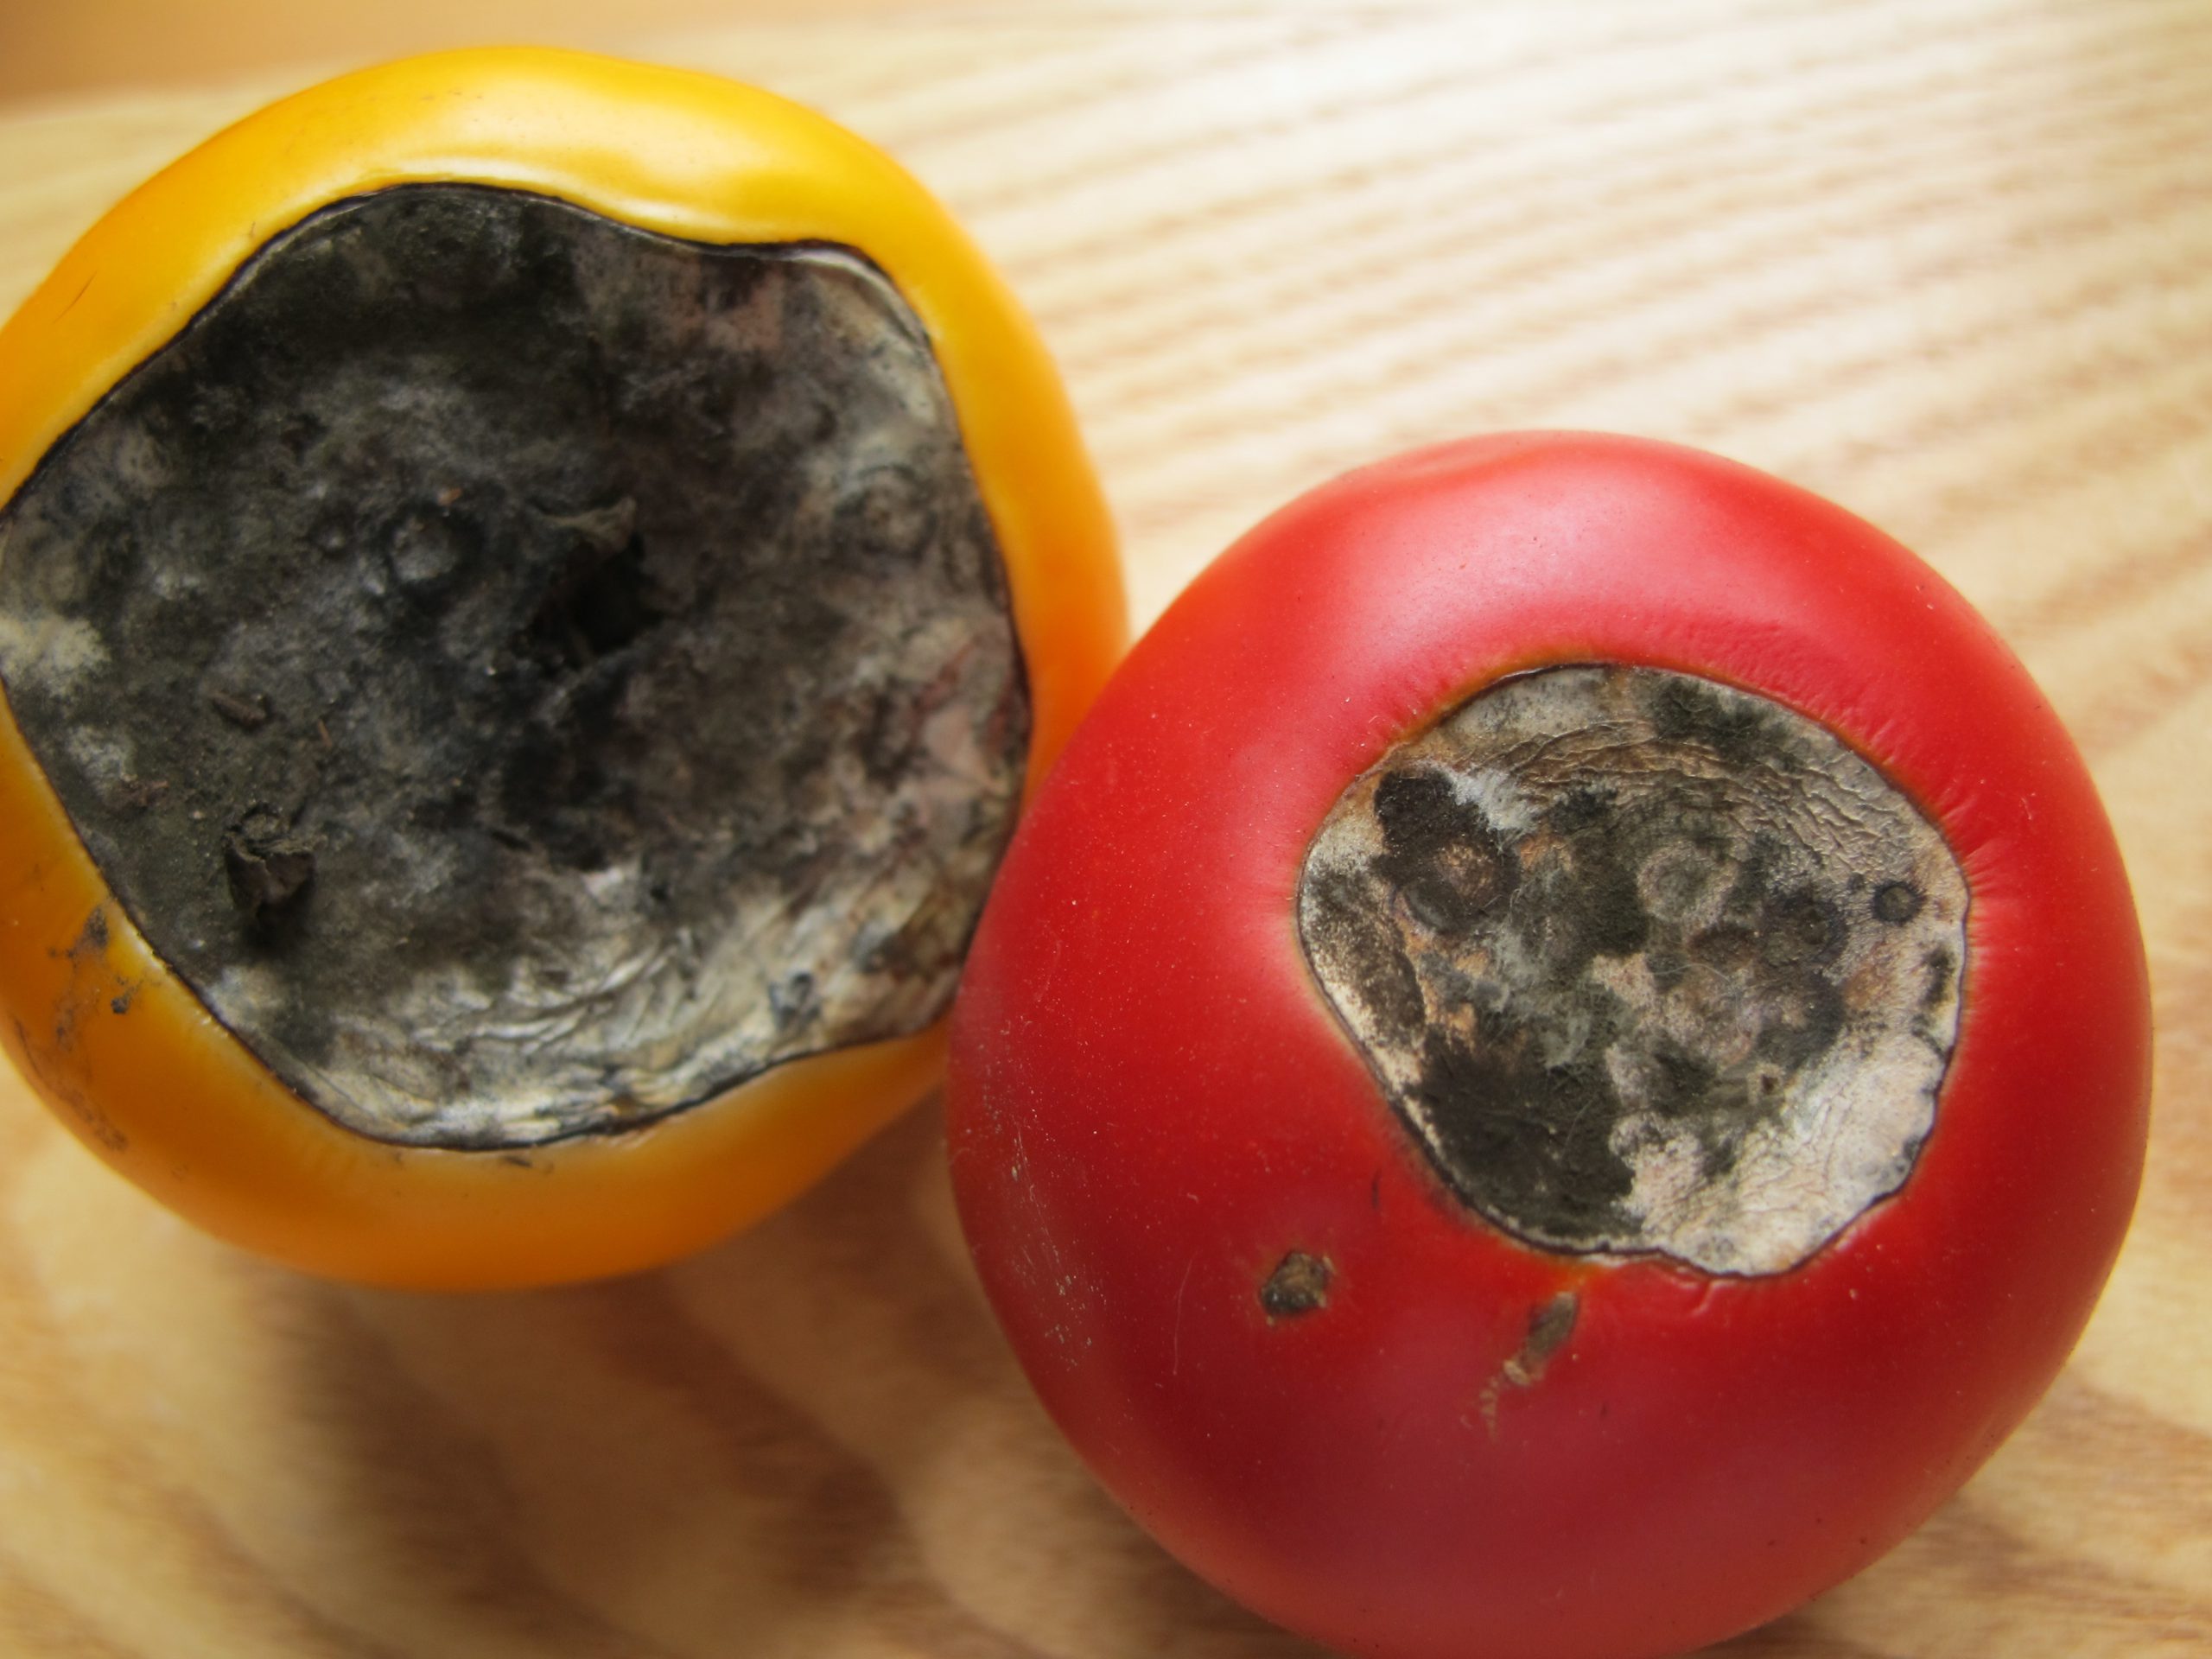
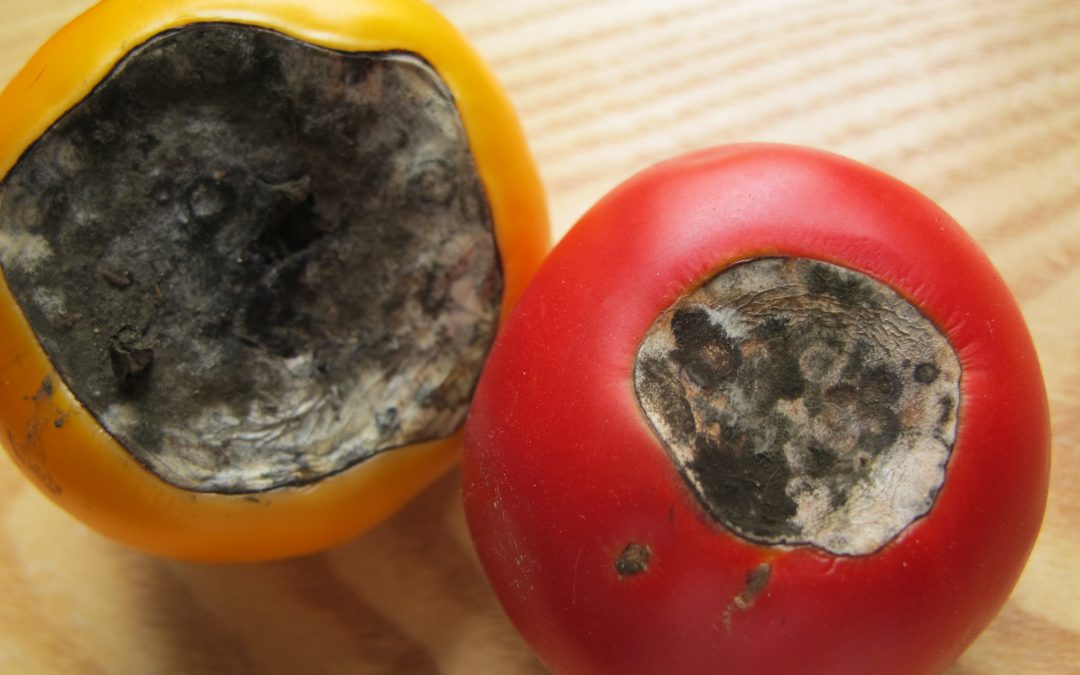
There aren’t many more frustrating things than growing seemingly healthy tomatoes, those plants setting an abundance of flower and fruit, and then, once your tomatoes get about the size of a golf ball, having the fruit rot away from the base. This very common condition, called Blossom End Rot (BER), is caused one of two ways: by either a soil calcium deficiency or disruption of soil calcium uptake by the plant. Fortunately, preventing BER from occurring and then realizing an awesome crop of tasty tomato fruit is relatively simple and home gardeners have a couple of possible preventative solution!
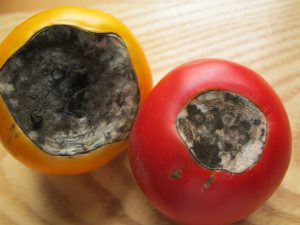
Blossom End Rot damage. Photo Courtesy Larry Williams, Okaloosa County Extension.
- Soil Test & Lime if Needed. The only way to really know if your soil calcium level is sufficient is through a soil test. A complete soil test through the UF Soil Lab or other lab measures both raw nutrient levels and pH. Testing for pH is especially critical. For calcium, either already in the soil or in a supplement you apply, to be available to tomato plants, soil pH needs to be between 6.0-7. In more “acidic” soil pH below 6, nutrients like iron and aluminum become more available to your tomato plants, outcompeting calcium for uptake into the roots. We don’t want that. If your soil test indicates a pH below 6, it will give a lime recommendation somewhere between 3-5 lbs/100 ft sq of garden area to raise the pH to the sweet spot between 6.0-7.0 where your tomatoes will thrive.
- Use a Non-Lime Calcium Supplement. If you’ve had your soil tested and your pH is fine, adding more lime as a calcium supplement isn’t helpful. Using lime as an additional calcium source can actually lift pH above that 6.0-7.0 zone and cause other problems. At this point, once pH is where we want it, I like to add a non-lime calcium supplement. There are lots of options here. Traditional fertilizers labeled for tomatoes and veggies tend to have a good calcium content in the 6-10% range and work great. However, if you’re into organic gardening or just don’t need the extra nutrient value of a complete fertilizer, Gypsum is a good calcium supplement and is widely available. Regardless of which non-lime source you choose, apply at planting or shortly after and follow label rates for best results.
- Water Properly. Consistent watering is key in helping ward off BER. Though we know BER is generally

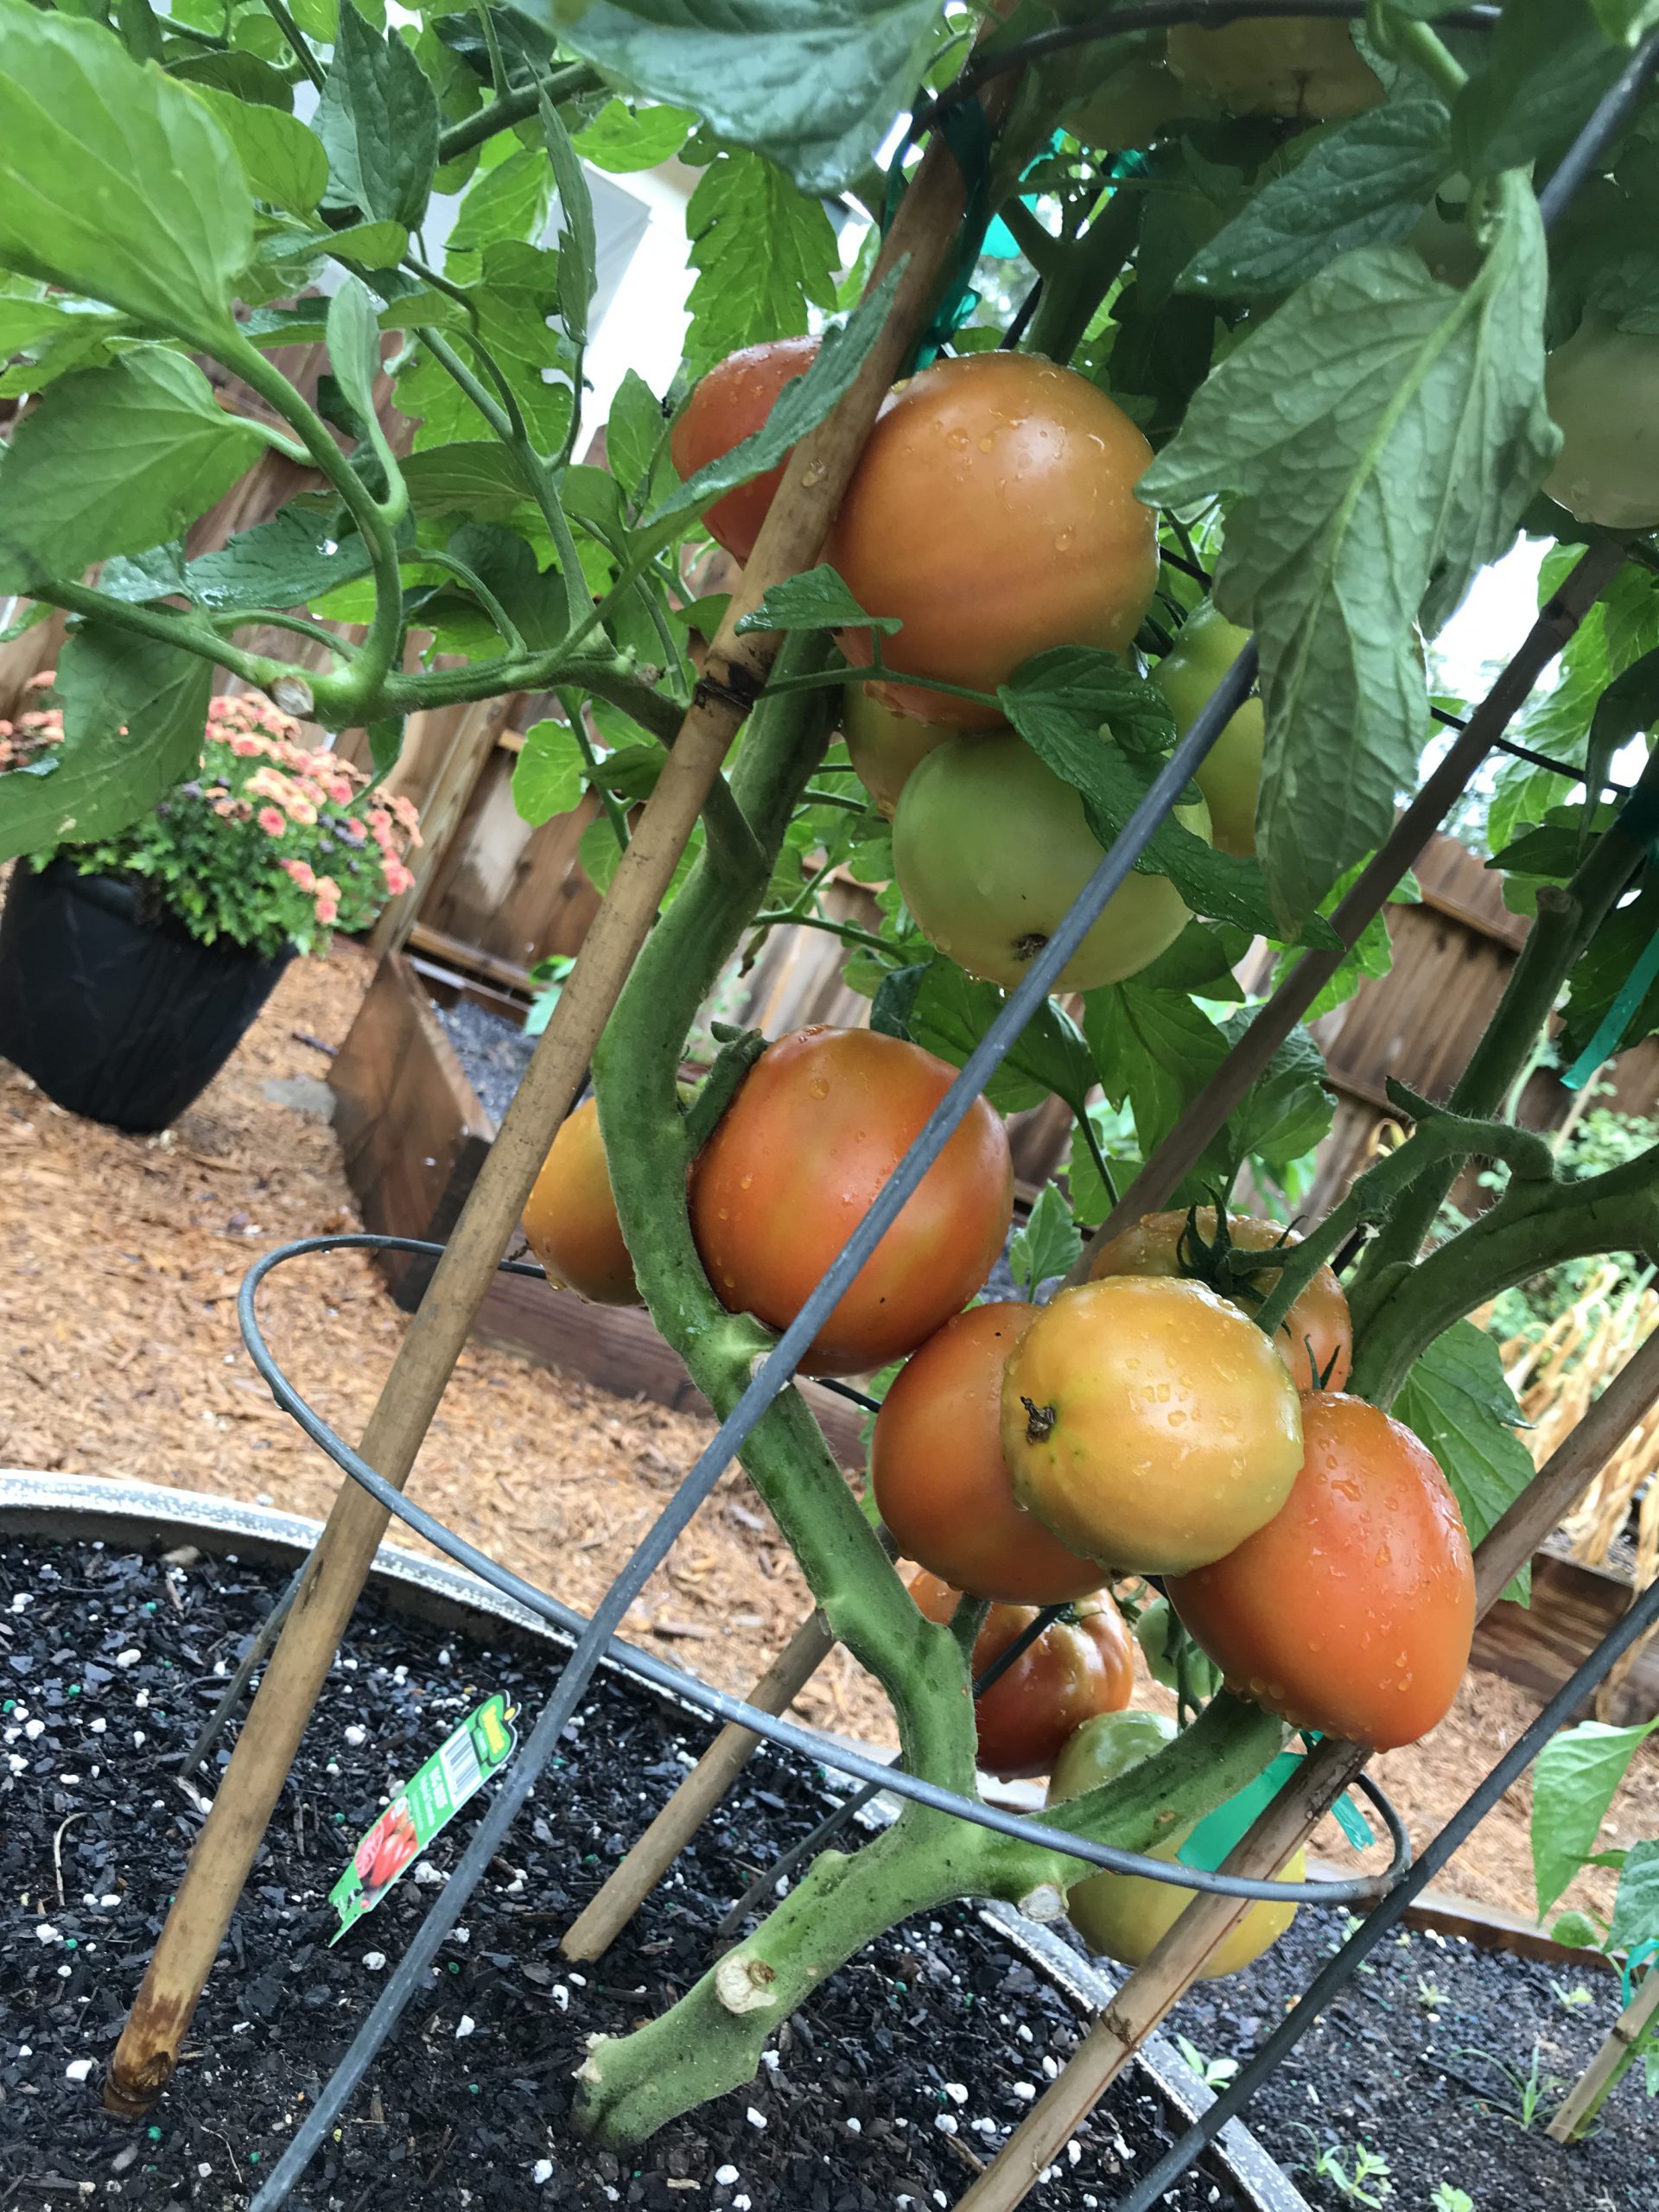
Healthy ‘Big Beef’ tomatoes grown in 2019 with a pH of 6.5, amended with Gypsum at planting, and watered regularly each day! Notice no BER. Photo courtesy the author.
caused by calcium deficiency, it can be induced by creation of distinct wet and dry periods from non-regular watering, interfering with calcium uptake and availability to the plant. So, while you may have adequate soil calcium, if you don’t water correctly, the condition will happen anyway! It’s also good to keep in mind that mature tomato plants use large quantities of water daily, so during the heat of summer, plants in containers may need to be watered multiple times daily to maintain consistently moist soil. Think about it, you don’t drink 8 glasses of water when you wake up and then never drink again throughout a hot day. A tomato is no different. Allowing your plants to wilt down before providing additional water ruins productivity and can induce BER.
Blossom End Rot, while one of the more destructive fates of tomatoes, is totally preventable by a little legwork early in the growing game from you! Soil test and change pH with lime if needed, add a shot of calcium through a tomato blend fertilizer or non-lime supplement like gypsum, and water regularly! Do these three things and you’ll be well on your way to a great crop of early summer tomatoes. If you have any questions about tomato blossom end rot or any other horticulture or agricultural topic, please don’t hesitate to reach out to us at the UF/IFAS Calhoun County Extension Office. Take advantage of this beautiful spring weather and get in the garden today! Happy gardening.
by Daniel J. Leonard | Nov 8, 2019
Most lawn weeds are annoying, appearing in unwanted places and numbers, but few actually cause physical harm like the pest plant Lawn Burweed (Soliva sessilis)! This infamous small, spreading winter weed’s seeds generally germinate when temperatures begin to cool in the fall (late October-November). Burweed then grows mostly unnoticed through the winter until spring, when it then produces the hard, spiny burs that contain the plant’s seeds and the plants finally die. Once the burs have formed, Burweed’s presence makes walking on newly greened-up spring turf extremely painful for pets and people (barefoot of course, the burs aren’t large enough to puncture shoe soles). At this point of the plant’s life, once it has made its unwanted presence known, control is not feasible as the Burweed plants have set seed, ensuring a new crop next year, and killing the remaining foliage doesn’t remove the burs. What is a homeowner to do?
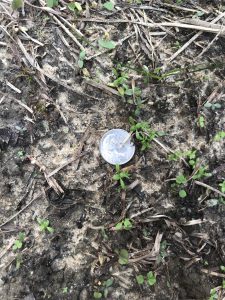
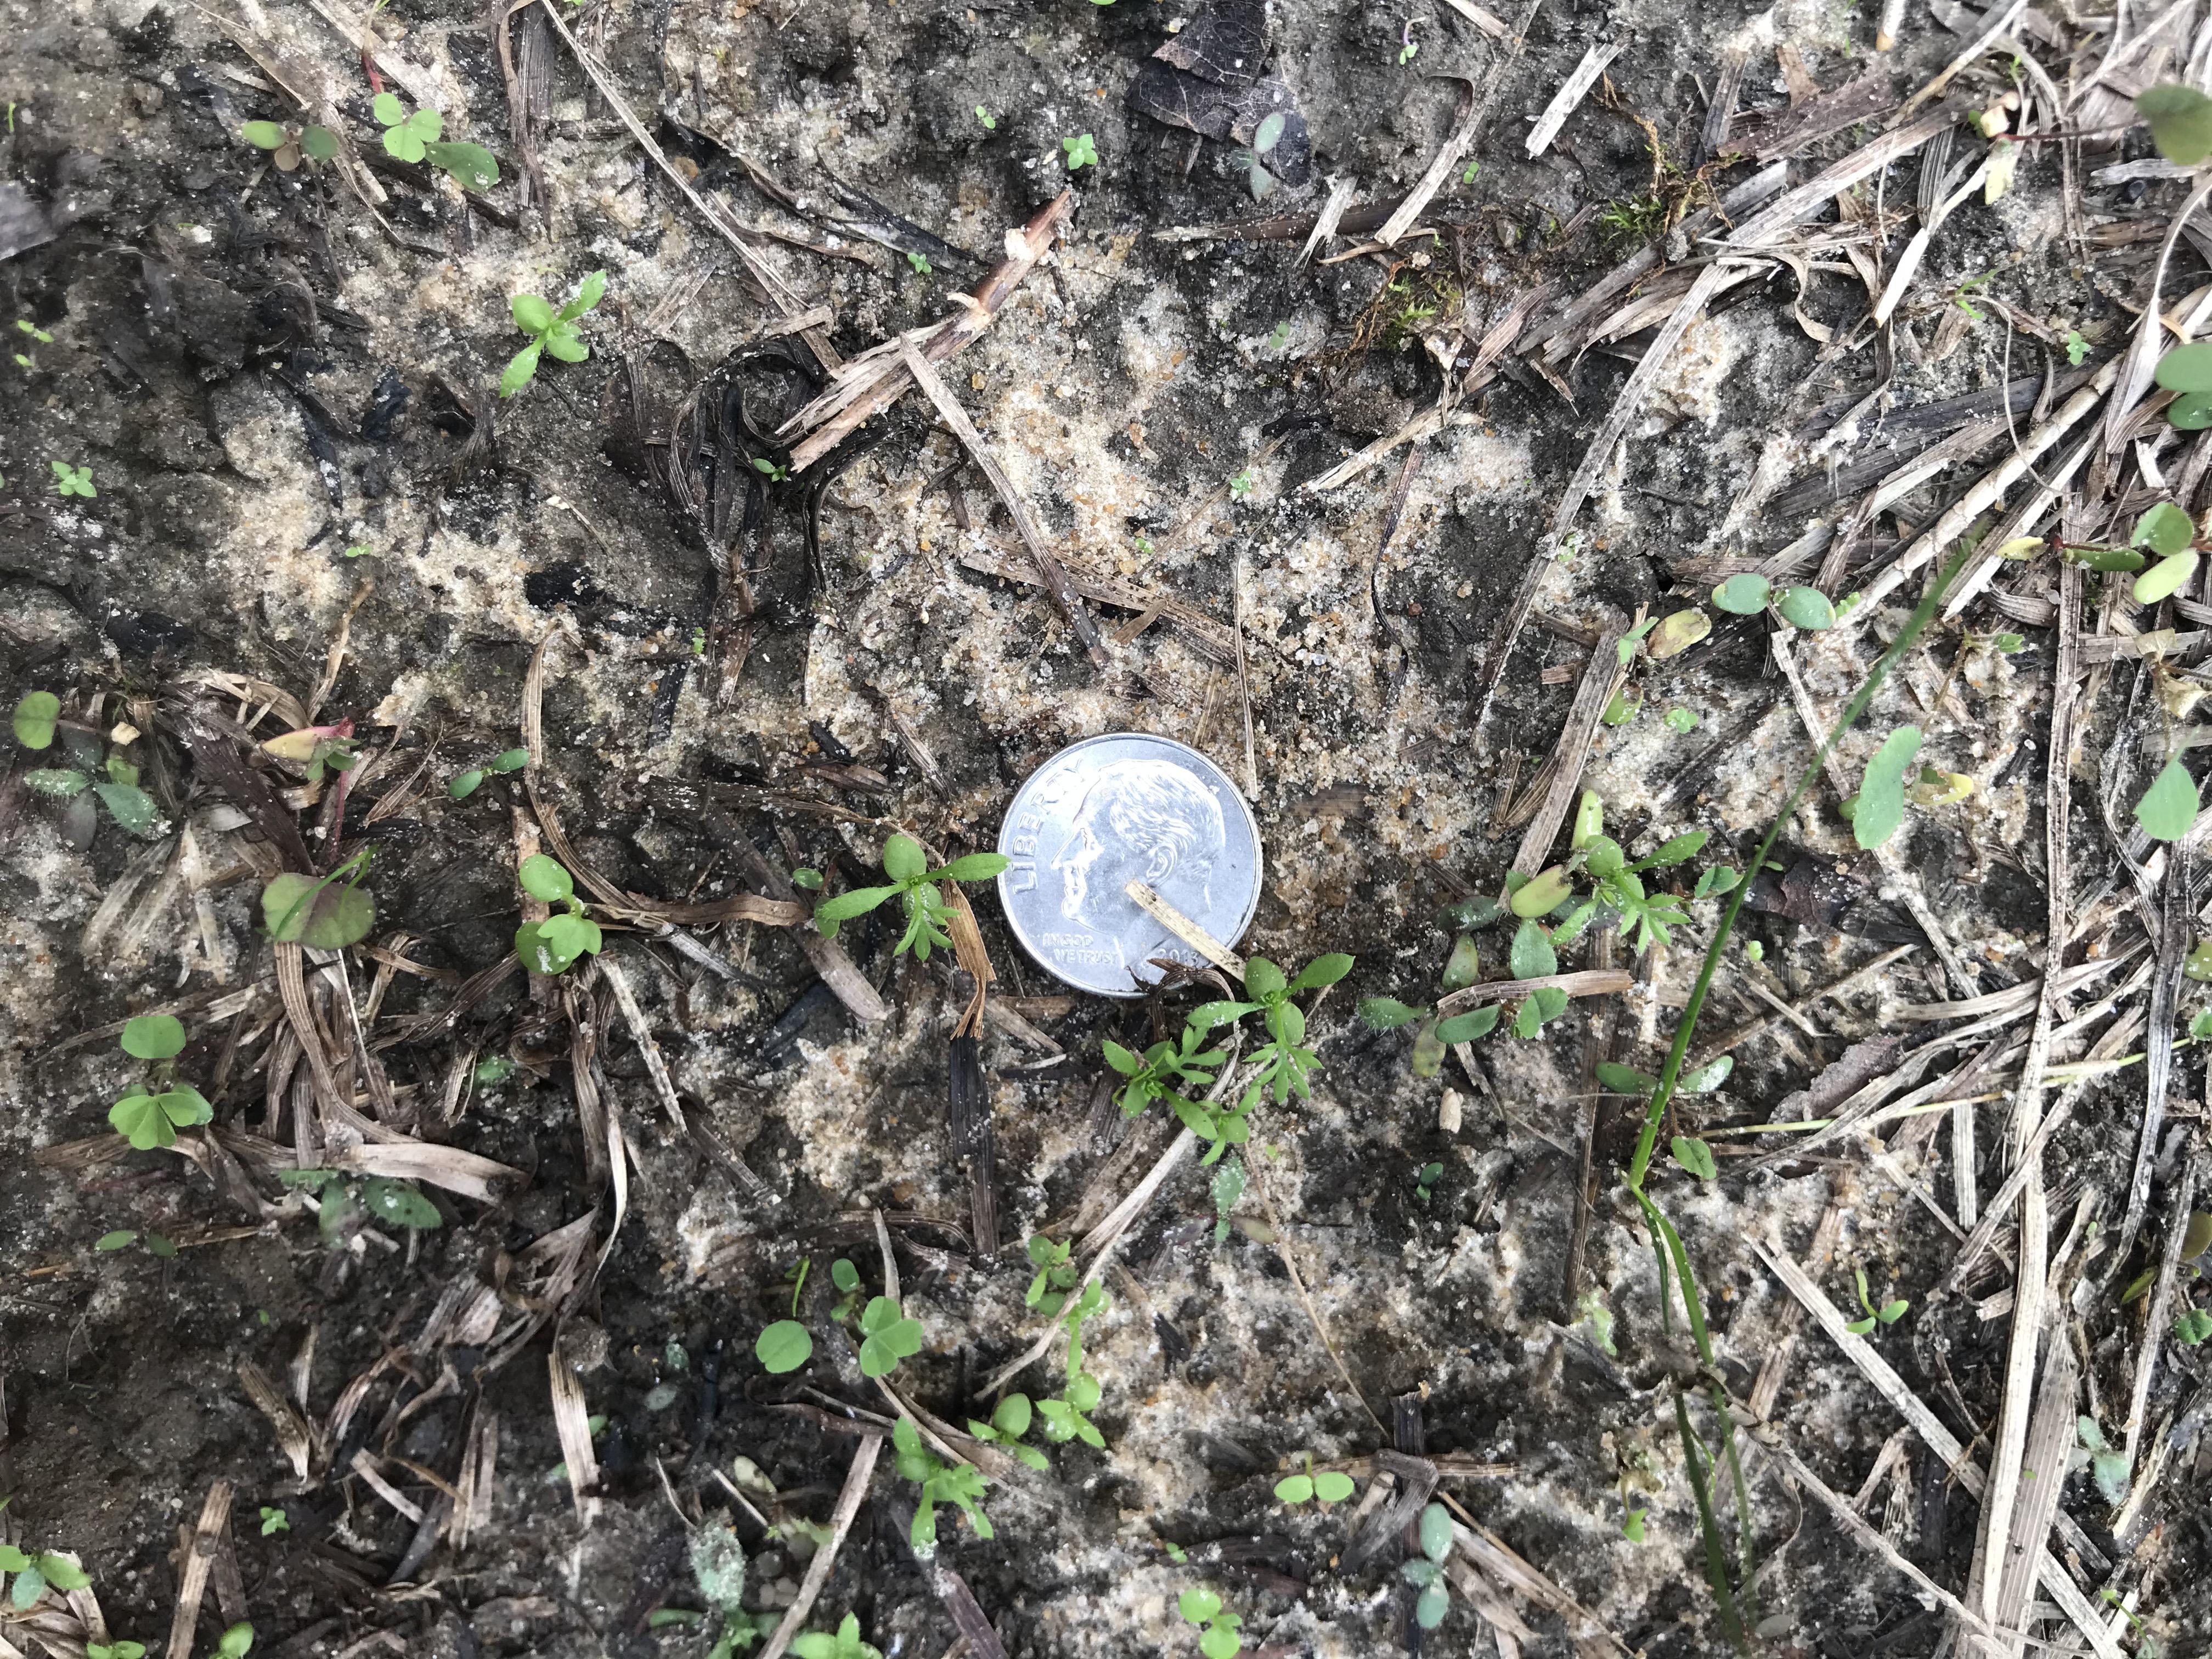
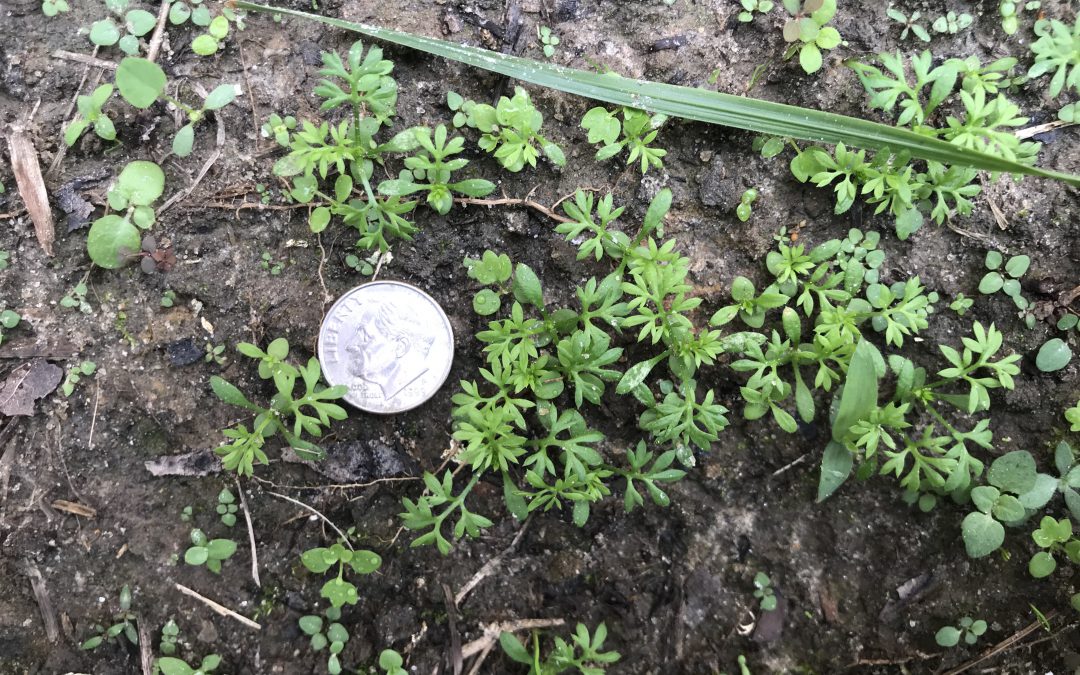
Newly germinated Lawn Burweed. Photo courtesy of the author.
Fortunately, Lawn Burweed is relatively easy to control chemically if one pays close attention to seasonal changes and uses herbicides (either pre-emergent or post-emergent herbicides) effectively.
Pre-emergent Herbicide Options: The first chemical control option for Lawn Burweed is a timely application of the pre-emergent herbicide Isoxaben (sold under various brand names at most farm or garden stores) to prevent Burweed seeds from germinating, greatly reducing plant populations. However, pre-emergent Isoxaben applications must be made before the plants sprout and begin to grow to be effective. For Burweed, this generally means application in October, once nighttime temperatures dip into the 55-60 degrees F range for several nights in a row, as consistent temperatures in this range give Burweed seeds the signal to germinate. Though we’re already past the point of pre-emergent herbicides being an option for control this year, homeowners should plan to include this method in their Lawn Burweed control plan for fall 2020!
Post-Emergent Herbicide Options: If you haven’t already used a pre-emergent herbicide this fall for Burweed control, you must turn to post-emergent options. Like pre-emergent herbicides, timing is critical if you want your post-emergent applications to work! These herbicides are most effective when Burweed plants are young, small, vigorously growing, and haven’t set burs yet. Successful post-emergent applications may be made from December-early February before burs harden. Unlike pre-emergents, where there is only one strong option for Burweed control, many post-emergent herbicides exist that are extremely effective! When shopping, look for products containing the following active ingredients:
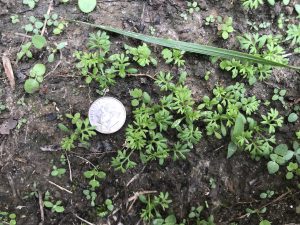
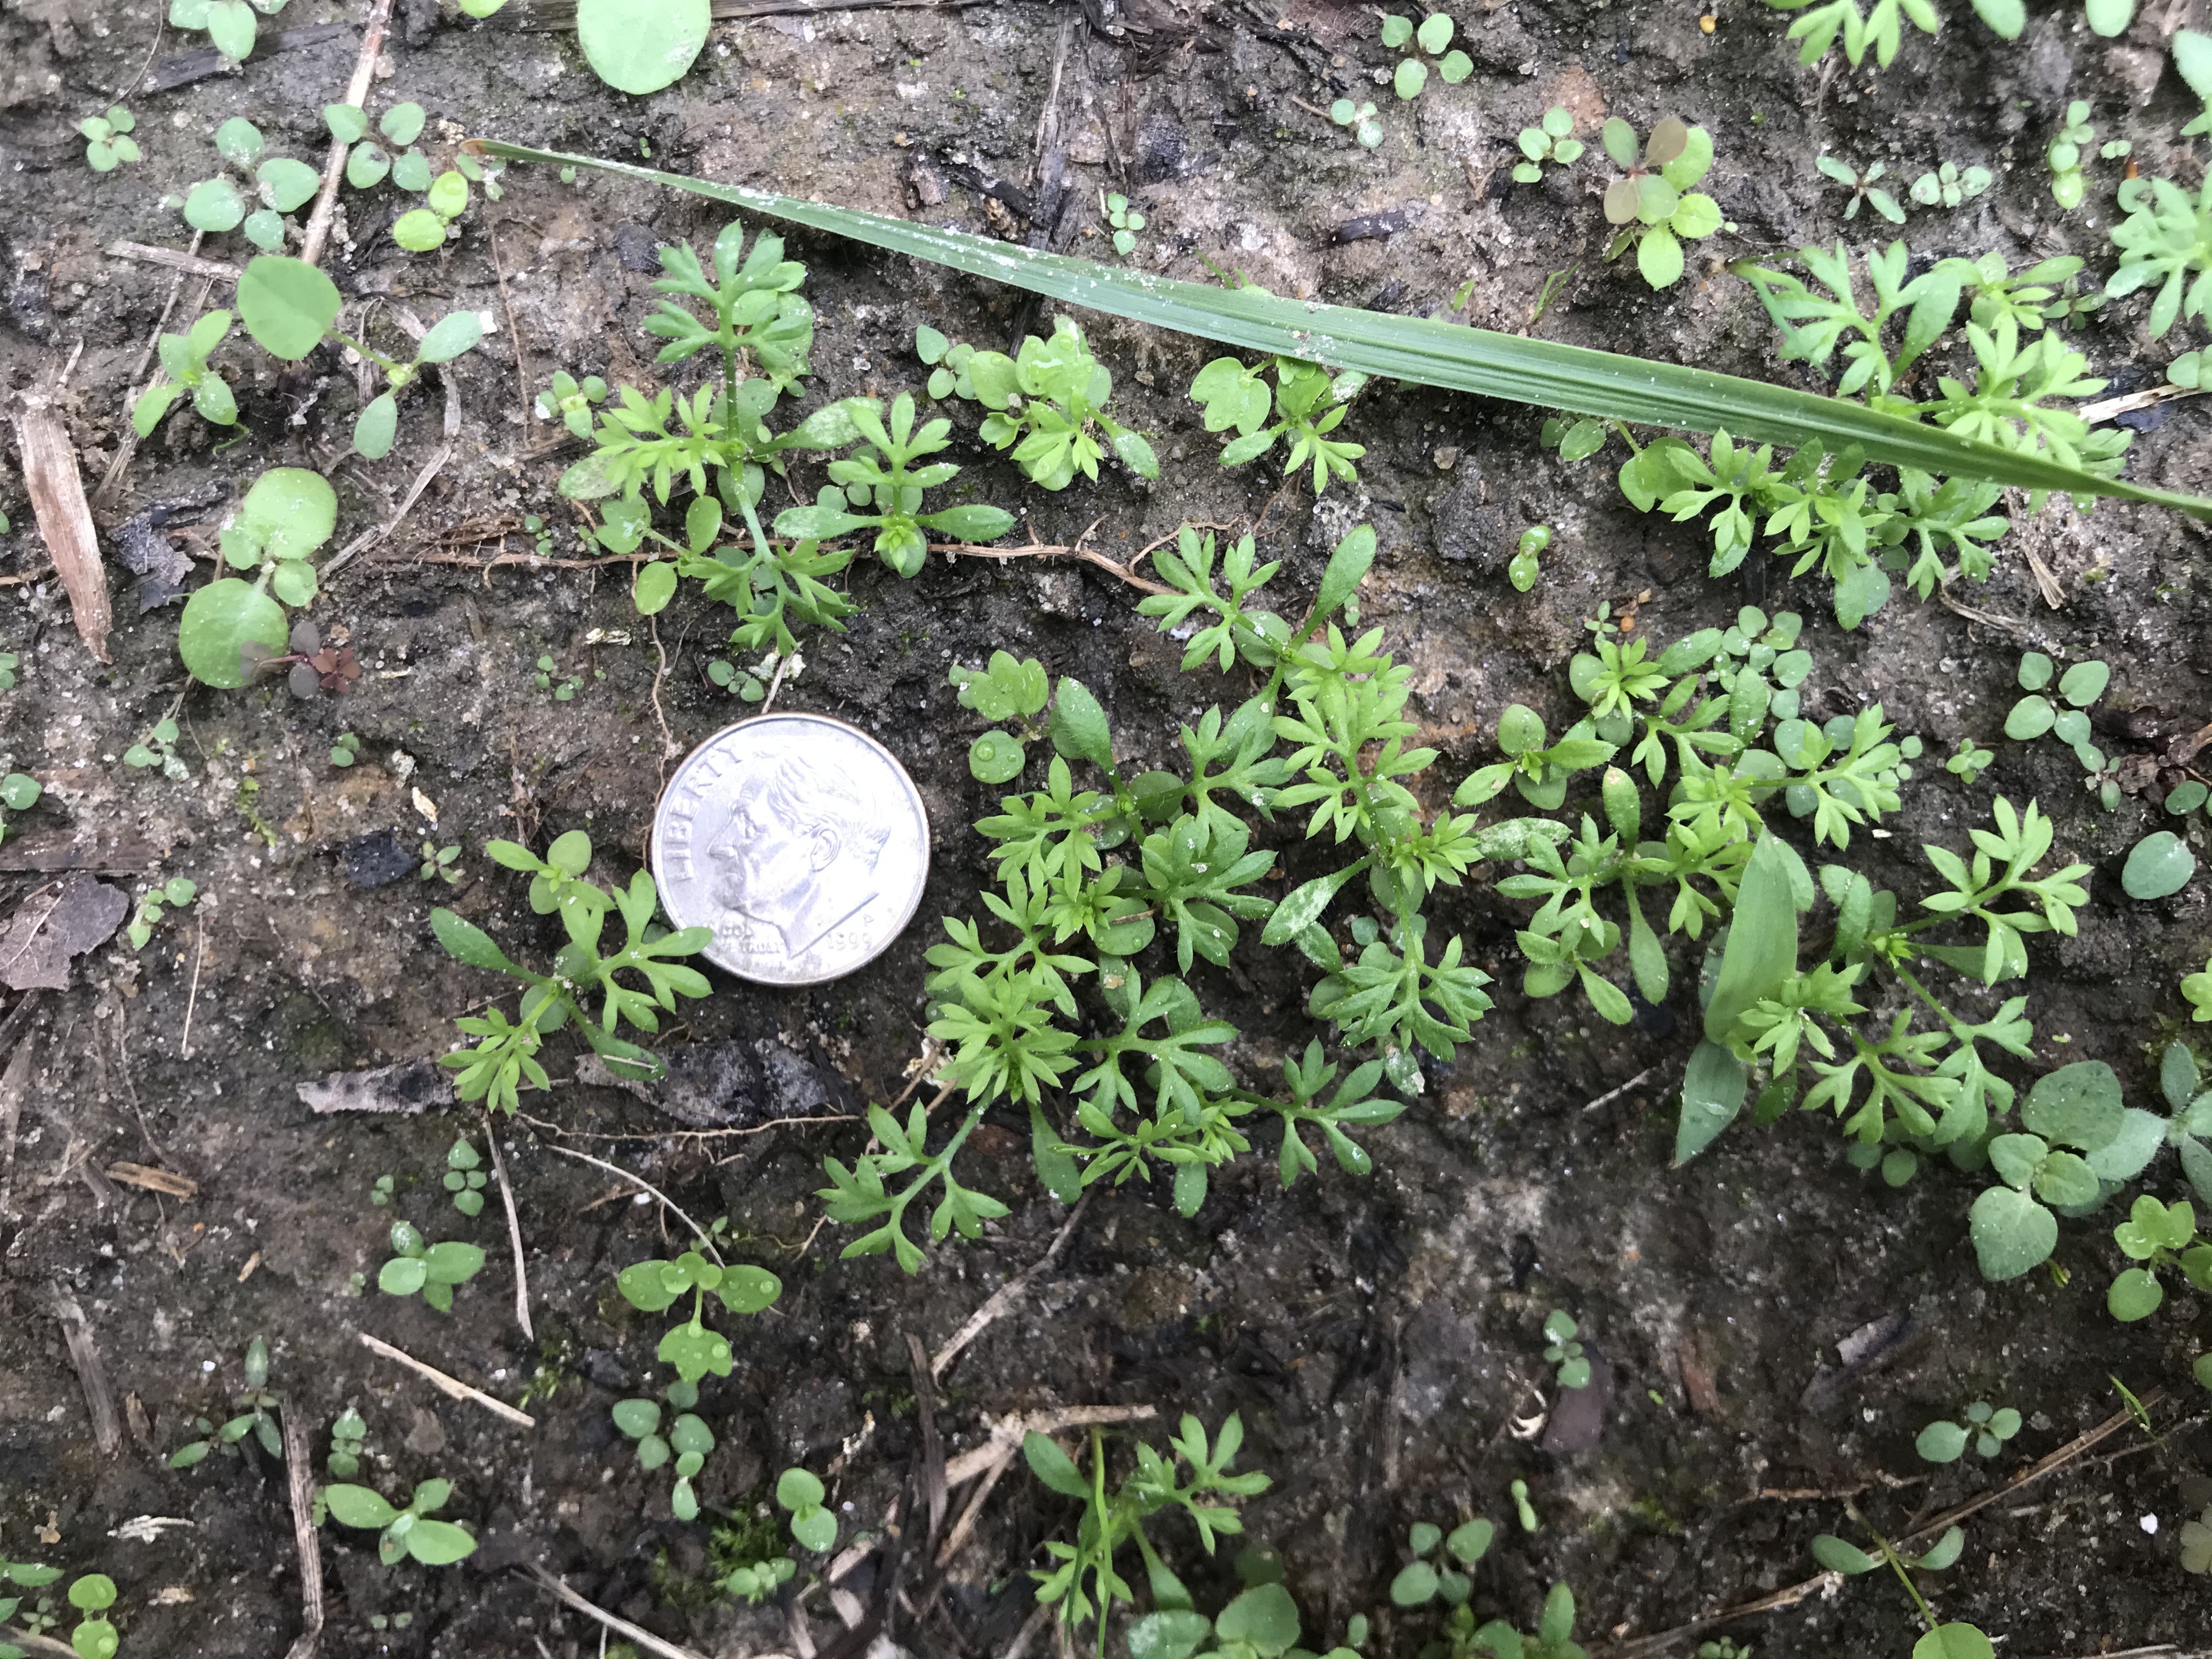
Lawn Burweed around 10 days after emergence. Photo courtesy of author.
- Atrazine – sold under many brand names and safe in Centipede, St. Augustine, & Bermudagrass. Do not use in Zoysia or Bahiagrass lawns.
- Dicamba, Mecoprop, 2,4-D – commonly sold in three-way formulations through many brand names. Generally safe in Centipede, St. Augustine, Bermuda, Zoysia, & Bahiagrass lawns.
- Metsulfuron – sold under several brand names and safe in Centipede, St. Augustine, Zoysia & Bermudagrass. Do not use in Bahiagrass. Be careful if used around ornamentals.
- Thiencarbazone, iodosulfuron, dicamba – sold as Celsius WG from Bayer. Safe in Centipedegrass, Zoysiagrass, Bermudagrass, and St. Augustinegrass. Do not use in Bahiagrass.
Lawn Burweed control with of all the above-listed herbicides will be most effective with a follow-up application 10-14 days later.
Note: With the exception of the Thiencarbazone, iodosulfuron & dicamba mixture (Celsius), do not apply any of these post-emergent herbicides during spring turf green up.
As always, if you have questions about Lawn Burweed control or any other horticulture or agriculture related questions, please contact your local UF/IFAS County Extension office or consult any of the following related articles: https://nwdistrict.ifas.ufl.edu/hort/2015/10/06/lawn-burweed-prevention-is-easier-than-cure/ and http://blogs.ifas.ufl.edu/washingtonco/2017/10/11/prepare-now-to-avoid-lawn-burweed-infestation-later/
Happy gardening!