by Daniel J. Leonard | Oct 28, 2020
In the Panhandle, fall is the prettiest season for wildflowers. Our roadsides and woodlands are covered with pinks, whites, yellows, blues, purples, and even a little red here and there. Pretty as it may be, the beautiful wildflower look isn’t super appropriate for most yards. It would look unkempt, a little “wild” if you will, would be hard to manage and is probably best enjoyed in natural areas. However, we can bring some of the native colors of fall into our landscapes in a much lower maintenance, refined manner with two Panhandle species that pair excellently together, Muhly Grass (Muhlenbergia capillaris) and Darrow’s Blueberry (Vaccineum darrowii).
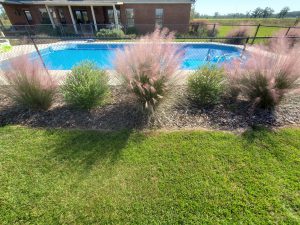
Muhly Grass and Darrow’s Blueberry in a local landscape. Photo courtesy of Daniel Leonard.
Muhly Grass, the native grass with the pinkish/purple panicles blooming right now, has gained much popularity in recent years, earning a reputation as a near pest/disease free, drought tolerant, attractive landscape plant. Operating in lieu of more traditional low growing shrubs in landscapes, Muhly is an airy, greenish gray bunch grass growing about 3-4’ tall and wide, lending informal, coastal texture to landscapes most of the year and really shining in fall during its flowering season. Once established, it never needs extra water, prefers little fertilizer, and only needs a rejuvenation prune (or burn – the Leonard preferred method. It’s fun and mimics the role of fire in Muhly’s native ecosystems!) every couple of years to keep it looking tidy.
Unlike Muhly Grass, Darrow’s Blueberry has not caught on broadly in the landscape industry but is no less deserving. This native blueberry species only grows a couple of feet tall, produces edible fruit that wildlife enjoy, and adds an unusual blue green color to landscapes via its tiny-leaved, evergreen foliage. It prefers the same sites as Muhly and is part of the reason they pair so well together. Our mostly sandy, well drained soils work just fine, but both plants can handle soils that are occasionally wet. A bonus, Darrow’s also has tiny, bell shaped flowers in spring that attract all manner of beneficial bee species. This makes it a must in any native pollinator garden!
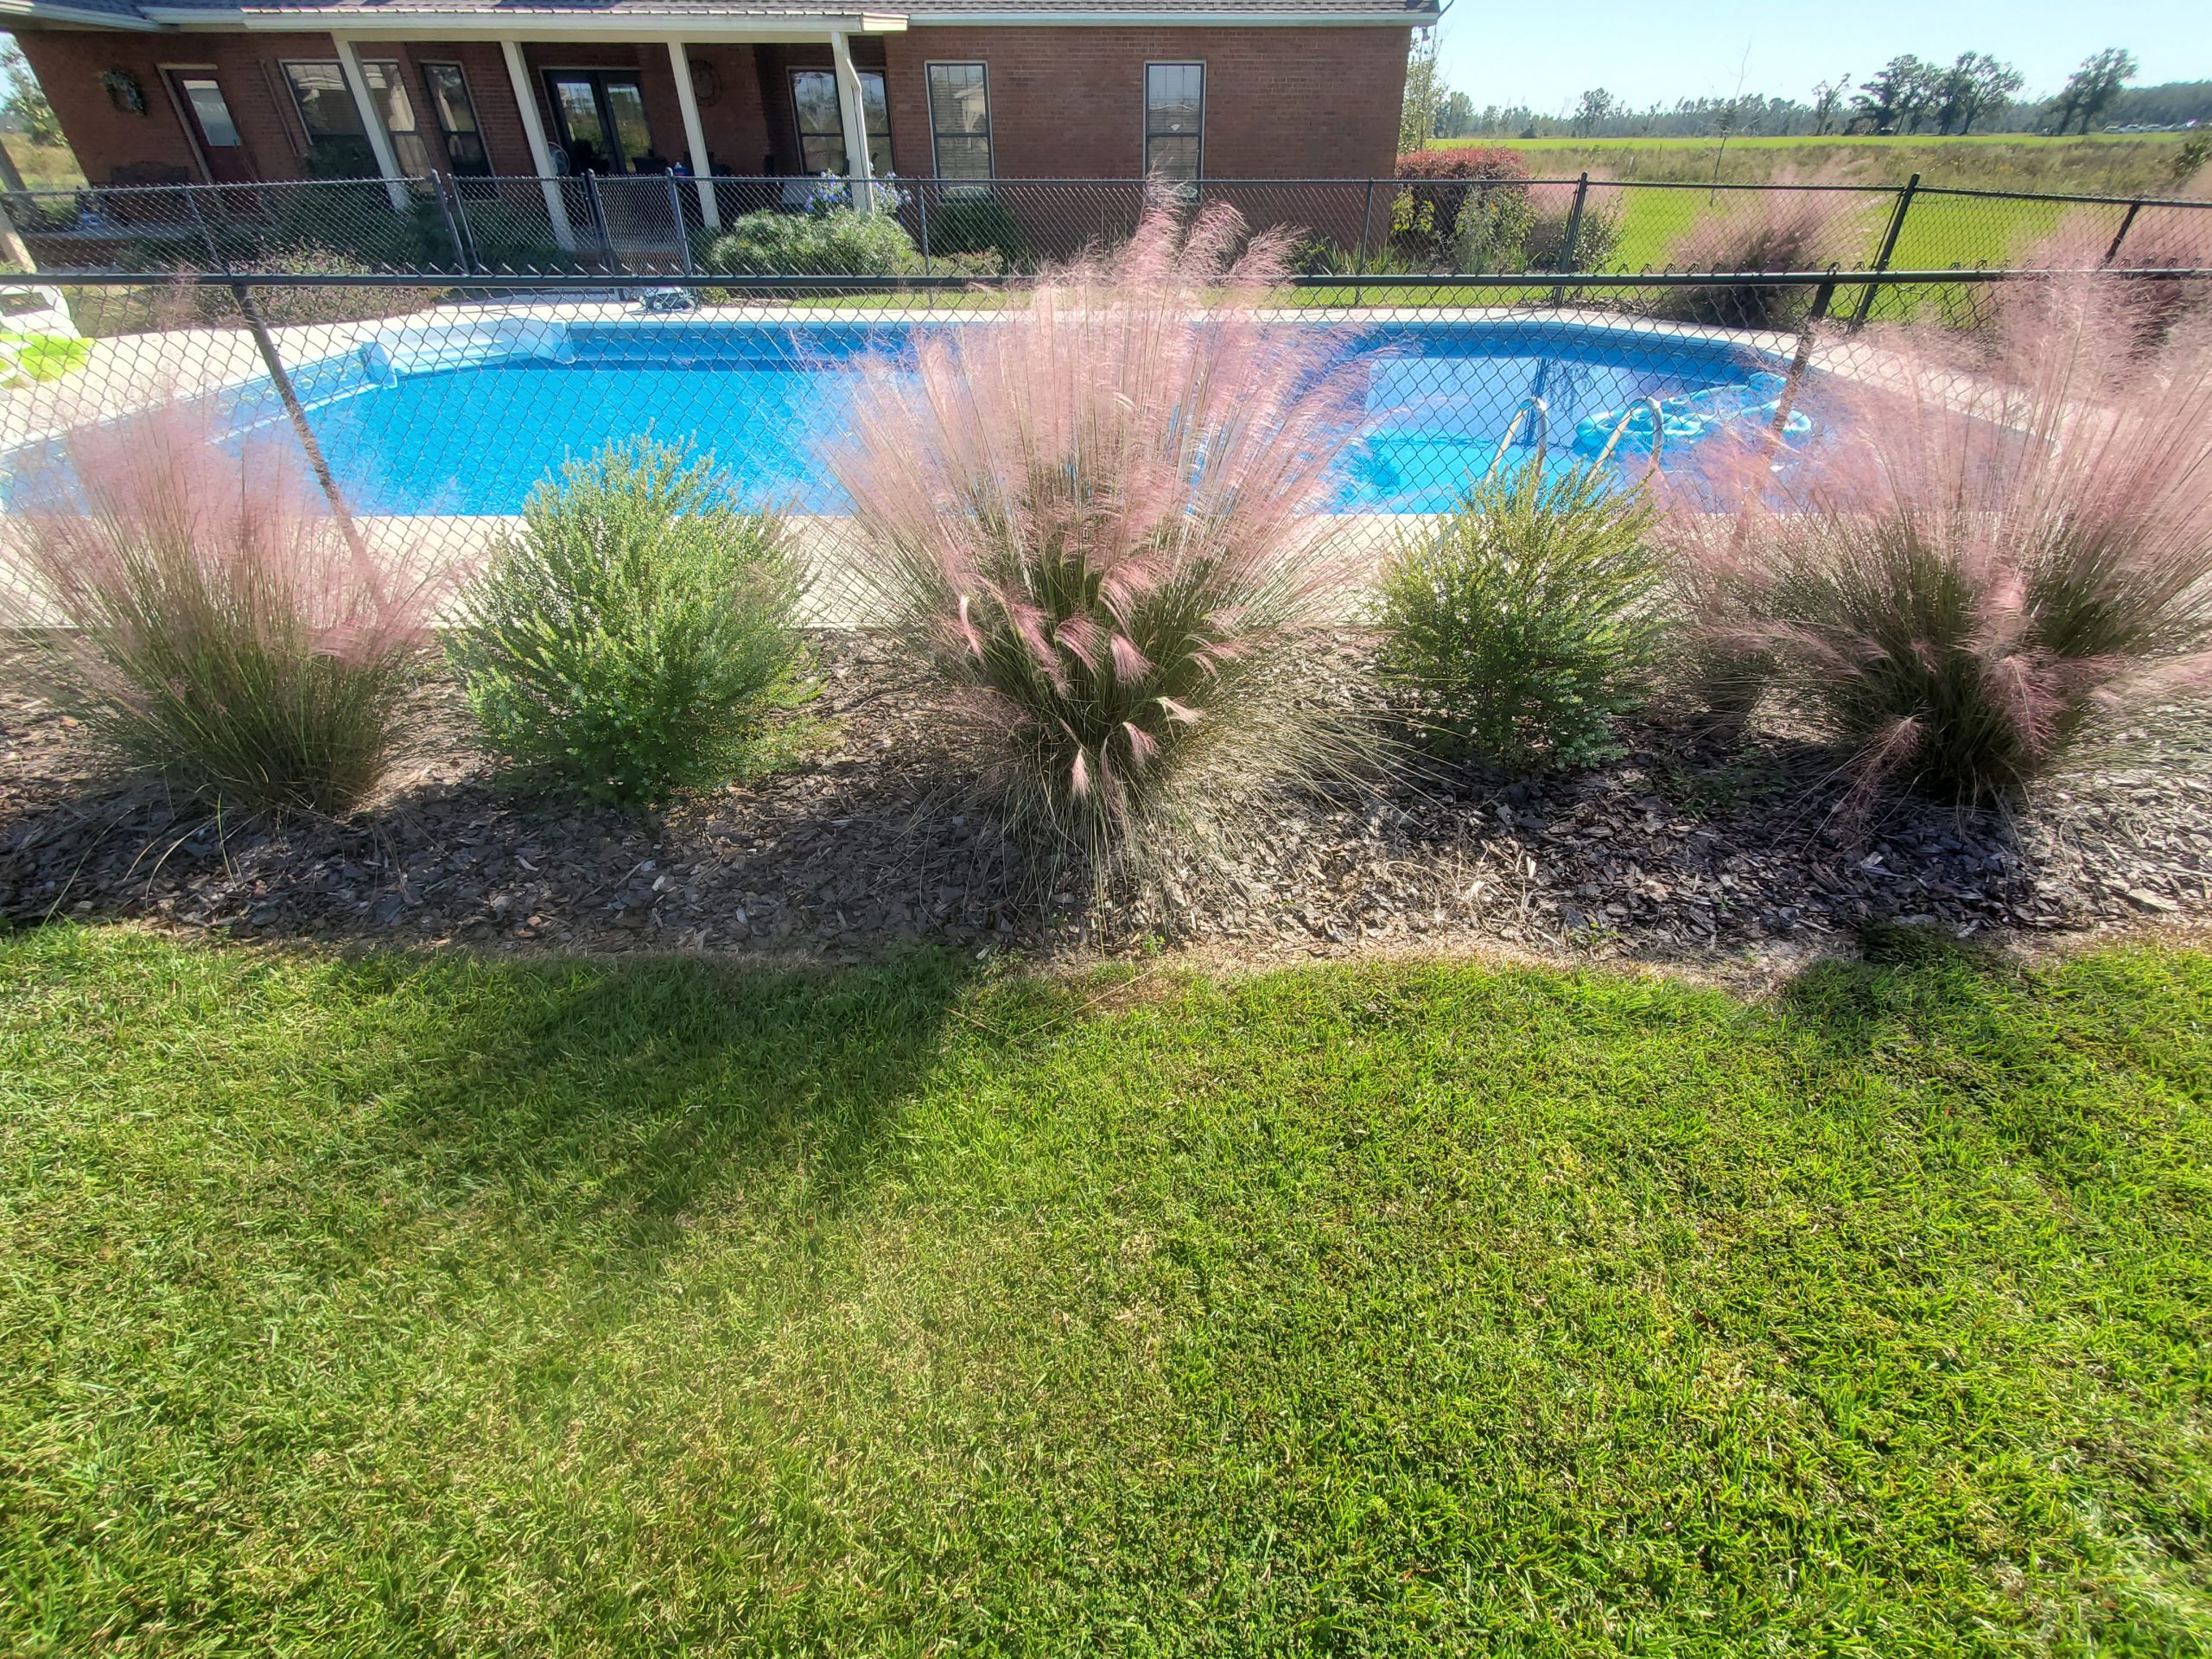
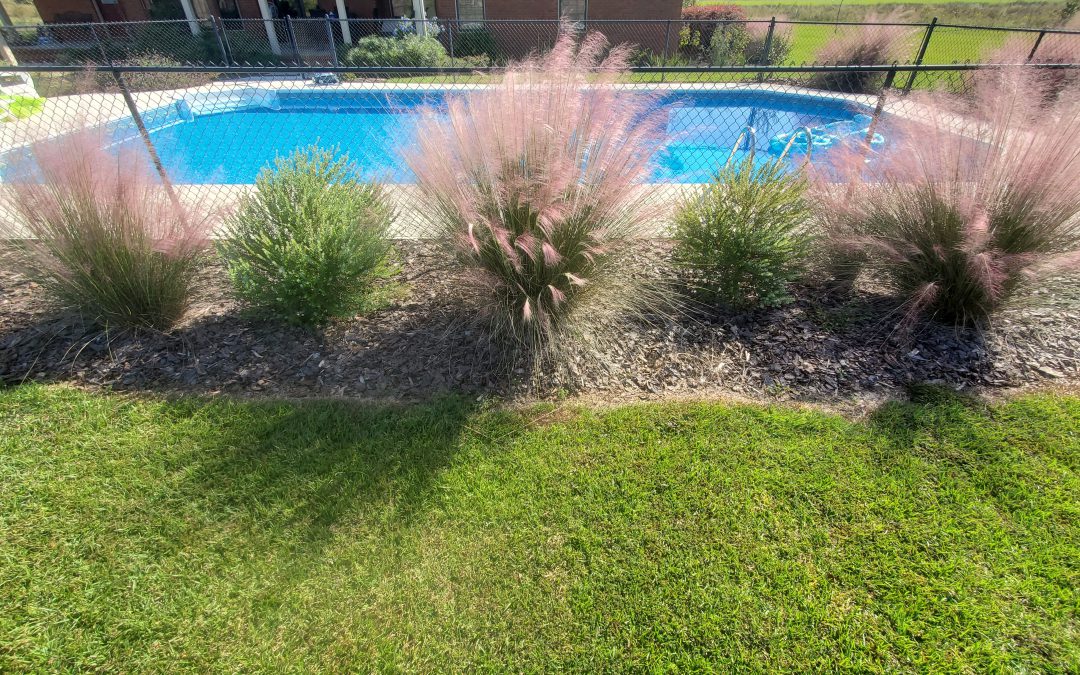
As good as these species are alone, I think they are better together. In my family’s yard, we created a loose screen of widely spaced (8’ apart) Muhly Grass specimens around a pool, in the spirit of giving the area a “coastal” airy feel, and interspersed Darrow’s Blueberry in between.
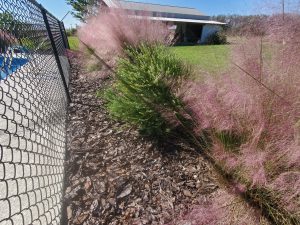
The pink Muhly Grass flowers pair nicely with the green blue foliage of Darrow’s Blueberry. Photo courtesy of Daniel Leonard.
The look has been outstanding, particularly in the late summer/early fall. The pinky purple flowers of Muhly Grass complement the green-blue foliage of the blueberries nicely and provide easy, lasting color without having to worry about planting finicky annuals or perennials each season.
Landscaping with natives does not have to look wild and unkempt, nor does it have to be drab and unattractive. Combining native yet showy plants like Darrow’s Blueberry and Muhly Grass makes for an unusual, refined, nearly no-maintenance feature in your landscape. Look for these and other neat native plants at native nurseries and independent garden centers around the Panhandle. If you’d like more information on native grasses, blueberries or any other horticultural topic, please contact your local UF/IFAS County Extension Office! Happy Gardening!
by Daniel J. Leonard | Sep 8, 2020
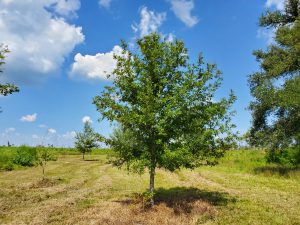
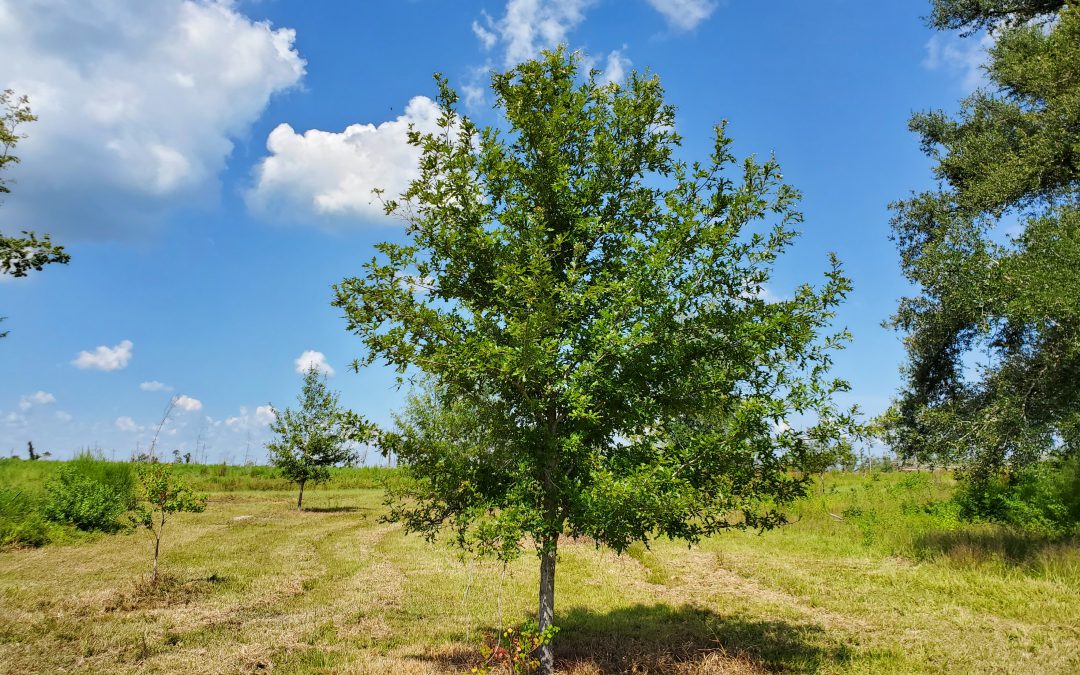
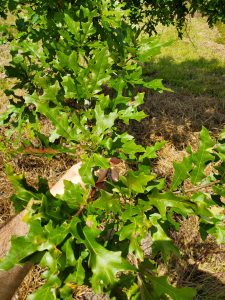
7 year old Overcup Oak (Quercus lyrata) on the edge of a wet weather pond in Calhoun County. Photo courtesy of Daniel Leonard.
Haunting alluvial river bottoms and creek beds across the Deep South, is a highly unusual oak species, Overcup Oak (Quercus lyrata). Unlike nearly any other Oak and most sane people, Overcups occur deep in alluvial swamps and spend most of their lives with their feet wet. Though the species hides out along water’s edge in secluded swamps, it has nevertheless been discovered by the horticultural industry and is becoming one of the favorite species of landscape designers and nurserymen around the South. The reasons for Overcup’s rise are numerous, let’s dive into them.
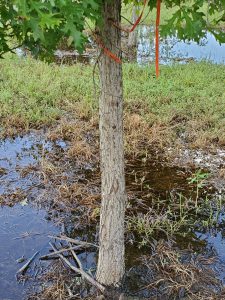
First, much of the deep South, especially in the Coastal Plain, is dominated by poorly drained flatwoods soils cut through by river systems and dotted with cypress and blackgum ponds. These conditions call for landscape plants that can handle hot, humid air, excess rainfall, and even periodic inundation (standing water). It stands to reason our best tree options for these areas, Sycamore, Bald Cypress, Red Maple, and others, occur naturally in swamps that mimic these conditions. Overcup Oak is one of these hardy species. Overcup goes above and beyond being able to handle a squishy lawn, it is often found inundated for weeks at a time by more than 20’ of water during the spring floods our river systems experience.
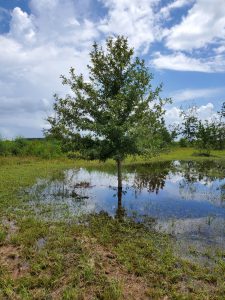
The same Overcup Oak thriving under inundation conditions 2 weeks after a heavy rain. Photo courtesy Daniel Leonard.
The species has even developed an interesting adaptation to allow populations to thrive in flooded seasons. Their acorns, preferred food of many waterfowl, are almost totally covered by a buoyant acorn cap, allowing seeds to float downstream until they hit dry land, thus ensuring the species survives and spreads. While it will not survive perpetual inundation like Cypress and Blackgum, if you have a periodically damp area in your lawn where other species struggle, Overcup will shine.
Overcup Oak is also an exceedingly attractive tree. In youth, the species is extremely uniform, with a straight, stout trunk and rounded “lollipop” canopy. This regular habit is maintained into adulthood, where it becomes a stately tree with a distinctly upturned branching habit, lending itself well to mowers and other traffic underneath without having to worry about hitting low-hanging branches. The large, lustrous green leaves are lyre-shaped if you use your imagination (hence the name, Quercus lyrata) and turn a not-unattractive yellowish brown in fall. Overcups especially shines in the winter, however, when the whitish gray, shaggy bark takes center stage. Overcup bark is very reminiscent of White Oak or Shagbark Hickory and is exceedingly pretty relative to other landscape trees that can be successfully grown here.
Overcup Oak leaves in August. Note the characteristic “lyre” shape. Photo courtesy Daniel Leonard.
Finally, Overcup Oak is among the easiest to grow landscape trees. We have already discussed its ability to tolerate wet soils and our blazing heat and humidity, but Overcups can also tolerate periodic drought, partial shade, and nearly any soil pH. They are long-lived trees and have no known serious pest or disease problems. They transplant easily from standard nursery containers or dug from a field (if it’s a larger specimen), making establishment in the landscape an easy task. In the establishment phase, defined as the first year or two after transplanting, young, transplanted Overcups require only a weekly rain or irrigation event of around 1” (wetter areas may not require any supplemental irrigation) and bi-annual applications of a general purpose fertilizer, 10-10-10 or similar. After that, they are generally on their own without any help!
Typical shaggy bark on 7 year old Overcup Oak. Photo courtesy Daniel Leonard.
If you’ve been looking for an attractive, low-maintenance tree for a pond bank or just generally wet area in your lawn or property, Overcup Oak might be your answer. For more information on Overcup Oak, other landscape trees and native plants, give your local UF/IFAS County Extension office a call!
by Ray Bodrey | Aug 24, 2020
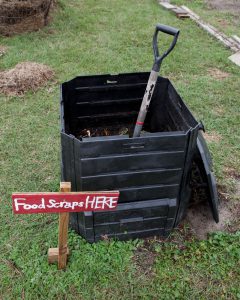
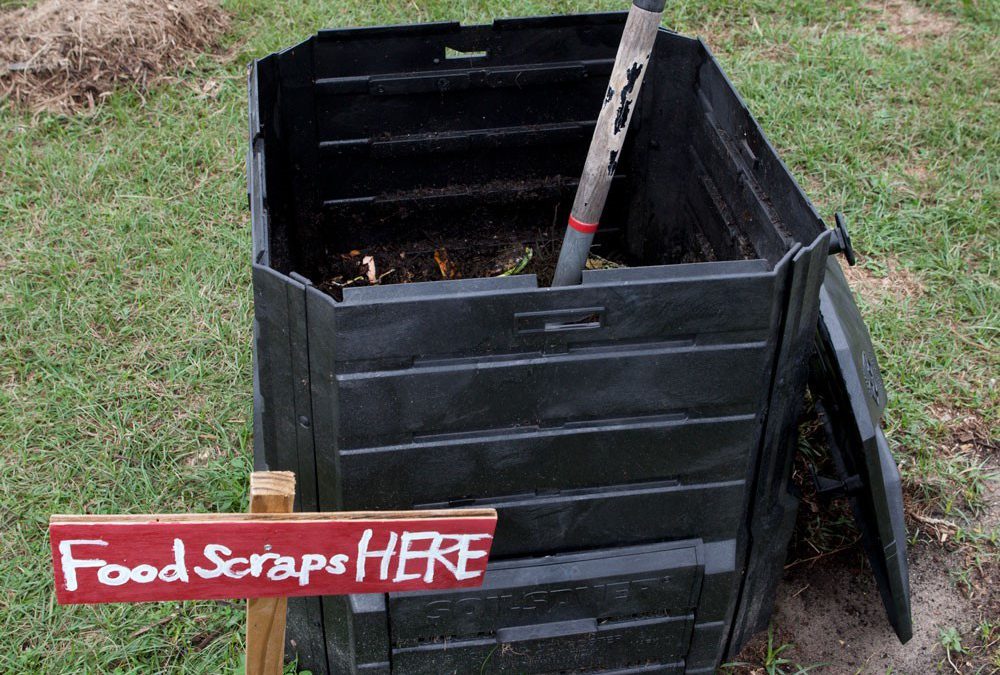
Figure: Increase water holding capacity through home composting.
Credit: Tyler Jones, UF/IFAS Communications.
Water is a precious resource for Floridians, even if the last couple of months of rainfall may make you think otherwise. As home gardeners, we should keep water conservation in mind.
Wasting water now may cause restrictions in the future, as basic water needs of a growing population outpace capacity. Of course, we all hope that’ll never happen, but it is possible.
As we start planning for our fall vegetable garden, let’s think about conserving water usage. We can start by putting our “plant biology” cap on. A great way to save water is to plant fast growing, early-maturing vegetables. The strategy, of course, is the sooner a plant matures the less water it will need.
Gardening periods in Florida vary, too. Thus, there are broad choices of planting dates for many vegetables. For Panhandle gardeners, the current trend has shown dry periods in the spring, but adequate rainfall in summer months. Usually with the seasonal change to fall, soil moisture holding capacity is not a great struggle in Panhandle. However, much of our soils consist of coarse sandy particles, which are not ideal for water holding capacity. Amending garden soils with organic materials such as compost, manures, and cover crops, will help the soil hold water better.
Selecting the right irrigation method is also a great way to conserve water. Overhead sprinkling is not ideal for most gardening applications. This method wastefully projects water into areas between rows, outside of root zones and allows for much evaporation loss. Drip irrigation can help solve these issues, by concentrating water directly to the root system. IFAS research has estimated an 80% reduction in water usage when utilizing a drip system.
If drip irrigation isn’t a method you’re interested in, overhead watering the garden thoroughly twice weekly is an acceptable alternative. Remember, there’s a limit to how much water plants can use. Excess water can cause runoff and consistent heavily saturated soils may promote root rot. Mulching also ranks highly among water conservation practices, by allowing the soil to hold more moisture. Examples of mulch types include hay, straw, leaves or plastic.
Supporting information for this article can be found at the UF/IFAS gardening solutions website.
For planting information, please see the Florida Vegetable Gardening Guide.

by Daniel J. Leonard | May 20, 2020
Nearly everyone dreams of having a perfectly lush, green turfgrass lawn in the backyard. Indeed, lawns provide many benefits to homeowners! A well-managed lawn is an excellent filter of chemical and nutrient runoff, builds soil through the breakdown of clippings, thatch and organisms that exist in turf systems, is aesthetically pleasing and increases property values, reduces ambient air temperatures and provides a durable surface for pets and play! However, none of these turf benefits can be realized if you don’t install and establish sod correctly. Remember these ten tips when planning, installing, and establishing sod to realize your perfect lawn dream!
Choose the Correct Species for Your Site. Not every site is equal. Is irrigation present, or will the turf be on its own? Are you willing and able to provide a higher level of care or will you sacrifice some aesthetic appeal for a lower maintenance turf? These and other questions need to be answered before you buy! Do some homework before settling on a particular grass species and cultivar; they all have merits and drawbacks.
Prepare the Site. Ensure the area you’ll be installing your new sod is weed-free, not compacted, and smooth. Several weeks before installation, apply a non-selective herbicide to “clean” the site of weeds. After existing weeds die, it’s a good idea to till the area or at least “rough it up” with a heavy rake. This helps alleviate site soil compaction which allows easier root initiation from sod to soil. Finally, smooth the site to ensure good root to soil contact and prevent a bumpy surface later.
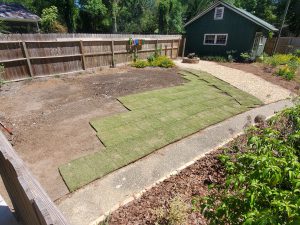
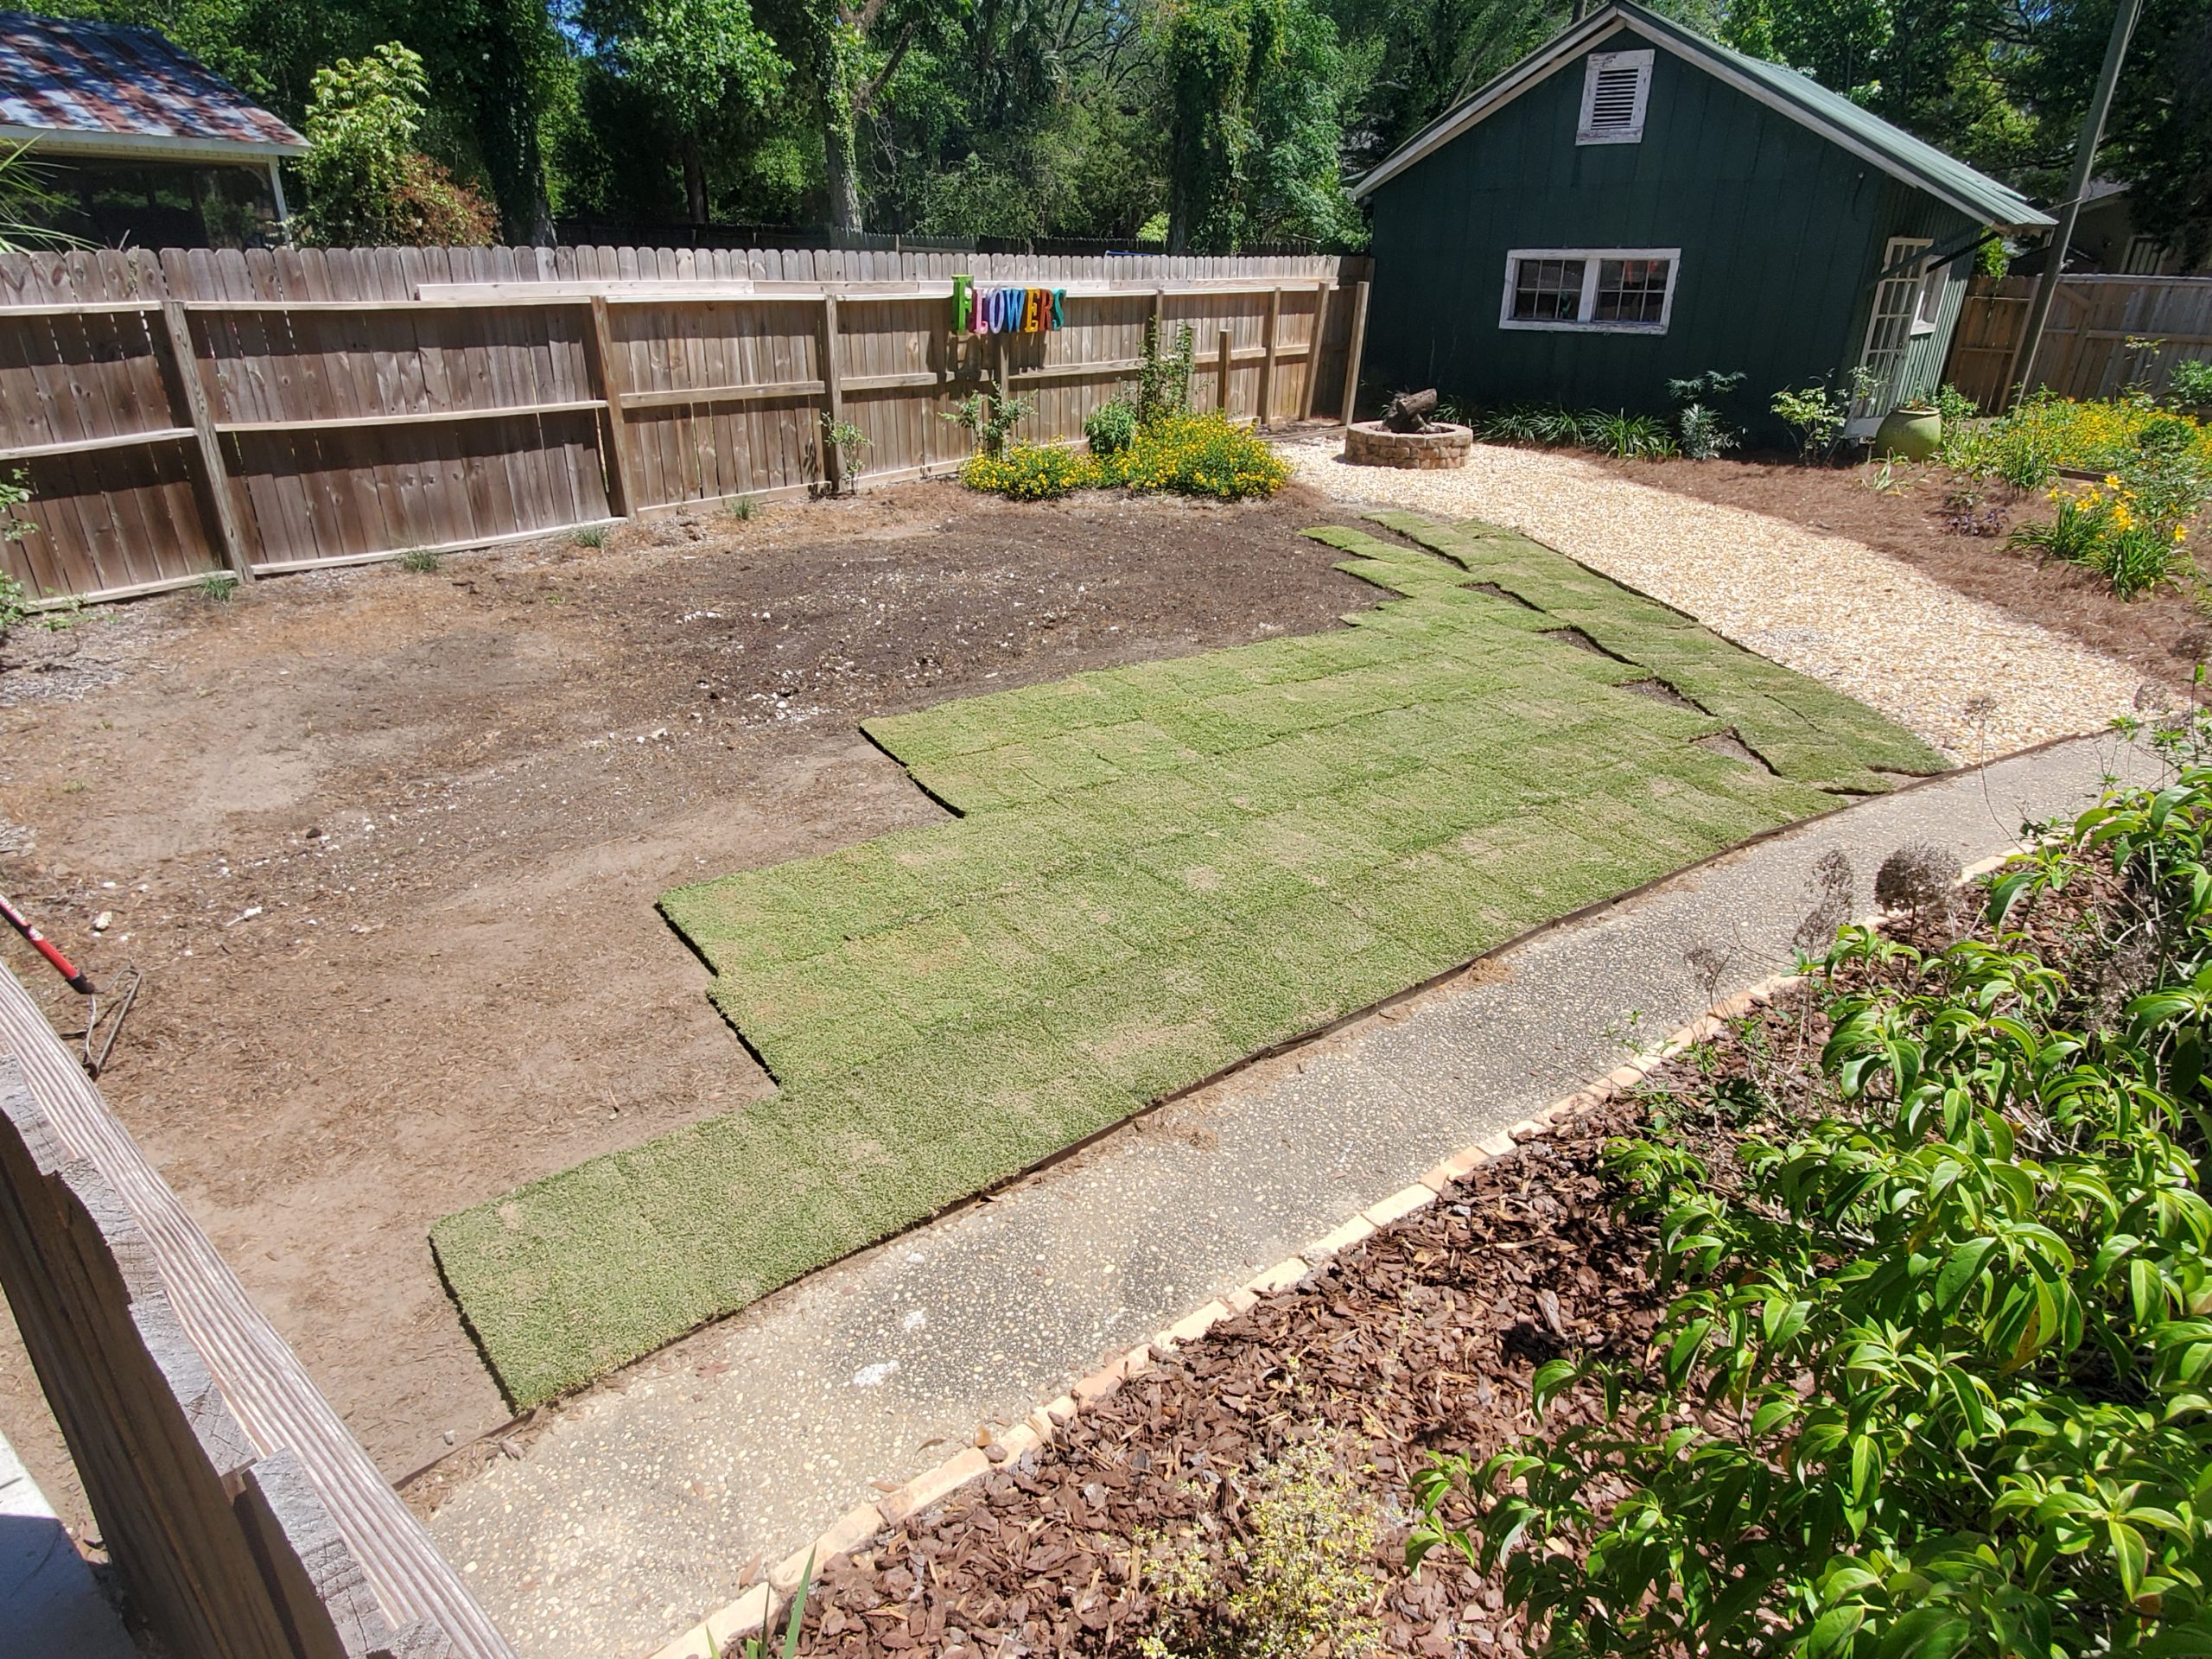
Time for some water! ‘Tiftuf’ Bermuda sod ready for a mid-lay watering. Hot and dry conditions demand sod be kept moist. Photo courtesy of the author.
Buy Quality Sod. Research where the dealer you purchase sod from sources their grass. Ensure you’re buying turf from a respected operation that follows Sod Production Best Management Practices. Not all farms are equal.
Lay it Quickly. If buying from a retail dealer, make sure their sod is fresh. Sod quality declines rapidly after 48 hours from cutting. Ideally, sod is installed the same day it’s cut on the farm, but not later than the next day.
Water periodically during installation. If installing a large area of turf, periodically wet sod you’ve already laid. Think about the day the sod you’ve laid has had. It was ripped from its home soil, windblown on a trailer en route to your site, laid onto a warm, bare soil surface and is currently baking in the sun waiting on you to finish laying the rest. That’s stressful and a good way to have a crispy brown patch in the new lawn! Ease the sod’s stress by periodically wetting as you lay it. It’s also not a bad idea to lightly moisten the site prior to laying the new sod. Avoid making it muddy.
Mound Soil Around Edges. This prevents the edges of freshly laid turf from drying quicker than the rest of the grass and browning out. It doesn’t have to be a lot, just take a heavy rake and fill in the gap between the soil surface and the leaf blades. Think of it as hiding exposed roots from the sun and wind. Trust me, this step keeps you from having a nice brown ring circumventing your new green lawn!
Pack it Down. You can be fancy with a drum roller partially filled with water or simply use a rake or tamping tool to lightly tamp the grass down. This helps ensure good root contact with the soil, prevents dry patches in the establishing sod, and quickens rooting time.
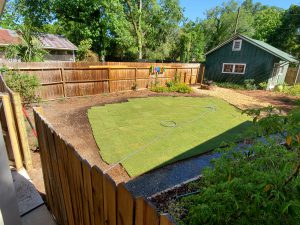
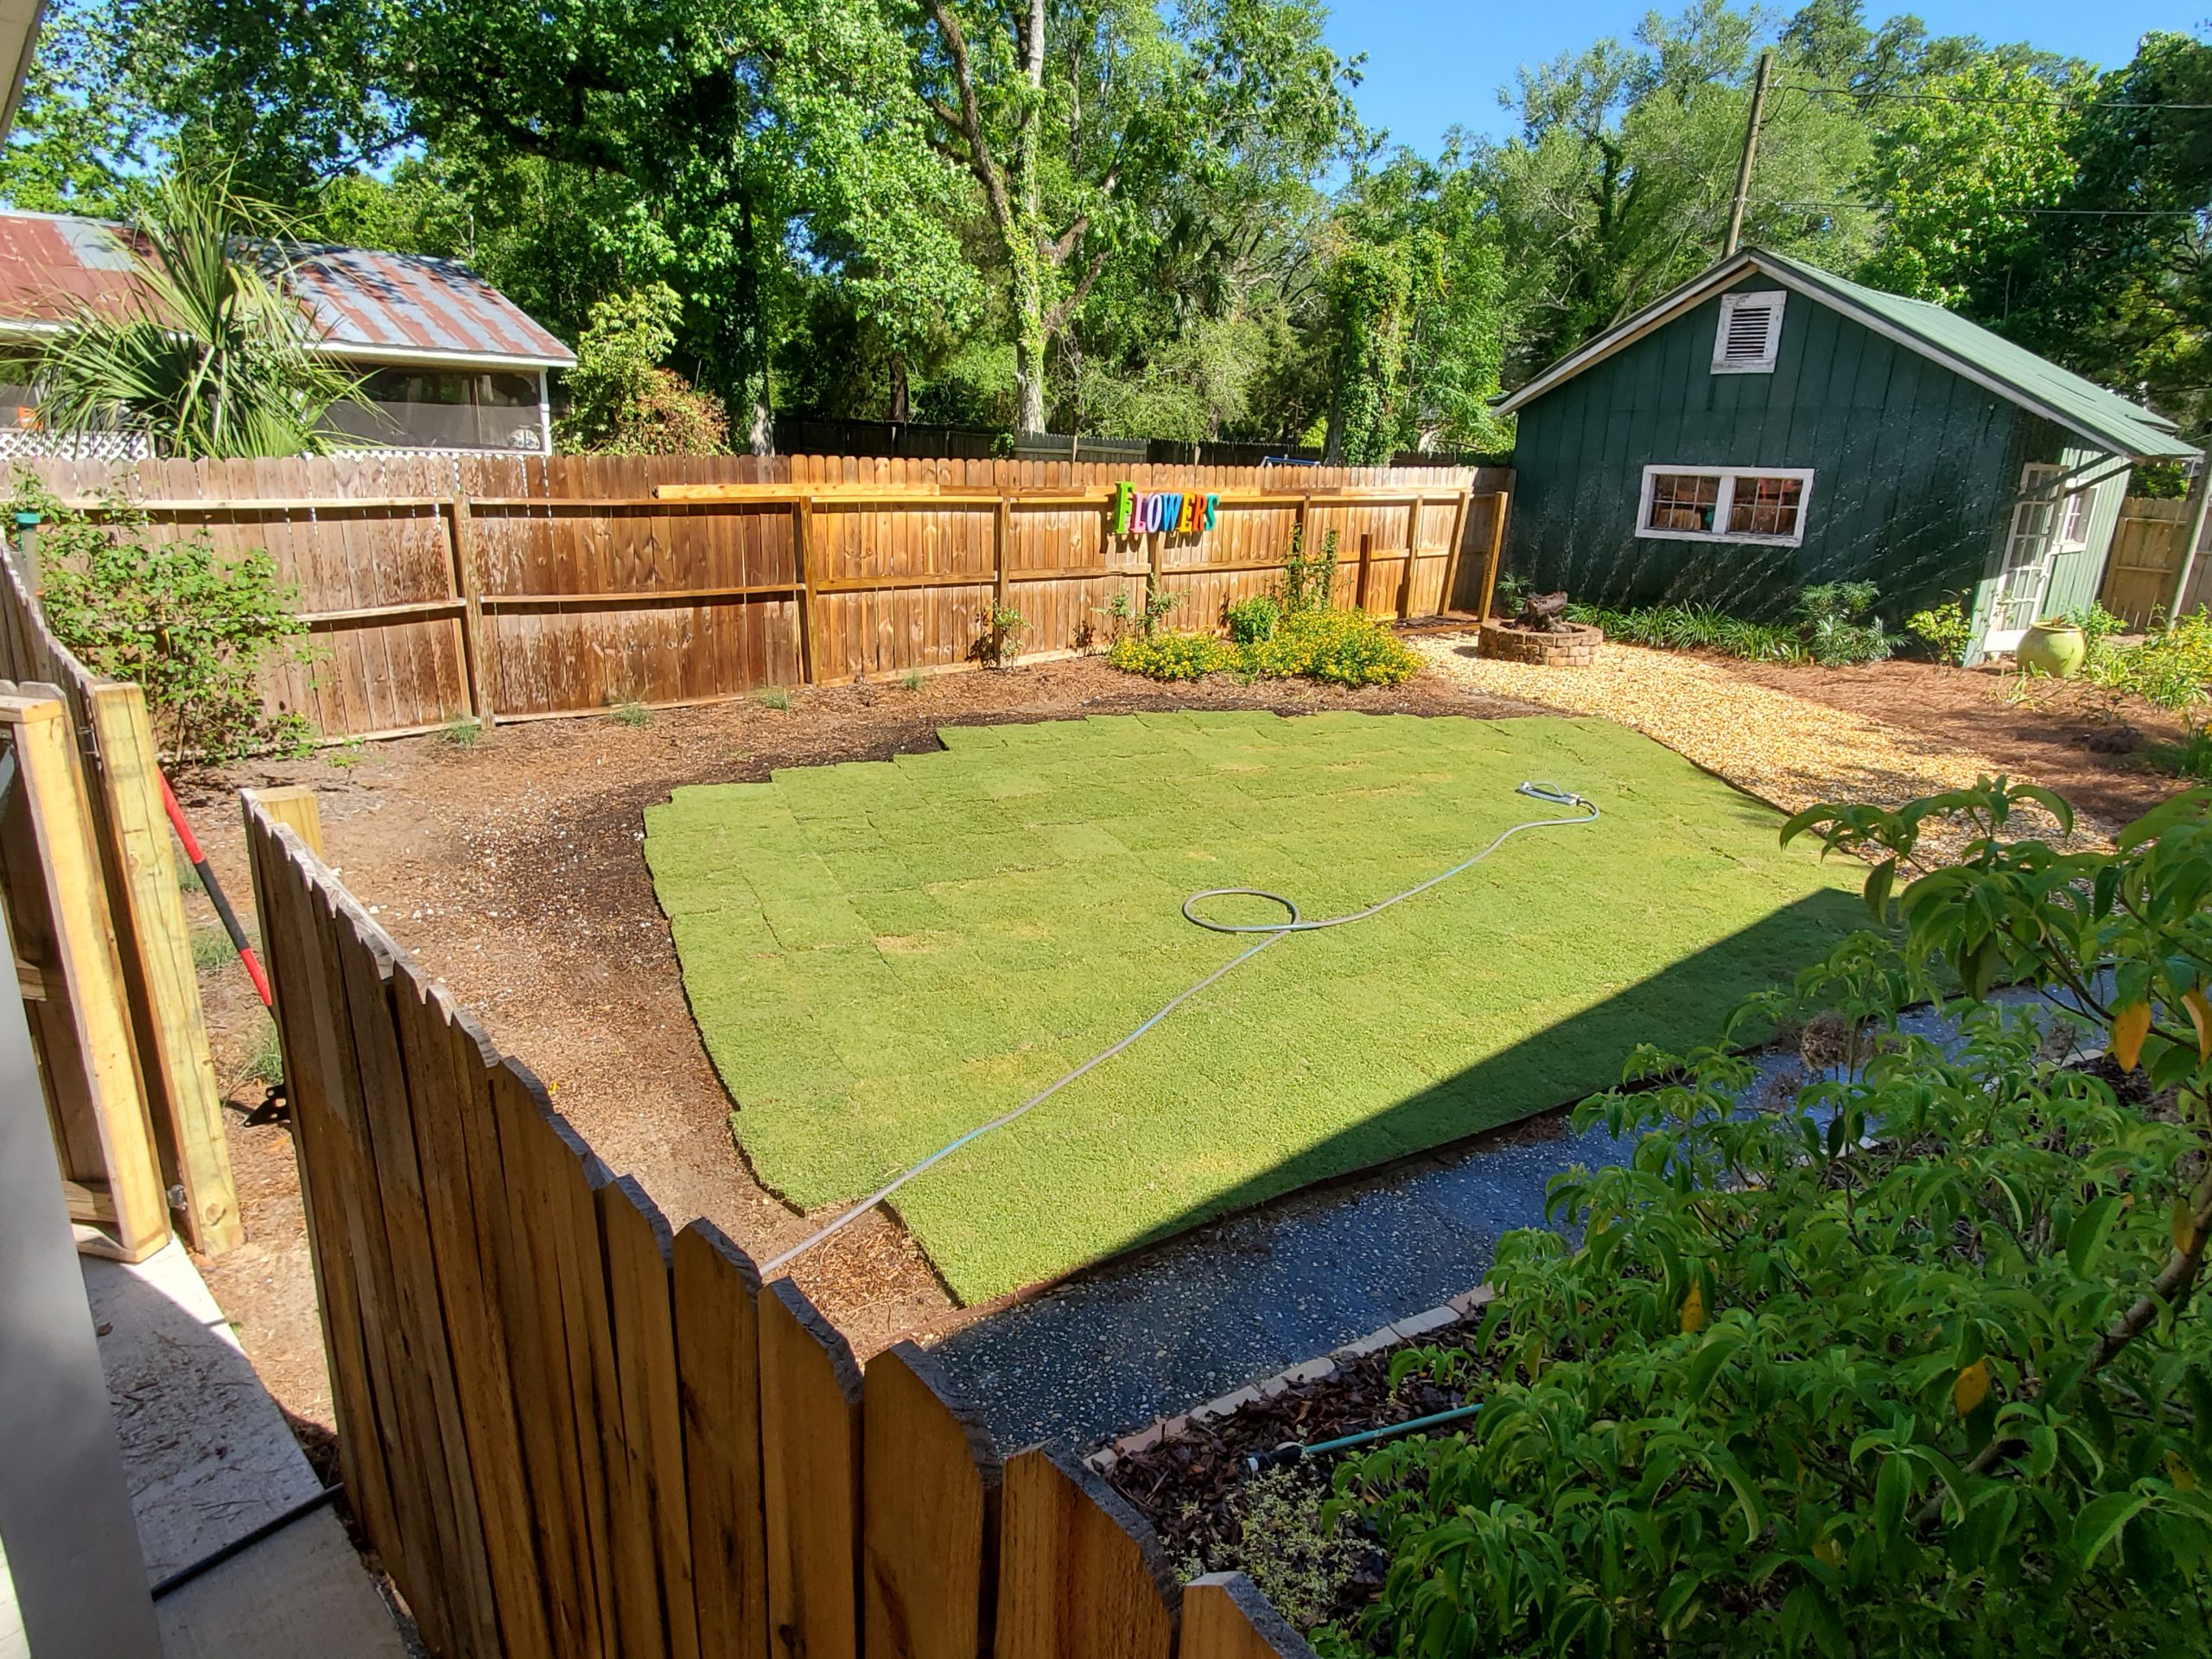
Almost finished! Remember to tamp down and mound soil around the roots of the edge pieces. Photo courtesy of the author.
Water Correctly. Your new sod needs to be thoroughly watered daily for the first 10-14 days after installation. Remember how stressful the sod laying process is to turf. It takes a little while for sod to recover and initiate rooting into its new home. Don’t miss a day! Following this initial 10-14 day period, back off to once every couple of days for another two weeks or so. After that, the sod should be rooted in nicely and be able to rely on regular, as needed, lawn irrigation intervals.
Stay Off It! Minimize traffic on new sod for several weeks after installation. Roots are establishing during this time and are extremely vulnerable to disturbance until anchored. I know you’re ready to enjoy your new lawn, but you’ve come too far now to mess it up!
No Fertilizer for 30-60 days! Plants without roots have a hard time taking up nutrients. Therefore, it makes sense that until sod has firmly anchored into place and established a new root system, fertilizer application should be withheld. Fertilizer applied during the initial establishment period will likely be wasted and leach through the soon-to-be rootzone and could even burn fragile new roots. Also, avoid using a starter fertilizer for the same reason – there aren’t any roots to take up the nutrients.
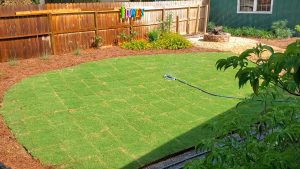
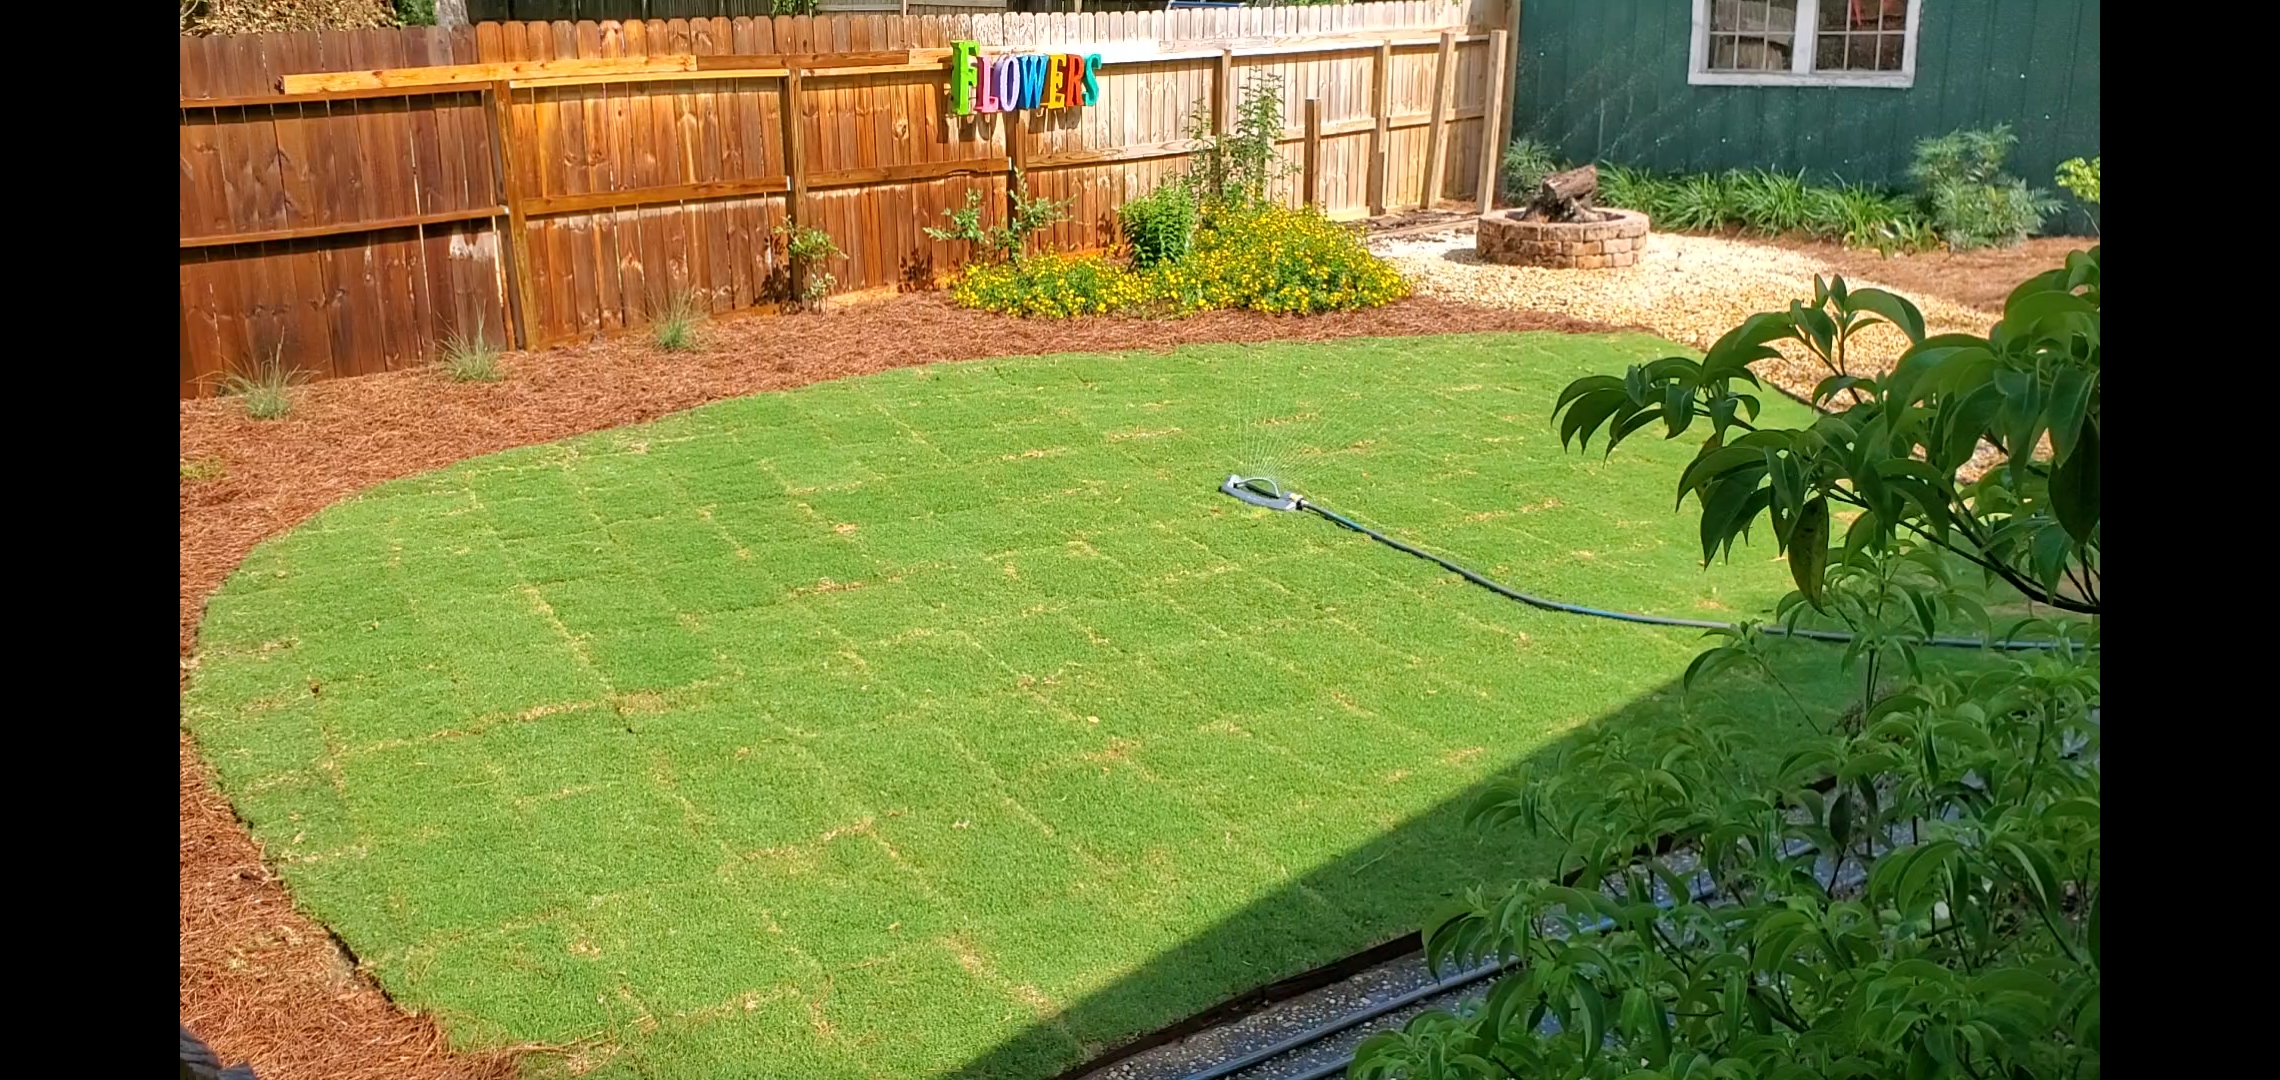
‘Tiftuf’ Bermudagrass sod being watered after installation is finished. Do this daily for 10-14 days following installation. Photo courtesy of the author.
By following these ten tips, you’ll be well on your way to a perfect lawn! For more information on these and other lawn care topics, contact your local UF/IFAS Extension Agent and consult The Florida Lawn Handbook, a research-based publication written by UF/IFAS Extension specialists.
by Evan Anderson | May 13, 2020
As temperatures lean more toward summertime highs, conditions can sometimes leave a landscape looking sad. Water issues can be a major source of headaches for homeowners when they cause plants to decline. The cause is not always readily apparent.
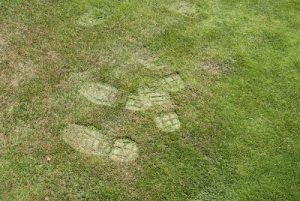
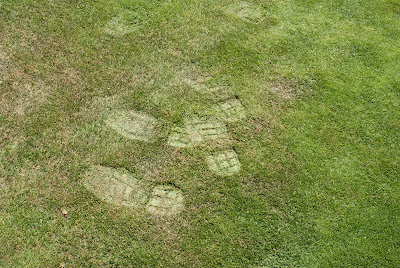
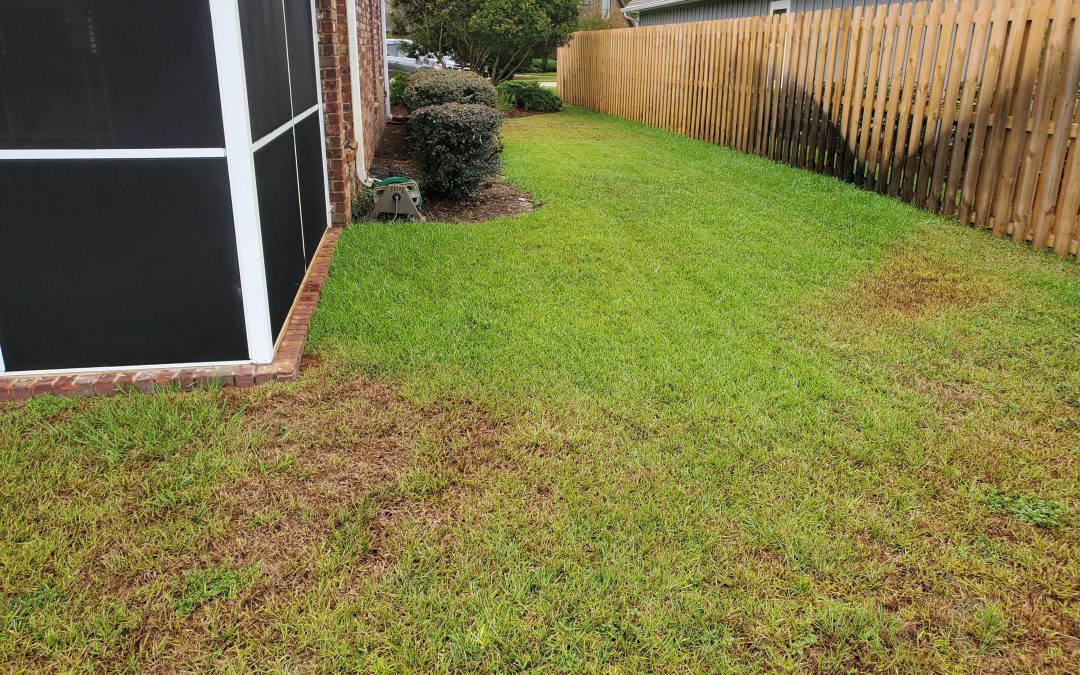
Footprints remain in droughty grass. Photo courtesy of Taylor Vandiver.
Water is something not even the meanest cactus in the driest desert can do without. Too little, and plants start to develop symptoms of drought stress. These symptoms include more than just wilting; stunted growth, curling or rolling leaves, fruit or leaves dropping, and yellowing or browning especially at leaf edges are all clues that a plant is thirsty. In lawns, underwatered grass may not spring back when stepped upon, leaving visible footprints in the turf. Long periods of drought stress can cause grass to thin. Plants exhibiting symptoms such as these may require extra water. A layer of mulch around landscaping can also help to retain moisture if soil dries out too quickly. Newly installed plants are particularly susceptible to drying out, and hot weather dries out all plants more quickly.
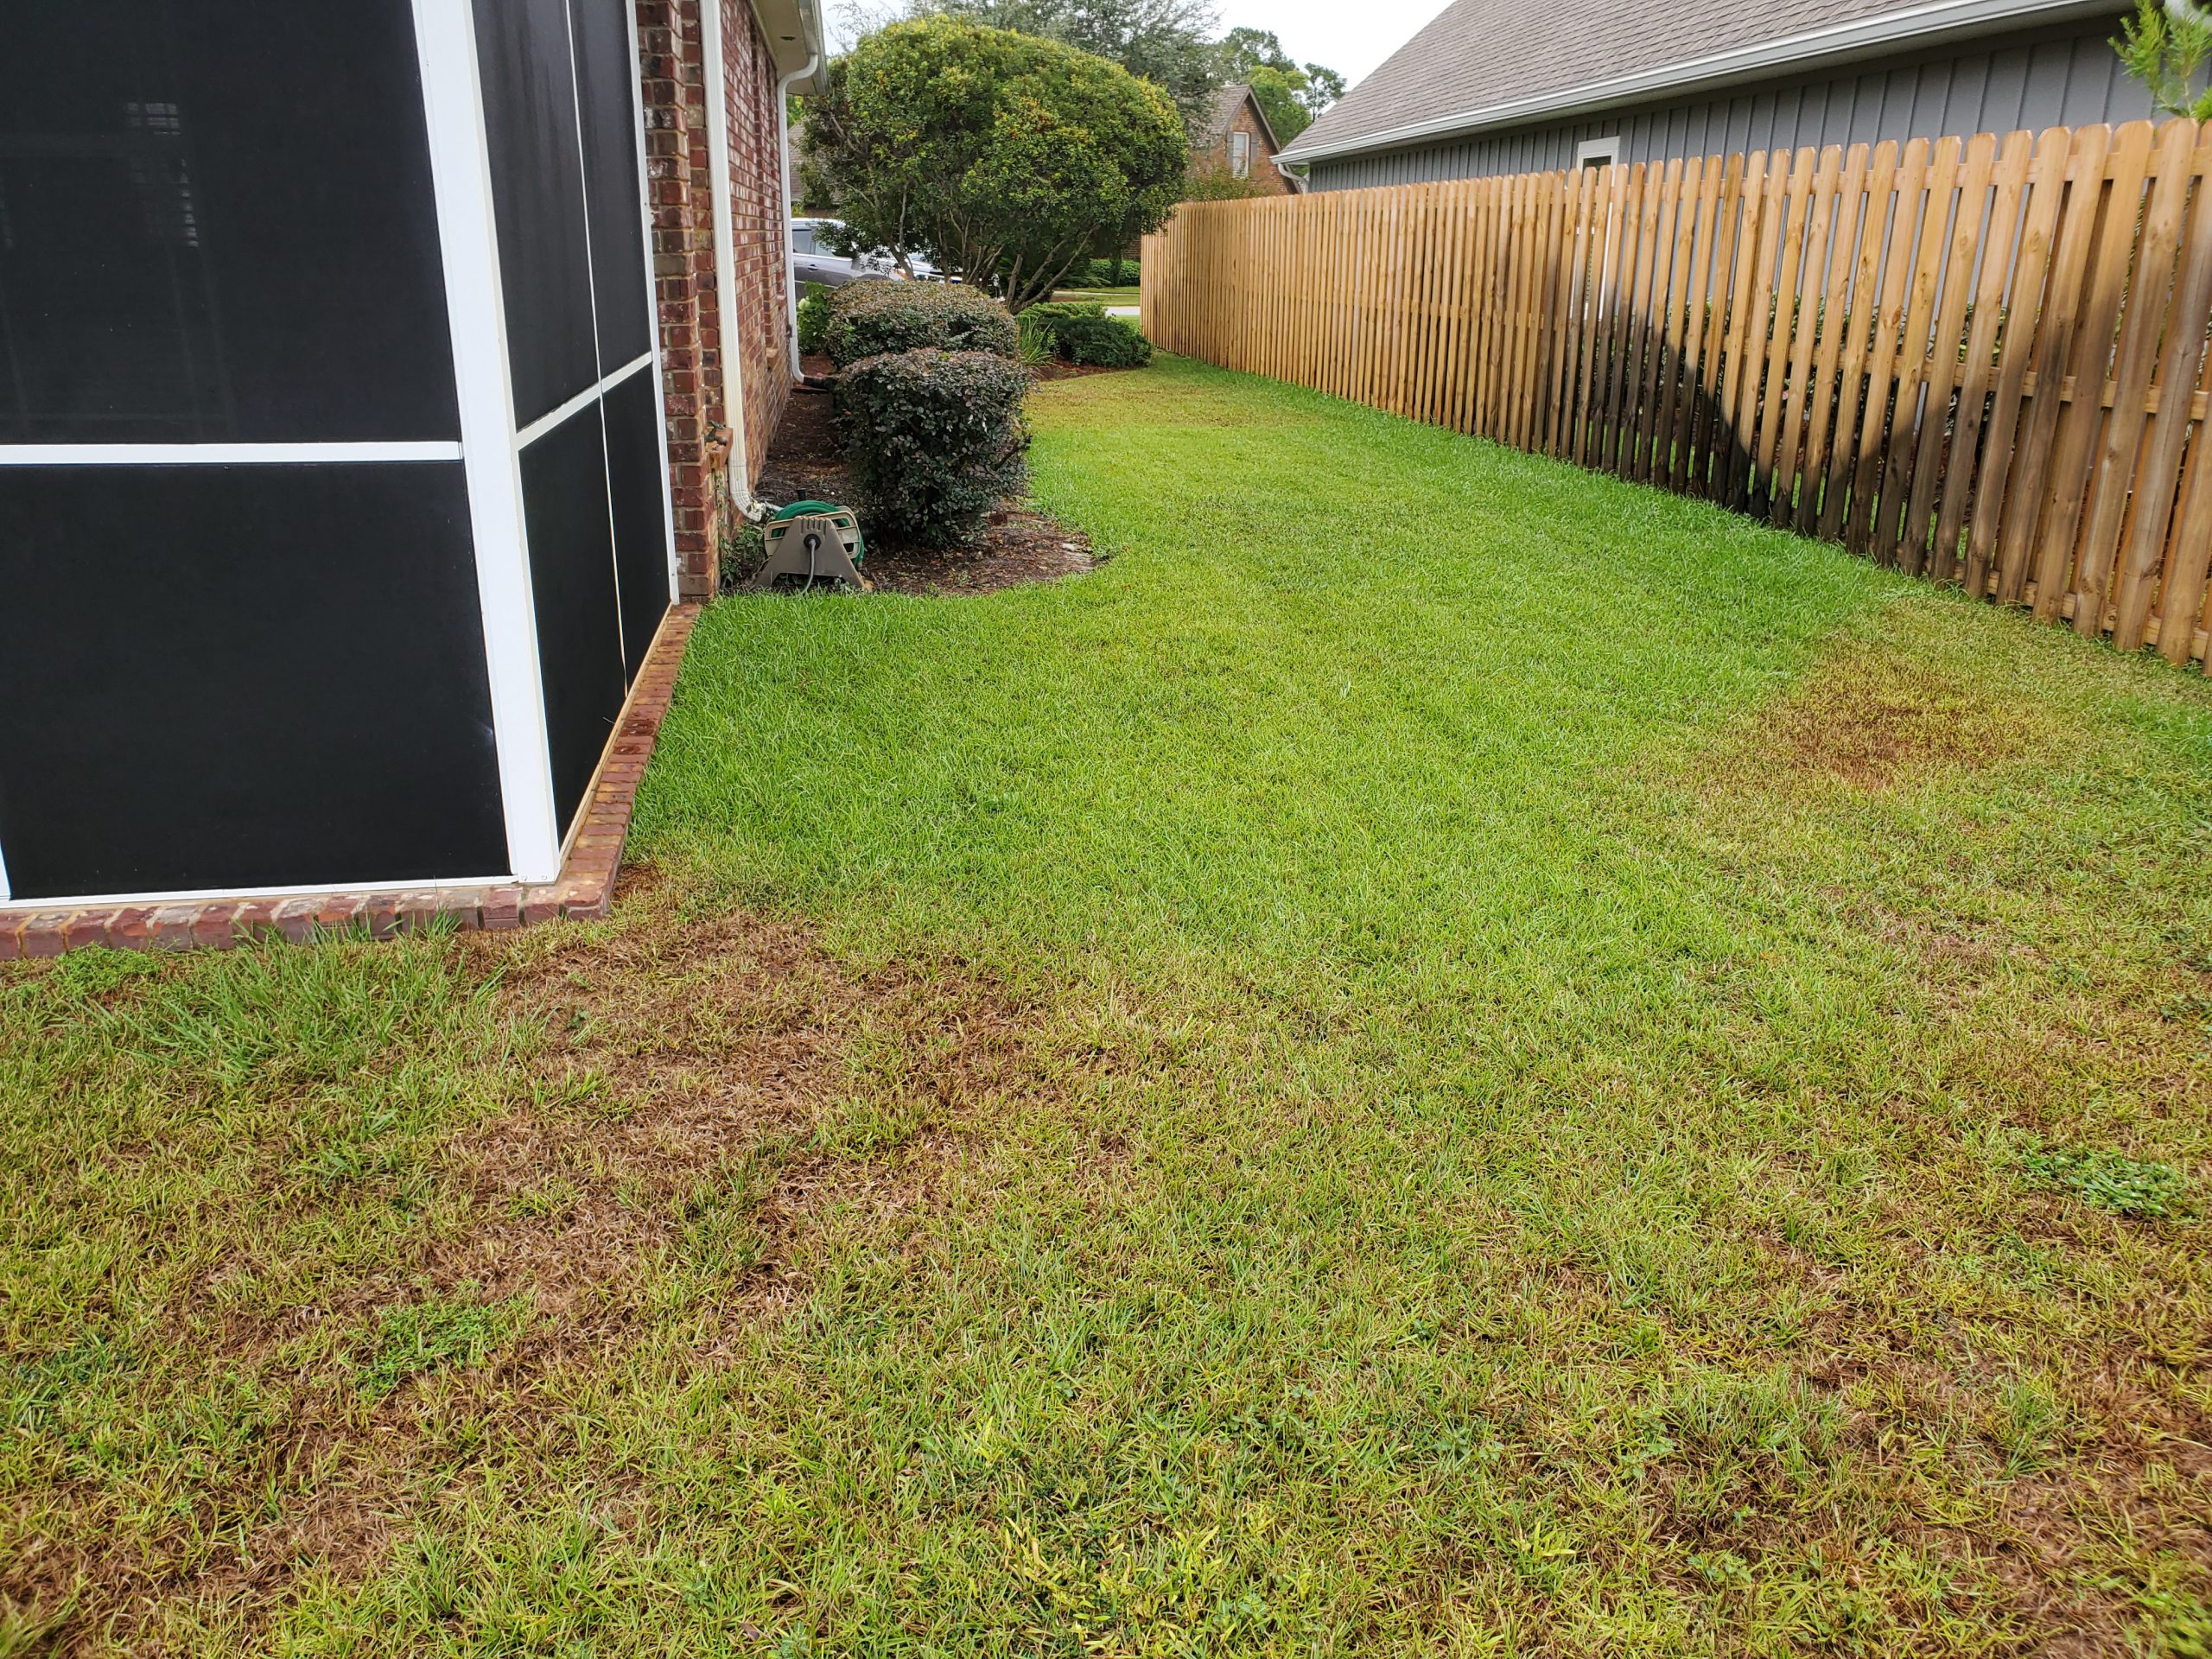
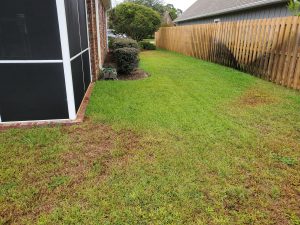
Plants can also be overwatered, however. Even with the well-drained, sandy soils that are present in much of the Florida Panhandle, it is possible to put too much water on a lawn or landscape. This can lead to problems that may be similar to those caused by underwatering – stunted growth, curled leaves, wilting, limbs or leaves dying, and increases in fungal disease can all occur. Lawns may become patchy and weeds, especially those that enjoy damp conditions such as sedges or dollarweed may establish themselves.
Improperly calibrated sprinklers. Photo courtesy of Evan Anderson.
Stress of any sort can also leave plants more susceptible to pest and disease issues. A healthy plant is better able to compete with weeds and fight off infestation or infection. If you notice problems with fungal disease, increased insect populations, or weed issues, it could be made worse by over- or underwatering!
To help avoid watering issues, make sure plants with similar water requirements are planted near one another. If you have irrigation for your lawn or landscape, it is important to calibrate it regularly. Make sure the system has a rainfall shutoff device and check systems for damaged or malfunctioning emitters. And remember, if you are having trouble with your lawn or landscape, contact your local Extension office for help!
You can find further information on watering in our EDIS publications located at https://edis.ifas.ufl.edu/topic_landscape_irrigation_and_fertilization, and at our Gardening Solutions website at https://gardeningsolutions.ifas.ufl.edu/care/irrigation/.