by Mark Tancig | Aug 19, 2019
Horticulture Extension Agents are asked a wide variety of questions, from plant identification to erosion control, from herbicide selection to water regulation. We’re usually expected to know the answer on the spot, too. We’re also expected to write a lot and share information with the public. Well, oftentimes, those factors come together to give us writing inspiration. A challenging question leads to research and gathering of information, which leads to an answer that should be shared so others can learn from it. A recent question regarding the use and regulation of backflow preventers from a longtime gardener inspired my latest knowledge quest and what I found seemed important enough to share with other gardeners.
I would guess that backflow preventers probably aren’t a common item on people’s minds, unless you’re a plumber or in the water supply business. However, backflow prevention devices help ensure that when we turn on the tap to drink, cook, clean, flush, bathe, and yes, garden, that the water isn’t contaminated.
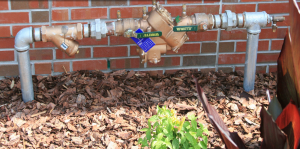
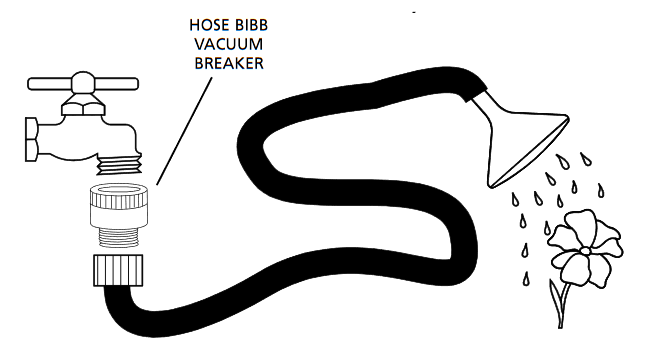
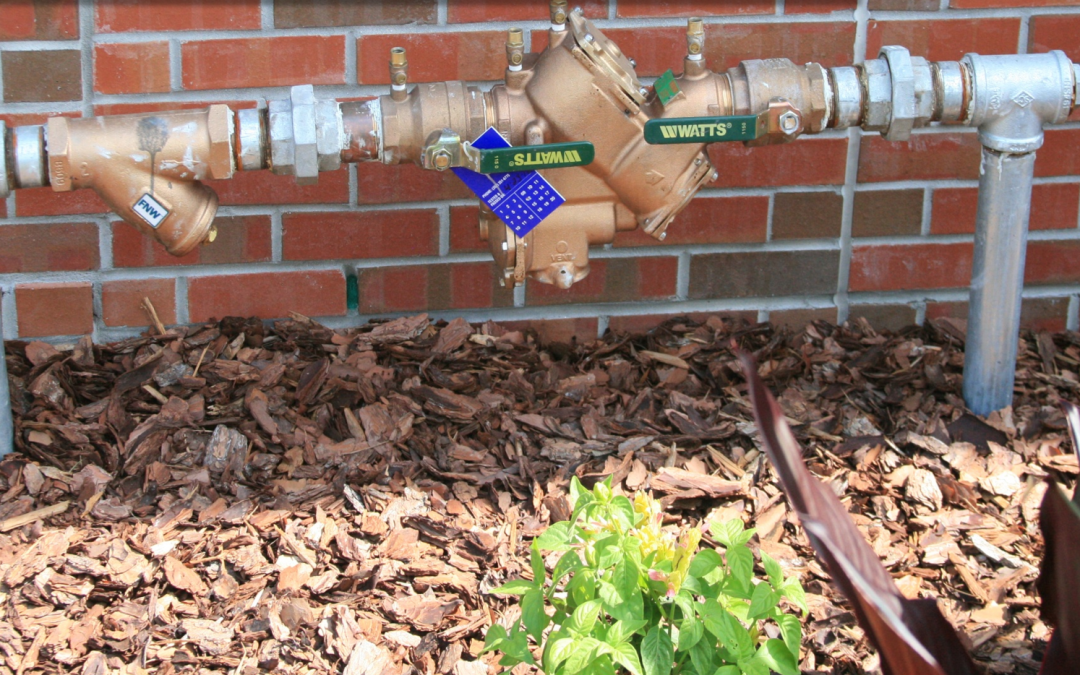
These larger backflow preventers are required to be installed and regularly inspected for certain plumbing systems. They usually hide under utility boxes or fake rocks. Credit: UF/IFAS.
Backflow preventers do just what their name implies, they prevent backflow. Backflow in a plumbing system happens when pressure in another part of the system drops, causing water from other locations to move in to equalize the pressure difference. This can be a problem in a potable water system when the main line loses pressure and water from a contaminated line is pulled in to the main line, potentially contaminating many users water. This can happen when a pipe breaks or during fire-fighting activities, for example. Contaminants of concern include chemical and biological agents, such as heavy metals, industrial compounds, bacteria, and pesticides.
Many of our indoor fixtures have built-in backflow preventers, such as toilets and bathtubs. Exterior backflow preventers, usually found under boxes or fake rocks near the water connection, are required for plumbing systems considered to be more of a hazard risk or where higher pressures could more easily flow back into the line. Examples of such plumbing systems include those with fire-fighting systems, hospitals, several-storied buildings, those associated with certain industrial processes, and, finally back to gardening, irrigation systems. In 1990, the Florida Building Code required that all residential irrigation systems include a backflow preventer. While the Florida Building Code also requires backflow preventers on all hose connections, i.e. spigots, many residential homeowners do not have these in place nor do water suppliers have the budgets to inspect each home’s spigots. A survey of 200 homes in the Midwest during 2002 found that 91% of homeowners did not have a backflow preventer attached to their spigots. I’m not sure north Florida would fare much better.
Gardeners should be aware of this responsibility and go ahead and install a backflow preventer on their outdoor spigots. This is especially true for those that use hose-end fertilizer or pesticide applicators, mix pesticides, or leave a pressurized hose connected to a sprinkler or other device. In addition to chemicals, all sorts of bacteria, algae, and other contaminants can grow in or enter a hose and get sucked back into the house’s line or, worse, the public supply line.
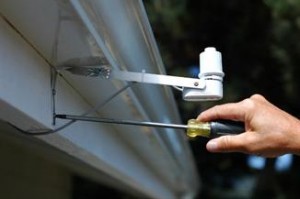
Backflow preventers are cheap and easy to install. A simple brass backflow preventer that connects between the spigot and the hose runs from $3 to $10 and will typically last for several years. You know it’s still working when water leaks out of the backflow preventer as you turn the spigot off. That’s a pretty easy and inexpensive fix to make sure the potable water source stays clean.
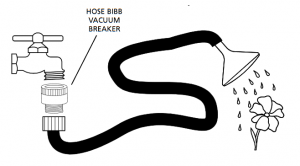
A simple and inexpensive hose bibb/spigot backflow preventer can help gardeners protect their potable water supply. Credit: Univ. S. Cal.
For more information on backflow prevention devices, and to keep writing ideas coming in, please contact your local UF/IFAS Extension Office.
by Daniel J. Leonard | Jun 25, 2019
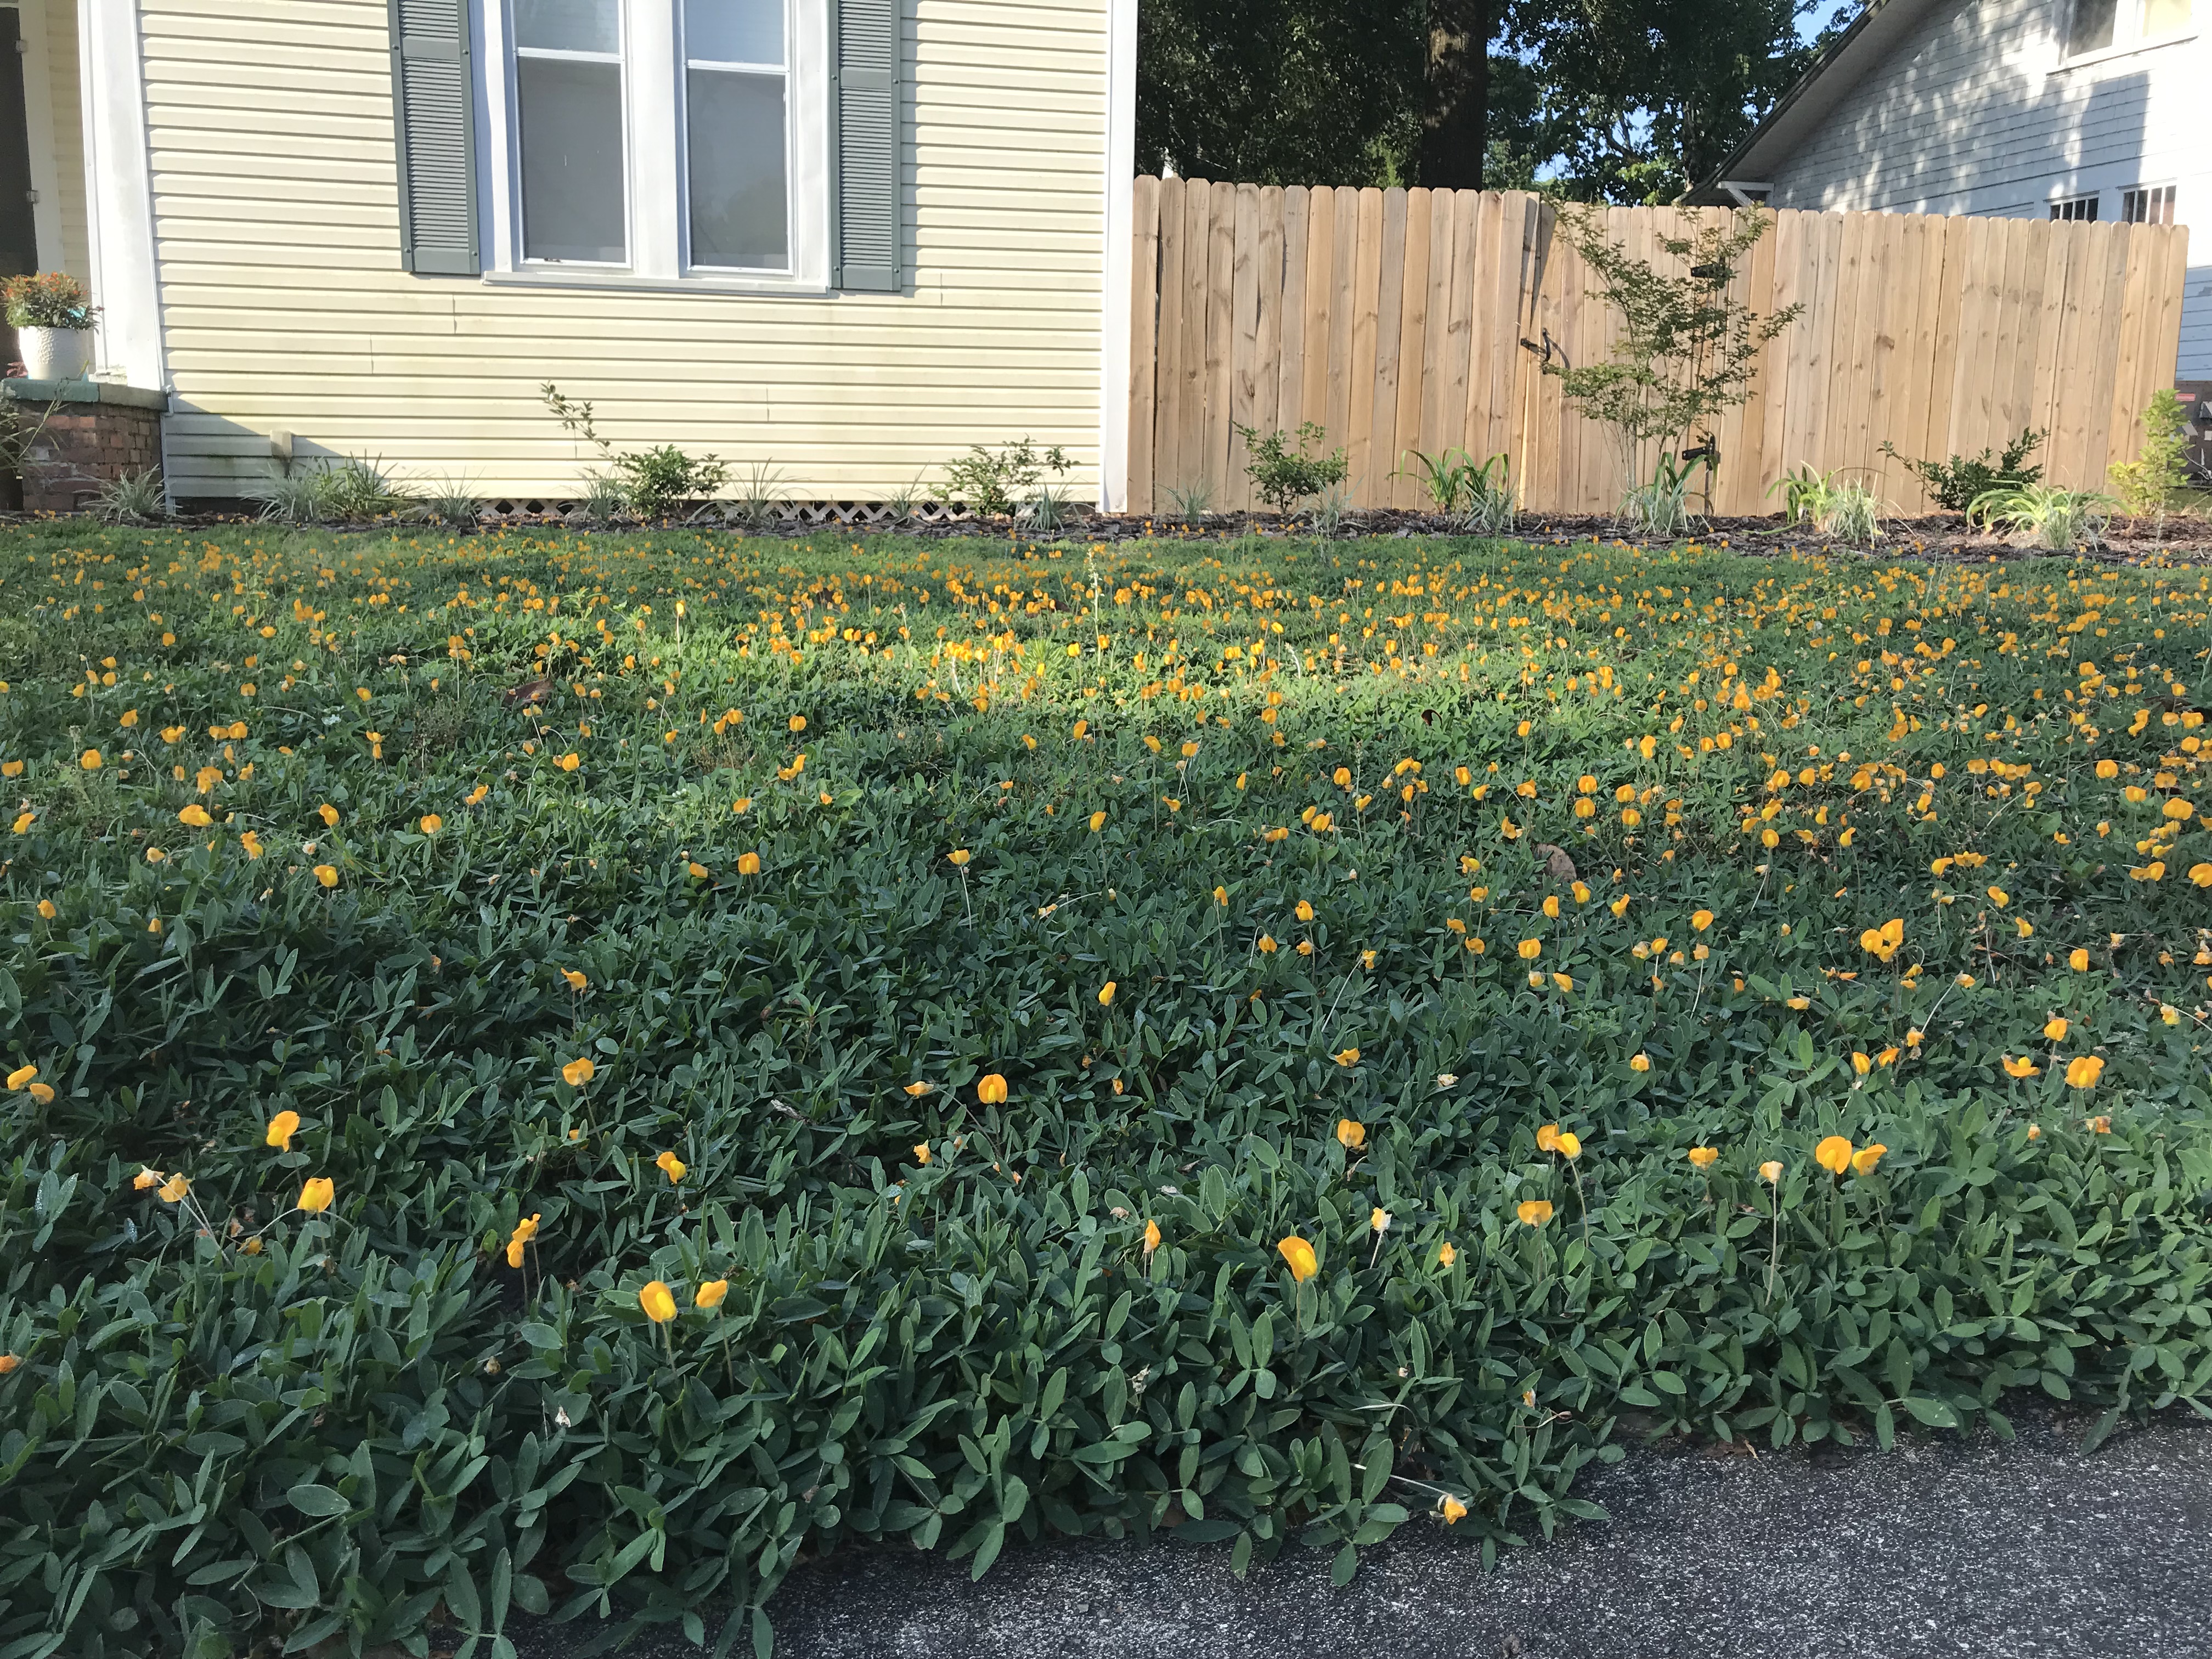
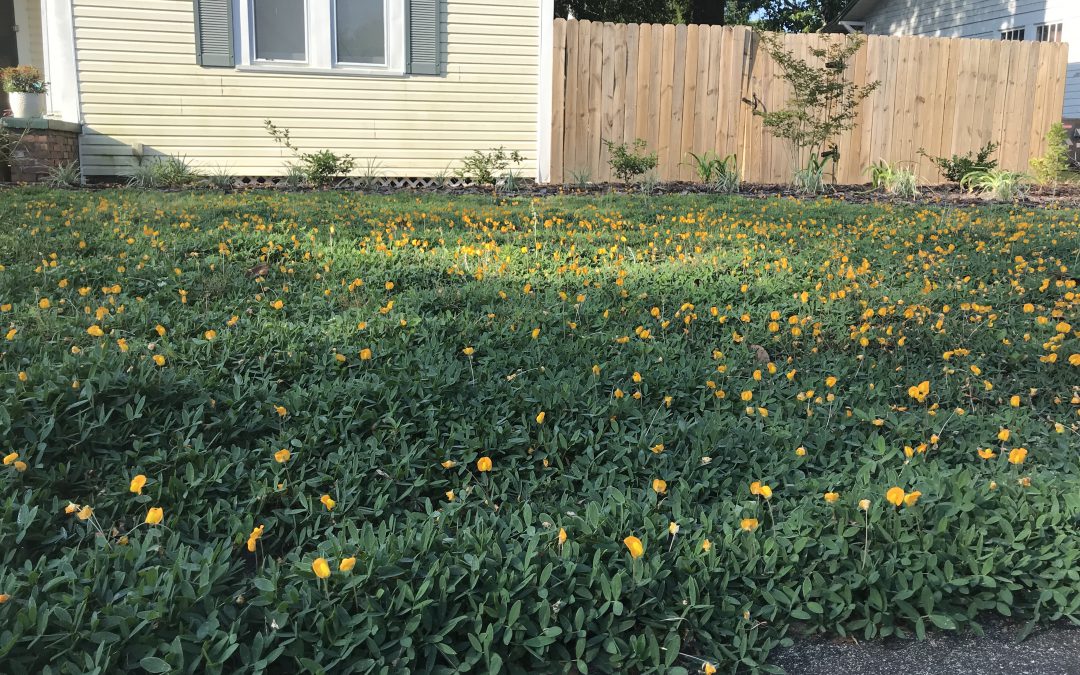
‘Needlepoint’ Perennial Peanut in the author’s lawn.
What began as my journey toward a turf-less lawn in September of 2017 is finally beginning to come together! In the fall of 2017, I installed about 120 one-gallon-sized ‘Needlepoint’ Perennial Peanut (Arachis glabrata) plants, purchased from Sunset Specialty Groundcovers in Live Oak, FL, on roughly 20” centers in my front lawn, an oddly shaped (650 ft2) patch of ground that had been previously filled with spotty centipedegrass and a healthy and diverse weed population. 18 months later, the peanut has almost completely filled in, shaded out all the weeds, and blooms nonstop!
Looking back, I definitely learned a few lessons the hard way. First, you should mulch bare ground in between plants at time of installation. Because there are few herbicides labelled for residential use on this crop and I didn’t want to experiment on my new “lawn”, I spent a lot of time on my hands and knees (much to the amusement of my neighbors and folks driving by) pulling weeds in the first two years that could have been prevented with mulch. Second, have a plan for keeping the perennial peanut in bounds once it has filled in the area it was supposed to and begins to travel into adjacent landscaped beds! The area my peanut inhabits is surrounded on two sides by inescapable concrete. It was on the other two sides, however, that I have had to improvise after they came under siege (literally under, because perennial peanut spreads by underground rhizomes). Installing some sort of edge blocker at planting and vigilance with routine mechanical edging is a must to keep it in bounds! Third, I recommend that you have a counter-argument prepared when the peanut goes dormant in the winter and your wife asks why the yard is bare dirt!
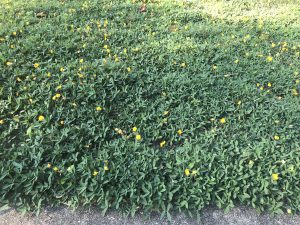
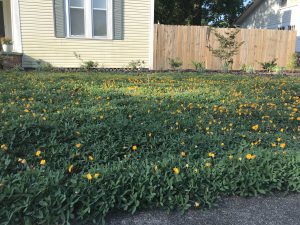
‘Needlepoint’ Perennial Peanut overhead shot showing complete ground coverage in the author’s lawn.
Overall, though there are a couple of things I would have done differently, I’m extremely pleased with my lawn of perennial peanut. It is absolutely stunning in the warm months, incredibly low maintenance, and unique! Plant some today!
As always, if you have any questions about perennial peanut or any other plant/crop, contact your local UF/IFAS Extension office.
by Daniel J. Leonard | May 27, 2019
Talk to nearly any Panhandle gardener and one of the first things brought up in conversation is the difficulty growing large, beefsteak/slicing tomatoes (Solanum lycopersicum) in their home garden. Large tomatoes are indeed among the more challenging garden vegetables in North Florida, affected by myriad pests, pathogens and abiotic issues. However, giving up growing this garden favorite is unwarranted as success can be had by following a couple of often overlooked, simple steps to ward off potential problems.
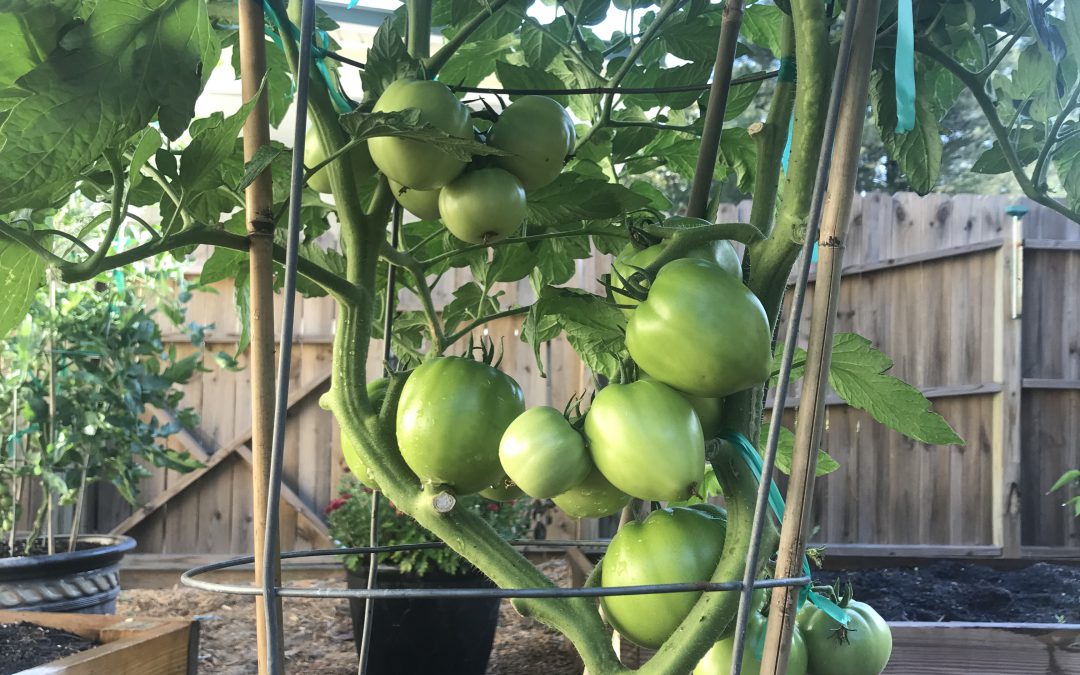
Choose Resistant Cultivars – One of the major recent gardening trends is the rise of heirloom veggies, particularly heirloom tomatoes. While many of these varieties certainly are interesting and often possess superior flavor/texture, heirlooms are, as a group, extraordinarily susceptible to disease in our climate. Fortunately for gardeners, there are a number of excellent varieties available with large resistance profiles to many common diseases and a similar taste profile to heirloom favorites! ‘Big Beef’ (pictured), ‘Better Boy’, ‘Celebrity’, and ‘Skyway’ are just a few of the many great cultivars with extensive disease resistance available as transplants at garden centers or as seed from quality online seed vendors.

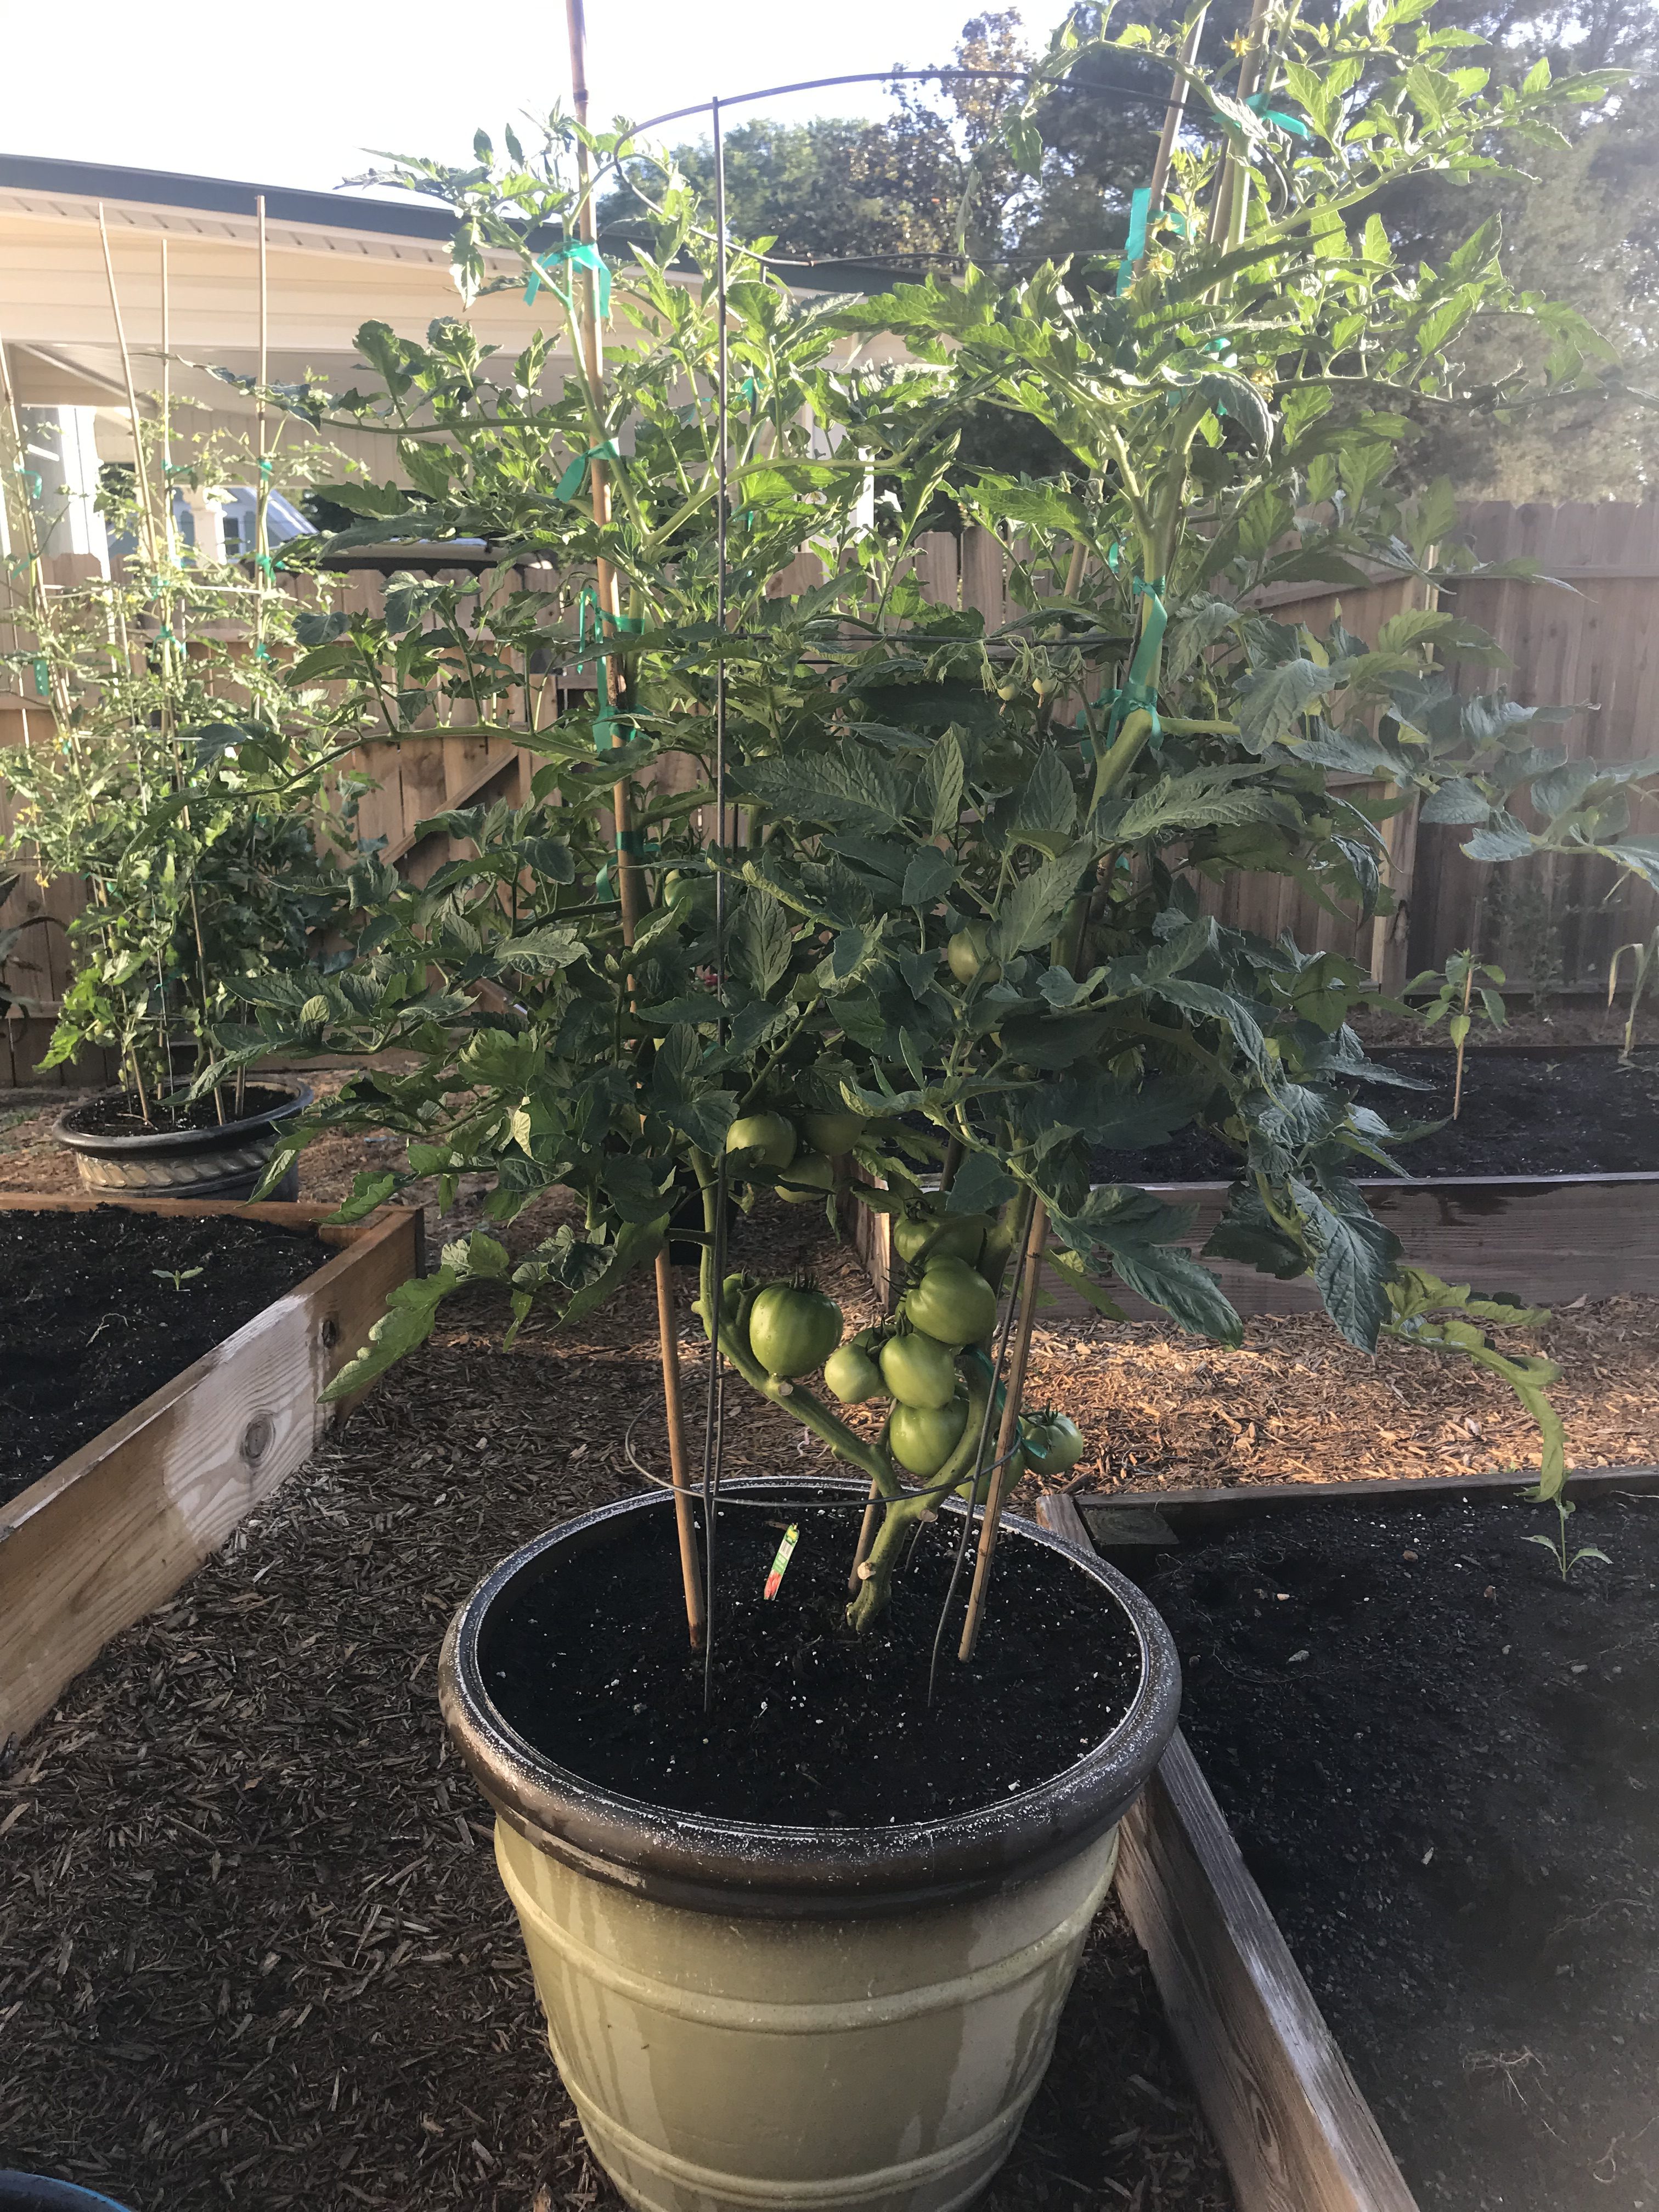
Tomato ‘Big Beef’ in 15 gallon decorative container
Start Early – Once, you’ve selected the proper cultivar, the next key is to get them in the ground early! I’m convinced one of the primary reasons folks fail with tomatoes is waiting for “traditional” garden planting dates. For instance, an old tradition in the South is to plant your garden on Good Friday before Easter. However, according to Johnny’s Selected Seeds Southeast Sales Representative Blake Thaxton, tomatoes should be germinated and growing in the garden no later than March 15. Mr. Thaxton notes two primary reasons for this, the most important being pest/disease avoidance. Beefsteak tomato varieties take around 70 days from planting to harvest, so a March 15th planting date yields ripe tomatoes around the third or fourth week of May, when pest/disease pressure is still manageable. Pests and disease occurrence becomes exponentially worse in the Panhandle as May trickles into June and July, therefore it is critical that your fruit begin ripening prior to this onslaught. An important second motivation to plant early is that tomatoes stop setting fruit when nighttime temperatures rise above 75°F. At these temperatures, tomato pollen is rendered sterile and though the plant will continue flowering, no fruit will be set.
Mulch – Another overlooked best management practice in backyard veggie gardening is mulching! Those of us who tend flower beds already know many benefits of mulch like soil temperature moderation, weed prevention, and moisture conservation. But for tomato growers, mulch has another benefit – disease prevention! Several serious diseases that affect tomato are soil-borne pathogens (i.e. Early Blight, Late Blight, Bacterial Spot, etc.). These pathogens find their way onto plants either indirectly via water splashing from soil onto leaves or direct contact from leaves and fruit resting on the soil. To prevent these pathogens from infecting plant tissue, apply an organic mulch (preferably wheat straw or tree leaves) under and around plants. This simple step goes a long way toward season-long, yield-saving disease prevention.
Consistent Watering – Everyone knows plants need water but what you might not know is that irrigation consistency makes a huge difference in plant health, particularly tomatoes. Consistent watering is key in helping ward off one of the most frustrating tomato maladies, blossom end rot (BER) – you know, the one where the bottom end of your perfectly good tomato fruit turns to a brownish mush! Though BER is caused by calcium deficiency, the condition is commonly induced by creation of distinct wet and dry periods from non-regular watering, interfering with calcium uptake and availability to the plant. So, while you may have adequate soil calcium, if you don’t water correctly, the condition will happen anyway! It’s also good to keep in mind that mature tomato plants use large quantities of water daily, so during the heat of summer, plants in containers may need to be watered multiple times daily to maintain consistently moist soil. Think about it, you don’t drink 8 glasses of water when you wake up and then never drink again throughout a hot day. A tomato is no different. Allowing your plants to wilt down before providing additional water ruins productivity and can induce BER.
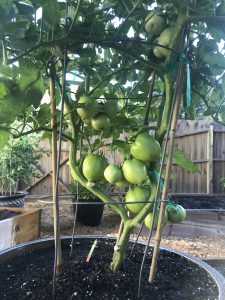
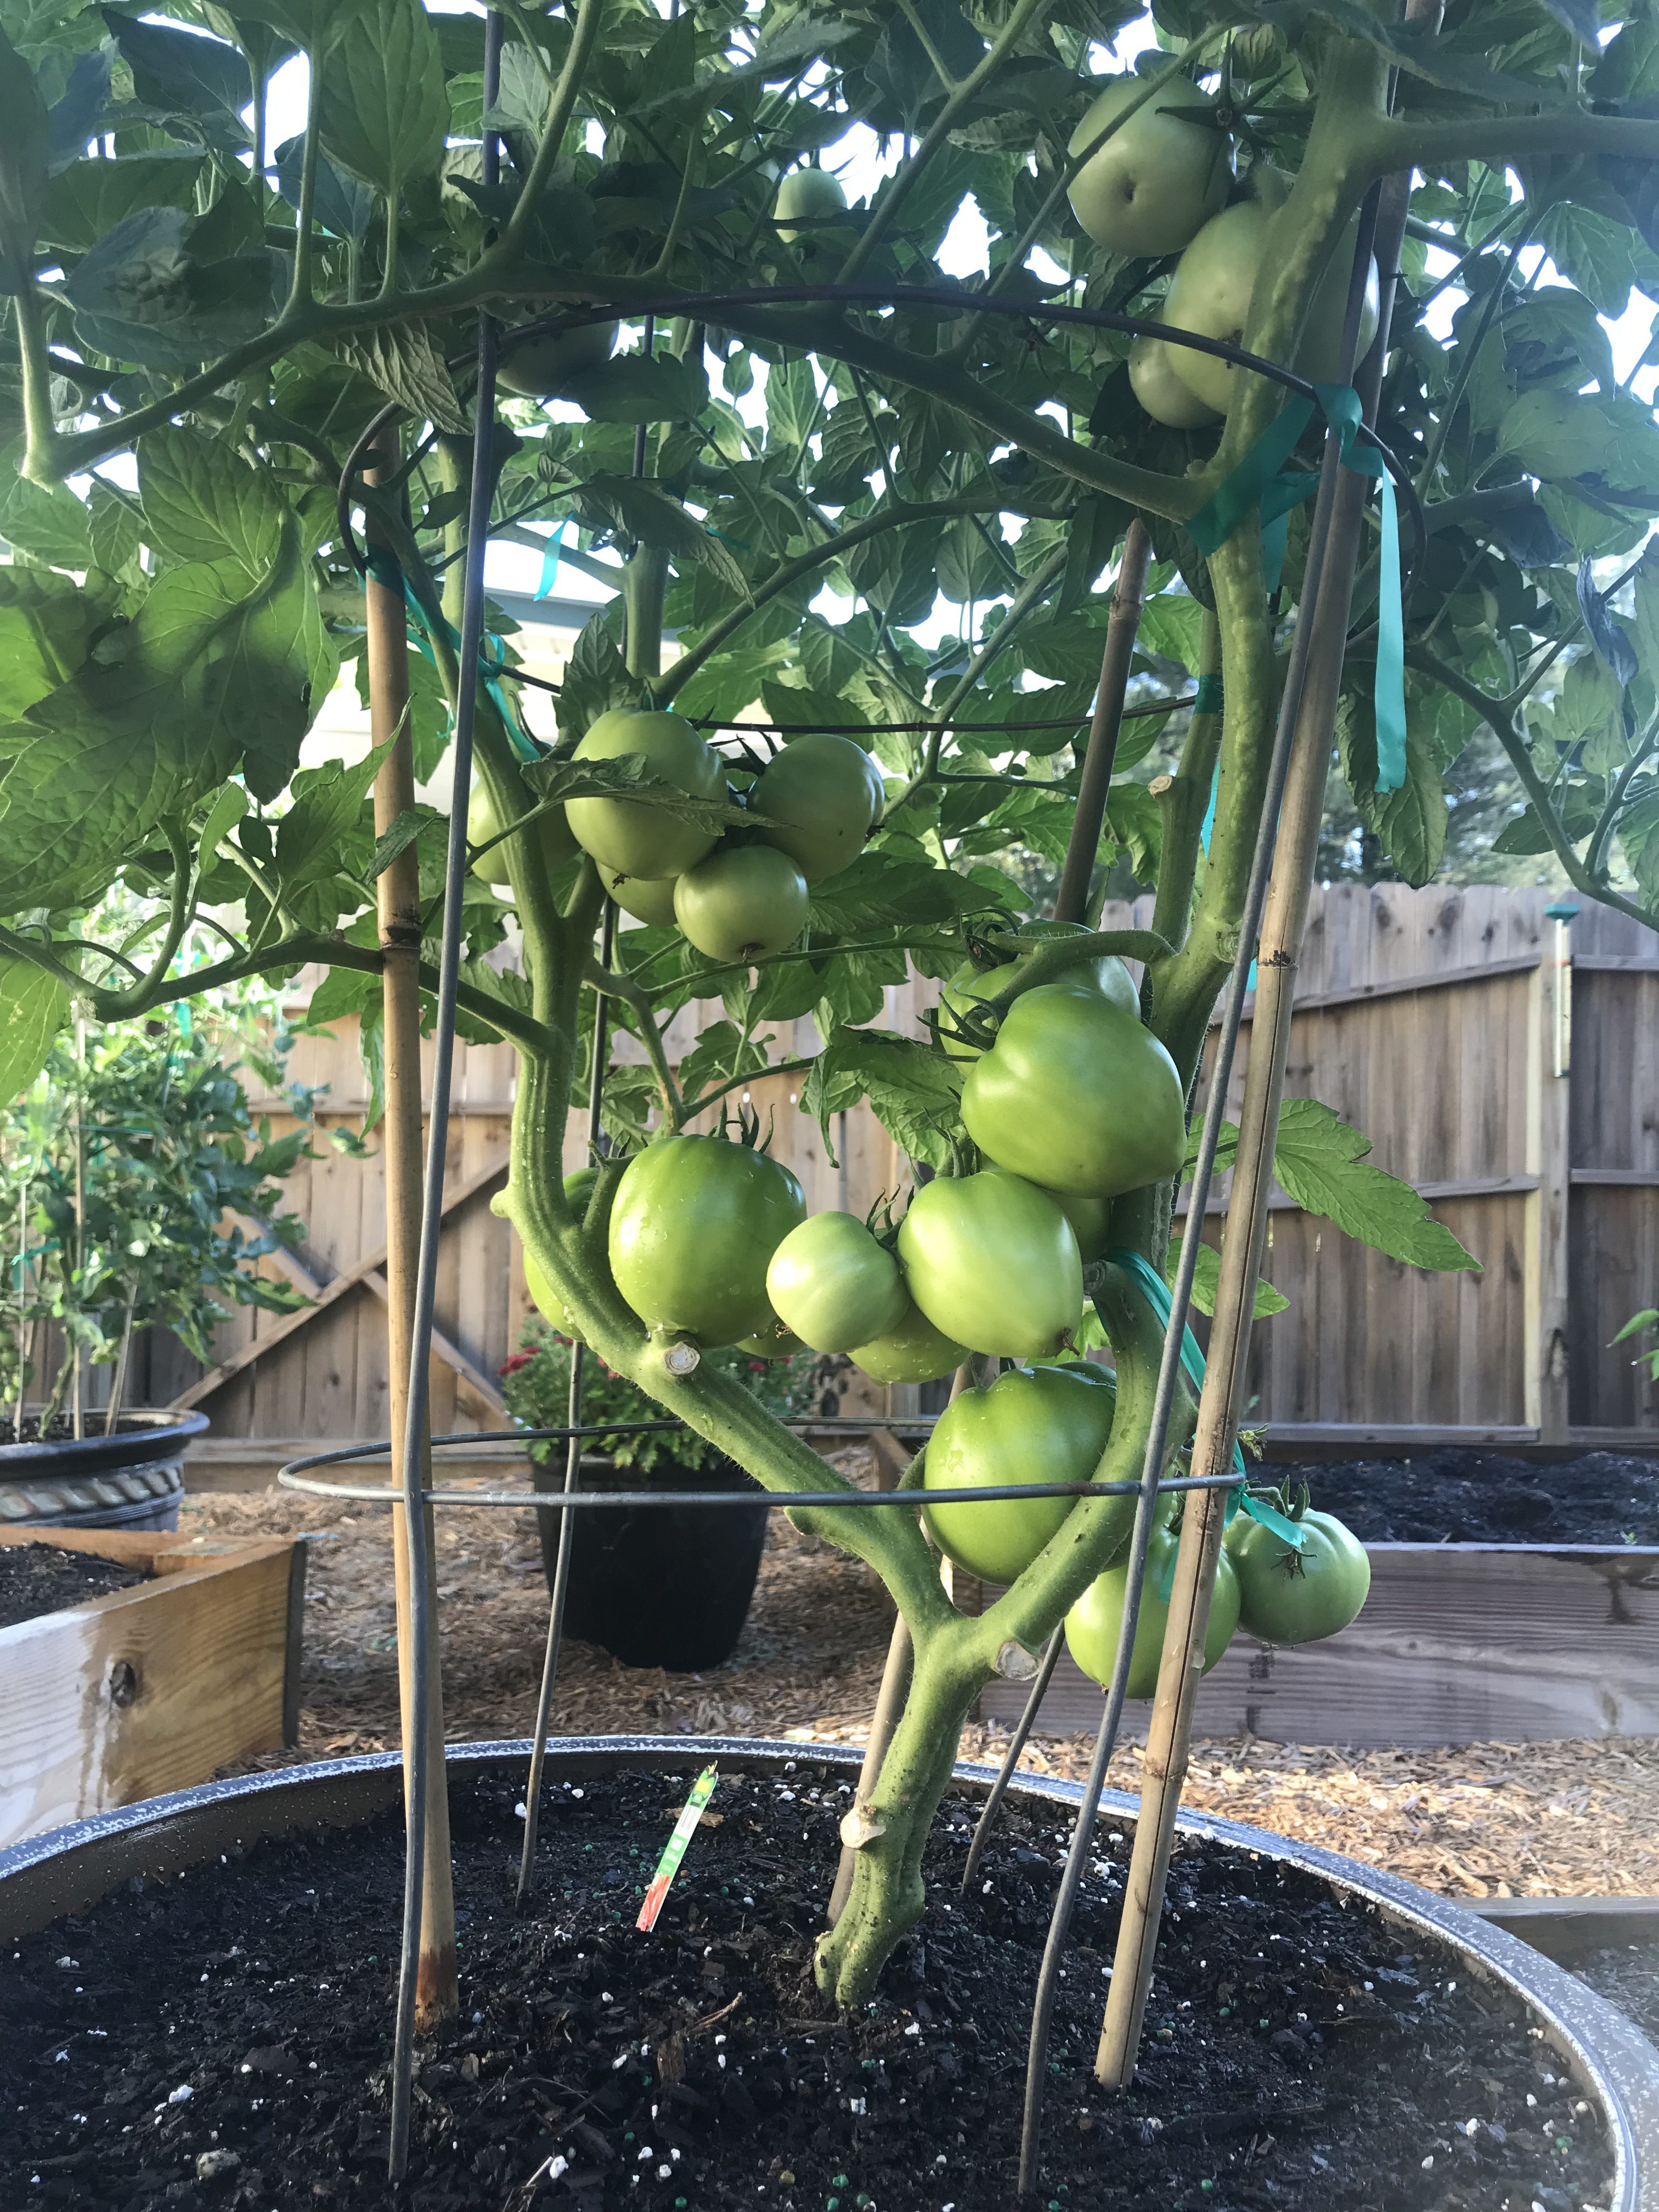
Tomato ‘Big Beef’ demonstrating pruning for soil clearance and airflow.
Pruning – I get it. Once you’ve nursed your baby tomato from a wee transplant or seed into a rapidly growing and flowering plant, it seems counter-intuitive to break out the pruners, but to keep your tomato plant as healthy as possible for as long as possible, that is what you must do! Pruning tomatoes should accomplish two things. First, remove the bottom layer of foliage from the plant base, so that water will not readily splash onto the lowest remaining leaves. (I tend to remove all leaves up to the second set of flowers 8-12” from the soil’s surface.) As with mulching, this prevents bacterial and fungal pathogens from spreading easily from the soil surface onto your plant. Second, tomato plants, especially the vigorous indeterminate varieties, often grow more foliage than is necessary for fruit production. This excess foliage can prevent airflow and trap moisture in the canopy of the plant, promoting disease. To open up the canopy and allow for more airflow, I prune off leaves that grow from the primary stems inward to the center of the plant. The idea is to keep the inside of the plant open while allowing enough leaves to power photosynthesis and shade the developing fruit below.
Tomatoes are notoriously hard to grow, but by following a few easy preventative practices, gardeners can greatly increase their chances of realizing harvestable fruit come summer. Please keep in mind that this is not an exhaustive list that will ensure disease-free plants over the entire growing season (you should also get a soil test to make sure your pH and soil fertility are correct and ideally you’d never work in your tomatoes when they are wet, etc., but this is a good place to start!). However, a little bit of planning and prevention early in the season can make growing tomatoes a lot less frustrating! As always, if you have questions regarding tomatoes or any other horticultural topic, please contact your local UF/IFAS Extension Office. Happy gardening!
by Sheila Dunning | Aug 2, 2018
Although it has been very hot this summer throughout the Florida Panhandle, many areas have been blessed with afternoon showers several day in a row. Historically, this has been the typical Northwest Florida weather pattern known as the ‘Dog Days’. 
Yet, many landscape sprinkler systems were still running. One has to ask, “Where are all the rain shut-off devices?”. Florida is one of just a few states with a rain sensor statute. Since May 1991, new installations of irrigation systems have been required to include a rain shut-off device. However, no wording was included to cover installation or maintenance. The 2010 statute change now states the following: “Any person who operates an automatic landscape system shall properly install, maintain and operate technology that inhibits or interrupts operation of the system during periods of sufficient moisture.” (Florida Statute 373.62).
Thus, ALL automatic landscape irrigation systems require rain sensors, or other shut-off devices such as soil moisture sensor irrigation controllers. No “grandfather clause” was included for existing systems. Regardless of when it was installed, every sprinkler system must have an operational rain shut-off device. Irrigation contractors can be fined for working on a system without checking out and/or connecting a device.
Moisture sensing technology conserves water, saves money, reduces wear on irrigation system components, reduces disease and helps protect water resources from runoff. Previous research has shown that homeowners using in-ground, automatic irrigation systems, typically in Florida, apply 47% more water for landscape irrigation than homeowners without automatic irrigation systems. This over-irrigation is largely due to a “set it and forget it” mentality despite seasonal fluctuations in plant water needs. If the water costs and the amount of water applied per watering cycle are known, it is easy to calculate how much money is being saved each time the sensor interrupts the program. For example, if a system irrigates ½ acre of turf and is set to deliver ½ inch of water to each zone, approximately 13,576 gallons of water will be used during each watering event. If the cost of the water is $2.00 per thousand gallons, every time the sprinkler system comes on the water bill will be $27.15. A significant amount of money and water can be saved by maintaining a rain shut-off device.
 Irrigation is common in Florida landscapes because of sporadic rainfall and the low water holding capacity of sandy soils. Water conservation is a growing issue due to increased demands from a growing population. The least expensive and most common rain sensor device is the expansion disk rain shut-off. Expanding cork disks trigger a pressure switch. The expansion space can be easily adjusted by rotation of the disk cover to a predetermined amount of rain required to trigger the switch. The amount of rain that will interrupt the irrigation system is marked on the adjustment cap. A rain sensor must be mounted where it will be exposed to unobstructed rainfall, typically installed near the roofline on the side of a building.
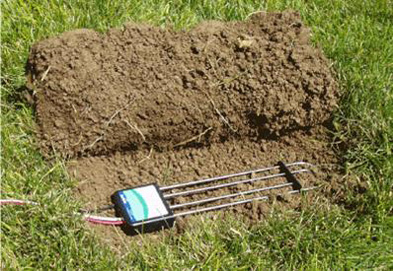
Irrigation control technology that improves water application efficiency is now available. Soil moisture sensors (SMS) can reduce the number of unnecessary irrigation events. Most soil moisture sensors are designed to estimate soil volumetric water content based on the soil’s ability to transmit electricity, which increases as the water content of the soil increases. Bypass type soil moisture irrigation controllers use water content information from the sensor to either allow or bypass scheduled irrigation cycles on the irrigation timer. Another type of control technique with SMS devices is “on-demand” where the controller initiates irrigation at a low threshold and terminates irrigation at a high threshold. A single sensor can be used to control the irrigation for many zones or multiple sensors can be used to irrigate individual zones. In the case of one sensor for several zones, the zone that is normally the driest, or most in need of irrigation, is selected for placement of the sensor in order to ensure adequate irrigation in all zones. Sensors should be buried in the root zone of the plants to be irrigated. For turfgrass, the sensor should typically be buried at about three inches deep. The placement of SMS should be at least 5 feet from hard surfaces and sprinkler heads. The sensor needs to be calibrated and/or the soil water content threshold needs to be selected.
The amount of water that can be saved using rain shut-off devices is substantial since water use increases substantially during summer months. Remember that every drop that hits the ground will be picking up pollutants as it flows to our groundwater. Nonpoint source pollution is the leading cause of water quality problems. These pollutants have harmful effects on drinking water supplies, recreation, fisheries and wildlife. By only irrigating when the soil needs it, you are also preventing contamination of drinking water.
This article is being reissued as part of our ‘Best Of” series, from August 2013 .
by Daniel J. Leonard | Jul 3, 2018
Each time I travel to central and south Florida and observe the wonderfully flamboyant tropical flora, I am reminded of the unique and frustrating climatic characteristics of Northwest Florida. Our weather is tropical enough through the summer to sustain virtually everything our friends to the south grow, but winters north of the Big Bend are just cold enough to prevent long-term success with most tropical species. However, the genus that is maybe most synonymous with tropical color, the Hibiscus (it even has its own texting emoji!), contains several species that are hardy through our winters. The best landscape plant of these hardy Hibiscus species is creatively (sarcasm) called Hardy Hibiscus or Giant Rose Mallow (Hibiscus moscheutos) and is an absolute star in the Panhandle, bringing the beauty of the tropics to your yard!

Hibiscus ‘Starry Starry Night’ – Photo courtesy Daniel Leonard
Rose Mallow is a native perennial species that occurs in sunny wetlands across the eastern U.S. This species can grow 7-8’ in height in its natural, unimproved state and possesses the largest flowers of any hardy perennial, some varieties easily eclipse 12” in diameter. Rose Mallows bloom through the heat of our long summers and return reliably each winter unfazed by frost. The flowers also happen to be a favorite of butterflies and hummingbirds and bring beneficial wildlife to the landscape. These characteristics and the trend towards the use of pollinator friendly, low-maintenance native perennials in landscapes quickly made Rose Mallow a jewel for plant breeders and now virtually all major horticultural brands have a line of Hardy Hibiscus available at garden centers, in varying sizes, flower color and leaf color/form. Recent breeding efforts have focused on introducing plants with enormous, richly colored flowers held on compact plants with attractive foliage. The results have yielded two series and three individual cultivars that I consider superior selections and are more than worthy of inclusion in your garden:
- Summerific® Series by Proven Winners. This series is comprised of four robust (up to 5’ in height) cultivars, ‘Cherry Cheesecake’ (bicolor magenta and white flowers), ‘Berry Awesome’ (purplish lavender flowers), ‘Cranberry Crush’ (a red you really have to see to believe), and ‘Perfect Storm’ (notable for its deep purple foliage).
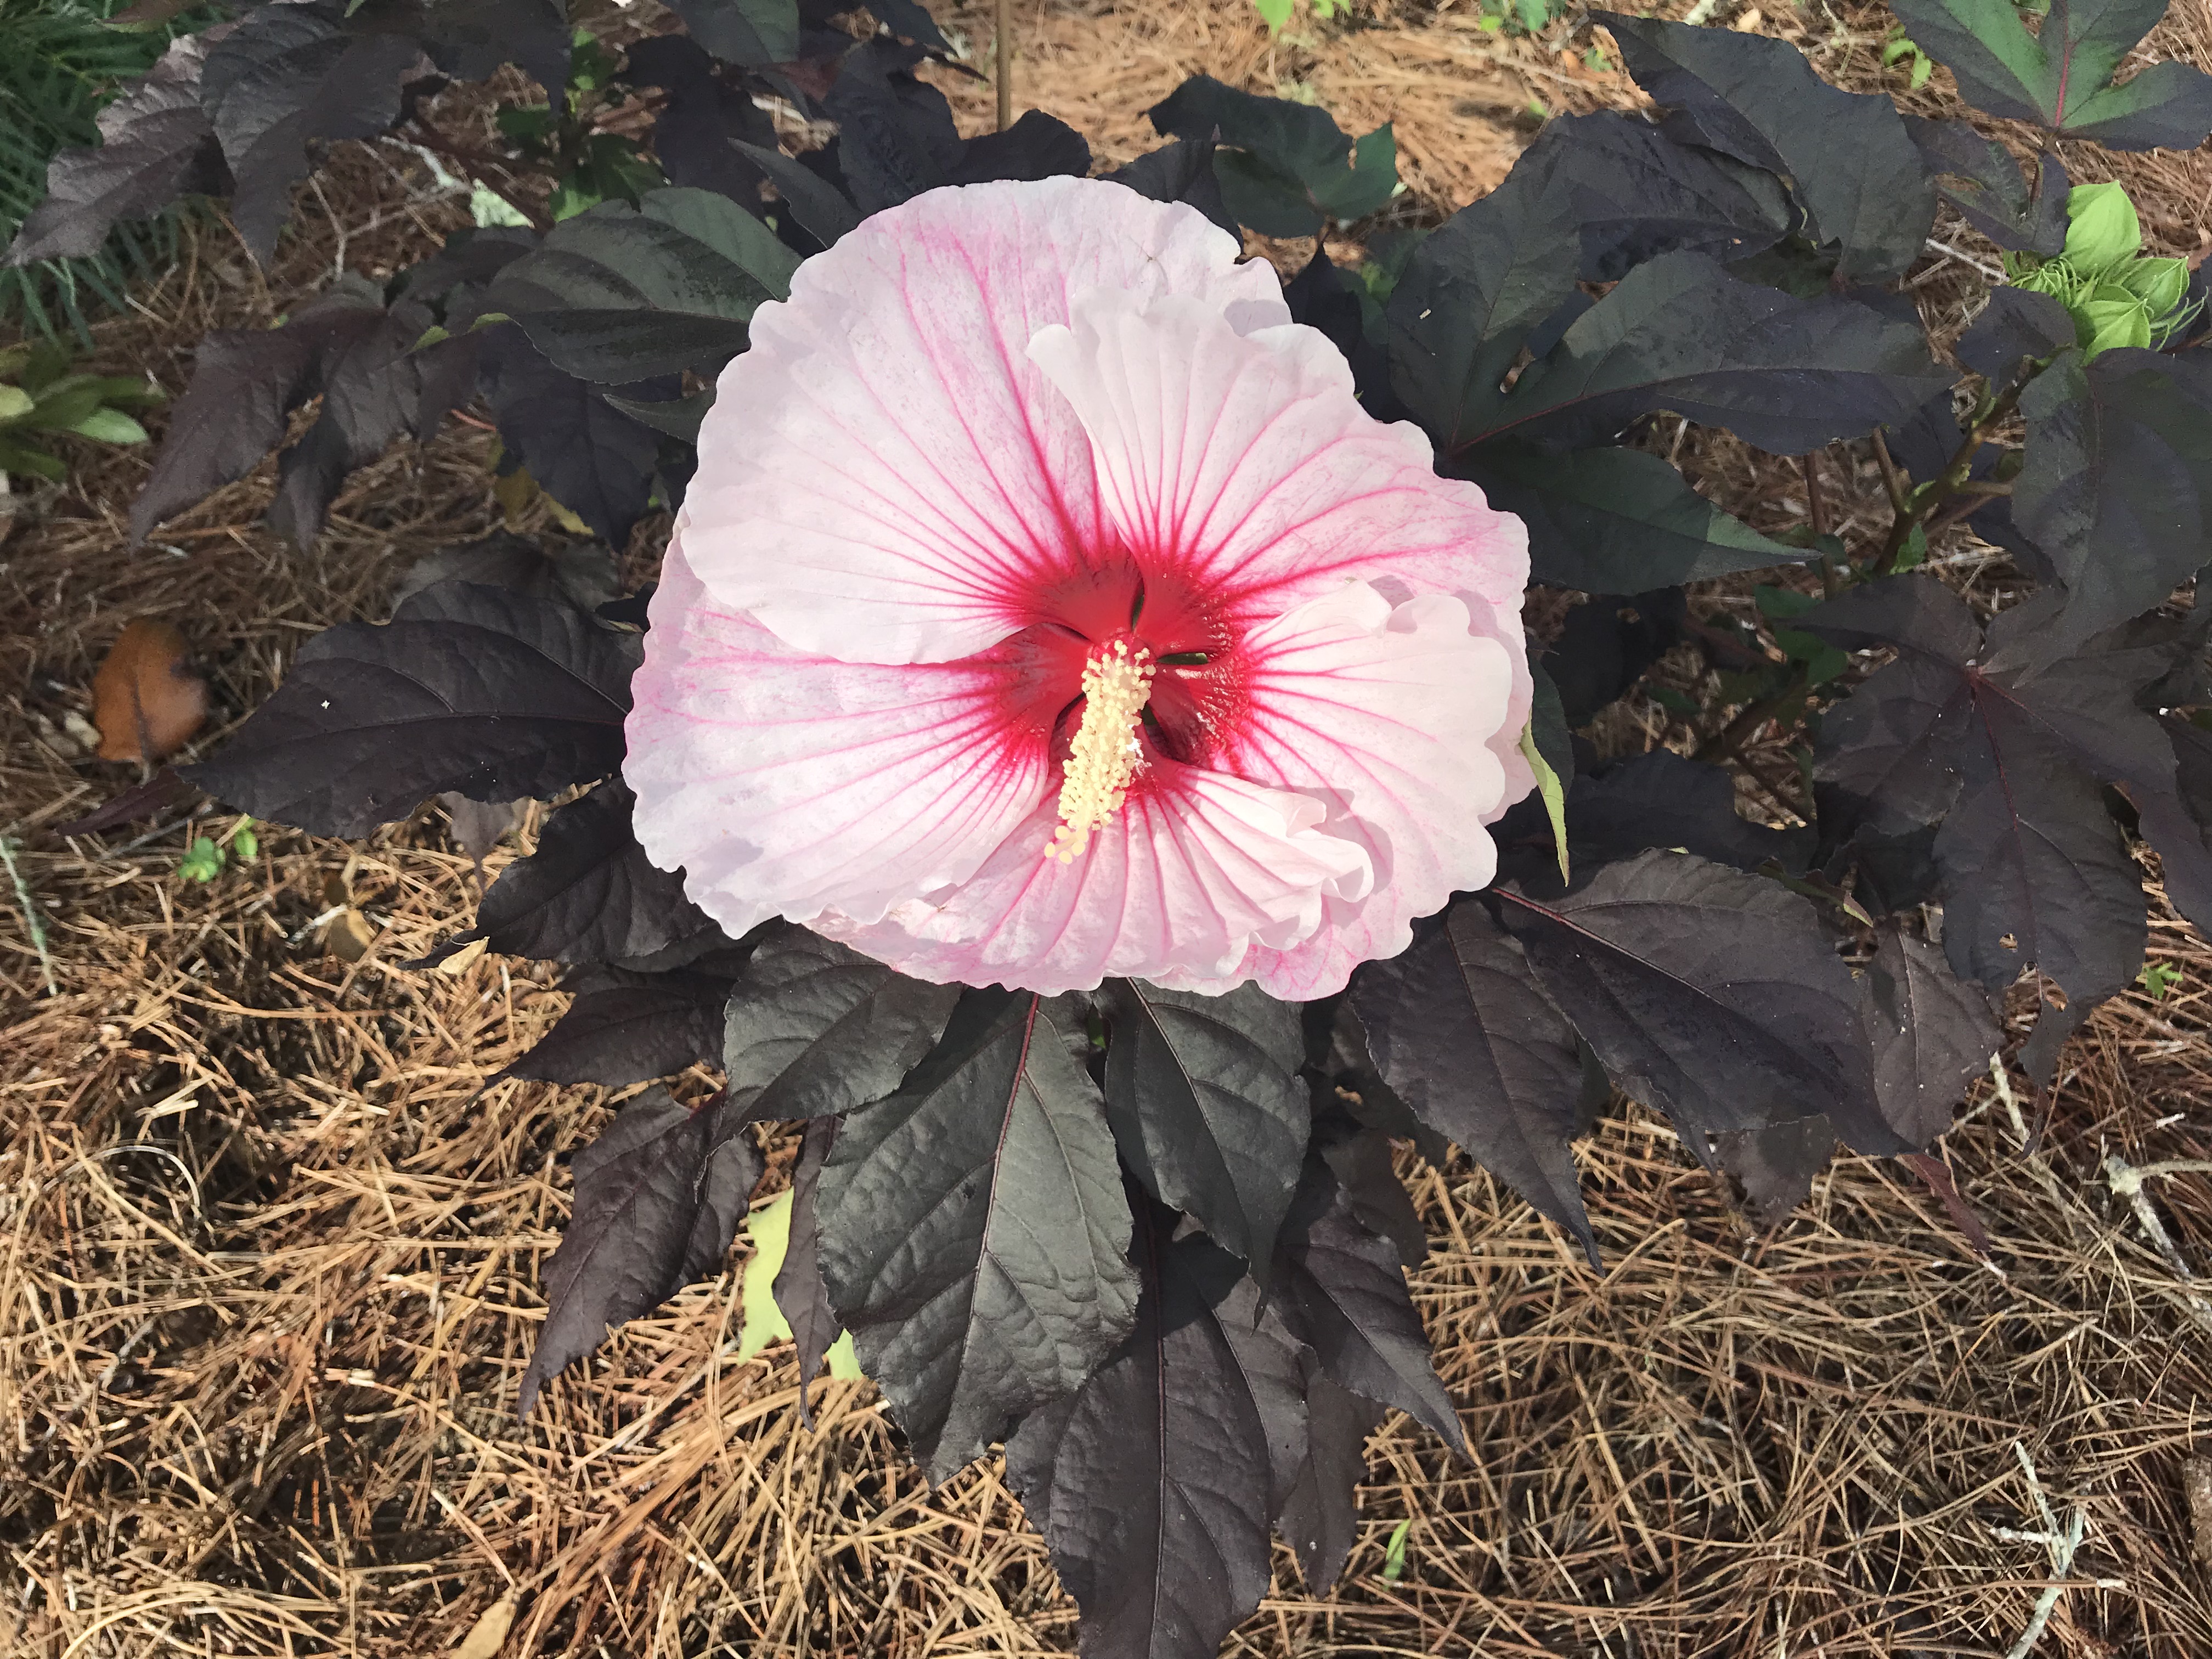
- Luna Series by Monrovia. This series is notable for its ultra-compact (3’ in height or less) size and characteristically large flowers. It is also composed of four cultivars, ‘Luna Red’ (deep red), ‘Luna Blush’ (white, fading to pink near flower margins), ‘Luna Pink Swirl’ (pictured and my favorite, bicolor swirly flowers), and ‘Luna White’ (white with a red center).

Hibiscus ‘Luna Pink Swirl’ – Photo courtesy Daniel Leonard
- ‘Starry Starry Night’ by Walter’s Gardens. (Pictured) This cultivar combines dark purple to black leaves with swirled pale and dark pink flowers. It has performed very well in my landscape and if I could only grow one, this might be it.
- ‘Lord Baltimore.’ The classic, large growing cultivar with bright red flowers that is widely available and easily found. An oldie (introduced in 1955) but a goodie.
- ‘Midnight Marvel’ by Walter’s Gardens. A “hot off the press” new cultivar that is currently difficult to find due to popularity, though some online outlets have them available in small sizes. This one is worth your patience. Sporting deep red blooms on near black foliage, there’s nothing else like it in the landscape.
In addition to being gorgeous plants, Rose Mallows are extremely versatile in the landscape and could not be easier to grow. Because the size varies so greatly (from the diminutive 30” tall ‘Luna’ series to the 8’ tall unimproved species), there really is a place for one in every garden. I like to use the smaller cultivars in large containers to facilitate moving them around where their floral display has the greatest impact or to create a tropical effect where in ground plantings are not an option (pool decks, patios, etc). The larger cultivars make spectacular specimen plantings in perennial and shrub beds and even make a really dense, striking hedge (just know they disappear in the winter). Be sure to give them as much sun as possible, as this will enhance the number of flowers on each plant and darken the foliage on the cultivars with purplish/black leaves. Too little sun will result in fewer flowers and lighter green foliage. As wetland plants, Rose Mallows enjoy regular water, either from rainfall or irrigation; they will let you know when they need it – their large leaves readily wilt under drought stress, somewhat like Hydrangea.
For low-maintenance, native, pollinator friendly, cold-hardy tropical color, you need look no further than Rose Mallow. These perennial shrubs come in all sizes and colors and fit any landscape! Look for the above listed series and cultivars at better garden centers and online retailers and enjoy the oohs and ahhs elicited when people first get a glimpse of Hardy Hibiscus in your landscape! Happy Gardening!