by Beth Bolles | Oct 23, 2017
Trees are a landscape asset for many homeowners. When a new tree is installed in our landscapes, we can’t wait for it to mature to provide shade or landscape interest. The heartbreak for many homeowners comes when this important part of their landscape, begins to decline five to ten years after establishment. We often consider a pest as the cause. The common culprit is often hidden below the mulch and soil and is easily preventable.
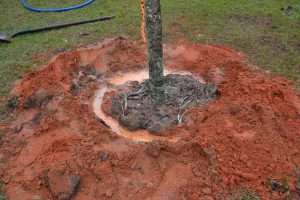
When larger specimen trees are installed in residential and commercial landscapes, they may be delivered with materials that help hold the rootball in place. Strapping often runs over the rootball and when trees are young is several inches away from the trunk. Installers or homeowners often do not cut the strapping during installation.

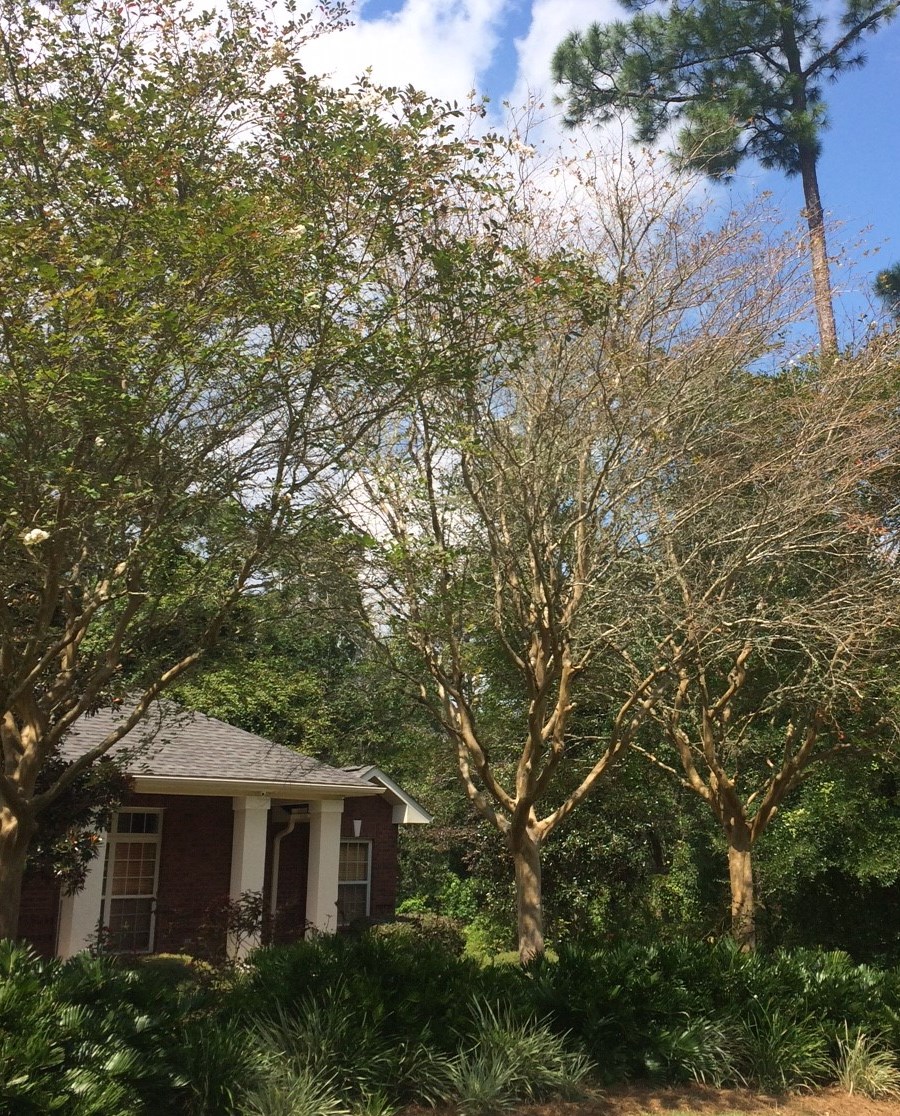
As this tree continue to grow, the rootball straps will interfere with normal trunk development. Cutting the straps takes only a few seconds at the time of planting. Photo by Beth Bolles, UF / IFAS Extension Escambia County
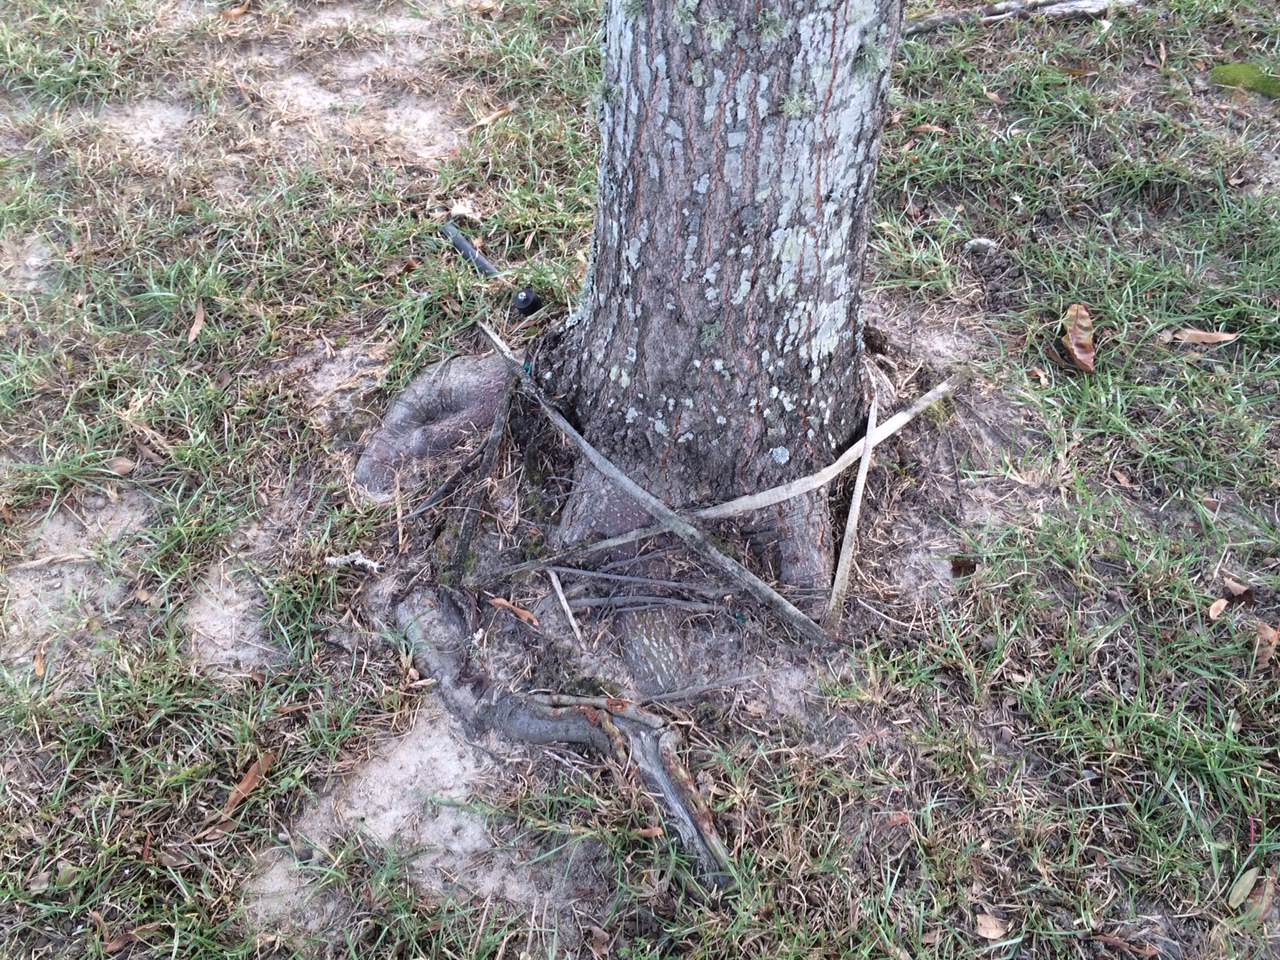
Over the years, tree trunks will grow in diameter and eventually reach the strapping. Because the strapping is still firmly in place, it can cut into a growing tree, resulting in girdling. Although many trees try to overcome the injured area by forming new wood over and around the girdling, this is a major stress that interferes with water and food movement in the plant. What we see is a tree that may be slower to leaf out in the spring, a thinning canopy, and twig dieback. These symptoms may be confused with another cause since the strapping is normally hidden from view.
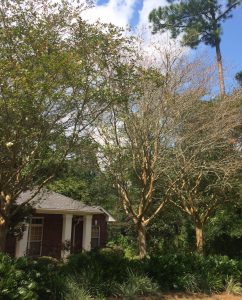
The crape myrtle on the right has a very thin canopy. Investigation found a severe area of girdling from strapping left uncut at planting. Photo by Beth Bolles, UF / IFAS Extension Escambia County.
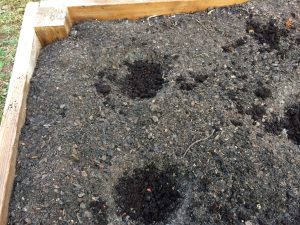
If you do have a tree that exhibits the above listed symptoms, it never hurts to look at the trunk and root flare just below the mulch and soil surface. If you find strapping still in place, cut it so that it is loose. Depending on the severity of the problem, this may not save the tree but it is worth a try on your important investment.
by Molly Jameson | Apr 7, 2017
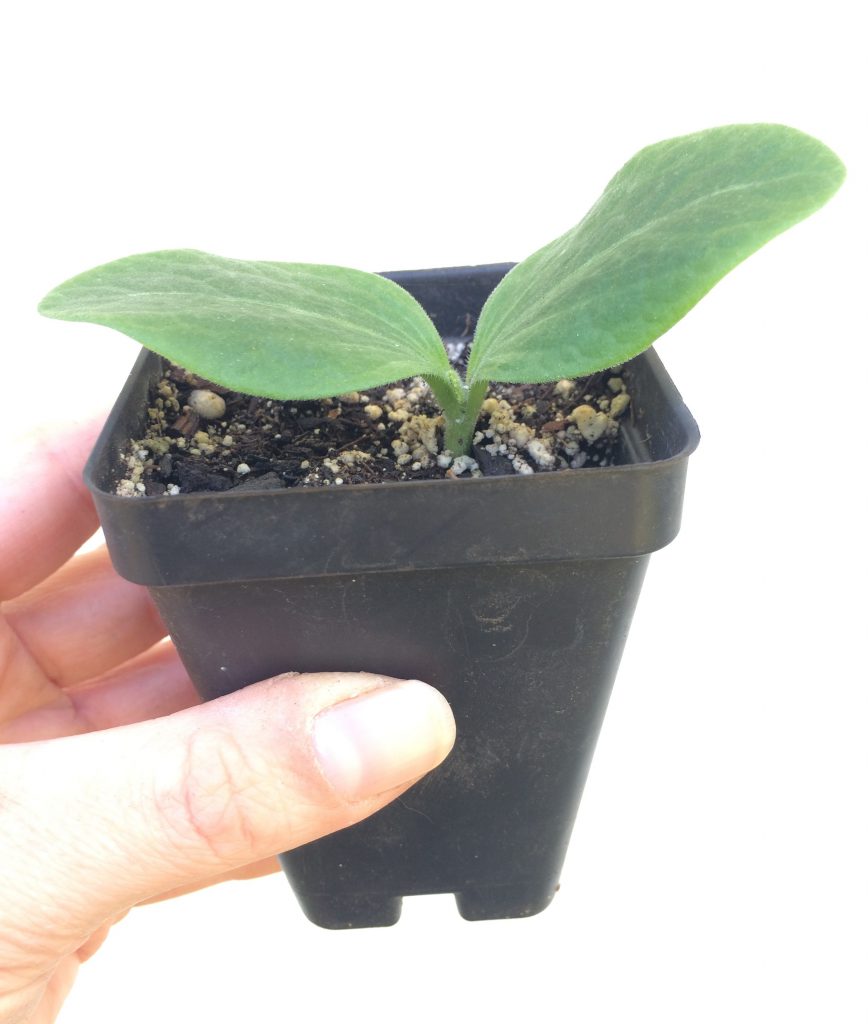
Be careful planting cucurbit transplants, as they have sensitive roots. Photo by Molly Jameson.
When I think of the end of winter and the hot temperatures that will soon be here to stay in the Florida Panhandle, I often feel a little melancholy. But the one silver lining that always picks me back up is remembering what warmer temperatures will mean in the garden. This is the start to all the fun, colorful, fruiting crops. Think of the oranges, reds, yellows, and even purples that will soon fill their vines.
As an extension agent, one of the questions I am often asked is whether to start summer vegetables from seed directly in the garden, or to start seeds in pots and transplant them later. The answer is – as is often the case – it depends.
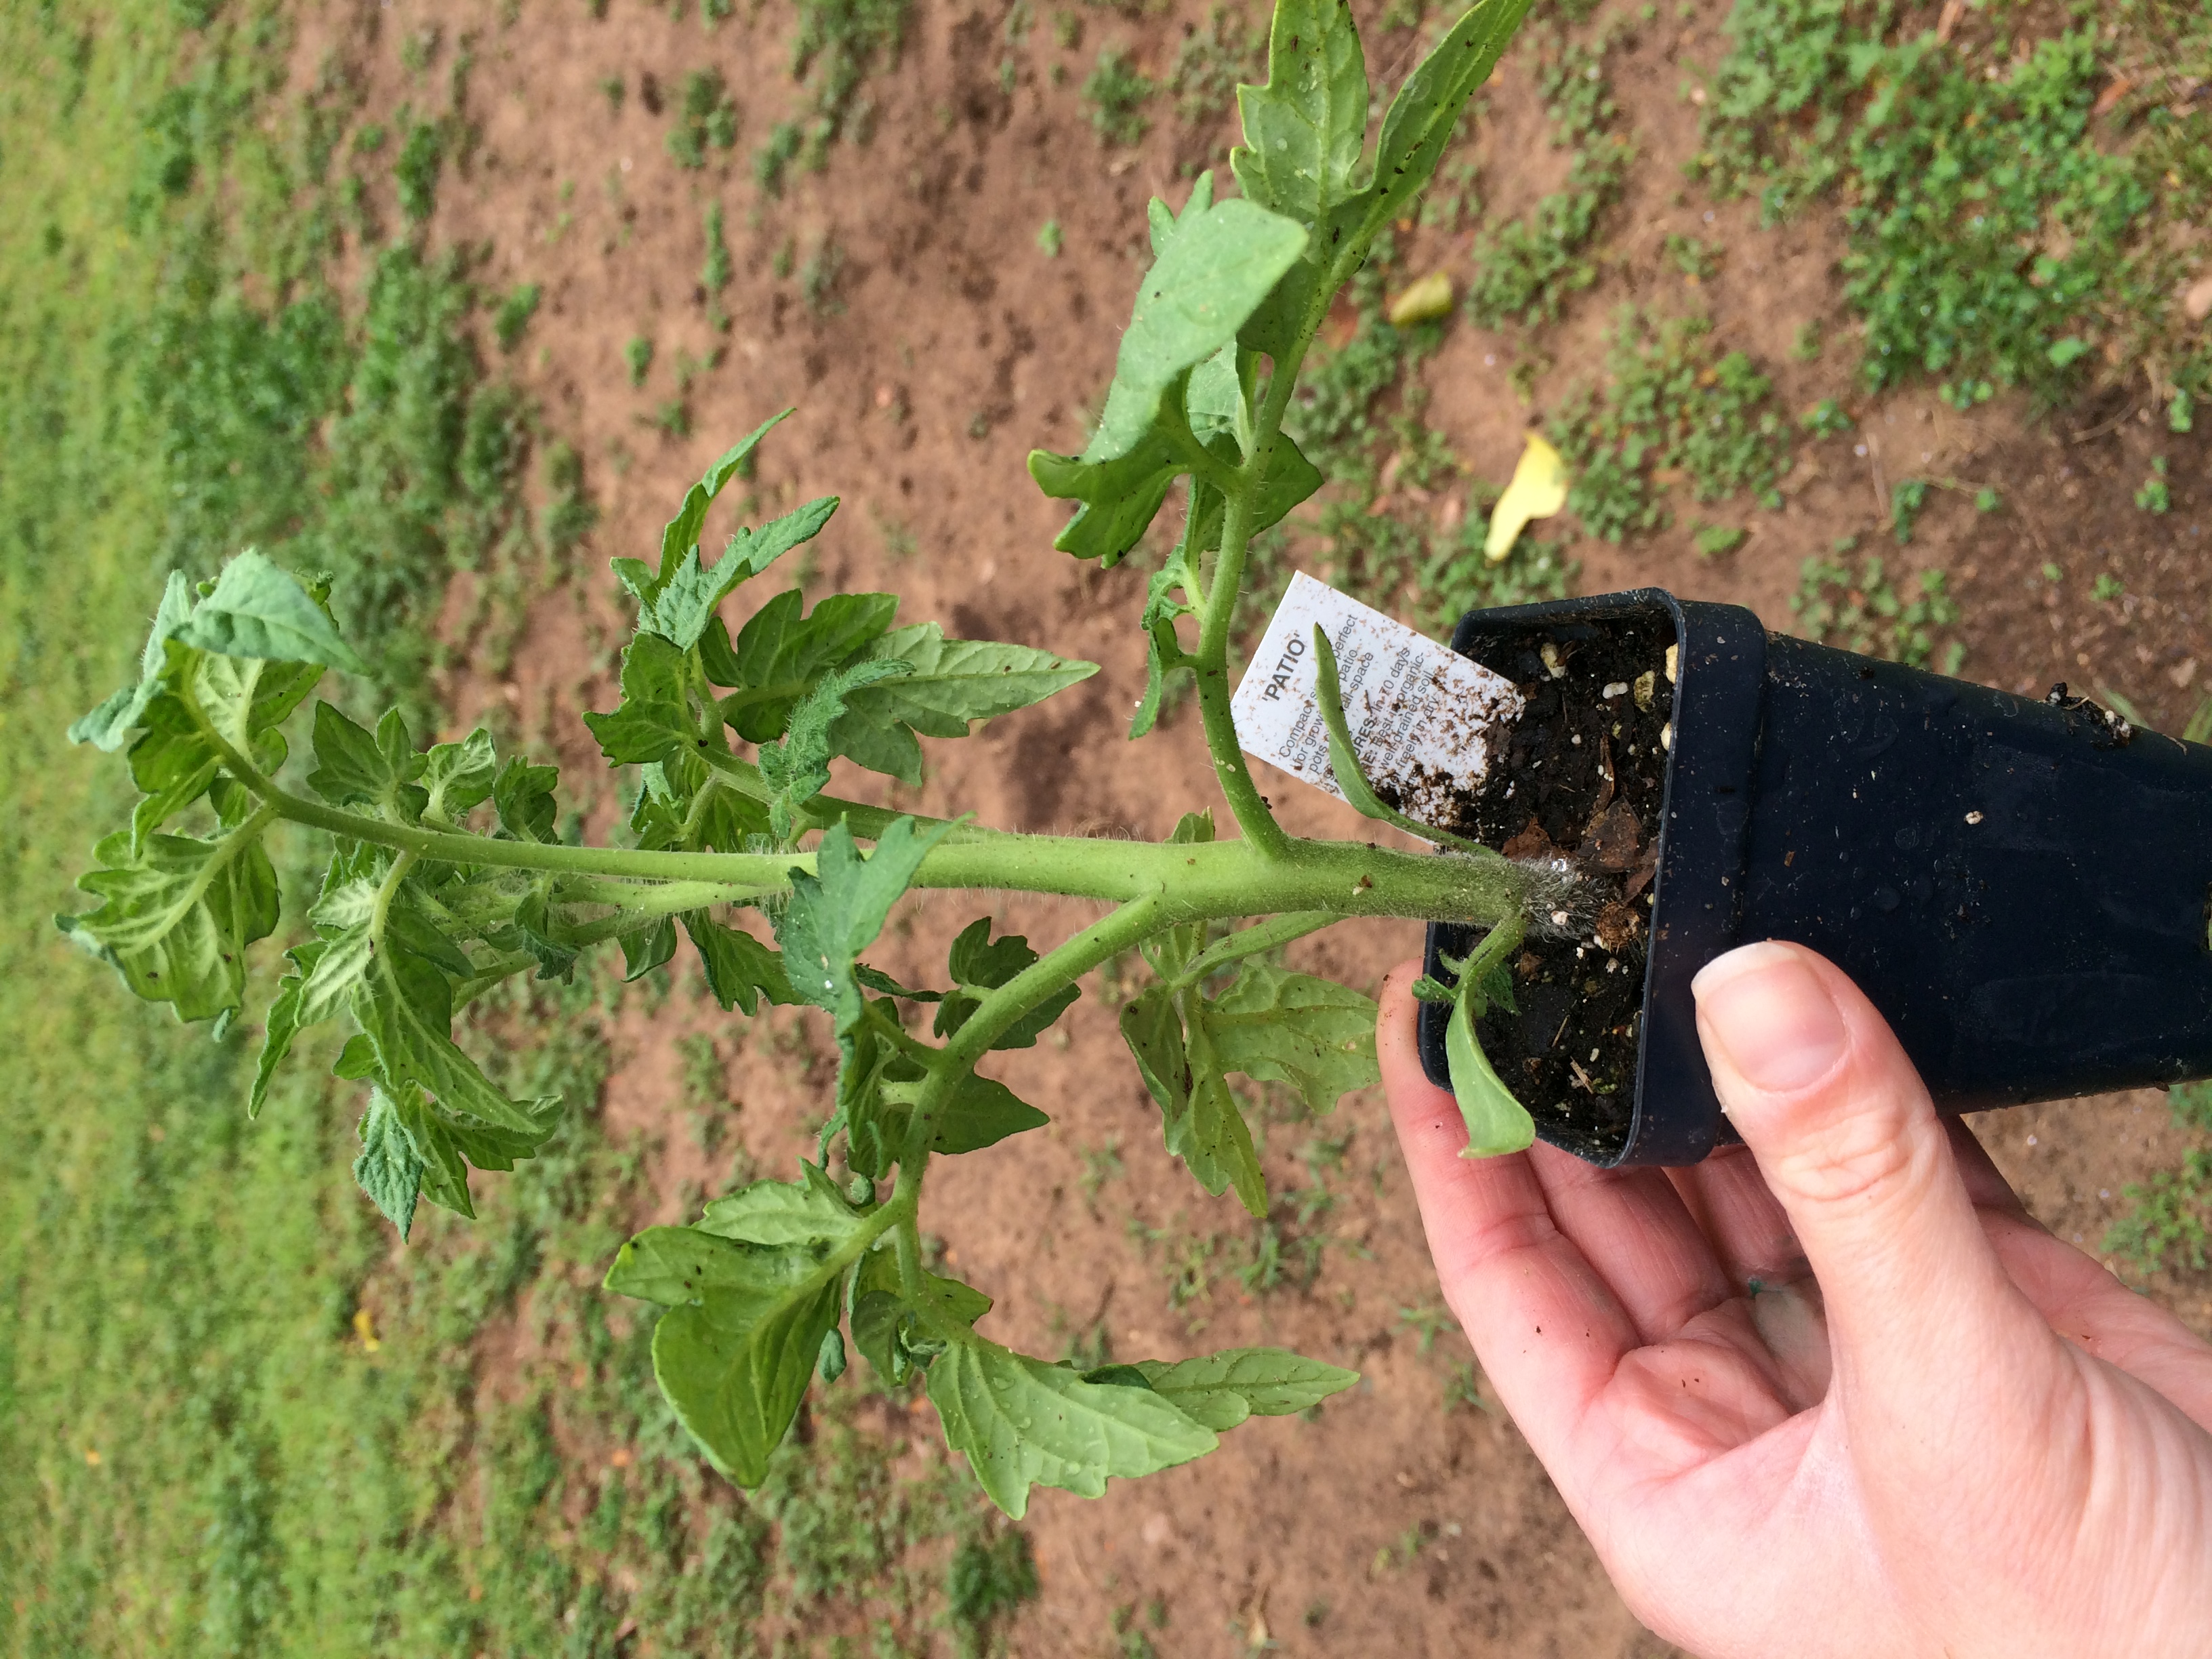
Are you planting tomatoes, peppers, or eggplant? Well, the beginning of April is too late to start from seeds with these crops in our neck of the woods. Buy transplants! Are you growing beans, okra, or root crops? Now that we are past the risk of frost, put those seeds directly into your garden. Are you growing cucurbits, like squash, cucumbers, or melons? You have a choice. You could seed them directly, or you could start seeds in pots. What is the advantage of starting in pots, you ask? Well – this will give you the chance to pick the strongest plants and will allow you to transplant them exactly where you want them. The disadvantage? Other than the extra work, cucurbits tend to be sensitive to disturbance. Be sure to handle with care and do not over water once your seedlings have sprouted.
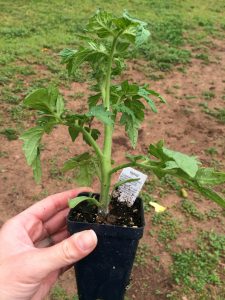
Transplant into the garden when the plant is about the length of its pot. Photo by Molly Jameson.
Whether you grew the seeds in pots yourself or acquired transplants elsewhere, there are certain practices you can follow to ensure your plant babies have a good start. Here are a few tips when it comes to transplanting into the garden:
What should be considered when purchasing transplants? When purchasing transplants, it is important to make sure the plant is healthy. Look for plants with strong stems, green leaves, and no signs of pest or disease damage. Ideally, the plant should not be much taller than the length of its pot, and should be about as tall as it is wide. Also, avoid vegetable plants that are already producing fruit, this is an indication they have been in their pot too long, prompting them to become stressed. When stressed, annuals often feel they need to hurry and produce seeds to carry on the next generation.
When should transplants be planted into the garden? For spring gardens, plant transplants once danger of frost has passed (late March in the Panhandle), when the transplant has had time to develop a strong root system, and when the transplant is about the length of its pot. If you are growing your seeds indoors or in a greenhouse, allow the plant to “harden-off” by placing the plants outdoors in partial shade for a few hours a day for about a week before transplanting.
What is the transplanting process?
- First, prepare your garden site with compost and other soil amendments.
- Water your plants very thoroughly just before planting to decrease transplant shock. The entire root system should be completely wet.
- Dig a hole that is at least double the width of the plant’s root ball.
Add fresh compost or worm castings to each planting hole to give your plants an extra nutrient boost. Photo by Molly Jameson.
- Add one to two handfuls of fresh compost or worm castings to each hole. These soil amendments will improve soil health, introduce beneficial microbes, and provide a slow- release nutrient source for your growing seedlings.
- Avoid covering any leaves or stems under the soil surface. Remove these lower leaves and stems with sharp garden clippers to minimize the size of the wound.
- Avoid touching the stem and avoid disturbing the root ball when removing the transplant from its pot. Gently squeeze the pot to loosen the potting soil and turn the transplant sideways or upside down with the palm of your hand to gently “catch” the transplant.
- Unless the transplant is a tomato, plant it so that the soil level is about the soil level of the transplant, making sure the plant has good structure to decrease susceptibility of falling over as it grows.
- If transplanting a tomato, plant deeper than the soil level of the transplant, as tomatoes can grow what are called “adventitious” roots – roots that grow from their stem – that will improve overall root development.
- Make sure to cover up all roots, and water the soil around the plant thoroughly. Continue to water deeply, keeping the soil moist but not soggy, for the next three to four days while the plant becomes established. You can then begin to switch to a normal watering pattern.
- Always water the soil around the plant, not the plant leaves, throughout the season to decrease susceptibility to disease.
Remember: gardening is a science and an art! And just like art, there are many aspects that are open to interpretation. Have fun gardening – experiment and try new techniques. Keep a journal tracking all your gardening adventures. With time, this can become your road map to the sweetest of summer fruit.
by Beth Bolles | Dec 22, 2016
A new tree or shrub is an investment for the future. When we pick an ornamental plant, we have the hope that it will survive for many years and offer seasons of beauty that enhance our landscape. Time is often spent picking a suitable spot, preparing the planting hole, and watering until establishment. We give it the best of care to make certain that our new plant becomes a more or less permanent feature.
With all of our tender love and care for new ornamentals, there is one important practice that we may neglect. Most homeowners purchase plants in containers and it is common to find root balls with circling roots. If any root ball problems are not addressed before installation, the life of your plant may be shorter than you want.

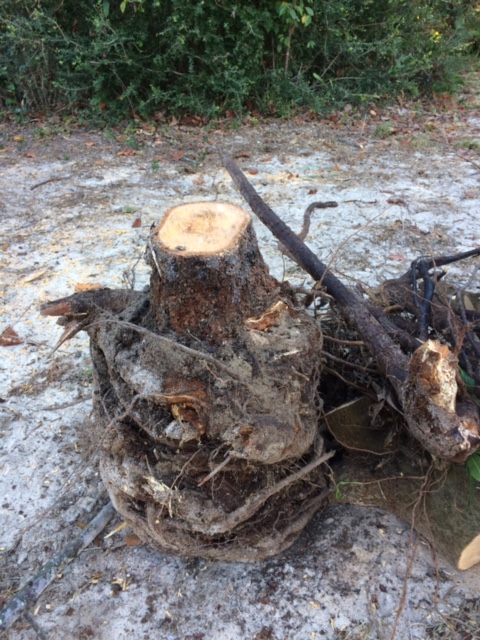
Ten years after installation, this plant was ultimately killed by girdling, circling roots. Photo by Warren Tate, Escambia County Master Gardener.
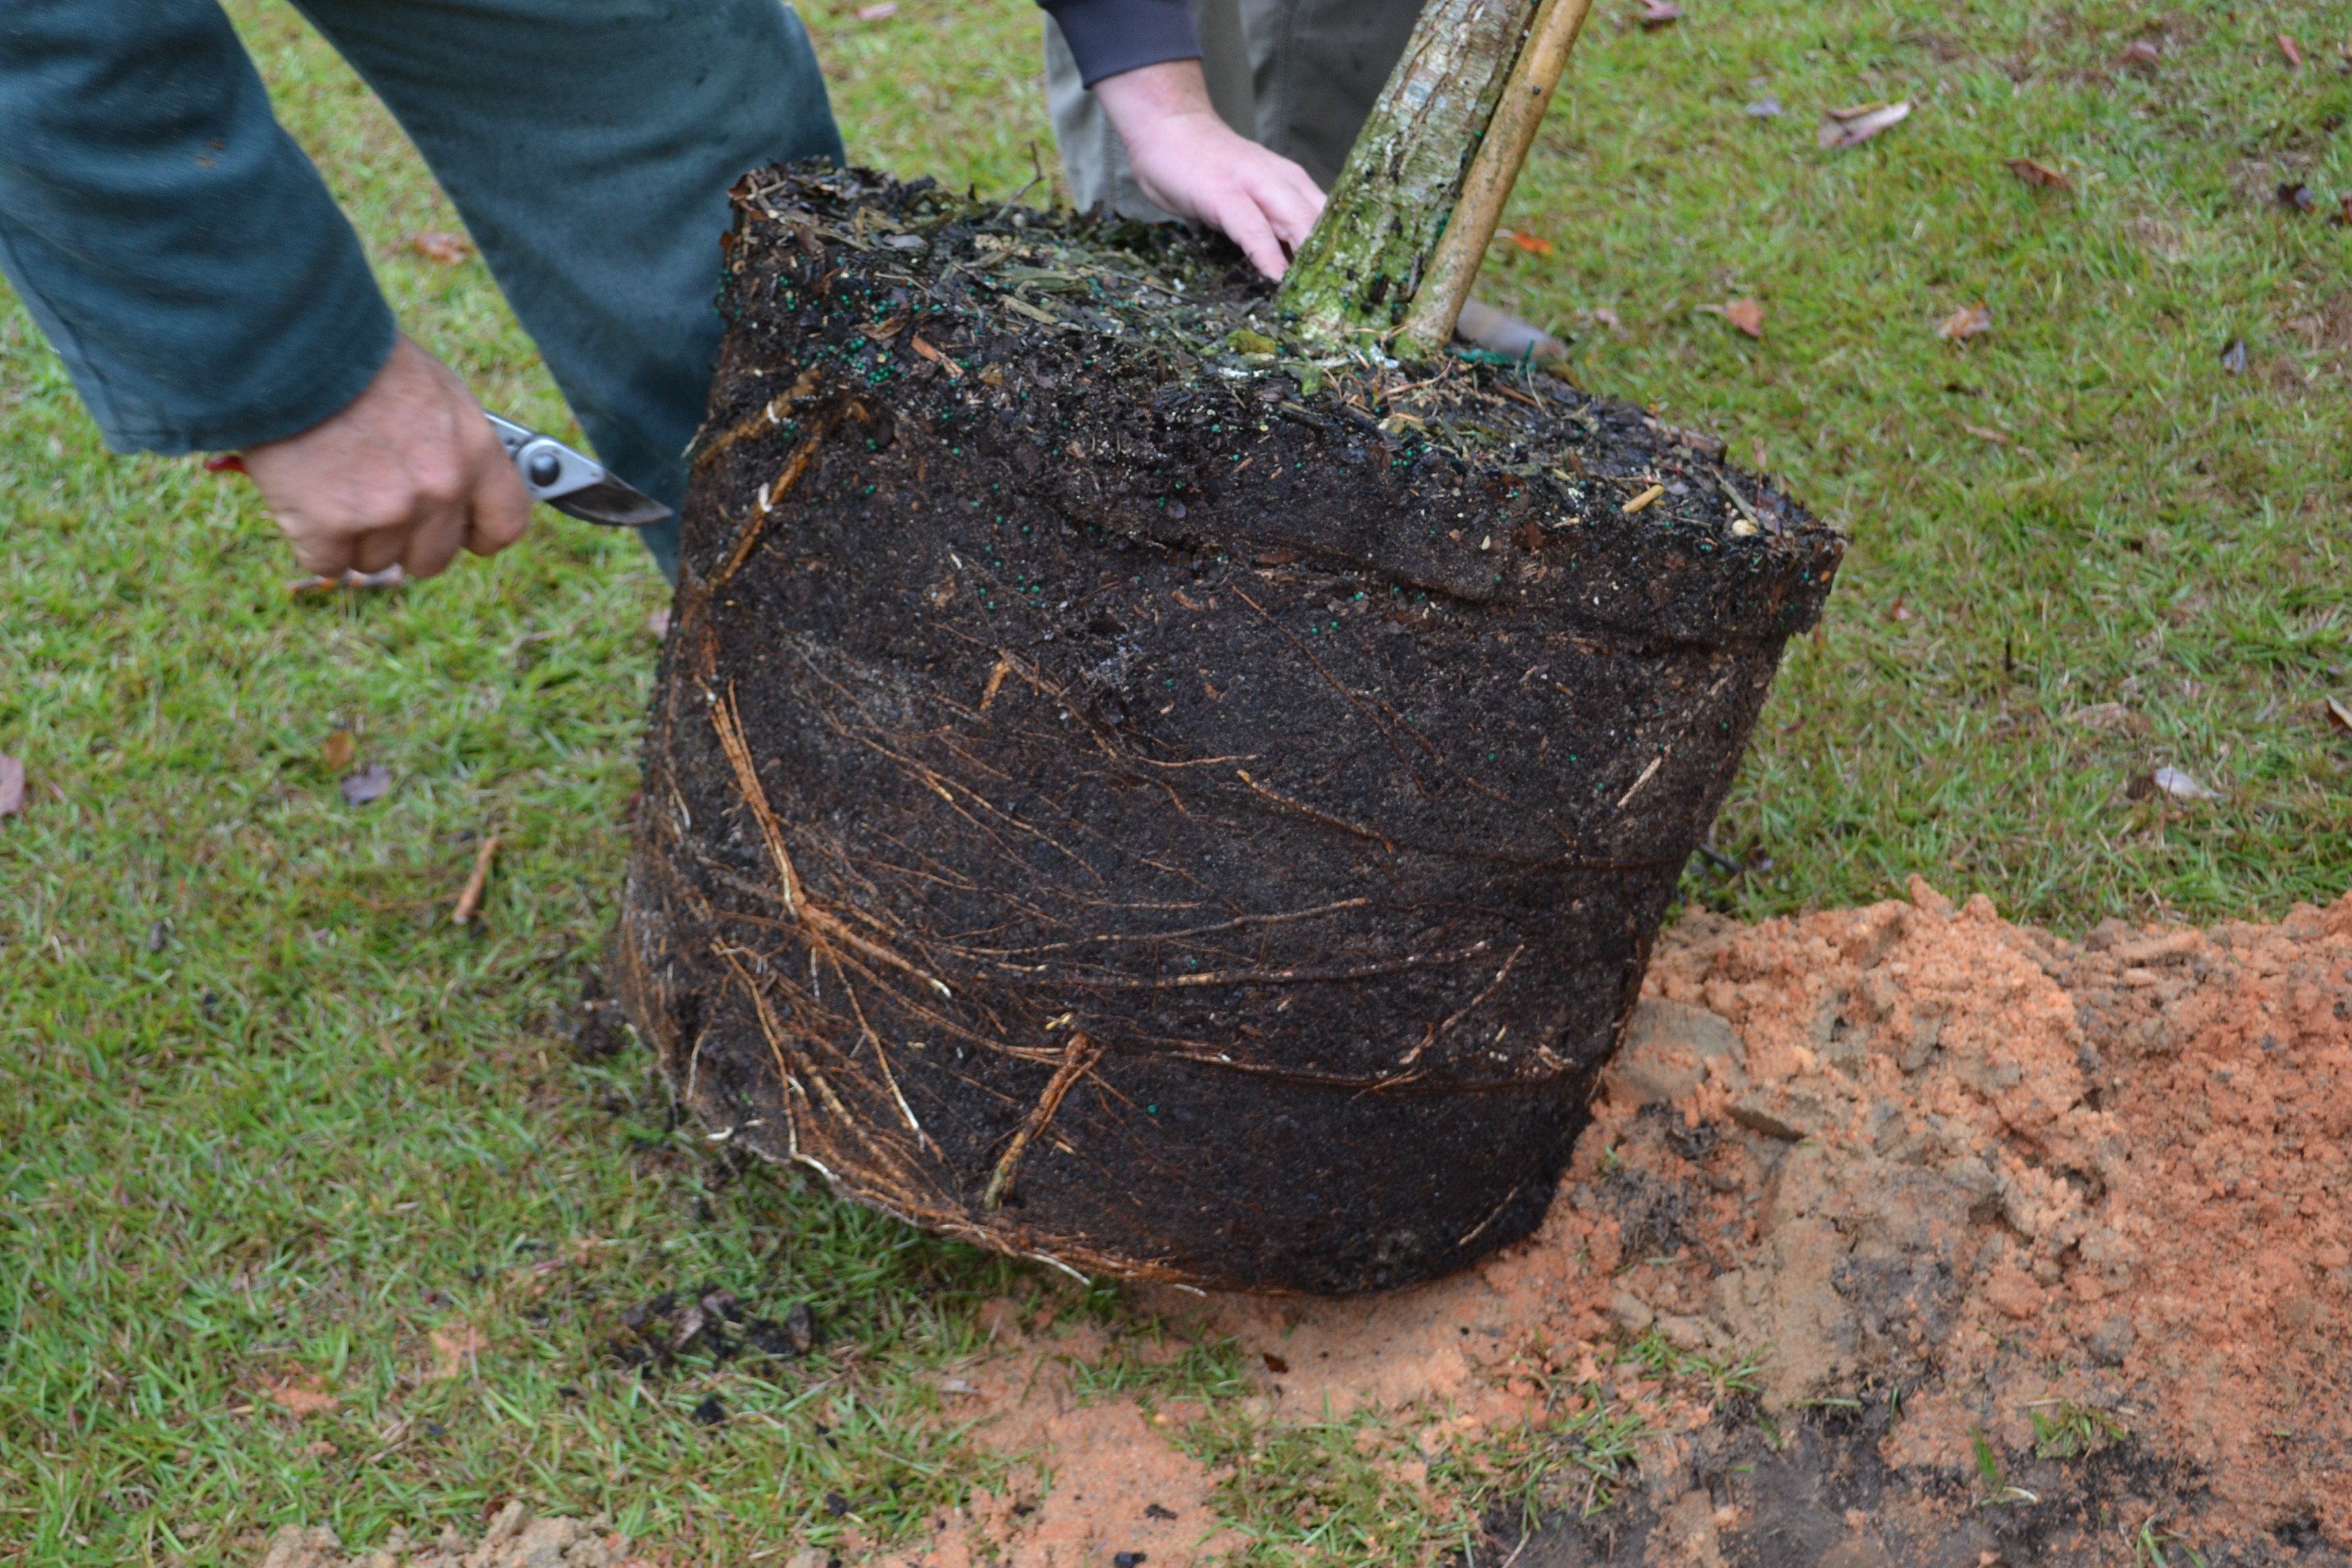
The best practice for woody ornamentals is to cut any roots that are circling the trunk or container. Homeowners may slice downward through the root ball around the entire plant. For shrubs, it is recommended to shave off “the entire outside periphery of the rootball” to eliminate circling roots. These practices allow the root system to grow outward into new soil and greatly reduce the possibility of girdling roots killing your plants years after establishment.

Circling roots are cut before installation. Photo by Beth Bolles, Escambia County Extension.
For more information on shrub establishment, visit the UF Publication Planting Shrubs in the Florida Landscape.
by Blake Thaxton | Nov 3, 2016
It was a hot summer that has continued into Fall. We hope cooler temperatures are on their way to the panhandle of Florida. Fall can be a great time to spruce up your landscape with some new shrubs.
Image Credit UF / IFAS
It may be time for your landscape to receive a mini-makeover and to get a new look. Perhaps some strategically placed shrubs will be what makes an outdoor living space pop. Proper selection and installation is key to future health of new shrubs.
Selection
There are several factors that need to be considered before installing new shrubs to the landscape. Selecting plants carefully, based on the following points, will help with long-term success of the plant:
- Climate – Be sure that the species are climate appropriate.
- Environment – Study the light level, acidity, and drainage of the planting site.
- Space – Account for the mature size of the plant before planting. This will eliminate the possible need for plant removal if space is not adequate.
- Inspect the plant – Check for mechanical injury (scars and open wounds), cold injury, condition and shape of the canopy, and examine the root system.
Installation
Now that essential considerations have been made, it is time to give the shrub the best chance for survival with proper installation techniques. Fall and winter is an ideal time for planting shrubs. The roots can develop before the tops begin to grow in spring. The following are keys to proper establishment of container shrubs.
- Root ball preparation – Remove the container from the root ball and inspect for circling roots. If there are circling roots than make three or four cuts vertically to cut the roots. Pull some of the roots away so they will take on a new growth direction (massage the roots). Also find the top most roots, as sometimes they are covered by extra potting media. Remove the extra potting media so the top most roots are exposed and become the top of the root ball.
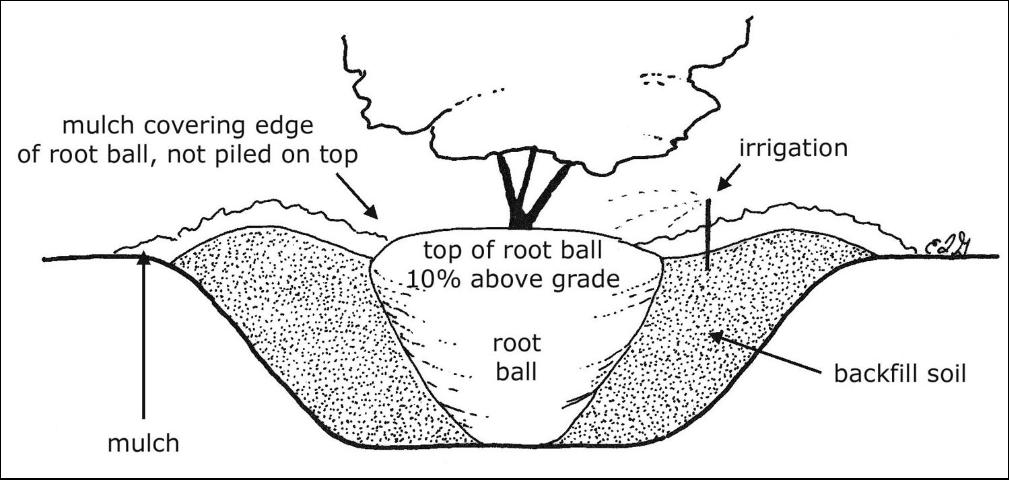
Image Credits: UF/IFAS, Edward F. Gilman
- Wider is better – Dig the hole two or three times the diameter of the root ball.
- Proper depth – Make sure to dig the hole 10% less than the height of the root ball. In poorly drained soils dig the hole 25% less than the height of the root ball. The top most roots should be slightly above the native soils.
- Backfill – Fill the hole with existing soil half way and tamp the soil to settle. Again fill the rest of the hole with the existing soil and tamp again to settle the soil. Do not place any backfill soil or mulch over the root ball as it is crucial that water and air are able to be in contact with the roots.
- Aftercare – Irrigate daily for the first two weeks, followed by every other day for the next two months, and weekly until the shrub is established (For <2 inch caliper shrubs).
If these key points are followed regarding selection and installation, the shrubs will be well on their way to becoming established in the landscape. If you would like read more in detail about installation please read the following:
Specifications for Planting Trees and Shrubs in the Southeastern U.S.
Literature:
Gilman, E.F., (2011, August) Specifications for Planting Trees and Shrubs in the Southeastern U.S.. Retrieved from: http://edis.ifas.ufl.edu/ep112
Black, R.J. and Ruppert, K.C., (1998) Your Florida Landscape, A complete guide to planting & maintenance. Gainesville, FL: University Press of Florida.

by Beth Bolles | Sep 8, 2016
By the look of the crowded nurseries during March and April, springtime seems to be the best time for planting. This is the case for our frost tender annuals and perennials but we are actually heading into our best seasons for planting trees and shrubs.
The fact that above ground portions of trees and shrubs go through a time of slowed growth or dormancy is the good reason for planting during the fall and winter. Although we don’t see it, roots are still growing slowly and the upcoming months give new plants the time for roots to spread into surrounding soil before hot temperatures return. Water stress is also not as significant during the cooler months. Plants still need to be supplied regular water but needs are not as high, especially if rainfall occurs.
A tree installed in the cooler months has more time to establish before hot weather returns.
Start gathering your ideas for new or replacement trees and shrubs that will match your landscape and visit a local nursery this Fall.
If you need an update on tree and shrubs planting and care techniques read more in the UF IFAS publication.