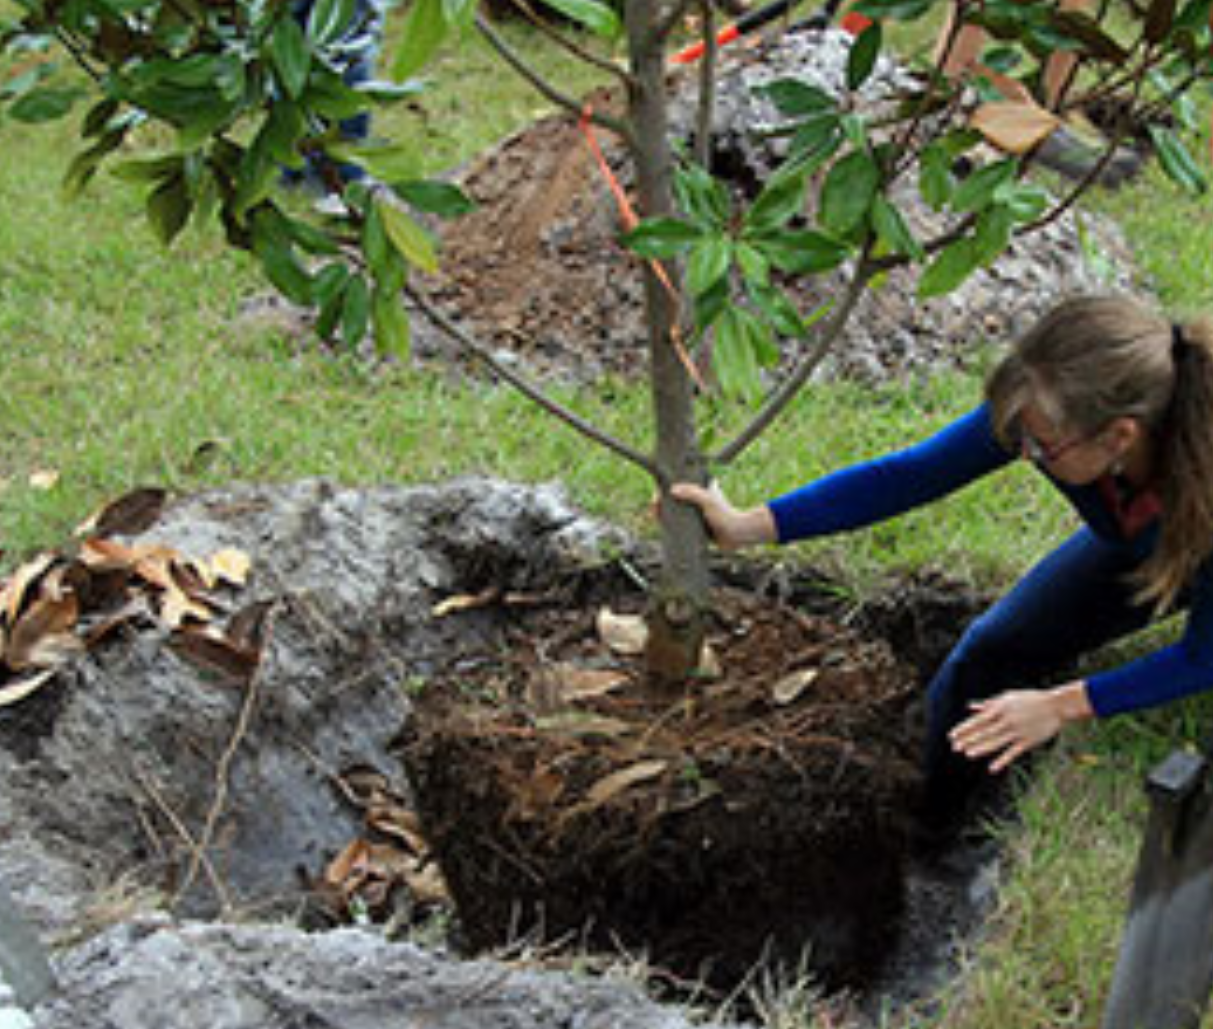
Need tips on planting and caring for trees? The primary focus in care of your newly planted tree is root development. It takes several months for roots to establish and newly planted trees and shrubs do not have a very strong root system. Start by digging the hole in a popcorn bowl shape. Once planted, backfill around the root system, but be careful not to compact the soil as this will hinder root growth. Be sure to keep the topmost area of the root ball exposed, about one to two inches. A layer of mulch will be applied here.
Frequent watering is much needed, especially if you are planting in the summer. Water thoroughly, so that water percolates below the root system. Shallow watering promotes surface root growth, which will make the plant more susceptible to stress during a drought. Concentrate some of the water in a diameter pattern a few feet from the trunk. This will cause the root system to grow towards the water, and thus better establish the root system and anchor the tree.
Figure: A Traditional Staking Option. Credit: Edward F. Gilman, UF/IFAS Extension.
Mulch is important in the conservation of soil moisture. Pine needles, bark, wood chips, and other organic materials make a great mulch. A three inch layer of mulch will usually suffice. It’s important to keep the mulch a few inches from the trunk as mulching too close to the tree trunk can cause rot.
You should always prune the bare roots of trees during planting. These exposed roots in containers can be damaged in shipping and removing some of the roots will help trigger growth. Pruning some of the top foliage can also reduce the amount of water needed for the plant to establish, as well. Trees and shrubs grown and shipped in burlap or containers usually need very little pruning.
Newly planted trees often have a difficult time establishing if the root system cannot be held in place. Strong winds and rain can cause the plant to tip over. Avoid this by staking the plant for temporary support. A good rule of thumb to determine staking need is if the trunk diameter measures three inches or less, it probably needs some support! Tie the stake to the plant every six inches from the top. However, only tie the trunk at one spot. Don’t tie too tightly so that the tree has no flexibility. This will stunt the growth of the tree.
Following these tips will help ensure your tree becomes well established in your landscape. For more information please contact your local county extension office.
Information for this article can be found in the UF/IFAS EDIS publication: “Planting and Establishing Trees” by Edward F. Gilman and Laura Sadowiski: https://edis.ifas.ufl.edu/pdf%5CEP%5CEP31400.pdf
Supporting information also provided by UF/IFAS Extension Forestry Specialist Dr. Patrick Minogue, of the North Florida Research Education Center in Quincy, Florida.
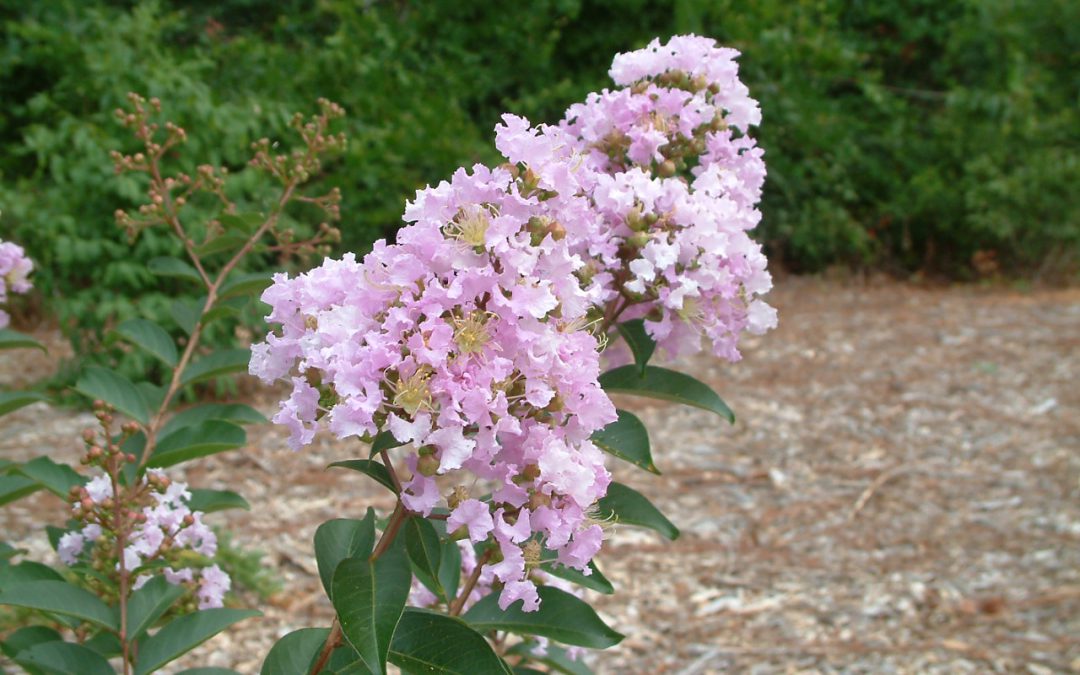
Crape Myrtle season is almost upon us. Soon, every roadside, landscape, and gas station parking lot in the deep south will be lit up in gaudy colors from white to hot pink to fire engine red. A well-placed Crape Myrtle (Lagerstroemia hybrids) can turn even the most boring landscape into a picturesque photo op once summer rolls around. These toughest of flowering trees also ask very little of gardeners to look their best, thriving in many varied settings with a wide range of care given to them. Despite their low-maintenance nature, I see all too many Crape Myrtles languishing in landscapes. While it is difficult to fail with Crape Myrtles, it is not impossible if you site and maintain the trees incorrectly. This summer, follow these three tips to get the most out of the best small tree a southern landscape can offer.
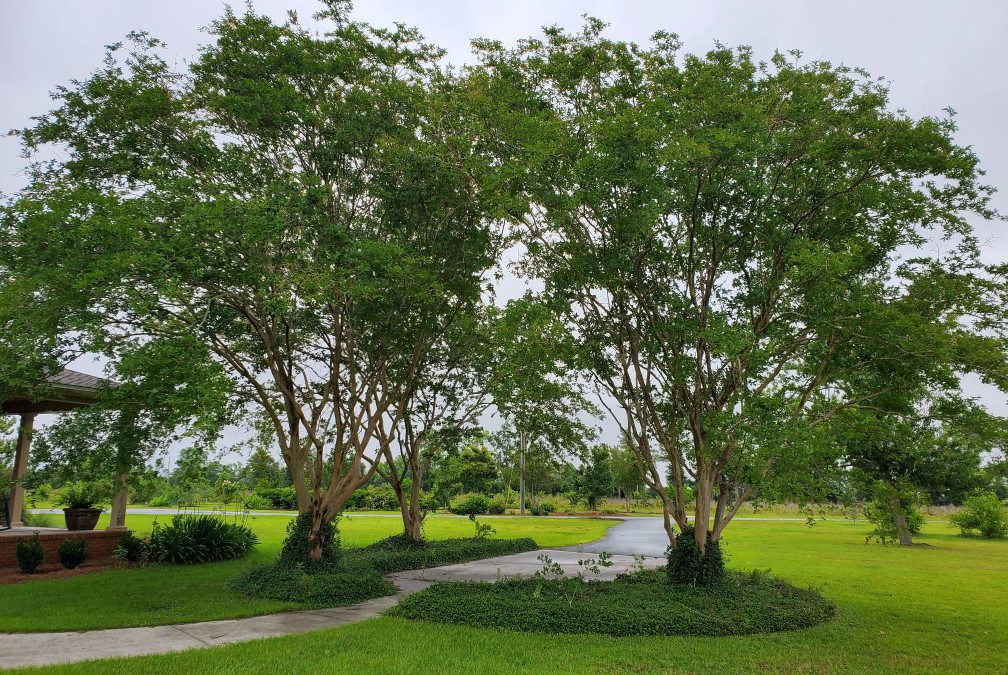
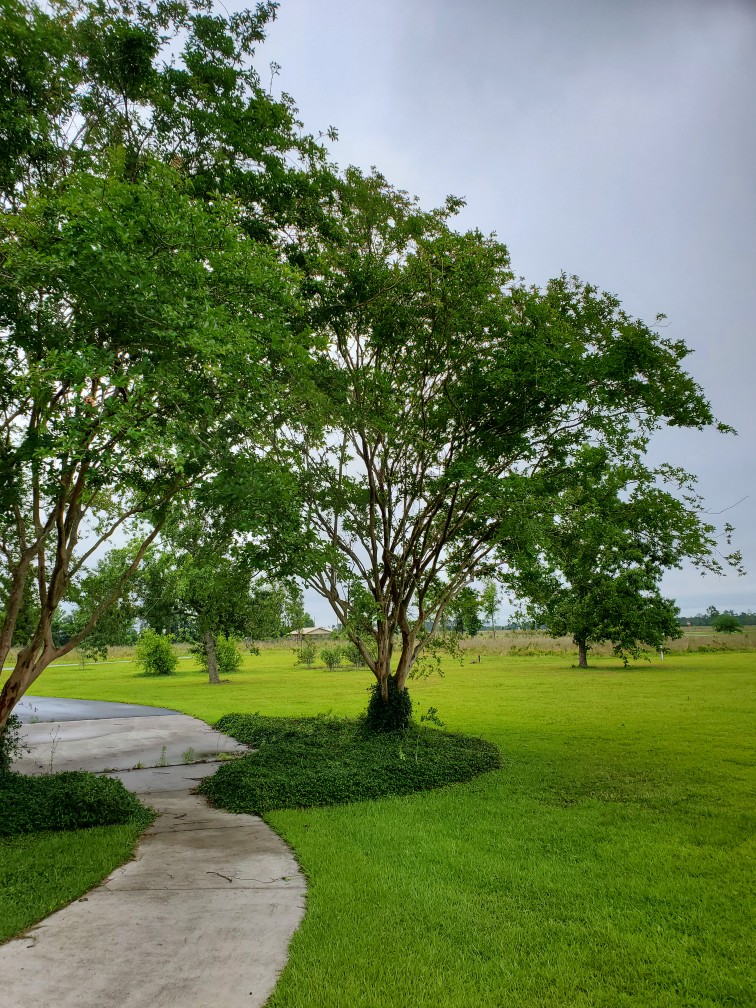
Properly sited, pruned, and maintained crape myrtle. Photo courtesy of Daniel Leonard.
Do not murder your Crape Myrtles. For any reason. No other tree gets lopped off each year to a random height in the belief that it makes it prettier. While your “murdered” crape may indeed produce more flowers the following season, you are permanently damaging the tree, giving rot and decay a foothold, unnecessarily making the tree more susceptible to storm damage, and ultimately shortening the tree’s lifespan. The only pruning that should be done to the species is an occasional “limbing-up” to expose the gorgeous flaky bark underneath and to remove dead or dying branches.
Don’t plant Crape Myrtles in shade. Crape Myrtles perform their best in 6+ hours of blistering full sun per day. Even light shade at various times during the day will greatly reduce flowering, cause the tree to appear thin, and force it to reach for the sun, creating a leggy look. There are many wonderful small landscape trees like Greybeard, Redbud, and Japanese Magnolia that make excellent Crape Myrtle alternatives in shady sites. If you can’t put a Crape in full sun, plant something else.
Keep the area under the canopy free of turfgrass. Turf is a wonderful feature in lawns, just not directly under crape myrtles. Grass does an excellent job of scavenging nutrients and water that otherwise would benefit the crape myrtle above. Also, having grass inside the dripline forces homeowners and landscape professionals to cut the grass right up to the trunk. This often leads to soil compaction from heavy mower traffic and damage from lawnmower decks and string trimmers, which damages the thin Crape Myrtle bark and can even girdle and kill the tree. Either kill out the grass and weeds under the canopy with a nonselective herbicide like Glyphosate and then mulch or plant a shade loving groundcover like Asiatic Jasmine.
Crape Myrtle is one of the most rewarding plants Panhandle gardeners can grow as well as one of the easiest. By following just a few best practices, not overpruning, planting only in full sun and keeping the ground free of turfgrass under the canopy, pretty much every landscape can enjoy success with the species. For more information on growing Crape Myrtle and other gardening topics, reach out to your local UF/IFAS County Extension office! Happy Gardening!
Crape myrtles are all around good tree selections for the landscape. When left in their more natural form with just a little selective pruning, crape myrtles can provide shade during our hot summer days. Learn the many qualities of the crape myrtle with UF IFAS Extension Escambia County.
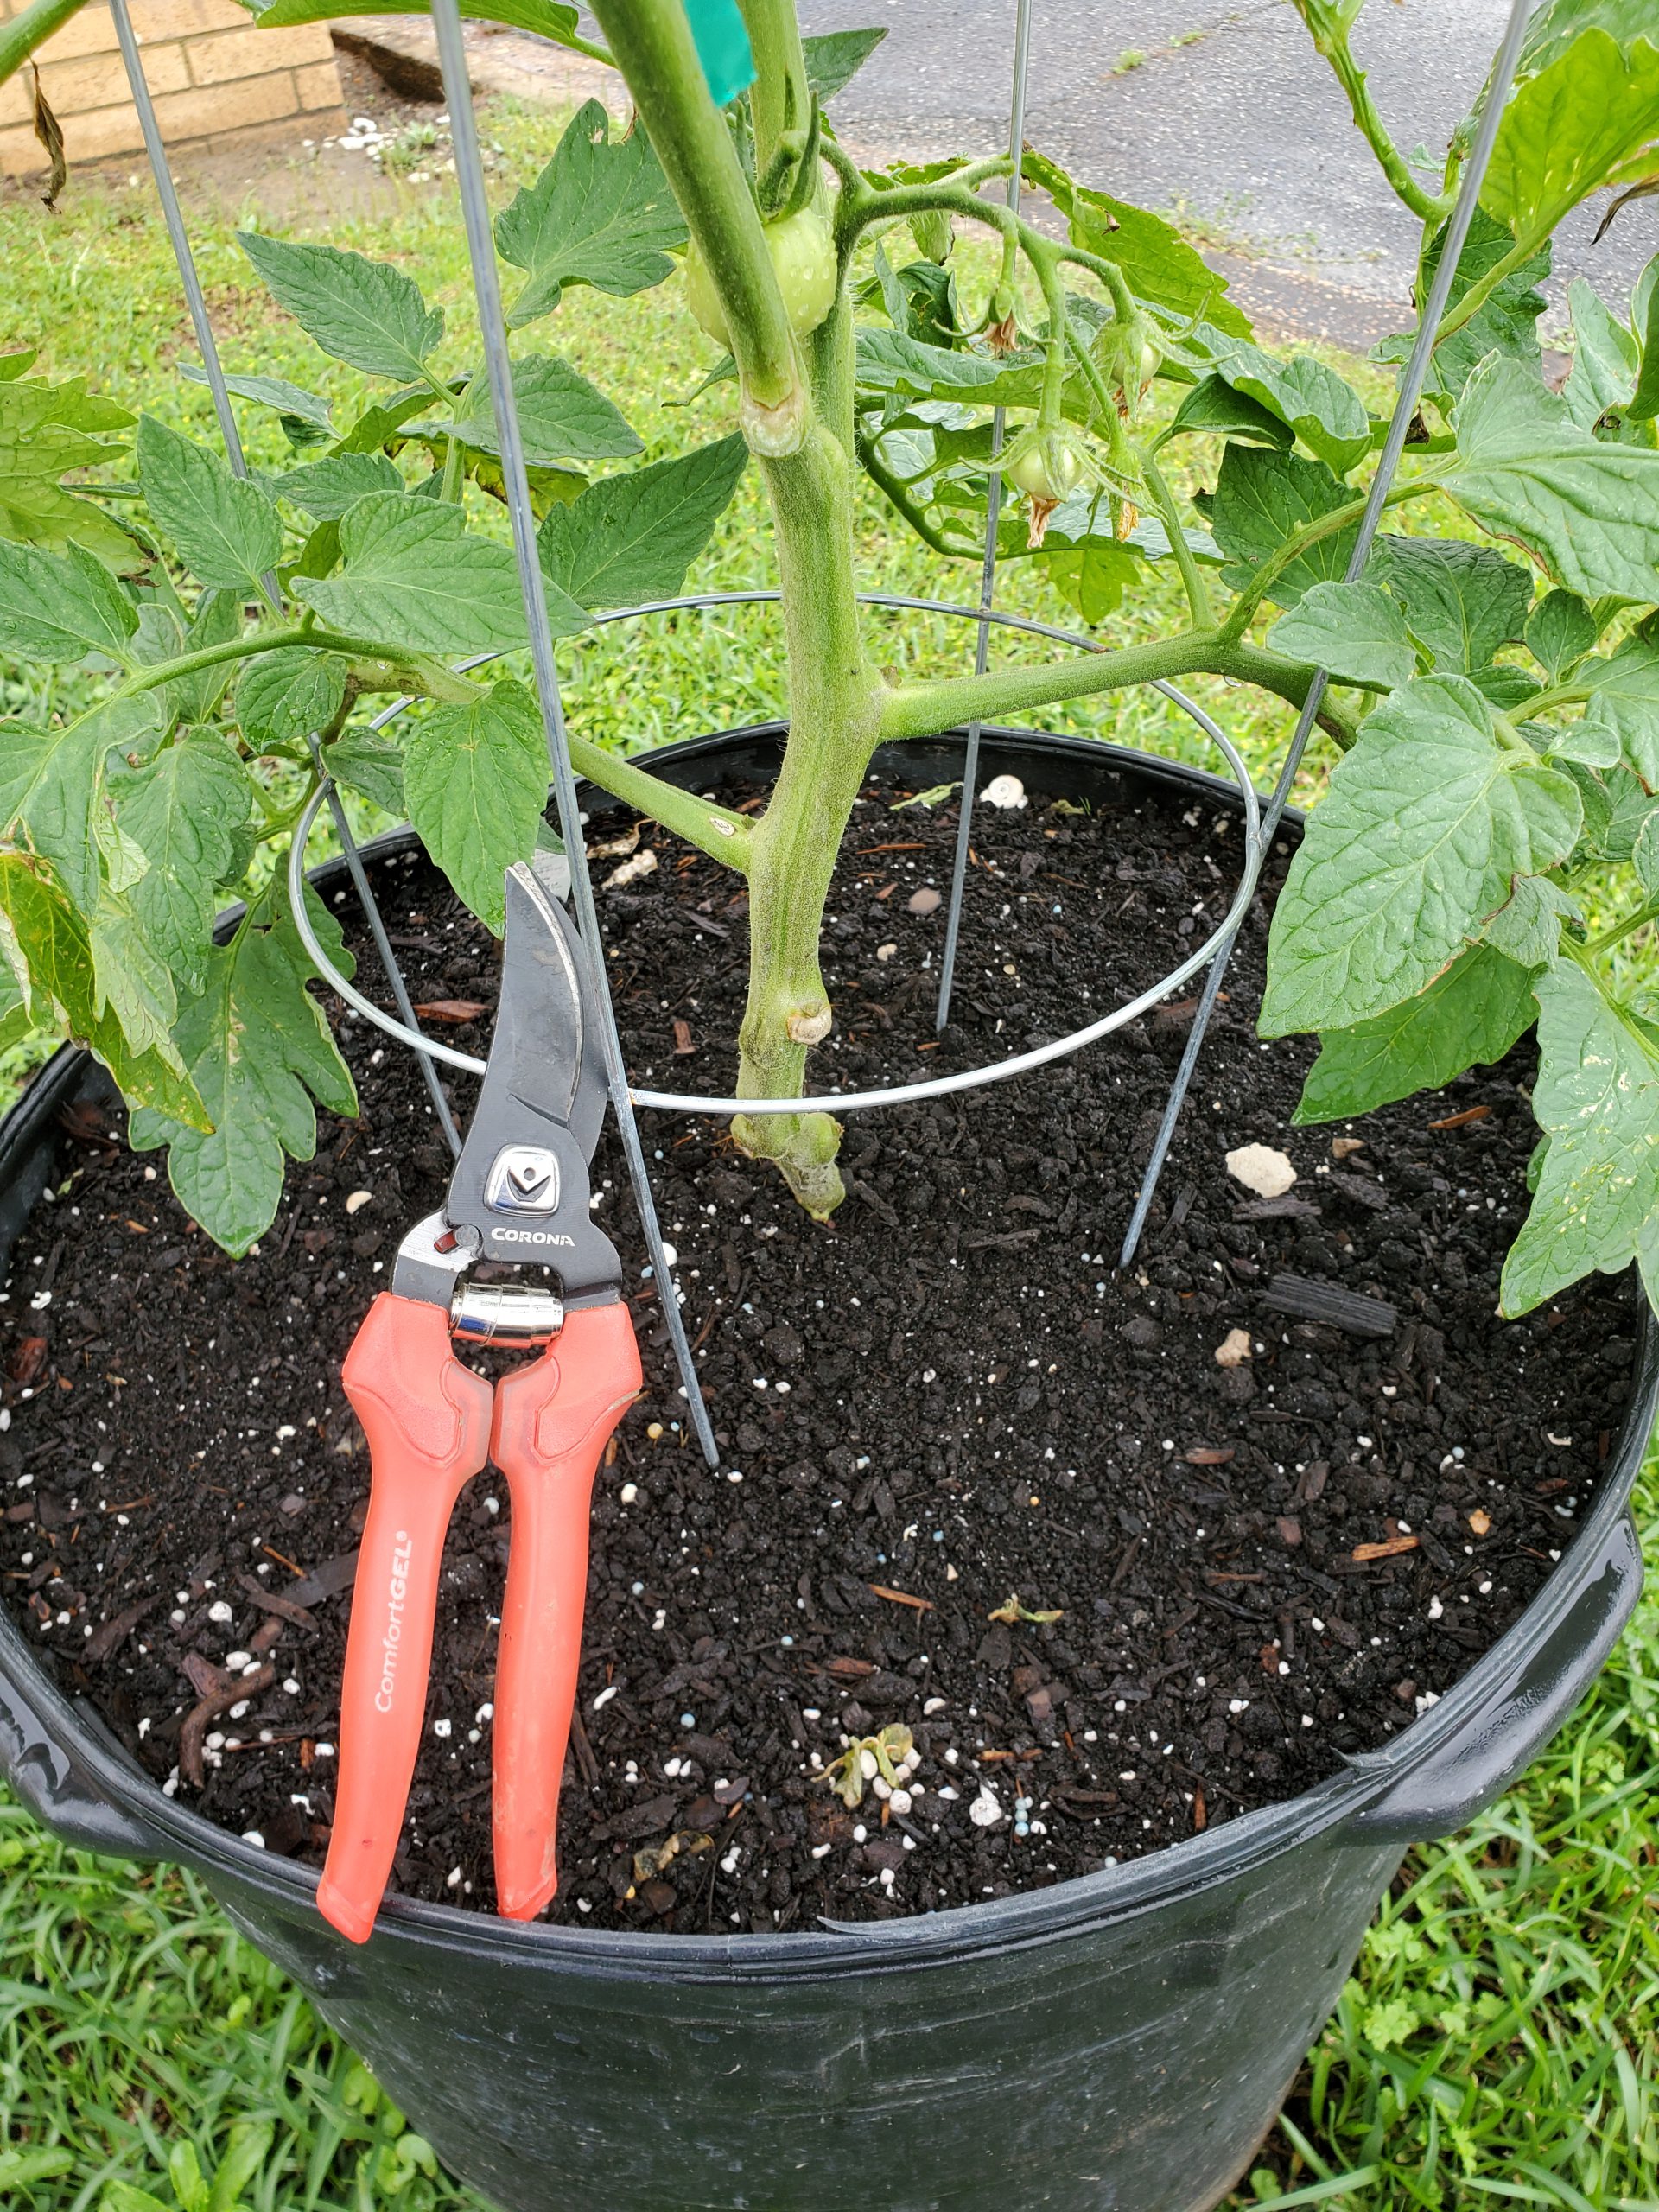
With the traditional planting date of Good Friday behind us, the home tomato gardening season in the Panhandle is in full swing. While tomatoes are the most persnickety veggie we grow, there are several practices you can adopt to help you succeed: selecting an adapted variety; regularly scouting for insects and disease; and watering and fertilizing appropriately. However, the most overlooked practice for success gardeners can adopt is proper pruning.
‘Big Beef’ Tomato with lower leaves removed. This is an excellent disease reduction practice. Photo courtesy of Daniel Leonard.
Correct pruning does a couple of positive things for tomatoes. First, it reduces the incidence of disease by preventing leaf contact with the soil, opening the interior of the plant, and allowing better airflow. This is important as many plant pathogens reside in the soil and only need a splash of water to travel onto plant leaves. Also, densely foliaged plants trap warm, moist air in their canopies, creating a perfect environment for disease to flourish. Letting the plant canopy “breathe” through pruning prevents that negative environment from forming! Second, correct pruning of “suckers” (extra growth points that can develop into shoots) helps tomato plants develop optimum yield and fruit quality. By removing suckers, more water, nutrients, airflow, and light are directed to the main stems, where the majority of tomato fruit production occurs. Failing to remove suckers (especially on indeterminate varieties) can result in reduced yields, increased disease, and generally messy plants!
With the reasons for pruning tomatoes established, the next step is learning exactly what to prune and how to do it in a sanitary matter.
Get rid of any foliage that could encounter the soil, generally all leaves occurring on the lower 12-16″ of the plant. All kinds of nasty tomato destroying diseases, like Early Blight and Bacterial Leaf Spot, reside in the soil and are just waiting to be splashed onto your plants – don’t let that happen.
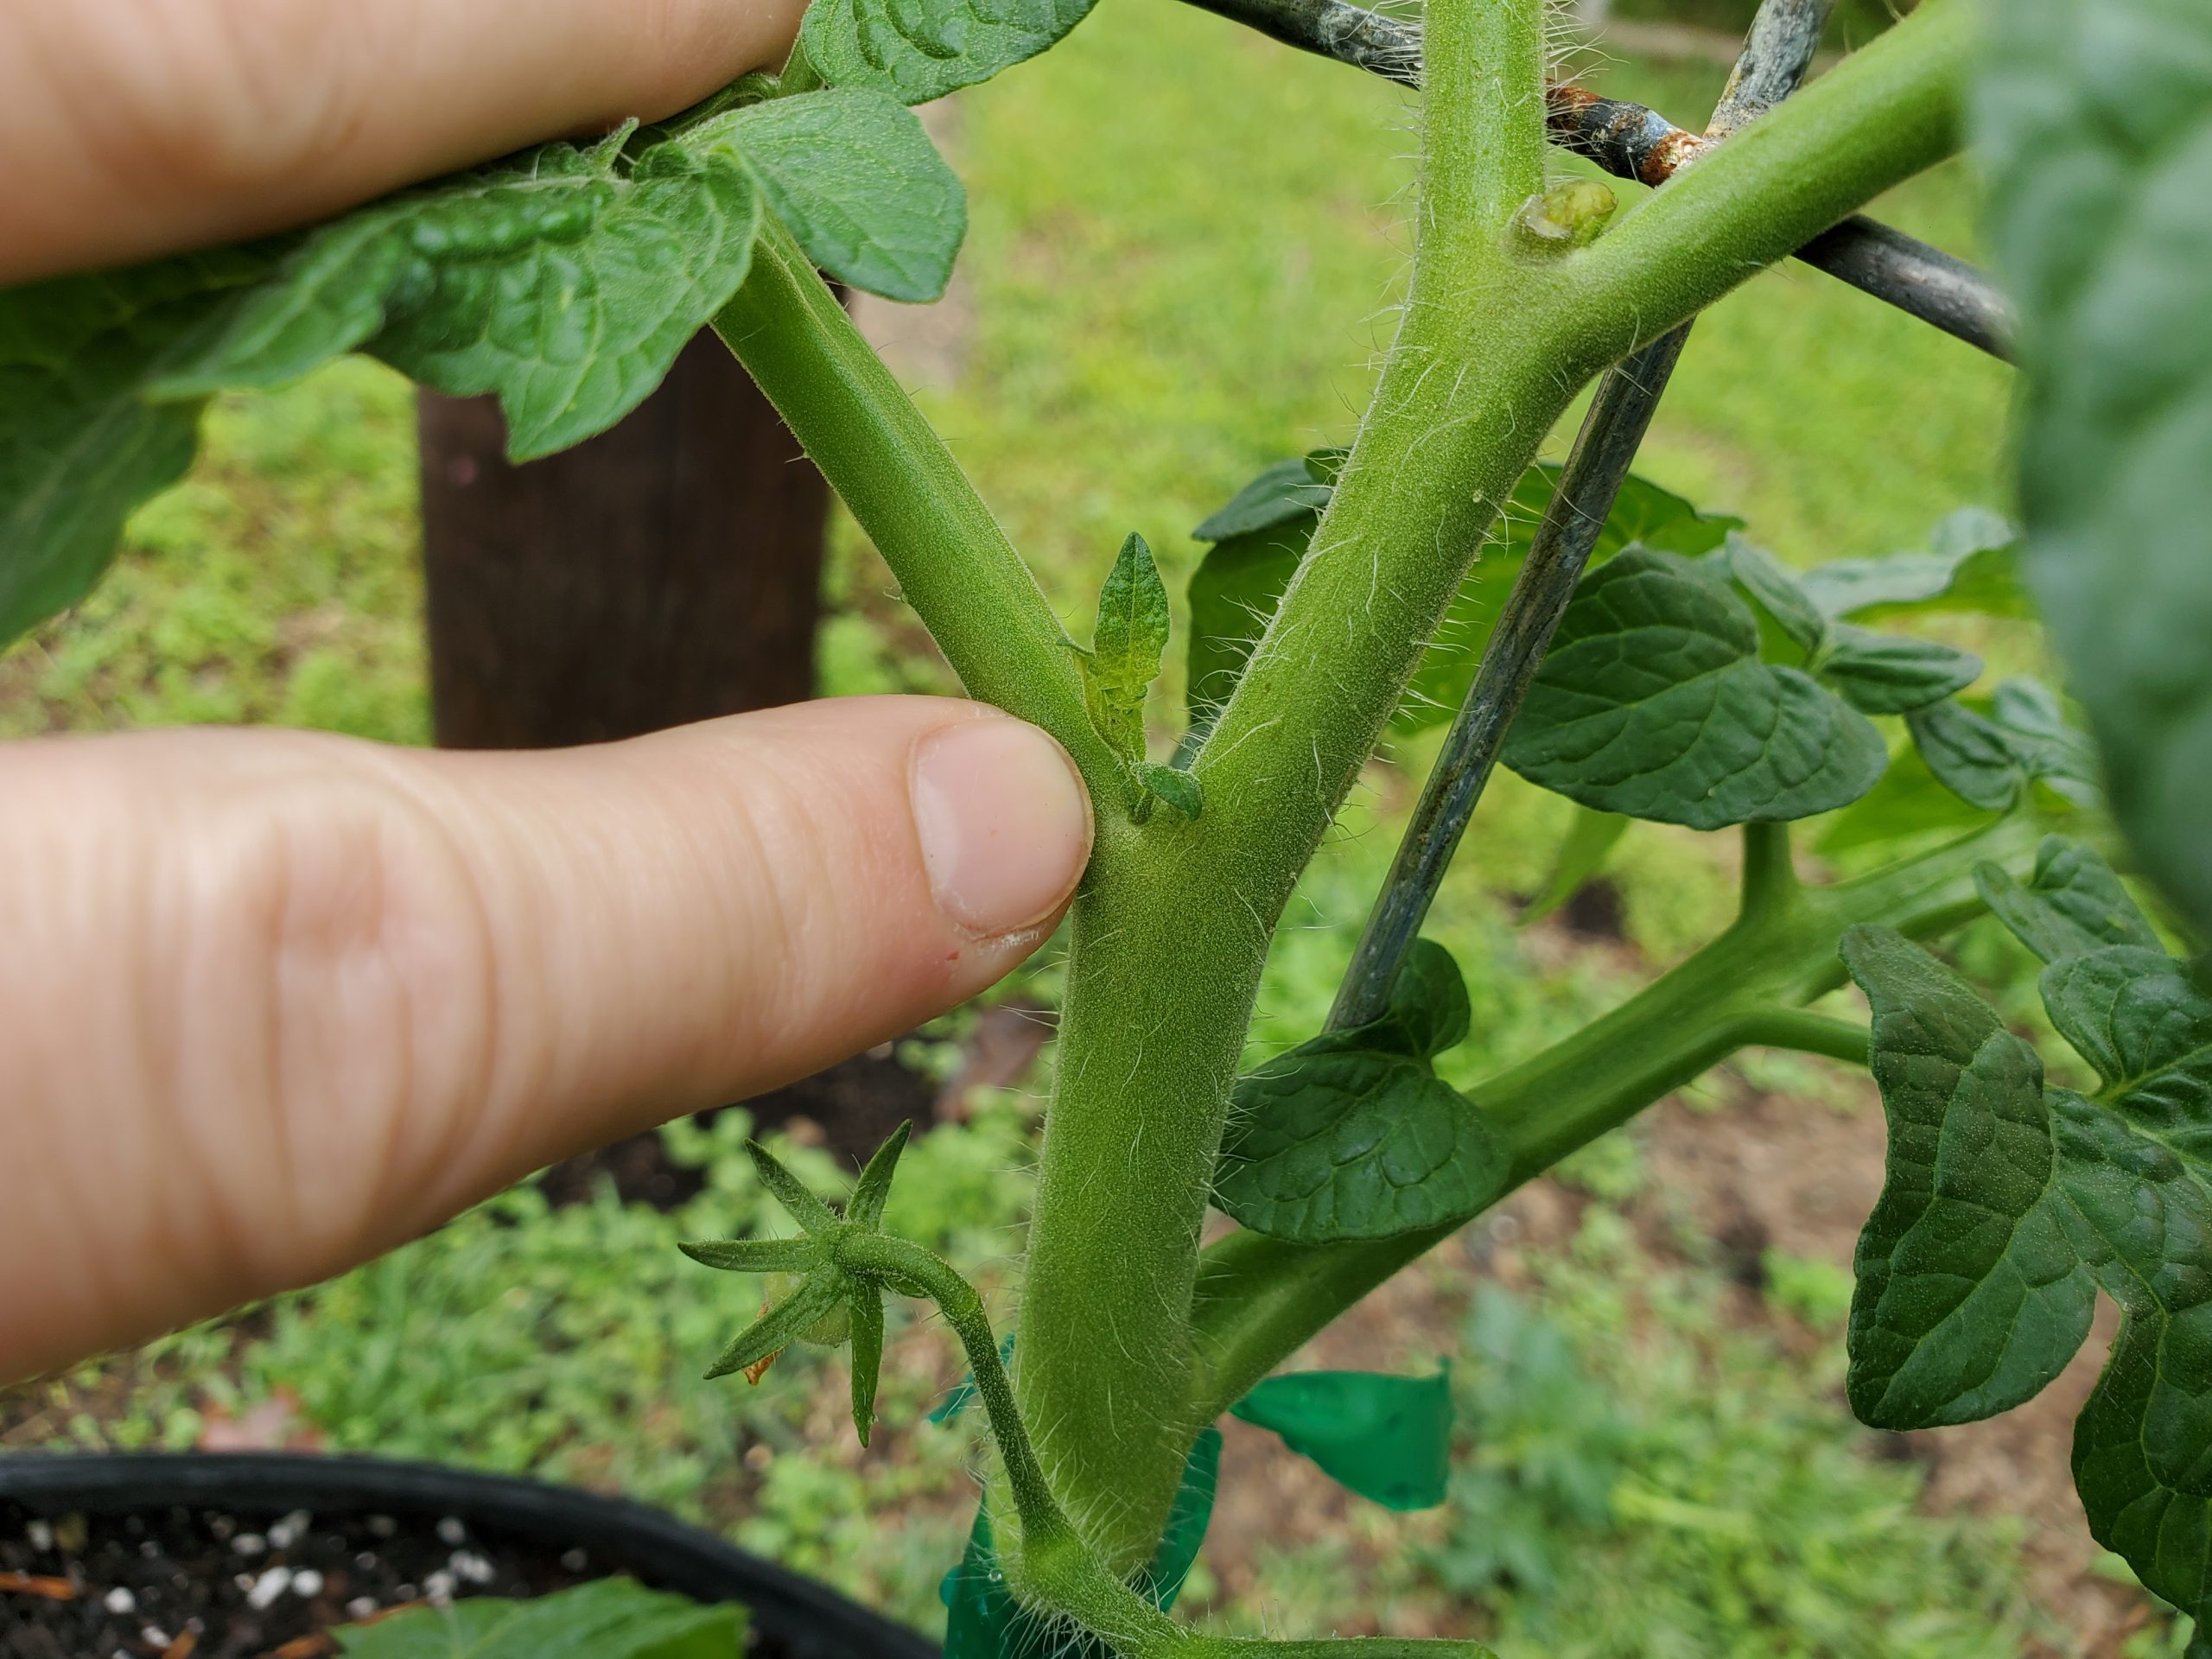
Determine how many primary shoots you want your plant to have. Leave enough lower suckers to achieve that number (generally just one, two, or three as more than 3 primary stems gets hard to manage), and prune or pinch out all the rest. To prevent stress from pruning, be diligent in removing suckers when they are still small, 2” or less.
Always clean and disinfect your pruners before making a cut on a tomato plant. This is best accomplished by rinsing the blades with warm soapy water, drying, and following with by a quick alcohol spray. A 10% bleach solution will also work, but if not thoroughly rinsed after, bleach can corrode pruner blades and other working parts. If you make cuts on a plant that appears diseased, repeat the sanitizing process before you begin pruning another plant as “dirty” pruners are an easy way to spread pathogens in the garden.
Developing vegetative “sucker” that will need to be removed. Photo courtesy of Daniel Leonard.
While tomatoes are indeed a difficult vegetable to grow, learning to prune them correctly will greatly help to make this a successful season. If you just keep leaves off the ground, suckers pinched, and pruners cleaned, you’ll be well on your way to less disease, prettier plants, and more tomatoes to pick. For more information on growing tomatoes and any other horticultural topic, please contact your local UF/IFAS County Extension office. Happy Gardening!
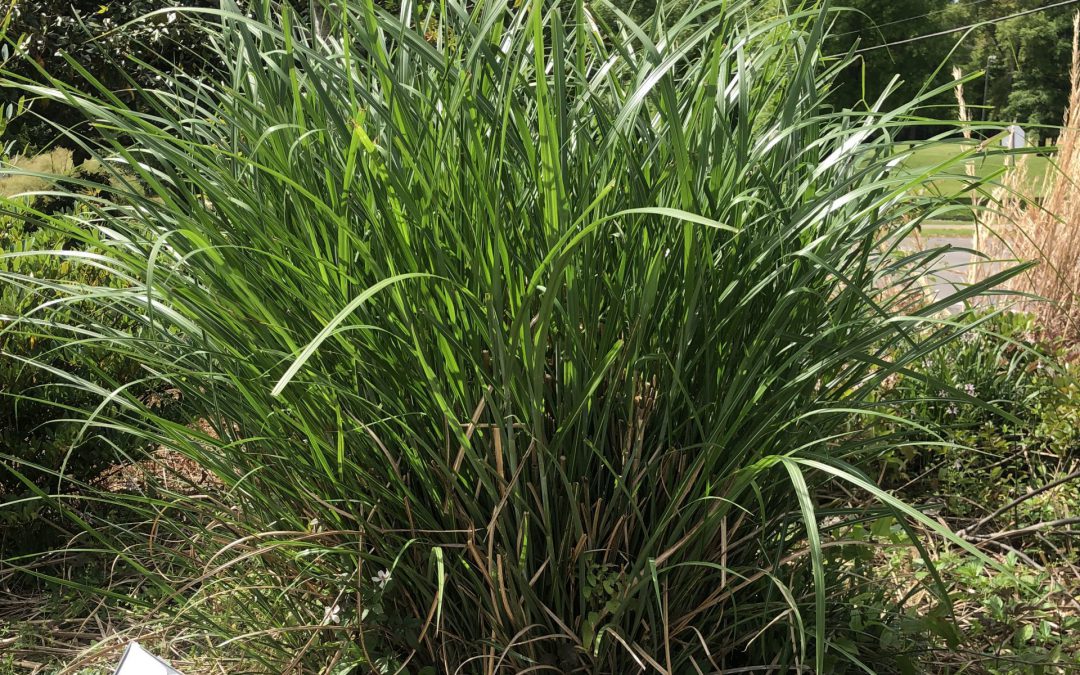
Ornamental grasses are a great addition to the landscape. Most are usually easy to establish, need little water and fertilization, provide different textures, and are generally low maintenance. The one main maintenance activity that is necessary for most of our north Florida ornamental grasses is a good “haircut” in the spring.
Ornamental grasses for north Florida, such as muhly grass, purple fountain grass, and Miscanthus (l to r), add texture, color, and winter interest to a landscape. Credit: UF/IFAS.
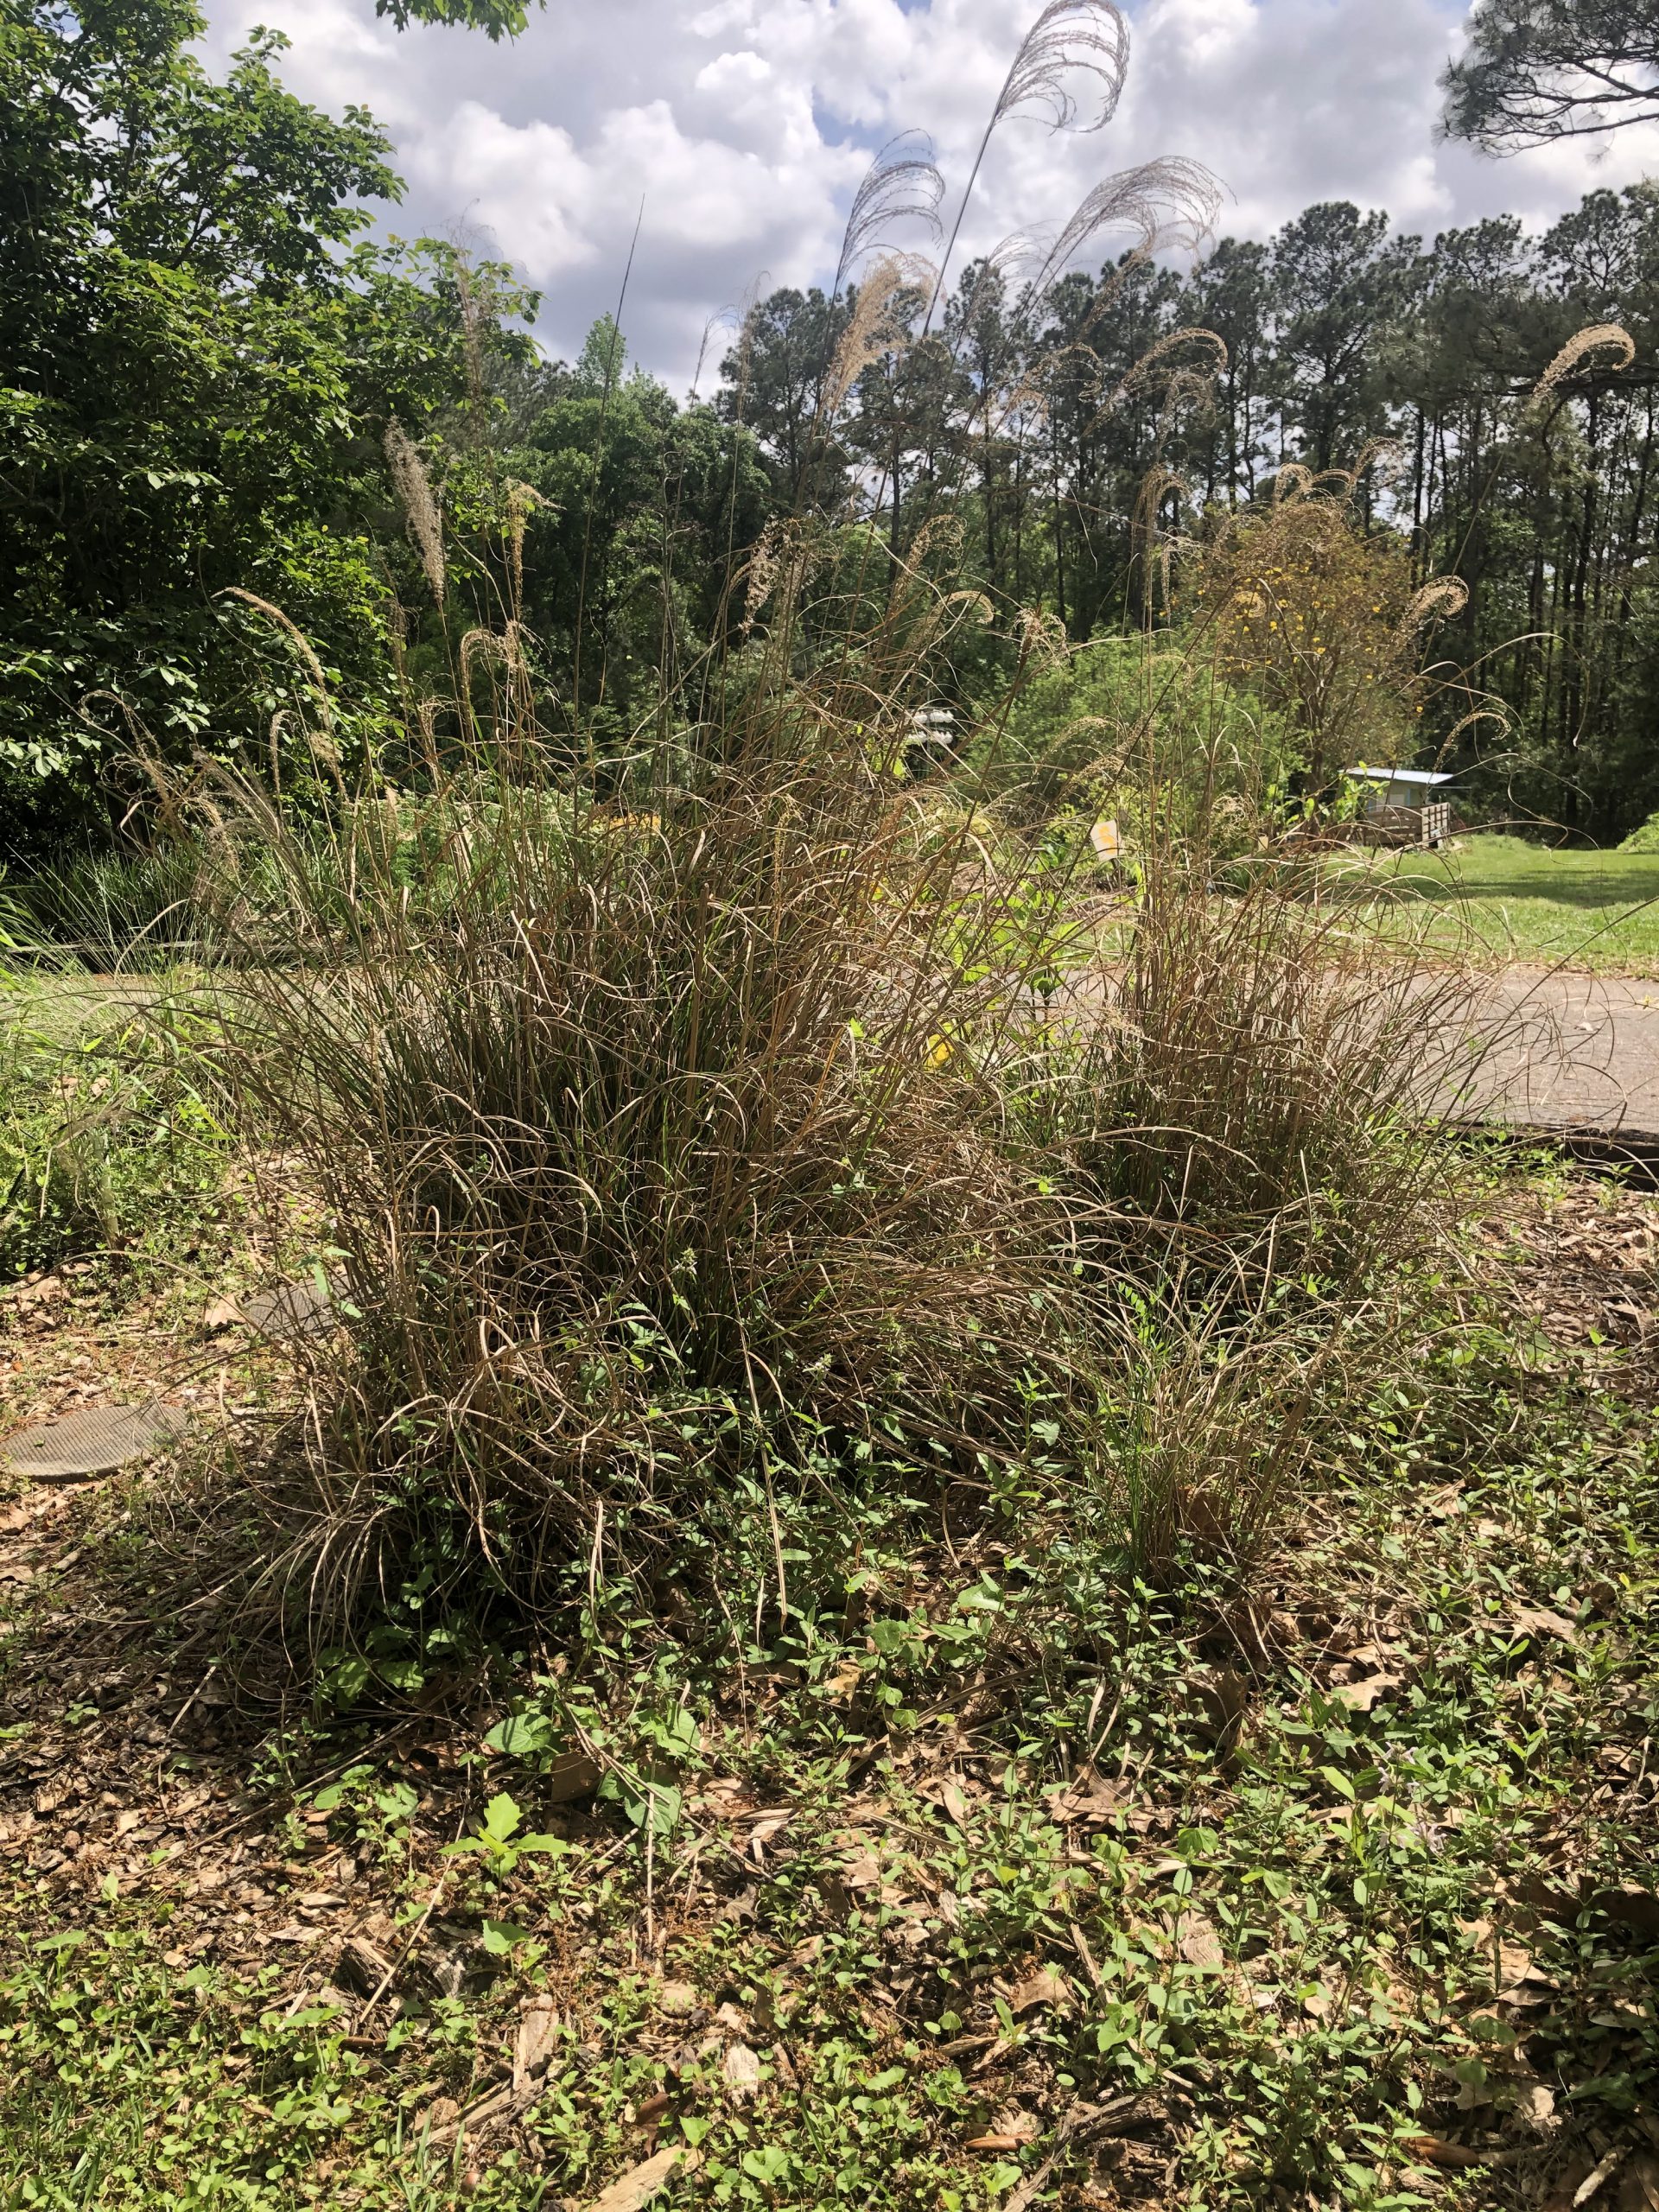
Pruning grasses removes the spent flowers and seed heads, as well as all of the brown leaves, which provided the fall and winter interest that ornamental grasses bring to the landscape. These leaves also serve as a sort of natural wind-chime during the cold, windy days of our winters and may even provide cover and nesting material for wildlife. However, now it’s spring, and lush green growth is waiting to pop through that dead mix of leaves and stems. Pruning clears all that out, allowing for good air movement and a rejuvenation of the plant that can help minimize pests and disease.
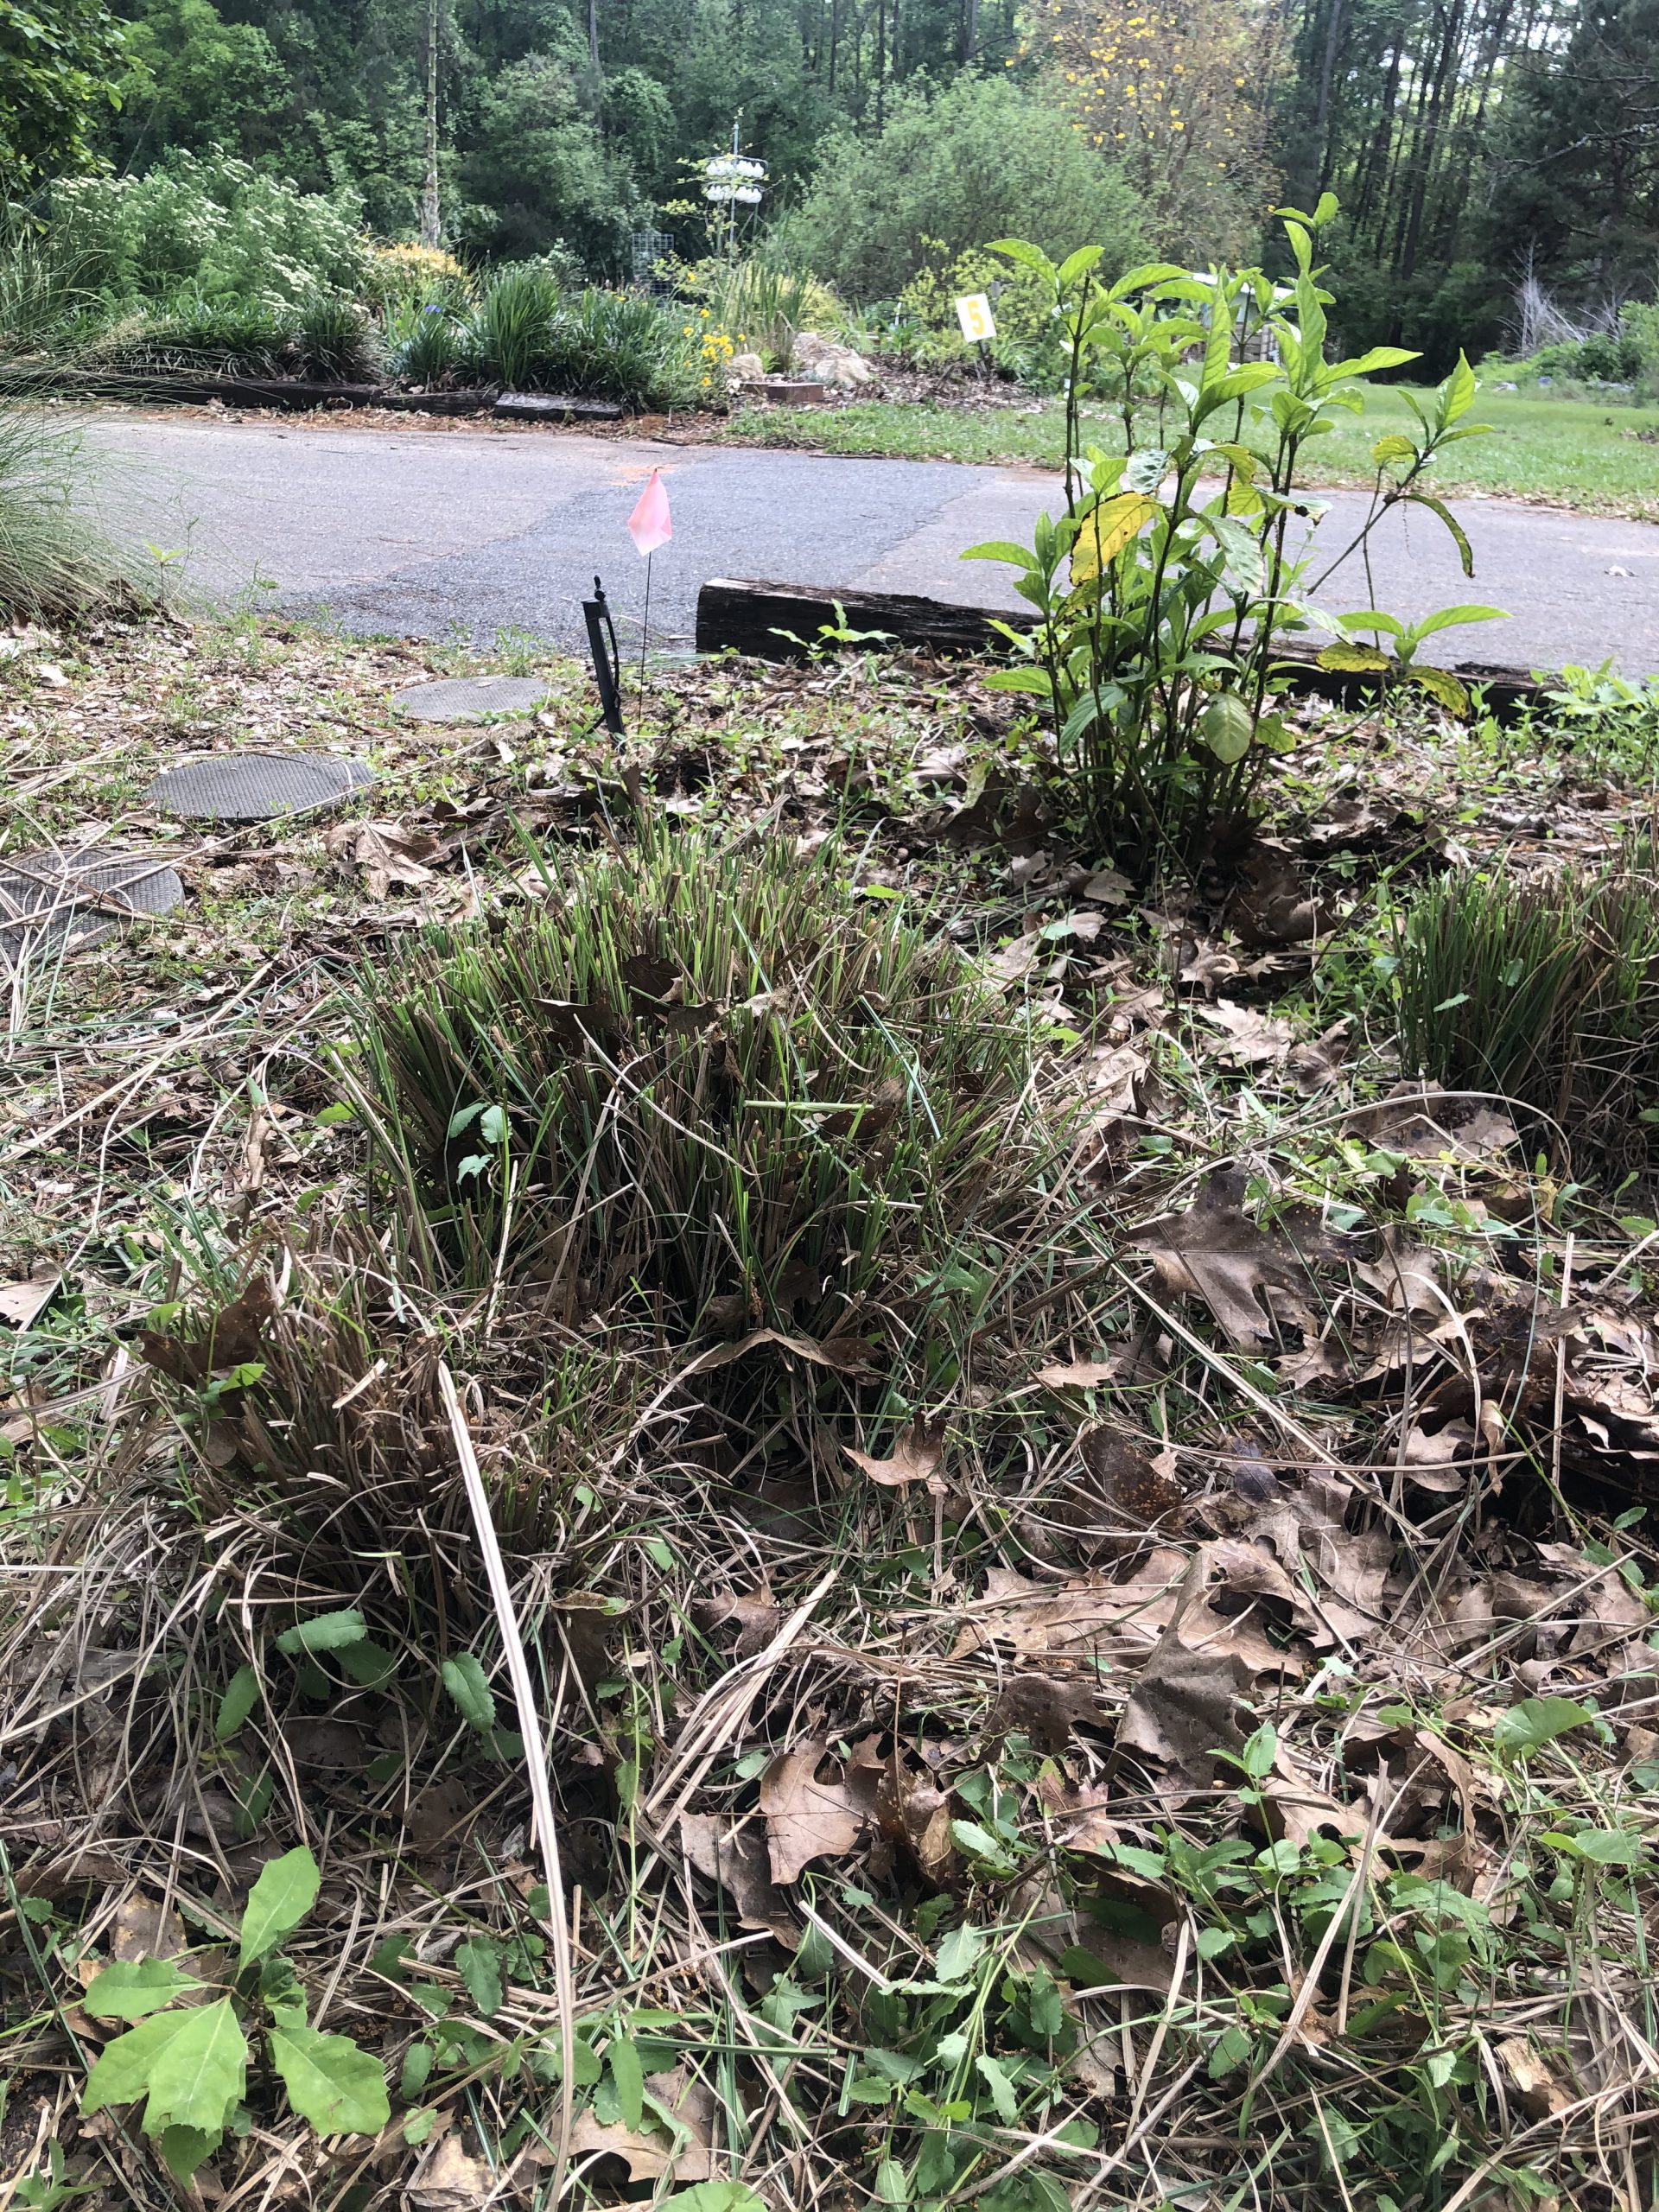
Miscanthus grass before a spring “haircut”. Credit: Mark Tancig, UF/IFAS.
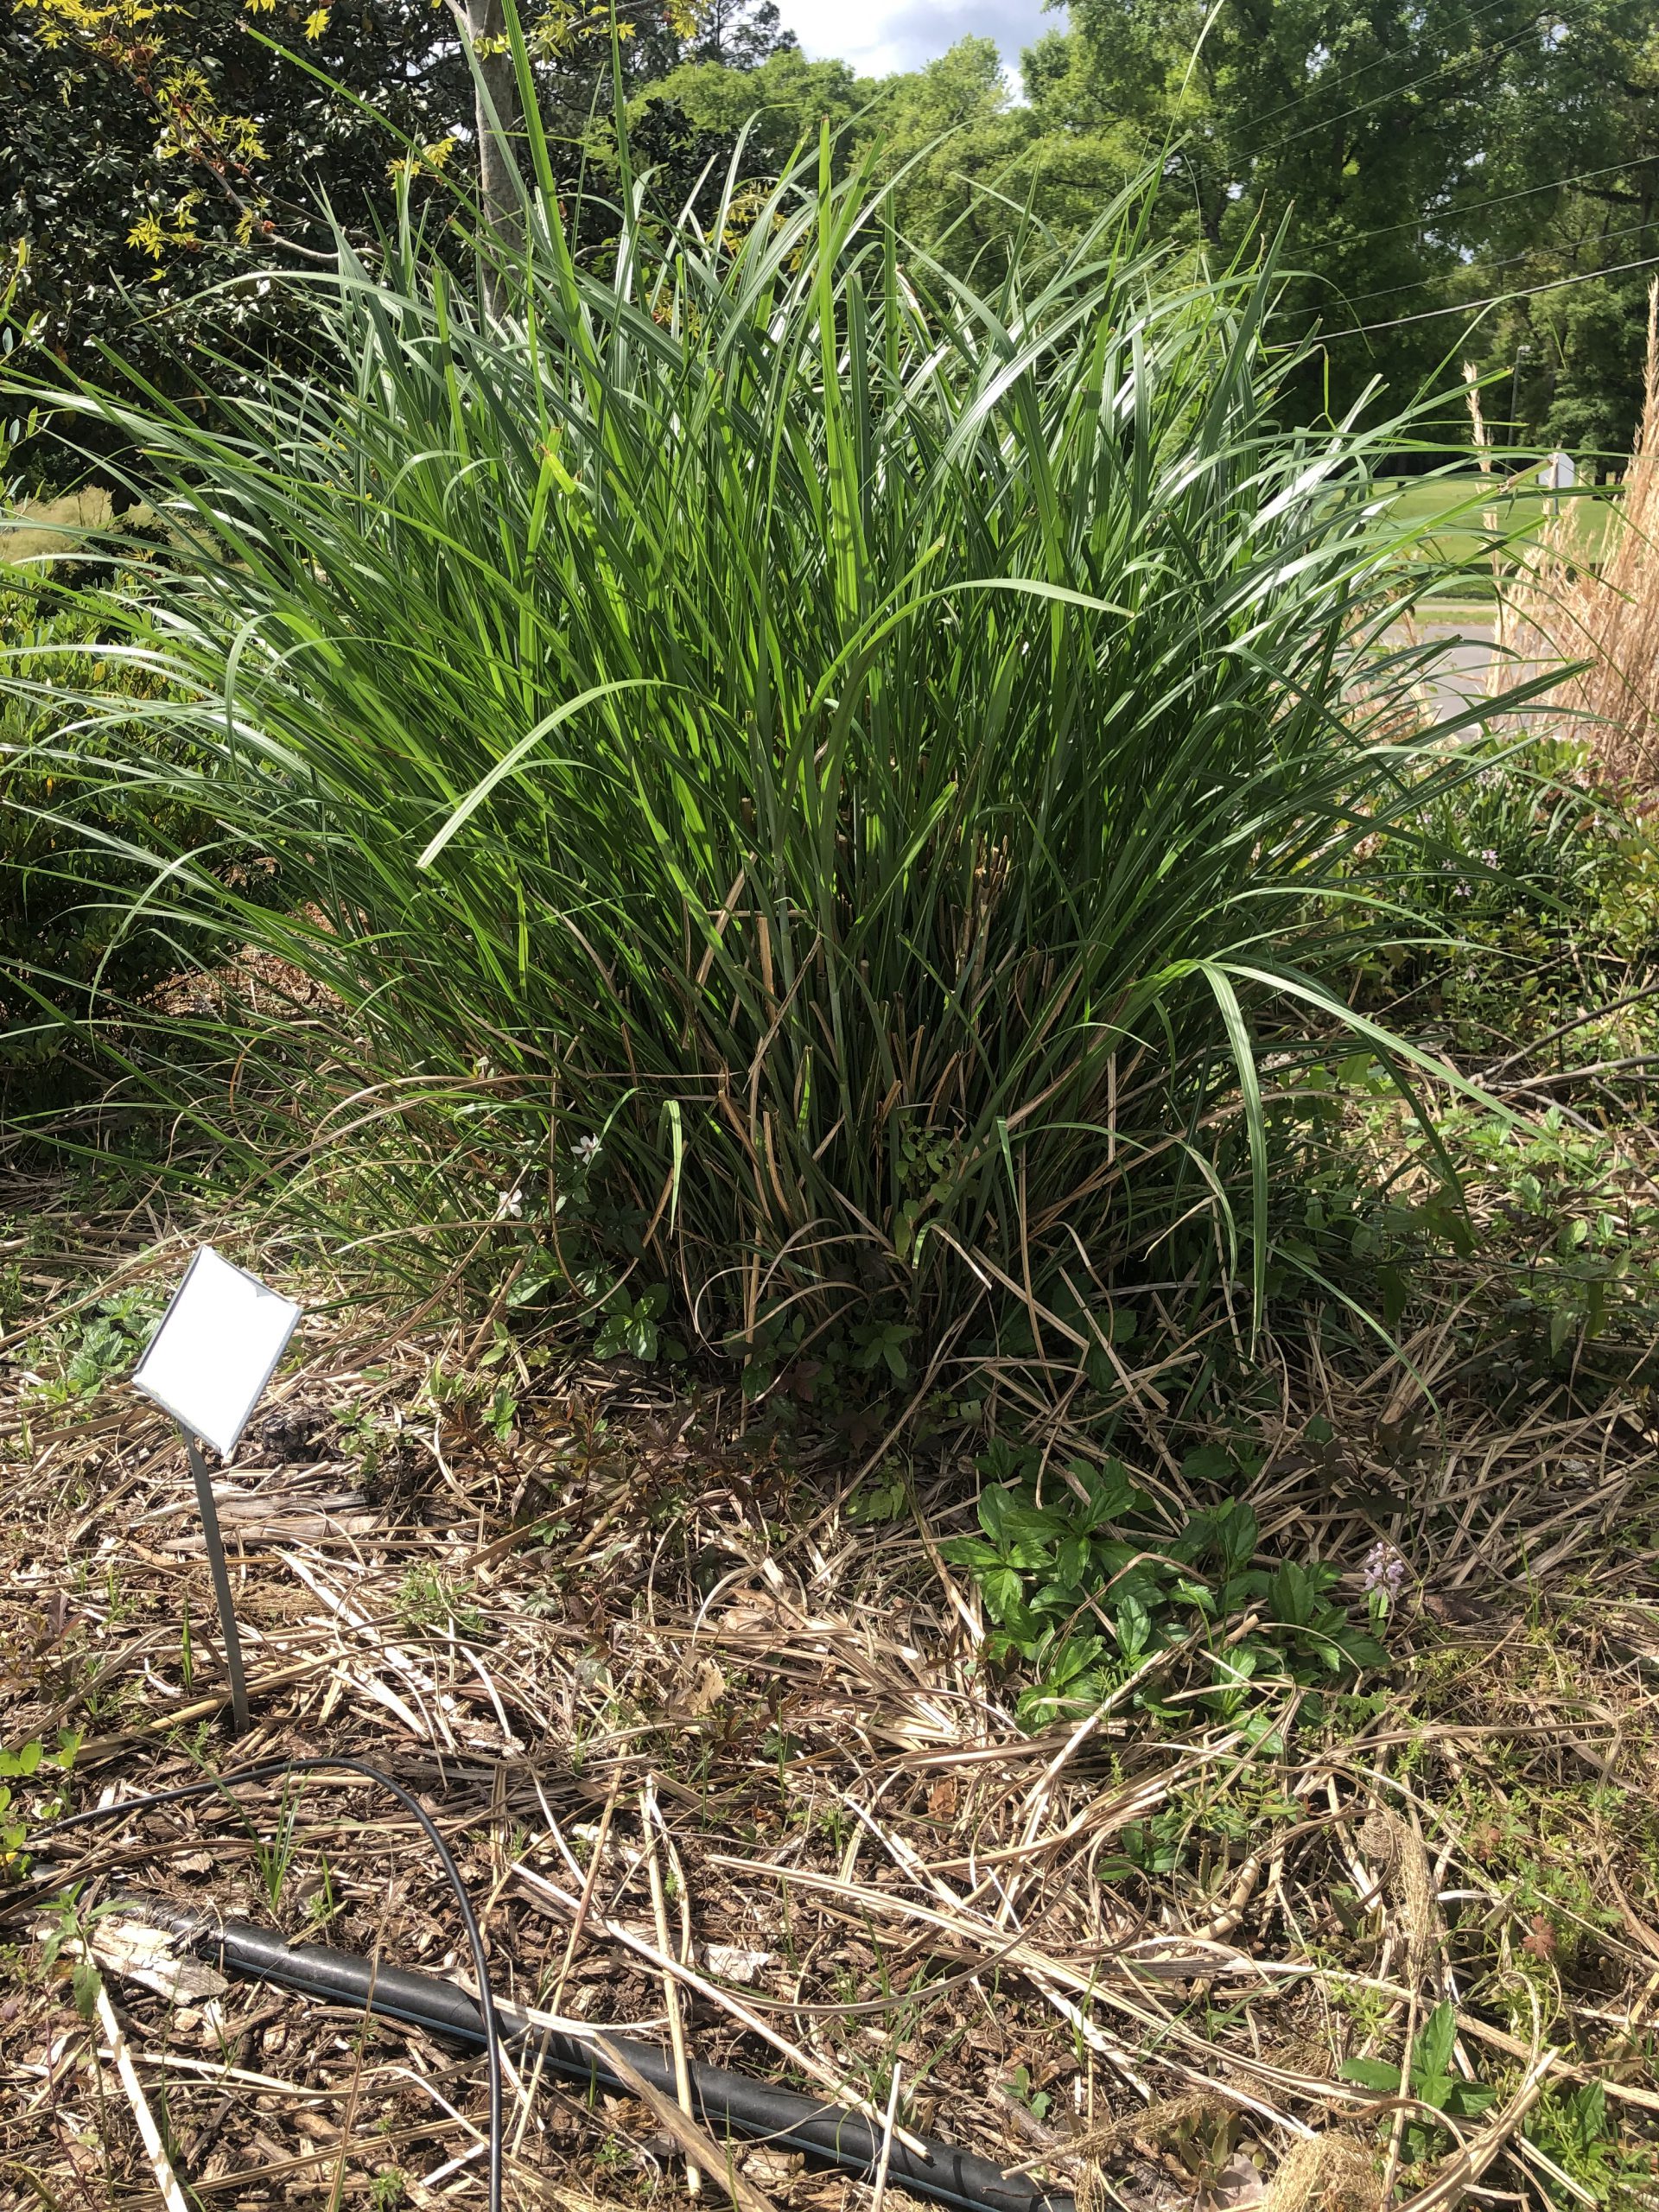
Miscanthus grass after a spring “haircut”. Credit: Mark Tancig, UF/IFAS.
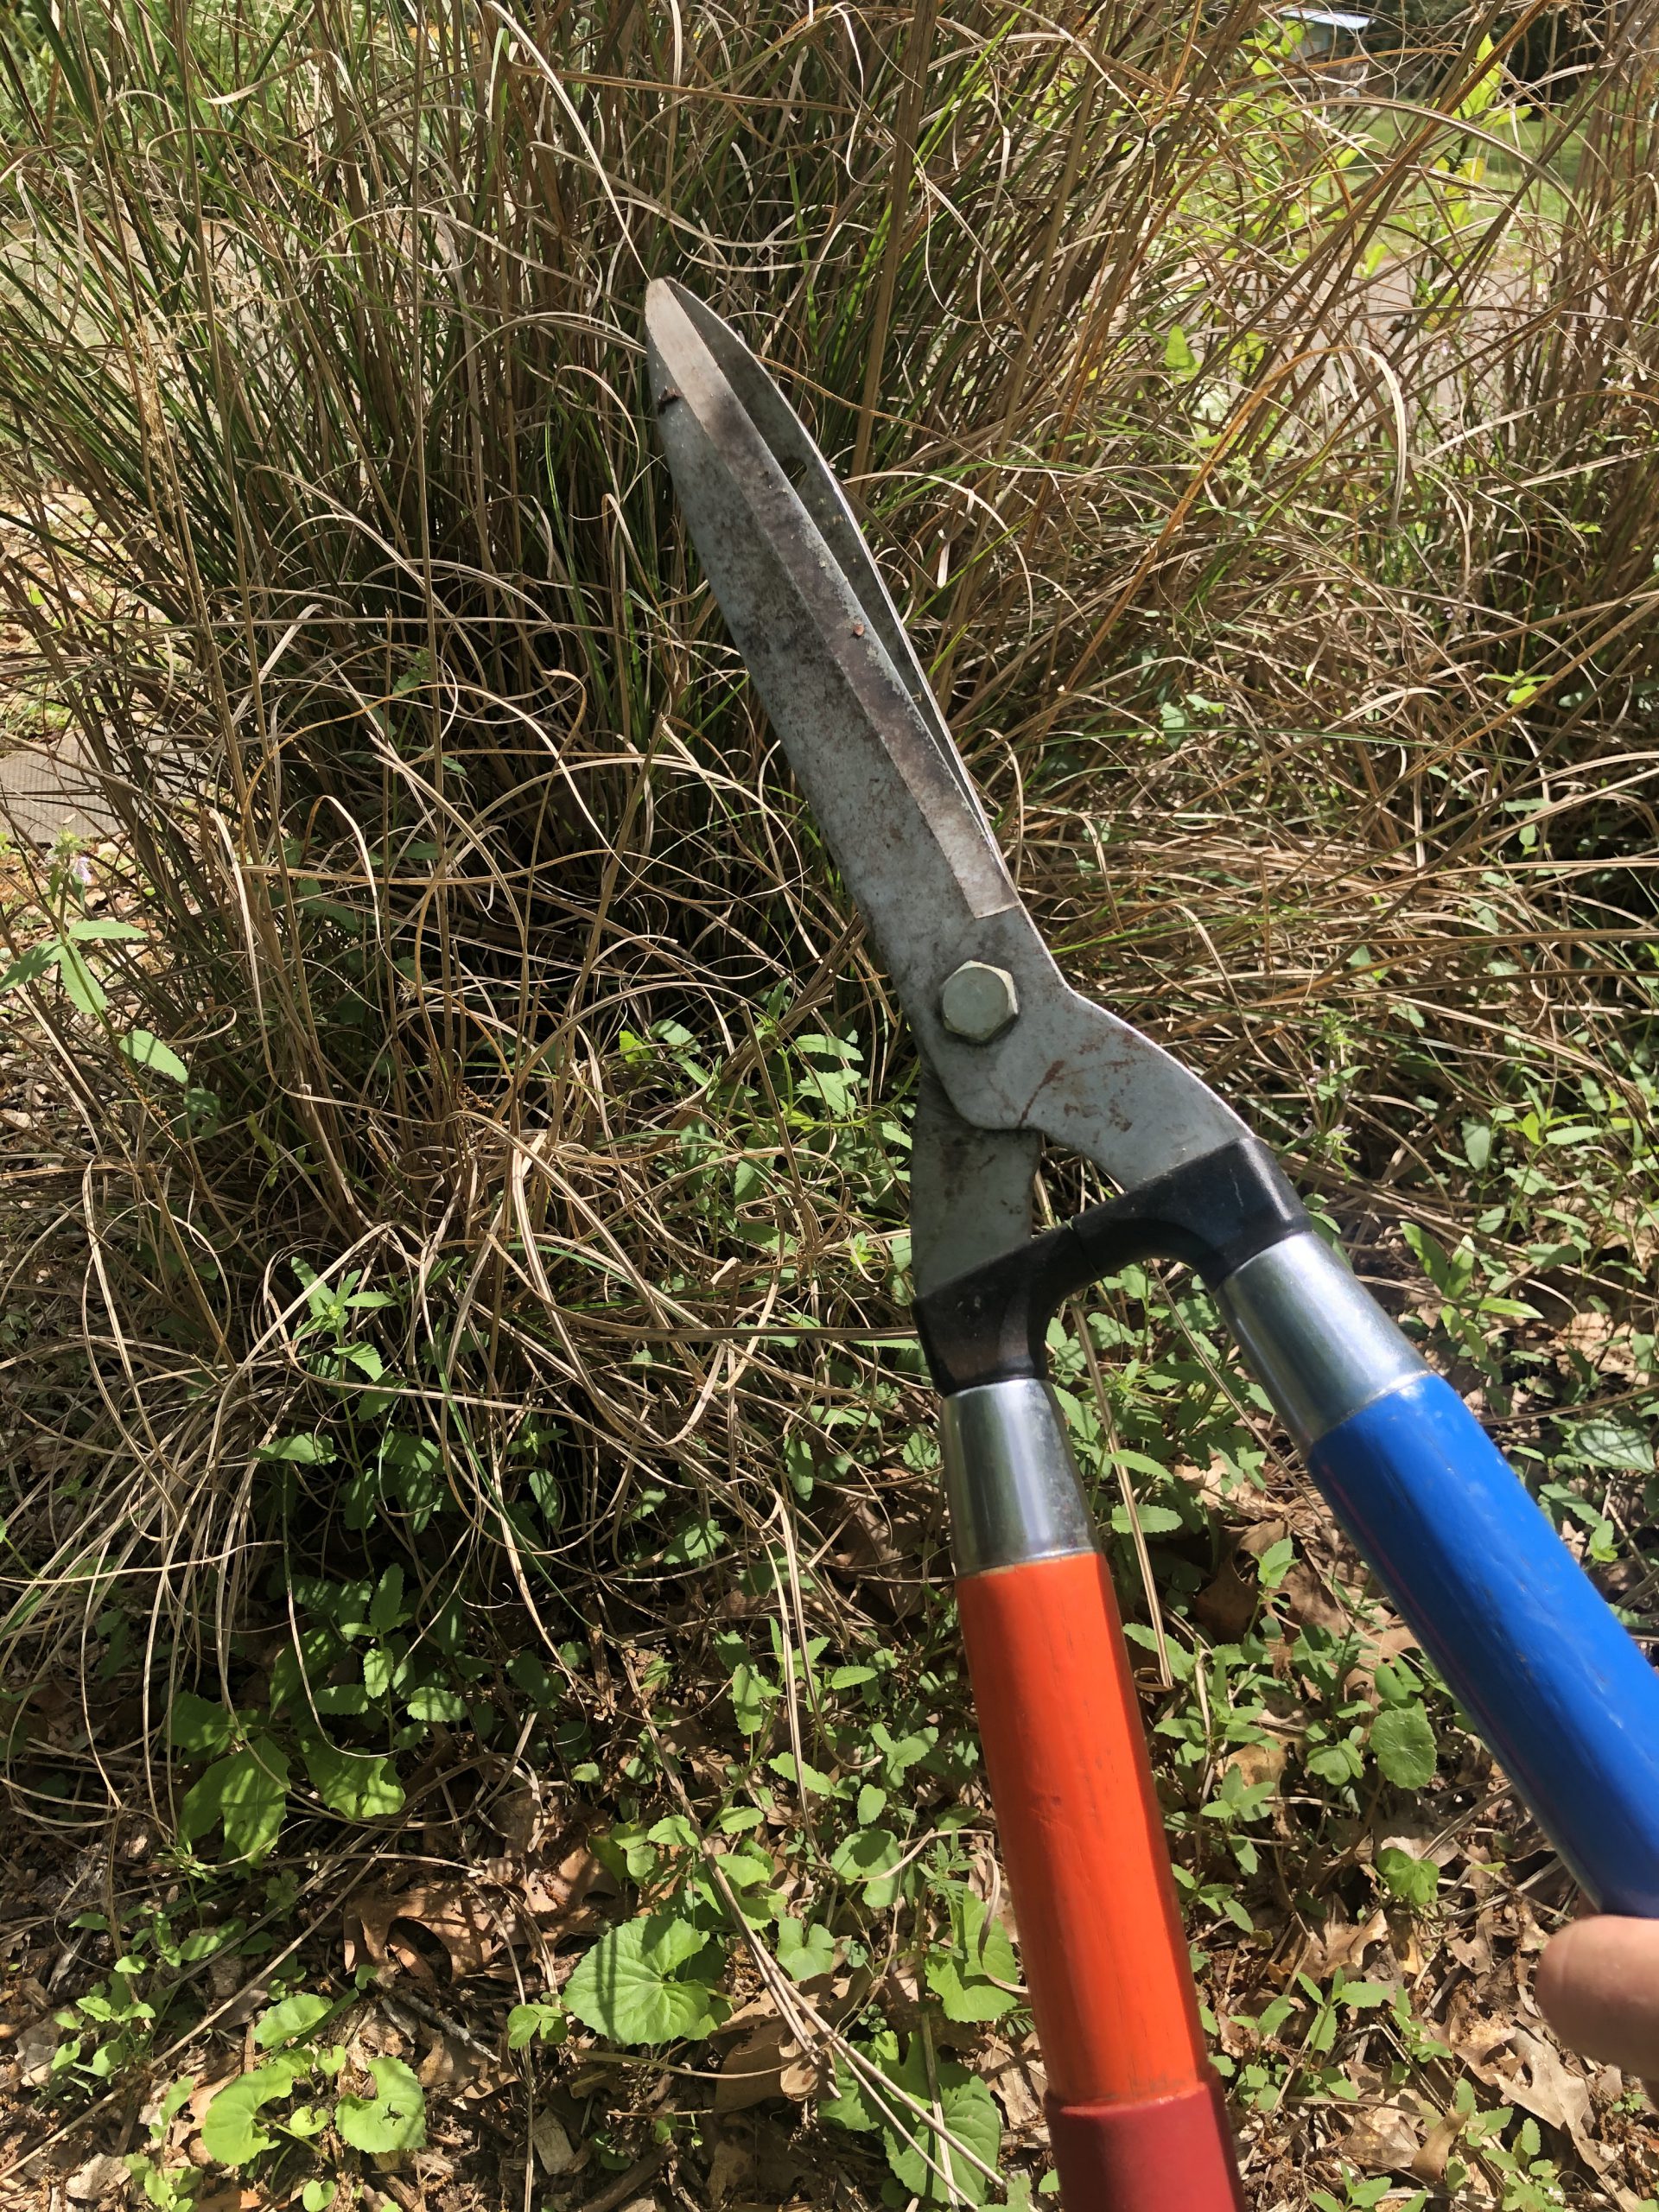
To prune ornamental grasses, wait for after the last average frost date and grab some nice sharp shears. Next, just shear the clump about six inches above the soil line working from the outside towards the center with a slight angle, creating a sort of fade effect. For larger specimens you may need to adjust the cut a bit higher and may even want to use a hedge trimmer. Nice clean cuts are preferred.
Shears are the way to go when pruning ornamental grasses. Orange and blue handles optional! Credit: Mark Tancig, UF/IFAS
One good pointer I saw online is to also bring along an old belt or a piece of rope to cinch up the dead material before pruning to easily collect the debris. I tend to use a cut and swipe motion that pushes the large material to one side of the plant, and I follow up with a metal garden rake to pull out more of the old, coarser material.
Within no time, new growth will flush out from the mound and often surprise you with how quick it can grow. This proves just how dynamic ornamental grasses can be in the landscape, showcasing lush green growth during one season and providing stark, whimsical interest during another.
Miscanthus grass two weeks following pruning. Credit: Mark Tancig, UF/IFAS.